Cook it once
  • Home
  • Privacy Policy
  • Recipes
    • KETO
    • LC
    • WW
  • Tips
  • Contact
Cook it once
  • Home
  • Privacy Policy
  • Recipes
    • KETO
    • LC
    • WW
  • Tips
  • Contact
Category:

General Recipes

General Recipes

Sweet Chili Chicken

by Rebecca July 13, 2022
written by Rebecca

PREP TIME: 15 MINS | COOK TIME: 10 MINS | TOTAL TIME: 25 MINS | YIELD: 3 people

I love this sweet chili chicken! It is very easy and quick to make. All you need are a few simple ingredients to whip this dish up. The combination of sweet, sticky, and savory chili sauce is hard to ignore. This lip-smacking Thai sweet chili chicken will make you lick your plate clean!

I love a wholesome Thai meal at least once a week. And I cannot think of any better meal than this sweet chili chicken. Serve this with steamed rice for a filling weeknight dinner. Do not forget the garnish the chicken with some sesame seeds and chopped cilantro for a no-fuss, winner dinner!

Ingredients

oil, for deep-frying

12 ounces (340 grams) skinless, boneless chicken breast/thigh, cut into small pieces

4 tbsp bottled Thai sweet chili sauce

2 cloves garlic, minced

1 tsp lime juice

1 tbsp oil

1/2 tsp white sesame

1/2 tbsp chopped cilantro leaves

1 pinch salt

Frying Batter:

1 tbsp cooking oil

1 egg white

1/4 c. corn starch

1/2 c. all-purpose flour

1/2 tsp baking powder

1 pinch salt

1/2 c. water, ice cold

How to make Sweet Chili Chicken

Step 1: Combine the frying batter ingredients until well mixed. Then, add the chicken.

Step 2: Pour in about 2 inches of oil in a wok/skillet. Once the oil is completely heated, add the chicken to the wok/skillet and deep-fry until golden brown. To a paper towel-lined dish, transfer the chicken when done.

Step 3: Clean the wok/skillet and return to medium heat. Drizzle with oil. Add the garlic and stir-fry until fragrant. Return the fried chicken to the wok. Then, add the sweet chili sauce, and lime juice, and season with salt. Stir well, making sure the chicken is evenly coated in the sauce.

Step 4: Serve the sweet chili chicken immediately, garnished with some white sesame and cilantro leaves. Enjoy!

NUTRITION FACTS:

Serving Size: 3 People, Amount Per Serving: Calories 282, Total Fat 15g, Saturated Fat 5g, Cholesterol 108mg, Sodium 362mg, Carbohydrates 38g, Protein 25g

Sweet Chili Chicken

Rebecca PREP TIME: 15 MINS | COOK TIME: 10 MINS | TOTAL TIME: 25 MINS | YIELD: 3 people I love this sweet chili chicken! It is very easy and quick… General Recipes Sweet Chili Chicken European Print This
Serves: 3 Prep Time: 15 mins Cooking Time: 10 mins 10 mins
Nutrition facts: 282 calories 15 fat
Rating: 5.0/5
( 1 voted )

Ingredients

  • oil, for deep-frying
  • 12 ounces (340 grams) skinless, boneless chicken breast/thigh, cut into small pieces
  • 4 tbsp bottled Thai sweet chili sauce
  • 2 cloves garlic, minced
  • 1 tsp lime juice
  • 1 tbsp oil
  • 1/2 tsp white sesame
  • 1/2 tbsp chopped cilantro leaves
  • 1 pinch salt
  • Frying Batter:
  • 1 tbsp cooking oil
  • 1 egg white
  • 1/4 c. corn starch
  • 1/2 c. all-purpose flour
  • 1/2 tsp baking powder
  • 1 pinch salt
  • 1/2 c. water, ice cold

Instructions

Step 1: Combine the frying batter ingredients until well mixed. Then, add the chicken.

Step 2: Pour in about 2 inches of oil in a wok/skillet. Once the oil is completely heated, add the chicken to the wok/skillet and deep-fry until golden brown. To a paper towel-lined dish, transfer the chicken when done.

Step 3: Clean the wok/skillet and return to medium heat. Drizzle with oil. Add the garlic and stir-fry until fragrant. Return the fried chicken to the wok. Then, add the sweet chili sauce, and lime juice, and season with salt. Stir well, making sure the chicken is evenly coated in the sauce.

Step 4: Serve the sweet chili chicken immediately, garnished with some white sesame and cilantro leaves. Enjoy!

July 13, 2022 0 comment
0 FacebookTwitterPinterestEmail
General Recipes

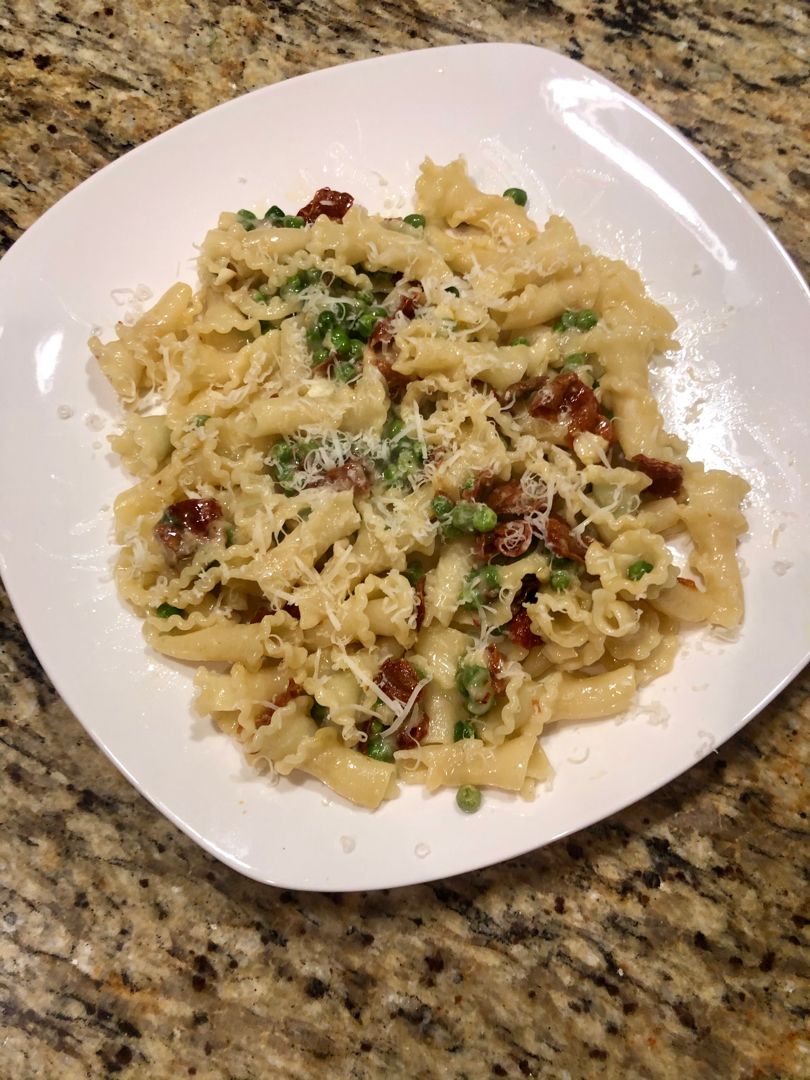
Aglio E Olio with Peas and Prosciutto

by Rebecca July 13, 2022
written by Rebecca

Prep Time: 5 mins | Cook Time: 20 mins | Total Time: 25 mins | Servings: 6 people

This pasta dish is chock-full of flavors. It is very easy to whip up, and it takes only twenty minutes to make from start to finish. It is a very fabulous dish made with just simple ingredients that come together beautifully!

INGREDIENTS

4 oz. thinly sliced prosciutto, cut across into 1/4” slices

1 lb fusilli lunghi or cavatappi pasta

6 cloves of garlic, smashed and peeled

3/4 tsp crushed red pepper flakes

2 c. freshly grated Parmigiano-Reggiano, plus more for serving

Kosher salt

1 1/2 c. frozen peas, thawed

1/2 c. olive oil, plus more for serving, optional

How to make Aglio E Olio with Peas and Prosciutto

Step 1: Heat the oil in a large skillet over medium-high heat. Once the oil is hot, add the chopped prosciutto to the skillet and cook for about 4 minutes, stirring constantly until crispy and deep golden brown. To a paper towel-lined plate, transfer the prosciutto.

Step 2: Adjust the heat to low and add the garlic to the same pan. Cook for about 3 minutes, stirring occasionally, until the garlic is lightly golden. Then, add the peas along with the pepper flakes and 1/8 tsp salt. Turn the heat off.

Step 3: Into the pot of salted boiling water, add the pasta, and cook for 2 minutes less than the package directions.

Step 4: Place the skillet with the garlic oil over medium heat. Take the pasta out of the water using tongs and transfer directly to the skillet with oil and sprinkle with 1 c. Parmigiano-Reggiano. Then, pour in half a cup of the pasta water and stir to coat the pasta and form a creamy sauce. Next, add the rest of the 1 c. Parmigiano-Reggiano and up to half a cup extra pasta water.

Step 5: Serve right away with sprinkles of crispy prosciutto, extra Parmigiano-Reggiano, and more drizzle of olive oil (optional). Enjoy!

Aglio E Olio with Peas and Prosciutto

Rebecca Prep Time: 5 mins | Cook Time: 20 mins | Total Time: 25 mins | Servings: 6 people This pasta dish is chock-full of flavors. It is very easy to… General Recipes Aglio E Olio with Peas and Prosciutto European Print This
Serves: 6 Prep Time: 5 mins Cooking Time: 20 mins 20 mins
Nutrition facts: 200 calories 20 grams fat
Rating: 5.0/5
( 1 voted )

Ingredients

  • 4 oz. thinly sliced prosciutto, cut across into 1/4” slices
  • 1 lb fusilli lunghi or cavatappi pasta
  • 6 cloves of garlic, smashed and peeled
  • 3/4 tsp crushed red pepper flakes
  • 2 c. freshly grated Parmigiano-Reggiano, plus more for serving
  • Kosher salt
  • 1 1/2 c. frozen peas, thawed
  • 1/2 c. olive oil, plus more for serving, optional

Instructions

Step 1: Heat the oil in a large skillet over medium-high heat. Once the oil is hot, add the chopped prosciutto to the skillet and cook for about 4 minutes, stirring constantly until crispy and deep golden brown. To a paper towel-lined plate, transfer the prosciutto.

Step 2: Adjust the heat to low and add the garlic to the same pan. Cook for about 3 minutes, stirring occasionally, until the garlic is lightly golden. Then, add the peas along with the pepper flakes and 1/8 tsp salt. Turn the heat off.

Step 3: Into the pot of salted boiling water, add the pasta, and cook for 2 minutes less than the package directions.

Step 4: Place the skillet with the garlic oil over medium heat. Take the pasta out of the water using tongs and transfer directly to the skillet with oil and sprinkle with 1 c. Parmigiano-Reggiano. Then, pour in half a cup of the pasta water and stir to coat the pasta and form a creamy sauce. Next, add the rest of the 1 c. Parmigiano-Reggiano and up to half a cup extra pasta water.

Step 5: Serve right away with sprinkles of crispy prosciutto, extra Parmigiano-Reggiano, and more drizzle of olive oil (optional). Enjoy!

July 13, 2022 0 comment
0 FacebookTwitterPinterestEmail
General Recipes

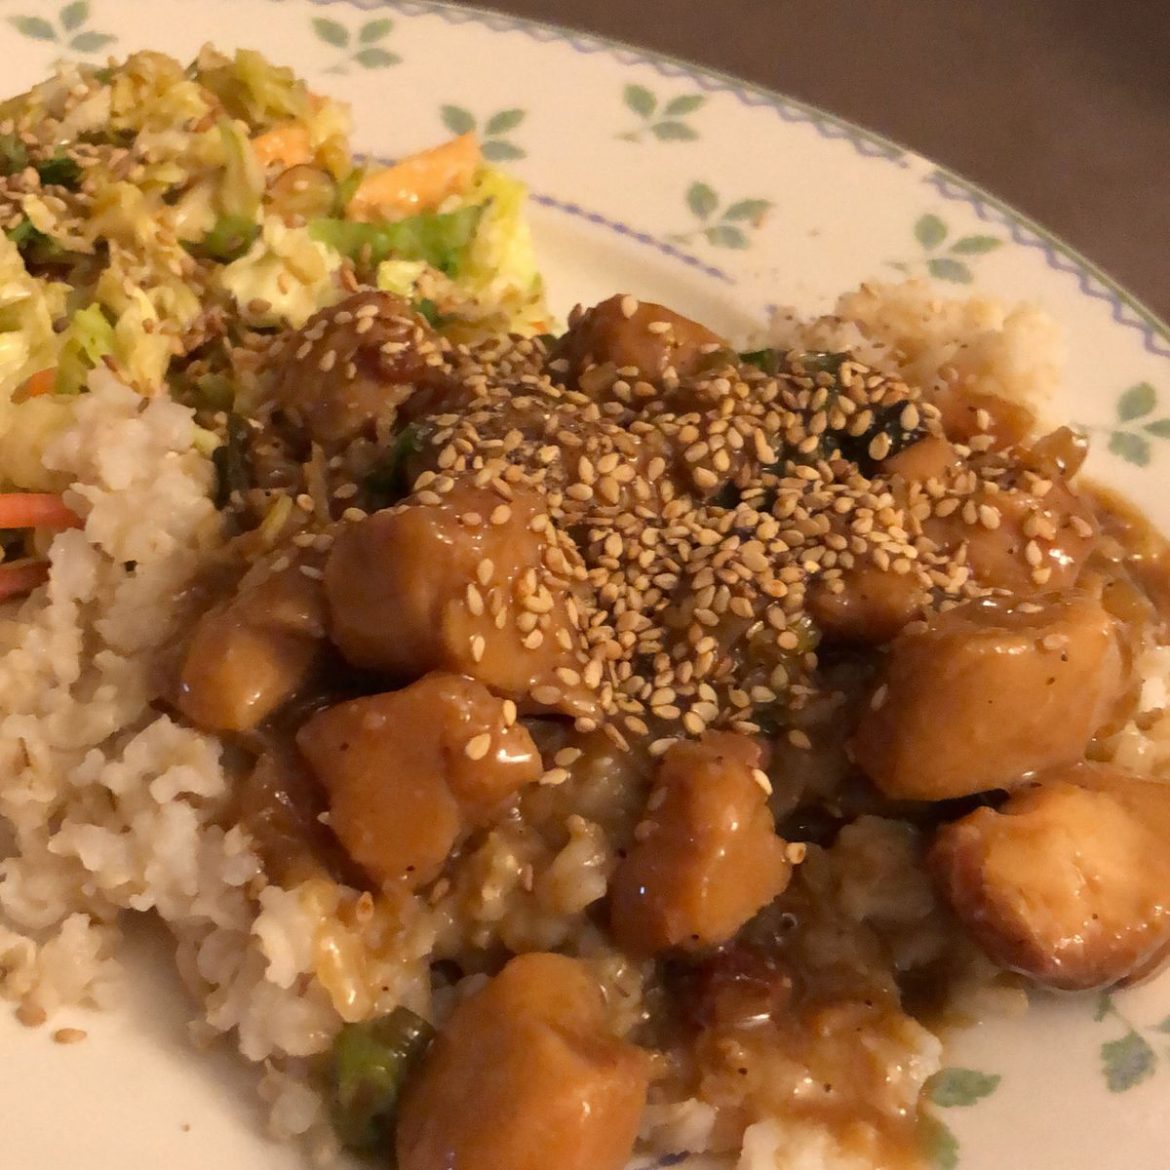
Slow Cooker Honey Teriyaki Chicken

by Rebecca July 12, 2022
written by Rebecca

Yield: 4-6 servings

This is the best teriyaki chicken I’ve tasted! The sauce is what makes this very special. Easily make this in your trusty slow cooker and enjoy a simple yet bursting with flavor dinner any time with this mouthwatering honey teriyaki chicken!

INGREDIENTS

2 cloves garlic, minced

1/2 medium yellow onion, diced (about 1 c.)

2 lbs boneless, skinless chicken thighs (about 6), cut into 1 1/2” pieces

1/2 c. honey

1/2 c. tamari or soy sauce

1/4 c. rice vinegar

1 tbsp grated peeled fresh ginger

2 tbsp cornstarch

1/4 c. water

For serving: cooked rice, red pepper flakes, sesame seeds, sliced scallions

1/4 tsp freshly ground black pepper

How to make Slow Cooker Honey Teriyaki Chicken

Step 1: In the bottom of a 6-quart or larger slow cooker, arrange the chicken in a single layer. On top, scatter the onion and garlic. In a small bowl, whisk the soy sauce, honey, rice vinegar, pepper, and ginger and pour this over the chicken.

Step 2: Put the lid on and set to cook for 2 to 3 hours on low setting or 1 to 2 hours on high. Once the internal temperature of the chicken reaches 165 degrees F, then the chicken is done.

Step 3: To a bowl, transfer the chicken using a slotted spoon. Into a small saucepan, pour the leftover sauce from the slow cooker, and bring to a boil over medium-high heat. Cook for about 15 to 20 minutes until the sauce has reduced. In the meantime, place the water and cornstarch in a small bowl. Mix well until the lumps are gone. Stir this into the sauce once the sauce has reduced and cook for another 1 to 2 minutes until the sauce has thickened.

Step 4: Place the chicken back into the slow cooker and pour in just enough sauce. Set aside any remaining sauce.

Step 5: Serve the honey teriyaki chicken right away over cooked rice and garnish with some sesame seeds, red pepper flakes, and scallions. Enjoy!

NOTES:

In an airtight container, keep any leftover chicken and store it in the fridge for up to 3 days.

You can make the chicken a day ahead and simply keep it in the fridge and store it in the fridge. In a saucepan, warm the chicken over medium-low heat. Then, serve. Or do this in the microwave.

Nutrition Facts:

Calories 304, Fat 6.4 g (9.8%), Saturated 1.7 g (8.4%), Carbs 29.6 g (9.9%), Fiber 0.7 g (2.9%), Sugars 24.3 g, Protein 31.9 g (63.8%), Sodium 1314.1 mg (54.8%)

Slow Cooker Honey Teriyaki Chicken

Rebecca Yield: 4-6 servings This is the best teriyaki chicken I’ve tasted! The sauce is what makes this very special. Easily make this in your trusty slow cooker and enjoy a… General Recipes Slow Cooker Honey Teriyaki Chicken European Print This
Serves: 4-6
Nutrition facts: 304 calories 6.4 fat
Rating: 5.0/5
( 1 voted )

Ingredients

  • 2 cloves garlic, minced
  • 1/2 medium yellow onion, diced (about 1 c.)
  • 2 lbs boneless, skinless chicken thighs (about 6), cut into 1 1/2” pieces
  • 1/2 c. honey
  • 1/2 c. tamari or soy sauce
  • 1/4 c. rice vinegar
  • 1 tbsp grated peeled fresh ginger
  • 2 tbsp cornstarch
  • 1/4 c. water
  • For serving: cooked rice, red pepper flakes, sesame seeds, sliced scallions
  • 1/4 tsp freshly ground black pepper

Instructions

Step 1: In the bottom of a 6-quart or larger slow cooker, arrange the chicken in a single layer. On top, scatter the onion and garlic. In a small bowl, whisk the soy sauce, honey, rice vinegar, pepper, and ginger and pour this over the chicken.

Step 2: Put the lid on and set to cook for 2 to 3 hours on low setting or 1 to 2 hours on high. Once the internal temperature of the chicken reaches 165 degrees F, then the chicken is done.

Step 3: To a bowl, transfer the chicken using a slotted spoon. Into a small saucepan, pour the leftover sauce from the slow cooker, and bring to a boil over medium-high heat. Cook for about 15 to 20 minutes until the sauce has reduced. In the meantime, place the water and cornstarch in a small bowl. Mix well until the lumps are gone. Stir this into the sauce once the sauce has reduced and cook for another 1 to 2 minutes until the sauce has thickened.

Step 4: Place the chicken back into the slow cooker and pour in just enough sauce. Set aside any remaining sauce.

Step 5: Serve the honey teriyaki chicken right away over cooked rice and garnish with some sesame seeds, red pepper flakes, and scallions. Enjoy!

Notes

In an airtight container, keep any leftover chicken and store it in the fridge for up to 3 days. You can make the chicken a day ahead and simply keep it in the fridge and store it in the fridge. In a saucepan, warm the chicken over medium-low heat. Then, serve. Or do this in the microwave.

July 12, 2022 0 comment
0 FacebookTwitterPinterestEmail
General Recipes

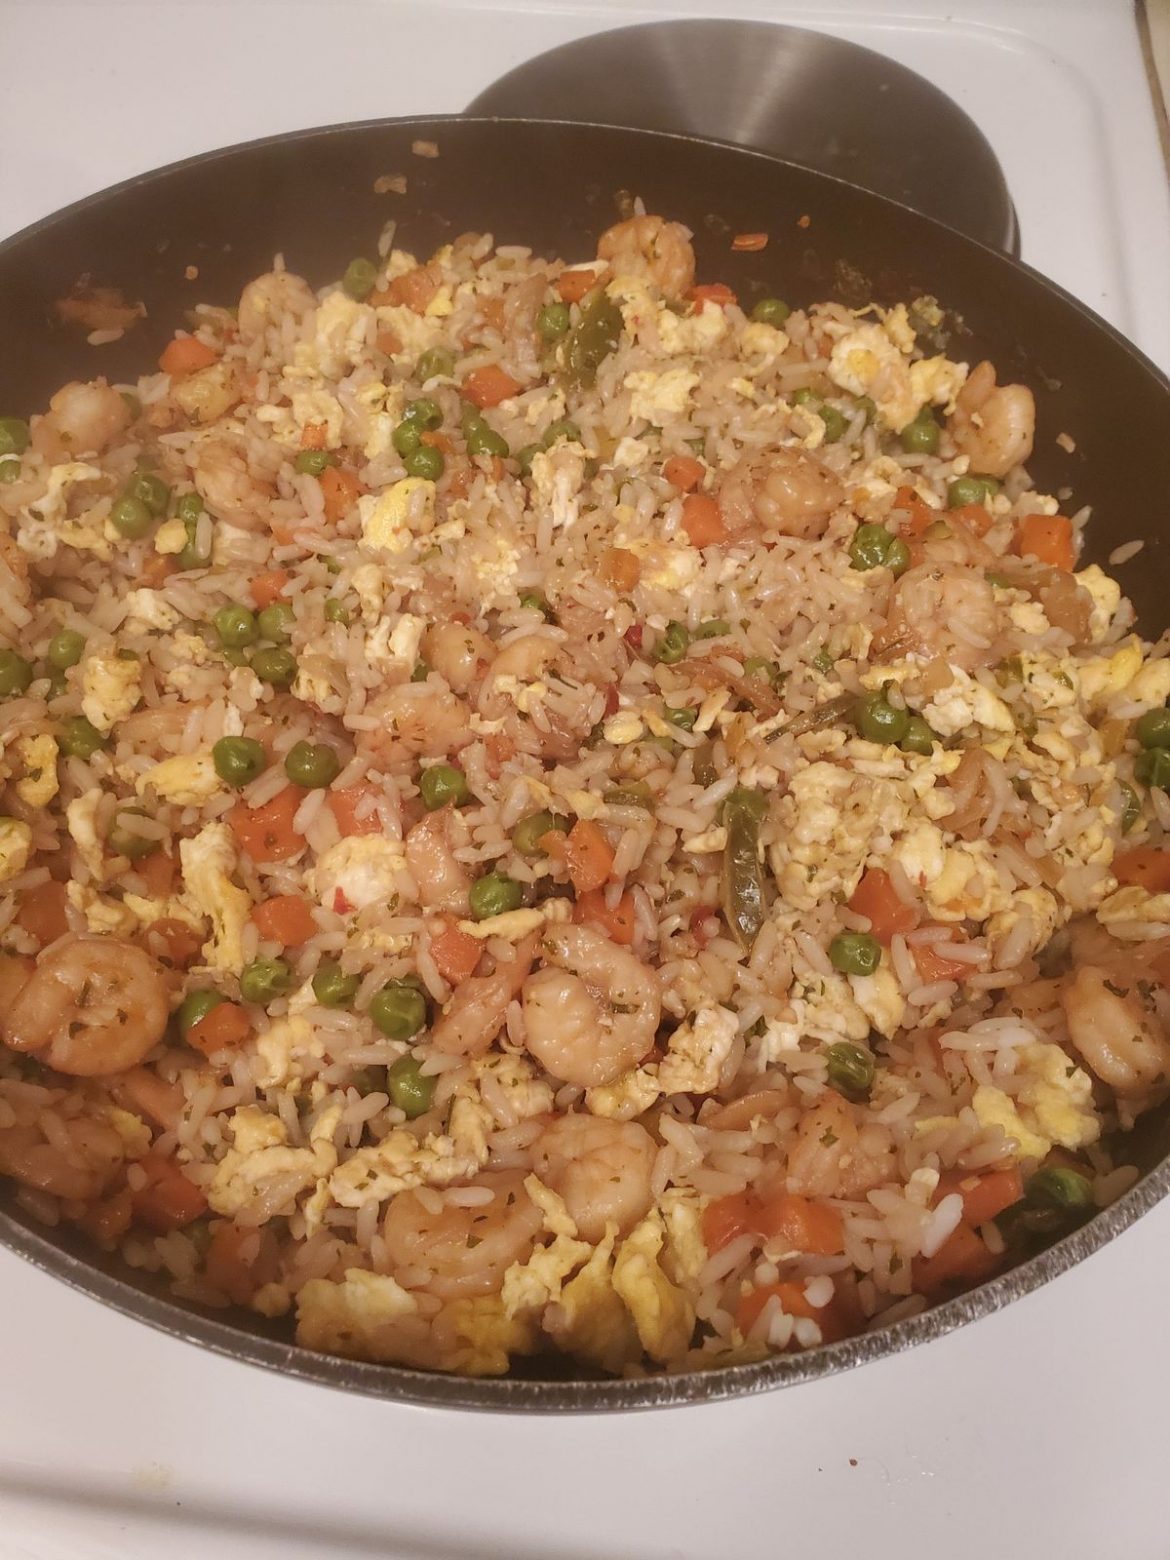
Easy Shrimp Fried Rice

by Rebecca July 12, 2022
written by Rebecca

PREP TIME: 10 mins | COOK TIME: 10 mins | TOTAL TIME: 20 mins | SERVINGS: 4

Turn your ordinary rice into a delicious dinner with this easy shrimp-fried rice recipe. All you need are shrimp, leftover rice, frozen veggies, soy sauce, and a few minutes to throw this shrimp, fried rice together. Forget the takeout and make this easiest and fastest dinner at home any time!

INGREDIENTS

2 tsp canola oil

1 tsp sesame oil

1 pound small shrimp, deveined and cleaned

3 tbsp low-sodium soy sauce

2 tsp cornstarch

2 large eggs

3 green onions, chopped

1/4 tsp ground ginger

4 c. cooked rice

2 tsp minced garlic

1/4 tsp ground turmeric

1/2 c. whole kernel corn, frozen is fine

1 c. peas and carrots, frozen is fine

1/2 tsp salt

1/4 tsp black pepper

How to make Easy Shrimp Fried Rice

Step 1: Devein the shrimp after cleaning and season with salt and pepper. Then, toss the shrimp in cornstarch.

Step 2: In a small bowl, whisk the eggs and set them aside.

Step 3: In a large skillet, heat the canola and sesame oil. Once the oil is hot, add the shrimp to the skillet and cook until pink. Onto a plate, transfer the shrimp, and set aside.

Step 4: If needed, add more oil to the skillet. Then, add the green onions and cook for about 2 minutes, stirring. Next, add the rice, soy sauce, garlic, ginger, and turmeric (optional). Stir well and cook until heated through.

Step 5: In the center of the skillet, make space and pour the beaten eggs, stirring until set. Then, toss everything together. Add the peas along with carrots and corn. Stir and cook until heated through.

Step 6: Return the shrimp to the skillet, stir, and cook for an additional 2 to 3 minutes.

Step 7: Serve the shrimp, and fried rice immediately. Enjoy!

NOTE: For best results, use cooked rice that has been kept in the fridge overnight.

NUTRITION FACTS:

Calories: 394 kcal | Carbohydrates: 54g | Protein: 29g | Fat: 5g | Cholesterol: 285mg | Sodium: 1633mg | Potassium: 282mg | Fiber: 2g | Vitamin A: 3415IU | Vitamin C: 11.1mg | Calcium: 199mg | Iron: 3.5mg

Easy Shrimp Fried Rice

Rebecca PREP TIME: 10 mins | COOK TIME: 10 mins | TOTAL TIME: 20 mins | SERVINGS: 4 Turn your ordinary rice into a delicious dinner with this easy shrimp-fried rice… General Recipes Easy Shrimp Fried Rice European Print This
Serves: 4 Prep Time: 10 mins Cooking Time: 10 mins 10 mins
Nutrition facts: 394 calories 5 fat
Rating: 5.0/5
( 1 voted )

Ingredients

  • 2 tsp canola oil
  • 1 tsp sesame oil
  • 1 pound small shrimp, deveined and cleaned
  • 3 tbsp low-sodium soy sauce
  • 2 tsp cornstarch
  • 2 large eggs
  • 3 green onions, chopped
  • 1/4 tsp ground ginger
  • 4 c. cooked rice
  • 2 tsp minced garlic
  • 1/4 tsp ground turmeric
  • 1/2 c. whole kernel corn, frozen is fine
  • 1 c. peas and carrots, frozen is fine
  • 1/2 tsp salt
  • 1/4 tsp black pepper

Instructions

Step 1: Devein the shrimp after cleaning and season with salt and pepper. Then, toss the shrimp in cornstarch.

Step 2: In a small bowl, whisk the eggs and set them aside.

Step 3: In a large skillet, heat the canola and sesame oil. Once the oil is hot, add the shrimp to the skillet and cook until pink. Onto a plate, transfer the shrimp, and set aside.

Step 4: If needed, add more oil to the skillet. Then, add the green onions and cook for about 2 minutes, stirring. Next, add the rice, soy sauce, garlic, ginger, and turmeric (optional). Stir well and cook until heated through.

Step 5: In the center of the skillet, make space and pour the beaten eggs, stirring until set. Then, toss everything together. Add the peas along with carrots and corn. Stir and cook until heated through.

Step 6: Return the shrimp to the skillet, stir, and cook for an additional 2 to 3 minutes.

Step 7: Serve the shrimp, and fried rice immediately. Enjoy!

Notes

For best results, use cooked rice that has been kept in the fridge overnight.

July 12, 2022 0 comment
0 FacebookTwitterPinterestEmail
General Recipes

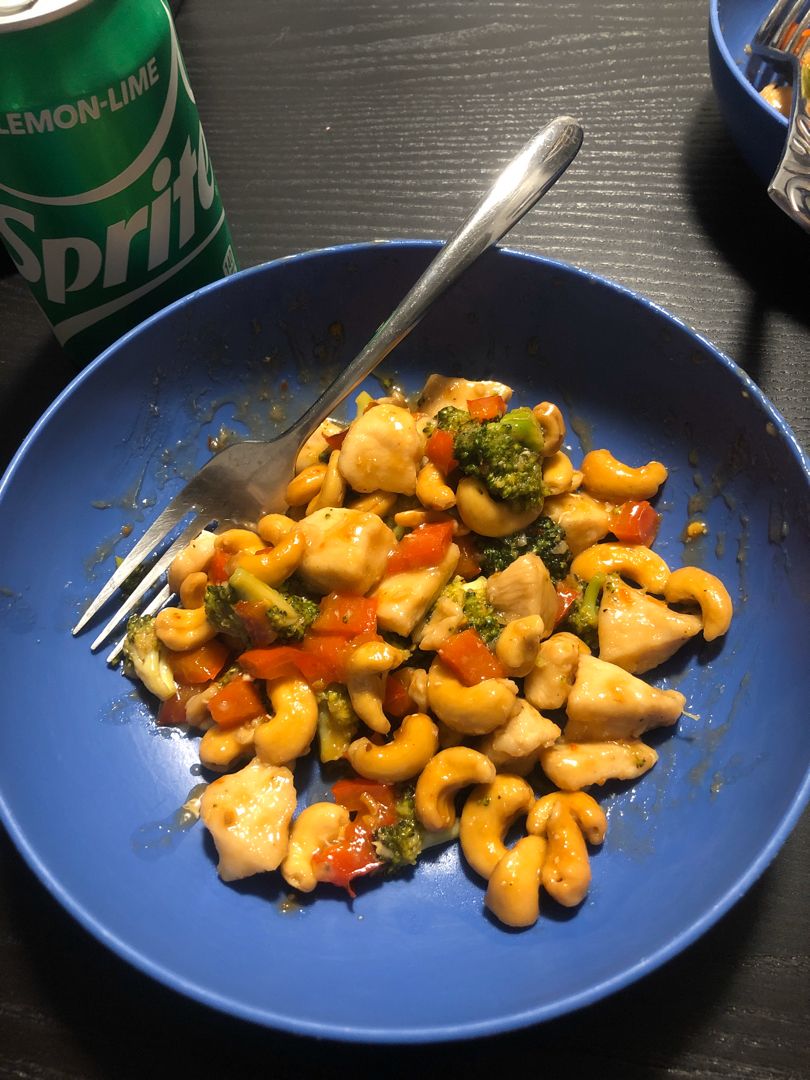
Better-Than-Takeout Cashew Chicken

by Rebecca July 12, 2022
written by Rebecca

Prep time: 5 mins | Cook time: 15 mins | Total time: 20 mins | Yield: 5

It is time to skip the takeout and make this restaurant-quality cashew chicken right in the comfort of your home. It’s incredibly easy to whip up and ready in under twenty minutes. This cashew chicken is an amazing weeknight dinner option with juicy chicken, crisp-tender vegetables, and crunchy cashews clothed in an impressive garlicky soy sauce! A healthier version that is better than takeout!

INGREDIENTS

Stir-fry:

1 tbsp olive oil

about 1.25 lbs boneless, skinless chicken breasts, diced into 1” pieces

3 tbsp cornstarch

2 cloves garlic, finely minced or pressed

2 tbsp sesame oil

3/4 to 1 c. green onions, sliced into thin rounds (from about 3 or 4 green onions)

2 heaping cups of broccoli florets

1 c. shelled frozen edamame

1 c. red bell peppers, diced small

1 c. unsalted dry-roasted whole cashews

1/2 tsp salt

1/2 tsp pepper

Sauce:

1 tbsp Asian chili garlic sauce

3 tbsp low-sodium soy sauce

1 tbsp rice wine vinegar

3/4 tsp ground ginger

2 tbsp honey, or to taste

How to make Better-Than-Takeout Cashew Chicken

Step 1: Add the cornstarch, salt, pepper, and chicken to a gallon-sized zip top bag. Seal the bag and shake well to evenly coat the chicken.

Step 2: Add the olive oil, sesame oil, and chicken to a large skillet and cook over medium-high heat for about 4 to 5 minutes, flipping and stirring to make sure all sides of the chicken are evenly cooked to about 80 to 90%.

Step 3: To the skillet, add the broccoli, bell peppers, edamame (straight from the freezer), and garlic. Stir well and continue to cook for about 3 to 4 minutes or until the chicken is completely cooked and the veggies are crisp-tender.

Step 4: Add the soy sauce, honey, rice wine vinegar, chili-garlic sauce, and ginger to a medium bowl. Stir well until blended and set aside.

Step 5: To the skillet, stir in the cashews. Add the sauce, stir well, and let it simmer for about 1 to 2 minutes over medium-low heat.

Step 6: Before serving, stir in the green onions. Enjoy right away.

Storage: In an airtight container, keep any leftovers and store them in the fridge for up to 5 days.

NUTRITION FACTS:

YIELD: 5 SERVING SIZE: 1
Amount Per Serving: CALORIES: 369 | TOTAL FAT: 14g | SATURATED FAT: 2g | TRANS FAT: 0g | UNSATURATED FAT: 10g | CHOLESTEROL: 96mg | SODIUM: 642mg | CARBOHYDRATES: 22g | FIBER: 4g | SUGAR: 10g | PROTEIN: 40g

Better-Than-Takeout Cashew Chicken

Rebecca Prep time: 5 mins | Cook time: 15 mins | Total time: 20 mins | Yield: 5 It is time to skip the takeout and make this restaurant-quality cashew chicken… General Recipes Better-Than-Takeout Cashew Chicken European Print This
Serves: 5 Prep Time: 5 mins Cooking Time: 15 mins 15 mins
Nutrition facts: 369 calories 14 fat
Rating: 5.0/5
( 1 voted )

Ingredients

  • Stir-fry:
  • 1 tbsp olive oil
  • about 1.25 lbs boneless, skinless chicken breasts, diced into 1” pieces
  • 3 tbsp cornstarch
  • 2 cloves garlic, finely minced or pressed
  • 2 tbsp sesame oil
  • 3/4 to 1 c. green onions, sliced into thin rounds (from about 3 or 4 green onions)
  • 2 heaping cups of broccoli florets
  • 1 c. shelled frozen edamame
  • 1 c. red bell peppers, diced small
  • 1 c. unsalted dry-roasted whole cashews
  • 1/2 tsp salt
  • 1/2 tsp pepper
  • Sauce:
  • 1 tbsp Asian chili garlic sauce
  • 3 tbsp low-sodium soy sauce
  • 1 tbsp rice wine vinegar
  • 3/4 tsp ground ginger
  • 2 tbsp honey, or to taste

Instructions

Step 1: Add the cornstarch, salt, pepper, and chicken to a gallon-sized zip top bag. Seal the bag and shake well to evenly coat the chicken.

Step 2: Add the olive oil, sesame oil, and chicken to a large skillet and cook over medium-high heat for about 4 to 5 minutes, flipping and stirring to make sure all sides of the chicken are evenly cooked to about 80 to 90%.

Step 3: To the skillet, add the broccoli, bell peppers, edamame (straight from the freezer), and garlic. Stir well and continue to cook for about 3 to 4 minutes or until the chicken is completely cooked and the veggies are crisp-tender.

Step 4: Add the soy sauce, honey, rice wine vinegar, chili-garlic sauce, and ginger to a medium bowl. Stir well until blended and set aside.

Step 5: To the skillet, stir in the cashews. Add the sauce, stir well, and let it simmer for about 1 to 2 minutes over medium-low heat.

Step 6: Before serving, stir in the green onions. Enjoy right away.

Storage: In an airtight container, keep any leftovers and store them in the fridge for up to 5 days.

July 12, 2022 0 comment
0 FacebookTwitterPinterestEmail
General Recipes

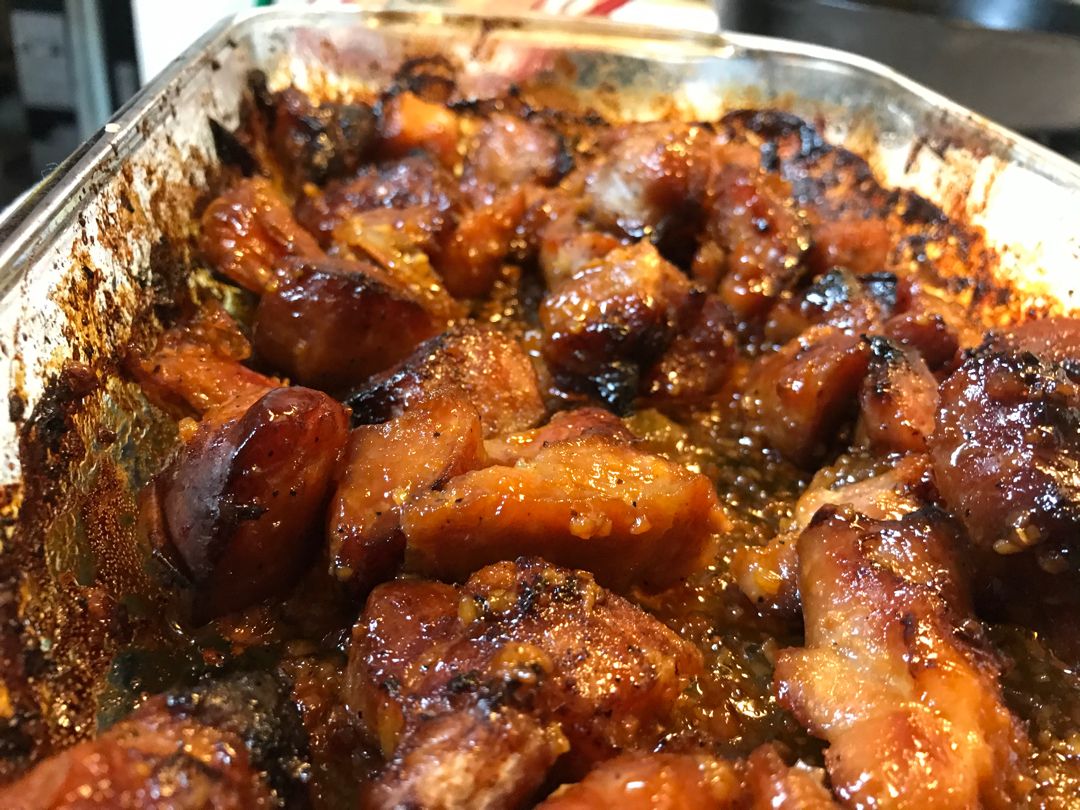
Honey Garlic Baked Pork Bites

by Rebecca July 12, 2022
written by Rebecca

Prep Time: 15 mins | Cook Time: 3 hrs | Total Time: 3 hrs 15 mins | Servings: 10

Easy to prepare and very delicious, this moist and tender with charred pork bits in honey garlic sauce is hard to resist! The sweet and garlicky flavor of these baked pork bites is very scrumptious with the addition of the optional heat from the dried red chili flakes. This honey garlic-baked pork bite is a no-fuss, toss-together kind of dinner that will ultimately become one of your favorites! Serve this with your favorite sides for the perfect meal that your entire family will love!

Ingredients

1 tbsp olive oil

4 lbs pork shoulder, fat cap removed, cut into 1.5 – 2-inches pieces

1 large yellow onion, sliced 1/2” thick

1 c. honey

8 cloves garlic, finely minced

1/2 tsp dried red chili flakes

parsley, chopped for garnish

1 tsp sesame seeds, plus more for garnish

1/2 tsp salt

1/4 tsp pepper

How to make Honey Garlic Baked Pork Bites

Step 1: Prepare the oven. Preheat it to 350 degrees.

Step 2: Place the pork in a large oven-safe baking dish and gently toss with salt, pepper, onion, and olive oil. Using aluminium foil, tent the dish and place it in the preheated oven. Bake for about an hour.

Step 3: Whisk the honey, dried red chili flakes, and garlic until well blended and set aside.

Step 4: Take the pan out of the oven when done and add the honey and garlic mixture. Stir the mixture into the pork bites. Do not drain the water from the pan. Return to the oven and continue baking for another 30 minutes, uncovered.

Step 5: Take the dish out of the oven. Stir and bake for additional 30 minutes. Do this step once again.

Step 6: To the dish, stir in the sesame seeds and bake for 30 minutes more.

Step 7: Let the honey garlic-baked pork bites cool for about 5 minutes. Before serving, sprinkle with some chopped, fresh parsley and sesame seeds. Enjoy!

Nutrition Facts:

Calories: 290 kcal | Carbohydrates: 30g | Protein: 22g | Fat: 9g | Saturated Fat: 3g | Cholesterol: 74mg | Sodium: 204mg | Potassium: 430mg | Fiber: 1g | Sugar: 29g | Vitamin A: 37IU | Vitamin C: 3mg | Calcium: 28mg | Iron: 2mg

Honey Garlic Baked Pork Bites

Rebecca Prep Time: 15 mins | Cook Time: 3 hrs | Total Time: 3 hrs 15 mins | Servings: 10 Easy to prepare and very delicious, this moist and tender with… General Recipes Honey Garlic Baked Pork Bites European Print This
Serves: 10 Prep Time: 15 mins Cooking Time: 3 hrs 3 hrs
Nutrition facts: 290 calories 9 fat
Rating: 4.5/5
( 2 voted )

Ingredients

  • 1 tbsp olive oil
  • 4 lbs pork shoulder, fat cap removed, cut into 1.5 – 2-inches pieces
  • 1 large yellow onion, sliced 1/2” thick
  • 1 c. honey
  • 8 cloves garlic, finely minced
  • 1/2 tsp dried red chili flakes
  • parsley, chopped for garnish
  • 1 tsp sesame seeds, plus more for garnish
  • 1/2 tsp salt
  • 1/4 tsp pepper

Instructions

Step 1: Prepare the oven. Preheat it to 350 degrees.

Step 2: Place the pork in a large oven-safe baking dish and gently toss with salt, pepper, onion, and olive oil. Using aluminium foil, tent the dish and place it in the preheated oven. Bake for about an hour.

Step 3: Whisk the honey, dried red chili flakes, and garlic until well blended and set aside.

Step 4: Take the pan out of the oven when done and add the honey and garlic mixture. Stir the mixture into the pork bites. Do not drain the water from the pan. Return to the oven and continue baking for another 30 minutes, uncovered.

Step 5: Take the dish out of the oven. Stir and bake for additional 30 minutes. Do this step once again.

Step 6: To the dish, stir in the sesame seeds and bake for 30 minutes more.

Step 7: Let the honey garlic-baked pork bites cool for about 5 minutes. Before serving, sprinkle with some chopped, fresh parsley and sesame seeds. Enjoy!

July 12, 2022 0 comment
0 FacebookTwitterPinterestEmail
General Recipes

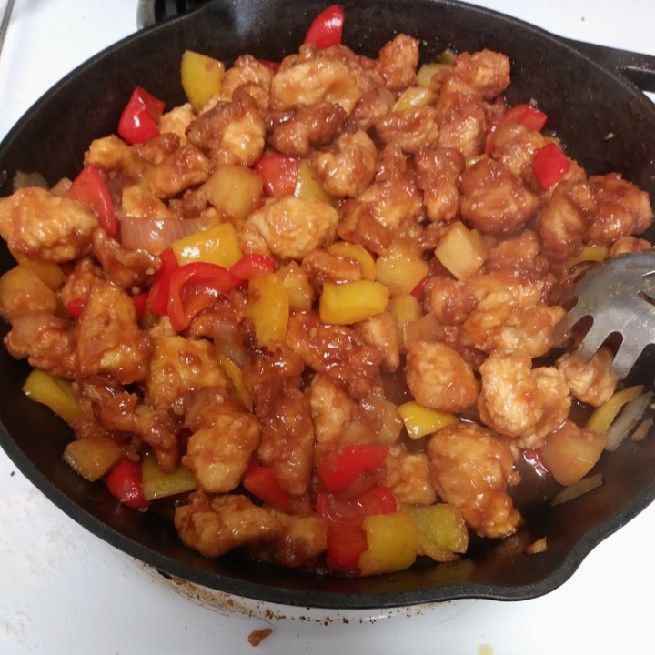
Sweet and Sour Chicken

by Rebecca July 12, 2022
written by Rebecca

Prep Time: 15 mins | Cook Time: 10 mins | Total Time: 25 mins | Yield: 4

Sweet and Sour Chicken is one of my favorite takeout dishes, and with this easy and quick recipe, you’ll get to enjoy this delicious dish with crispy chicken, pineapple, and bell peppers at home.

Ingredients

2 eggs, beaten

canola oil for frying

1 1/2 lbs chicken breasts, cut into 1-inch chunks

1/2 c. cornstarch

1/4 c. flour

1 red bell pepper, cut into 1-inch chunks

1/2 yellow onion, cut into 1-inch chunks

1 green bell pepper, cut into 1-inch chunks

1 c. pineapple chunks

1/2 c. sugar

1/2 c. apple cider vinegar

1/4 c. brown sugar

1/3 c.

ketchup

2 cloves garlic, minced

4 tsp reduced-sodium soy sauce

How to make Sweet and Sour Chicken

Step 1: Into a small bowl, place the sugar, brown sugar, apple cider vinegar, ketchup, soy sauce, and garlic. Mix well until blended.

Step 2: Into a Dutch oven or frying pan, pour enough oil to fill about 1 inch to 1 1/2 inch of the pan. Then, heat the oil over medium-high to high heat.

Step 3: To a large Ziplock bag, add the cornstarch followed by the pieces of chicken. Seal the bag and shake until all the chicken pieces are well coated.

Step 4: Into the egg, dip the pieces of chicken and dredge into the flour. Add the chicken piece into the hot oil and cook for about 2 to 3 minutes or until browned and crispy.

Step 5: To a cookie sheet, transfer the pieces of chicken and cook the rest.

Step 6: Discard the cooking oil from the pan when done cooking the chicken except for 1 tbsp of oil.

Step 7: To the same pan, add the bell peppers, onion, and pineapple. Cook until crisp-tender. This takes about 1 to 2 minutes. Then, pour in the sauce and stir well. Continue to cook for another 30 seconds until warmed through. Next, return the chicken pieces to the pan. Stir and cook further until the sauce has thickened.

Step 8: Remove from the heat when done and serve the sweet and sour chicken right away garnished with sesame seeds or green onions. Enjoy!

Nutrition Facts:

Calories: 602 kcal | Carbohydrates: 92g | Protein: 41g | Fat: 6g | Saturated Fat: 1g | Cholesterol: 190mg | Sodium: 588mg | Potassium: 1082mg | Fiber: 3g | Sugar: 65g | Vitamin A: 1385IU | Vitamin C: 79.5mg | Calcium: 67mg | Iron: 2.4mg

Sweet and Sour Chicken

Rebecca Prep Time: 15 mins | Cook Time: 10 mins | Total Time: 25 mins | Yield: 4 Sweet and Sour Chicken is one of my favorite takeout dishes, and with… General Recipes Sweet and Sour Chicken European Print This
Serves: 4 Prep Time: 15 mins Cooking Time: 10 mins 10 mins
Nutrition facts: 602 calories 6 fat
Rating: 5.0/5
( 1 voted )

Ingredients

  • 2 eggs, beaten
  • canola oil for frying
  • 1 1/2 lbs chicken breasts, cut into 1-inch chunks
  • 1/2 c. cornstarch
  • 1/4 c. flour
  • 1 red bell pepper, cut into 1-inch chunks
  • 1/2 yellow onion, cut into 1-inch chunks
  • 1 green bell pepper, cut into 1-inch chunks
  • 1 c. pineapple chunks
  • 1/2 c. sugar
  • 1/2 c. apple cider vinegar
  • 1/4 c. brown sugar
  • 1/3 c. ketchup
  • 2 cloves garlic, minced
  • 4 tsp reduced-sodium soy sauce

Instructions

Step 1: Into a small bowl, place the sugar, brown sugar, apple cider vinegar, ketchup, soy sauce, and garlic. Mix well until blended.

Step 2: Into a Dutch oven or frying pan, pour enough oil to fill about 1 inch to 1 1/2 inch of the pan. Then, heat the oil over medium-high to high heat.

Step 3: To a large Ziplock bag, add the cornstarch followed by the pieces of chicken. Seal the bag and shake until all the chicken pieces are well coated.

Step 4: Into the egg, dip the pieces of chicken and dredge into the flour. Add the chicken piece into the hot oil and cook for about 2 to 3 minutes or until browned and crispy.

Step 5: To a cookie sheet, transfer the pieces of chicken and cook the rest.

Step 6: Discard the cooking oil from the pan when done cooking the chicken except for 1 tbsp of oil.

Step 7: To the same pan, add the bell peppers, onion, and pineapple. Cook until crisp-tender. This takes about 1 to 2 minutes. Then, pour in the sauce and stir well. Continue to cook for another 30 seconds until warmed through. Next, return the chicken pieces to the pan. Stir and cook further until the sauce has thickened.

Step 8: Remove from the heat when done and serve the sweet and sour chicken right away garnished with sesame seeds or green onions. Enjoy!


July 12, 2022 0 comment
0 FacebookTwitterPinterestEmail
General Recipes

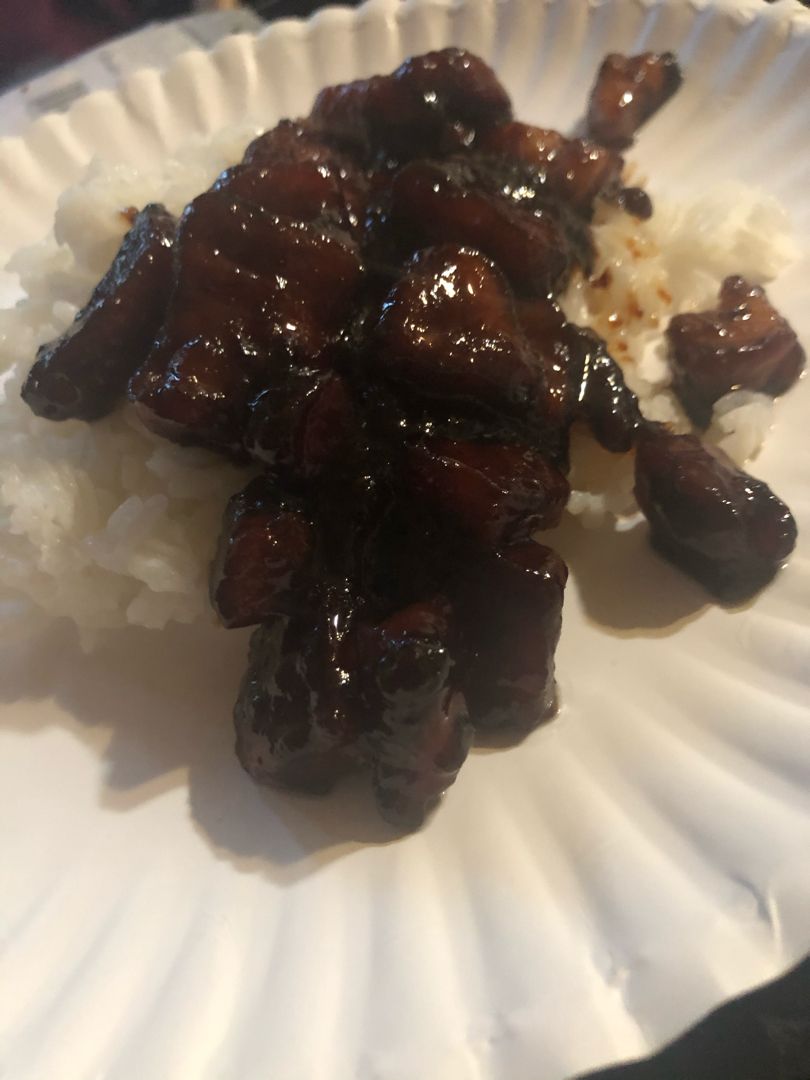
Sweet caramelized pork with rice

by Rebecca July 12, 2022
written by Rebecca

Prep Time: 5 mins | Cook Time: 35 mins | Total Time: 40 mins | Servings: 4 people

Enjoy every bite of this sweet caramelized pork with rice. It’s a very tasty dish that you can easily make using only a few simple ingredients. A great dinner option that is ready in under an hour! Serve this savory-sweet caramelized pork over rice and enjoy a very satisfying, restaurant-quality meal right at home!

This is one of the best pork dishes I’ve tried! The perfect balance of flavors and incredible taste of this sweet caramelized pork makes my taste buds happy. To complete the dish, serve this over plain white rice and garnish it with some green onions. You can also throw in some sauteed vegetables for an additional texture and to freshen up your plate.

This mouthwatering, sticky caramelized pork is another amazing addition to your weekly rotation. It is not only very easy and fast to make, but insanely good your entire family will ask for again and again!

Ingredients

1 teaspoon olive oil

2 pounds pork butt or boneless ribs

3 tablespoons brown sugar

2 tablespoons fish sauce

1/2 onion

1 tablespoon soy sauce

cooked white rice

green onions for garnish

1-2 c. water UPDATE: begin with 1 c. and then add more if needed

How to make Sweet caramelized pork with rice

Step 1: Start by chopping the onion. Into small pieces, slice the pork.

Step 2: In a large, wide skillet, heat the oil. Once the oil is hot, add the onions and pork to the skillet and cook for about 5 minutes or until the meat is well browned.

Step 3: Pour in the water and add the soy sauce, sugar, and fish sauce. Bring everything to a light boil. Let the mixture simmer for about 30 minutes to 1 hour or until almost all the water has thickened and turned into a brown caramel-like sauce.

Step 4: Stir well. Over rice, serve the caramel pork garnished with some green onions. Enjoy!

Nutrition Facts:

Calories: 343 kcal | Carbohydrates: 10g | Protein: 43g | Fat: 13g | Saturated Fat: 4g | Cholesterol: 136mg | Sodium: 408mg | Potassium: 810mg | Sugar: 9g | Vitamin C: 1mg | Calcium: 46mg | Iron: 2.9mg

Sweet caramelized pork with rice

Rebecca Prep Time: 5 mins | Cook Time: 35 mins | Total Time: 40 mins | Servings: 4 people Enjoy every bite of this sweet caramelized pork with rice. It’s a… General Recipes Sweet caramelized pork with rice European Print This
Serves: 4 Prep Time: 5 mins Cooking Time: 35 mins 35 mins
Nutrition facts: 343 calories 13 fat
Rating: 5.0/5
( 1 voted )

Ingredients

  • 1 teaspoon olive oil
  • 2 pounds pork butt or boneless ribs
  • 3 tablespoons brown sugar
  • 2 tablespoons fish sauce
  • 1/2 onion
  • 1 tablespoon soy sauce
  • cooked white rice
  • green onions for garnish
  • 1-2 c. water UPDATE: begin with 1 c. and then add more if needed

Instructions

Step 1: Start by chopping the onion. Into small pieces, slice the pork.

Step 2: In a large, wide skillet, heat the oil. Once the oil is hot, add the onions and pork to the skillet and cook for about 5 minutes or until the meat is well browned.

Step 3: Pour in the water and add the soy sauce, sugar, and fish sauce. Bring everything to a light boil. Let the mixture simmer for about 30 minutes to 1 hour or until almost all the water has thickened and turned into a brown caramel-like sauce.

Step 4: Stir well. Over rice, serve the caramel pork garnished with some green onions. Enjoy!

July 12, 2022 0 comment
0 FacebookTwitterPinterestEmail
General Recipes

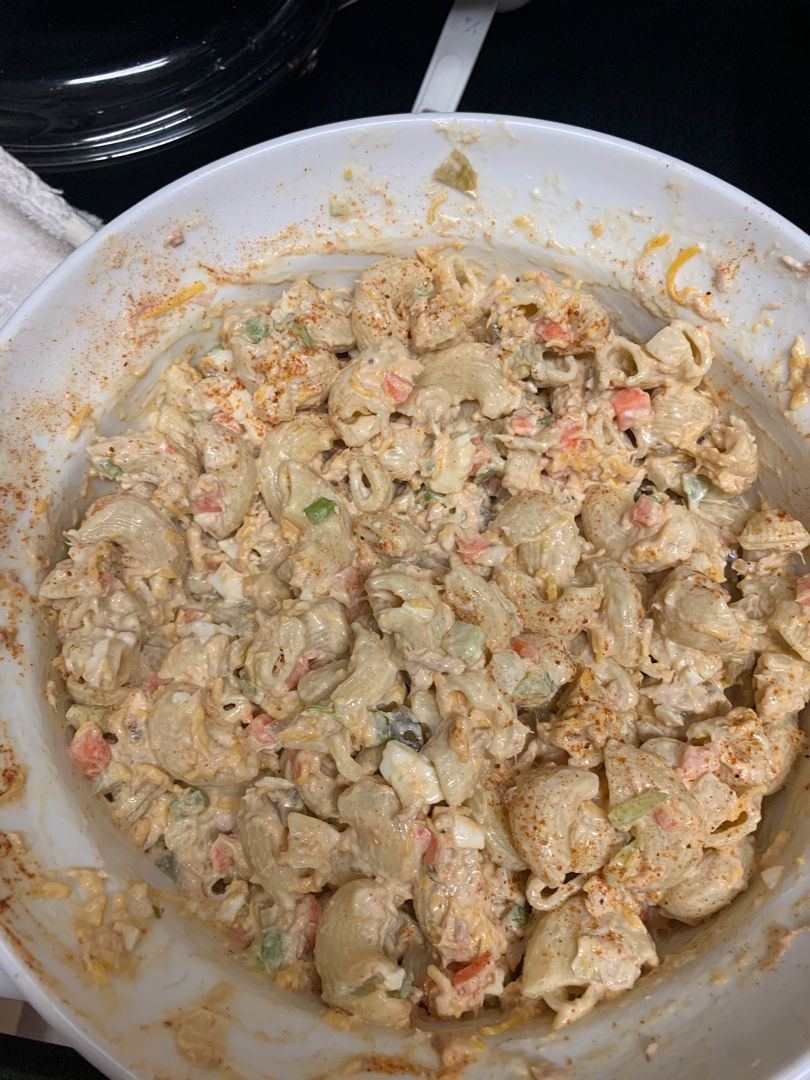
Tuna Pasta Salad

by Rebecca July 12, 2022
written by Rebecca

PREP TIME: 15 MINS | COOK TIME: 10 MINS | TOTAL TIME: 25 MINS | SERVINGS: 8

This tuna pasta salad is my favorite anytime meal and my go-to for a perfect picnic lunch. It is a simple yet very delicious salad with tender pasta, a creamy dressing, and healthy tuna. This tuna pasta salad is an excellent addition to your next backyard barbecue, potluck, or picnic.

This easy and quick tuna pasta salad is an amazing salad with lots of healthy benefits. Tuna, as we all know, is rich in omega-3 fatty acids that are great to reduce cholesterol. It is also packed with potassium, immune system-building anti-oxidants, proteins, and nutrients. This tuna salad is not only delicious, but also great for our bodies. If you are looking for another healthy meal idea, you do not have to look any further because this tuna pasta salad is everything! Serve this to a big crowd, eat this for lunch, and keep any leftovers in the fridge for a few days for a quick meal.

Ingredients

½ c. diced celery

1 c. mayonnaise

1 tsp yellow mustard

1 tbsp lemon juice

½ tsp garlic powder

1 tbsp fresh dill

½ c. diced red onion

17 oz. canned white albacore tuna packed in water, drained

Salt and pepper

½ c. pickle relish

16 oz. uncooked small pasta like shells or farfalle

How to make Tuna Pasta Salad

Step 1: Following the package directions, cook the pasta in a large pot of salted boiling water until al dente. Drain when done and rinse with cold water. Set aside.

Step 2: Place the mayonnaise, mustard, garlic powder, lemon juice, and fresh dill in a small bowl. Mix well until combined.

Step 3: In a large bowl, place all ingredients and mix well. To taste, season with salt and pepper.

Step 4: Serve the Tuna Pasta Salad right away or chilled. Keep the salad in an airtight container and store it in the fridge for up to 3 days.

Nutrition Facts:

Calories: 498 kcal, Carbohydrates: 47g, Protein: 22g, Fat: 24g, Saturated Fat: 4g, Cholesterol: 37mg, Sodium: 587mg, Potassium: 318mg, Fiber: 2g, Sugar: 3g, Vitamin A: 84IU, Vitamin C: 2mg, Calcium: 27mg, Iron: 2mg

Tuna Pasta Salad

Rebecca PREP TIME: 15 MINS | COOK TIME: 10 MINS | TOTAL TIME: 25 MINS | SERVINGS: 8 This tuna pasta salad is my favorite anytime meal and my go-to for… General Recipes Tuna Pasta Salad European Print This
Serves: 8 Prep Time: 15 mins1 Cooking Time: 10 mins 10 mins
Nutrition facts: 498 calories 24 fat
Rating: 5.0/5
( 1 voted )

Ingredients

  • ½ c. diced celery
  • 1 c. mayonnaise
  • 1 tsp yellow mustard
  • 1 tbsp lemon juice
  • ½ tsp garlic powder
  • 1 tbsp fresh dill
  • ½ c. diced red onion
  • 17 oz. canned white albacore tuna packed in water, drained
  • Salt and pepper
  • ½ c. pickle relish
  • 16 oz. uncooked small pasta like shells or farfalle

Instructions

Step 1: Following the package directions, cook the pasta in a large pot of salted boiling water until al dente. Drain when done and rinse with cold water. Set aside.

Step 2: Place the mayonnaise, mustard, garlic powder, lemon juice, and fresh dill in a small bowl. Mix well until combined.

Step 3: In a large bowl, place all ingredients and mix well. To taste, season with salt and pepper.

Step 4: Serve the Tuna Pasta Salad right away or chilled. Keep the salad in an airtight container and store it in the fridge for up to 3 days.

July 12, 2022 0 comment
0 FacebookTwitterPinterestEmail
General Recipes

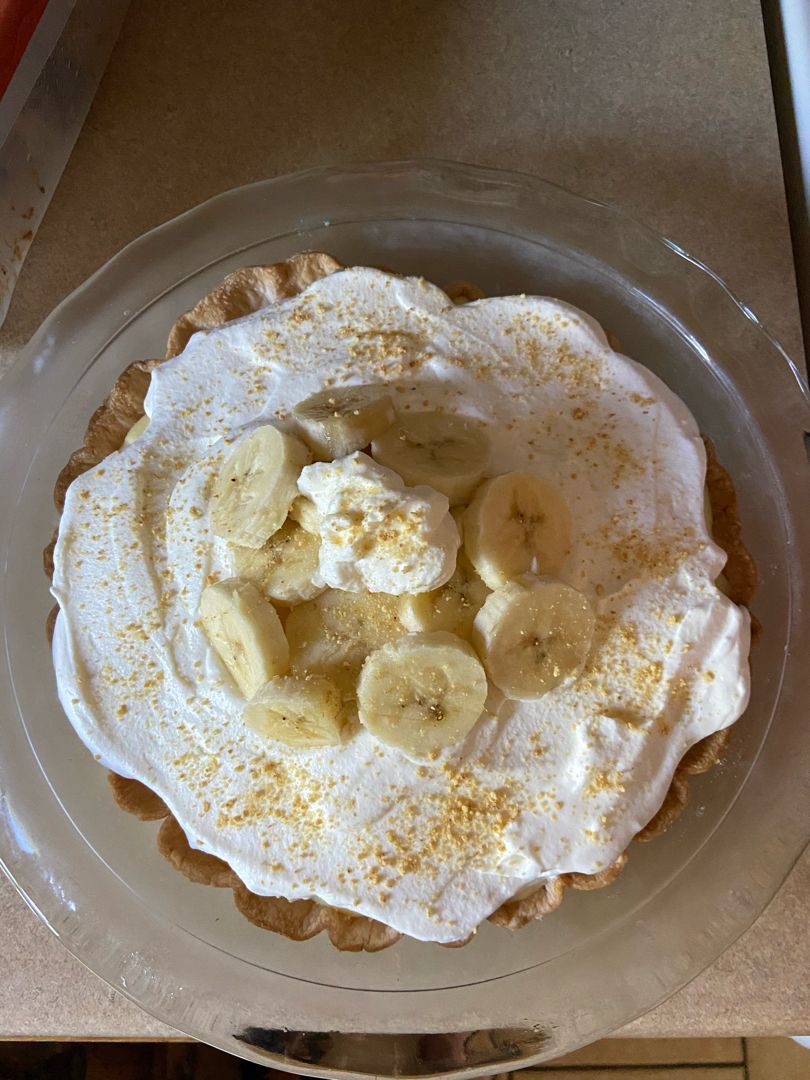
Old Fashioned Banana Cream Pie

by Rebecca July 12, 2022
written by Rebecca

Prep Time: 2 hrs | Cook Time: 10 mins | Total Time: 2 hrs 10 mins | Servings: 8 slices

Make this Old Fashioned Banana Cream Pie from scratch with this easy recipe. This pie is a very decadent dessert that has layers of homemade custard, fresh slices of banana, and homemade whipped cream. It’s a delicious pie that is packed with banana flavor!

INGREDIENTS

Custard:

4 egg yolks, slightly beaten

2 tablespoons butter

2/3 c. sugar

1/4 c. corn starch

3 c. whole milk

1 tablespoon vanilla extract

1/2 tsp salt

Pie Crust (9-inch):

1 tsp oil

2 tablespoons butter

1 c. flour

1/3 c. shortening

1 tsp lemon juice or vinegar

3 tablespoons milk

1/2 tsp salt

Whipped Cream:

3 tablespoons powdered sugar

1 c. heavy whipping cream

Graham cracker or Nilla Wafer crumbs, optional for garnish

3 bananas (not overripe) 2 for the pie, one for garnish

How to make Old Fashioned Banana Cream Pie

Step 1: In a saucepan, whisk the sugar, cornstarch, and salt. Gradually stir in the milk and cook while stirring constantly over medium heat until the mixture has thickened and boils. Let the mixture boil for about 1 to 2 minutes, then adjust the heat to low.

Step 2: In a glass measuring bowl, slightly beat the eggs. Over the eggs, pour a cup of the hot milk liquid from the saucepan and stir well using a fork. Into the pan, pour the egg and milk mixture and let it boil for about 1 to 2 minutes, stirring. Then, take off the heat.

Step 3: To the saucepan while off the heat, stir in the butter and vanilla.

Step 4: Onto the custard, press a piece of plastic wrap and let it cool in the fridge.

Step 5: In the meantime, make the pie crust. Start by combining the flour and salt. Using a pastry cutter, cut in the butter and shortening. Then, stir in the oil. Whisk the milk and lemon or vinegar until well mixed and stir this into the pie crust until the dough comes together. Onto a lightly floured surface, knead the dough until smooth, then roll it out to fit a 9-inch pie pan. Using a fork, poke holes across the bottom and crimp the edges. Place in 450 degrees preheated oven and bake for about 8 to 10 minutes or until the edges of the pie crust are lightly golden. Remove from the oven and let the pie crust cool.

Step 6: Once the pie crust has cooled, slice two of the bananas and put them in a single layer into the cooled pie crust. On top, add the cooled custard.

Step 7: Using an electric mixer, beat the whipping cream and powdered sugar until stiff peaks form. Then, place it on top of the pie.

Step 8: Place the pie in the fridge for at least an hour or until ready to serve. As a garnish, top with extra slices of bananas. Enjoy!

Tips for making the custard filling:

The custard should have a consistency of gravy after the first boil and a pudding after the second boil.

Before starting the first-timer, ensure that the custard is at a boil. This may take about 1 to 2 minutes or so depending on your stove. Note that the custard will thicken as it cools, and it will thicken further after chilling in the pie crust. Undercook custard has a soup-like consistency.

NUTRITION INFO.

Calories: 460 kcal

Old Fashioned Banana Cream Pie

Rebecca Prep Time: 2 hrs | Cook Time: 10 mins | Total Time: 2 hrs 10 mins | Servings: 8 slices Make this Old Fashioned Banana Cream Pie from scratch with… General Recipes Old Fashioned Banana Cream Pie European Print This
Serves: 8 Prep Time: 2 hrs Cooking Time: 10 mins 10 mins
Nutrition facts: 460 calories 20 grams fat
Rating: 5.0/5
( 1 voted )

Ingredients

  • Custard:
  • 4 egg yolks, slightly beaten
  • 2 tablespoons butter
  • 2/3 c. sugar
  • 1/4 c. corn starch
  • 3 c. whole milk
  • 1 tablespoon vanilla extract
  • 1/2 tsp salt
  • Pie Crust (9-inch):
  • 1 tsp oil
  • 2 tablespoons butter
  • 1 c. flour
  • 1/3 c. shortening
  • 1 tsp lemon juice or vinegar
  • 3 tablespoons milk
  • 1/2 tsp salt
  • Whipped Cream:
  • 3 tablespoons powdered sugar
  • 1 c. heavy whipping cream
  • Graham cracker or Nilla Wafer crumbs, optional for garnish
  • 3 bananas (not overripe) 2 for the pie, one for garnish

Instructions

Step 1: In a saucepan, whisk the sugar, cornstarch, and salt. Gradually stir in the milk and cook while stirring constantly over medium heat until the mixture has thickened and boils. Let the mixture boil for about 1 to 2 minutes, then adjust the heat to low.

Step 2: In a glass measuring bowl, slightly beat the eggs. Over the eggs, pour a cup of the hot milk liquid from the saucepan and stir well using a fork. Into the pan, pour the egg and milk mixture and let it boil for about 1 to 2 minutes, stirring. Then, take off the heat.

Step 3: To the saucepan while off the heat, stir in the butter and vanilla.

Step 4: Onto the custard, press a piece of plastic wrap and let it cool in the fridge.

Step 5: In the meantime, make the pie crust. Start by combining the flour and salt. Using a pastry cutter, cut in the butter and shortening. Then, stir in the oil. Whisk the milk and lemon or vinegar until well mixed and stir this into the pie crust until the dough comes together. Onto a lightly floured surface, knead the dough until smooth, then roll it out to fit a 9-inch pie pan. Using a fork, poke holes across the bottom and crimp the edges. Place in 450 degrees preheated oven and bake for about 8 to 10 minutes or until the edges of the pie crust are lightly golden. Remove from the oven and let the pie crust cool.

Step 6: Once the pie crust has cooled, slice two of the bananas and put them in a single layer into the cooled pie crust. On top, add the cooled custard.

Step 7: Using an electric mixer, beat the whipping cream and powdered sugar until stiff peaks form. Then, place it on top of the pie.

Step 8: Place the pie in the fridge for at least an hour or until ready to serve. As a garnish, top with extra slices of bananas. Enjoy!

Notes

The custard should have a consistency of gravy after the first boil and a pudding after the second boil. Before starting the first-timer, ensure that the custard is at a boil. This may take about 1 to 2 minutes or so depending on your stove. Note that the custard will thicken as it cools, and it will thicken further after chilling in the pie crust. Undercook custard has a soup-like consistency.

July 12, 2022 0 comment
0 FacebookTwitterPinterestEmail
Newer Posts
Older Posts

Popular Posts

  • 1

    Crispy Crunchy Parmesan Potatoes

    March 21, 2020
  • 2

    CROCK POT SMOTHERED PORK CHOPS

    March 21, 2020
  • Facebook
  • Twitter

@2019 - All Right Reserved.


Back To Top