Cook it once
  • Home
  • Privacy Policy
  • Recipes
    • KETO
    • LC
    • WW
  • Tips
  • Contact
Cook it once
  • Home
  • Privacy Policy
  • Recipes
    • KETO
    • LC
    • WW
  • Tips
  • Contact
Category:

General Recipes

General Recipes

Slow Cooker Beef Barbacoa

by Rebecca July 14, 2022
written by Rebecca

Prep Time: 10 mins | Cook Time: 4 hrs | Servings: 10

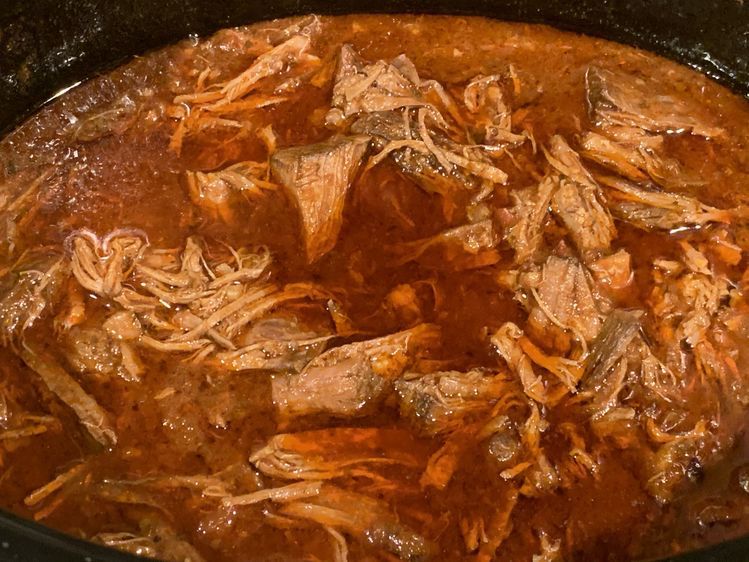
This slow cooker Beef Barbacoa is a very mouthwatering dish that is loaded with perfect Mexican flavors. A no-fuss recipe with melt-in-your-mouth beef that is cooked low and slow. Serve this on tacos with some lime wedges on the side for that perfect Mexican dinner experience at home! You can keep any leftovers in an airtight container (make sure to include the juices) and store them in the fridge for up to 5 days or freeze them for up to 3 months.

Ingredients

4 cloves garlic, minced

1 large yellow onion, diced

3 to 4 lbs chuck roast, cut into 6 to 8 chunks

½ c. beef broth, (try to use low-sodium beef broth whenever possible)

1 can (4-oz.) of green chilies

1 tbsp ground cumin

2 chipotles in adobo, diced

1 tbsp dried oregano

juices from 2 limes

2 tbsp apple cider vinegar

2 bay leaves

1/4 c. chopped fresh cilantro or parsley, for garnish

1 ½ tsp salt

¾ tsp fresh ground black pepper

How to make Slow Cooker Beef Barbacoa

Step 1: Combine the prepped chuck roast, onions, garlic, green chilies, chipotles, ground cumin, oregano, salt, and pepper in the bowl of a slow cooker.

Step 2: Place the beef broth, vinegar, and lime juice in a small bowl. Whisk until combined. On top of the ingredients in your slow cooker, pour the broth mixture. Then, add the bay leaves.

Step 3: Put the lid on and set to cook for 6 to 8 hours on low or 3 to 4 hours on high until the beef is fall-apart-tender.

Step 4: To a cutting board, transfer the beef. Shred the beef into bite-size pieces using two forks or shredder claws.

Step 5: Return the beef into the slow cooker and stir until well incorporated.

Step 6: Before serving, garnish with cilantro or parsley. Enjoy!

Notes:

NET CARBS: 2 g, WW Freestyle: 6

Nutrition Facts:

Amount Per Serving: Calories 262, Calories from Fat 144, Fat 16g25%, Saturated Fat 7g35%, Cholesterol 94mg31%, Sodium 559mg23%, Potassium 514mg15%, Carbohydrates 3g1%, Fiber 1g4%, Sugar 1g1%, Protein 27g54%, Vitamin A 184IU4%, Vitamin C 3mg4%, Calcium 41mg4%, Iron 4mg22%
Slow Cooker Beef Barbacoa

Rebecca Prep Time: 10 mins | Cook Time: 4 hrs | Servings: 10 This slow cooker Beef Barbacoa is a very mouthwatering dish that is loaded with perfect Mexican flavors. A… General Recipes Slow Cooker Beef Barbacoa European Print This
Serves: 10 Prep Time: 10 mins Cooking Time: 4 hrs 4 hrs
Nutrition facts: 262 calories 16 fat
Rating: 5.0/5
( 1 voted )

Ingredients

  • 4 cloves garlic, minced
  • 1 large yellow onion, diced
  • 3 to 4 lbs chuck roast, cut into 6 to 8 chunks
  • ½ c. beef broth, (try to use low-sodium beef broth whenever possible)
  • 1 can (4-oz.) of green chilies
  • 1 tbsp ground cumin
  • 2 chipotles in adobo, diced
  • 1 tbsp dried oregano
  • juices from 2 limes
  • 2 tbsp apple cider vinegar
  • 2 bay leaves
  • 1/4 c. chopped fresh cilantro or parsley, for garnish
  • 1 ½ tsp salt
  • ¾ tsp fresh ground black pepper

Instructions

Step 1: Combine the prepped chuck roast, onions, garlic, green chilies, chipotles, ground cumin, oregano, salt, and pepper in the bowl of a slow cooker.

Step 2: Place the beef broth, vinegar, and lime juice in a small bowl. Whisk until combined. On top of the ingredients in your slow cooker, pour the broth mixture. Then, add the bay leaves.

Step 3: Put the lid on and set to cook for 6 to 8 hours on low or 3 to 4 hours on high until the beef is fall-apart-tender.

Step 4: To a cutting board, transfer the beef. Shred the beef into bite-size pieces using two forks or shredder claws.

Step 5: Return the beef into the slow cooker and stir until well incorporated.

Step 6: Before serving, garnish with cilantro or parsley. Enjoy!
July 14, 2022 0 comment
0 FacebookTwitterPinterestEmail
General Recipes

Banana Pudding Recipe

by Rebecca July 14, 2022
written by Rebecca

PREP TIME: 30 MINS | COOK TIME: 17 MINS | TOTAL TIME: 47 MINS | SERVINGS: 10

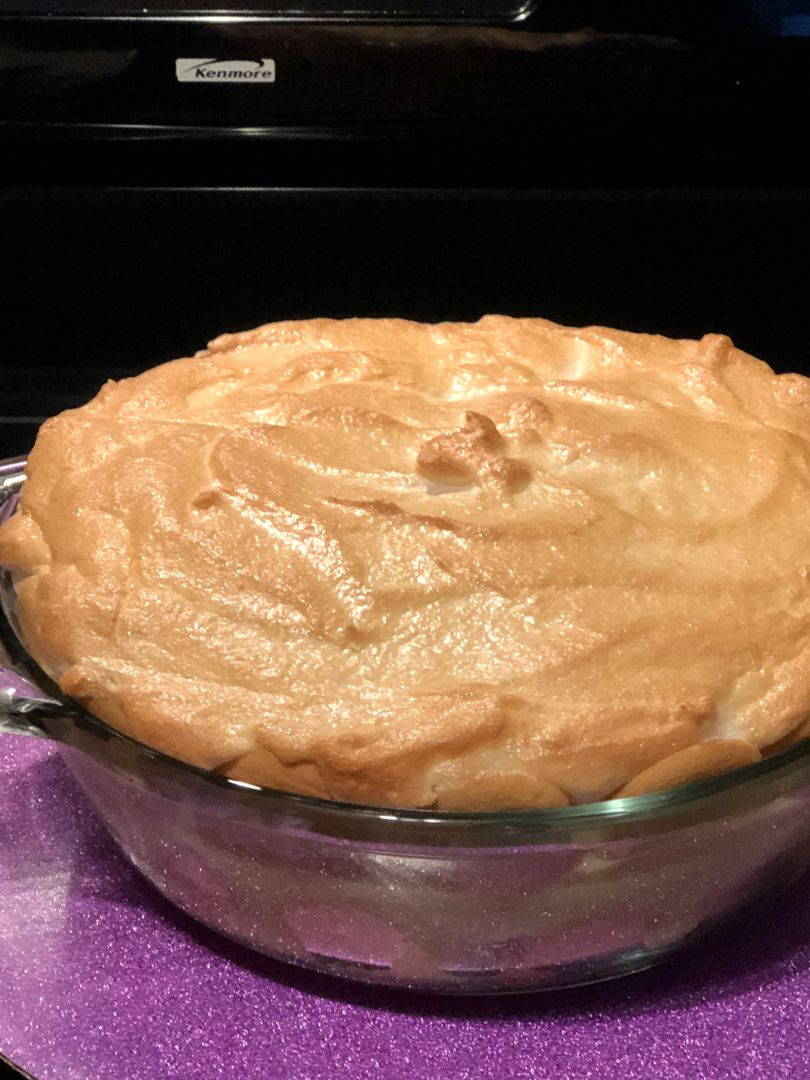
Sweet and delicious – this made-from-scratch banana pudding is a classic, old Southern style recipe that has been around since. This is the exact recipe my grandma used to make that she passed on to my mom and now, me. My favorite part of this banana pudding is the tall peaks of the lightly sweet meringue that have been toasted in the oven. If you are not a big fan of meringue, you can simply top the banana pudding with your preferred whipped cream.

INGREDIENTS

4 c. milk

⅔ c. all-purpose flour

1 ½ c. sugar, divided

6 eggs, yokes with egg yokes and whites separated in two bowls

1 tsp vanilla extract

5 whole ripe bananas, sliced (about 3 1/2 c.), divided

45 NILLA Wafer Cookies

Dash salt

How to make Banana Pudding

Step 1: On top of a double boiler, add 1 cup of sugar, flour, and salt. Stir in 6 egg yolks and milk. In a bowl, set the egg whites aside. Cook the mixture over boiling water, uncovered, for about 5 to 10 minutes while stirring constantly until thickened. Take the double boiler off the heat and whisk in the vanilla.

Step 2: On the bottom of a 1 1/2-quart casserole dish, spread a small amount of the pudding. Top with a layer of wafers followed by a layer of sliced bananas. Over the bananas, pour 1/3 of the pudding. Do the same to create 3 layers, ending with pudding.

Step 3: Beat the egg whites using a mixer until soft peaks form. Then, slowly add in the rest of the half cup sugar, beating until stiff. Spoon this over the pudding, evenly spreading to cover the whole pudding surface.

Step 4: Place in preheated 425 degrees and bake for about 5 to 7 minutes or until lightly browned. Remove from the oven and let the banana pudding cool.

NUTRITION FACTS:

Serving: 1cup, Calories: 374 kcal, Carbohydrates: 67g, Protein: 9g, Fat: 9g, Saturated Fat: 4g, Polyunsaturated Fat: 2g, Monounsaturated Fat: 2g, Trans Fat: 1g, Cholesterol: 110mg, Sodium: 144mg, Potassium: 418mg, Sugar: 47g, Calcium: 139mg, Iron: 1mg

Banana Pudding Recipe

Rebecca PREP TIME: 30 MINS | COOK TIME: 17 MINS | TOTAL TIME: 47 MINS | SERVINGS: 10 Sweet and delicious – this made-from-scratch banana pudding is a classic, old Southern… General Recipes Banana Pudding Recipe European Print This
Serves: 10 Prep Time: 30 mins Cooking Time: 17 mins 17 mins
Nutrition facts: 374 calories 9 fat
Rating: 5.0/5
( 1 voted )

Ingredients

  • 4 c. milk
  • ⅔ c. all-purpose flour
  • 1 ½ c. sugar, divided
  • 6 eggs, yokes with egg yokes and whites separated in two bowls
  • 1 tsp vanilla extract
  • 5 whole ripe bananas, sliced (about 3 1/2 c.), divided
  • 45 NILLA Wafer Cookies
  • Dash salt

Instructions

Step 1: On top of a double boiler, add 1 cup of sugar, flour, and salt. Stir in 6 egg yolks and milk. In a bowl, set the egg whites aside. Cook the mixture over boiling water, uncovered, for about 5 to 10 minutes while stirring constantly until thickened. Take the double boiler off the heat and whisk in the vanilla.

Step 2: On the bottom of a 1 1/2-quart casserole dish, spread a small amount of the pudding. Top with a layer of wafers followed by a layer of sliced bananas. Over the bananas, pour 1/3 of the pudding. Do the same to create 3 layers, ending with pudding.

Step 3: Beat the egg whites using a mixer until soft peaks form. Then, slowly add in the rest of the half cup sugar, beating until stiff. Spoon this over the pudding, evenly spreading to cover the whole pudding surface.

Step 4: Place in preheated 425 degrees and bake for about 5 to 7 minutes or until lightly browned. Remove from the oven and let the banana pudding cool.

July 14, 2022 0 comment
0 FacebookTwitterPinterestEmail
General Recipes

Banana Pudding

by Rebecca July 13, 2022
written by Rebecca

PREP TIME: 15 mins | COOK TIME: 15 mins | REFRIGERATE: 4 hrs | TOTAL TIME: 4 hrs 30 mins

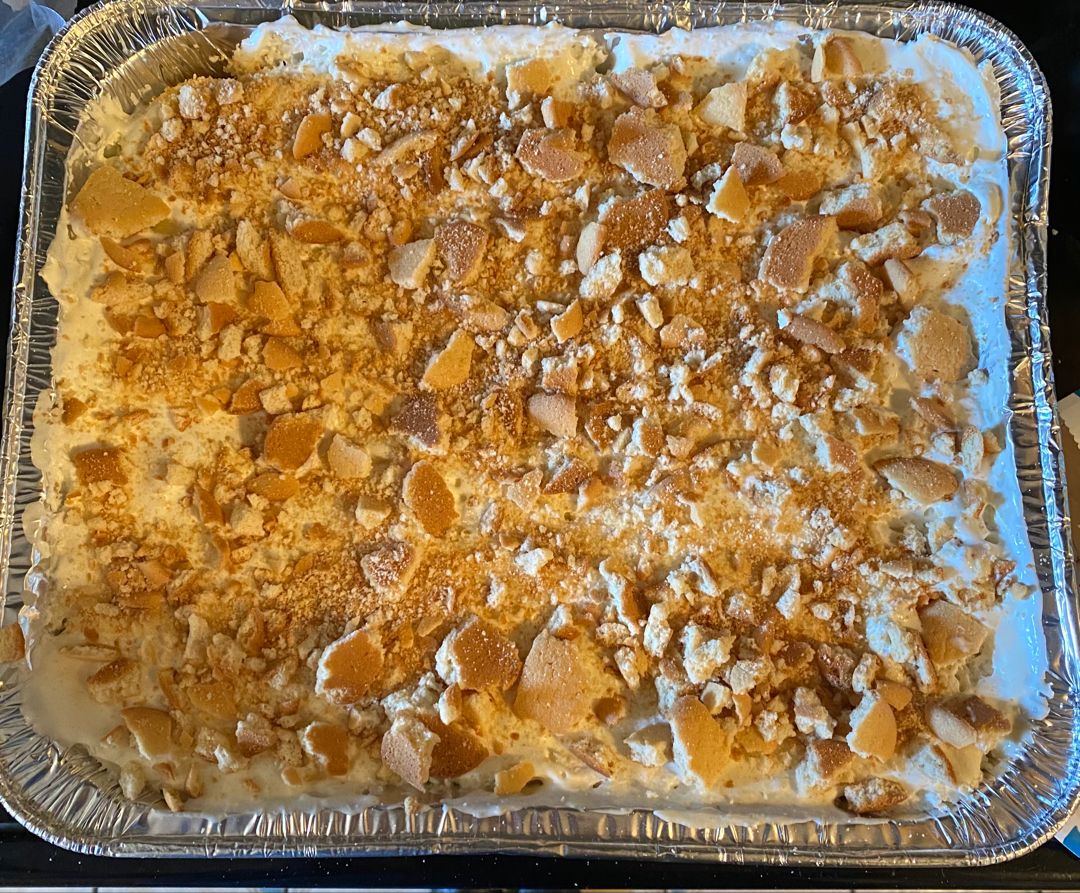
Make this delicious, easy homemade banana pudding from scratch. This dessert is an old-fashioned, classic favorite with layers of vanilla pudding, Nilla wafers, sliced bananas, and whipped cream.

Ingredients

1 egg, at room temperature

2 egg yolks, at room temperature

1/2 c. heavy cream

2 1/2 c. whole milk

¾ c. sugar

4 1/2 tbsp cornstarch

3 tsp vanilla extract

4 tbsp butter, chopped

½ tsp salt

1 box Nilla wafers

Fresh whipped cream, for topping (optional)

4 large bananas, sliced (use ripe, but not overly ripe bananas)

How to make Banana Pudding

Step 1: To a medium saucepan, add the milk and cream over medium heat. Bring to a simmer, stirring occasionally.

Step 2: Place the eggs, sugar, and cornstarch in a medium bowl. Mix well until combined.

Step 3: Over the egg mixture, spoon a bit of the hot milk, and stir well. Do the same with another couple of spoonfuls of hot milk.

Step 4: Into the saucepan, pour the egg mixture, and cook for another 5-8 minutes over medium-low heat or until the mixture has thickened and coats the back of a spoon. Make sure not to allow the mixture to boil.

Step 5: Take the pan off the heat once the mixture has thickened and whisk in the butter, vanilla extract, and salt.

Step 6: Through a sieve or fine-mesh strainer into a colander, pour the pudding. This will remove any lumps and make the mixture silky smooth.

Step 7: Directly on top, place a piece of plastic wrap. This will prevent skin from forming. Place in the fridge for 1 hour or so until chilled. Once chilled, stir the mixture well.

Step 8: To assemble: Line the bottom of a 9-inch square pan or large bowl, trifle dish, or even individual dishes with vanilla wafers. On top, place the sliced bananas and top with half of the pudding mixture. Repeat one more time and top the final layer with either whole or crushed wafers.

Step 9: Using plastic wrap, tightly cover the dish and place in the fridge for 4-8 hours until set.

Step 10: Before serving, top with fresh whipped cream. Enjoy!

Notes:

You can make this banana pudding about 1 to 2 days in advance and just keep it in the fridge, covered, until ready to serve.

When freezing, freeze only the pudding. Thaw the pudding and assemble. To freeze, place the completely cooled homemade pudding in a freezer-safe bag and store it in the freezer for up to 3 months. Before you assemble, thaw the pudding in the fridge overnight.

Nutrition Facts:

Calories: 289 kcal, Carbohydrates: 38g, Protein: 4g, Fat: 14g, Saturated Fat: 8g, Cholesterol: 100mg, Sodium: 218mg, Potassium: 327mg, Fiber: 2g, Sugar: 28g, Vitamin A: 582IU, Vitamin C: 5mg, Calcium: 98mg, Iron: 1mg

Banana Pudding

Rebecca PREP TIME: 15 mins | COOK TIME: 15 mins | REFRIGERATE: 4 hrs | TOTAL TIME: 4 hrs 30 mins Make this delicious, easy homemade banana pudding from scratch. This… General Recipes Banana Pudding European Print This
Prep Time: 15 mins Cooking Time: 15 mins 15 mins
Nutrition facts: 289 calories 14 fat
Rating: 5.0/5
( 1 voted )

Ingredients

  • 1 egg, at room temperature
  • 2 egg yolks, at room temperature
  • 1/2 c. heavy cream
  • 2 1/2 c. whole milk
  • ¾ c. sugar
  • 4 1/2 tbsp cornstarch
  • 3 tsp vanilla extract
  • 4 tbsp butter, chopped
  • ½ tsp salt
  • 1 box Nilla wafers
  • Fresh whipped cream, for topping (optional)
  • 4 large bananas, sliced (use ripe, but not overly ripe bananas)

Instructions

Step 1: To a medium saucepan, add the milk and cream over medium heat. Bring to a simmer, stirring occasionally.

Step 2: Place the eggs, sugar, and cornstarch in a medium bowl. Mix well until combined.

Step 3: Over the egg mixture, spoon a bit of the hot milk, and stir well. Do the same with another couple of spoonfuls of hot milk.

Step 4: Into the saucepan, pour the egg mixture, and cook for another 5-8 minutes over medium-low heat or until the mixture has thickened and coats the back of a spoon. Make sure not to allow the mixture to boil.

Step 5: Take the pan off the heat once the mixture has thickened and whisk in the butter, vanilla extract, and salt.

Step 6: Through a sieve or fine-mesh strainer into a colander, pour the pudding. This will remove any lumps and make the mixture silky smooth.

Step 7: Directly on top, place a piece of plastic wrap. This will prevent skin from forming. Place in the fridge for 1 hour or so until chilled. Once chilled, stir the mixture well.

Step 8: To assemble: Line the bottom of a 9-inch square pan or large bowl, trifle dish, or even individual dishes with vanilla wafers. On top, place the sliced bananas and top with half of the pudding mixture. Repeat one more time and top the final layer with either whole or crushed wafers.

Step 9: Using plastic wrap, tightly cover the dish and place in the fridge for 4-8 hours until set.

Step 10: Before serving, top with fresh whipped cream. Enjoy!

Notes

You can make this banana pudding about 1 to 2 days in advance and just keep it in the fridge, covered, until ready to serve. When freezing, freeze only the pudding. Thaw the pudding and assemble. To freeze, place the completely cooled homemade pudding in a freezer-safe bag and store it in the freezer for up to 3 months. Before you assemble, thaw the pudding in the fridge overnight.

July 13, 2022 0 comment
0 FacebookTwitterPinterestEmail
General Recipes

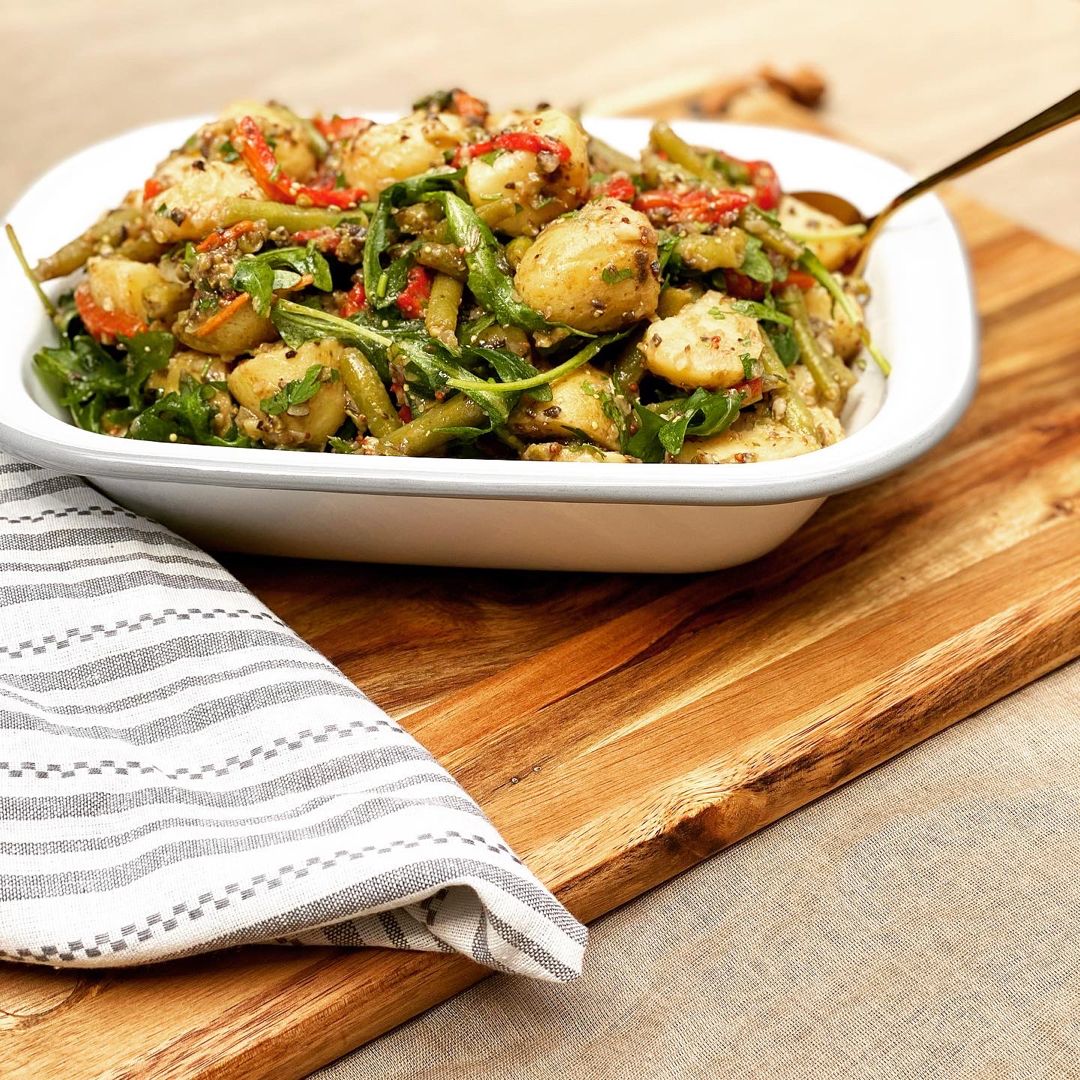
Mediterranean Potato Salad

by Rebecca July 13, 2022
written by Rebecca

PREP TIME: 20 mins | COOK TIME: 40 mins | TOTAL TIME: 60 mins | SERVINGS: 10 to 12

This delicious Mediterranean Potato Salad is a great potluck or picnic option. Feel free to make this ahead and simply keep it in the fridge for a few days. I like to store this salad in the fridge and enjoy it the next day as everything gets marinated in vinaigrette to ensure a flavor-infused salad!

Ingredients

3/4 c. red onion, minced

4 lbs small new potatoes or fingerling potatoes, scrubbed clean

3 large roasted red bell peppers, core removed, flesh cut into 2 x 1/4” strips (about 2 c., or a 16 oz. jar, drained)

1 lb fresh, tender green beans, trimmed and cut into 1” pieces (4 c. prepped green beans)

1 c. kalamata and green olives, pitted and minced (mini-chopper works well for this)

Salted water (1 1/2 tsp salt to every quart of water) for cooking the potatoes

A large handful of fresh baby arugula leaves

A large handful of fresh Italian parsley leaves, roughly chopped

Dressing:

1 teaspoon dried tarragon (or herbes de provence)

1/3 cup red wine vinegar

2 tablespoons whole-grain mustard

1/3 cup extra virgin olive oil

1/2 teaspoon kosher salt

How to make Mediterranean Potato Salad

Step 1: In a large pot, place the whole potatoes. Pour in the water to about an inch above the level of the potatoes. Sprinkle with salt (for every quart of water used, add 1 1/2 tsp of salt). Bring the water to a simmer over high heat, then decrease the heat to maintain a simmer.

Step 2: Simmer for about 10-15 minutes until the potatoes are easily pierced using a fork or sharp knife.

Step 3: Drain the potatoes. On a sheet pan, place the potatoes and let them cool to room temperature. Place in the fridge to speed up the cooling process.

Step 4: In another pot with boiling salted water, place the green beans. Note that for every 2 quarts of water, add 1 tbsp salt. Blanch the beans for about 4-5 minutes until you reached your desired doneness. Then, drain the beans and place them in a bowl of ice water.

Step 5: To make the Vinaigrette, whisk the mustard, vinegar, tarragon, salt, and olive oil in a bowl until blended.

Step 6: Cut the cooled potatoes into about 3/4 to 1-inch bite-sized pieces. In a large bowl, place the pieces of potato. Add the green beans along with the strips of roasted peppers, red onion, and olives. Add the vinaigrette and toss well. Marinate until ready to serve.

Step 7: Add the parsley and arugula to the bowl once the salad is ready to serve. Toss well. Feel free to make this in advance and just store it in the fridge for a couple of days.

NUTRITION FACTS (PER SERVING):

CALORIES 248, FAT 10g, CARBS 38g, PROTEIN 5g

Mediterranean Potato Salad

Rebecca PREP TIME: 20 mins | COOK TIME: 40 mins | TOTAL TIME: 60 mins | SERVINGS: 10 to 12 This delicious Mediterranean Potato Salad is a great potluck or picnic… General Recipes Mediterranean Potato Salad European Print This
Serves: 10-12 Prep Time: 20 mins Cooking Time: 40 mins 40 mins
Nutrition facts: 248 calories 10 fat
Rating: 5.0/5
( 1 voted )

Ingredients

  • 3/4 c. red onion, minced
  • 4 lbs small new potatoes or fingerling potatoes, scrubbed clean
  • 3 large roasted red bell peppers, core removed, flesh cut into 2 x 1/4” strips (about 2 c., or a 16 oz. jar, drained)
  • 1 lb fresh, tender green beans, trimmed and cut into 1” pieces (4 c. prepped green beans)
  • 1 c. kalamata and green olives, pitted and minced (mini-chopper works well for this)
  • Salted water (1 1/2 tsp salt to every quart of water) for cooking the potatoes
  • A large handful of fresh baby arugula leaves
  • A large handful of fresh Italian parsley leaves, roughly chopped
  • Dressing:
  • 1 teaspoon dried tarragon (or herbes de provence)
  • 1/3 cup red wine vinegar
  • 2 tablespoons whole-grain mustard
  • 1/3 cup extra virgin olive oil
  • 1/2 teaspoon kosher salt

Instructions

Step 1: In a large pot, place the whole potatoes. Pour in the water to about an inch above the level of the potatoes. Sprinkle with salt (for every quart of water used, add 1 1/2 tsp of salt). Bring the water to a simmer over high heat, then decrease the heat to maintain a simmer.

Step 2: Simmer for about 10-15 minutes until the potatoes are easily pierced using a fork or sharp knife.

Step 3: Drain the potatoes. On a sheet pan, place the potatoes and let them cool to room temperature. Place in the fridge to speed up the cooling process.

Step 4: In another pot with boiling salted water, place the green beans. Note that for every 2 quarts of water, add 1 tbsp salt. Blanch the beans for about 4-5 minutes until you reached your desired doneness. Then, drain the beans and place them in a bowl of ice water.

Step 5: To make the Vinaigrette, whisk the mustard, vinegar, tarragon, salt, and olive oil in a bowl until blended.

Step 6: Cut the cooled potatoes into about 3/4 to 1-inch bite-sized pieces. In a large bowl, place the pieces of potato. Add the green beans along with the strips of roasted peppers, red onion, and olives. Add the vinaigrette and toss well. Marinate until ready to serve.

Step 7: Add the parsley and arugula to the bowl once the salad is ready to serve. Toss well. Feel free to make this in advance and just store it in the fridge for a couple of days.

July 13, 2022 0 comment
0 FacebookTwitterPinterestEmail
General Recipes

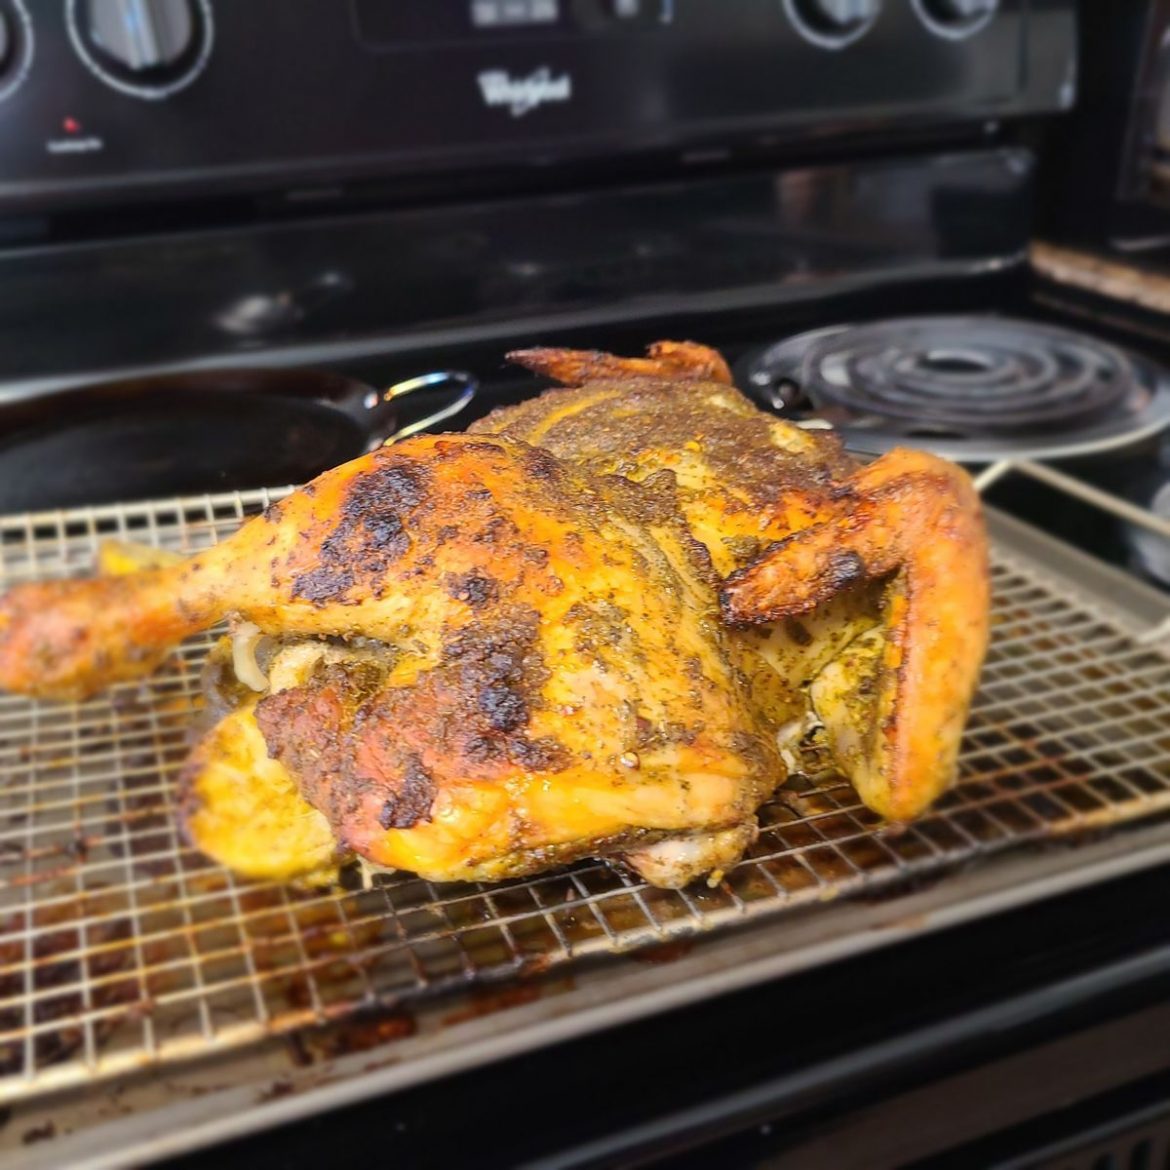
Cuban Mojo Chicken

by Rebecca July 13, 2022
written by Rebecca

Cook Time: 45 mins | Total Time: 45 mins | Servings: 4

Tender and juicy Cuban Mojo Chicken that is bursting with exciting, mouthwatering flavors from the herbs, citrus, and spices. The impressive caramelized crispy skin and the lush meat of the chicken are to die for!

Ingredients

1/4 c. Olive Oil

3-4 lbs Chicken

3 limes, zest and juice

1 Orange zest and juice

1 c. Cilantro, Chopped

6 Cloves Garlic, Crushed and Chopped

1 tsp Red Pepper Flakes

1 tbsp Ground Cumin

1/4 c. Fresh Oregano Chopped

1 tsp Salt

How to make Cuban Mojo Chicken

Step 1: In a blender, place the marinade ingredients and process until smooth.

Step 2: If using a whole chicken, lay the chicken, breast side down with the legs towards you. Skip to Step 8 if using individual chicken pieces.

Step 3: Cut along either side of the backbone using kitchen scissors or shears to remove it. Set the backbone aside for the stock.

Step 4: Using a knife, break the wishbone.

Step 5: Then, flip the bird breast side-up. Using your palm, press the breast down to make it lay flat.

Step 6: At the joint between the drumstick and thighs, create a shallow incision.

Step 7: At the joint between the wings and breast, create a shallow incision.

Step 8: In a large bowl, place the chicken and pour the marinade over, making sure to completely cover the chicken. Marinate the chicken for at least 1 hour or up to 24 hours.

Step 9: On one side of the grill, pile the charcoal.

Step 10: On the grill, place the chicken, skin-side up, with the leg closest to the flames. Make sure the chicken is not over the flames.

Step 11: Roast the chicken for about 30-45 minutes, covered, until the internal temperature of the chicken reaches 165 degrees F.

Step 12: In foil, wrap the chicken and allow to rest for about 10-15 minutes.

Oven Roasting:

Prepare the oven. Preheat it to 375 degrees F. In a roasting pan lined with aluminium foil, place the chicken. Place in the preheated oven and roast for about 40 minutes, rotating the pan halfway through. Continue roasting the chicken, rotating the pan every 10 minutes or until the internal temperature of the thickest part of the chicken reaches 165 degrees F. Take the chicken out of the oven when done and lightly brush with olive oil. Tent with foil and allow the chicken to rest for about 10-15 minutes.

Nutrition Facts:

Amount Per Serving: Calories 523, Calories from Fat 351, Fat 39g60%, Saturated Fat 9g56%, Cholesterol 122mg41%, Sodium 711mg31%, Potassium 532mg15%, Carbohydrates 14g5%, Fiber 4g17%, Sugar 4g4%, Protein 32g64%, Vitamin A 816IU16%, Vitamin C 37mg45%, Calcium 120mg12%, Iron 4mg22%

Cuban Mojo Chicken

Rebecca Cook Time: 45 mins | Total Time: 45 mins | Servings: 4 Tender and juicy Cuban Mojo Chicken that is bursting with exciting, mouthwatering flavors from the herbs, citrus, and… General Recipes Cuban Mojo Chicken European Print This
Serves: 4 Cooking Time: 45 mins 45 mins
Nutrition facts: 523 calories 39 fat
Rating: 5.0/5
( 1 voted )

Ingredients

  • 1/4 c. Olive Oil
  • 3-4 lbs Chicken
  • 3 limes, zest and juice
  • 1 Orange zest and juice
  • 1 c. Cilantro, Chopped
  • 6 Cloves Garlic, Crushed and Chopped
  • 1 tsp Red Pepper Flakes
  • 1 tbsp Ground Cumin
  • 1/4 c. Fresh Oregano Chopped
  • 1 tsp Salt

Instructions

Step 1: In a blender, place the marinade ingredients and process until smooth.

Step 2: If using a whole chicken, lay the chicken, breast side down with the legs towards you. Skip to Step 8 if using individual chicken pieces.

Step 3: Cut along either side of the backbone using kitchen scissors or shears to remove it. Set the backbone aside for the stock.

Step 4: Using a knife, break the wishbone.

Step 5: Then, flip the bird breast side-up. Using your palm, press the breast down to make it lay flat.

Step 6: At the joint between the drumstick and thighs, create a shallow incision.

Step 7: At the joint between the wings and breast, create a shallow incision.

Step 8: In a large bowl, place the chicken and pour the marinade over, making sure to completely cover the chicken. Marinate the chicken for at least 1 hour or up to 24 hours.

Step 9: On one side of the grill, pile the charcoal.

Step 10: On the grill, place the chicken, skin-side up, with the leg closest to the flames. Make sure the chicken is not over the flames.

Step 11: Roast the chicken for about 30-45 minutes, covered, until the internal temperature of the chicken reaches 165 degrees F.

Step 12: In foil, wrap the chicken and allow to rest for about 10-15 minutes.

Oven Roasting:

Prepare the oven. Preheat it to 375 degrees F. In a roasting pan lined with aluminium foil, place the chicken. Place in the preheated oven and roast for about 40 minutes, rotating the pan halfway through. Continue roasting the chicken, rotating the pan every 10 minutes or until the internal temperature of the thickest part of the chicken reaches 165 degrees F. Take the chicken out of the oven when done and lightly brush with olive oil. Tent with foil and allow the chicken to rest for about 10-15 minutes.

July 13, 2022 0 comment
0 FacebookTwitterPinterestEmail
General Recipes

Paprika Chicken Legs

by Rebecca July 13, 2022
written by Rebecca

Prep time: 15 mins | Cook time: 50 mins | Total time: 1 hr 5 mins | Servings: 7

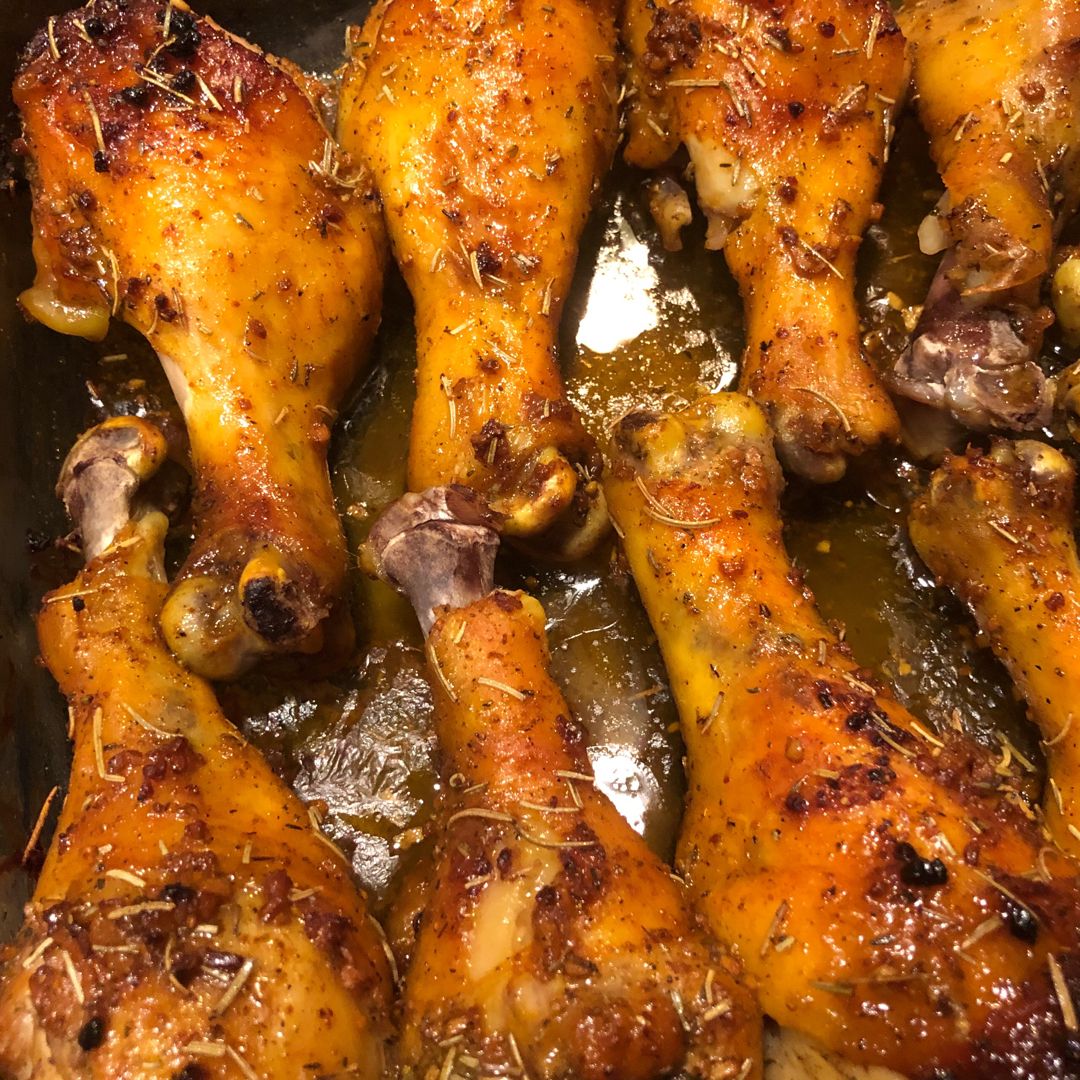
These paprika chicken legs are loaded with amazing flavors from garlic, onion, cayenne pepper, herbs, and paprika. This chicken dish is another great dinner option that will surely become your family’s new favorite!

Juicy chicken legs with super crispy skin. Pair these delicious paprika chicken legs with some green beans or your favorite veggies for an amazing weeknight dinner excellent for everyone!

Ingredients

1/4 c. canola oil

3-3 ½ lbs chicken drumsticks

1 tsp bouillon powder (you may replace it with salt)

2-3 tbsp fresh herbs (thyme, parsley, oregano)

4-6 garlic cloves, minced

1 tbsp smoked paprika

2 tbsp onion powder

½ tsp cayenne pepper (optional)

1 ¼ tsp salt

1 tsp white pepper

How to make Paprika Chicken Legs

Step 1: After washing the chicken legs, pat them dry and rub them with salt, white pepper, and bouillon powder. Set aside.

Step 2: Add the canola oil, minced garlic, fresh herbs, smoked paprika, and cayenne pepper to a small pan over medium-low heat. Stir for approximately 30 seconds to 1 minute, then allow the mixture to sit for about 5 minutes.

Step 3: Prepare the oven. Preheat it to 425 degrees.

Step 4: In a large bowl, place the chicken and garlic paprika spice mix. Toss to coat and sprinkle with onion powder.

Step 5: Using foil, line a baking pan and top with a wire rack. In a single layer, arrange the chicken legs in the prepared pan. Place in the preheated oven and bake for about 40-45 minutes or until the chicken legs are completely cooked, and the skin is crispy.

Step 6: Roughly about 25 minutes, rotate the chicken if desired and continue to cook until the chicken is cooked through and the juices run clear.

Step 7: Remove from the oven when done and allow the paprika chicken legs to cool for a little before serving. Enjoy!

Nutrition Facts:

Calories: 277 kcal (14%) | Carbohydrates: 10g (3%)| Protein: 17g (34%)| Fat: 18g (28%)| Saturated Fat: 2g (13%)| Cholesterol: 79mg (26%)| Sodium: 218mg (9%)| Potassium: 443mg (13%)| Fiber: 3g (13%)| Sugar: 3g (3%)| Vitamin A: 9530IU (191%)| Vitamin C: 3.1mg (4%)| Calcium: 59mg (6%)| Iron: 2.1mg (12%)

Paprika Chicken Legs

Rebecca Prep time: 15 mins | Cook time: 50 mins | Total time: 1 hr 5 mins | Servings: 7 These paprika chicken legs are loaded with amazing flavors from garlic,… General Recipes Paprika Chicken Legs European Print This
Serves: 7 Prep Time: 15 mins Cooking Time: 50 mins 50 mins
Nutrition facts: 277 calories 18 fat
Rating: 5.0/5
( 1 voted )

Ingredients

  • 1/4 c. canola oil
  • 3-3 ½ lbs chicken drumsticks
  • 1 tsp bouillon powder (you may replace it with salt)
  • 2-3 tbsp fresh herbs (thyme, parsley, oregano)
  • 4-6 garlic cloves, minced
  • 1 tbsp smoked paprika
  • 2 tbsp onion powder
  • ½ tsp cayenne pepper (optional)
  • 1 ¼ tsp salt
  • 1 tsp white pepper

Instructions

Step 1: After washing the chicken legs, pat them dry and rub them with salt, white pepper, and bouillon powder. Set aside.

Step 2: Add the canola oil, minced garlic, fresh herbs, smoked paprika, and cayenne pepper to a small pan over medium-low heat. Stir for approximately 30 seconds to 1 minute, then allow the mixture to sit for about 5 minutes.

Step 3: Prepare the oven. Preheat it to 425 degrees.

Step 4: In a large bowl, place the chicken and garlic paprika spice mix. Toss to coat and sprinkle with onion powder.

Step 5: Using foil, line a baking pan and top with a wire rack. In a single layer, arrange the chicken legs in the prepared pan. Place in the preheated oven and bake for about 40-45 minutes or until the chicken legs are completely cooked, and the skin is crispy.

Step 6: Roughly about 25 minutes, rotate the chicken if desired and continue to cook until the chicken is cooked through and the juices run clear.

Step 7: Remove from the oven when done and allow the paprika chicken legs to cool for a little before serving. Enjoy!

July 13, 2022 0 comment
0 FacebookTwitterPinterestEmail
General Recipes

El Pollo Loco Chicken (Copycat)

by Rebecca July 13, 2022
written by Rebecca

Prep Time: 8 hrs | Cook Time: 30 mins | Total Time: 8 hrs 30 mins | Yield: 8 servings

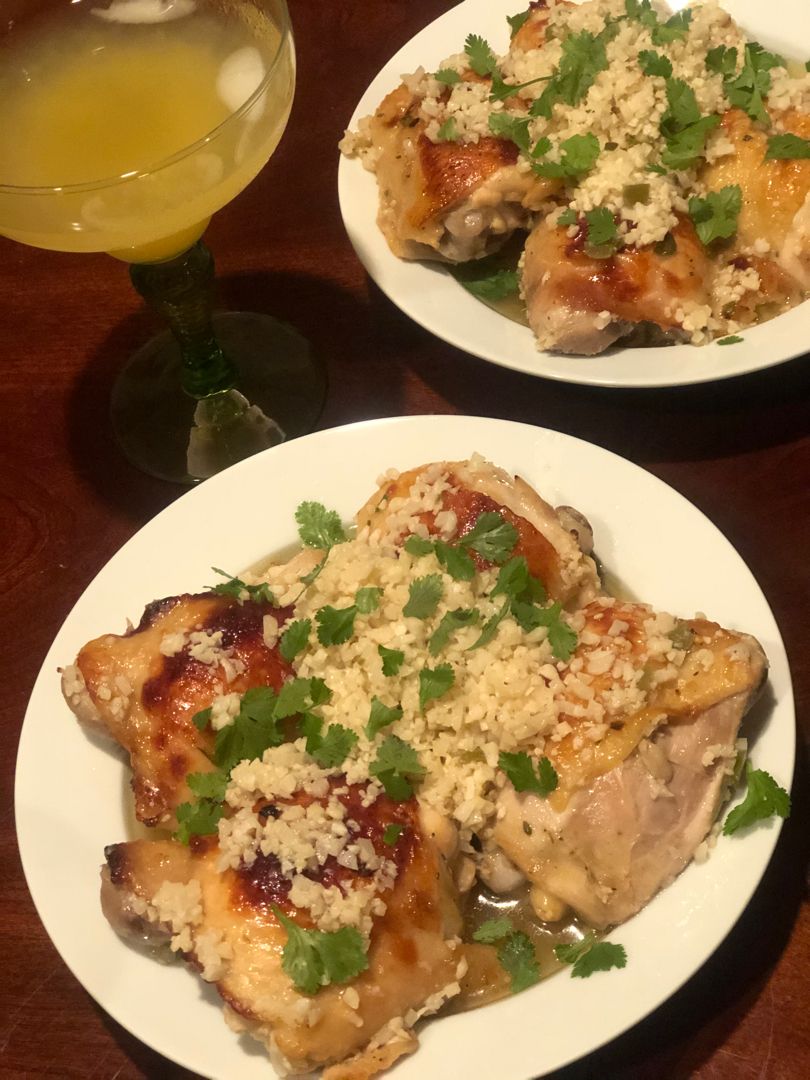
This El Pollo Loco Chicken is a great copycat recipe that delivers the same delicious goodness! The chicken is marinated overnight in citrus and pineapple juice to ensure better results. The authentic recipe calls for yellow food coloring. This does not add to the flavor, but makes the chicken looks better! You can leave it out if desired. For the perfect meal, serve this El Pollo Loco Chicken with BBQ black beans.

Ingredients

8 chicken thighs, bone-in and skin on

1 tbsp canola oil

2 cloves garlic, minced

1 tbsp white vinegar

1/2 tsp dried oregano

1 c. pineapple juice

1/4 jalapeno, seeded and minced very finely

2 tbsp lime juice

1/4 tsp ground pepper

1/2 tsp Kosher salt

How to make Copycat El Pollo Loco Chicken

Step 1: In a large bowl, add all the ingredients except for the chicken. Mix well until combined. In a small Tupperware, reserve 1/4 c of the marinade.

Step 2: To the bowl, add the chicken and tent using plastic wrap. Marinate the chicken overnight.

Step 3: Once ready to bake, prepare the oven. Preheat it to 425 degrees.

Step 4: Add the chicken to a cast-iron grill pan, skin-side up. Place in the preheated oven and bake for about 25 minutes. Transfer the pan to the stovetop over medium-high heat using potholders.

Step 5: Using canola oil spray, spray some foil and lay it on top of the chicken, sprayed side down. Press the foil onto the meat using either a bacon press, a foil-wrapped brick, or a second heavy pan.

Step 6: Over the chicken, while it cooks, spoon half of the reserved marinade. Continue to cook for 3 minutes more, then take the bacon press/brick off. Turn the chicken on the other side and add some extra marinade. Cook for additional 3 minutes.

Step 7: Serve and enjoy!

Note:

If adding yellow food coloring, use 6 drops.

Nutrition Facts:
Serving: 1g | Calories: 281 kcal | Carbohydrates: 4g | Protein: 18g | Fat: 20g | Saturated Fat: 5g | Cholesterol: 110mg | Sodium: 233mg | Potassium: 270mg | Sugar: 3g | Vitamin A: 90IU | Vitamin C: 4.9mg | Calcium: 16mg | Iron: 0.9mg

El Pollo Loco Chicken (Copycat)

Rebecca Prep Time: 8 hrs | Cook Time: 30 mins | Total Time: 8 hrs 30 mins | Yield: 8 servings This El Pollo Loco Chicken is a great copycat recipe… General Recipes El Pollo Loco Chicken (Copycat) European Print This
Serves: 8 Prep Time: 8 hrs Cooking Time: 30 mins 30 mins
Nutrition facts: 281 calories 20 fat
Rating: 5.0/5
( 1 voted )

Ingredients

  • 8 chicken thighs, bone-in and skin on
  • 1 tbsp canola oil
  • 2 cloves garlic, minced
  • 1 tbsp white vinegar
  • 1/2 tsp dried oregano
  • 1 c. pineapple juice
  • 1/4 jalapeno, seeded and minced very finely
  • 2 tbsp lime juice
  • 1/4 tsp ground pepper
  • 1/2 tsp Kosher salt

Instructions

Step 1: In a large bowl, add all the ingredients except for the chicken. Mix well until combined. In a small Tupperware, reserve 1/4 c of the marinade.

Step 2: To the bowl, add the chicken and tent using plastic wrap. Marinate the chicken overnight.

Step 3: Once ready to bake, prepare the oven. Preheat it to 425 degrees.

Step 4: Add the chicken to a cast-iron grill pan, skin-side up. Place in the preheated oven and bake for about 25 minutes. Transfer the pan to the stovetop over medium-high heat using potholders.

Step 5: Using canola oil spray, spray some foil and lay it on top of the chicken, sprayed side down. Press the foil onto the meat using either a bacon press, a foil-wrapped brick, or a second heavy pan.

Step 6: Over the chicken, while it cooks, spoon half of the reserved marinade. Continue to cook for 3 minutes more, then take the bacon press/brick off. Turn the chicken on the other side and add some extra marinade. Cook for additional 3 minutes.

Step 7: Serve and enjoy!

Notes

If adding yellow food coloring, use 6 drops.

July 13, 2022 0 comment
0 FacebookTwitterPinterestEmail
General Recipes

Thai Cashew Chicken

by Rebecca July 13, 2022
written by Rebecca

Prep Time: 10 mins | Cook Time: 15 mins | Total Time: 25 mins | Servings: 4

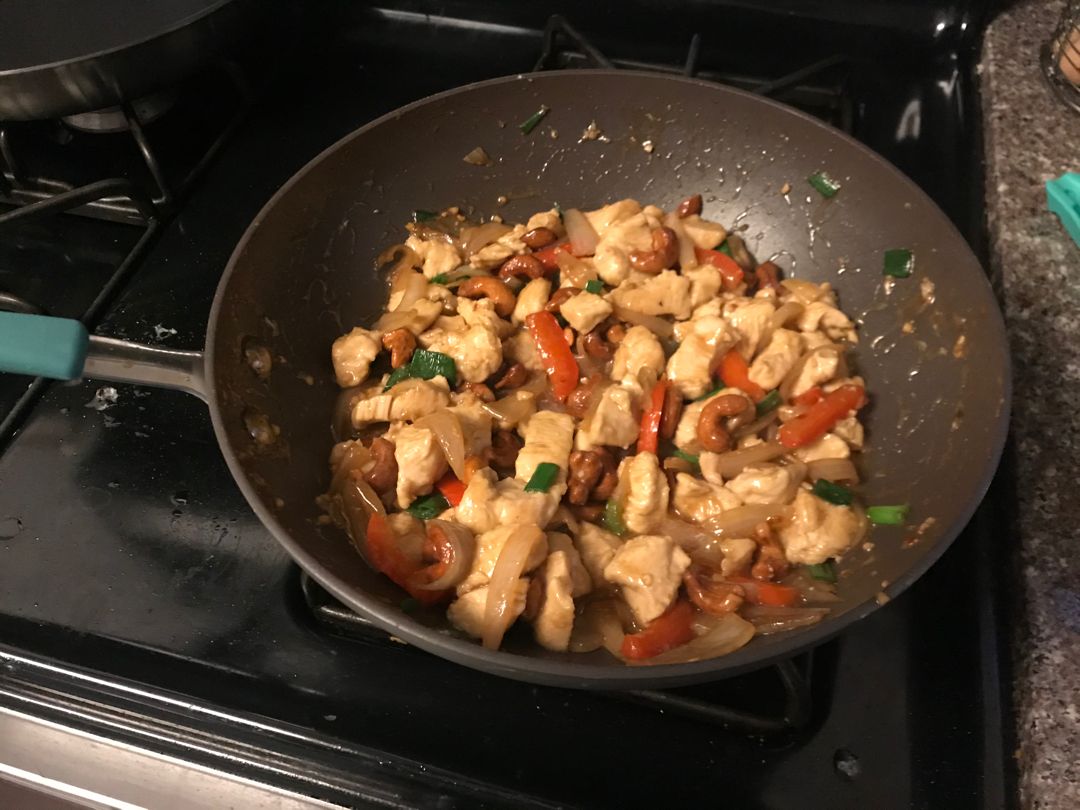
This Thai Cashew Chicken is a great homemade version of our favorite takeout. The tender bites of chicken are covered in a very savory and slightly sweet sauce. This delicious Thai Cashew Chicken is an amazing weeknight dinner loaded with crisp toasted cashews. Whip this dish up in under thirty minutes and serve over rice for an easy and filling meal any time!

Ingredients

Sauce:

2 tsp Oyster Sauce

2 cloves Garlic, chopped

2 tbsp Light Soy Sauce

1 tbsp Dark Sweet Soy Sauce

1 tsp Cornstarch

½ c. Water

¼ tsp Ground White Pepper (optional)

½ tsp Red Pepper Flakes (optional – skip if you don’t want the dish to be spicy)

Cashew Chicken:

1 pound Boneless, Skinless Chicken Breast, chopped

½ Yellow Onion, sliced

3 stalks of Green Onions, chopped

½ Red Bell Pepper, sliced

1 tbsp All-Purpose Flour

¼ c. Cooking Oil (like vegetable or peanut oil)

½ c. Raw Cashews (or use roasted and unsalted cashews)

Rice, for serving

pinch salt

How to make Thai Cashew Chicken

Step 1: For the sauce, mix the garlic, water, light soy sauce, dark sweet soy sauce, and oyster sauce until combined. Stir in the cornstarch. If using, add the red pepper flakes and white pepper. Set aside.

Step 2: Slice the red pepper and onion and mix well. Then, chop the green onions. Sprinkle the diced chicken with salt and flour. Toss well until coated.

Step 3: In a wok, heat the cooking oil over medium-high heat. Add the cashews to the wok once the oil is hot and saute for about 1 to 2 minutes or until golden brown and toasted. On a paper-towel-lined plate, transfer the cashew, leaving the oil in the wok.

Step 4: Add the chicken to the wok and cook in the remaining oil for about 2 minutes, undisturbed, until the bottom has browned. Cook further, turning often, until the chicken is cooked through and golden brown. This takes another 6-7 minutes.

Step 5: To the plate with the cashews, transfer the chicken.

Step 6: Add the onions and bell peppers to the same wok and saute in the remaining oil for about 3-4 minutes or until tender. If the pan begins to look dry, add a splash of water.

Step 7: Over the onions and peppers, pour the sauce. Let the sauce simmer for about 1 to 2 minutes or until the sauce begins to thicken. Next, add the green onions, chicken, and cashews. Cook for an additional minute.

Step 8: Serve the Thai cashew chicken right away over rice. Enjoy!

Nutrition Facts:

Calories: 377 kcal | Carbohydrates: 11g | Protein: 29g | Fat: 24g | Saturated Fat: 3g | Cholesterol: 73mg | Sodium: 978mg | Potassium: 631mg | Fiber: 1g | Sugar: 3g | Vitamin A: 664IU | Vitamin C: 24mg | Calcium: 24mg | Iron: 2mg

Thai Cashew Chicken

Rebecca Prep Time: 10 mins | Cook Time: 15 mins | Total Time: 25 mins | Servings: 4 This Thai Cashew Chicken is a great homemade version of our favorite takeout.… General Recipes Thai Cashew Chicken European Print This
Serves: 4 Prep Time: 10 mins Cooking Time: 15 mins 15 mins
Nutrition facts: 377 calories 24 fat
Rating: 5.0/5
( 1 voted )

Ingredients

  • Sauce:
  • 2 tsp Oyster Sauce
  • 2 cloves Garlic, chopped
  • 2 tbsp Light Soy Sauce
  • 1 tbsp Dark Sweet Soy Sauce
  • 1 tsp Cornstarch
  • ½ c. Water
  • ¼ tsp Ground White Pepper (optional)
  • ½ tsp Red Pepper Flakes (optional - skip if you don't want the dish to be spicy)
  • Cashew Chicken:
  • 1 pound Boneless, Skinless Chicken Breast, chopped
  • ½ Yellow Onion, sliced
  • 3 stalks of Green Onions, chopped
  • ½ Red Bell Pepper, sliced
  • 1 tbsp All-Purpose Flour
  • ¼ c. Cooking Oil (like vegetable or peanut oil)
  • ½ c. Raw Cashews (or use roasted and unsalted cashews)
  • Rice, for serving
  • pinch salt

Instructions

Step 1: For the sauce, mix the garlic, water, light soy sauce, dark sweet soy sauce, and oyster sauce until combined. Stir in the cornstarch. If using, add the red pepper flakes and white pepper. Set aside.

Step 2: Slice the red pepper and onion and mix well. Then, chop the green onions. Sprinkle the diced chicken with salt and flour. Toss well until coated.

Step 3: In a wok, heat the cooking oil over medium-high heat. Add the cashews to the wok once the oil is hot and saute for about 1 to 2 minutes or until golden brown and toasted. On a paper-towel-lined plate, transfer the cashew, leaving the oil in the wok.

Step 4: Add the chicken to the wok and cook in the remaining oil for about 2 minutes, undisturbed, until the bottom has browned. Cook further, turning often, until the chicken is cooked through and golden brown. This takes another 6-7 minutes.

Step 5: To the plate with the cashews, transfer the chicken.

Step 6: Add the onions and bell peppers to the same wok and saute in the remaining oil for about 3-4 minutes or until tender. If the pan begins to look dry, add a splash of water.

Step 7: Over the onions and peppers, pour the sauce. Let the sauce simmer for about 1 to 2 minutes or until the sauce begins to thicken. Next, add the green onions, chicken, and cashews. Cook for an additional minute.

Step 8: Serve the Thai cashew chicken right away over rice. Enjoy!

July 13, 2022 0 comment
0 FacebookTwitterPinterestEmail
General Recipes

Teriyaki Chicken Skewers

by Rebecca July 13, 2022
written by Rebecca

PREP TIME: 1 HR | COOK TIME: 30 MINS | TOTAL TIME: 1 HR 30 MINS | SERVINGS: 4 people

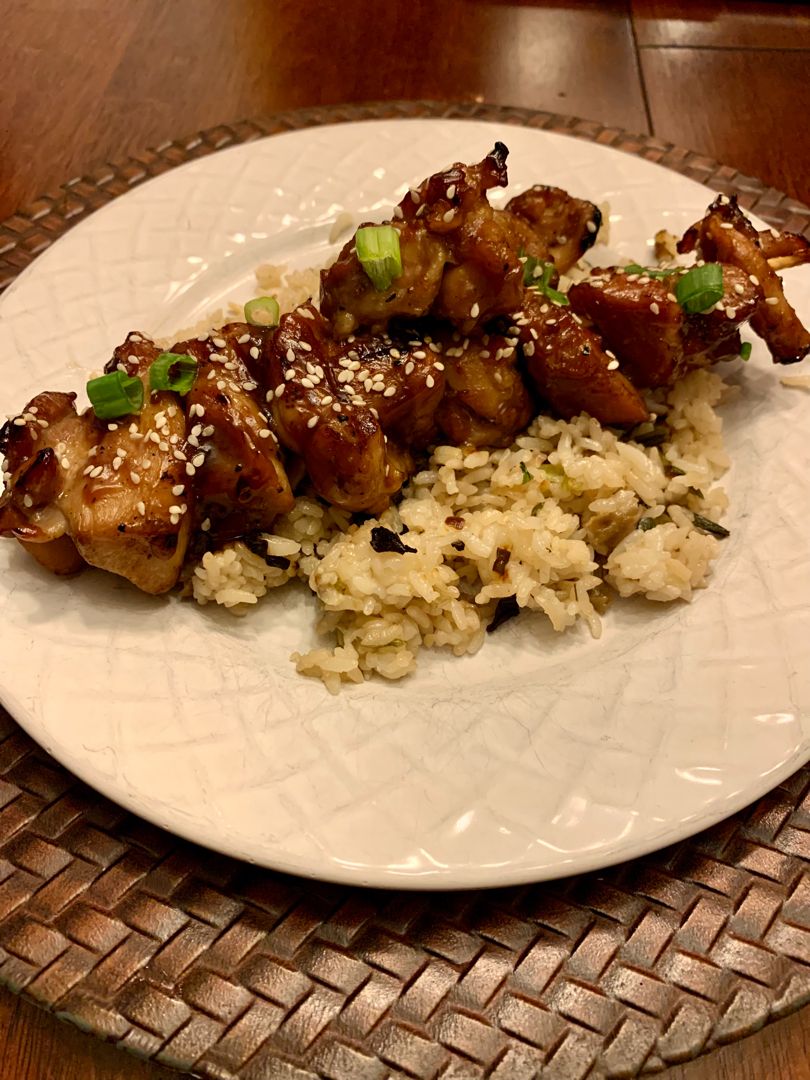
These Teriyaki Chicken Skewers are the most delicious marinated teriyaki grilled chicken! The chicken skewers are marinated, then coated in a mouthwatering teriyaki sauce, and grilled to perfection. Serve these scrumptious teriyaki chicken skewers over steamed rice garnished with some fresh chopped green onions and sesame seeds.

INGREDIENTS

2 pounds of chicken thighs (or breasts) cut into 1-inch cubes

Teriyaki Sauce/Marinade:

1/2 tablespoon fresh ginger, minced

2 tablespoons cornstarch

2 cloves garlic, minced

1 c. water

1/3 c. brown sugar

1 tablespoon rice vinegar

1 tablespoon honey

1/3 c. soy sauce – low sodium recommended

8 skewers

1/2 teaspoon sesame oil

Optional Topping:

chopped green onion

sesame seed

How to make Teriyaki Chicken Skewers

Step 1: To make the sauce: In a small bowl, mix the cornstarch and water. Add the rest of the ingredients to a medium saucepan and pour in the cornstarch/water mixture. Bring the sauce to a simmer, stirring frequently, and cook until the sauce has thickened a little. At this point, the sauce should be dark brown. Take the pan off the heat once the sauce has thickened and allow it cool completely. To speed up the process, you can place the sauce in the fridge.

Step 2: In a large ziplock bag, place the cubed chicken and pour half of the cooled sauce on top. Shake the bag gently to coat the chicken. Place in the fridge and marinate the chicken for at least 30 minutes. Set the rest of the sauce aside.

Step 3: On skewers, place the chicken and preheat the grill to medium heat. Onto the hot grill that is lightly greased with oil, place the skewers and cook for about 20 to 30 minutes, turning the skewers every 3-4 minutes until the internal temperature of the chicken reaches 165 degrees. Baste the chicken with the reserved teriyaki sauce during the last couple of turns.

Step 4: Before serving, garnish the skewers with some chopped green onions and sprinkles of sesame seeds. Enjoy!

Teriyaki Chicken Skewers

Rebecca PREP TIME: 1 HR | COOK TIME: 30 MINS | TOTAL TIME: 1 HR 30 MINS | SERVINGS: 4 people These Teriyaki Chicken Skewers are the most delicious marinated teriyaki… General Recipes Teriyaki Chicken Skewers European Print This
Serves: 4 Prep Time: 1 hr Cooking Time: 30 mins 30 mins
Nutrition facts: 200 calories 20 grams fat
Rating: 5.0/5
( 1 voted )

Ingredients

  • 2 pounds of chicken thighs (or breasts) cut into 1-inch cubes
  • Teriyaki Sauce/Marinade:
  • 1/2 tablespoon fresh ginger, minced
  • 2 tablespoons cornstarch
  • 2 cloves garlic, minced
  • 1 c. water
  • 1/3 c. brown sugar
  • 1 tablespoon rice vinegar
  • 1 tablespoon honey
  • 1/3 c. soy sauce - low sodium recommended
  • 8 skewers
  • 1/2 teaspoon sesame oil
  • Optional Topping:
  • chopped green onion
  • sesame seed

Instructions

Step 1: To make the sauce: In a small bowl, mix the cornstarch and water. Add the rest of the ingredients to a medium saucepan and pour in the cornstarch/water mixture. Bring the sauce to a simmer, stirring frequently, and cook until the sauce has thickened a little. At this point, the sauce should be dark brown. Take the pan off the heat once the sauce has thickened and allow it cool completely. To speed up the process, you can place the sauce in the fridge.

Step 2: In a large ziplock bag, place the cubed chicken and pour half of the cooled sauce on top. Shake the bag gently to coat the chicken. Place in the fridge and marinate the chicken for at least 30 minutes. Set the rest of the sauce aside.

Step 3: On skewers, place the chicken and preheat the grill to medium heat. Onto the hot grill that is lightly greased with oil, place the skewers and cook for about 20 to 30 minutes, turning the skewers every 3-4 minutes until the internal temperature of the chicken reaches 165 degrees. Baste the chicken with the reserved teriyaki sauce during the last couple of turns.

Step 4: Before serving, garnish the skewers with some chopped green onions and sprinkles of sesame seeds. Enjoy!

July 13, 2022 0 comment
0 FacebookTwitterPinterestEmail
General Recipes

Easy Crockpot Beef Burgundy

by Rebecca July 13, 2022
written by Rebecca

PREP TIME: 5 MINS | COOK TIME: 6 HRS | TOTAL TIME: 6 HRS 5 MINS | SERVES: 6

A few readily ingredients and three simple steps are all you need to make this easy crockpot beef burgundy. Cook this slow and low for a melt-in-your-mouth beef or on high for a couple of hours for a quick weeknight dinner. Enjoy a gourmet meal right in the comfort of your home without a hassle with this delicious crockpot beef burgundy.

This beef burgundy is better known by its French name, bouef bourginon. Most people find this recipe intimidating; the browning, deglazing, simmering, and sauteing seem exhausting. But with this easy crockpot version, all you need is to dump everything in your crockpot and leave.

This beef burgundy practically makes itself. It’s a no-fuss version that you can make in your crockpot, making this the perfect dinner for busy days. Serve this mouthwatering beef burgundy over egg noodles with your preferred on the side for a filling meal excellent for your entire family!

Ingredients

1 small onion, chopped (about 1/2 c.)

1 1-ounce package of dry onion soup mix

1.5 pounds boneless beef round steak, cubed

2 c. mushrooms, sliced

2-3 cloves of garlic, minced

1/2 c. beef broth

1 tbsp Worcestershire sauce

1/2 c. red wine

1 package of egg noodles prepared

1 10 .75-ounces can of condensed cream of mushroom soup, undiluted

How to make Easy Crockpot Beef Burgundy

Step 1: Add the cubed steak to a 5 – 6-quart crockpot. Over the cubed steak, sprinkle the dry onions soup mix. Next, add the mushrooms along with the onion and garlic.

Step 2: Into the crockpot, pour in the wine, and broth, and add the Worcestershire sauce. On top, add the cream of mushrooms. Put the lid on and set to cook for 6 to 7 hours on low or 4 to 5 hours on high.

Step 3: Serve the beef burgundy right away over egg noodles. Enjoy!

Nutrition Facts:

Calories: 256kcal (13%) | Carbohydrates: 9g (3%) | Protein: 29g (58%) | Fat: 6g (9%) | Saturated Fat: 2g (10%) | Cholesterol: 73mg (24%) | Sodium: 884mg (37%) | Potassium: 680mg (19%) | Fiber: 1g (4%) | Sugar: 2g (2%) | Vitamin C: 2.6mg (3%) | Calcium: 39mg (4%) | Iron: 3.3mg (18%)

Easy Crockpot Beef Burgundy

Rebecca PREP TIME: 5 MINS | COOK TIME: 6 HRS | TOTAL TIME: 6 HRS 5 MINS | SERVES: 6 A few readily ingredients and three simple steps are all you… General Recipes Easy Crockpot Beef Burgundy European Print This
Serves: 6 Prep Time: 5 mins Cooking Time: 6 hrs 6 hrs
Nutrition facts: 256 calories 6 fat
Rating: 5.0/5
( 1 voted )

Ingredients

  • 1 small onion, chopped (about 1/2 c.)
  • 1 1-ounce package of dry onion soup mix
  • 1.5 pounds boneless beef round steak, cubed
  • 2 c. mushrooms, sliced
  • 2-3 cloves of garlic, minced
  • 1/2 c. beef broth
  • 1 tbsp Worcestershire sauce
  • 1/2 c. red wine
  • 1 package of egg noodles prepared
  • 1 10 .75-ounces can of condensed cream of mushroom soup, undiluted

Instructions

Step 1: Add the cubed steak to a 5 - 6-quart crockpot. Over the cubed steak, sprinkle the dry onions soup mix. Next, add the mushrooms along with the onion and garlic.

Step 2: Into the crockpot, pour in the wine, and broth, and add the Worcestershire sauce. On top, add the cream of mushrooms. Put the lid on and set to cook for 6 to 7 hours on low or 4 to 5 hours on high.

Step 3: Serve the beef burgundy right away over egg noodles. Enjoy!

July 13, 2022 0 comment
0 FacebookTwitterPinterestEmail
Newer Posts
Older Posts

Popular Posts

  • 1

    Crispy Crunchy Parmesan Potatoes

    March 21, 2020
  • 2

    CROCK POT SMOTHERED PORK CHOPS

    March 21, 2020
  • Facebook
  • Twitter

@2019 - All Right Reserved.


Back To Top