Cook it once
  • Home
  • Privacy Policy
  • Recipes
    • KETO
    • LC
    • WW
  • Tips
  • Contact
Cook it once
  • Home
  • Privacy Policy
  • Recipes
    • KETO
    • LC
    • WW
  • Tips
  • Contact
Category:

General Recipes

General Recipes

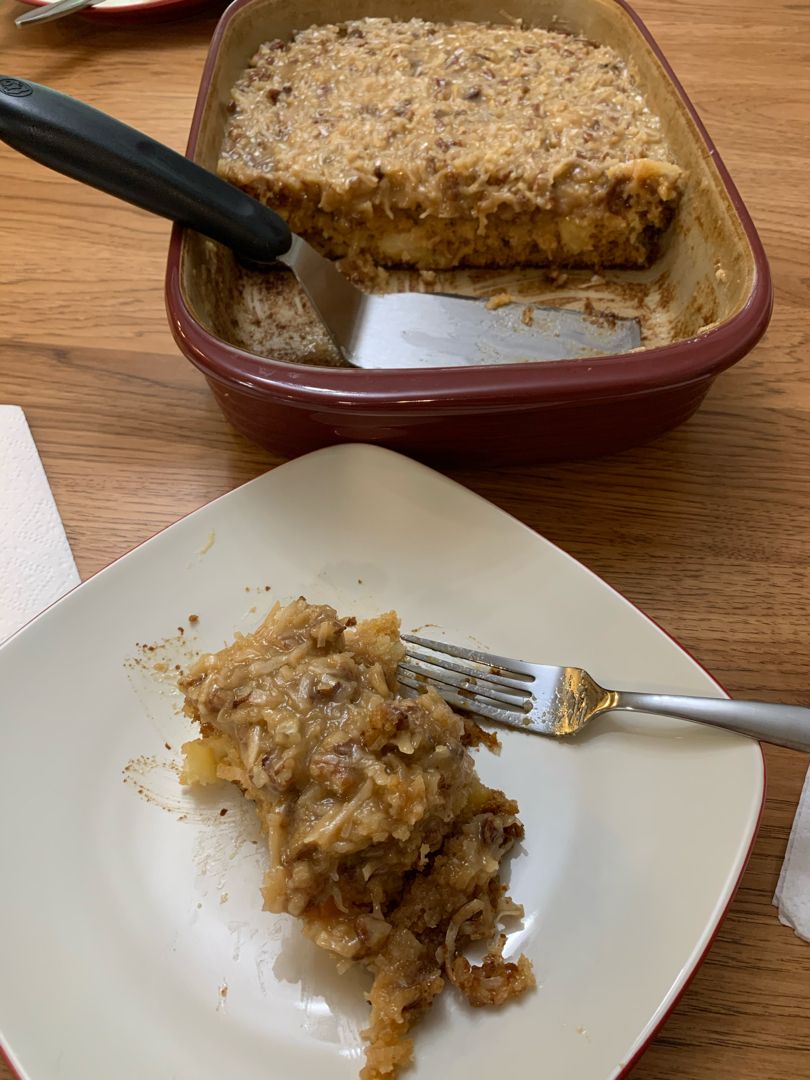
God Bless America Cake

by Rebecca July 16, 2022
written by Rebecca

Prep time: 10 mins | Cook time: 40 mins | Total time: 50 mins | Yield: 12-15 servings

Make this amazing cake from scratch and enjoy an impressive dessert with crushed pineapple and a completely awesome caramel pecan coconut icing.

INGREDIENTS

Cake:

2 eggs

2 c. all-purpose flour

1/2 tsp salt

2 tsp baking soda

1/4 c. vegetable oil

1 20-oz. can of crushed pineapple, with juice

1/2 c. brown sugar

1 c. sugar

Icing:

1 c. (2 sticks) butter

1 12-oz. can evaporate milk

1 1/2 c. sugar

2 c. sweetened, flaked coconut

1 tsp vanilla

1 1/4 c. chopped pecans

1/4 tsp salt

How to make God Bless America Cake

Cake:

Step 1: Using cooking spray, grease a 3-quart (13 x 9-inch) baking pan and set aside. Combine the flour, baking soda, and salt, then set aside.

Step 2: Mix the eggs with vegetable oil, pineapple (with juice from the can), sugar, and brown sugar until well blended. Add the flour and mix well until incorporated. Into the prepared baking pan, pour the batter, and place in the preheated 350 degrees oven. Bake for about 25 to 30 minutes or until the cake is golden and the toothpick inserted in the center of the cake comes out clean.

Icing:

Step 3: While the cake is baking, place the evaporated milk, butter, sugar, and salt in a medium-size saucepan. Heat while stirring often, over medium-high heat until boiling.

Step 4: Adjust the heat to medium and let the mixture boil for about 10 to 15 minutes or until thickened and the color turned into caramel. Take the pan off the heat and whisk in the vanilla, coconut, and pecans.

Step 5: Allow the icing to cool for about 5 minutes.

Step 6: Over the warm cake, spread the icing. Let the cake rest for about 2 hours, uncovered. Then, slice and serve. Enjoy!

Notes:

This cake does not need to be refrigerated. Simply store it at room temperature, covered.

For this recipe, I used 7 ounces of coconut (measures 2 cups).
God Bless America Cake

Rebecca Prep time: 10 mins | Cook time: 40 mins | Total time: 50 mins | Yield: 12-15 servings Make this amazing cake from scratch and enjoy an impressive dessert with… General Recipes God Bless America Cake European Print This
Serves: 12-15 Prep Time: 10 mins Cooking Time: 40 mins 40 mins
Nutrition facts: 200 calories 20 grams fat
Rating: 5.0/5
( 1 voted )

Ingredients

  • Cake:
  • 2 eggs
  • 2 c. all-purpose flour
  • 1/2 tsp salt
  • 2 tsp baking soda
  • 1/4 c. vegetable oil
  • 1 20-oz. can of crushed pineapple, with juice
  • 1/2 c. brown sugar
  • 1 c. sugar
  • Icing:
  • 1 c. (2 sticks) butter
  • 1 12-oz. can evaporate milk
  • 1 1/2 c. sugar
  • 2 c. sweetened, flaked coconut
  • 1 tsp vanilla
  • 1 1/4 c. chopped pecans
  • 1/4 tsp salt

Instructions

Cake:

Step 1: Using cooking spray, grease a 3-quart (13 x 9-inch) baking pan and set aside. Combine the flour, baking soda, and salt, then set aside.

Step 2: Mix the eggs with vegetable oil, pineapple (with juice from the can), sugar, and brown sugar until well blended. Add the flour and mix well until incorporated. Into the prepared baking pan, pour the batter, and place in the preheated 350 degrees oven. Bake for about 25 to 30 minutes or until the cake is golden and the toothpick inserted in the center of the cake comes out clean.

Icing:

Step 3: While the cake is baking, place the evaporated milk, butter, sugar, and salt in a medium-size saucepan. Heat while stirring often, over medium-high heat until boiling.

Step 4: Adjust the heat to medium and let the mixture boil for about 10 to 15 minutes or until thickened and the color turned into caramel. Take the pan off the heat and whisk in the vanilla, coconut, and pecans.

Step 5: Allow the icing to cool for about 5 minutes.

Step 6: Over the warm cake, spread the icing. Let the cake rest for about 2 hours, uncovered. Then, slice and serve. Enjoy!

Notes

This cake does not need to be refrigerated. Simply store it at room temperature, covered. For this recipe, I used 7 ounces of coconut (measures 2 cups).
July 16, 2022 0 comment
0 FacebookTwitterPinterestEmail
General Recipes

CHICKEN KUNG PAO

by Rebecca July 16, 2022
written by Rebecca

TOTAL TIME: 20 MINS | YIELD: 5 SERVINGS

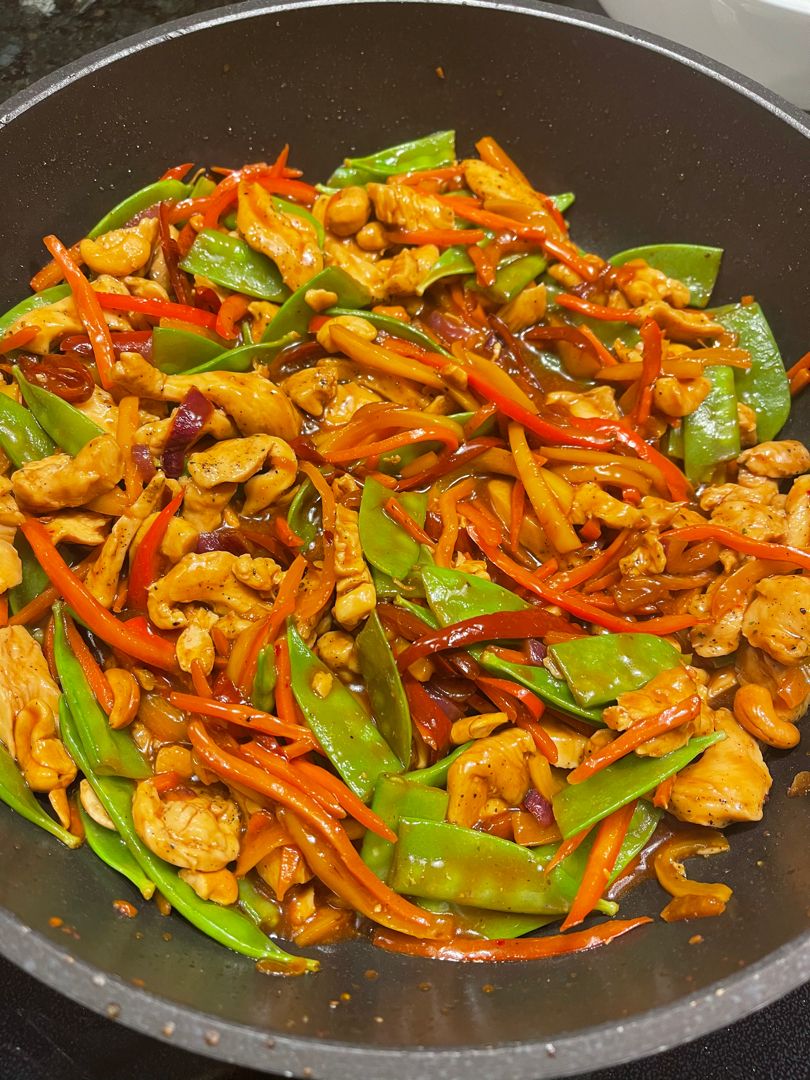
This delicious Chicken Kung Pao has been my favorite for years. It is made with simple ingredients thrown together to make a sensational meal. Have this ready in no more than twenty minutes and serve warm over brown rice.

I always have a soft spot for winner recipes and this Chicken Kung Pao is a true champion. It is an easy, quick, and versatile recipe. I love chicken, but you are welcome to use your favorite protein instead. For a vegetarian version, make this using extra firm tofu. So if you are looking for another great addition to your weekly menu rotation, then this Chicken Kung Pao is an excellent option!

INGREDIENTS

2 tablespoons olive oil

1 1/2 pound organic chicken breast, cut into chunks

1 orange organic pepper, diced

1 yellow organic pepper, diced

9 ounces of snow peas

1/3 c. raw cashews

1 tablespoon ginger, minced

1 teaspoon pepper flakes, optional

2 c. uncooked brown rice

1 red organic pepper, diced

SAUCE:

2 tablespoons tomato ketchup

2 tablespoons rice wine vinegar

2 tablespoons unrefined sugar

4 tablespoons soy sauce, gluten-free

3 teaspoons arrowroot powder, or cornstarch

1/4 c. water

HOW TO MAKE CHICKEN KUNG PAO

Step 1: Following the package directions, cook the brown rice. In the meantime, place the sauce ingredients in a small bowl. Mix well until blended.

Step 2: Add the olive oil to a large non-stick skillet over medium to high heat. To the hot skillet, add the chicken and cook for about 5 to 6 minutes. Next, add the peppers and ginger. Continue to cook for additional 5 minutes, stirring often, until everything is almost cooked. Then, add the snow peas and cook for a minute more.

Step 3: To the skillet, add the cashew and cook over high heat for another minute or until the sauce has thickened.

Step 4: Remove from the heat when done and serve the Chicken Kung Pao right away over brown rice. Enjoy!

CHICKEN KUNG PAO

Rebecca TOTAL TIME: 20 MINS | YIELD: 5 SERVINGS This delicious Chicken Kung Pao has been my favorite for years. It is made with simple ingredients thrown together to make a… General Recipes CHICKEN KUNG PAO European Print This
Serves: 5
Nutrition facts: 200 calories 20 grams fat
Rating: 5.0/5
( 1 voted )

Ingredients

  • 2 tablespoons olive oil
  • 1 1/2 pound organic chicken breast, cut into chunks
  • 1 orange organic pepper, diced
  • 1 yellow organic pepper, diced
  • 9 ounces of snow peas
  • 1/3 c. raw cashews
  • 1 tablespoon ginger, minced
  • 1 teaspoon pepper flakes, optional
  • 2 c. uncooked brown rice
  • 1 red organic pepper, diced
  • SAUCE:
  • 2 tablespoons tomato ketchup
  • 2 tablespoons rice wine vinegar
  • 2 tablespoons unrefined sugar
  • 4 tablespoons soy sauce, gluten-free
  • 3 teaspoons arrowroot powder, or cornstarch
  • 1/4 c. water

Instructions

Step 1: Following the package directions, cook the brown rice. In the meantime, place the sauce ingredients in a small bowl. Mix well until blended.

Step 2: Add the olive oil to a large non-stick skillet over medium to high heat. To the hot skillet, add the chicken and cook for about 5 to 6 minutes. Next, add the peppers and ginger. Continue to cook for additional 5 minutes, stirring often, until everything is almost cooked. Then, add the snow peas and cook for a minute more.

Step 3: To the skillet, add the cashew and cook over high heat for another minute or until the sauce has thickened.

Step 4: Remove from the heat when done and serve the Chicken Kung Pao right away over brown rice. Enjoy!

July 16, 2022 0 comment
0 FacebookTwitterPinterestEmail
General Recipes

Szechuan Chicken Stir Fry

by Rebecca July 15, 2022
written by Rebecca

PREP TIME: 10 MINS | COOK TIME: 20 MINS | TOTAL TIME: 50 MINS | SERVINGS: 4

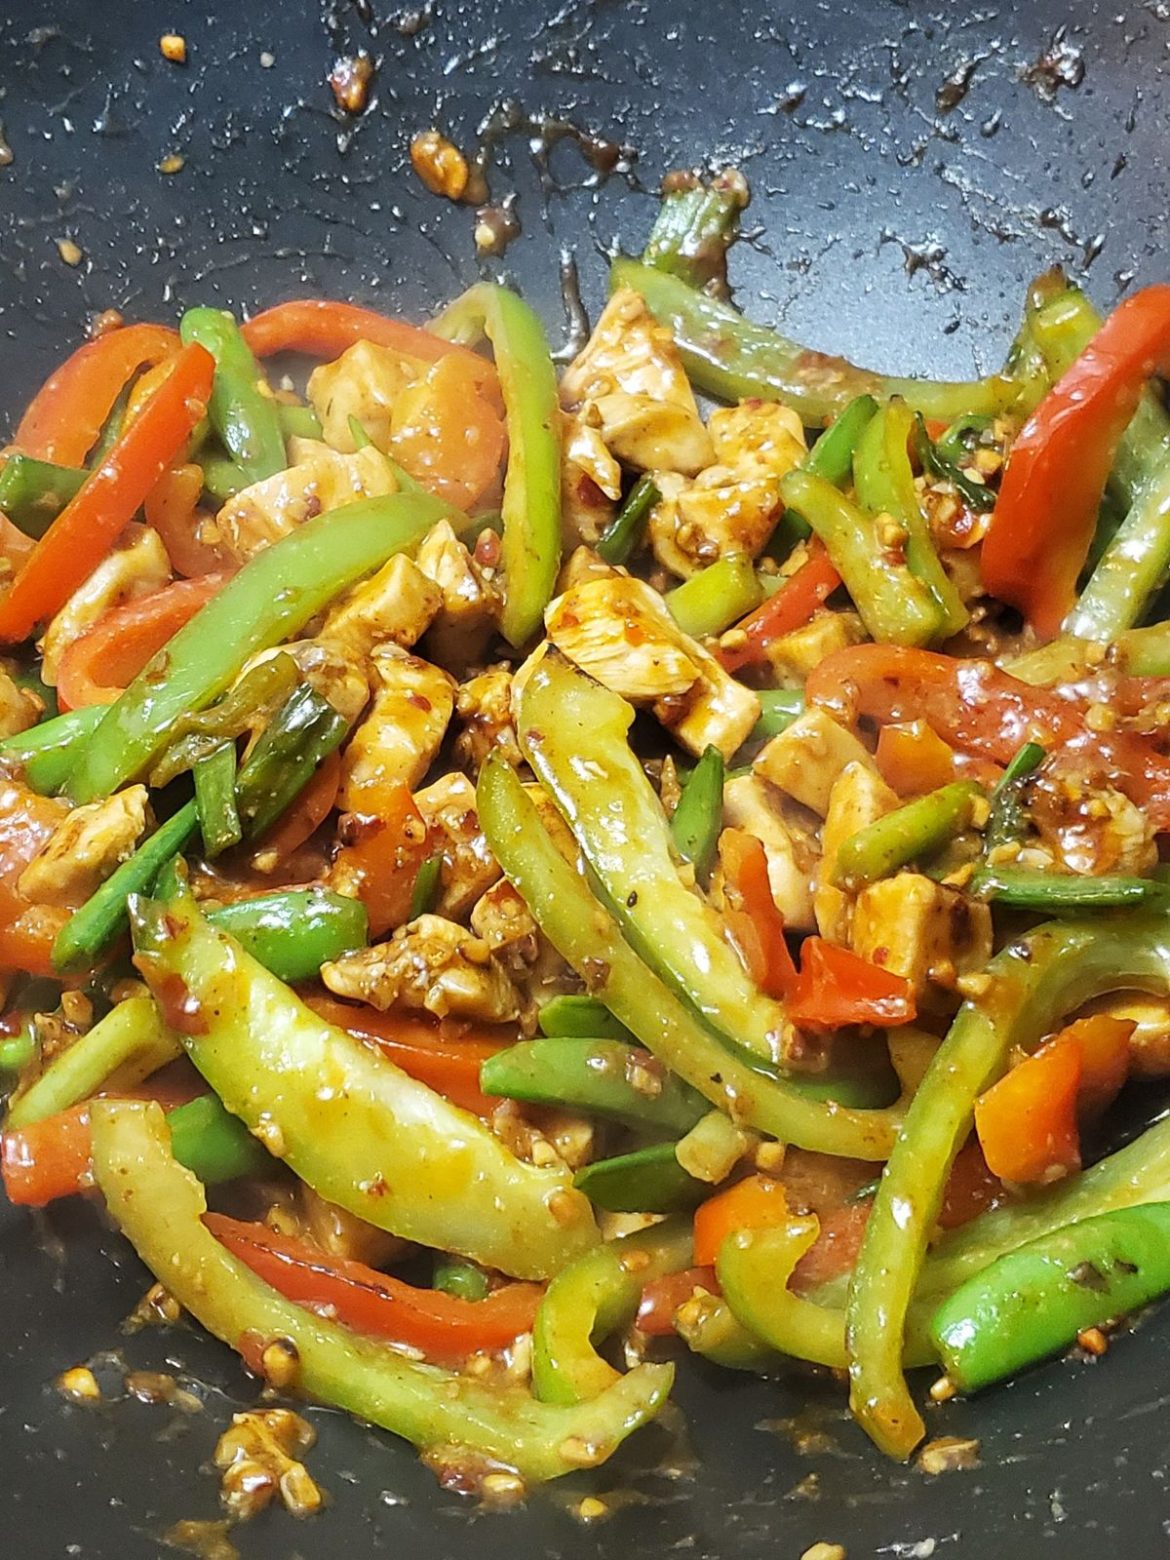
Enjoy a far East right at home with this delicious Szechuan Chicken Stir Fry. A great dinner option with fried chicken and brightly colored vegetables in a simple sweet and spicy sauce.

Ingredients

1 lb boneless, skinless chicken breast, sliced into bite-sized pieces

1 tsp soy sauce

2 tsp rice wine vinegar

1 tbsp cornstarch

Szechuan Sauce:

2 tbsp soy sauce

¼ c. chicken stock

1 tbsp rice wine vinegar

2 tsp brown sugar

1-2 tbsp chili paste like sambal oelek

½ tsp crushed red pepper flakes

1 tbsp cornstarch

Stir Fry:

4 cloves garlic, minced

½ c. vegetable oil

5-6 dried red chilies, chopped

1 1” piece fresh ginger, peeled and grated

1 c. snap peas

½ red bell pepper, thinly sliced

½ green bell pepper, thinly sliced

⅓ c. peanuts chopped

2 c. steamed white rice for serving

3 green onions, chopped into 1” pieces, plus more for garnish

How to make Szechuan Chicken Stir Fry

Step 1: Place the cornstarch, rice wine vinegar, and soy sauce in a medium mixing bowl. Mix well until combined. Add the chicken and toss to coat. Set aside.

Szechuan Sauce:

Step 2: Combine the stock, soy sauce, chili paste, vinegar, cornstarch, brown sugar, and red pepper flakes in a small bowl and set aside.

Stir Fry:

Step 3: Heat the oil to about 120 degrees F in a wok or large nonstick skillet over medium-high heat.

Step 4: In batches, fry the chicken for about 5 to 6 minutes until mostly cooked and browned. To a paper towel-lined plate, transfer the chicken when done and set aside.

Step 5: Drain the oil from the wok, making sure to reserve about 2 tbsp for frying the veggies.

Step 6: In the same wok with the remaining oil, stir-fry the ginger, garlic, and red chilies for about a minute or until aromatic. Next, add the peas, bell pepper, green onions, and peanuts. Continue to cook for an additional 1 to 2 minutes.

Step 7: Place the chicken back on the wok and stir fry for 2 to 3 minutes more or until the chicken is completely cooked.

Step 8: Adjust the heat to medium-low, then pour the sauce mixture over the chicken and veggies. Toss well to coat and let everything simmer for approximately 3 minutes or until the sauce has thickened.

Step 9: Remove from the heat and serve the Szechuan Chicken Stir Fry over white rice. If desired, garnish with extra chopped green onions. Enjoy!

Nutrition Facts:

Calories: 607 kcal, Carbohydrates: 38g, Protein: 32g, Fat: 37g, Saturated Fat: 24g, Cholesterol: 73mg, Sodium: 754mg, Potassium: 757mg, Fiber: 3g, Sugar: 5g, Vitamin A: 1150IU, Vitamin C: 50.2mg, Calcium: 49mg, Iron: 2.1mg

Szechuan Chicken Stir Fry

Rebecca PREP TIME: 10 MINS | COOK TIME: 20 MINS | TOTAL TIME: 50 MINS | SERVINGS: 4 Enjoy a far East right at home with this delicious Szechuan Chicken Stir… General Recipes Szechuan Chicken Stir Fry European Print This
Serves: 4 Prep Time: 10 mins Cooking Time: 20 mins 20 mins
Nutrition facts: 607 calories 37 fat
Rating: 5.0/5
( 1 voted )

Ingredients

  • 1 lb boneless, skinless chicken breast, sliced into bite-sized pieces
  • 1 tsp soy sauce
  • 2 tsp rice wine vinegar
  • 1 tbsp cornstarch
  • Szechuan Sauce:
  • 2 tbsp soy sauce
  • ¼ c. chicken stock
  • 1 tbsp rice wine vinegar
  • 2 tsp brown sugar
  • 1-2 tbsp chili paste like sambal oelek
  • ½ tsp crushed red pepper flakes
  • 1 tbsp cornstarch
  • Stir Fry:
  • 4 cloves garlic, minced
  • ½ c. vegetable oil
  • 5-6 dried red chilies, chopped
  • 1 1” piece fresh ginger, peeled and grated
  • 1 c. snap peas
  • ½ red bell pepper, thinly sliced
  • ½ green bell pepper, thinly sliced
  • ⅓ c. peanuts chopped
  • 2 c. steamed white rice for serving
  • 3 green onions, chopped into 1” pieces, plus more for garnish

Instructions

Step 1: Place the cornstarch, rice wine vinegar, and soy sauce in a medium mixing bowl. Mix well until combined. Add the chicken and toss to coat. Set aside.

Szechuan Sauce:

Step 2: Combine the stock, soy sauce, chili paste, vinegar, cornstarch, brown sugar, and red pepper flakes in a small bowl and set aside.

Stir Fry:

Step 3: Heat the oil to about 120 degrees F in a wok or large nonstick skillet over medium-high heat.

Step 4: In batches, fry the chicken for about 5 to 6 minutes until mostly cooked and browned. To a paper towel-lined plate, transfer the chicken when done and set aside.

Step 5: Drain the oil from the wok, making sure to reserve about 2 tbsp for frying the veggies.

Step 6: In the same wok with the remaining oil, stir-fry the ginger, garlic, and red chilies for about a minute or until aromatic. Next, add the peas, bell pepper, green onions, and peanuts. Continue to cook for an additional 1 to 2 minutes.

Step 7: Place the chicken back on the wok and stir fry for 2 to 3 minutes more or until the chicken is completely cooked.

Step 8: Adjust the heat to medium-low, then pour the sauce mixture over the chicken and veggies. Toss well to coat and let everything simmer for approximately 3 minutes or until the sauce has thickened.

Step 9: Remove from the heat and serve the Szechuan Chicken Stir Fry over white rice. If desired, garnish with extra chopped green onions. Enjoy!

July 15, 2022 0 comment
0 FacebookTwitterPinterestEmail
General Recipes

OATMEAL CHOCOLATE CHIP GREEK YOGURT MUFFINS

by Rebecca July 15, 2022
written by Rebecca

Prep Time: 15 mins | Cook Time: 18 mins | Total Time: 33 mins | Yield: 12

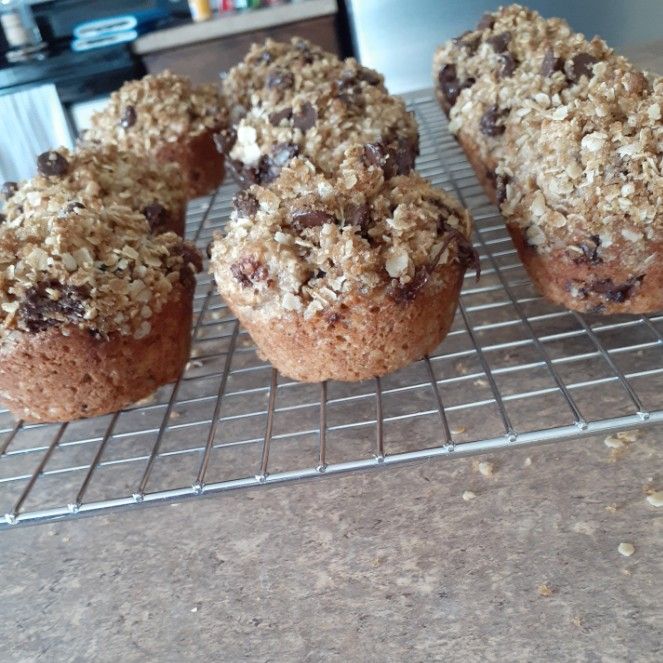
I am sure that everyone will love these oatmeal chocolate chip Greek yoghurt muffins. These are one of the best and healthier muffins I’ve made. These muffins are incredibly delicious and worth the hype!

INGREDIENTS

MUFFINS:

2 large eggs

1 c. whole wheat flour

1–1/2 tsp baking powder

1 tsp baking soda

1 tsp cinnamon

1/4 c. canola oil

1 c. Greek vanilla yoghurt

1/2 c. dark brown sugar

1–1/2 c. old-fashioned oats

1 tsp vanilla

1 c. semi-sweet chocolate chips

1/2 tsp salt

STREUSEL:

1/3 c. semi-sweet chocolate chips

2 tbsp canola oil

1/2 c. old-fashioned oats

1/3 c. dark brown sugar

HOW TO MAKE OATMEAL CHOCOLATE CHIP GREEK YOGURT MUFFINS

Step 1: Prepare the oven. Preheat it to 350 degrees F. Using cooking spray, lightly grease a 12-cup muffin pan, and set aside.

Step 2: Place the flour, oats, baking powder, baking soda, salt, and cinnamon in a large bowl. Mix well until combined.

Step 3: Combine the oil, brown sugar, eggs, vanilla, and Greek yoghurt in a medium bowl. Into the dry ingredients, stir in the wet ingredients until well blended. Then, fold in 1 c chocolate chips.

Step 4: Among the greased muffin cups, evenly divide the batter, filling each cup to almost full.

Step 5: Place the streusel ingredients in a small bowl. Using a fork, mix the ingredients until well coated in the oil. Over the batter in the muffin cups, place a heaping tablespoon of streusel.

Step 6: Place in the preheated oven and bake for about 15 to 18 minutes or until the muffins begin to turn golden brown and the streusel is crisp. Remove from the oven when done and allow the muffins to cool for about 5 to 10 minutes in the pan, then remove to a wire rack to cool fully.

Step 7: Serve and enjoy!

OATMEAL CHOCOLATE CHIP GREEK YOGURT MUFFINS

Rebecca Prep Time: 15 mins | Cook Time: 18 mins | Total Time: 33 mins | Yield: 12 I am sure that everyone will love these oatmeal chocolate chip Greek yoghurt… General Recipes OATMEAL CHOCOLATE CHIP GREEK YOGURT MUFFINS European Print This
Serves: 12 Prep Time: 15 mins Cooking Time: 18 mins 18 mins
Nutrition facts: 200 calories 20 grams fat
Rating: 5.0/5
( 1 voted )

Ingredients

  • MUFFINS:
  • 2 large eggs
  • 1 c. whole wheat flour
  • 1–1/2 tsp baking powder
  • 1 tsp baking soda
  • 1 tsp cinnamon
  • 1/4 c. canola oil
  • 1 c. Greek vanilla yoghurt
  • 1/2 c. dark brown sugar
  • 1–1/2 c. old-fashioned oats
  • 1 tsp vanilla
  • 1 c. semi-sweet chocolate chips
  • 1/2 tsp salt
  • STREUSEL:
  • 1/3 c. semi-sweet chocolate chips
  • 2 tbsp canola oil
  • 1/2 c. old-fashioned oats
  • 1/3 c. dark brown sugar

Instructions

Step 1: Prepare the oven. Preheat it to 350 degrees F. Using cooking spray, lightly grease a 12-cup muffin pan, and set aside.

Step 2: Place the flour, oats, baking powder, baking soda, salt, and cinnamon in a large bowl. Mix well until combined.

Step 3: Combine the oil, brown sugar, eggs, vanilla, and Greek yoghurt in a medium bowl. Into the dry ingredients, stir in the wet ingredients until well blended. Then, fold in 1 c chocolate chips.

Step 4: Among the greased muffin cups, evenly divide the batter, filling each cup to almost full.

Step 5: Place the streusel ingredients in a small bowl. Using a fork, mix the ingredients until well coated in the oil. Over the batter in the muffin cups, place a heaping tablespoon of streusel.

Step 6: Place in the preheated oven and bake for about 15 to 18 minutes or until the muffins begin to turn golden brown and the streusel is crisp. Remove from the oven when done and allow the muffins to cool for about 5 to 10 minutes in the pan, then remove to a wire rack to cool fully.

Step 7: Serve and enjoy!

July 15, 2022 0 comment
0 FacebookTwitterPinterestEmail
General Recipes

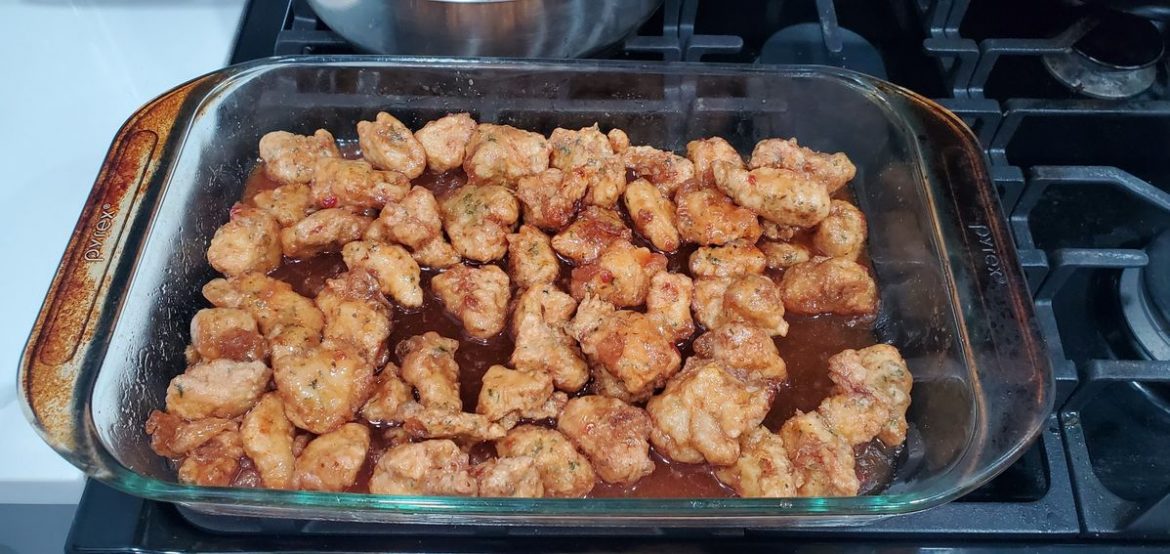
BAKED SWEET & SOUR CHICKEN

by Rebecca July 15, 2022
written by Rebecca

PREP TIME: 30 mins | COOK TIME: 1 hr | SERVINGS: 8 people

This sweet & sour chicken has been one of my favorite take-out with pieces of crispy baked chicken tossed in a simple sweet and sour sauce. Once I’ve learned about this easy homemade version, I never have this the other way!

INGREDIENTS

Sweet & Sour Sauce:

½ c. apple cider vinegar

¼ c. ketchup

¾ c. granulated sugar

½ tsp garlic powder

1 tbsp soy sauce – I use reduced-sodium

Chicken:

3 large eggs

4 boneless, skinless chicken breasts about 2 lbs

½ c. cornstarch

canola or vegetable oil for frying enough for about 2-inches in a pan

1 tsp salt

½ tsp black pepper

HOW TO MAKE BAKED SWEET & SOUR CHICKEN

Step 1: Into a small bowl. Add the sweet & sour ingredients. Mix well until combined and set aside.

Step 2: Into a skillet pan with high sides, pour enough oil to cover about 2 inches in the pan. Heat over medium heat.

Step 3: Into 1-inch bite-sized chunks, slice the chicken. Put the pieces in a gallon-sized Ziploc bag or bowl. Season with salt and pepper. Then, add the flour. Seal the bag and shake to coat the pieces of chicken.

Step 4: Prepare the oven. Preheat it to 325 degrees. Using cooking spray, grease a 9 x 13-inch baking dish. Into a rimmed plate or bowl, crack the eggs. Using a fork or a whisk, beat the eggs.

Step 5: In the eggs, dip the chicken while working in batches. Shake the excess off and place the chicken pieces in the hot oil. Repeat with the rest of the chicken. Cook the pieces of chicken for about 3 minutes per side. Flip and continue to cook the other side for 3 minutes more. At this point, the chicken does not need to be cooked through, just aim for golden brown outside. On a paper towel-lined plate, transfer the chicken. I cooked the chicken anywhere about 3 to 4 batches depending on how big the skillet is.

Step 6: After draining the excess oil from the chicken pieces, transfer them into the prepared dish. Once done with all the chicken, pour the sweet & sour sauce over them and gently stir.

Step 7: Cook the sweet and sour chicken for about 60 minutes, stirring every 15 minutes.

Step 8: Remove from the heat when done and serve right away over rice. If desired, garnish with some green onions. Enjoy!

NUTRITION FACTS:

Calories: 397 kcal, Carbohydrates: 29g, Protein: 27g, Fat: 19g, Saturated Fat: 2g, Cholesterol: 142mg, Sodium: 644mg, Potassium: 485mg, Fiber: 1g, Sugar: 21g, Vitamin A: 174IU, Vitamin C: 2mg, Calcium: 16mg, Iron: 1mg

BAKED SWEET & SOUR CHICKEN

Rebecca PREP TIME: 30 mins | COOK TIME: 1 hr | SERVINGS: 8 people This sweet & sour chicken has been one of my favorite take-out with pieces of crispy baked… General Recipes BAKED SWEET & SOUR CHICKEN European Print This
Serves: 8 Prep Time: 30 mins Cooking Time: 1 hr 1 hr
Nutrition facts: 397 calories 19 fat
Rating: 5.0/5
( 1 voted )

Ingredients

  • Sweet & Sour Sauce:
  • ½ c. apple cider vinegar
  • ¼ c. ketchup
  • ¾ c. granulated sugar
  • ½ tsp garlic powder
  • 1 tbsp soy sauce - I use reduced-sodium
  • Chicken:
  • 3 large eggs
  • 4 boneless, skinless chicken breasts about 2 lbs
  • ½ c. cornstarch
  • canola or vegetable oil for frying enough for about 2-inches in a pan
  • 1 tsp salt
  • ½ tsp black pepper

Instructions

Step 1: Into a small bowl. Add the sweet & sour ingredients. Mix well until combined and set aside.

Step 2: Into a skillet pan with high sides, pour enough oil to cover about 2 inches in the pan. Heat over medium heat.

Step 3: Into 1-inch bite-sized chunks, slice the chicken. Put the pieces in a gallon-sized Ziploc bag or bowl. Season with salt and pepper. Then, add the flour. Seal the bag and shake to coat the pieces of chicken.

Step 4: Prepare the oven. Preheat it to 325 degrees. Using cooking spray, grease a 9 x 13-inch baking dish. Into a rimmed plate or bowl, crack the eggs. Using a fork or a whisk, beat the eggs.

Step 5: In the eggs, dip the chicken while working in batches. Shake the excess off and place the chicken pieces in the hot oil. Repeat with the rest of the chicken. Cook the pieces of chicken for about 3 minutes per side. Flip and continue to cook the other side for 3 minutes more. At this point, the chicken does not need to be cooked through, just aim for golden brown outside. On a paper towel-lined plate, transfer the chicken. I cooked the chicken anywhere about 3 to 4 batches depending on how big the skillet is.

Step 6: After draining the excess oil from the chicken pieces, transfer them into the prepared dish. Once done with all the chicken, pour the sweet & sour sauce over them and gently stir.

Step 7: Cook the sweet and sour chicken for about 60 minutes, stirring every 15 minutes.

Step 8: Remove from the heat when done and serve right away over rice. If desired, garnish with some green onions. Enjoy!

July 15, 2022 0 comment
0 FacebookTwitterPinterestEmail
General Recipes

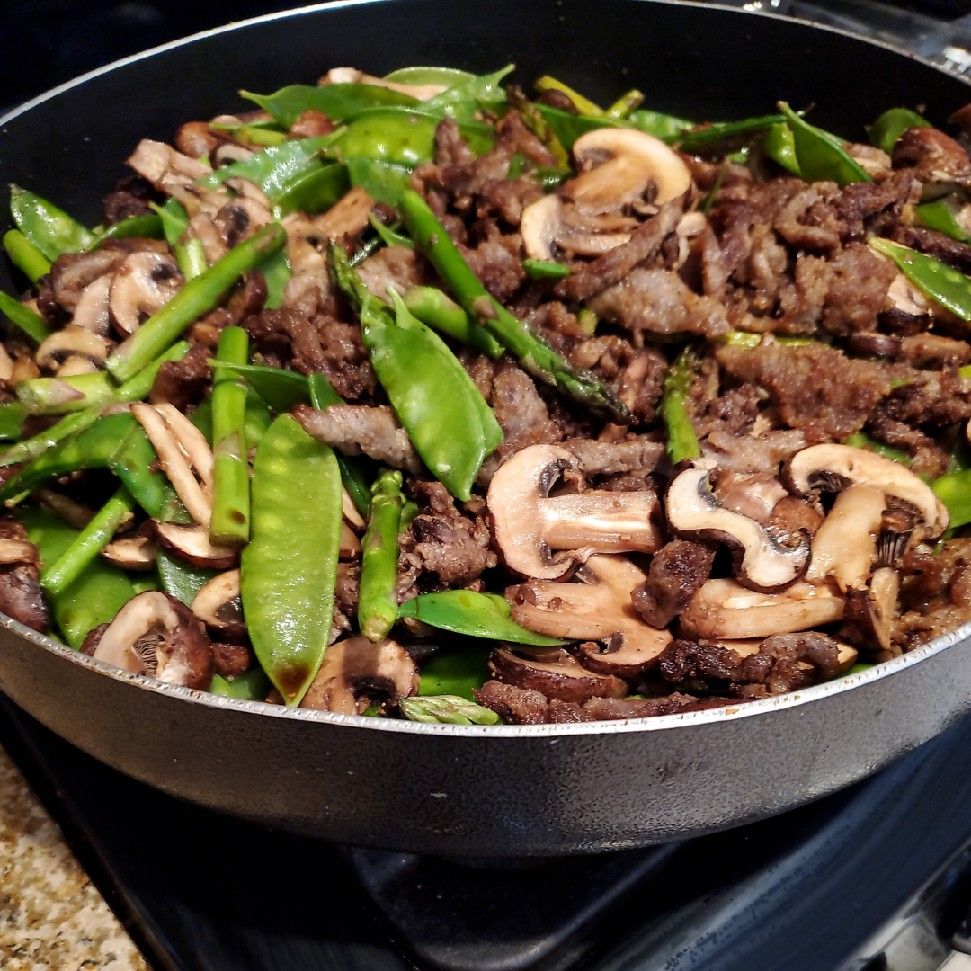
Asian Beef with Mushrooms & Snow Peas

by Rebecca July 15, 2022
written by Rebecca

PREP TIME: 20 MINS | COOK TIME: 30 MINS | TOTAL TIME: 50 MINS | SERVINGS: 4

This might be one of the simplest dinner options, but this dish does not disappoint! It is loaded with tender slices of sirloin steak, mushrooms, and crisp snow peas tossed in a delicious Asian sauce. This Asian beef would be a great addition to your weekly menu rotation!

Ingredients

Homemade Asian Sauce:

6 garlic cloves, minced

½ c Tamari or low-sodium soy sauce

2 tsp rice vinegar

5 tbsp brown sugar

½ tsp ginger

Beef:

1 lb beef thinly sliced (sirloin steak strips, flank steak, or any other steak)

10 ounces of snow peas

10 ounces mushrooms, sliced thinly

4 tbsp olive oil

How to make Asian Beef with Mushrooms & Snow Peas

Step 1: In a bowl, place the sauce ingredients and mix well until combined. Set aside.

Step 2: In a medium pot with boiling water, add the snow peas. Cook the snow peas for about 5 minutes. Drain when done and set aside.

Step 3: Heat 2 tbsp olive oil in a large skillet. Add the thinly sliced mushrooms to the skillet once the oil sizzles and cook over high heat until nicely browned, turning often. Sprinkle the mushrooms with a little salt midway. To a bowl, transfer the mushrooms.

Step 4: Add another 2 tbsp olive oil to the same skillet over high heat. Then, add the thinly sliced meat. I do this in 2 batches to avoid overcrowding the pan. Cook the first side of the beef until browned. Flip and continue to cook the other side until browned. To a bowl, transfer the beef when done. Repeat with the rest of the beef.

To Assemble:

Step 5: To the skillet, add all the cooked beef back along with the snow peas and cooked mushrooms. Pour in the Asian sauce and stir. Cook for about a minute over high heat. Then, turn the heat off and put the lid on.

Nutrition Facts:

Amount per Serving: Calories 538, Fat 37g 57%, Saturated Fat 10g 63%, Cholesterol 80mg 27%, Sodium 1707mg 74%, Potassium 772mg 22%, Carbohydrates 25g 8%, Fiber 2g 8%, Sugar 19g 21%, Protein 27g 54%, Vitamin A 770IU 15%, Vitamin C 45.5mg 55%, Calcium 77mg 8%, Iron 5mg 28%

Asian Beef with Mushrooms & Snow Peas

Rebecca PREP TIME: 20 MINS | COOK TIME: 30 MINS | TOTAL TIME: 50 MINS | SERVINGS: 4 This might be one of the simplest dinner options, but this dish does… General Recipes Asian Beef with Mushrooms & Snow Peas European Print This
Serves: 4 Prep Time: 20 mins Cooking Time: 30 mins 30 mins
Nutrition facts: 538 calories 37 fat
Rating: 5.0/5
( 1 voted )

Ingredients

  • Homemade Asian Sauce:
  • 6 garlic cloves, minced
  • ½ c Tamari or low-sodium soy sauce
  • 2 tsp rice vinegar
  • 5 tbsp brown sugar
  • ½ tsp ginger
  • Beef:
  • 1 lb beef thinly sliced (sirloin steak strips, flank steak, or any other steak)
  • 10 ounces of snow peas
  • 10 ounces mushrooms, sliced thinly
  • 4 tbsp olive oil

Instructions

Step 1: In a bowl, place the sauce ingredients and mix well until combined. Set aside.

Step 2: In a medium pot with boiling water, add the snow peas. Cook the snow peas for about 5 minutes. Drain when done and set aside.

Step 3: Heat 2 tbsp olive oil in a large skillet. Add the thinly sliced mushrooms to the skillet once the oil sizzles and cook over high heat until nicely browned, turning often. Sprinkle the mushrooms with a little salt midway. To a bowl, transfer the mushrooms.

Step 4: Add another 2 tbsp olive oil to the same skillet over high heat. Then, add the thinly sliced meat. I do this in 2 batches to avoid overcrowding the pan. Cook the first side of the beef until browned. Flip and continue to cook the other side until browned. To a bowl, transfer the beef when done. Repeat with the rest of the beef.

To Assemble:

Step 5: To the skillet, add all the cooked beef back along with the snow peas and cooked mushrooms. Pour in the Asian sauce and stir. Cook for about a minute over high heat. Then, turn the heat off and put the lid on.

July 15, 2022 0 comment
0 FacebookTwitterPinterestEmail
General Recipes

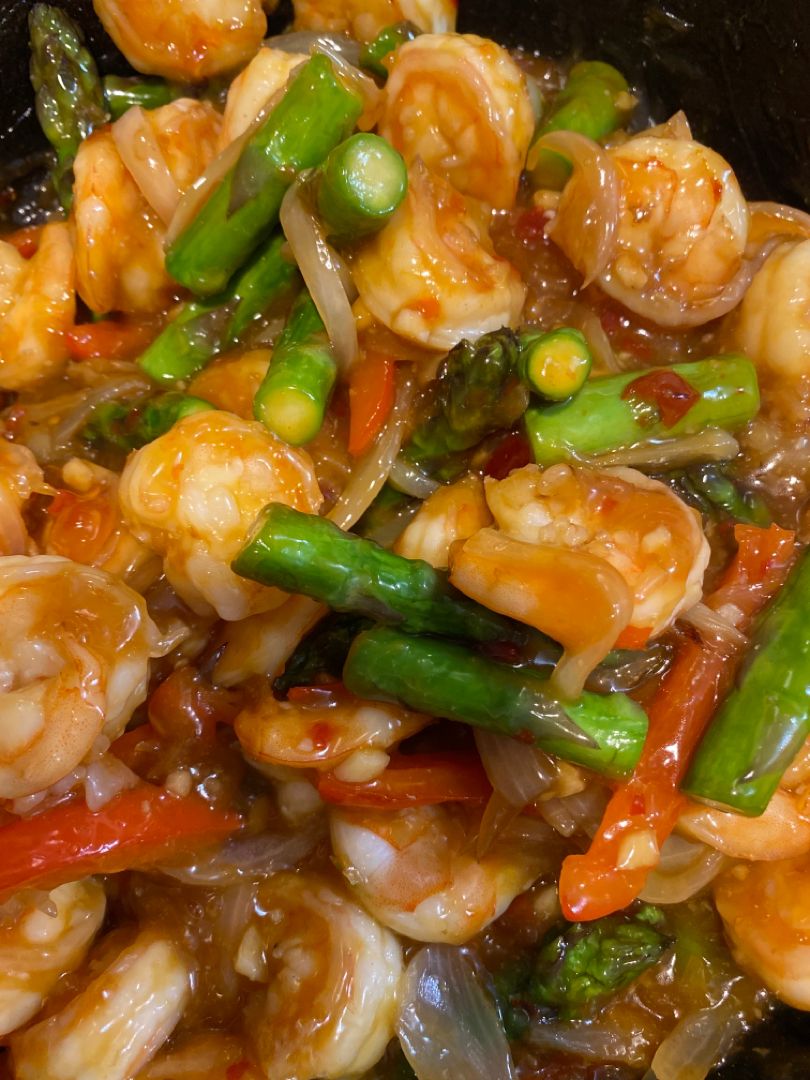
SWEET CHILI SHRIMP STIR FRY

by Rebecca July 15, 2022
written by Rebecca

Prep Time: 10 mins | Cook Time: 20 mins | Total Time: 30 mins | Yield: 5

This is another great stir fry recipe with sauteed shrimp, onions, red peppers, and asparagus in a delicious sweet and spicy sauce. Insanely easy to whip up and ready in under thirty minutes. You can pair this up with steamed rice, but I love pairing this up with coconut rice.

INGREDIENTS

2 tbsp olive oil

1 1/2 pounds large shrimp, cleaned and deveined

1 small onion, cut into slices

1 red bell pepper, cut into slices

1 pound asparagus, cut into thirds

1/2 c. sweet chili sauce

4 garlic cloves, diced

5 tbsp soy sauce

3 tsp cornstarch

1/4 c. water

COCONUT RICE:

1½ c. Jasmine rice

½ c. water

1 tsp salt

1 15-ounces can of coconut milk

HOW TO MAKE SWEET CHILI SHRIMP STIR FRY

Step 1: Place the chili sauce, soy sauce, water, and cornstarch in a small bowl. Mix well until combined and set aside.

Step 2: In a cast-iron skillet, heat 1 tbsp olive oil over medium-high heat. Once the oil is hot, add the peppers, onions, asparagus, and garlic to the skillet and cook for about 3 to 4 minutes until just tender. To a plate, transfer the veggies.

Step 3: To the same skillet, add another 1 tbsp oil. Add the shrimp and cook for about 2 minutes. Flip and continue to cook the other side for 2 minutes more or until pink & firm and completely cooked. Transfer the shrimp to a plate.

Step 4: Into the skillet, pour in the sauce mixture and let it simmer for about 2 minutes or until thickened. Then, add the veggies and shrimp.

Coconut rice:

Step 5: Add the water, coconut milk, jasmine rice, and salt to a medium saucepan. Stir well until blended. Then, let it boil. Once boiling, adjust the heat to medium/low. Put the lid on and cook for about 18 to 20 minutes. Finally, fluff the coconut rice using a fork.

NUTRITION FACTS:

Yield: 5, Serving Size: 5 Servings
Amount Per Serving: Calories 544, Total Fat 26g, Saturated Fat 18g, Trans Fat 0g, Unsaturated Fat 7g, Cholesterol 287mg, Sodium 2621mg, Carbohydrates 41g, Fiber 3g, Sugar 16g, Protein 38g

SWEET CHILI SHRIMP STIR FRY

Rebecca Prep Time: 10 mins | Cook Time: 20 mins | Total Time: 30 mins | Yield: 5 This is another great stir fry recipe with sauteed shrimp, onions, red peppers,… General Recipes SWEET CHILI SHRIMP STIR FRY European Print This
Serves: 5 Prep Time: 10 mins Cooking Time: 20 mins 20 mins
Nutrition facts: 544 calories 26 fat
Rating: 5.0/5
( 1 voted )

Ingredients

  • 2 tbsp olive oil
  • 1 1/2 pounds large shrimp, cleaned and deveined
  • 1 small onion, cut into slices
  • 1 red bell pepper, cut into slices
  • 1 pound asparagus, cut into thirds
  • 1/2 c. sweet chili sauce
  • 4 garlic cloves, diced
  • 5 tbsp soy sauce
  • 3 tsp cornstarch
  • 1/4 c. water
  • COCONUT RICE:
  • 1½ c. Jasmine rice
  • ½ c. water
  • 1 tsp salt
  • 1 15-ounces can of coconut milk

Instructions

Step 1: Place the chili sauce, soy sauce, water, and cornstarch in a small bowl. Mix well until combined and set aside.

Step 2: In a cast-iron skillet, heat 1 tbsp olive oil over medium-high heat. Once the oil is hot, add the peppers, onions, asparagus, and garlic to the skillet and cook for about 3 to 4 minutes until just tender. To a plate, transfer the veggies.

Step 3: To the same skillet, add another 1 tbsp oil. Add the shrimp and cook for about 2 minutes. Flip and continue to cook the other side for 2 minutes more or until pink & firm and completely cooked. Transfer the shrimp to a plate.

Step 4: Into the skillet, pour in the sauce mixture and let it simmer for about 2 minutes or until thickened. Then, add the veggies and shrimp.

Coconut rice:

Step 5: Add the water, coconut milk, jasmine rice, and salt to a medium saucepan. Stir well until blended. Then, let it boil. Once boiling, adjust the heat to medium/low. Put the lid on and cook for about 18 to 20 minutes. Finally, fluff the coconut rice using a fork.

July 15, 2022 0 comment
0 FacebookTwitterPinterestEmail
General Recipes

Cheddar Cheese Cauliflower Casserole

by Rebecca July 15, 2022
written by Rebecca

Prep time: 15 mins | Cook time: 33 mins | Total time: 48 mins | Servings: 6

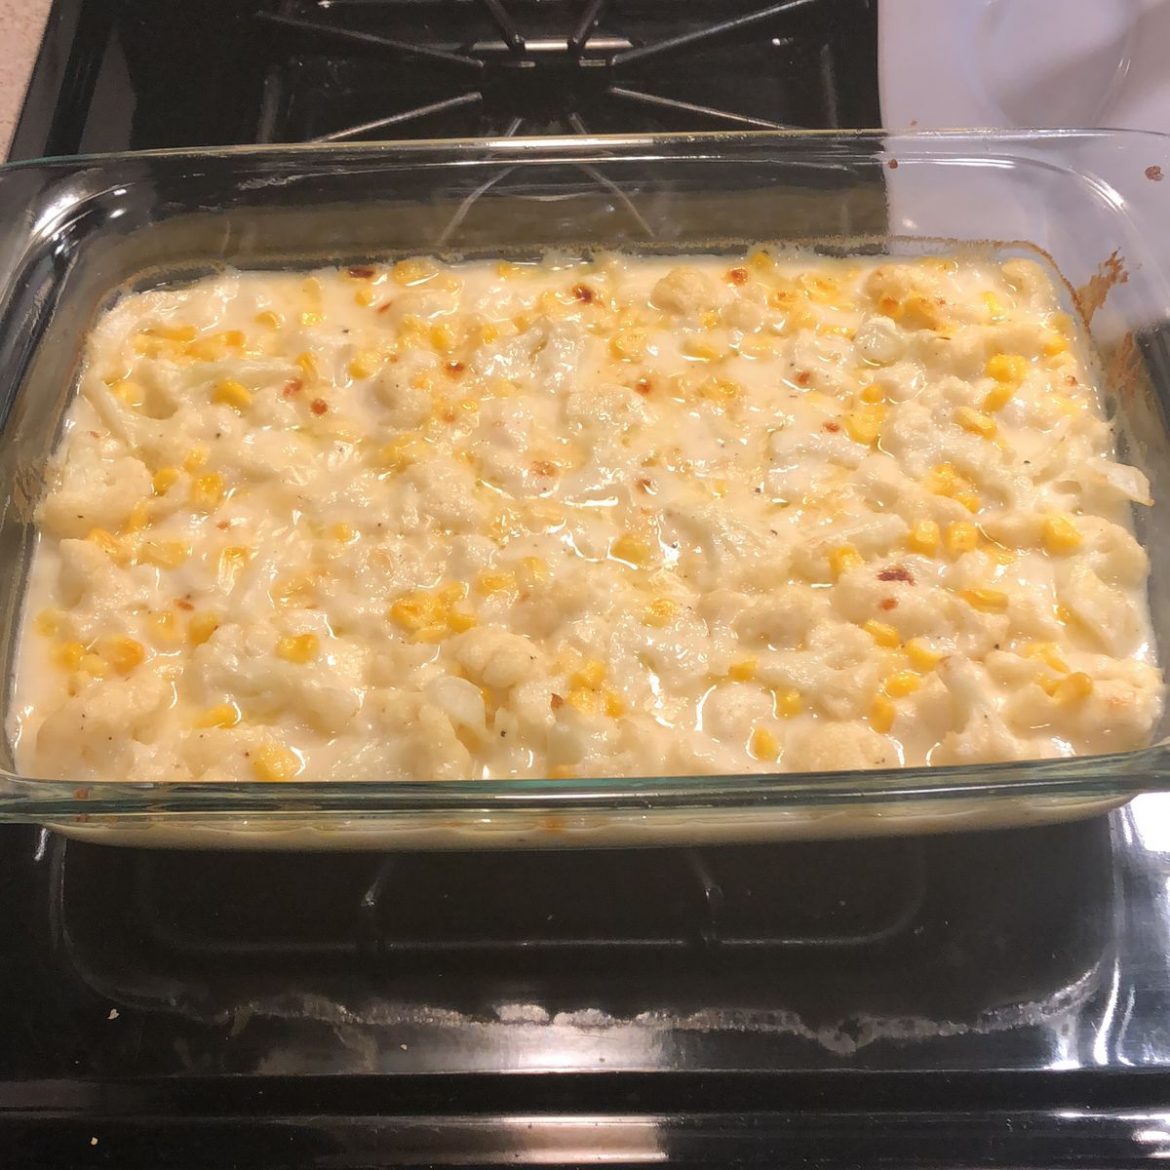
This casserole is the perfect vegetarian dish with corn and cauliflower in a delicious cheese sauce. It is an amazing side dish that you can serve as the main dish, too! Super easy to whip up and ready in minutes, this low-carb and keto cheddar cheese cauliflower casserole would be an excellent dinner option for even your fussiest eaters!

This simple recipe is pretty straightforward. You can keep it as is, or you could try swapping some ingredients to make an ultimate keto-friendly version. I have tried tossing in some leftover chicken, and it works very well!

Ingredients

3 tbsp butter

1 c. frozen corn

1 c. milk

3 tbsp all-purpose flour

1 1/2 c. cheddar cheese, shredded

1 large head of cauliflower, cut into florets

salt and pepper

How to make Cheddar Cheese Cauliflower Casserole

Step 1: Prepare the oven. Preheat it to 350 degrees.

Step 2: To a large pot with boiling water, add the cauliflower, and cook for about 5 minutes until tender. Add the frozen corn in the last minute of cooking. When done, drain the veggies and set them aside.

Step 3: Melt the butter in a medium-sized saucepan over medium-high heat. Then, whisk in the flour, stirring constantly until smooth. Pour in the milk and add half a cup of cheese. Continue to cook while stirring until the cheese has melted and the sauce has thickened.

Step 4: To a medium-sized casserole dish, add cauliflower and corn. Pour in the cheese sauce and toss well. To taste, season with salt and pepper. On top, add the rest of the 1 c cheddar cheese.

Step 5: Bake in the preheated oven for about 30 minutes. Then, broil for about 2 to 3 minutes until the cheese turned lightly brown.

Note:

For the ultimate keto-friendly version, use chopped green beans instead of corn, heavy cream in place of milk, and almond flour instead of all-purpose flour.

Nutrition Info.:

Calories: 225 kcal (11%)

Cheddar Cheese Cauliflower Casserole

Rebecca Prep time: 15 mins | Cook time: 33 mins | Total time: 48 mins | Servings: 6 This casserole is the perfect vegetarian dish with corn and cauliflower in a… General Recipes Cheddar Cheese Cauliflower Casserole European Print This
Serves: 6 Prep Time: 15 mins Cooking Time: 33 mins 33 mins
Nutrition facts: 225 calories 20 grams fat
Rating: 5.0/5
( 1 voted )

Ingredients

  • 3 tbsp butter
  • 1 c. frozen corn
  • 1 c. milk
  • 3 tbsp all-purpose flour
  • 1 1/2 c. cheddar cheese, shredded
  • 1 large head of cauliflower, cut into florets
  • salt and pepper

Instructions

Step 1: Prepare the oven. Preheat it to 350 degrees.

Step 2: To a large pot with boiling water, add the cauliflower, and cook for about 5 minutes until tender. Add the frozen corn in the last minute of cooking. When done, drain the veggies and set them aside.

Step 3: Melt the butter in a medium-sized saucepan over medium-high heat. Then, whisk in the flour, stirring constantly until smooth. Pour in the milk and add half a cup of cheese. Continue to cook while stirring until the cheese has melted and the sauce has thickened.

Step 4: To a medium-sized casserole dish, add cauliflower and corn. Pour in the cheese sauce and toss well. To taste, season with salt and pepper. On top, add the rest of the 1 c cheddar cheese.

Step 5: Bake in the preheated oven for about 30 minutes. Then, broil for about 2 to 3 minutes until the cheese turned lightly brown.

Notes

For the ultimate keto-friendly version, use chopped green beans instead of corn, heavy cream in place of milk, and almond flour instead of all-purpose flour.

July 15, 2022 0 comment
0 FacebookTwitterPinterestEmail
General Recipes

HOMEMADE EGG FOO YOUNG RECIPE

by Rebecca July 15, 2022
written by Rebecca

PREP TIME: 5 MINS | COOK TIME: 15 MINS | TOTAL TIME: 20 MINS | YIELD: 4

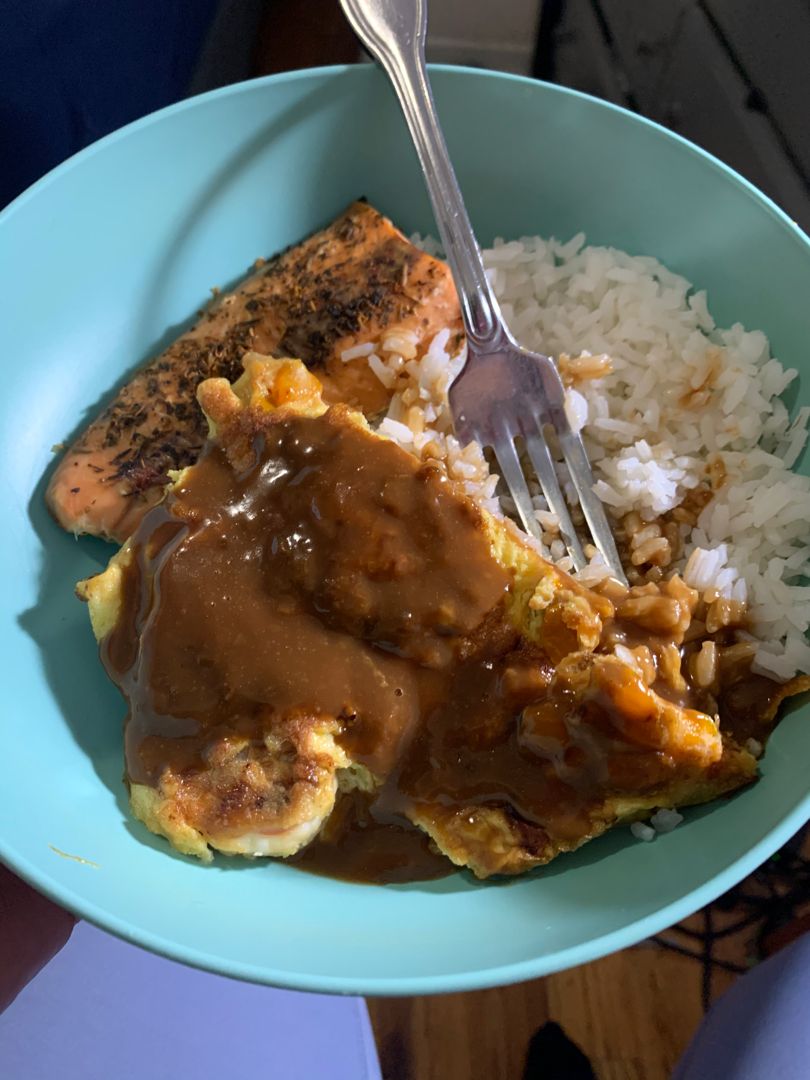
Enjoy the popular Chinese takeout dish at home with this easy homemade Egg Foo Young recipe. This delicious Egg Foo Young is incredibly easy and quick to make using only a few simple ingredients. This recipe is also very versatile. You can use any veggies you have on hand and add protein if desired. If you love Chinese food and, you are looking for easy homemade recipes that you can make any time, then you have to give this recipe a try. Serve this Egg Foo Young for breakfast, lunch, and even dinner. Top this with gravy, and enjoy with soy sauce on the side.

INGREDIENTS

Vegetable oil

1/2 lb cooked shrimp, chopped

4 eggs, beaten

1/2 c. onion, chopped

1 c. bean sprouts

1/2 c. mushrooms, chopped

2 tbsp soy sauce

1 tsp cornstarch

For beef gravy, I used jarred

green onion, chopped (for garnish)

HOW TO MAKE HOMEMADE EGG FOO YOUNG

Step 1: Add vegetable oil to a large skillet. Then, add the onions, mushrooms, and bean sprouts. Saute the veggies and add the shrimp. Whisk in the cornstarch and soy sauce.

Step 2: To a bowl with 4 beaten eggs, add the mixture, and gently stir. The correct ratio should be more veggies than eggs, and the consistency is not too runny. You can add extra sauteed vegetables or protein if the mixture turned out too runny.

Step 3: Drizzle enough vegetable oil to cover the bottom of a clean skillet. Then, add 1/4 Egg Foo Young mixture, forming it into a pancake shape. Fry until the bottom of the Egg Foo Young is firm enough to flip. Continue to cook the other side until the egg is firm.

Step 4: On a paper towel, transfer the cooked Egg Foo Young to absorb the oil.

Step 5: Serve the homemade Egg Foo Young with gravy on top and garnished with some green onions. Enjoy with soy sauce on the side.

NUTRITION FACTS:

YIELD: 4 SERVING SIZE: 1 gram
Amount Per Serving: CALORIES: 232 | TOTAL FAT: 11g | SATURATED FAT: 3g | TRANS FAT: 0g | UNSATURATED FAT: 7g | CHOLESTEROL: 307mg | SODIUM: 1377mg | CARBOHYDRATES: 10g | FIBER: 1g | SUGAR: 3g | PROTEIN: 24g

HOMEMADE EGG FOO YOUNG RECIPE

Rebecca PREP TIME: 5 MINS | COOK TIME: 15 MINS | TOTAL TIME: 20 MINS | YIELD: 4 Enjoy the popular Chinese takeout dish at home with this easy homemade Egg… General Recipes HOMEMADE EGG FOO YOUNG RECIPE European Print This
Serves: 4 Prep Time: 5 mins Cooking Time: 15 mins 15 mins
Nutrition facts: 232 calories 11 fat
Rating: 5.0/5
( 1 voted )

Ingredients

  • Vegetable oil
  • 1/2 lb cooked shrimp, chopped
  • 4 eggs, beaten
  • 1/2 c. onion, chopped
  • 1 c. bean sprouts
  • 1/2 c. mushrooms, chopped
  • 2 tbsp soy sauce
  • 1 tsp cornstarch
  • For beef gravy, I used jarred
  • green onion, chopped (for garnish)

Instructions

Step 1: Add vegetable oil to a large skillet. Then, add the onions, mushrooms, and bean sprouts. Saute the veggies and add the shrimp. Whisk in the cornstarch and soy sauce.

Step 2: To a bowl with 4 beaten eggs, add the mixture, and gently stir. The correct ratio should be more veggies than eggs, and the consistency is not too runny. You can add extra sauteed vegetables or protein if the mixture turned out too runny.

Step 3: Drizzle enough vegetable oil to cover the bottom of a clean skillet. Then, add 1/4 Egg Foo Young mixture, forming it into a pancake shape. Fry until the bottom of the Egg Foo Young is firm enough to flip. Continue to cook the other side until the egg is firm.

Step 4: On a paper towel, transfer the cooked Egg Foo Young to absorb the oil.

Step 5: Serve the homemade Egg Foo Young with gravy on top and garnished with some green onions. Enjoy with soy sauce on the side.

July 15, 2022 0 comment
0 FacebookTwitterPinterestEmail
General Recipes

Literally The Best Mac and Cheese I’ve Ever Had

by Rebecca July 15, 2022
written by Rebecca

Prep time: 5 mins | Cook time: 28 mins | Total time: 33 mins | Servings: 6

This mac and cheese are the best in town! Insanely cheesy and creamy, I’m pretty sure you’ll be dying to make this over and over again!

Ingredients

1/4 c. butter

2 & 1/4 c. dry elbow macaroni

1/4 c. flour

2/3 c. milk

1 & 1/3 c. SHARP cheddar cheese, shredded

2/3 c. mozzarella cheese, shredded

1/3 c. heavy cream

1/2 lb cheese, cut into slices

1 tsp salt

1/2 tsp pepper

Crumb topping:

2/3 c. Panko bread crumbs

1/4 c. butter, melted

How to make The Best Mac and Cheese

Step 1: Prepare the oven. Preheat it to 350 degrees F. Using butter or nonstick spray, grease an 8 x 8-inch pan or any 2-quart casserole dish.

Step 2: Following the package directions, cook the macaroni in a 3-quart pot, making sure to omit any salt or fat called for. Drain the macaroni when done and return it to the pot. Drizzle the macaroni with 1 to 2 tsp of oil to prevent them from sticking.

Step 3: In the meantime, melt 1/4 c. butter in another small pot. Stir in the flour once the butter is hot and cook for about a minute, stirring constantly until bubbly. Then, gradually whisk in the cream and milk, making sure to not stop stirring until the mixture has thickened. To taste, add salt and pepper. Stir for another minute.

Step 4: Take the pot off the heat and slowly stir in the shredded mozzarella and cheddar. Return the pot to the burner over very low heat of the cheeses are not melting and stir constantly until blended.

Step 5: Onto the cooked macaroni, stir in the cheese sauce.

Step 6: Into the prepared casserole dish, pour half of the mac and cheese. On top, add a half-pound layer of the cheese slices. Then, add another layer of mac and cheese.

Step 7: Melt 1/4 c. butter in a small bowl. Add the bread crumbs and stir well. On top of the mac and cheese, spread the mixture.

Step 8: Place in the preheated oven and bake for about 20 to 25 minutes until the top of the casserole is golden brown and the cheese is bubbly.

Notes:

You can skip the cream and use 1 c of milk instead.

Feel free to use your favorite cheese. For this recipe, I used half each of sharp cheddar and Monterey Jack.

Assemble this about 1 to 2 days in advance, but do not include the crumb topping. Cover and store in the fridge. When ready to bake, add the crumb topping. Bake a bit longer.

Nutrition Facts:

Serving: 1 cup, calories: 729 kcal, carbohydrates: 51 g, protein: 28 g, fat: 46 g, saturated fat: 28 g, polyunsaturated fat: 2 g, monounsaturated fat: 13 g, trans fat: 1 g, cholesterol: 137 mg, sodium: 1060 mg, potassium: 259 mg, fiber: 2 g, sugar: 4 g, vitamin a: 1426 iu, vitamin c: 1 mg, calcium: 585 mg, iron: 2 mg

Literally The Best Mac and Cheese I’ve Ever Had

Rebecca Prep time: 5 mins | Cook time: 28 mins | Total time: 33 mins | Servings: 6 This mac and cheese are the best in town! Insanely cheesy and creamy,… General Recipes Literally The Best Mac and Cheese I’ve Ever Had European Print This
Serves: 6 Prep Time: 5 mins Cooking Time: 28 mins 28 mins
Nutrition facts: 729 calories 46 fat
Rating: 5.0/5
( 1 voted )

Ingredients

  • 1/4 c. butter
  • 2 & 1/4 c. dry elbow macaroni
  • 1/4 c. flour
  • 2/3 c. milk
  • 1 & 1/3 c. SHARP cheddar cheese, shredded
  • 2/3 c. mozzarella cheese, shredded
  • 1/3 c. heavy cream
  • 1/2 lb cheese, cut into slices
  • 1 tsp salt
  • 1/2 tsp pepper
  • Crumb topping:
  • 2/3 c. Panko bread crumbs
  • 1/4 c. butter, melted

Instructions

Step 1: Prepare the oven. Preheat it to 350 degrees F. Using butter or nonstick spray, grease an 8 x 8-inch pan or any 2-quart casserole dish.

Step 2: Following the package directions, cook the macaroni in a 3-quart pot, making sure to omit any salt or fat called for. Drain the macaroni when done and return it to the pot. Drizzle the macaroni with 1 to 2 tsp of oil to prevent them from sticking.

Step 3: In the meantime, melt 1/4 c butter in another small pot. Stir in the flour once the butter is hot and cook for about a minute, stirring constantly until bubbly. Then, gradually whisk in the cream and milk, making sure to not stop stirring until the mixture has thickened. To taste, add salt and pepper. Stir for another minute.

Step 4: Take the pot off the heat and slowly stir in the shredded mozzarella and cheddar. Return the pot to the burner over very low heat of the cheeses are not melting and stir constantly until blended.

Step 5: Onto the cooked macaroni, stir in the cheese sauce.

Step 6: Into the prepared casserole dish, pour half of the mac and cheese. On top, add a half-pound layer of the cheese slices. Then, add another layer of mac and cheese.

Step 7: Melt 1/4 c butter in a small bowl. Add the bread crumbs and stir well. On top of the mac and cheese, spread the mixture.

Step 8: Place in the preheated oven and bake for about 20 to 25 minutes until the top of the casserole is golden brown and the cheese is bubbly.

July 15, 2022 0 comment
0 FacebookTwitterPinterestEmail
Newer Posts
Older Posts

Popular Posts

  • 1

    Crispy Crunchy Parmesan Potatoes

    March 21, 2020
  • 2

    CROCK POT SMOTHERED PORK CHOPS

    March 21, 2020
  • Facebook
  • Twitter

@2019 - All Right Reserved.


Back To Top