Cook it once
  • Home
  • Privacy Policy
  • Recipes
    • KETO
    • LC
    • WW
  • Tips
  • Contact
Cook it once
  • Home
  • Privacy Policy
  • Recipes
    • KETO
    • LC
    • WW
  • Tips
  • Contact
Category:

General Recipes

General Recipes

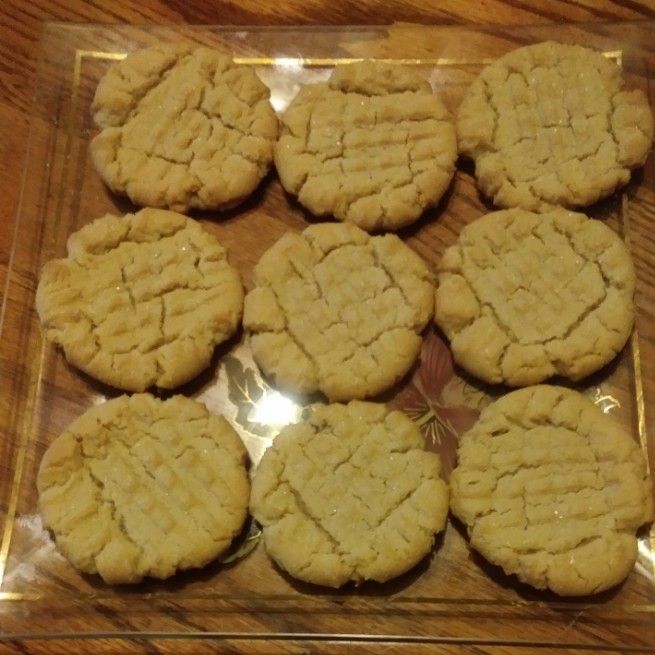
Soft and Chewy Peanut Butter Cookies

by Rebecca July 20, 2022
written by Rebecca

PREP TIME: 8 MINS | COOK TIME: 8 MINS | CHILLING TIME: 2 HRS | TOTAL TIME: 16 MINS | SERVINGS: 24 cookies

These are the best peanut butter cookies. Very soft, chewy, and tastes like roasted peanuts with an impressive slightly crunchy exterior!

INGREDIENTS

1 large egg

1/2 c. smooth peanut butter

1/2 c. unsalted butter, softened

1/2 c. granulated sugar

1 3/4 c. all-purpose bleached flour

1/2 c. packed brown sugar

1 tsp vanilla extract

1 tsp baking soda

1/2 c. granulated sugar for rolling

1/2 tsp salt

How to make Soft and Chewy Peanut Butter Cookies

Step 1: Place the softened butter and peanut butter in a large mixing bowl. Beat using a hand mixer for 30 seconds. Then, add both sugars and continue beating for another 3 minutes until light and fluffy. Next, add the egg along with the vanilla. Mix again until just blended.

Step 2: Combine the flour, salt, and baking soda in a medium mixing bowl. In three additions, add this to the butter and sugar mixture, mixing until just blended. Fold in some chocolate chips or chopped nuts if desired. Tent the bowl and let the dough rest in the fridge for at least 2 hours.

Step 3: Prepare the oven. Preheat it to 350 degrees F.

Step 4: Form 1 1/2 tbsp dough balls and roll each in sugar. Place the dough balls about 2 inches apart on a baking sheet. Place in the preheated oven and bake for about 8 to 9 minutes. Remove from the oven when done and allow the cookies to cool for about 3 to 5 minutes on the baking sheet, then invert them onto the cooling rack.

NOTES:

You can properly measure the flour by fluffing it in the container you keep the flour in using a whisk or fork. Using a spoon, scoop flour into the measuring cup and level the top off.

For this recipe, I do not recommend using unbleached flour.

If desired, fold in some chopped nuts or chocolate chips to the dough before chilling. Or put a Hershey Kiss candy on each cookie after baking.

NUTRITION FACTS:

Calories: 147 kcal | Carbohydrates: 21g | Protein: 2g | Fat: 5g | Saturated Fat: 2g | Cholesterol: 16mg | Sodium: 127mg | Potassium: 54mg | Sugar: 13g | Vitamin A: 130IU | Calcium: 9mg | Iron: 0.6mg

Soft and Chewy Peanut Butter Cookies

Rebecca PREP TIME: 8 MINS | COOK TIME: 8 MINS | CHILLING TIME: 2 HRS | TOTAL TIME: 16 MINS | SERVINGS: 24 cookies These are the best peanut butter cookies.… General Recipes Soft and Chewy Peanut Butter Cookies European Print This
Serves: 24 Prep Time: 8 mins Cooking Time: 8 mins 8 mins
Nutrition facts: 147 calories 5 fat
Rating: 5.0/5
( 1 voted )

Ingredients

  • 1 large egg
  • 1/2 c. smooth peanut butter
  • 1/2 c. unsalted butter, softened
  • 1/2 c. granulated sugar
  • 1 3/4 c. all-purpose bleached flour
  • 1/2 c. packed brown sugar
  • 1 tsp vanilla extract
  • 1 tsp baking soda
  • 1/2 c. granulated sugar for rolling
  • 1/2 tsp salt

Instructions

Step 1: Place the softened butter and peanut butter in a large mixing bowl. Beat using a hand mixer for 30 seconds. Then, add both sugars and continue beating for another 3 minutes until light and fluffy. Next, add the egg along with the vanilla. Mix again until just blended.

Step 2: Combine the flour, salt, and baking soda in a medium mixing bowl. In three additions, add this to the butter and sugar mixture, mixing until just blended. Fold in some chocolate chips or chopped nuts if desired. Tent the bowl and let the dough rest in the fridge for at least 2 hours.

Step 3: Prepare the oven. Preheat it to 350 degrees F.

Step 4: Form 1 1/2 tbsp dough balls and roll each in sugar. Place the dough balls about 2 inches apart on a baking sheet. Place in the preheated oven and bake for about 8 to 9 minutes. Remove from the oven when done and allow the cookies to cool for about 3 to 5 minutes on the baking sheet, then invert them onto the cooling rack.

Notes

You can properly measure the flour by fluffing it in the container you keep the flour in using a whisk or fork. Using a spoon, scoop flour into the measuring cup and level the top off. For this recipe, I do not recommend using unbleached flour. If desired, fold in some chopped nuts or chocolate chips to the dough before chilling. Or put a Hershey Kiss candy on each cookie after baking.
July 20, 2022 0 comment
0 FacebookTwitterPinterestEmail
General Recipes

Black Bean and Chicken Vegetable Stir Fry

by Rebecca July 20, 2022
written by Rebecca

Cook time: 30 mins | Total time: 30 mins | Yield: 3

This stir fry is a wonderful Chinese dish that you can easily make in under thirty minutes. It’s a very flavorful, low-fat, gluten-free, and healthy dish with chicken and veggies in a black bean sauce.

Ingredients

2 Boneless chicken breasts

1 tablespoon Sesame oil

2 tablespoons Cornstarch

1 Onion

2 cloves, crushed Garlic

3 Green Onions

1 teaspoon Ginger

1 Red Pepper

1 Green Pepper

SAUCE:

2 tablespoons Black Bean Sauce

1/4 c. Chicken Stock, low sodium

1 tablespoon Medium Soya sauce

1 tablespoon Oyster sauce

1 teaspoon Sugar

Salt to taste

1 tablespoon Shaoxing wine

OPTIONAL:

1 teaspoon black pepper

2 c. Jasmine Rice

How to make Black Bean and Chicken Vegetable Stir Fry

Step 1: Place the chopped chicken breasts, 2 tablespoons chicken stock, and 2 tablespoons cornstarch mix in a bowl. Mix well. Place in the fridge and let the chicken marinate for about 30 minutes.

Step 2: In the meantime, slice the green and red pepper, onion, and green onions. Next, crush the garlic and chop the ginger. Set everything aside.

Step 3: Heat 1 tablespoon sesame oil in a large frying pan or wok. Add the chicken and saute until no longer pink, but not completely cooked yet. Set the chicken aside when done.

Step 4: Drizzle another 1 tablespoon of oil in the now-empty pan and add the sliced veggies. Saute for about 2 minutes. Next, add the ginger and garlic. Saute further until aromatic.

Step 5: Place the sauce ingredients in a small bowl. Mix well until combined, then pour this into the pan.

Step 6: Return the chicken to the pan and season with black pepper (optional). Let everything simmer for about 5 minutes over low heat, flipping often, until the sauce has thickened and the veggies are crisp-tender.

Step 7: Remove from the heat when done and serve the stir fry right away over rice. Enjoy!

Nutrition Facts:

YIELD: 3 SERVING SIZE: 1
Amount Per Serving: CALORIES: 411 | TOTAL FAT: 10g | SATURATED FAT: 2g | TRANS FAT: 0g | UNSATURATED FAT: 7g | CHOLESTEROL: 68mg | SODIUM: 550mg | CARBOHYDRATES: 50g | FIBER: 3g | SUGAR: 7g | PROTEIN: 30g

Black Bean and Chicken Vegetable Stir Fry

Rebecca Cook time: 30 mins | Total time: 30 mins | Yield: 3 This stir fry is a wonderful Chinese dish that you can easily make in under thirty minutes. It’s… General Recipes Black Bean and Chicken Vegetable Stir Fry European Print This
Serves: 3 Cooking Time: 30 mins 30 mins
Nutrition facts: 411 calories 10 fat
Rating: 5.0/5
( 1 voted )

Ingredients

  • 2 Boneless chicken breasts
  • 1 tablespoon Sesame oil
  • 2 tablespoons Cornstarch
  • 1 Onion
  • 2 cloves, crushed Garlic
  • 3 Green Onions
  • 1 teaspoon Ginger
  • 1 Red Pepper
  • 1 Green Pepper
  • SAUCE:
  • 2 tablespoons Black Bean Sauce
  • 1/4 c. Chicken Stock, low sodium
  • 1 tablespoon Medium Soya sauce
  • 1 tablespoon Oyster sauce
  • 1 teaspoon Sugar
  • Salt to taste
  • 1 tablespoon Shaoxing wine
  • OPTIONAL:
  • 1 teaspoon black pepper
  • 2 c. Jasmine Rice

Instructions

Step 1: Place the chopped chicken breasts, 2 tablespoons chicken stock, and 2 tablespoons cornstarch mix in a bowl. Mix well. Place in the fridge and let the chicken marinate for about 30 minutes.

Step 2: In the meantime, slice the green and red pepper, onion, and green onions. Next, crush the garlic and chop the ginger. Set everything aside.

Step 3: Heat 1 tablespoon sesame oil in a large frying pan or wok. Add the chicken and saute until no longer pink, but not completely cooked yet. Set the chicken aside when done.

Step 4: Drizzle another 1 tablespoon of oil in the now-empty pan and add the sliced veggies. Saute for about 2 minutes. Next, add the ginger and garlic. Saute further until aromatic.

Step 5: Place the sauce ingredients in a small bowl. Mix well until combined, then pour this into the pan.

Step 6: Return the chicken to the pan and season with black pepper (optional). Let everything simmer for about 5 minutes over low heat, flipping often, until the sauce has thickened and the veggies are crisp-tender.

Step 7: Remove from the heat when done and serve the stir fry right away over rice. Enjoy!

July 20, 2022 0 comment
0 FacebookTwitterPinterestEmail
General Recipes

Slow Cooker Chicken Thighs

by Rebecca July 19, 2022
written by Rebecca

Prep Time: 15 mins | Cook Time: 2 hrs | Total Time: 2 hrs 15 mins | Servings: 4

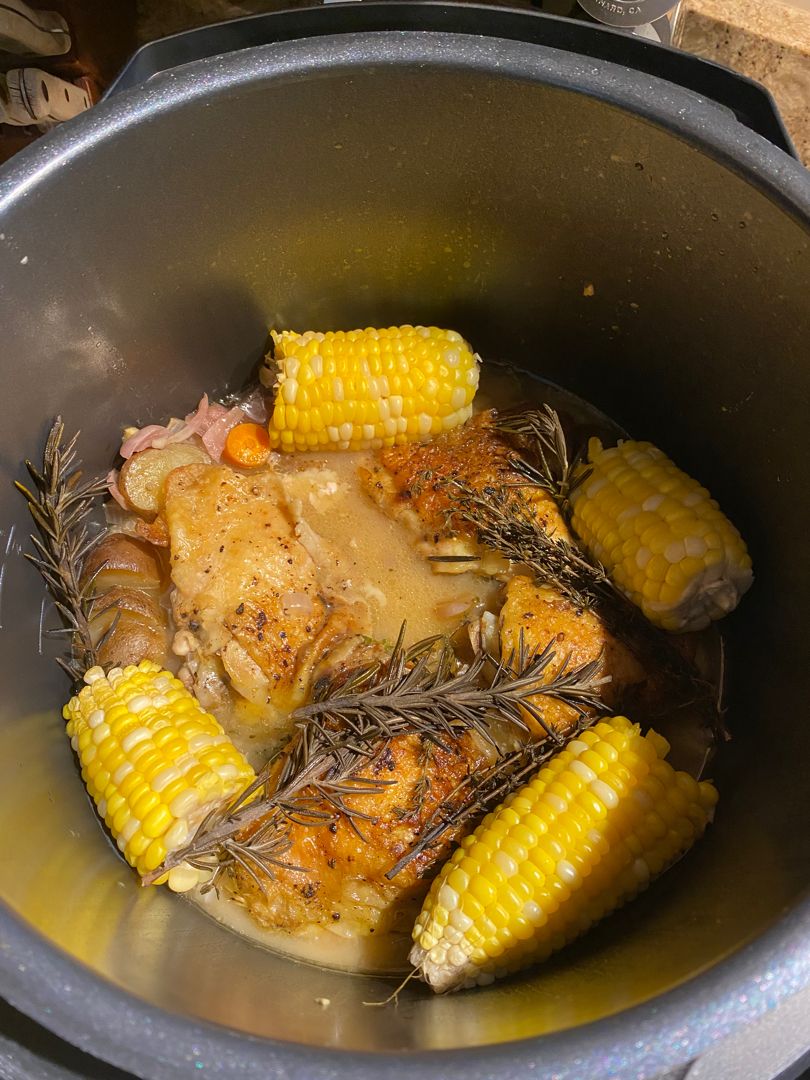
This slow cooker dish is a complete meal with lush chicken thighs and veggies simmered in a simple yet delicious lemon garlic herb sauce. Broiling the chicken is optional but highly recommended if you prefer crispy chicken skin.

Ingredients

2 tbsp olive oil

4 chicken thighs, bone-in, about 1 to 1 ½ lb

1 ear of corn, cut into 4 pieces

1 c. red onion, 1-inch dice

1 lb baby red potatoes, cut in half

1 ½ c. carrots, 1-inch pieces

2 tbsp garlic, roughly chopped

3 tbsp all-purpose flour

1 ¼ c. unsalted chicken stock

4 sprigs thyme

2 sprigs rosemary

1 tbsp lemon juice, plus 4 wedges for serving

1 tsp kosher salt, plus more for seasoning

¼ tsp black pepper, plus more for seasoning

How to make Slow Cooker Chicken Thighs

Step 1: After trimming the excess skin and fat from the chicken thighs, sprinkle all sides with salt and pepper.

Step 2: To a hot large skillet over medium-high heat, add 2 tbsp olive oil. Then, add the chicken, skin-side down, and cook for about 5 minutes or until golden. Flip the chicken and continue to cook the other side for 2 minutes more. To a clean plate, transfer the chicken when done.

Step 3: To a slow cooker, add the onion, carrot, potatoes, corn, and garlic.

Step 4: Place 1 tsp salt, ½ tsp pepper, chicken stock, flour, and lemon juice in a medium-sized bowl. Mix well and add to the slow cooker. Next, add the chicken along with thyme and rosemary.

Step 5: Put the lid on and set to cook on high for 2 to 4 hours or low for 4 to 6 hours or until the chicken is completely cooked and the potatoes are tender.

Step 6: To serve plates, transfer the chicken and vegetables. If desired, pour the cooking liquid through a strainer. Stir well and season according to taste. Serve the chicken and veggies with the sauce and lemon wedges on the side. Enjoy!

Note:

If you prefer crispy chicken skin, place the cooked chicken on a foil-lined sheet pan and lightly brush it with olive oil. Place in the oven about 10 inches from the upper heating element. Broil for approximately 3 to 7 minutes.

Nutrition Facts:

Amount Per Serving: Calories 419, Calories from Fat 171, Fat 19g29%, Saturated Fat 3g15%, Polyunsaturated Fat 2g, Monounsaturated Fat 10g, Cholesterol 105mg35%, Sodium 499mg21%, Potassium 241mg7%, Carbohydrates 36g12%, Fiber 5g20%, Sugar 5g6%, Protein 27g54%, Vitamin A 8400IU168%, Vitamin C 11.6mg14%, Calcium 20mg2%, Iron 1.4mg8%

Slow Cooker Chicken Thighs

Rebecca Prep Time: 15 mins | Cook Time: 2 hrs | Total Time: 2 hrs 15 mins | Servings: 4 This slow cooker dish is a complete meal with lush chicken… General Recipes Slow Cooker Chicken Thighs European Print This
Serves: 4 Prep Time: 15 mins Cooking Time: 2 hrs 2 hrs
Nutrition facts: 419 calories 19 fat
Rating: 5.0/5
( 1 voted )

Ingredients

  • 2 tbsp olive oil
  • 4 chicken thighs, bone-in, about 1 to 1 ½ lb
  • 1 ear of corn, cut into 4 pieces
  • 1 c. red onion, 1-inch dice
  • 1 lb baby red potatoes, cut in half
  • 1 ½ c. carrots, 1-inch pieces
  • 2 tbsp garlic, roughly chopped
  • 3 tbsp all-purpose flour
  • 1 ¼ c. unsalted chicken stock
  • 4 sprigs thyme
  • 2 sprigs rosemary
  • 1 tbsp lemon juice, plus 4 wedges for serving
  • 1 tsp kosher salt, plus more for seasoning
  • ¼ tsp black pepper, plus more for seasoning

Instructions

Step 1: After trimming the excess skin and fat from the chicken thighs, sprinkle all sides with salt and pepper.

Step 2: To a hot large skillet over medium-high heat, add 2 tbsp olive oil. Then, add the chicken, skin-side down, and cook for about 5 minutes or until golden. Flip the chicken and continue to cook the other side for 2 minutes more. To a clean plate, transfer the chicken when done.

Step 3: To a slow cooker, add the onion, carrot, potatoes, corn, and garlic.

Step 4: Place 1 tsp salt, ½ tsp pepper, chicken stock, flour, and lemon juice in a medium-sized bowl. Mix well and add to the slow cooker. Next, add the chicken along with thyme and rosemary.

Step 5: Put the lid on and set to cook on high for 2 to 4 hours or low for 4 to 6 hours or until the chicken is completely cooked and the potatoes are tender.

Step 6: To serve plates, transfer the chicken and vegetables. If desired, pour the cooking liquid through a strainer. Stir well and season according to taste. Serve the chicken and veggies with the sauce and lemon wedges on the side. Enjoy!

Notes

If you prefer crispy chicken skin, place the cooked chicken on a foil-lined sheet pan and lightly brush it with olive oil. Place in the oven about 10 inches from the upper heating element. Broil for approximately 3 to 7 minutes.

July 19, 2022 0 comment
0 FacebookTwitterPinterestEmail
General Recipes

French Onion Stuffed Meatloaf

by Rebecca July 19, 2022
written by Rebecca

Prep time: 20 mins | Cook time: 1 hr 20 mins | Total time: 1 hr 40 mins | Servings: 6

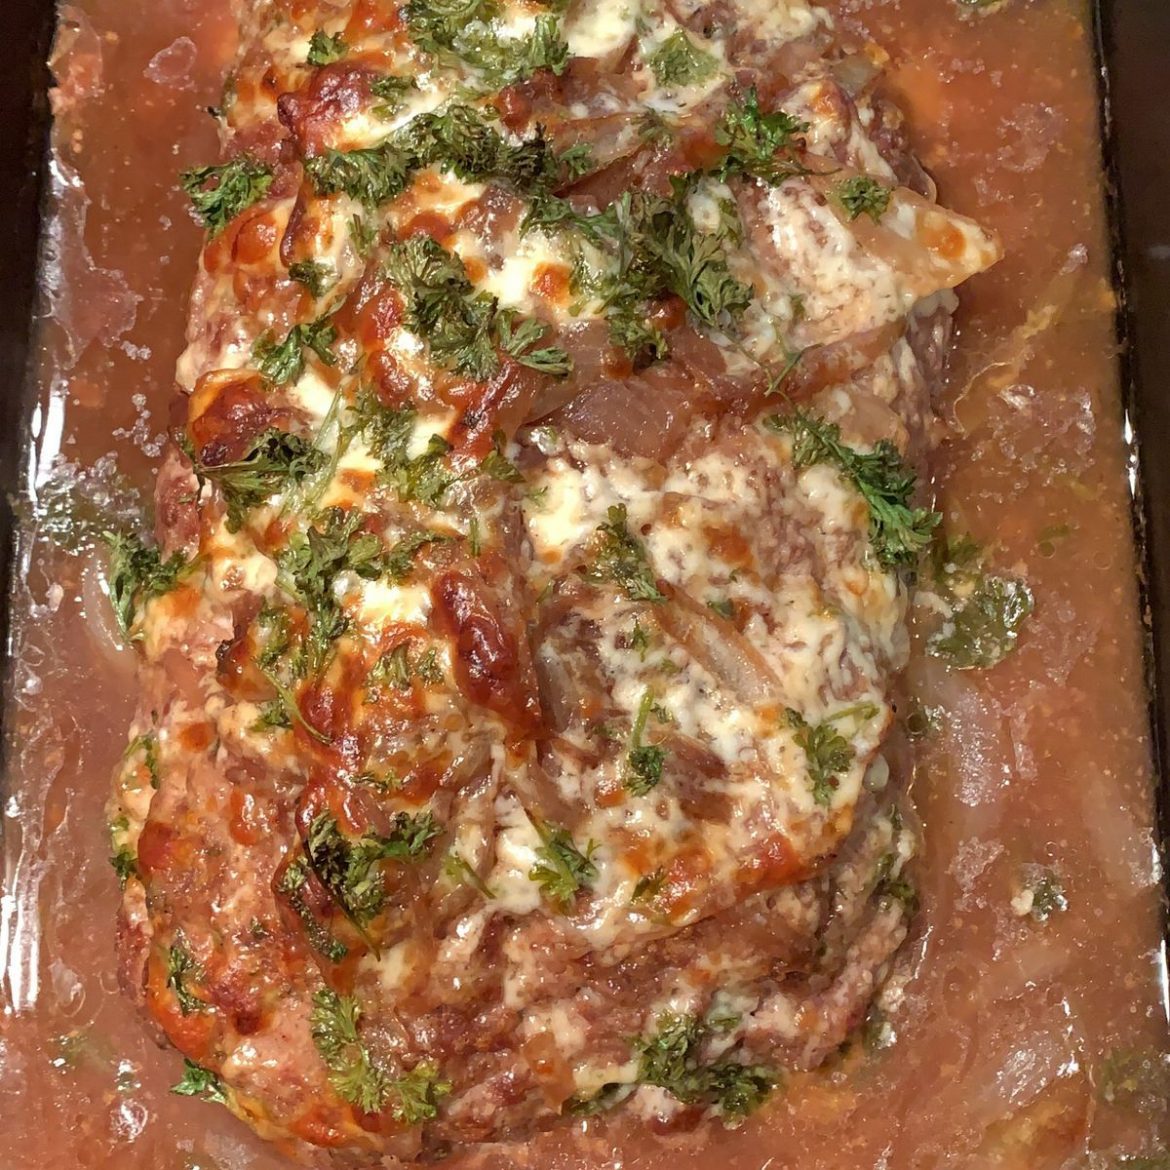
This French Onion Stuffed Meatloaf is the best meatloaf you could ever make! It is oozing with melty mozzarella cheese and loaded with caramelized onions. This meatloaf screams comfort all way through!

Ingredients

Caramelized Onions:

3 onions, halved and thinly sliced

1 tbsp olive oil

½ tbsp fresh thyme or ½ tsp dried thyme

¼ c. beef broth

¼ c. red wine I used Gallo Family Cabernet Sauvignon, but Pinot Noir or Merlot would also work great

1 tsp kosher salt

½ tsp pepper

Meatloaf:

2 eggs, lightly beaten

2 pounds lean ground beef

2 tbsp minced fresh parsley

1/2 c. bread crumbs or instant or slightly ground oats gluten-free, if needed

Fresh chopped parsley for garnish optional

8 ounces mozzarella cheese, shredded, divided

1 tsp kosher salt

1 tsp pepper

Sauce:

1/2 c. red wine I used Gallo Family Cabernet Sauvignon, but Pinot Noir or Merlot would also be great

2 1/2 c. beef broth

salt & pepper to taste

3 tbsp cornstarch

How to make French Onion Stuffed Meatloaf

Onions:

Step 1: In a skillet, heat the oil over medium heat. Then, add the onions and sprinkle with salt and pepper. Cook the onions for about 15 to 20 minutes or until caramelized, stirring often.

Step 2: Next, add the thyme and saute for another minute or two before adding the wine and beef broth. Continue to cook until only very little liquid remains in the pan. Set aside when done.

Meatloaf:

Step 3: Prepare the oven. Preheat it to 350 degrees F.

Step 4: Place the ground beef, bread crumbs or oats, parsley, pepper, salt, and eggs in a bowl. Using your hands, gently combine the ingredients until mixed. Make sure not to overwork the meat.

Step 5: Press the meat mixture on a piece of plastic wrap or wax paper into about a 10 x 12-inch rectangle.

Step 6: Reserve half a cup each of the shredded mozzarella cheese and caramelized onions. And evenly sprinkle the rest over the ground beef. Roll the mixture up like a jelly roll, beginning from the short end, lifting the wax paper or plastic wrap as you roll. Completely seal the end and place the meatloaf into a 9 x 13-inch baking pan, seam-side down.

Step 7: In the preheated oven, place the pan and bake the meatloaf for about 45 minutes.

Step 8: In the meantime, place the sauce ingredients in a small saucepan. Mix well and bring the sauce to a boil on medium heat. Let it simmer until reduced and thickened.

Step 9: Take the meatloaf out of the oven and pour the sauce over it. Sprinkle the reserved onions and cheese on top. Resume baking for another 15 to 20 minutes or until no pink remains, and the internal temperature of the meatloaf reaches 160 degrees F. Then, broil the meatloaf for about 2 to 3 minutes or until the cheese has browned and bubbly.
Step 10: Before serving, let the meatloaf stand for about 10 minutes. Then, slice and serve. If desired, garnish the meatloaf with some fresh parsley. Enjoy!

Notes:

In an airtight container, keep the cooled meatloaf and store it in the fridge for up to 3 to 4 days.

When reheating, tent the meatloaf with aluminium foil and pop it in the oven. Reheat for about 25 minutes at 250 degrees F or until hot. To prevent the meatloaf from getting dry, pour some beef broth over the meatloaf. Or reheat individual servings in the microwave.

Nutrition Facts:

Amount Per Serving: Calories 588, Calories from Fat 324, Fat 36g55%, Saturated Fat 15g75%, Trans Fat 1g, Polyunsaturated Fat 2g, Monounsaturated Fat 15g, Cholesterol 187mg62%, Sodium 1613mg67%, Potassium 708mg20%, Carbohydrates 18g6%, Fiber 2g8%, Sugar 4g4%, Protein 42g84%, Vitamin A 479IU10%, Vitamin C 7mg8%, Calcium 267mg27%, Iron 5mg28%

French Onion Stuffed Meatloaf

Rebecca Prep time: 20 mins | Cook time: 1 hr 20 mins | Total time: 1 hr 40 mins | Servings: 6 This French Onion Stuffed Meatloaf is the best meatloaf… General Recipes French Onion Stuffed Meatloaf European Print This
Serves: 6 Prep Time: 20 mins Cooking Time: 1 hr 20 mins 1 hr 20 mins
Nutrition facts: 588 calories 36 fat
Rating: 5.0/5
( 1 voted )

Ingredients

  • Caramelized Onions:
  • 3 onions, halved and thinly sliced
  • 1 tbsp olive oil
  • ½ tbsp fresh thyme or ½ tsp dried thyme
  • ¼ c. beef broth
  • ¼ c. red wine I used Gallo Family Cabernet Sauvignon, but Pinot Noir or Merlot would also work great
  • 1 tsp kosher salt
  • ½ tsp pepper
  • Meatloaf:
  • 2 eggs, lightly beaten
  • 2 pounds lean ground beef
  • 2 tbsp minced fresh parsley
  • 1/2 c. bread crumbs or instant or slightly ground oats gluten-free, if needed
  • Fresh chopped parsley for garnish optional
  • 8 ounces mozzarella cheese, shredded, divided
  • 1 tsp kosher salt
  • 1 tsp pepper
  • Sauce:
  • 1/2 c. red wine I used Gallo Family Cabernet Sauvignon, but Pinot Noir or Merlot would also be great
  • 2 1/2 c. beef broth
  • salt & pepper to taste
  • 3 tbsp cornstarch

Instructions

Onions:

Step 1: In a skillet, heat the oil over medium heat. Then, add the onions and sprinkle with salt and pepper. Cook the onions for about 15 to 20 minutes or until caramelized, stirring often.

Step 2: Next, add the thyme and saute for another minute or two before adding the wine and beef broth. Continue to cook until only very little liquid remains in the pan. Set aside when done.

Meatloaf:

Step 3: Prepare the oven. Preheat it to 350 degrees F.

Step 4: Place the ground beef, bread crumbs or oats, parsley, pepper, salt, and eggs in a bowl. Using your hands, gently combine the ingredients until mixed. Make sure not to overwork the meat.

Step 5: Press the meat mixture on a piece of plastic wrap or wax paper into about a 10 x 12-inch rectangle.

Step 6: Reserve half a cup each of the shredded mozzarella cheese and caramelized onions. And evenly sprinkle the rest over the ground beef. Roll the mixture up like a jelly roll, beginning from the short end, lifting the wax paper or plastic wrap as you roll. Completely seal the end and place the meatloaf into a 9 x 13-inch baking pan, seam-side down.

Step 7: In the preheated oven, place the pan and bake the meatloaf for about 45 minutes.

Step 8: In the meantime, place the sauce ingredients in a small saucepan. Mix well and bring the sauce to a boil on medium heat. Let it simmer until reduced and thickened.

Step 9: Take the meatloaf out of the oven and pour the sauce over it. Sprinkle the reserved onions and cheese on top. Resume baking for another 15 to 20 minutes or until no pink remains, and the internal temperature of the meatloaf reaches 160 degrees F. Then, broil the meatloaf for about 2 to 3 minutes or until the cheese has browned and bubbly.
Step 10: Before serving, let the meatloaf stand for about 10 minutes. Then, slice and serve. If desired, garnish the meatloaf with some fresh parsley. Enjoy!

Notes

In an airtight container, keep the cooled meatloaf and store it in the fridge for up to 3 to 4 days. When reheating, tent the meatloaf with aluminium foil and pop it in the oven. Reheat for about 25 minutes at 250 degrees F or until hot. To prevent the meatloaf from getting dry, pour some beef broth over the meatloaf. Or reheat individual servings in the microwave.

July 19, 2022 0 comment
0 FacebookTwitterPinterestEmail
General Recipes

Thick Peanut Butter Chocolate Chip Cookies

by Rebecca July 19, 2022
written by Rebecca

PREP TIME: 10 MINS | COOK TIME: 12 MINS | CHILLING TIME: 1 HR 15 MINS | TOTAL TIME: 22 minutes | SERVINGS: 14 cookies

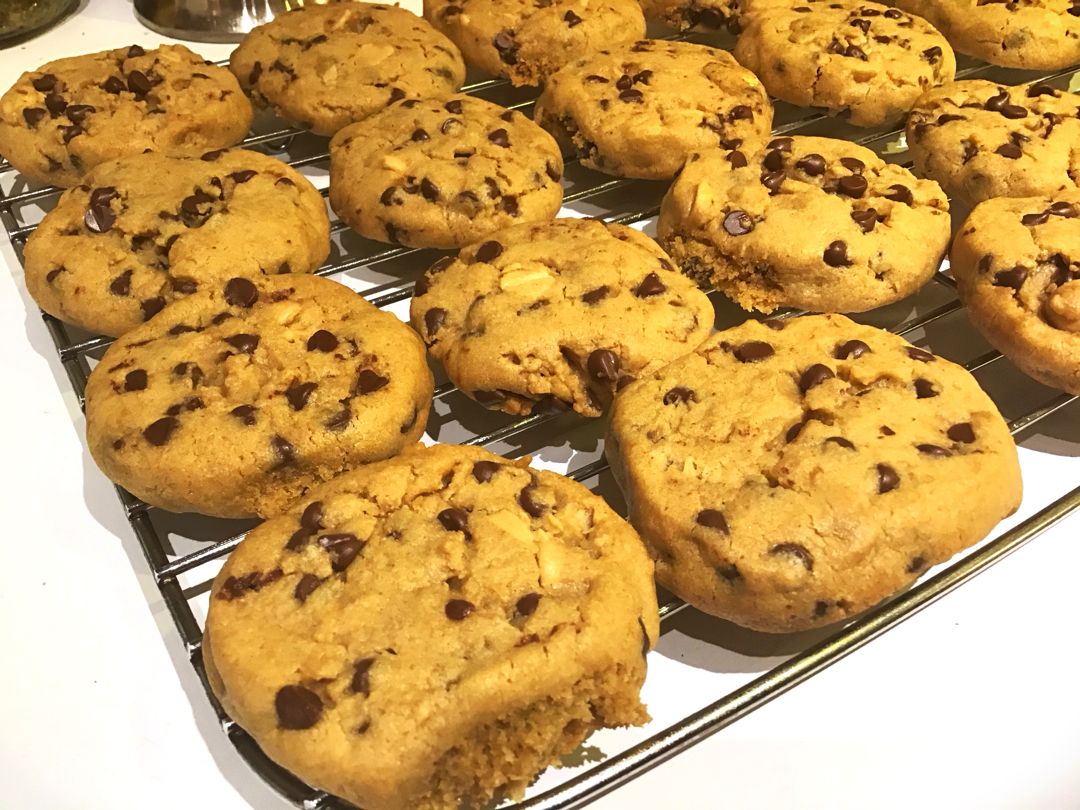
These are the best peanut butter chocolate chip cookies! Thick, decadent, and absolutely amazing! If you enjoy cookies, I am pretty sure that you’ll dig these divine cookies. Made with just a few simple ingredients and ready in no time, these thick peanut butter cookies filled with chocolate chips are to die for!

INGREDIENTS

1 egg, at room temperature

1/4 c. butter (salted) softened (if using unsalted butter, add 1/4 tsp salt)

1/2 c. peanut butter

1/2 c. brown sugar, lightly packed

1 c. flour

3/4 c. mini semi-sweet chocolate chips

1/2 tsp baking soda

1 pinch salt

How to make Thick Peanut Butter Chocolate Chip Cookies

Step 1: Place the peanut butter, butter, sugar, and add egg in a medium bowl. Mix well until light.

Step 2: Combine the flour, salt, and baking soda in a medium bowl, then fold in the chocolate chips.

Step 3: To the creamed mixture, add the whisked ingredients and mix well using a wooden spoon.

Step 4: Form the mixture into about 8 x 2 1/2 inches (20 x 6 cm) log, then wrap the log with plastic and keep it in the fridge for at least an hour or up to overnight. Alternately, you can shape the mixture into golf ball size dough balls (or larger), lay them on cookie sheets, and place them in the fridge.

Step 5: When ready to bake, take the log or ball out of the fridge. Slice the log into 1/4 inch pieces using a sharp knife and place it on parchment paper-lined cookie sheets. Using a lightly floured fork, flatten the dough balls. Let them sit in the fridge for about 15 minutes, then bake for about 10 to 12 minutes in a preheated 350 degrees F or 180 degrees C oven.

Step 6: Remove from the oven when done and allow the cookies to cool fully before serving. Enjoy!

NUTRITION FACTS:

Calories: 223 kcal, Carbohydrates: 22g, Protein: 4g, Fat: 13g, Saturated Fat: 5g, Cholesterol: 21mg, Sodium: 121mg, Potassium: 156mg, Fiber: 1g, Sugar: 13g, Vitamin A: 125IU, Calcium: 22mg, Iron: 1.5mg

Thick Peanut Butter Chocolate Chip Cookies

Rebecca PREP TIME: 10 MINS | COOK TIME: 12 MINS | CHILLING TIME: 1 HR 15 MINS | TOTAL TIME: 22 minutes | SERVINGS: 14 cookies These are the best peanut… General Recipes Thick Peanut Butter Chocolate Chip Cookies European Print This
Serves: 14 Prep Time: 10 mins Cooking Time: 12 mins 12 mins
Nutrition facts: 223 calories 13 fat
Rating: 5.0/5
( 1 voted )

Ingredients

  • 1 egg, at room temperature
  • 1/4 c. butter (salted) softened (if using unsalted butter, add 1/4 tsp salt)
  • 1/2 c. peanut butter
  • 1/2 c. brown sugar, lightly packed
  • 1 c. flour
  • 3/4 c. mini semi-sweet chocolate chips
  • 1/2 tsp baking soda
  • 1 pinch salt

Instructions

Step 1: Place the peanut butter, butter, sugar, and add egg in a medium bowl. Mix well until light.

Step 2: Combine the flour, salt, and baking soda in a medium bowl, then fold in the chocolate chips.

Step 3: To the creamed mixture, add the whisked ingredients and mix well using a wooden spoon.

Step 4: Form the mixture into about 8 x 2 1/2 inches (20 x 6 cm) log, then wrap the log with plastic and keep it in the fridge for at least an hour or up to overnight. Alternately, you can shape the mixture into golf ball size dough balls (or larger), lay them on cookie sheets, and place them in the fridge.

Step 5: When ready to bake, take the log or ball out of the fridge. Slice the log into 1/4 inch pieces using a sharp knife and place it on parchment paper-lined cookie sheets. Using a lightly floured fork, flatten the dough balls. Let them sit in the fridge for about 15 minutes, then bake for about 10 to 12 minutes in a preheated 350 degrees F or 180 degrees C oven.

Step 6: Remove from the oven when done and allow the cookies to cool fully before serving. Enjoy!

July 19, 2022 0 comment
0 FacebookTwitterPinterestEmail
General Recipes

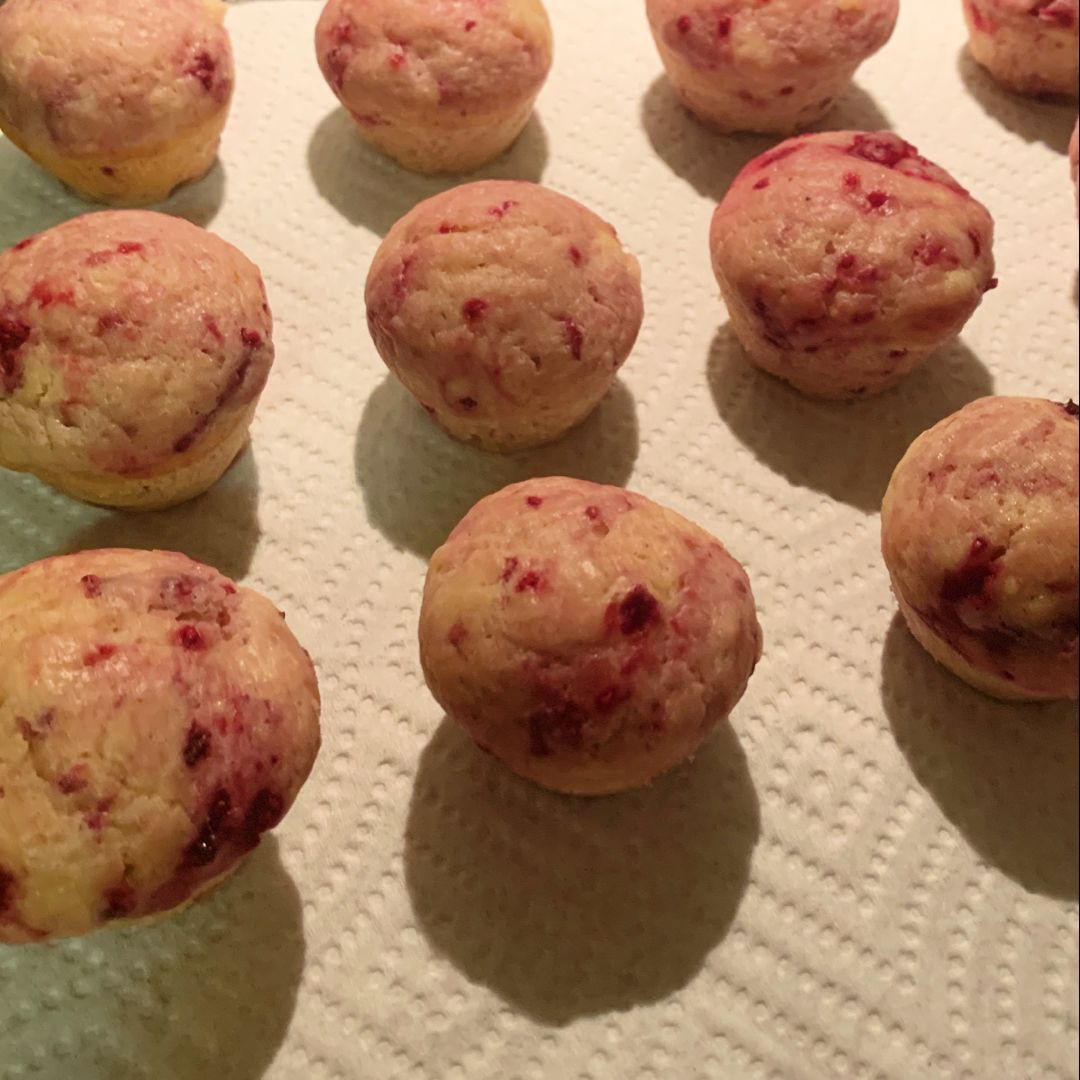
LEMON RASPBERRY MUFFINS

by Rebecca July 19, 2022
written by Rebecca

Prep Time: 10 mins | Cook Time: 15 mins | Total Time: 25 mins | Servings: 12 Muffins

I love delicious sweet treats that I can easily and quickly make at any time, just like these lemon raspberry muffins. These are great to serve for breakfast or even for afternoon tea. And also an amazing low-sugar lunchbox treat option for the kids.

INGREDIENTS

1/2 c. (120ml) Canola Oil

2 eggs

1 2/3 c. (250 grams) Plain Flour

1 c. (100 grams) Raspberries, fresh or Frozen

1/3 c. (70 grams) Caster Sugar

1/2 teaspoon Baking Soda

1 1/2 teaspoons Baking Powder

1/3 c. (90ml) Sour Cream (or Greek Yogurt)

1 Lemon, Juice, and Zest (about 60 ml – 1/4 c. of juice)

HOW TO MAKE LEMON RASPBERRY MUFFINS

Step 1: Prepare the oven. Preheat it to 180 degrees C or 350 degrees F. Using muffin paper cups, line a muffin tray.

Step 2: Place the dry ingredients (plain flour, caster sugar, baking powder, and baking soda) in a large bowl. Mix well until combined.

Step 3: In another bowl, place the wet ingredients (eggs, sour cream, lemon juice, lemon zest, and canola oil). Mix well until blended.

Step 4: To the wet ingredients, gradually add the dry ingredients, stirring until incorporated. Then, gently fold in the Raspberries.

Step 5: Into the prepared muffin cups pour the batter. Place in the preheated oven and bake for about 15 to 20 minutes or until the tip of a knife inserted in the center of the muffin comes out clean. Remove from the oven when done and let the muffins cool.

Step 6: Store the lemon raspberry muffins for up to 3 days in an airtight container, or you can individually freeze them for up to 2 months.

NOTE:

Remove the frozen raspberries from the freezer for at least 30 minutes before making this recipe. Make sure that the raspberries are not completely frozen when added to the batter as it will sauce the batter around them to begin freezing.

NUTRITION FACTS:

Calories: 219 kcal | Carbohydrates: 24g | Protein: 3g | Fat: 12g | Saturated Fat: 2g | Cholesterol: 31mg | Sodium: 131mg | Potassium: 68mg | Fiber: 1g | Sugar: 7g | Vitamin A: 86IU | Vitamin C: 7mg | Calcium: 54mg | Iron: 1mg

LEMON RASPBERRY MUFFINS

Rebecca Prep Time: 10 mins | Cook Time: 15 mins | Total Time: 25 mins | Servings: 12 Muffins I love delicious sweet treats that I can easily and quickly make… General Recipes LEMON RASPBERRY MUFFINS European Print This
Serves: 12 Prep Time: 10 mins Cooking Time: 15 mins 15 mins
Nutrition facts: 219 calories 12 fat
Rating: 5.0/5
( 1 voted )

Ingredients

  • 1/2 c. (120ml) Canola Oil
  • 2 eggs
  • 1 2/3 c. (250 grams) Plain Flour
  • 1 c. (100 grams) Raspberries, fresh or Frozen
  • 1/3 c. (70 grams) Caster Sugar
  • 1/2 teaspoon Baking Soda
  • 1 1/2 teaspoons Baking Powder
  • 1/3 c. (90ml) Sour Cream (or Greek Yogurt)
  • 1 Lemon, Juice, and Zest (about 60 ml - 1/4 c. of juice)

Instructions

Step 1: Prepare the oven. Preheat it to 180 degrees C or 350 degrees F. Using muffin paper cups, line a muffin tray.

Step 2: Place the dry ingredients (plain flour, caster sugar, baking powder, and baking soda) in a large bowl. Mix well until combined.

Step 3: In another bowl, place the wet ingredients (eggs, sour cream, lemon juice, lemon zest, and canola oil). Mix well until blended.

Step 4: To the wet ingredients, gradually add the dry ingredients, stirring until incorporated. Then, gently fold in the Raspberries.

Step 5: Into the prepared muffin cups pour the batter. Place in the preheated oven and bake for about 15 to 20 minutes or until the tip of a knife inserted in the center of the muffin comes out clean. Remove from the oven when done and let the muffins cool.

Step 6: Store the lemon raspberry muffins for up to 3 days in an airtight container, or you can individually freeze them for up to 2 months.

Notes

Remove the frozen raspberries from the freezer for at least 30 minutes before making this recipe. Make sure that the raspberries are not completely frozen when added to the batter as it will sauce the batter around them to begin freezing.

July 19, 2022 0 comment
0 FacebookTwitterPinterestEmail
General Recipes

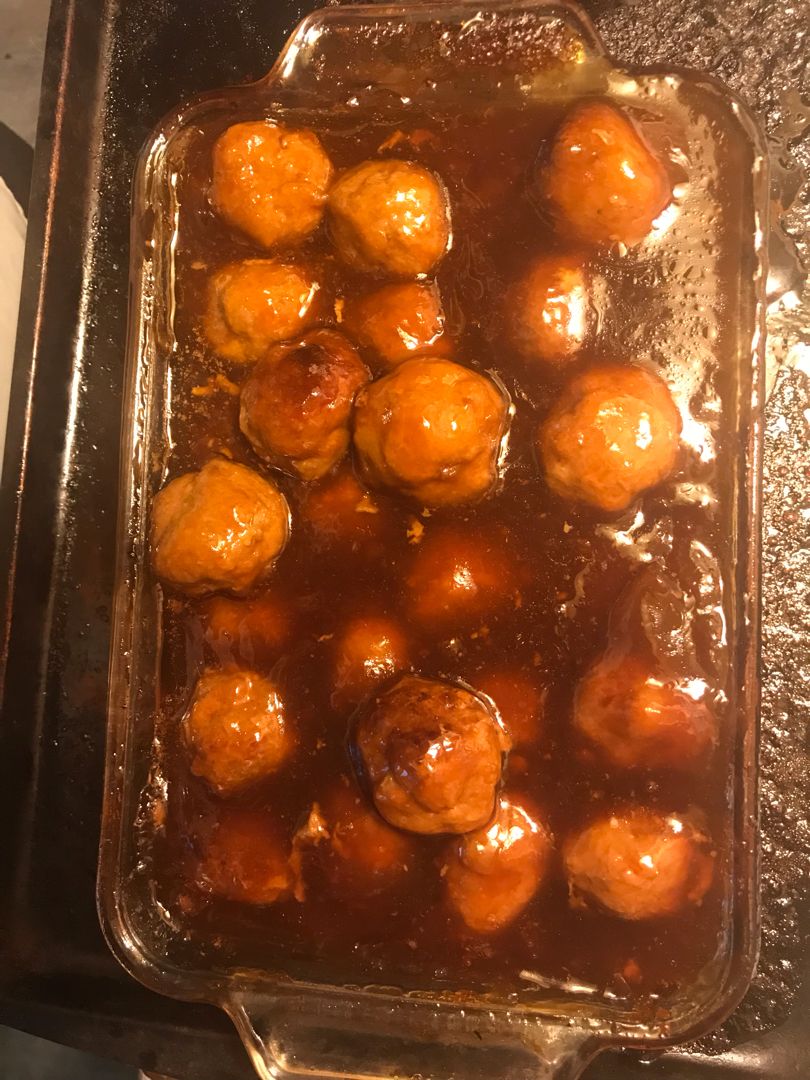
Sweet and Sour Meatballs Recipe

by Rebecca July 19, 2022
written by Rebecca

Prep Time: 5 mins | Cook Time: 40 mins | Total Time: 45 mins | Servings: 24 meatballs

I love meatballs, and I have tried many different meatballs recipes, but this sweet and sour meatballs recipe is my favorite! Just like other meatballs recipes, this too is very easy and quick to whip up. These flavor-packed meatballs in a retro, oh-so-tasty saucy sweet and sour sauce are not only great as a meal served over rice, but also as an appetizer. If serving a crowd, easily double this recipe, too!

Ingredients

Meatball:

2 large eggs

2 lbs ground beef

1 tsp minced garlic

1/2 c. dry bread crumbs

1 c. of diced onion – optional

1 tsp salt

1 tsp black pepper

Sweet and Sour Sauce:

1 1/2 c. water

1 c. packed brown sugar

1/4 c. distilled white vinegar

1/4 c. ketchup

3 tbsp soy sauce

3 tbsp all-purpose flour or cornstarch

How to make Sweet and Sour Meatballs

Step 1: Prepare the oven. Preheat it to 375 degrees F.

Step 2: In a medium-sized saucepan, whisk the sauce ingredients until completely mixed. Bring everything to a low rolling boil and cook until thickened. Set the sauce aside when done.

Step 3: In a stand mixer bowl, place the meatball ingredients (breadcrumbs, garlic, salt, pepper, egg, onions, and ground beef). Mix on low using the paddle attachment until blended.

Step 4: Into your preferred meatball size, roll the meat mixture. Bake the meatballs in the preheated oven for about 20 minutes, taking the meatballs out for a second to drain the fat out.

Step 5: Pour the sauce over the meatballs, covering them completely. Return to the oven and continue to cook for an additional 20 to 30 minutes until done. Note that the cooking time of the meatballs depends on their size. The meatballs are done when their internal temperature reaches at least 165 degrees.

Step 6: Serve the sweet and sour meatballs over rice with your preferred side. Enjoy!

Nutrition Facts:

Calories: 156 kcal, Carbohydrates: 12g, Protein: 7g, Fat: 8g, Saturated Fat: 3g, Cholesterol: 42mg, Sodium: 296mg, Potassium: 146mg, Sugar: 9g, Vitamin A: 35IU, Vitamin C: 0.7mg, Calcium: 23mg, Iron: 1.1mg

Sweet and Sour Meatballs Recipe

Rebecca Prep Time: 5 mins | Cook Time: 40 mins | Total Time: 45 mins | Servings: 24 meatballs I love meatballs, and I have tried many different meatballs recipes, but… General Recipes Sweet and Sour Meatballs Recipe European Print This
Serves: 24 Prep Time: 5 mins Cooking Time: 40 mins 40 mins
Nutrition facts: 156 calories 8 fat
Rating: 5.0/5
( 1 voted )

Ingredients

  • Meatball:
  • 2 large eggs
  • 2 lbs ground beef
  • 1 tsp minced garlic
  • 1/2 c. dry bread crumbs
  • 1 c. of diced onion - optional
  • 1 tsp salt
  • 1 tsp black pepper
  • Sweet and Sour Sauce:
  • 1 1/2 c. water
  • 1 c. packed brown sugar
  • 1/4 c. distilled white vinegar
  • 1/4 c. ketchup
  • 3 tbsp soy sauce
  • 3 tbsp all-purpose flour or cornstarch

Instructions

Step 1: Prepare the oven. Preheat it to 375 degrees F.

Step 2: In a medium-sized saucepan, whisk the sauce ingredients until completely mixed. Bring everything to a low rolling boil and cook until thickened. Set the sauce aside when done.

Step 3: In a stand mixer bowl, place the meatball ingredients (breadcrumbs, garlic, salt, pepper, egg, onions, and ground beef). Mix on low using the paddle attachment until blended.

Step 4: Into your preferred meatball size, roll the meat mixture. Bake the meatballs in the preheated oven for about 20 minutes, taking the meatballs out for a second to drain the fat out.

Step 5: Pour the sauce over the meatballs, covering them completely. Return to the oven and continue to cook for an additional 20 to 30 minutes until done. Note that the cooking time of the meatballs depends on their size. The meatballs are done when their internal temperature reaches at least 165 degrees.

Step 6: Serve the sweet and sour meatballs over rice with your preferred side. Enjoy!

July 19, 2022 0 comment
0 FacebookTwitterPinterestEmail
General Recipes

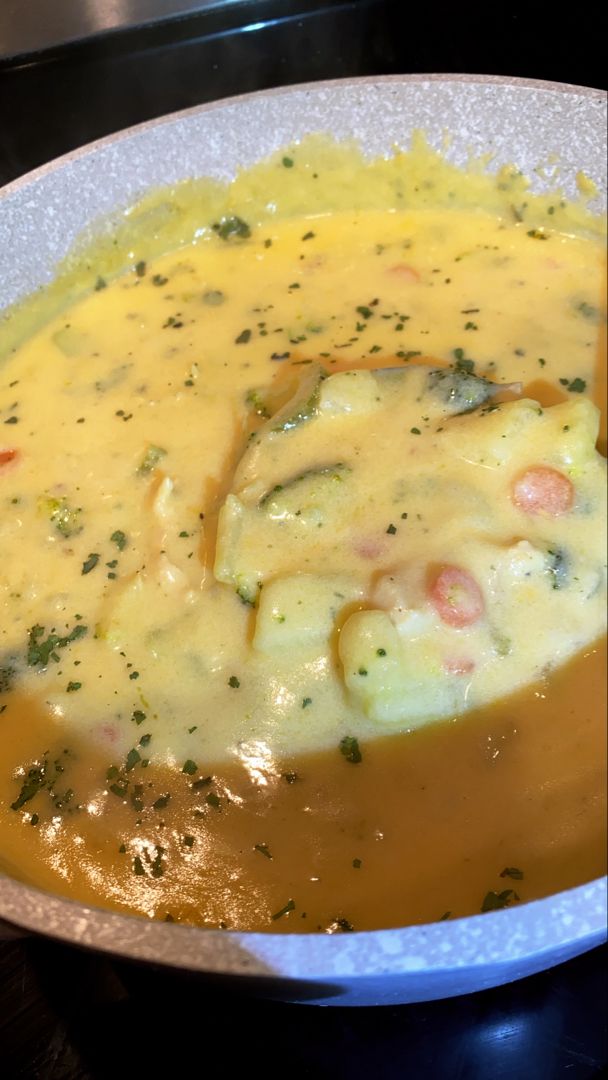
Broccoli Cheddar Soup

by Rebecca July 19, 2022
written by Rebecca

PREP TIME: 10 MINS | COOK TIME: 25 MINS | TOTAL TIME: 35 MINS | YIELD: 4 people

This broccoli cheddar soup has been one of my favorite go-to during cold weather. It is a thick and creamy soup packed with broccoli florets and tons of cheddar cheese. A flavor-packed and very comforting cheesy soup!

This recipe calls for only a few simple (readily available) ingredients. This soup serves four people, which is perfect for my small family. Make this amazing soup in about thirty minutes from start to finish. Ladle this soup to serving bowls and serve immediately.

I love this homemade broccoli soup. I have been making this for years. It’s very simple, but incredibly delicious! This recipe is perfect if you are searching for an easy broccoli soup recipe. Insanely good, even your fussiest eaters will love this comforting broccoli cheddar soup!

Ingredients

1 c. diced yellow onions

1/2 c. butter

3 c. chicken broth

1 tablespoon onion powder

3 c. milk

1 tablespoon garlic powder

3 c. shredded triple cheddar cheese blend

10 ounces broccoli florets, chopped

1/2 c. all-purpose flour

1 teaspoon salt

1 teaspoon pepper

How to make Broccoli Cheddar Soup

Step 1: Into a large pot over medium heat, add the butter. Let the butter melt, then add the diced onions. Cook until translucent. Next, add the flour and whisk well. Continue to cook for another 3 minutes, stirring often.

Step 2: To the pot, pour in the chicken broth and stir well until the mixture has thickened. Then, add the milk and stir well before stirring in the onion powder, garlic powder, salt, and pepper.

Step 3: To the pot, add the chopped broccoli florets and stir. Let the soup simmer for about 15 minutes over medium heat, stirring often.

Step 4: Take the pot off the heat when done and stir in the shredded cheddar cheese.

Step 5: Ladle the soup into bowls and serve right away. Enjoy!

Broccoli Cheddar Soup

Rebecca PREP TIME: 10 MINS | COOK TIME: 25 MINS | TOTAL TIME: 35 MINS | YIELD: 4 people This broccoli cheddar soup has been one of my favorite go-to during… General Recipes Broccoli Cheddar Soup European Print This
Serves: 4 Prep Time: 10 mins Cooking Time: 25 mins 25 mins
Nutrition facts: 200 calories 20 grams fat
Rating: 5.0/5
( 1 voted )

Ingredients

  • 1 c. diced yellow onions
  • 1/2 c. butter
  • 3 c. chicken broth
  • 1 tablespoon onion powder
  • 3 c. milk
  • 1 tablespoon garlic powder
  • 3 c. shredded triple cheddar cheese blend
  • 10 ounces broccoli florets, chopped
  • 1/2 c. all-purpose flour
  • 1 teaspoon salt
  • 1 teaspoon pepper

Instructions

Step 1: Into a large pot over medium heat, add the butter. Let the butter melt, then add the diced onions. Cook until translucent. Next, add the flour and whisk well. Continue to cook for another 3 minutes, stirring often.

Step 2: To the pot, pour in the chicken broth and stir well until the mixture has thickened. Then, add the milk and stir well before stirring in the onion powder, garlic powder, salt, and pepper.

Step 3: To the pot, add the chopped broccoli florets and stir. Let the soup simmer for about 15 minutes over medium heat, stirring often.

Step 4: Take the pot off the heat when done and stir in the shredded cheddar cheese.

Step 5: Ladle the soup into bowls and serve right away. Enjoy!

July 19, 2022 0 comment
0 FacebookTwitterPinterestEmail
General Recipes

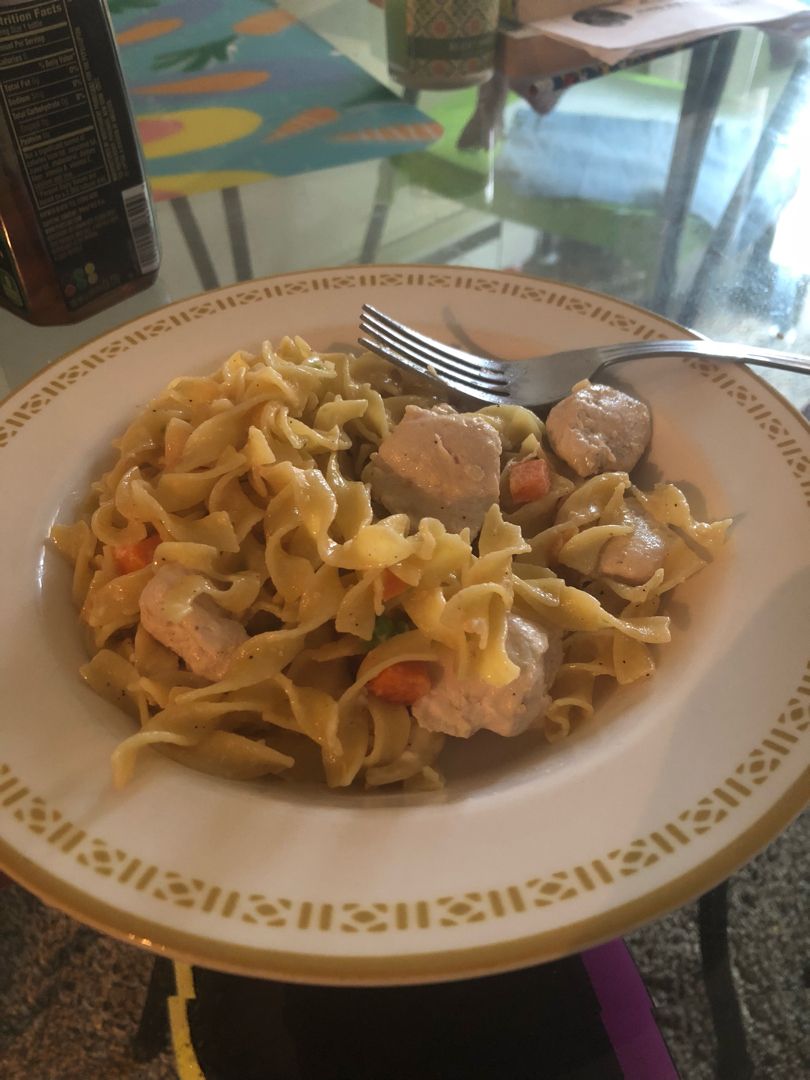
Chicken Pot Pie Noodle Skillet

by Rebecca July 19, 2022
written by Rebecca

Prep Time: 15 mins | Cook Time: 10 mins | Total Time: 25 mins | Servings: 6

If you are looking for another amazing weeknight meal that your entire family will love, then you have to give this chicken pot pie noodle skillet a try. It is incredibly easy to make using only a few simple ingredients and have this ready on your dinner table in under twenty-five minutes. This dish is a classic and one of my ultimate favorites for years! Instead of a crust, I used noodles to transform this chicken pot pie into an easy and quick skillet dish.

This skillet meal is loaded with peas, carrots, chicken, and cooked egg noodles. It is an awesome recipe to use leftover noodles and chicken. The perfect dinner option for a great weeknight meal!

Ingredients

1 1/2 c. cooked chicken breast, cut into small cubes

2 cloves garlic, minced

2 tbsp unsalted butter

1 medium sweet onion, diced

1 1/2 c. frozen peas and carrots, thawed

1 c. low-sodium chicken broth

2 tbsp all-purpose flour

1 c. heavy cream

10 oz. egg noodles

1/2 tsp kosher salt

1/4 tsp black pepper

How to make Chicken Pot Pie Noodle Skillet

Step 1: Following the package directions, cook the noodles until al dente.

Step 2: Melt the butter in a large skillet over medium-high heat. Once the butter has melted, add the onion, garlic, peas, and carrots to the skillet and season with salt and pepper. Cook for approximately 3 minutes or until the onions have softened and are translucent. Then, whisk in the flour until blended.

Step 3: To the skillet, pour in the chicken broth and heavy cream. Bring everything to a boil, then decrease to a simmer. Continue to cook for another 5 minutes, stirring often until thickened.

Step 4: Once the pasta is done, drain and add to the skillet. Add the chicken and season with extra salt and pepper if needed.

Step 5: Serve the chicken pot pie noodle immediately. Enjoy!

Nutrition Facts:

Serving: 6servings | Calories: 445 kcal | Carbohydrates: 41g | Protein: 20g | Fat: 22g | Saturated Fat: 12g | Cholesterol: 133mg | Sodium: 284mg | Potassium: 336mg | Fiber: 2g | Sugar: 1g | Vitamin A: 4055IU | Vitamin C: 4.5mg | Calcium: 59mg | Iron: 1.8mg

Chicken Pot Pie Noodle Skillet

Rebecca Prep Time: 15 mins | Cook Time: 10 mins | Total Time: 25 mins | Servings: 6 If you are looking for another amazing weeknight meal that your entire family… General Recipes Chicken Pot Pie Noodle Skillet European Print This
Serves: 6 Prep Time: 15 mins Cooking Time: 10 mins 10 mins
Nutrition facts: 445 calories 22 fat
Rating: 5.0/5
( 2 voted )

Ingredients

  • 1 1/2 c. cooked chicken breast, cut into small cubes
  • 2 cloves garlic, minced
  • 2 tbsp unsalted butter
  • 1 medium sweet onion, diced
  • 1 1/2 c. frozen peas and carrots, thawed
  • 1 c. low-sodium chicken broth
  • 2 tbsp all-purpose flour
  • 1 c. heavy cream
  • 10 oz. egg noodles
  • 1/2 tsp kosher salt
  • 1/4 tsp black pepper

Instructions

Step 1: Following the package directions, cook the noodles until al dente.

Step 2: Melt the butter in a large skillet over medium-high heat. Once the butter has melted, add the onion, garlic, peas, and carrots to the skillet and season with salt and pepper. Cook for approximately 3 minutes or until the onions have softened and are translucent. Then, whisk in the flour until blended.

Step 3: To the skillet, pour in the chicken broth and heavy cream. Bring everything to a boil, then decrease to a simmer. Continue to cook for another 5 minutes, stirring often until thickened.

Step 4: Once the pasta is done, drain and add to the skillet. Add the chicken and season with extra salt and pepper if needed.

Step 5: Serve the chicken pot pie noodle immediately. Enjoy!

July 19, 2022 0 comment
0 FacebookTwitterPinterestEmail
General Recipes

Meltaway Cinnamon Muffins | Cinnamon Muffin Recipe

by Rebecca July 19, 2022
written by Rebecca

Prep Time: 10 mins | Cook Time: 12 mins | Total Time: 22 mins | Yield: 24

Melt-in-your-mouth cinnamon muffins are easily made with a few simple ingredients. These muffins are a great treat dipped in butter and rolled in cinnamon sugar. If you love cinnamon, I am pretty sure that you’ll fall head over heels with these mini melt-away cinnamon muffins! Make sure to always whip up a big batch because these cinnamon muffins are gone way too fast!

These cinnamon muffins are best served warm. But if you are planning to keep these for an easy and quick dessert, all you need to do is store the muffins that are not yet coated in butter and cinnamon sugar for up to 3 days in an airtight container. When ready to serve, warm and coat in butter and cinnamon sugar.

Ingredients

1 egg

1 1/2 c. all-purpose flour

1 1/2 tsp baking powder

1 tsp cinnamon

3/4 c. milk

1/3 c. butter, softened

1/2 c. white granulated sugar

1 tsp vanilla

1/2 tsp salt

Topping:

1/2 c. white granulated sugar

1/2 c. butter, melted

1/2 tsp cinnamon

How to make Melt-Away Cinnamon Muffins

Step 1: Prepare the oven. Preheat it to 350 degrees.

Step 2: Mix the dry ingredients and set them aside.

Step 3: Place the egg, milk, butter, and vanilla in a large mixing bowl. Mix well until combined. Slowly stir in the dry ingredients until moist.

Step 4: Fill the greased mini muffin pan to just over 2/3 full. Place in the preheated oven and bake for about 12 minutes. Remove from the oven when done and let the muffins cool for about 5 minutes.

Step 5: Take the muffins out of the pan and coat them in butter. In the cinnamon sugar mixture, roll each muffin.

Tips:

If using salted butter, omit the salt.

Make sure not to overfill the muffin pan and overbake the muffins.

In an airtight container, keep the muffins that are not yet coated in butter and cinnamon sugar for up to 3 days. Before serving, warm the muffins, then dip them in butter and roll in cinnamon sugar mixture.

Nutrition Facts:

Calories: 125 kcal (6%), Carbohydrates: 14g (5%), Protein: 1g (2%), Fat: 6g (9%), Saturated Fat: 4g (20%), Cholesterol: 24mg (8%), Sodium: 111mg (5%), Potassium: 52mg (1%), Sugar: 8g (9%), Vitamin A: 220IU (4%), Calcium: 28mg (3%), Iron: 0.4mg (2%)

Meltaway Cinnamon Muffins | Cinnamon Muffin Recipe

Rebecca Prep Time: 10 mins | Cook Time: 12 mins | Total Time: 22 mins | Yield: 24 Melt-in-your-mouth cinnamon muffins are easily made with a few simple ingredients. These muffins… General Recipes Meltaway Cinnamon Muffins | Cinnamon Muffin Recipe European Print This
Serves: 24 Prep Time: 10 mins Cooking Time: 12 mins 12 mins
Nutrition facts: 125 calories 6 fat
Rating: 5.0/5
( 1 voted )

Ingredients

  • 1 egg
  • 1 1/2 c. all-purpose flour
  • 1 1/2 tsp baking powder
  • 1 tsp cinnamon
  • 3/4 c. milk
  • 1/3 c. butter, softened
  • 1/2 c. white granulated sugar
  • 1 tsp vanilla
  • 1/2 tsp salt
  • Topping:
  • 1/2 c. white granulated sugar
  • 1/2 c. butter, melted
  • 1/2 tsp cinnamon

Instructions

Step 1: Prepare the oven. Preheat it to 350 degrees.

Step 2: Mix the dry ingredients and set them aside.

Step 3: Place the egg, milk, butter, and vanilla in a large mixing bowl. Mix well until combined. Slowly stir in the dry ingredients until moist.

Step 4: Fill the greased mini muffin pan to just over 2/3 full. Place in the preheated oven and bake for about 12 minutes. Remove from the oven when done and let the muffins cool for about 5 minutes.

Step 5: Take the muffins out of the pan and coat them in butter. In the cinnamon sugar mixture, roll each muffin.

Notes

If using salted butter, omit the salt. Make sure not to overfill the muffin pan and overbake the muffins. In an airtight container, keep the muffins that are not yet coated in butter and cinnamon sugar for up to 3 days. Before serving, warm the muffins, then dip them in butter and roll in cinnamon sugar mixture.

July 19, 2022 0 comment
0 FacebookTwitterPinterestEmail
Newer Posts
Older Posts

Popular Posts

  • 1

    Crispy Crunchy Parmesan Potatoes

    March 21, 2020
  • 2

    CROCK POT SMOTHERED PORK CHOPS

    March 21, 2020
  • Facebook
  • Twitter

@2019 - All Right Reserved.


Back To Top