Cook it once
  • Home
  • Privacy Policy
  • Recipes
    • KETO
    • LC
    • WW
  • Tips
  • Contact
Cook it once
  • Home
  • Privacy Policy
  • Recipes
    • KETO
    • LC
    • WW
  • Tips
  • Contact
Category:

General Recipes

General Recipes

CRAB RANGOON EGG ROLLS

by Rebecca July 21, 2022
written by Rebecca

Yield: 8 servings

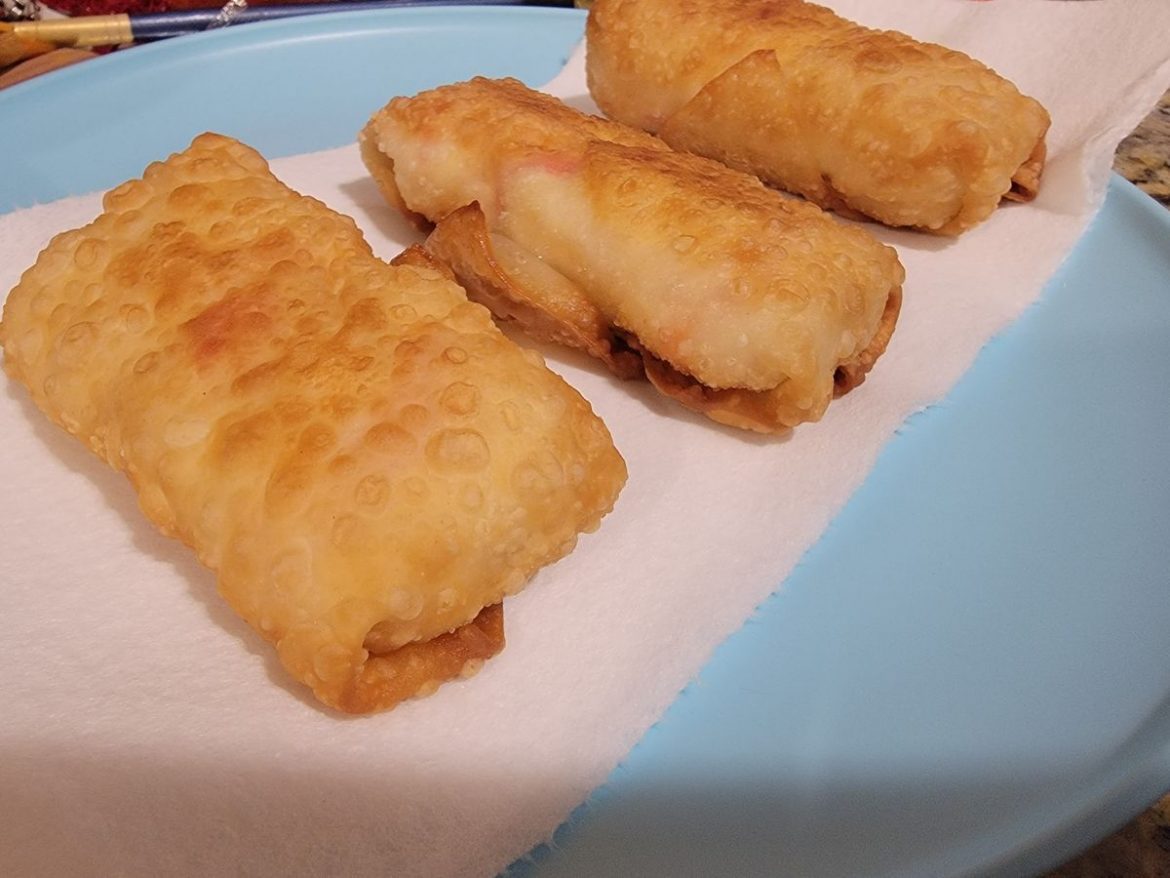
If you are searching for another winner party appetizer, then you have to give these Crab Rangoon Egg Rolls a try. These rolls are made with, cheese, fresh crab meat, and egg. To make this recipe a lot easier, we use pre-made egg roll skins. Everyone enjoys these delicious egg rolls. With the perfect balance of spices that filled the Crab Rangoon Egg Rolls, you are sure to fall in love with this delicious fried delicacy!

Ingredients

8–10 egg roll wrappers

2 (8 oz.) boxes of softened cream cheese

1 tsp garlic powder

3 green onions, chopped

½ tsp onion powder

1–2 tbsp Worcestershire sauce

Vegetable oil for frying

½ pound fresh white, cooked crab meat, flaked or diced

TO MAKE CRAB RANGOON EGG ROLLS

Step 1: In a food processor, place the cream cheese, Worcestershire sauce, garlic powder, onion powder, and green onions. Pulse for a few times until well mixed. Then, add the crab meat and mix again.

Step 2: In the middle of each egg roll wrapper, place around 3 rounded tbsp of the mixture, creating a short horizontal lump. Fold the wrapper, tuck in, and tightly roll. Using a little amount of water, seal the tip of the wrapper.

Step 3: Let the saucepan, heat to 375 degrees F. Once hot, add the rolls 2 to 3 at a time. Fry for about 1 to 2 minutes or until lightly brown.

Step 4: When done, transfer the fried egg rolls to paper towels to drain. Repeat to cook the rest of the rolls and serve warm. Enjoy!

Tips:

For this recipe, you can use other varieties of crab such as snow crab, Dungeness crab, blue crab, and stone crab.

Make sure to bring the cream cheese to room temperature.

Some of the best oils (high smoking oil) to use for this recipe are vegetables, canola, or peanut oil.

If desired, add Worcestershire sauce to taste.

CRAB RANGOON EGG ROLLS

Rebecca Yield: 8 servings If you are searching for another winner party appetizer, then you have to give these Crab Rangoon Egg Rolls a try. These rolls are made with, cheese,… General Recipes CRAB RANGOON EGG ROLLS European Print This
Serves: 8
Nutrition facts: 200 calories 20 grams fat
Rating: 5.0/5
( 1 voted )

Ingredients

  • 8–10 egg roll wrappers
  • 2 (8 oz.) boxes of softened cream cheese
  • 1 tsp garlic powder
  • 3 green onions, chopped
  • ½ tsp onion powder
  • 1–2 tbsp Worcestershire sauce
  • Vegetable oil for frying
  • ½ pound fresh white, cooked crab meat, flaked or diced

Instructions

Step 1: In a food processor, place the cream cheese, Worcestershire sauce, garlic powder, onion powder, and green onions. Pulse for a few times until well mixed. Then, add the crab meat and mix again.

Step 2: In the middle of each egg roll wrapper, place around 3 rounded tbsp of the mixture, creating a short horizontal lump. Fold the wrapper, tuck in, and tightly roll. Using a little amount of water, seal the tip of the wrapper.

Step 3: Let the saucepan, heat to 375 degrees F. Once hot, add the rolls 2 to 3 at a time. Fry for about 1 to 2 minutes or until lightly brown.

Step 4: When done, transfer the fried egg rolls to paper towels to drain. Repeat to cook the rest of the rolls and serve warm. Enjoy!

Notes

For this recipe, you can use other varieties of crab such as snow crab, Dungeness crab, blue crab, and stone crab. Make sure to bring the cream cheese to room temperature. Some of the best oils (high smoking oil) to use for this recipe are vegetables, canola, or peanut oil. If desired, add Worcestershire sauce to taste.

July 21, 2022 0 comment
0 FacebookTwitterPinterestEmail
General Recipes

BREAKFAST CUPCAKES RECIPE

by Rebecca July 21, 2022
written by Rebecca

My kids love these breakfast cupcakes! These cupcakes are a star at brunch and great for entertaining. And they are super easy to whip up and are easily modifiable.

INGREDIENTS

8-10 eggs – scrambled

1 20-ounces package of pre-shredded hash brown-style potatoes

4 tbsp flour

2 thick slices of deli ham – chopped into small bits (about 1 c.)

1 small-medium sweet onion – coarsely grated

1/2 c. grated Parmesan cheese

1 c. shredded mozzarella cheese

2 large eggs – lightly beaten

Chives for garnish

Salt and freshly ground black pepper to taste

HOW TO MAKE BREAKFAST CUPCAKES

Step 1: Prepare the oven. Preheat it to 400 degrees F.

Step 2: Using non-stick cooking spray, generously grease a 12-cup muffin tin.

To Make the Nests:

Step 3: Place the hash browns, beaten eggs, flour, onion, ham, cheeses, and salt and pepper in a large mixing bowl. Mix well until blended.

Step 4: Into the prepared muffin cups, spoon the hash brown mixture to about 1/3 full. In the middle and up the sides of each cup, gently press the mixture.

Step 5: Place in the preheated oven and bake for about 25 to 30 minutes or until golden brown. When done, remove the cupcakes out of the oven. Then, adjust the oven temperature to 350 degrees F.

Step 6: Using the back of a spoon, press the puffed-up area down.

Egg Filling:

Step 7: Place the eggs in a large bowl and beat well. Into each nest, spoon/pour the egg mixture, and top with chives. Return to the oven and bake for an additional 12 to 15 minutes or until the egg is completely set.

Step 8: Let the muffins cool for about 5 minutes in the muffin tins before taking the muffins out of the tin. If desired, sprinkle a few freshly cracked peppers on top.

NOTES:

VARIATIONS:

Instead of regular flour, use 1:1 gluten-free flour.

You can swap ham with vegetarian sausage (crumbled).

For this recipe, you are welcome to use your preferred cheese. I love sharp cheddar and pepper-jack.

If you want to add some veggies, you can! To the egg mixture, add a little amount of finely chopped spinach, bell peppers, or de-seeded tomatoes.

You can substitute half of the eggs with egg whites. I suggest measuring the egg whites to get the exact portion.

TO STORE: Keep any leftovers in an airtight container and store them in the fridge for up to 4 days.

TO FREEZE: You can also freeze the muffins. Let them cool completely, then wrap each in plastic wrap. Place them in a freezer bag or airtight container and freeze for up to 2 months.

REHEATING: To reheat, pop in the microwave until heated through. If frozen, take the muffins out of the plastic wrap, and individually wrap them in a damp paper towel. Place in the microwave and reheat until warmed through.

BREAKFAST CUPCAKES RECIPE

Rebecca My kids love these breakfast cupcakes! These cupcakes are a star at brunch and great for entertaining. And they are super easy to whip up and are easily modifiable. INGREDIENTS… General Recipes BREAKFAST CUPCAKES RECIPE European Print This
Nutrition facts: 200 calories 20 grams fat
Rating: 5.0/5
( 1 voted )

Ingredients

  • 8-10 eggs – scrambled
  • 1 20-ounces package of pre-shredded hash brown-style potatoes
  • 4 tbsp flour
  • 2 thick slices of deli ham – chopped into small bits (about 1 c.)
  • 1 small-medium sweet onion – coarsely grated
  • 1/2 c. grated Parmesan cheese
  • 1 c. shredded mozzarella cheese
  • 2 large eggs – lightly beaten
  • Chives for garnish
  • Salt and freshly ground black pepper to taste

Instructions

Step 1: Prepare the oven. Preheat it to 400 degrees F.

Step 2: Using non-stick cooking spray, generously grease a 12-cup muffin tin.

To Make the Nests:

Step 3: Place the hash browns, beaten eggs, flour, onion, ham, cheeses, and salt and pepper in a large mixing bowl. Mix well until blended.

Step 4: Into the prepared muffin cups, spoon the hash brown mixture to about 1/3 full. In the middle and up the sides of each cup, gently press the mixture.

Step 5: Place in the preheated oven and bake for about 25 to 30 minutes or until golden brown. When done, remove the cupcakes out of the oven. Then, adjust the oven temperature to 350 degrees F.

Step 6: Using the back of a spoon, press the puffed-up area down.

Egg Filling:

Step 7: Place the eggs in a large bowl and beat well. Into each nest, spoon/pour the egg mixture, and top with chives. Return to the oven and bake for an additional 12 to 15 minutes or until the egg is completely set.

Step 8: Let the muffins cool for about 5 minutes in the muffin tins before taking the muffins out of the tin. If desired, sprinkle a few freshly cracked peppers on top.

Notes

VARIATIONS: Instead of regular flour, use 1:1 gluten-free flour. You can swap ham with vegetarian sausage (crumbled). For this recipe, you are welcome to use your preferred cheese. I love sharp cheddar and pepper-jack. If you want to add some veggies, you can! To the egg mixture, add a little amount of finely chopped spinach, bell peppers, or de-seeded tomatoes. You can substitute half of the eggs with egg whites. I suggest measuring the egg whites to get the exact portion. TO STORE: Keep any leftovers in an airtight container and store them in the fridge for up to 4 days. TO FREEZE: You can also freeze the muffins. Let them cool completely, then wrap each in plastic wrap. Place them in a freezer bag or airtight container and freeze for up to 2 months. REHEATING: To reheat, pop in the microwave until heated through. If frozen, take the muffins out of the plastic wrap, and individually wrap them in a damp paper towel. Place in the microwave and reheat until warmed through.

July 21, 2022 0 comment
0 FacebookTwitterPinterestEmail
General Recipes

SPICY SMOKED SAUSAGE ALFREDO BAKE

by Rebecca July 20, 2022
written by Rebecca

Prep time: 5 mins | Cook time: 20 mins | Total time: 25 mins | Yield: 8 SERVINGS

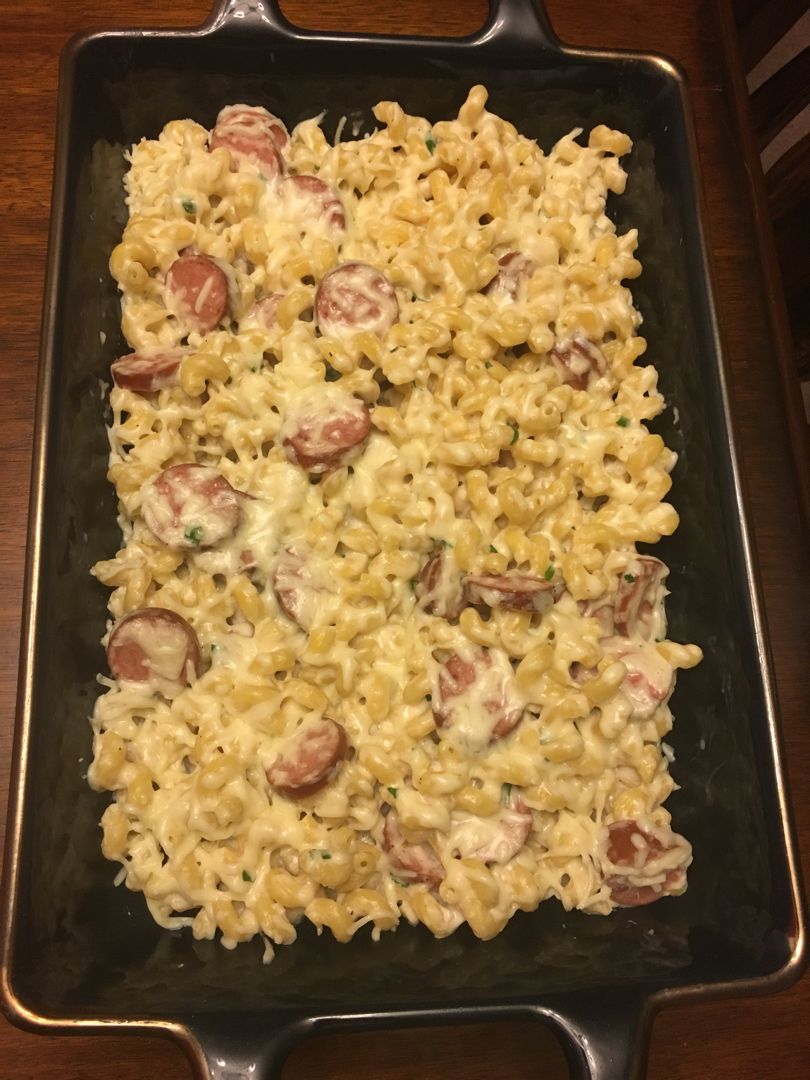
This is the perfect easy and quick weeknight dinner with pasta and smoked sausage in a creamy cheesy sauce. It’s a delicious meal that you can make using a few simple ingredients. Throw this together in under twenty-five minutes from start to finish. This Spicy Smoked Sausage Alfredo Bake is insanely good, I’m sure to make this over and over again!

INGREDIENTS

2-3 cloves garlic, minced

16 oz. dry pasta

3 tbsp flour

3 tbsp butter

1 c. chicken broth

2 c. half and half

1/4 tsp cayenne pepper

1/2 c. grated Parmesan cheese

1/4 tsp red pepper flakes

2 c. grated mozzarella cheese, divided

1 (12 ounces) fully cooked smoked sausage, any variety

1-2 tbsp chopped fresh parsley

1/2 tsp salt

1/4 tsp pepper

HOW TO MAKE SPICY SMOKED SAUSAGE ALFREDO BAKE

Step 1: Following the package directions, cook the pasta until al dente. Drain the pasta when done.

Step 2: In a large skillet, melt the butter over medium heat. Once the butter has melted, add the garlic to the skillet and cook for about 1 to 2 minutes or until aromatic. Then, whisk in the flour.

Step 3: Pour in the chicken broth and stir well until smooth. Add the half-and-half and stir again. Next, add the salt, pepper, cayenne, and red pepper flakes. Let everything simmer for about 5 minutes or until the sauce has thickened.

Step 4: Add the Parmesan cheese and 1 c mozzarella. Stir well until the cheeses have melted and are smooth.

Step 5: Into 1/4-inch pieces, slice the sausage. Add them to the sauce along with the chopped parsley and cooked pasta. If needed, season with extra salt and pepper.

Step 6: While preheating the broiler, transfer the pasta mixture into a lightly greased 9 x 13-inch baking dish. On top, sprinkle the rest of the mozzarella. Place in the broiler for about 2 to 3 minutes or until the cheese is bubbly and golden.

NUTRITION FACTS:

YIELD: 8, SERVING SIZE: 1
Amount Per Serving: CALORIES: 476 | TOTAL FAT: 22g | SATURATED FAT: 13g | TRANS FAT: 1g | UNSATURATED FAT: 8g | CHOLESTEROL: 66mg | SODIUM: 682mg | CARBOHYDRATES: 50g | FIBER: 2g | SUGAR: 5g | PROTEIN: 19g

SPICY SMOKED SAUSAGE ALFREDO BAKE

Rebecca Prep time: 5 mins | Cook time: 20 mins | Total time: 25 mins | Yield: 8 SERVINGS This is the perfect easy and quick weeknight dinner with pasta and… General Recipes SPICY SMOKED SAUSAGE ALFREDO BAKE European Print This
Serves: 8 Prep Time: 5 mins Cooking Time: 20 mins 20 mins
Nutrition facts: 476 calories 22 fat
Rating: 5.0/5
( 1 voted )

Ingredients

  • 2-3 cloves garlic, minced
  • 16 oz. dry pasta
  • 3 tbsp flour
  • 3 tbsp butter
  • 1 c. chicken broth
  • 2 c. half and half
  • 1/4 tsp cayenne pepper
  • 1/2 c. grated Parmesan cheese
  • 1/4 tsp red pepper flakes
  • 2 c. grated mozzarella cheese, divided
  • 1 (12 ounces) fully cooked smoked sausage, any variety
  • 1-2 tbsp chopped fresh parsley
  • 1/2 tsp salt
  • 1/4 tsp pepper

Instructions

Step 1: Following the package directions, cook the pasta until al dente. Drain the pasta when done.

Step 2: In a large skillet, melt the butter over medium heat. Once the butter has melted, add the garlic to the skillet and cook for about 1 to 2 minutes or until aromatic. Then, whisk in the flour.

Step 3: Pour in the chicken broth and stir well until smooth. Add the half-and-half and stir again. Next, add the salt, pepper, cayenne, and red pepper flakes. Let everything simmer for about 5 minutes or until the sauce has thickened.

Step 4: Add the Parmesan cheese and 1 c mozzarella. Stir well until the cheeses have melted and are smooth.

Step 5: Into 1/4-inch pieces, slice the sausage. Add them to the sauce along with the chopped parsley and cooked pasta. If needed, season with extra salt and pepper.

Step 6: While preheating the broiler, transfer the pasta mixture into a lightly greased 9 x 13-inch baking dish. On top, sprinkle the rest of the mozzarella. Place in the broiler for about 2 to 3 minutes or until the cheese is bubbly and golden.

July 20, 2022 0 comment
0 FacebookTwitterPinterestEmail
General Recipes

Sausage Green Bean Potato Casserole

by Rebecca July 20, 2022
written by Rebecca

PREP TIME: 30 MINS | COOK TIME: 40 MINS | TOTAL TIME: 1 HR 10 MINS | SERVINGS: 8

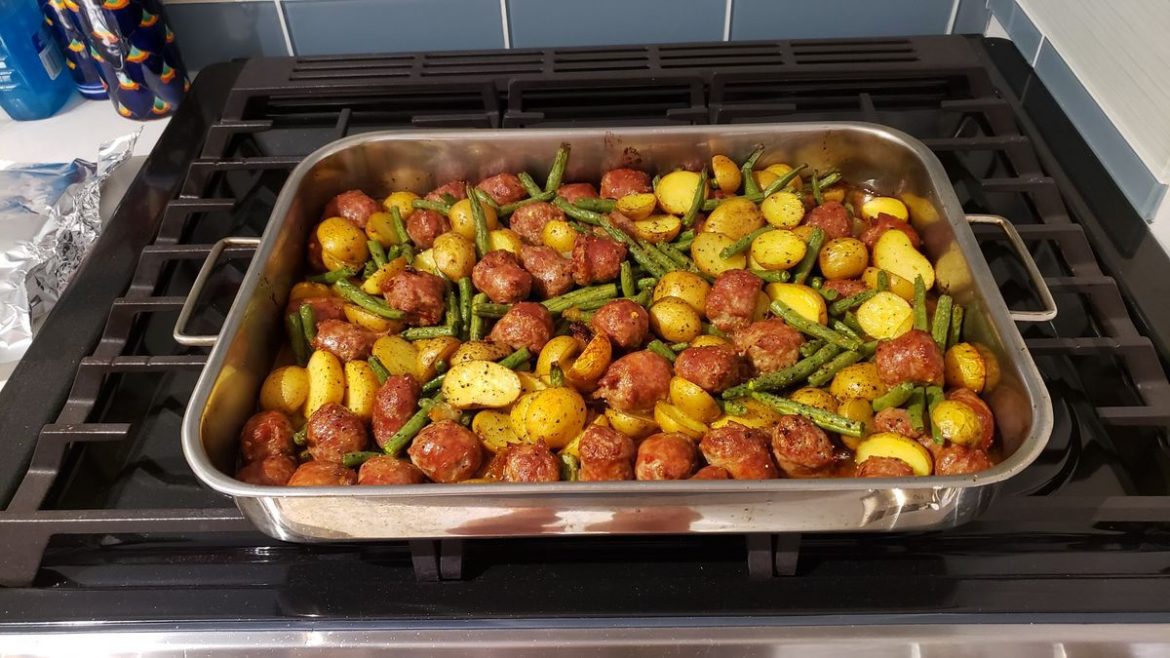
This sausage, green bean potato casserole is an amazing weeknight dinner recipe that is packed with flavor, very delicious, and hearty. Incredibly easy to whip up using ingredients that you might already have on hand. This casserole is perfectly seasoned and packed with kielbasa sausage, tender baby creamer potatoes, and green beans. This casserole is another amazing addition to your menu rotation and also perfect as a holiday meal!

INGREDIENTS

⅛ c. vegetable oil

¼ c. butter

1½ pounds sausage, kielbasa or smoked sausage, sliced ¼-inch thick

2 15-ounces cans of green beans, drained

2 pounds of baby creamer potatoes, washed, sliced in half

1 c. onions, chopped

1 teaspoon Slap Ya Mama® seasoning

3 cloves garlic, minced

1 teaspoon garlic powder

½ teaspoon red pepper flakes

¼ c. water

1 teaspoon pepper

How to make Sausage, Green Bean Potato Casserole

Step 1: Prepare the oven. Preheat it to 400 degrees. Using a non-stick spray, grease a 9 x 13-inch baking dish.

Step 2: After washing the creamer potatoes, slice them in half and add them to a sealable gallon-size baggie. Then, add the oil, seasonings, pepper, and red pepper flakes. Seal the bag and shake well.

Step 3: Add the sausage and water to a large frying pan. Cook for a few minutes over medium-high heat or until the sausages have browned and most of the water has evaporated.

Step 4: Set the sausages aside, then add them to the baggie once cool enough to handle.

Step 5: In a frying pan, melt the butter. Once the butter has melted, add the onions and garlic to the pan and cook until the onions are translucent. Set aside when done, then add to the baggie once cool enough to handle. Seal the bag and shake well.

Step 6: To the baggie, add the green beans. Shake well and transfer everything into the prepared baking dish. Tent using foil and bake in the preheated oven for about 40 minutes or until the potatoes are tender.

Step 7: Remove from the oven when done and serve the casserole immediately. Enjoy!

NUTRITION FACTS:

Serving: 1 serving, Sodium: 783mg, Calcium: 31mg, Vitamin C: 24mg, Vitamin A: 343IU, Sugar: 2g, Fiber: 3g, Potassium: 690mg, Cholesterol: 76mg, Calories: 437 kcal, Trans Fat: 1g, Monounsaturated Fat: 13g, Polyunsaturated Fat: 5g, Saturated Fat: 12g, Fat: 32g, Protein: 13g, Carbohydrates: 24g, Iron: 2mg

Sausage Green Bean Potato Casserole

Rebecca PREP TIME: 30 MINS | COOK TIME: 40 MINS | TOTAL TIME: 1 HR 10 MINS | SERVINGS: 8 This sausage, green bean potato casserole is an amazing weeknight dinner… General Recipes Sausage Green Bean Potato Casserole European Print This
Serves: 8 Prep Time: 30 mins Cooking Time: 40 mins 40 mins
Nutrition facts: 437 calories 32 fat
Rating: 5.0/5
( 1 voted )

Ingredients

  • ⅛ c. vegetable oil
  • ¼ c. butter
  • 1½ pounds sausage, kielbasa or smoked sausage, sliced ¼-inch thick
  • 2 15-ounces cans of green beans, drained
  • 2 pounds of baby creamer potatoes, washed, sliced in half
  • 1 c. onions, chopped
  • 1 teaspoon Slap Ya Mama® seasoning
  • 3 cloves garlic, minced
  • 1 teaspoon garlic powder
  • ½ teaspoon red pepper flakes
  • ¼ c. water
  • 1 teaspoon pepper

Instructions

Step 1: Prepare the oven. Preheat it to 400 degrees. Using a non-stick spray, grease a 9 x 13-inch baking dish.

Step 2: After washing the creamer potatoes, slice them in half and add them to a sealable gallon-size baggie. Then, add the oil, seasonings, pepper, and red pepper flakes. Seal the bag and shake well.

Step 3: Add the sausage and water to a large frying pan. Cook for a few minutes over medium-high heat or until the sausages have browned and most of the water has evaporated.

Step 4: Set the sausages aside, then add them to the baggie once cool enough to handle.

Step 5: In a frying pan, melt the butter. Once the butter has melted, add the onions and garlic to the pan and cook until the onions are translucent. Set aside when done, then add to the baggie once cool enough to handle. Seal the bag and shake well.

Step 6: To the baggie, add the green beans. Shake well and transfer everything into the prepared baking dish. Tent using foil and bake in the preheated oven for about 40 minutes or until the potatoes are tender.

Step 7: Remove from the oven when done and serve the casserole immediately. Enjoy!

July 20, 2022 0 comment
0 FacebookTwitterPinterestEmail
General Recipes

Sloppy Joe Casserole

by Rebecca July 20, 2022
written by Rebecca

Prep Time: 20 mins | Cook Time: 10 mins | Total Time: 30 mins | Servings: 5

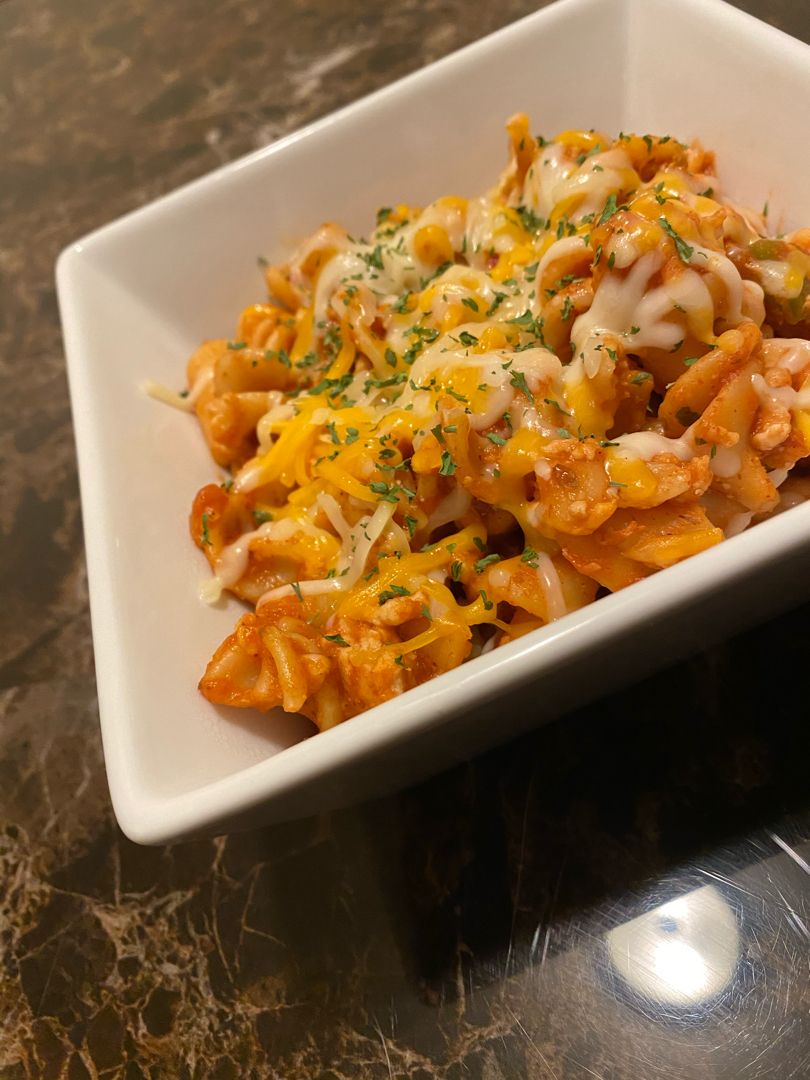
This casserole brings all the things I love in a single serving! Sloppy Joe and pasta are one of my two favorite combinations. This casserole is very easy to make. You can have it ready on your dinner table in under thirty minutes. It’s an excellent weeknight dinner option perfect for everyone!

This Sloppy Joe Casserole is made with just simple six ingredients. This guarantees to impress everyone. So if you are searching for a nostalgic, delicious, and fun dinner recipe, you have to give this casserole a try. It’s super easy and quick to whip up. For any leftovers, keep them in an airtight container and store them in the fridge for up to 4 to 5 days.

Ingredients

1 small onion, diced

1 pound of ground beef

1 green pepper, diced

2 c. cheddar cheese divided

1 16-ounces pkg Rotini cooked

2 15-ounces cans of sloppy Joe sauce

How to make Sloppy Joe Casserole

Step 1: Place the ground beef, onion, and green pepper in a large pan. Cook for a few minutes or until the ground beef is browned and the veggies are tender. If needed, drain the excess fat.

Step 2: To the pan, add the sloppy Joes and stir well. Heat for a couple of minutes until it simmers.

Step 3: Then, add the cooked pasta and toss to coat. Next, sprinkle in 1 1 1/2 cups cheese. Stir well until the melted.

Step 4: On top, sprinkle the rest of the cheese and continue to cook on low until the cheese has melted.

Step 5: If desired, garnish with parsley. Enjoy!

Notes:

To make this into a real casserole, simply throw everything in a 9 x 13-inch baking dish and bake for about 20 to 25 minutes or until the cheese has melted.

For this recipe, you can use any variety of pasta.

You can also use any of your preferred cheese. I like cheddar, but the Colby Jack blend is also a great option.

Nutrition Facts:

Calories: 511 kcal | Carbohydrates: 7g | Protein: 27g | Fat: 33g | Saturated Fat: 17g | Cholesterol: 112mg | Sodium: 467mg | Potassium: 427mg | Fiber: 1g | Sugar: 2g | Vitamin A: 541IU | Vitamin C: 21mg | Calcium: 350mg | Iron: 2mg

Sloppy Joe Casserole

Rebecca Prep Time: 20 mins | Cook Time: 10 mins | Total Time: 30 mins | Servings: 5 This casserole brings all the things I love in a single serving! Sloppy… General Recipes Sloppy Joe Casserole European Print This
Serves: 5 Prep Time: 20 mins Cooking Time: 10 mins 10 mins
Nutrition facts: 511 calories 33 fat
Rating: 5.0/5
( 1 voted )

Ingredients

  • 1 small onion, diced
  • 1 pound of ground beef
  • 1 green pepper, diced
  • 2 c. cheddar cheese divided
  • 1 16-ounces pkg Rotini cooked
  • 2 15-ounces cans of sloppy Joe sauce

Instructions

Step 1: Place the ground beef, onion, and green pepper in a large pan. Cook for a few minutes or until the ground beef is browned and the veggies are tender. If needed, drain the excess fat.

Step 2: To the pan, add the sloppy Joes and stir well. Heat for a couple of minutes until it simmers.

Step 3: Then, add the cooked pasta and toss to coat. Next, sprinkle in 1 1 1/2 cups cheese. Stir well until the melted.

Step 4: On top, sprinkle the rest of the cheese and continue to cook on low until the cheese has melted.

Step 5: If desired, garnish with parsley. Enjoy!

Notes

To make this into a real casserole, simply throw everything in a 9 x 13-inch baking dish and bake for about 20 to 25 minutes or until the cheese has melted. For this recipe, you can use any variety of pasta. You can also use any of your preferred cheese. I like cheddar, but the Colby Jack blend is also a great option.

July 20, 2022 0 comment
0 FacebookTwitterPinterestEmail
General Recipes

Creamy Chicken and Rice Casserole

by Rebecca July 20, 2022
written by Rebecca

Prep Time: 10 mins | Cook Time: 1 hr 5 mins | Resting Time: 10 mins | Total Time: 1 hr 25 mins | Servings: 6

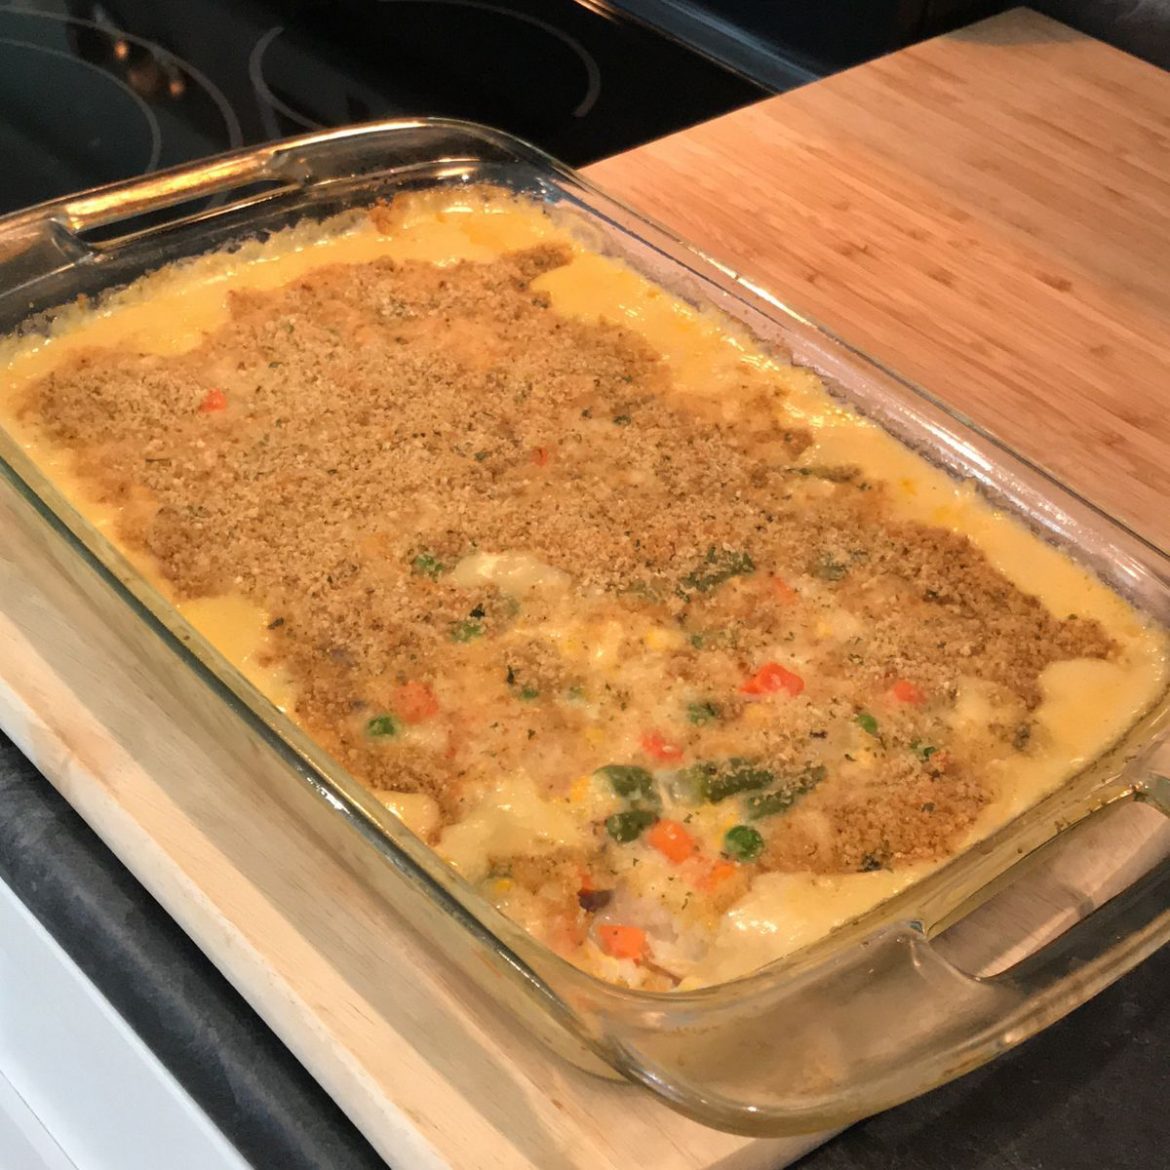
This is a delicious casserole packed with chicken, rice, and veggies mixed with a creamy sauce and topped with buttery, crunchy breadcrumbs. A filling, budget-friendly casserole that is perfect to serve the entire family!

Ingredients

2 tbsp Butter

1 lb Chicken Breast Boneless, skinless, poached

2 c. Chicken Broth

1 c. Long Grain White Rice

½ tsp Salt, plus a pinch

2-3 Sprigs of Thyme

8-10 oz. Frozen Mixed Vegetables cooked to package directions (use lowest cooking time)

⅓ c. Plain Breadcrumbs

2 c. Water

2 oz. Prepared Cheese such as Velveeta

2 (10 oz.) cans of Condensed Cream of Chicken Soup

How to make Creamy Chicken and Rice Casserole

Poach the chicken breast:

Step 1: In a medium saucepan, place the chicken without overlapping. Pour the chicken broth over to cover the chicken, then add the thyme and season with a pinch of salt.

Step 2: Cook the chicken on high. Then, adjust the heat to medium-low as soon as the liquid begins to boil. Put the lid on and gently simmer for about 20 minutes. The chicken is done when the internal temperature of the thickest part of the chicken reaches at least 165 degrees F. if not, cook the chicken for additional 5 minutes, then check the chicken again. On a cutting board, transfer the chicken to cool.

Step 3: Using a mesh strainer, strain the cooking liquid and set it aside.

Step 4: Cut the chicken into bite-sized cubes once cooled enough to handle.

White rice:

Step 5: Add the rice into vigorously boiling water. Season with half tsp salt and stir. Adjust the heat to medium and let it boil for about 5 to 7 minutes until most of the water has cooked out and the rice is on the surface. Then, stir the rice, adjust the heat to low, and put the lid on.

Step 6: Continue to cook for another 25 minutes or until done.

Step 7: Remove the cover and fluff the rice using a fork.

Mixed vegetables:

Step 8: Following the package directions, cook the mixed veggies. When done, drain well. Make sure not to overcook the veggies.

Breadcrumb topping:

Step 9: In a non-stick skillet, melt the butter over medium heat. Add the breadcrumbs to the skillet once the butter has melted. Stir well until the breadcrumbs are thoroughly moistened. Then, take the skillet off the heat.

Creamy sauce:

Step 10: In a large saucepan, heat the cream of chicken soup, reserved chicken broth (from poaching the chicken), and the cheese over medium-high heat. Using a whisk or fork, stir everything until the cheese has melted and the sauce is smooth. Take the pan off the heat when done.

Creamy chicken and rice casserole:

Step 11: Prepare the oven. Preheat it to 375 degrees F.

Step 12: To a large, oven-safe casserole dish or baking pan, add the rice, chicken, mixed vegetables, and creamy sauce. Stir gently and lightly sprinkle the breadcrumbs on top, making sure not to pack them down.

Step 13: On a baking sheet, place the casserole dish. Loosely cover the casserole dish with a piece of aluminium foil. Place in the preheated oven and bake for about 30 minutes. Remove the foil and continue to bake for another 10 to 15 minutes or until the breadcrumbs are golden and the edges are bubbly.

Step 14: Remove from the oven when done and allow the casserole to rest for a couple of minutes.

Step 15: Serve and enjoy!

Nutrition Facts:

Calories: 396 kcal | Carbohydrates: 44g | Protein: 25g | Fat: 13g | Saturated Fat: 5g | Cholesterol: 70mg | Sodium: 1487mg | Potassium: 569mg | Fiber: 3g | Sugar: 2g | Vitamin A: 2819IU | Vitamin C: 12mg | Calcium: 110mg | Iron: 2mg

Creamy Chicken and Rice Casserole

Rebecca Prep Time: 10 mins | Cook Time: 1 hr 5 mins | Resting Time: 10 mins | Total Time: 1 hr 25 mins | Servings: 6 This is a delicious… General Recipes Creamy Chicken and Rice Casserole European Print This
Serves: 6 Prep Time: 10 mins Cooking Time: 1 hr 5 mins 1 hr 5 mins
Nutrition facts: 396 calories 13 fat
Rating: 5.0/5
( 1 voted )

Ingredients

  • 2 tbsp Butter
  • 1 lb Chicken Breast Boneless, skinless, poached
  • 2 c. Chicken Broth
  • 1 c. Long Grain White Rice
  • ½ tsp Salt, plus a pinch
  • 2-3 Sprigs of Thyme
  • 8-10 oz. Frozen Mixed Vegetables cooked to package directions (use lowest cooking time)
  • ⅓ c. Plain Breadcrumbs
  • 2 c. Water
  • 2 oz. Prepared Cheese such as Velveeta
  • 2 (10 oz.) cans of Condensed Cream of Chicken Soup

Instructions

Poach the chicken breast:

Step 1: In a medium saucepan, place the chicken without overlapping. Pour the chicken broth over to cover the chicken, then add the thyme and season with a pinch of salt.

Step 2: Cook the chicken on high. Then, adjust the heat to medium-low as soon as the liquid begins to boil. Put the lid on and gently simmer for about 20 minutes. The chicken is done when the internal temperature of the thickest part of the chicken reaches at least 165 degrees F. if not, cook the chicken for additional 5 minutes, then check the chicken again. On a cutting board, transfer the chicken to cool.

Step 3: Using a mesh strainer, strain the cooking liquid and set it aside.

Step 4: Cut the chicken into bite-sized cubes once cooled enough to handle.

White rice:

Step 5: Add the rice into vigorously boiling water. Season with half tsp salt and stir. Adjust the heat to medium and let it boil for about 5 to 7 minutes until most of the water has cooked out and the rice is on the surface. Then, stir the rice, adjust the heat to low, and put the lid on.

Step 6: Continue to cook for another 25 minutes or until done.

Step 7: Remove the cover and fluff the rice using a fork.

Mixed vegetables:

Step 8: Following the package directions, cook the mixed veggies. When done, drain well. Make sure not to overcook the veggies.

Breadcrumb topping:

Step 9: In a non-stick skillet, melt the butter over medium heat. Add the breadcrumbs to the skillet once the butter has melted. Stir well until the breadcrumbs are thoroughly moistened. Then, take the skillet off the heat.

Creamy sauce:

Step 10: In a large saucepan, heat the cream of chicken soup, reserved chicken broth (from poaching the chicken), and the cheese over medium-high heat. Using a whisk or fork, stir everything until the cheese has melted and the sauce is smooth. Take the pan off the heat when done.

Creamy chicken and rice casserole:

Step 11: Prepare the oven. Preheat it to 375 degrees F.

Step 12: To a large, oven-safe casserole dish or baking pan, add the rice, chicken, mixed vegetables, and creamy sauce. Stir gently and lightly sprinkle the breadcrumbs on top, making sure not to pack them down.

Step 13: On a baking sheet, place the casserole dish. Loosely cover the casserole dish with a piece of aluminium foil. Place in the preheated oven and bake for about 30 minutes. Remove the foil and continue to bake for another 10 to 15 minutes or until the breadcrumbs are golden and the edges are bubbly.

Step 14: Remove from the oven when done and allow the casserole to rest for a couple of minutes.

Step 15: Serve and enjoy!

July 20, 2022 0 comment
0 FacebookTwitterPinterestEmail
General Recipes

Tater Tot Casserole

by Rebecca July 20, 2022
written by Rebecca

Prep time: 20 mins | Cook time: 50 mins | Total time: 1 hr 10 mins | Yield: 8 SERVINGS

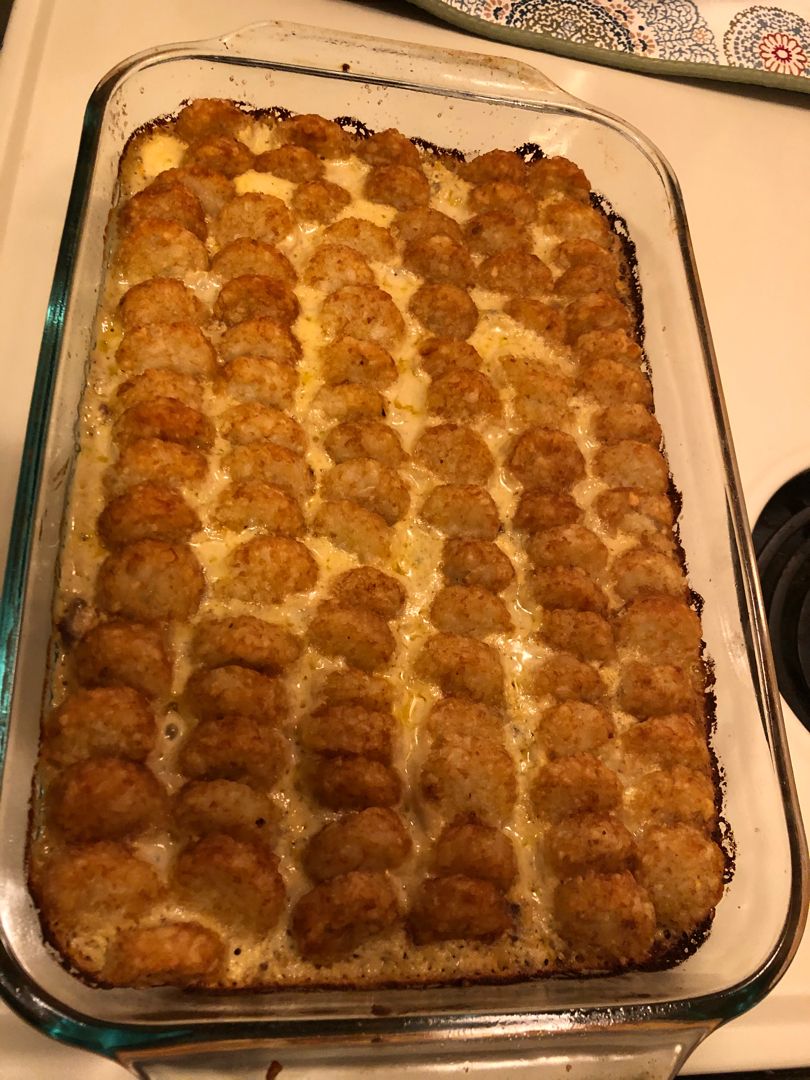
Tater Tot Casserole – everybody loves it and is obsessed with it. It is very easy to make using just a few simple ingredients. This casserole is perfect if you are looking to feed a crowd. This casserole is perfect as is, but you are welcome to add veggies for a complete lineup! This tater tot casserole is also a great addition to your menu rotation. It’s an easy dinner that is excellent for everybody of all ages.

Ingredients

1 lb ground beef

1 tbsp butter

28 oz. bag frozen tater tots

1/3 c. diced onion

1/2 c. sour cream

2 c. shredded cheddar cheese

10.5 oz. can condensed cream of chicken soup

1/2 c. milk

1 tsp garlic salt

pinch salt and black pepper

How to make Tater Tot Casserole

Step 1: Prepare the oven. Preheat it to 350 degrees. Ready a 9 x 13-inch casserole dish, Grease, and set aside.

Step 2: In a skillet, melt the butter over medium heat. Once the butter has melted, add the diced onions to the skillet and cook until golden brown. Then, add the ground beef and cook until browned. When done, drain the grease and transfer it to a large bowl.

Step 3: To the bowl with the onions and ground beef mixture, add the salt, pepper, garlic salt, sour cream, cream of chicken soup, shredded cheddar cheese, and milk. Mix well and empty the contents of the bowl into the prepared casserole dish. Spread the edges and top with the whole bag of tater tots.

Step 4: Place in the preheated oven and bake for about 45 to 50 minutes or until the tater tots are golden brown.

Notes:

In the last five minutes, turn the oven to broil. Do this if you want to get extra crispy tater tots.

You can store any leftovers in an airtight container or cover them with plastic wrap. Then, keep them in the fridge.

Nutrition Facts:

YIELD: 8, SERVING SIZE: 1
Amount Per Serving: CALORIES: 533 | TOTAL FAT: 33g | SATURATED FAT: 13g | TRANS FAT: 1g | UNSATURATED FAT: 17g | CHOLESTEROL: 91mg | SODIUM: 1177mg | CARBOHYDRATES: 33g | FIBER: 2g | SUGAR: 2g | PROTEIN: 26g

Tater Tot Casserole

Rebecca Prep time: 20 mins | Cook time: 50 mins | Total time: 1 hr 10 mins | Yield: 8 SERVINGS Tater Tot Casserole – everybody loves it and is obsessed… General Recipes Tater Tot Casserole European Print This
Serves: 8 Prep Time: 20 mins Cooking Time: 50 mins 50 mins
Nutrition facts: 533 calories 33 fat
Rating: 5.0/5
( 1 voted )

Ingredients

  • 1 lb ground beef
  • 1 tbsp butter
  • 28 oz. bag frozen tater tots
  • 1/3 c. diced onion
  • 1/2 c. sour cream
  • 2 c. shredded cheddar cheese
  • 10.5 oz. can condensed cream of chicken soup
  • 1/2 c. milk
  • 1 tsp garlic salt
  • pinch salt and black pepper

Instructions

Step 1: Prepare the oven. Preheat it to 350 degrees. Ready a 9 x 13-inch casserole dish, Grease, and set aside.

Step 2: In a skillet, melt the butter over medium heat. Once the butter has melted, add the diced onions to the skillet and cook until golden brown. Then, add the ground beef and cook until browned. When done, drain the grease and transfer it to a large bowl.

Step 3: To the bowl with the onions and ground beef mixture, add the salt, pepper, garlic salt, sour cream, cream of chicken soup, shredded cheddar cheese, and milk. Mix well and empty the contents of the bowl into the prepared casserole dish. Spread the edges and top with the whole bag of tater tots.

Step 4: Place in the preheated oven and bake for about 45 to 50 minutes or until the tater tots are golden brown.

Notes

In the last five minutes, turn the oven to broil. Do this if you want to get extra crispy tater tots. You can store any leftovers in an airtight container or cover them with plastic wrap. Then, keep them in the fridge.

July 20, 2022 0 comment
0 FacebookTwitterPinterestEmail
General Recipes

Sausage Alfredo Pasta

by Rebecca July 20, 2022
written by Rebecca

Prep Time: 5 mins | Cook Time: 15 mins | Total Time: 20 mins | Yield: 8 servings

This Sausage Alfredo Pasta is a great meal option if you are looking for a satisfying dinner that you can easily and quickly throw together. A delicious, very versatile dinner recipe with noodles tossed in a cheesy and hearty Alfredo sauce with sausage. Whip this pasta dish up any time using just a few simple ingredients and have this ready in under thirty minutes.

Ingredients

12 ounces fully cooked smoked sausage, sliced

1 lb (16 oz.) dry pasta

3 cloves garlic, pressed

½ c. unsalted butter

3 c. heavy cream

1 ½ c. grated Parmesan cheese

¼ tsp crushed red pepper flakes, optional

1 ½ tsp kosher salt

½ tsp black pepper

How to make Sausage Alfredo Pasta

Step 1: Following the package directions, cook the pasta. Drain when done.

Step 2: In the meantime, melt the butter in a large skillet over medium-high heat. Then, add the garlic and cook for about 2 to 3 minutes or until the garlic starts to brown.

Step 3: Into the skillet, gradually add the heavy cream and season with salt and pepper. Let everything simmer for about 8 to 10 minutes over medium heat or until the sauce has thickened, stirring often.

Step 4: Then, add in the Parmesan along with the red pepper flakes (if using). Add the sliced sausage and stir. Next, add the pasta and toss well.

Step 5: Serve the Sausage Alfredo Pasta right away. Enjoy!

Notes:

I do not recommend package shredded cheese. Freshly grated cheese melts way better. What I do is purchased Parmesan cheese in blocks and use a box grater or shredder to grate it right before adding the cheese to the dish.

For this recipe, you use any noodles.

Over individual portions of pasta before serving, sprinkle a little more red pepper flakes for more heat.

Spicy Italian Sausage is also amazing to use in this recipe.

Nutrition Facts:

Yield: 8, Serving Size: 1
Amount Per Serving: Calories: 642 | Total Fat: 61g | Saturated Fat: 35g | Trans Fat: 1g | Unsaturated Fat: 21g | Cholesterol: 173mg | Sodium: 952mg | Carbohydrates: 11g | Fiber: 0g | Sugar: 3g | Protein: 14g

Sausage Alfredo Pasta

Rebecca Prep Time: 5 mins | Cook Time: 15 mins | Total Time: 20 mins | Yield: 8 servings This Sausage Alfredo Pasta is a great meal option if you are… General Recipes Sausage Alfredo Pasta European Print This
Serves: 8 Prep Time: 5 mins Cooking Time: 15 mins 15 mins
Nutrition facts: 642 calories 61 fat
Rating: 5.0/5
( 1 voted )

Ingredients

  • 12 ounces fully cooked smoked sausage, sliced
  • 1 lb (16 oz.) dry pasta
  • 3 cloves garlic, pressed
  • ½ c. unsalted butter
  • 3 c. heavy cream
  • 1 ½ c. grated Parmesan cheese
  • ¼ tsp crushed red pepper flakes, optional
  • 1 ½ tsp kosher salt
  • ½ tsp black pepper

Instructions

Step 1: Following the package directions, cook the pasta. Drain when done.

Step 2: In the meantime, melt the butter in a large skillet over medium-high heat. Then, add the garlic and cook for about 2 to 3 minutes or until the garlic starts to brown.

Step 3: Into the skillet, gradually add the heavy cream and season with salt and pepper. Let everything simmer for about 8 to 10 minutes over medium heat or until the sauce has thickened, stirring often.

Step 4: Then, add in the Parmesan along with the red pepper flakes (if using). Add the sliced sausage and stir. Next, add the pasta and toss well.

Step 5: Serve the Sausage Alfredo Pasta right away. Enjoy!

Notes

I do not recommend package shredded cheese. Freshly grated cheese melts way better. What I do is purchased Parmesan cheese in blocks and use a box grater or shredder to grate it right before adding the cheese to the dish. For this recipe, you use any noodles. Over individual portions of pasta before serving, sprinkle a little more red pepper flakes for more heat. Spicy Italian Sausage is also amazing to use in this recipe.

July 20, 2022 0 comment
0 FacebookTwitterPinterestEmail
General Recipes

Lemonhead Cookies

by Rebecca July 20, 2022
written by Rebecca

Prep Time: 2 hrs | Cook Time: 11 mins | Total Time: 2 hrs 11 mins | Yield: 36 cookies

These lemonhead cookies are seriously one of the best cookies I’ve ever made! They are perfectly chewy, but still soft. I love the slightly caramelized bottoms from the crushed candies, it is what makes these cookies the real deal!

Ingredients

2 eggs

1 c. butter, room temperature

2 tbsp lemon zest

1 tbsp vanilla extract

1/2 tsp baking powder

3 1/2 c. all-purpose flour

1/2 tsp baking soda

2 c. granulated sugar

1 c. finely crushed Lemonhead candies

1/2 tsp kosher salt

Glaze:

2 tbsp water or milk

1 c. powdered sugar

How to make Lemonhead Cookies

Step 1: Prepare the oven. Preheat it to 350 degrees F. Using parchment paper, line a baking sheet and set aside.

Step 2: Place the butter, sugar, and lemon zest in the bowl of a stand mixer fitted with the paddle attachment. Mix well for about 2 minutes until light and fluffy. Then, add the eggs along with the vanilla, salt, baking powder, and baking soda. Mix again for another minute or until blended, scraping the sides of the bowl as needed.

Step 3: Adjust the mixer to low and add in the flour, beating until just blended. While the mixer is still on low, add the crushed lemon candies. Mix until evenly incorporated.

Step 4: Tent the bowl and chill the dough for at least 2 hours up to overnight.

Step 5: Roll 2 tbsp of dough into a ball and place it on the prepared baking sheet. Repeat with the remaining dough. Make sure to place the dough 2-inches apart from each other. Place in the preheated oven and bake for about 9 to 11 minutes or until the edges of the cookies are very lightly golden. Remove from the oven when done and let the cookies cool for about 4 to 5 minutes on the baking sheet. Then, transfer them to a wire rack to cool fully.

Step 6: To make the glaze, combine the powdered sugar and water in a medium bowl until you have a thin glaze.

Step 7: Into the glaze, dip the tops of, the cookies, letting the excess drip off. Let the glaze set before serving.

Notes:

You can keep the cookies in an airtight container for up to 3 days at room temperature.

Skip glazing the cookies if you are planning to freeze them.

Use your spatula to immediately reshape the cookies when they come out misshapen as soon as they come out of the oven.

Nutrition Facts:

Serving Size: 1 Cookie, Cal

Lemonhead Cookies

Rebecca Prep Time: 2 hrs | Cook Time: 11 mins | Total Time: 2 hrs 11 mins | Yield: 36 cookies These lemonhead cookies are seriously one of the best cookies… General Recipes Lemonhead Cookies European Print This
Serves: 36 Prep Time: 2 hrs Cooking Time: 11 mins 11 mins
Nutrition facts: 200 calories 20 grams fat
Rating: 5.0/5
( 1 voted )

Ingredients

  • 2 eggs
  • 1 c. butter, room temperature
  • 2 tbsp lemon zest
  • 1 tbsp vanilla extract
  • 1/2 tsp baking powder
  • 3 1/2 c. all-purpose flour
  • 1/2 tsp baking soda
  • 2 c. granulated sugar
  • 1 c. finely crushed Lemonhead candies
  • 1/2 tsp kosher salt
  • Glaze:
  • 2 tbsp water or milk
  • 1 c. powdered sugar

Instructions

Step 1: Prepare the oven. Preheat it to 350 degrees F. Using parchment paper, line a baking sheet and set aside.

Step 2: Place the butter, sugar, and lemon zest in the bowl of a stand mixer fitted with the paddle attachment. Mix well for about 2 minutes until light and fluffy. Then, add the eggs along with the vanilla, salt, baking powder, and baking soda. Mix again for another minute or until blended, scraping the sides of the bowl as needed.

Step 3: Adjust the mixer to low and add in the flour, beating until just blended. While the mixer is still on low, add the crushed lemon candies. Mix until evenly incorporated.

Step 4: Tent the bowl and chill the dough for at least 2 hours up to overnight.

Step 5: Roll 2 tbsp of dough into a ball and place it on the prepared baking sheet. Repeat with the remaining dough. Make sure to place the dough 2-inches apart from each other. Place in the preheated oven and bake for about 9 to 11 minutes or until the edges of the cookies are very lightly golden. Remove from the oven when done and let the cookies cool for about 4 to 5 minutes on the baking sheet. Then, transfer them to a wire rack to cool fully.

Step 6: To make the glaze, combine the powdered sugar and water in a medium bowl until you have a thin glaze.

Step 7: Into the glaze, dip the tops of, the cookies, letting the excess drip off. Let the glaze set before serving.

Notes

You can keep the cookies in an airtight container for up to 3 days at room temperature. Skip glazing the cookies if you are planning to freeze them. Use your spatula to immediately reshape the cookies when they come out misshapen as soon as they come out of the oven.

July 20, 2022 0 comment
0 FacebookTwitterPinterestEmail
General Recipes

SLOW COOKER JAMBALAYA

by Rebecca July 20, 2022
written by Rebecca

PREP TIME: 10 MINS | COOK TIME: 3 HRS | TOTAL TIME: 3 HRS 10 MINS | SERVINGS: 8 people

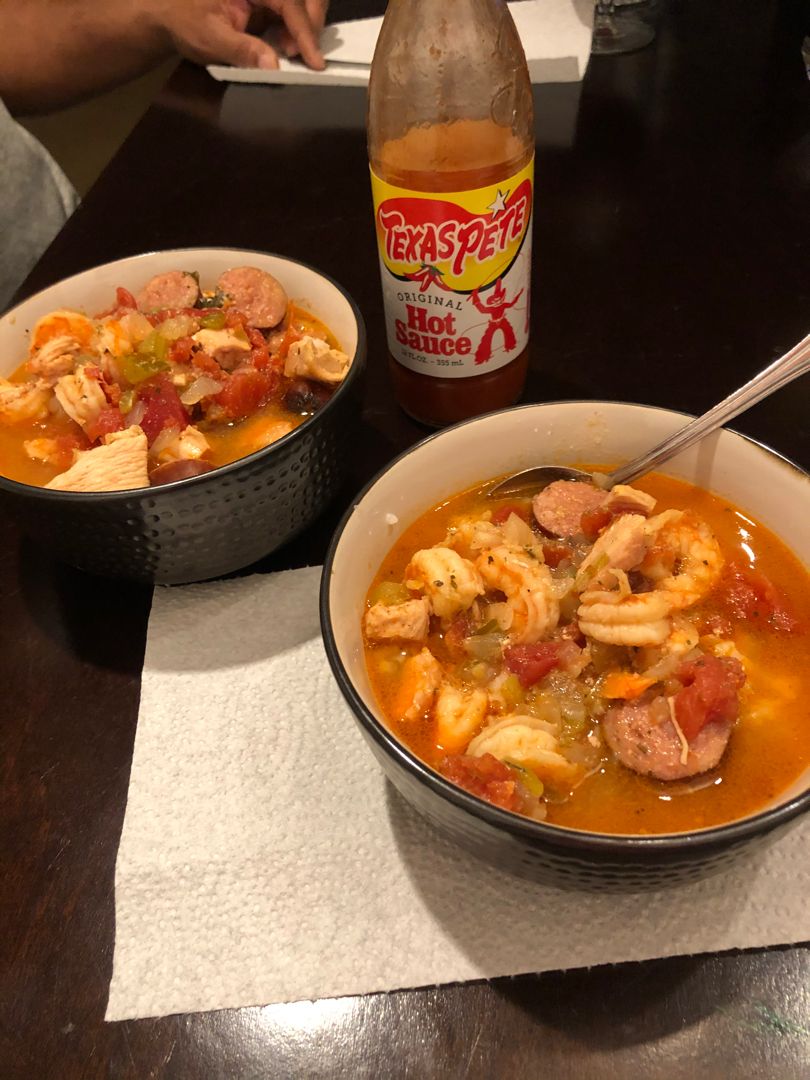
Prep this Jambalaya in ten minutes and cook it low and slow in your trusty slow cooker. This Jambalaya is a crazy delicious dish with andouille sausage, chicken, and shrimp with bold spices and veggies. A mouthwatering, simple weeknight dinner option that is perfect for busy days and the crowd! Leftovers are fantastic, too! To store the leftovers, place them in an airtight container and the fridge for up to 3 days. To reheat, place the jambalaya in a microwave-safe bowl and heat in the microwave in 30-second intervals. Or reheat on the stove over medium heat.

To make this flavor-packed Jambalaya, you do not need a lot of work. Simply toss everything together and leave all the work to your slow cooker. Brown the sausage with the onions and peppers before adding them to the slow cooker is extra work, but guarantees to instantly boost the flavor of this Jambalaya. So I recommend not skipping this very simple step.

Make this Jambalaya soon and enjoy a winner dinner that everyone will surely ask for over and over again!

Ingredients

1 lb andouille sausage links, sliced

2 chicken breasts, skinless, boneless, cut into chunks

1 large onion, chopped

1 can diced tomatoes 28 oz.

2 stalks of celery, thinly sliced

1/2 tsp dried thyme

2 c. chicken broth

1 red bell pepper, finely chopped

2 tsp dried oregano

1 tbsp Cajun seasoning

1 tbsp tomato paste

1/2 tsp cayenne pepper

1 lb shrimp 13-15 count

1 c. rice

HOW TO MAKE SLOW COOKER JAMBALAYA

Step 1: Into a slow cooker, add all the ingredients except for the shrimp. Stir well.

Step 2: Put the lid on and set to cook for 7 to 8 hours on low or 3 to 4 hours on high. In the last hour of cooking, add the rice.

Step 3: Fifteen minutes before cooking time is over, add the shrimp.

NOTE:

You can either add the rice to the slow cooker or skip it and simply serve the Jambalaya overcooked rice.

Nutrition Facts:
Serves: 8, Calories141kcal (7%), Carbohydrates4g (1%), Protein25g (50%), Fat3g (5%), Saturated Fat1g (5%), Cholesterol179mg (60%), Sodium797mg (33%), Potassium449mg (13%), Fiber1g (4%), Sugar2g (2%), Vitamin A1025IU (21%), Vitamin C30.9mg (37%), Calcium106mg (11%), Iron2.4mg (13%)

SLOW COOKER JAMBALAYA

Rebecca PREP TIME: 10 MINS | COOK TIME: 3 HRS | TOTAL TIME: 3 HRS 10 MINS | SERVINGS: 8 people Prep this Jambalaya in ten minutes and cook it low… General Recipes SLOW COOKER JAMBALAYA European Print This
Serves: 8 Prep Time: 10 mins Cooking Time: 3 hrs 3 hrs
Nutrition facts: 141 calories 3 fat
Rating: 5.0/5
( 1 voted )

Ingredients

  • 1 lb andouille sausage links, sliced
  • 2 chicken breasts, skinless, boneless, cut into chunks
  • 1 large onion, chopped
  • 1 can diced tomatoes 28 oz.
  • 2 stalks of celery, thinly sliced
  • 1/2 tsp dried thyme
  • 2 c. chicken broth
  • 1 red bell pepper, finely chopped
  • 2 tsp dried oregano
  • 1 tbsp Cajun seasoning
  • 1 tbsp tomato paste
  • 1/2 tsp cayenne pepper
  • 1 lb shrimp 13-15 count
  • 1 c. rice

Instructions

Step 1: Into a slow cooker, add all the ingredients except for the shrimp. Stir well.

Step 2: Put the lid on and set to cook for 7 to 8 hours on low or 3 to 4 hours on high. In the last hour of cooking, add the rice.

Step 3: Fifteen minutes before cooking time is over, add the shrimp.

Notes

You can either add the rice to the slow cooker or skip it and simply serve the Jambalaya overcooked rice.

July 20, 2022 0 comment
0 FacebookTwitterPinterestEmail
Newer Posts
Older Posts

Popular Posts

  • 1

    Crispy Crunchy Parmesan Potatoes

    March 21, 2020
  • 2

    CROCK POT SMOTHERED PORK CHOPS

    March 21, 2020
  • Facebook
  • Twitter

@2019 - All Right Reserved.


Back To Top