Cook it once
  • Home
  • Privacy Policy
  • Recipes
    • KETO
    • LC
    • WW
  • Tips
  • Contact
Cook it once
  • Home
  • Privacy Policy
  • Recipes
    • KETO
    • LC
    • WW
  • Tips
  • Contact
Category:

General Recipes

General Recipes

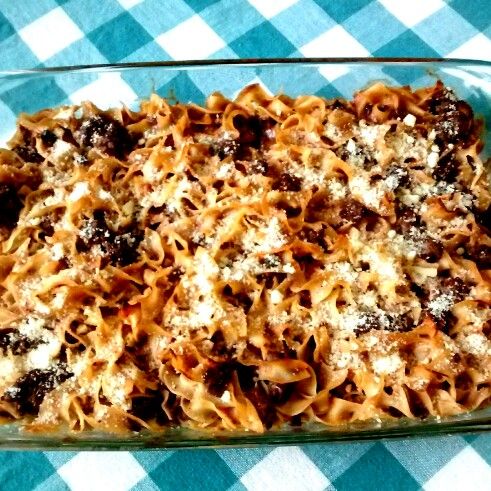
Delicious Amish Country Pasta Casserole Recipe

by Rebecca July 22, 2022
written by Rebecca

Total time: 45 mins | Servings: 6

Tastes great and is incredibly easy to whip up! This delicious casserole is a super comforting, creamy, cheesy, and beefy pasta bake. The perfect hearty dinner that is perfect for everyone!

My family has been enjoying this Amish Country Pasta Casserole. This is one of our favorite casseroles for years! And my go-to for a simple, quick, and filling weeknight meal.

INGREDIENTS

3 cloves garlic, minced

1/2 yellow onion, finely chopped

12 ounces egg noodles

1 lb ground beef

1 (10.75 ounces) can of cream of mushroom soup

1 (10.75 ounces) can of tomato soup

1/2 c. Parmesan cheese, grated

1 c. half-and-half

1/2 tbsp Worcestershire sauce

kosher salt and freshly ground pepper, to taste

1/4 tsp red pepper flakes

How to make Delicious Amish Country Pasta Casserole

Step 1: Prepare the oven. Preheat it to 350 degrees F.

Step 2: Following the package directions, cook the pasta in a large pot of salted boiling water until al dente.

Step 3: In a large pan or skillet, cook the beef for about 10-12 minutes over medium-high heat or until no longer pink. Drain the grease. Add the onion and garlic. Continue to cook for additional 5-6 minutes or until tender and aromatic. Generously season with salt and pepper.

Step 4: In a large bowl, combine the tomato and cream of mushroom soup. Add the half-and-half and Worcestershire sauce. Mix well.

Step 5: Sprinkle with red pepper flakes and season with salt & pepper. Mix well.

Step 6: Into the wet ingredients, combine the cooked noodles and ground beef & onion mixture. Pour everything into the baking dish and top with Parmesan. Place in the preheated oven and bake for about 25 to 30 minutes or until the cheese has melted and bubbly.

Step 7: Take the casserole out of the oven when done and allow it to cool for about 5 minutes.

Step 8: Serve and enjoy!
Delicious Amish Country Pasta Casserole Recipe

Rebecca Total time: 45 mins | Servings: 6 Tastes great and is incredibly easy to whip up! This delicious casserole is a super comforting, creamy, cheesy, and beefy pasta bake. The… General Recipes Delicious Amish Country Pasta Casserole Recipe European Print This
Serves: 6
Nutrition facts: 200 calories 20 grams fat
Rating: 5.0/5
( 1 voted )

Ingredients

  • 3 cloves garlic, minced
  • 1/2 yellow onion, finely chopped
  • 12 ounces egg noodles
  • 1 lb ground beef
  • 1 (10.75 ounces) can of cream of mushroom soup
  • 1 (10.75 ounces) can of tomato soup
  • 1/2 c. Parmesan cheese, grated
  • 1 c. half-and-half
  • 1/2 tbsp Worcestershire sauce
  • kosher salt and freshly ground pepper, to taste
  • 1/4 tsp red pepper flakes

Instructions

Step 1: Prepare the oven. Preheat it to 350 degrees F.

Step 2: Following the package directions, cook the pasta in a large pot of salted boiling water until al dente.

Step 3: In a large pan or skillet, cook the beef for about 10-12 minutes over medium-high heat or until no longer pink. Drain the grease. Add the onion and garlic. Continue to cook for additional 5-6 minutes or until tender and aromatic. Generously season with salt and pepper.

Step 4: In a large bowl, combine the tomato and cream of mushroom soup. Add the half-and-half and Worcestershire sauce. Mix well.

Step 5: Sprinkle with red pepper flakes and season with salt & pepper. Mix well.

Step 6: Into the wet ingredients, combine the cooked noodles and ground beef & onion mixture. Pour everything into the baking dish and top with Parmesan. Place in the preheated oven and bake for about 25 to 30 minutes or until the cheese has melted and bubbly.

Step 7: Take the casserole out of the oven when done and allow it to cool for about 5 minutes.

Step 8: Serve and enjoy!
July 22, 2022 0 comment
0 FacebookTwitterPinterestEmail
General Recipes

Turkey Stuffed Eggplant

by Rebecca July 22, 2022
written by Rebecca

Total time: 1 hr 15 mins | Servings: 4-6

Are you searching for another easy and healthy dinner? Then, you have to give this nutritious turkey-stuffed eggplant a try. Tender eggplant boats stuffed with veggies, ground turkey, and cheese. Incredibly delightful!

INGREDIENTS

1 pound ground turkey

1 egg, beaten

3-4 small eggplants

1 1/2 c. Pecorino Romano cheese

1 small onion, diced

1 medium tomato, chopped

2 cloves garlic, minced

4 tbsp olive oil

2 tbsp tomato paste

1 tsp dried oregano

2 tsp dried basil

Kosher salt and fresh ground pepper, to taste

1-2 tsp red chili flake (optional)

How to make Turkey Stuffed Eggplant

Step 1: Prepare the oven. Preheat it to 350 degrees F. For this recipe, I used an 8 x 12-inch baking dish.

Step 2: In half lengthwise, slice the eggplants and scoop the centers out, leaving enough of the insides intact. Then, finely chop the eggplant you have scooped out. In the baking dish, arrange the eggplant halves.

Step 3: In a large pan, heat 2 tbsp olive oil over medium heat. Once the oil is hot, add the onions to the pan along with the tomato and chopped eggplant. Cook for about 6-8 minutes or until the onion has softened and translucent. Next, add the garlic and tomato paste. Continue to cook for another 2 minutes. To a large bowl, transfer the veggies to cool.

Step 4: In the now-empty skillet, add the rest of the oil. Add the ground turkey and season with salt and pepper, basil, oregano, and chili flake (if using). Cook for a few minutes until the turkey has browned, breaking the meat into pieces using a wooden spoon as it cooks. Then, take the skillet off the heat.

Step 5: To the bowl with the veggies, add the slightly cooled turkey. Add the beaten egg and half a cup of cheese. If needed, season with extra salt and pepper.

Step 6: Into the eggplant halves, spoon the mixture, and top with the rest of the cheese. Place inside the preheated oven and bake for about 50 minutes or until the cheese has melted and the eggplant is tender. Remove from the oven when done and allow the turkey stuffed eggplant to cool for about 5 minutes.

Step 7: Serve and enjoy!

Turkey Stuffed Eggplant

Rebecca Total time: 1 hr 15 mins | Servings: 4-6 Are you searching for another easy and healthy dinner? Then, you have to give this nutritious turkey-stuffed eggplant a try. Tender… General Recipes Turkey Stuffed Eggplant European Print This
Serves: 4-6
Nutrition facts: 200 calories 20 grams fat
Rating: 5.0/5
( 1 voted )

Ingredients

  • 1 pound ground turkey
  • 1 egg, beaten
  • 3-4 small eggplants
  • 1 1/2 c. Pecorino Romano cheese
  • 1 small onion, diced
  • 1 medium tomato, chopped
  • 2 cloves garlic, minced
  • 4 tbsp olive oil
  • 2 tbsp tomato paste
  • 1 tsp dried oregano
  • 2 tsp dried basil
  • Kosher salt and fresh ground pepper, to taste
  • 1-2 tsp red chili flake (optional)

Instructions

Step 1: Prepare the oven. Preheat it to 350 degrees F. For this recipe, I used an 8 x 12-inch baking dish.

Step 2: In half lengthwise, slice the eggplants and scoop the centers out, leaving enough of the insides intact. Then, finely chop the eggplant you have scooped out. In the baking dish, arrange the eggplant halves.

Step 3: In a large pan, heat 2 tbsp olive oil over medium heat. Once the oil is hot, add the onions to the pan along with the tomato and chopped eggplant. Cook for about 6-8 minutes or until the onion has softened and translucent. Next, add the garlic and tomato paste. Continue to cook for another 2 minutes. To a large bowl, transfer the veggies to cool.

Step 4: In the now-empty skillet, add the rest of the oil. Add the ground turkey and season with salt and pepper, basil, oregano, and chili flake (if using). Cook for a few minutes until the turkey has browned, breaking the meat into pieces using a wooden spoon as it cooks. Then, take the skillet off the heat.

Step 5: To the bowl with the veggies, add the slightly cooled turkey. Add the beaten egg and half a cup of cheese. If needed, season with extra salt and pepper.

Step 6: Into the eggplant halves, spoon the mixture, and top with the rest of the cheese. Place inside the preheated oven and bake for about 50 minutes or until the cheese has melted and the eggplant is tender. Remove from the oven when done and allow the turkey stuffed eggplant to cool for about 5 minutes.

Step 7: Serve and enjoy!

July 22, 2022 0 comment
0 FacebookTwitterPinterestEmail
General Recipes

These Zucchini-Parmesan Cheese Fritters Are Easy, Delicious And Healthy

by Rebecca July 21, 2022
written by Rebecca

Prep time: 15 mins | Cook time: 10 mins | Additional time: 10 mins | Total time: 35 mins | Servings: 10 | Yield: 10 fritters

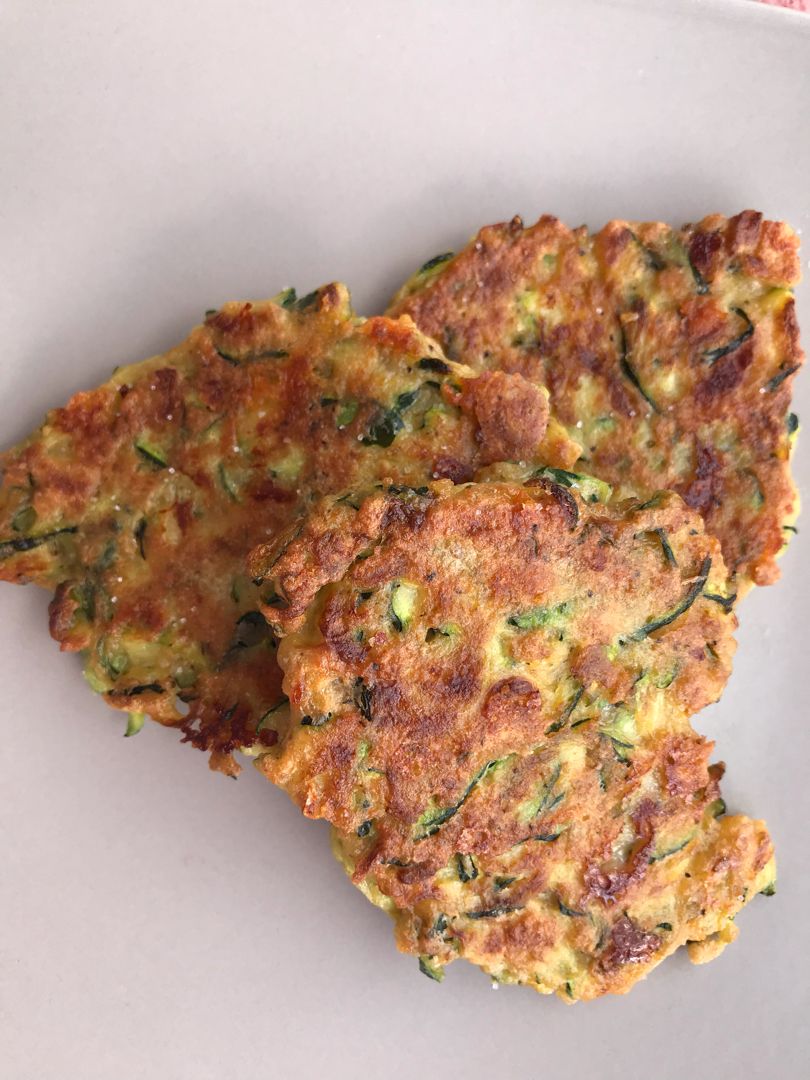
If you love fritters, I am pretty sure that you’ll enjoy these delicious and healthy Zucchini-Parmesan Cheese Fritters. They are insanely easy to throw together using just a few simple ingredients. Whip these fritters up in a breeze and make sure to serve while hot topped with sour cream. And for a simple meal, pair these fritters up with chicken wings or roasted chicken.

It’s great to know that our good-old unhealthy fritters have a counterpart. These healthy fritters offer the same delicious taste without the guilt. This recipe puts a fun, healthy twist on our favorite fritters. Would it be great to know that the kids are eating healthy without complaints? I have the fussiest eaters, and they all love every bite of these Zucchini-Parmesan Cheese Fritters!

Ingredients

½ tsp salt

3 large zucchini, finely grated

Batter:

oil for frying

1 egg

4 tbsp Parmesan cheese

5 tbsp all-purpose flour

¼ tsp salt

ground black pepper to taste

Toppings:

¼ c. sour cream, for topping

1 tbsp grated Parmesan cheese, or to taste

1 pinch salt

How to make Zucchini-Parmesan Cheese Fritters

Step 1: In a bowl, combine the zucchini and salt. Set it aside for about 10 minutes.

Step 2: Onto a clean dish towel or cheesecloth, pour the mixture and squeeze.

Step 3: In a bowl, beat the eggs. Add the flour along with the Parmesan cheese, salt, and pepper. Mix well, then add the drained zucchini. Mix again until combined.

Step 4: In a medium-sized pan, heat the oil over medium-high heat. Once the oil is hot, add the batter by tablespoon and cook for about 5 minutes on each side until golden brown. To a serving plate, transfer the fritters and sprinkle with Parmesan cheese and salt. Repeat with the rest of the batter.

Step 5: Serve the Zucchini-Parmesan Cheese Fritters right away with sour cream. Enjoy!

Nutrition Facts:

Per Serving: 138 calories; protein 3.4g; carbohydrates 6.7g; fat 11.4g; cholesterol 23.3mg; sodium 248mg.

These Zucchini-Parmesan Cheese Fritters Are Easy, Delicious And Healthy

Rebecca Prep time: 15 mins | Cook time: 10 mins | Additional time: 10 mins | Total time: 35 mins | Servings: 10 | Yield: 10 fritters If you love fritters,… General Recipes These Zucchini-Parmesan Cheese Fritters Are Easy, Delicious And Healthy European Print This
Serves: 10 Prep Time: 15 mins Cooking Time: 20 mins 20 mins
Nutrition facts: 138 calories 11.4 fat
Rating: 5.0/5
( 1 voted )

Ingredients

  • ½ tsp salt
  • 3 large zucchini, finely grated
  • Batter:
  • oil for frying
  • 1 egg
  • 4 tbsp Parmesan cheese
  • 5 tbsp all-purpose flour
  • ¼ tsp salt
  • ground black pepper to taste
  • Toppings:
  • ¼ c. sour cream, for topping
  • 1 tbsp grated Parmesan cheese, or to taste
  • 1 pinch salt

Instructions

Step 1: In a bowl, combine the zucchini and salt. Set it aside for about 10 minutes.

Step 2: Onto a clean dish towel or cheesecloth, pour the mixture and squeeze.

Step 3: In a bowl, beat the eggs. Add the flour along with the Parmesan cheese, salt, and pepper. Mix well, then add the drained zucchini. Mix again until combined.

Step 4: In a medium-sized pan, heat the oil over medium-high heat. Once the oil is hot, add the batter by tablespoon and cook for about 5 minutes on each side until golden brown. To a serving plate, transfer the fritters and sprinkle with Parmesan cheese and salt. Repeat with the rest of the batter.

Step 5: Serve the Zucchini-Parmesan Cheese Fritters right away with sour cream. Enjoy!

July 21, 2022 0 comment
0 FacebookTwitterPinterestEmail
General Recipes

Better Than Anything Cake

by Rebecca July 21, 2022
written by Rebecca

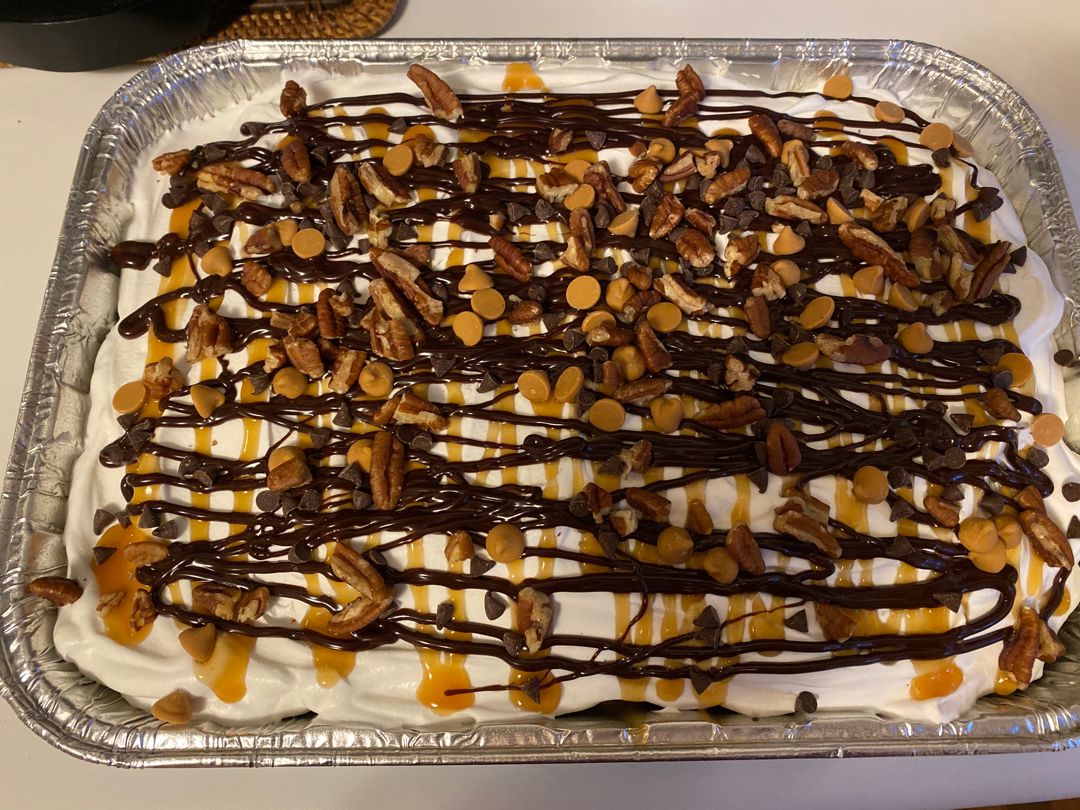
This cake is indeed better than any other cake! It is incredibly easy to make, but you have to plan as each layer of this cake needs to be chilled before adding the next layer. This cake is my favorite cake for every occasion. It’s decadent and incredibly fantastic!

Ingredients

Crust:

3/4 c. butter, melted

1 c. pecans finely chopped

1 1/2 c. all-purpose flour

First layer:

1 c. confectioners’ sugar

1 (8-12 ounces) container Cool Whip (divided) – 1 c. for this layer and the remaining for the topping

1 (8 ounces) package of cream cheese – room temperature

Second layer:

1 (3.4 ounces) package of chocolate instant pudding

3 c. whole milk (whole milk to make a sturdier pudding)

1 (3.4 ounces) package vanilla instant pudding

For the top:

Grated/Shaved chocolate sprinkled over the top

Remaining Cool Whip

How to make Better Than Anything Cake

Crust layer:

Step 1: Prepare the oven. Preheat it to 325 degrees F.

Step 2: Place the flour, butter, and pecans in a medium bowl. Mix well until blended. Into the bottom of a 9 x 13-inch baking dish, press the mixture.

Step 3: Place in the preheated oven and bake for about 25 minutes. When done, remove from the oven and let the crust cool completely.

First Layer:

Step 4: Place the cream cheese, confectioners’ sugar, and 1 c. Cool Whip in a large bowl. Using a mixer, beat the ingredients well until combined. Then, spread this over the crust.

Step 5: Chill until firm. I put the baking dish in the freezer for about 20 minutes.

Second Layer:

Step 6: In a large bowl, mix the two puddings and milk and combine following the package directions.

Step 7: Take the pan out of the freezer and spread the pudding on top of the cream cheese layer. Return the pan to the freezer and keep it there for additional 20 minutes.

Top Layer:

Step 8: On top, spread the rest of the Cool Whip and sprinkle with the grated/shaved chocolate. If time permits, allow the dessert to chill in the fridge for at least 2 hours before serving.

Notes:

For best results, allow this dessert to chill in the fridge.

Make this dessert 2 days ahead and simply wrap it in plastic wrap and keep it in the fridge.

Tightly wrap any leftovers with plastic wrap and store them in the fridge for up to 4 days.

Chilling each layer is an important step before proceeding with the next layer to prevent mess.

Better Than Anything Cake

Rebecca This cake is indeed better than any other cake! It is incredibly easy to make, but you have to plan as each layer of this cake needs to be chilled… General Recipes Better Than Anything Cake European Print This
Nutrition facts: 200 calories 20 grams fat
Rating: 5.0/5
( 1 voted )

Ingredients

  • Crust:
  • 3/4 c. butter, melted
  • 1 c. pecans finely chopped
  • 1 1/2 c. all-purpose flour
  • First layer:
  • 1 c. confectioners’ sugar
  • 1 (8-12 ounces) container Cool Whip (divided) – 1 c. for this layer and the remaining for the topping
  • 1 (8 ounces) package of cream cheese – room temperature
  • Second layer:
  • 1 (3.4 ounces) package of chocolate instant pudding
  • 3 c. whole milk (whole milk to make a sturdier pudding)
  • 1 (3.4 ounces) package vanilla instant pudding
  • For the top:
  • Grated/Shaved chocolate sprinkled over the top
  • Remaining Cool Whip

Instructions

Crust layer:

Step 1: Prepare the oven. Preheat it to 325 degrees F.

Step 2: Place the flour, butter, and pecans in a medium bowl. Mix well until blended. Into the bottom of a 9 x 13-inch baking dish, press the mixture.

Step 3: Place in the preheated oven and bake for about 25 minutes. When done, remove from the oven and let the crust cool completely.

First Layer:

Step 4: Place the cream cheese, confectioners’ sugar, and 1 c. Cool Whip in a large bowl. Using a mixer, beat the ingredients well until combined. Then, spread this over the crust.

Step 5: Chill until firm. I put the baking dish in the freezer for about 20 minutes.

Second Layer:

Step 6: In a large bowl, mix the two puddings and milk and combine following the package directions.

Step 7: Take the pan out of the freezer and spread the pudding on top of the cream cheese layer. Return the pan to the freezer and keep it there for additional 20 minutes.

Top Layer:

Step 8: On top, spread the rest of the Cool Whip and sprinkle with the grated/shaved chocolate. If time permits, allow the dessert to chill in the fridge for at least 2 hours before serving.

July 21, 2022 0 comment
0 FacebookTwitterPinterestEmail
General Recipes

Creamy Garlic Shrimp

by Rebecca July 21, 2022
written by Rebecca

I love this creamy garlic shrimp. It’s super easy to throw together using only a few simple ingredients. Make this today and have it ready in no time. Enjoy a filling dinner with tender shrimps tossed in a delicious Parmesan garlic sauce.

One of my favorite seafood is shrimp, and I can say the same with my daughter. We share a love for shrimp. The first time I made this creamy garlic shrimp, this blew her mind and mine, too. Shrimp is one of the easiest to cook. You just throw in simple ingredients, and you’re done in a blink!

If you love a restaurant-quality meal that you can easily and quickly make at home, then you have to give this creamy garlic shrimp recipe a try very soon. Enjoy this with pasta, rice, or mashed potatoes for a winner dinner that your entire family will absolutely love!

Ingredients

2 tablespoons olive oil

3 tbsp unsalted butter

1 ½ pound large peeled and flowered shrimp with tails

½ cup grated Parmesan cheese

3 teaspoons minced garlic

1 cup heavy whipping cream

Salt and pepper to taste

1 cup white cooking wine

How to make Creamy Garlic Shrimp

Step 1: In a frying pan, heat the oil over medium-high heat. Once the oil is hot, add the shrimp to the pan and sprinkle with salt and pepper. Fry the shrimp on each side until cooked through. Set aside when done.

Step 2: Adjust the heat to medium and add the butter to the now-empty skillet along with the garlic. Cook until the butter has melted. Then, whisk in the cooking wine and let it simmer until reduced by half.

Step 3: To the skillet, add the heavy whipping cream. Stir well and allow it to simmer until the sauce has thickened.

Step 4: Add the Parmesan cheese and return the shrimp to the skillet. Stir well.

Step 5: Serve the creamy garlic shrimp immediately. Enjoy!

Creamy Garlic Shrimp

Rebecca I love this creamy garlic shrimp. It’s super easy to throw together using only a few simple ingredients. Make this today and have it ready in no time. Enjoy a… General Recipes Creamy Garlic Shrimp European Print This
Nutrition facts: 200 calories 20 grams fat
Rating: 5.0/5
( 1 voted )

Ingredients

  • 2 tablespoons olive oil
  • 3 tbsp unsalted butter
  • 1 ½ pound large peeled and flowered shrimp with tails
  • ½ cup grated Parmesan cheese
  • 3 teaspoons minced garlic
  • 1 cup heavy whipping cream
  • Salt and pepper to taste
  • 1 cup white cooking wine

Instructions

Step 1: In a frying pan, heat the oil over medium-high heat. Once the oil is hot, add the shrimp to the pan and sprinkle with salt and pepper. Fry the shrimp on each side until cooked through. Set aside when done.

Step 2: Adjust the heat to medium and add the butter to the now-empty skillet along with the garlic. Cook until the butter has melted. Then, whisk in the cooking wine and let it simmer until reduced by half.

Step 3: To the skillet, add the heavy whipping cream. Stir well and allow it to simmer until the sauce has thickened.

Step 4: Add the Parmesan cheese and return the shrimp to the skillet. Stir well.

Step 5: Serve the creamy garlic shrimp immediately. Enjoy!

July 21, 2022 0 comment
0 FacebookTwitterPinterestEmail
General Recipes

SUPER EASY TEX-MEX BEEF ENCHILADAS RECIPE

by Rebecca July 21, 2022
written by Rebecca

Prep Time: 20 mins | Cook Time: 45 mins | Total Time: 1 hr 5 mins | Yield: 4 to 6 Servings

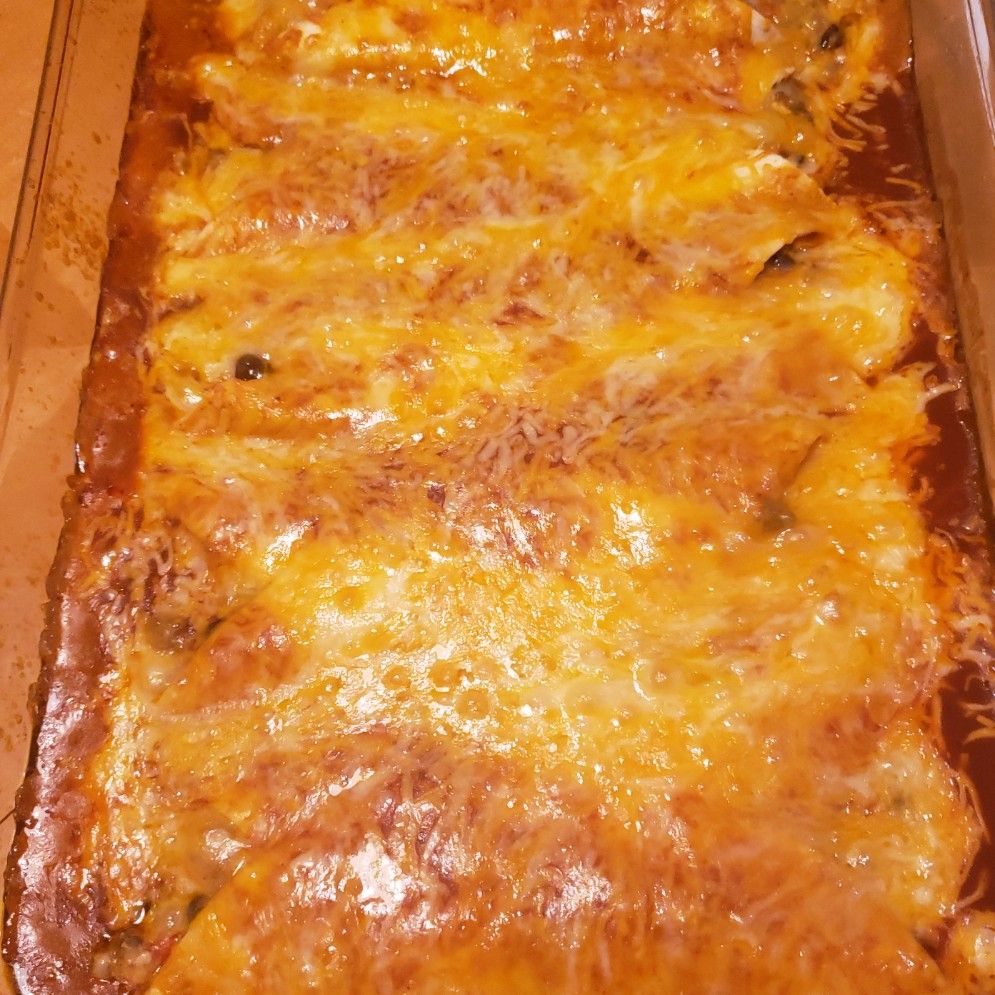
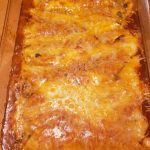
I am obsessed with enchiladas! They are an amazing dish with a mouthwatering combination of authentic enchilada gravy, flavorful ground beef filling, and gooey cheese. A fun and exciting (super easy!) Tex-Mex dinner that will have everyone begging for a repeat!

Ingredients

2 tbsp cooking oil

2-3 lbs coarse ground chuck

2-3 medium jalapeno or Serrano peppers

1 medium white onion

1 tbsp chili powder

1 tbsp smoked paprika

12+ homemade corn or flour tortillas

1 c. grated Mexican blend cheese

1 c. grated Monterey jack cheese

1/3 bunch of fresh cilantro

2-3 c. enchilada sauce

1 tsp sea salt

1 tsp ground black pepper

HOW TO MAKE SUPER EASY TEX-MEX BEEF ENCHILADAS

Step 1: Prepare the oven. Preheat it to 175 degrees C or 350 degrees F.

Step 2: Into four, slice the peeled onions. Place the sliced onions into a food processor along with the sliced peppers. Next, add the cilantro leaves. Pulse until well blended and minced.

Step 3: Add the cheeses to a mixing bowl and mix well until combined.

Step 4: Drizzle oil in a hot large non-stick skillet over medium-high heat. Then, add the ground chuck, paprika, chili powder, salt, and pepper. Stir well and cook until the ground chuck is browned. Stir in the minced ingredients and continue to cook for another 2 minutes or until fragrant. When done, take the skillet off the heat.

Step 5: Grease a 9 x 13-inch baking dish using cooking spray.

Step 6: Cover about 4 to 6 tortillas with a paper towel. Heat them in the microwave for about 20 seconds. Do the same for the remaining tortillas.

Step 7: Onto a clean surface, lay the tortillas. In the center of each tortilla, spoon the meat mixture and sprinkle with grated cheese. Then, roll each tortilla and place them into the prepared baking dish. On top, pour the enchilada sauce and evenly spread. Lastly, sprinkle the cheese on top.

Step 8: Bake in the preheated oven for about 30 minutes.

Step 9: Remove from the oven when done and serve the enchiladas immediately with salsa, refried beans, charro, and Spanish rice. Enjoy!

SUPER EASY TEX-MEX BEEF ENCHILADAS RECIPE

Rebecca Prep Time: 20 mins | Cook Time: 45 mins | Total Time: 1 hr 5 mins | Yield: 4 to 6 Servings I am obsessed with enchiladas! They are an… General Recipes SUPER EASY TEX-MEX BEEF ENCHILADAS RECIPE European Print This
Serves: 4-6 Prep Time: 20 mins Cooking Time: 45 mins 45 mins
Nutrition facts: 200 calories 20 grams fat
Rating: 5.0/5
( 1 voted )

Ingredients

  • 2 tbsp cooking oil
  • 2-3 lbs coarse ground chuck
  • 2-3 medium jalapeno or Serrano peppers
  • 1 medium white onion
  • 1 tbsp chili powder
  • 1 tbsp smoked paprika
  • 12+ homemade corn or flour tortillas
  • 1 c. grated Mexican blend cheese
  • 1 c. grated Monterey jack cheese
  • 1/3 bunch of fresh cilantro
  • 2-3 c. enchilada sauce
  • 1 tsp sea salt
  • 1 tsp ground black pepper

Instructions

Step 1: Prepare the oven. Preheat it to 175 degrees C or 350 degrees F.

Step 2: Into four, slice the peeled onions. Place the sliced onions into a food processor along with the sliced peppers. Next, add the cilantro leaves. Pulse until well blended and minced.

Step 3: Add the cheeses to a mixing bowl and mix well until combined.

Step 4: Drizzle oil in a hot large non-stick skillet over medium-high heat. Then, add the ground chuck, paprika, chili powder, salt, and pepper. Stir well and cook until the ground chuck is browned. Stir in the minced ingredients and continue to cook for another 2 minutes or until fragrant. When done, take the skillet off the heat.

Step 5: Grease a 9 x 13-inch baking dish using cooking spray.

Step 6: Cover about 4 to 6 tortillas with a paper towel. Heat them in the microwave for about 20 seconds. Do the same for the remaining tortillas.

Step 7: Onto a clean surface, lay the tortillas. In the center of each tortilla, spoon the meat mixture and sprinkle with grated cheese. Then, roll each tortilla and place them into the prepared baking dish. On top, pour the enchilada sauce and evenly spread. Lastly, sprinkle the cheese on top.

Step 8: Bake in the preheated oven for about 30 minutes.

Step 9: Remove from the oven when done and serve the enchiladas immediately with salsa, refried beans, charro, and Spanish rice. Enjoy!

July 21, 2022 0 comment
0 FacebookTwitterPinterestEmail
General Recipes

Homemade Beanie Weenies

by Rebecca July 21, 2022
written by Rebecca

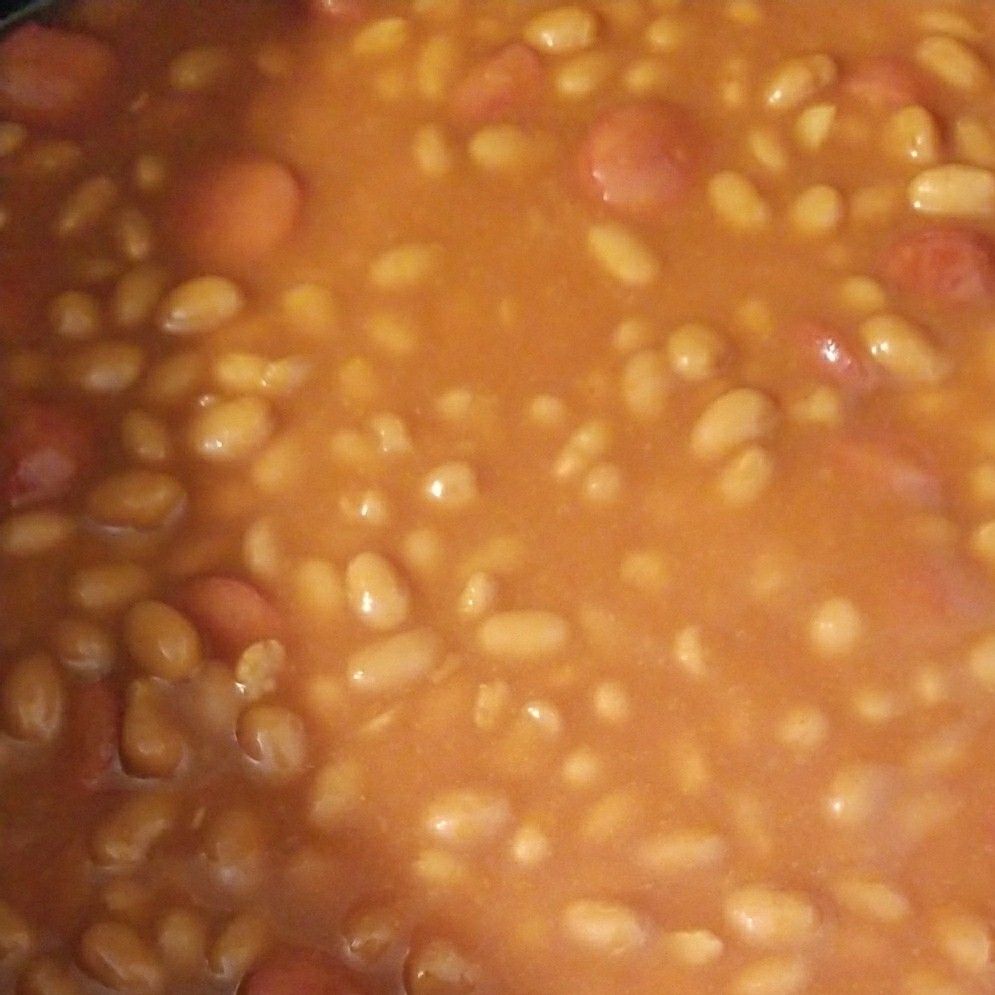
This homemade Beanie weenie is a very simple dish to make at home. A homemade version of the canned beanie weenies. It is made with three simple ingredients – sugar, hot dogs, and baked beans. These homemade beanie weenies are very delicious and worth begging for!

My daughter loves beanie weenies. It is one of her favorite dishes. This is her most requested dish. That’s fine because I can make this without any fuss either on the stovetop or in the crockpot.

This is a pretty simple beanie weenies recipe. A foolproof, budget-friendly recipe. The first time I saw this recipe, I knew that this will become a huge part of our menu rotation. We used to eat beanie weenies from the can not until this recipe. We have not canned beanie weenies since! This homemade version is a million times better. I can easily make this on the stovetop in under fifteen minutes. I can also dump everything in my crockpot and set it to cook while I’m doing other things. You can even double or triple this recipe if feeding a crowd. And this beanie weenie is very cheap, it’ll not break your bank!

Ingredients

¼ – ½ c. light brown sugar

4-5 hot dogs sliced

1 28-ounces can of Bush’s Baked Beans – Country Style is my favorite

How to make Homemade Beanie Weenies

Step 1: Cook the sliced hot dogs in a hot skillet over medium heat until browned. Then, sprinkle with brown sugar and stir well.

Step 2: To the skillet, pour in the can of Bush’s Baked Beans. Stir well and continue to cook for another 15 minutes over low/medium heat.

Note:

To make this in a crockpot, place all the ingredients in your crockpot. Stir and set to cook for 2 to 4 hours on low.

Homemade Beanie Weenies

Rebecca This homemade Beanie weenie is a very simple dish to make at home. A homemade version of the canned beanie weenies. It is made with three simple ingredients – sugar,… General Recipes Homemade Beanie Weenies European Print This
Nutrition facts: 200 calories 20 grams fat
Rating: 5.0/5
( 1 voted )

Ingredients

  • ¼ – ½ c. light brown sugar
  • 4-5 hot dogs sliced
  • 1 28-ounces can of Bush’s Baked Beans - Country Style is my favorite

Instructions

Step 1: Cook the sliced hot dogs in a hot skillet over medium heat until browned. Then, sprinkle with brown sugar and stir well.

Step 2: To the skillet, pour in the can of Bush’s Baked Beans. Stir well and continue to cook for another 15 minutes over low/medium heat.

Notes

To make this in a crockpot, place all the ingredients in your crockpot. Stir and set to cook for 2 to 4 hours on low.

July 21, 2022 0 comment
0 FacebookTwitterPinterestEmail
General Recipes

Stuffed Pepper Soup

by Rebecca July 21, 2022
written by Rebecca

Prep time: 15 mins | Cook time: 45 mins | Yield: 8 Servings (2 quarts)

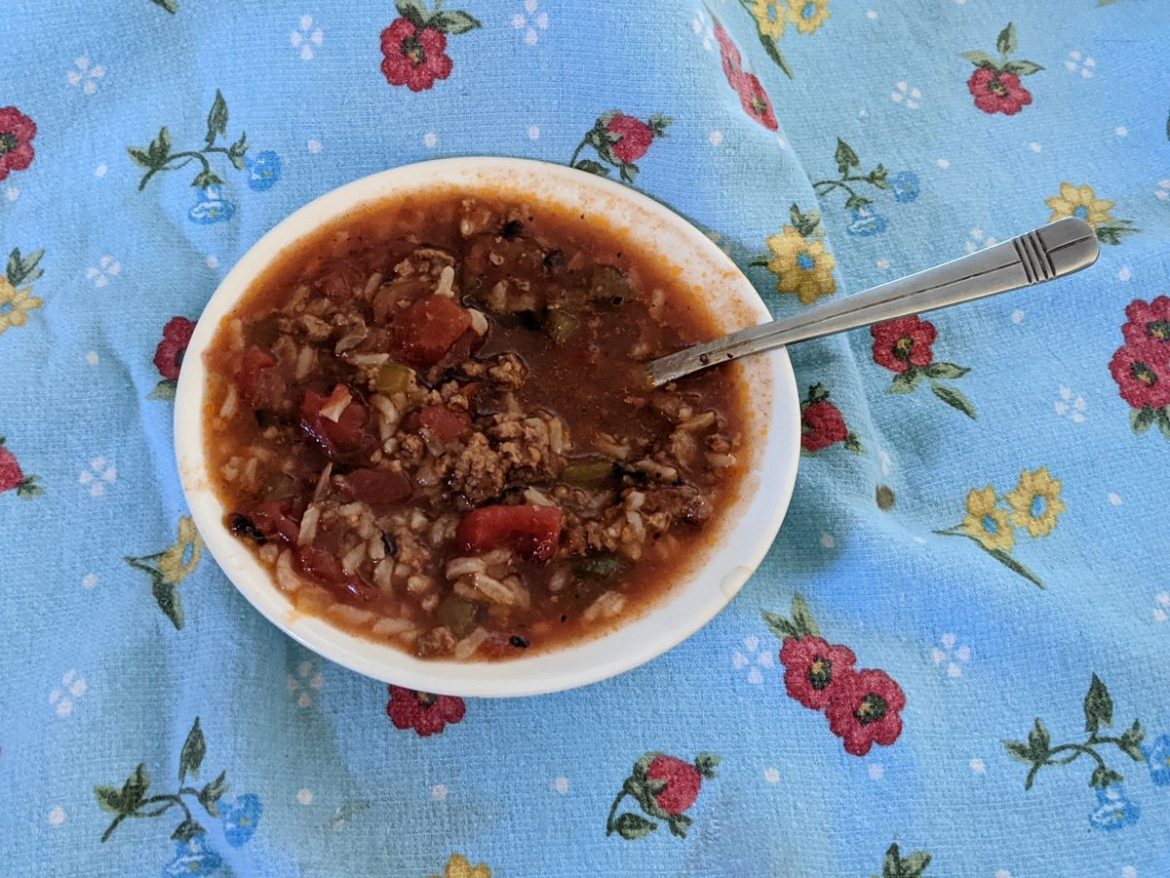
This Stuffed Pepper Soup is a very comforting soup with ground beef, rice, and peppers. A complete meal in one that you can make easily and quickly at any time!

Ingredients

2 lbs ground beef

2 c. cooked long grain rice

1/4 c. packed brown sugar

1 can (28 oz.) tomato sauce

2 c. chopped green peppers

1 can (28 oz) diced tomatoes, undrained

1 tsp pepper

2 tsp salt

6 c. water

2 tsp beef bouillon granules

Chopped fresh parsley, optional

How to make Stuffed Pepper Soup

Step 1: Place the beef in a Dutch oven. Stir and cook over medium heat until browned, breaking the meat into pieces as it cooks. Drain and bring to a boil while adding in the rest of the ingredients. Stir well. Adjust the heat to low and cook further, uncovered, or until the peppers are tender. This takes another 30 minutes.

Step 2: Continue to cook for 10 minutes more, uncovered. Then, add the cooked rice. If desired, sprinkle with some chopped fresh parsley.

Tips:

This stuffed pepper soup is already a complete meal with ground beef, peppers, and rice. But if you want some extra, pair this soup up with sour cream and cheddar biscuits or jalapeno buttermilk cornbread. Or for a more substantial meal, mix this up with a grilled cheese sandwich made with Garlic Fontina Bread.

Feel free to use either dark brown or light brown sugar. Just note that dark brown sugar has more molasses than light brown sugar, thus it has a stronger flavor.

Peeling the bell peppers is optional. You can leave the skin on and just diced the bell peppers.

For this recipe, you can swap the ground beef with mild or spicy sausage. You can even use ground chicken or turkey instead. If you love garlic, you can cook the beef with a few garlic cloves or garlic powder. For the rice, you can use brown rice, quinoa, barley, or orzo pasta. If you want a little more kick, add cayenne pepper or chopped tomatoes with the chilies.

To prevent the rice from getting soggy, scoop it into individual bowls and ladle the soup on top instead of stirring it in the soup.

Nutrition Facts:

1 Cup: 337 calories, 14g fat (5g saturated fat), 70mg cholesterol, 1466mg sodium, 30g carbohydrate (13g sugars, 4g fiber), 24g protein.

Stuffed Pepper Soup

Rebecca Prep time: 15 mins | Cook time: 45 mins | Yield: 8 Servings (2 quarts) This Stuffed Pepper Soup is a very comforting soup with ground beef, rice, and peppers.… General Recipes Stuffed Pepper Soup European Print This
Serves: 8 Prep Time: 15 mins Cooking Time: 45 mins 45 mins
Nutrition facts: 337 calories 14 fat
Rating: 5.0/5
( 1 voted )

Ingredients

  • 2 lbs ground beef
  • 2 c. cooked long grain rice
  • 1/4 c. packed brown sugar
  • 1 can (28 oz.) tomato sauce
  • 2 c. chopped green peppers
  • 1 can (28 oz) diced tomatoes, undrained
  • 1 tsp pepper
  • 2 tsp salt
  • 6 c. water
  • 2 tsp beef bouillon granules
  • Chopped fresh parsley, optional

Instructions

Step 1: Place the beef in a Dutch oven. Stir and cook over medium heat until browned, breaking the meat into pieces as it cooks. Drain and bring to a boil while adding in the rest of the ingredients. Stir well. Adjust the heat to low and cook further, uncovered, or until the peppers are tender. This takes another 30 minutes.

Step 2: Continue to cook for 10 minutes more, uncovered. Then, add the cooked rice. If desired, sprinkle with some chopped fresh parsley.

Notes

This stuffed pepper soup is already a complete meal with ground beef, peppers, and rice. But if you want some extra, pair this soup up with sour cream and cheddar biscuits or jalapeno buttermilk cornbread. Or for a more substantial meal, mix this up with a grilled cheese sandwich made with Garlic Fontina Bread. Feel free to use either dark brown or light brown sugar. Just note that dark brown sugar has more molasses than light brown sugar, thus it has a stronger flavor. Peeling the bell peppers is optional. You can leave the skin on and just diced the bell peppers. For this recipe, you can swap the ground beef with mild or spicy sausage. You can even use ground chicken or turkey instead. If you love garlic, you can cook the beef with a few garlic cloves or garlic powder. For the rice, you can use brown rice, quinoa, barley, or orzo pasta. If you want a little more kick, add cayenne pepper or chopped tomatoes with the chilies. To prevent the rice from getting soggy, scoop it into individual bowls and ladle the soup on top instead of stirring it in the soup.

July 21, 2022 0 comment
0 FacebookTwitterPinterestEmail
General Recipes

Chocolate Mayonnaise Cake

by Rebecca July 21, 2022
written by Rebecca

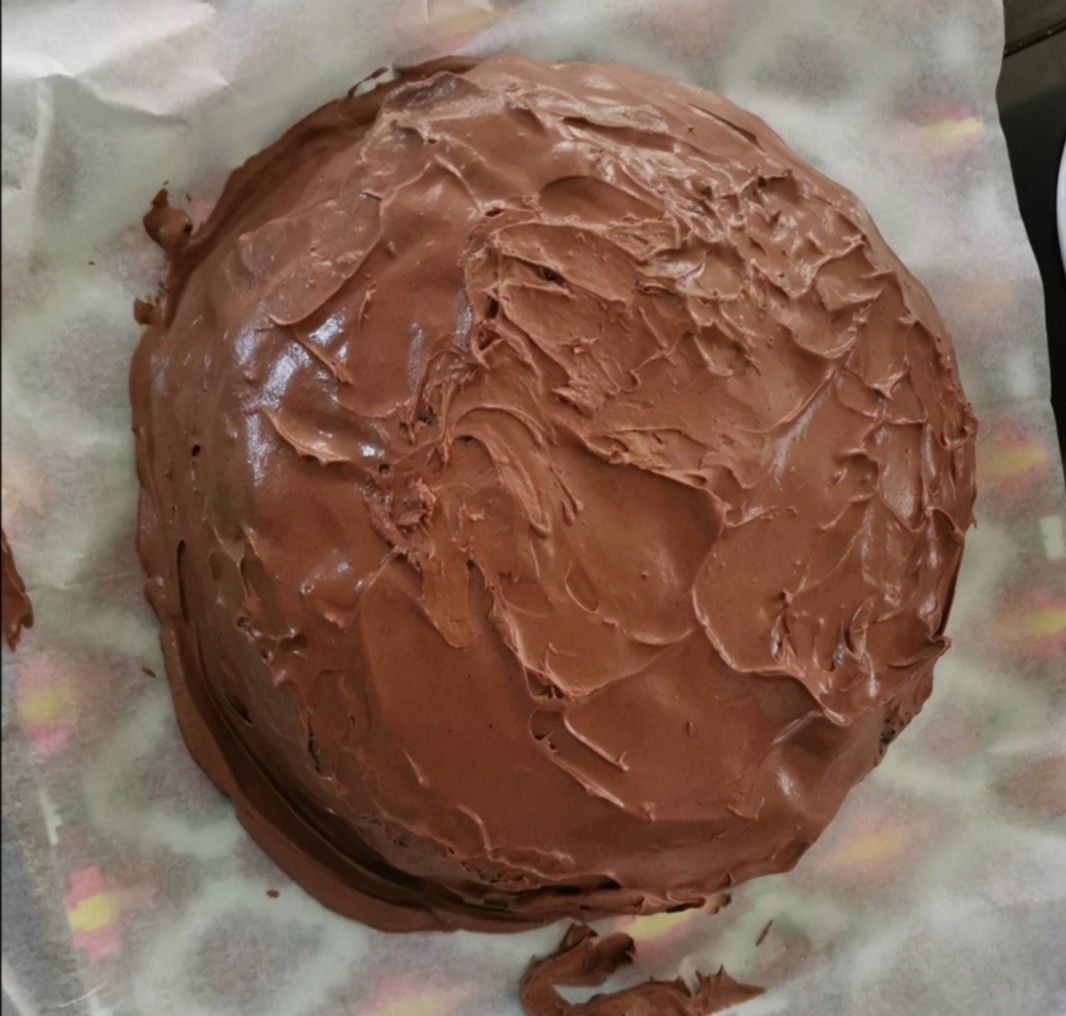
Tender crumbs, moist cake – this is always the goal when making the perfect cake. The fudgy, almost moist brownie texture of this decadent Chocolate-Mayonnaise Cake is to die for!

Ingredients

1 c. buttermilk

2 c. flour

1 ½ c. sugar

1½ teaspoon baking soda

2 teaspoons vanilla extract

¾ c. unsweetened cocoa powder – high quality is preferred

2 teaspoons baking powder

1 c. lukewarm water (or warm coffee)

1 c. creamy salad dressing like Miracle Whip or full-fat mayonnaise

1 teaspoon salt

How to make Chocolate-Mayonnaise Cake

Step 1: Prepare the oven. Preheat it to 350 degrees F. Ready a 9 x 13-inch baking dish or 12 cups Bundt cake pan. Grease, flour, and set aside.

Step 2: In a large bowl, place all the dry ingredients. Mix well until combined.

Step 3: Place the wet ingredients in a separate bowl and mix well until blended.

Step 4: Into the dry mixture, gradually pour in the wet mixture, whisking until just incorporated. Then, pour the batter into the prepared baking dish.

Step 5: Place in the preheated oven and bake for about 30 minutes or until a toothpick inserted in the middle of the cake comes out clean. Remove from the oven when done and let the cake cool completely. If using a Bundt pan, allow the cake to cool for 10 to 15 minutes before inverting it onto a cooling rack.

NOTES:

For best results, use full-fat mayonnaise.

Do not over-mix the batter, or else your cake will be tough.

Correctly measure the flour. Scoop the flour into a measuring cup and level the excess off using a straight edge.

To make sure the cake is done, insert a toothpick in the middle. Once the toothpick comes out clean, then the cake is perfect!

If you want extra rich and depth chocolate flavor, swap the coffee with water.

You can keep the cake for up to 3 days at room temperature, covered.

To freeze, allow the cake to cool completely. Do not frost. Double wrap the unfrosted cake in a freeze plastic wrap for up to 3 months.

Chocolate Mayonnaise Cake

Rebecca Tender crumbs, moist cake – this is always the goal when making the perfect cake. The fudgy, almost moist brownie texture of this decadent Chocolate-Mayonnaise Cake is to die for!… General Recipes Chocolate Mayonnaise Cake European Print This
Nutrition facts: 200 calories 20 grams fat
Rating: 5.0/5
( 1 voted )

Ingredients

  • 1 c. buttermilk
  • 2 c. flour
  • 1 ½ c. sugar
  • 1½ teaspoon baking soda
  • 2 teaspoons vanilla extract
  • ¾ c. unsweetened cocoa powder – high quality is preferred
  • 2 teaspoons baking powder
  • 1 c. lukewarm water (or warm coffee)
  • 1 c. creamy salad dressing like Miracle Whip or full-fat mayonnaise
  • 1 teaspoon salt

Instructions

Step 1: Prepare the oven. Preheat it to 350 degrees F. Ready a 9 x 13-inch baking dish or 12 cups Bundt cake pan. Grease, flour, and set aside.

Step 2: In a large bowl, place all the dry ingredients. Mix well until combined.

Step 3: Place the wet ingredients in a separate bowl and mix well until blended.

Step 4: Into the dry mixture, gradually pour in the wet mixture, whisking until just incorporated. Then, pour the batter into the prepared baking dish.

Step 5: Place in the preheated oven and bake for about 30 minutes or until a toothpick inserted in the middle of the cake comes out clean. Remove from the oven when done and let the cake cool completely. If using a Bundt pan, allow the cake to cool for 10 to 15 minutes before inverting it onto a cooling rack.

Notes

For best results, use full-fat mayonnaise. Do not over-mix the batter, or else your cake will be tough. Correctly measure the flour. Scoop the flour into a measuring cup and level the excess off using a straight edge. To make sure the cake is done, insert a toothpick in the middle. Once the toothpick comes out clean, then the cake is perfect! If you want extra rich and depth chocolate flavor, swap the coffee with water. You can keep the cake for up to 3 days at room temperature, covered. To freeze, allow the cake to cool completely. Do not frost. Double wrap the unfrosted cake in a freeze plastic wrap for up to 3 months.

July 21, 2022 0 comment
0 FacebookTwitterPinterestEmail
General Recipes

FRIED POTATOES AND ONIONS

by Rebecca July 21, 2022
written by Rebecca

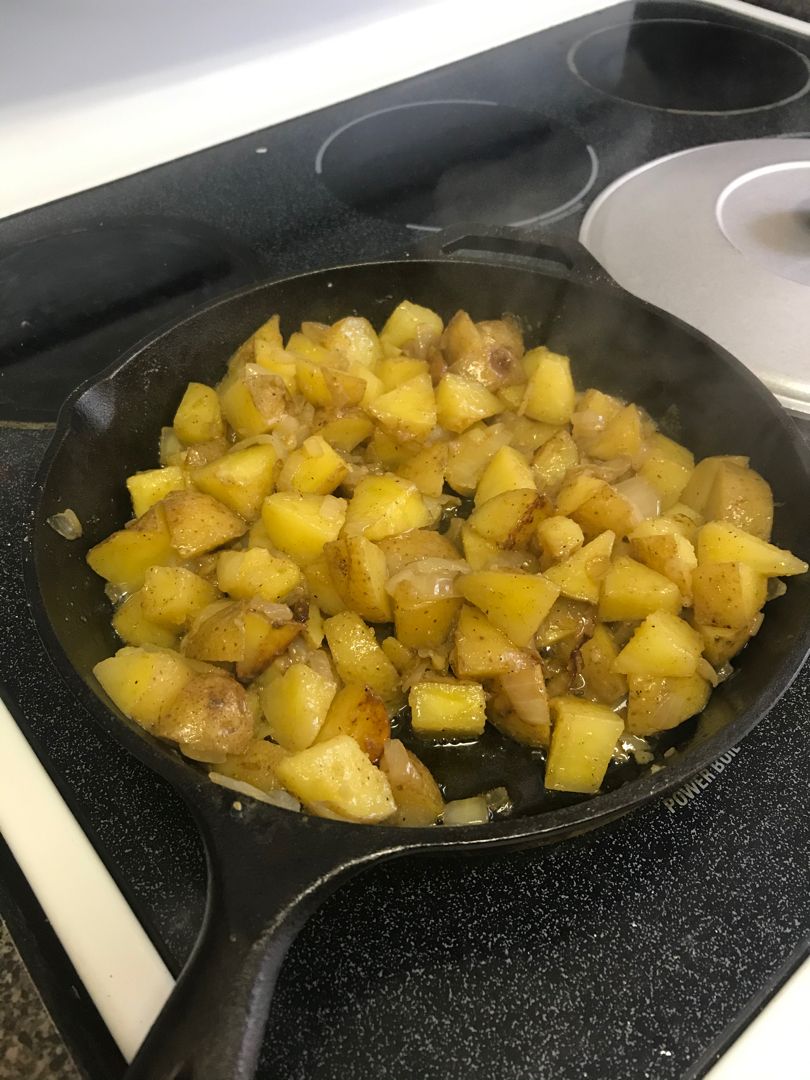
These delicious fried potatoes and onions are an amazing breakfast paired with eggs, sausage, or bacon. You can also serve them as a side to any meal.

Ingredients

1 large onion – sliced thinly

3-4 medium Russet potatoes – washed and peeled

2 tablespoons butter (or more)

¼ teaspoon salt

¼ teaspoon pepper

2 tablespoons olive oil – or omit the vegetable oil if you prefer

Optional Add-Ins:

1 tablespoon chives – chopped (garnish)

1 teaspoon red pepper flakes

2-3 cloves of garlic – minced or ½ teaspoon of garlic powder

HOW TO MAKE FRIED POTATOES AND ONIONS

Step 1: Into 1/4-inch thickness, slice the onions and potatoes.

Step 2: Add the butter and olive oil to a large frying pan. Heat over medium-high heat. Then, add the sliced potatoes and onions. Put the lid on and cook the onions and potatoes for about 10 minutes. DO NOT STIR. To taste, season with salt and pepper.

Step 3: Uncover and gently flip the potatoes and onions over using a spatula. Be very careful not to break them apart. You can add 1 to 2 tablespoons extra butter if the potatoes are too dry.

Step 4: Continue to cook the potatoes and onions for additional 5 minutes or until the potatoes start to turn slightly browned, stirring often. Decrease the heat if the potatoes and onions begin to burn.

Step 5: Cook further until the potatoes are crispy. Then, add the garlic or garlic powder and red pepper flakes (optional).

Step 6: Gently flip the potatoes and onions to coat them in the garlic and red pepper. Take the pan off the heat and transfer the fried potatoes and onions to a plate lined with paper towels. Allow them to rest for about 5 minutes.

Step 7: Before serving, garnish the fried potatoes and onions with chives. Enjoy!

NOTES:

SLICING: I use a mandolin to slice the potatoes and onions.

VARIATIONS: You can use butter or bacon grease to saute the onions and potatoes. Feel free to throw in a little chopped dill or your preferred fresh herbs.

POTATOES: Swap Russet potatoes with gold potatoes. You can dice them instead of slicing them.

FRIED POTATOES AND ONIONS

Rebecca These delicious fried potatoes and onions are an amazing breakfast paired with eggs, sausage, or bacon. You can also serve them as a side to any meal. Ingredients 1 large… General Recipes FRIED POTATOES AND ONIONS European Print This
Nutrition facts: 200 calories 20 grams fat
Rating: 5.0/5
( 1 voted )

Ingredients

  • 1 large onion – sliced thinly
  • 3-4 medium Russet potatoes – washed and peeled
  • 2 tablespoons butter (or more)
  • ¼ teaspoon salt
  • ¼ teaspoon pepper
  • 2 tablespoons olive oil – or omit the vegetable oil if you prefer
  • Optional Add-Ins:
  • 1 tablespoon chives – chopped (garnish)
  • 1 teaspoon red pepper flakes
  • 2-3 cloves of garlic – minced or ½ teaspoon of garlic powder

Instructions

Step 1: Into 1/4-inch thickness, slice the onions and potatoes.

Step 2: Add the butter and olive oil to a large frying pan. Heat over medium-high heat. Then, add the sliced potatoes and onions. Put the lid on and cook the onions and potatoes for about 10 minutes. DO NOT STIR. To taste, season with salt and pepper.

Step 3: Uncover and gently flip the potatoes and onions over using a spatula. Be very careful not to break them apart. You can add 1 to 2 tablespoons extra butter if the potatoes are too dry.

Step 4: Continue to cook the potatoes and onions for additional 5 minutes or until the potatoes start to turn slightly browned, stirring often. Decrease the heat if the potatoes and onions begin to burn.

Step 5: Cook further until the potatoes are crispy. Then, add the garlic or garlic powder and red pepper flakes (optional).

Step 6: Gently flip the potatoes and onions to coat them in the garlic and red pepper. Take the pan off the heat and transfer the fried potatoes and onions to a plate lined with paper towels. Allow them to rest for about 5 minutes.

Step 7: Before serving, garnish the fried potatoes and onions with chives. Enjoy!

Notes

SLICING: I use a mandolin to slice the potatoes and onions. VARIATIONS: You can use butter or bacon grease to saute the onions and potatoes. Feel free to throw in a little chopped dill or your preferred fresh herbs. POTATOES: Swap Russet potatoes with gold potatoes. You can dice them instead of slicing them.

July 21, 2022 0 comment
0 FacebookTwitterPinterestEmail
Newer Posts
Older Posts

Popular Posts

  • 1

    Crispy Crunchy Parmesan Potatoes

    March 21, 2020
  • 2

    CROCK POT SMOTHERED PORK CHOPS

    March 21, 2020
  • Facebook
  • Twitter

@2019 - All Right Reserved.


Back To Top