Cook it once
  • Home
  • Privacy Policy
  • Recipes
    • KETO
    • LC
    • WW
  • Tips
  • Contact
Cook it once
  • Home
  • Privacy Policy
  • Recipes
    • KETO
    • LC
    • WW
  • Tips
  • Contact
Category:

General Recipes

General Recipes

Crock Pot Ranch Chicken Tacos

by Rebecca July 30, 2022
written by Rebecca

Easy and absolutely delicious! This crockpot ranch chicken taco is filled with amazing flavors. It’s incredibly versatile, and you can use the chicken another way. To serve, ladle the chicken onto the tortillas and top with your favorite toppings such as shredded lettuce, diced avocado, shredded cheese, and more!

Ingredients

8-10 small taco-sized flour tortillas or corn tortillas

4 boneless, skinless chicken breasts

1 c. chicken stock – use, low sodium if desired

1 packet ranch seasoning

2 tbsp low sodium taco seasoning (or 1 packet of taco seasoning)

Optional:

Diced avocado

Shredded cheese

Diced tomato

Cilantro leaves – chopped

Red onion – thinly sliced

Shredded lettuce or Shredded cabbage

How to make Crock Pot Ranch Chicken Tacos

Step 1: In the bottom of a slow cooker, place the chicken breasts. Pour in the chicken stock and sprinkle the chicken with taco seasoning and ranch seasoning. Put the lid on and set to cook for 3 to 4 hours on high or 6 to 7 hours on low.

Step 2: To a bowl, transfer the chicken about 20 minutes before serving. Shred the chicken using two forks and place the shredded chicken back into the slow cooker. Then, stir.

Step 3: To serve, fill the tortillas with the shredded chicken and top with your favorite toppings. Enjoy!

Notes:

I love Iceberg lettuce in my tacos. I often grab a bag of pre-shredded cabbage or shred it thinly by myself.

You can add cayenne pepper to the taco and ranch seasoning mixture for spicier chicken. You can also use spicy taco seasoning mix or hot pepper sauce.

Keep any leftovers in an airtight container and store them in the fridge for up to 4 days.

Easily double this recipe if desired. Use a crockpot that can hold 6 quarts or more and adjust the cooking time by about 1 hour.

To freeze, let the chicken cool completely. Then, place the chicken in airtight containers or freezer bags.

Crock Pot Ranch Chicken Tacos

Rebecca Easy and absolutely delicious! This crockpot ranch chicken taco is filled with amazing flavors. It’s incredibly versatile, and you can use the chicken another way. To serve, ladle the chicken… General Recipes Crock Pot Ranch Chicken Tacos European Print This
Nutrition facts: 200 calories 20 grams fat
Rating: 5.0/5
( 1 voted )

Ingredients

  • 8-10 small taco-sized flour tortillas or corn tortillas
  • 4 boneless, skinless chicken breasts
  • 1 c. chicken stock – use, low sodium if desired
  • 1 packet ranch seasoning
  • 2 tbsp low sodium taco seasoning (or 1 packet of taco seasoning)
  • Optional:
  • Diced avocado
  • Shredded cheese
  • Diced tomato
  • Cilantro leaves – chopped
  • Red onion – thinly sliced
  • Shredded lettuce or Shredded cabbage

Instructions

Step 1: In the bottom of a slow cooker, place the chicken breasts. Pour in the chicken stock and sprinkle the chicken with taco seasoning and ranch seasoning. Put the lid on and set to cook for 3 to 4 hours on high or 6 to 7 hours on low.

Step 2: To a bowl, transfer the chicken about 20 minutes before serving. Shred the chicken using two forks and place the shredded chicken back into the slow cooker. Then, stir.

Step 3: To serve, fill the tortillas with the shredded chicken and top with your favorite toppings. Enjoy!

Notes

I love Iceberg lettuce in my tacos. I often grab a bag of pre-shredded cabbage or shred it thinly by myself. You can add cayenne pepper to the taco and ranch seasoning mixture for spicier chicken. You can also use spicy taco seasoning mix or hot pepper sauce. Keep any leftovers in an airtight container and store them in the fridge for up to 4 days. Easily double this recipe if desired. Use a crockpot that can hold 6 quarts or more and adjust the cooking time by about 1 hour. To freeze, let the chicken cool completely. Then, place the chicken in airtight containers or freezer bags.

July 30, 2022 0 comment
0 FacebookTwitterPinterestEmail
General Recipes

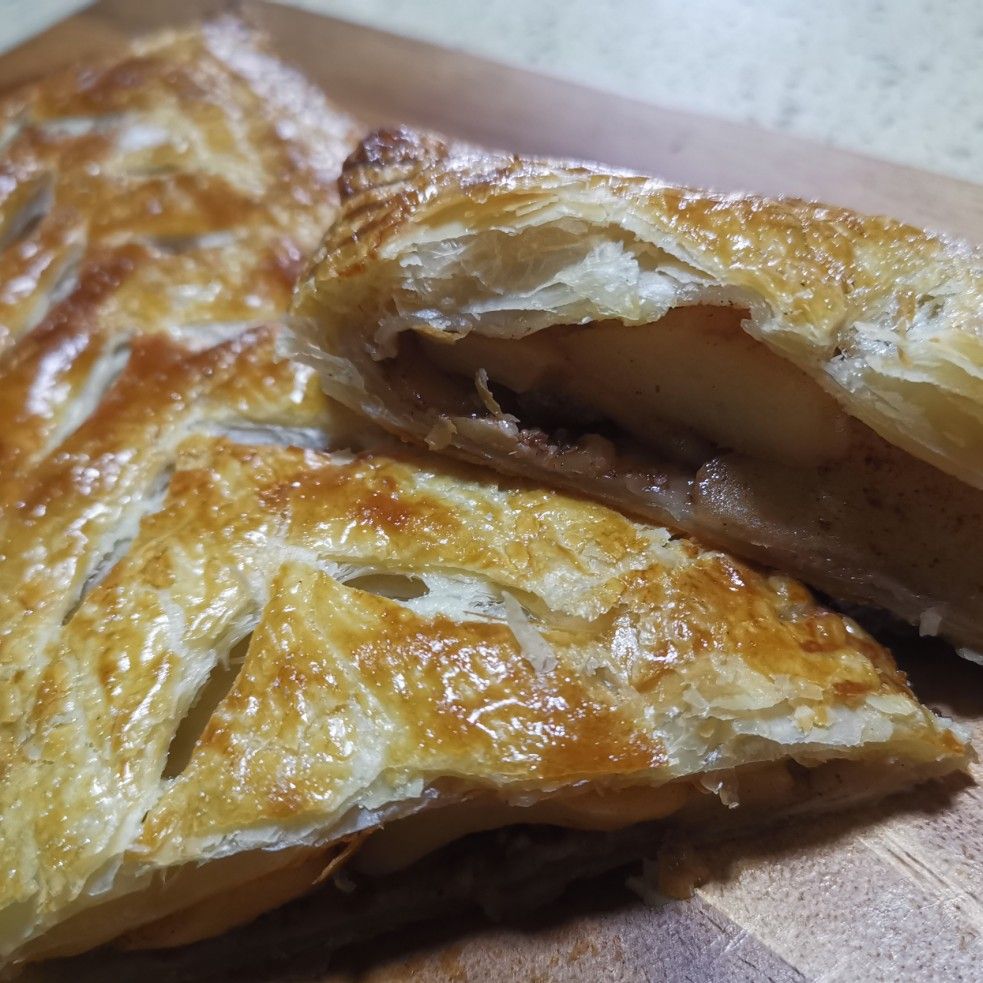
Apple Slab Pie

by Rebecca July 30, 2022
written by Rebecca

This Apple Slab Pie is a real treat for everyone who loves apple pie, but wants something different and fun. Delicious, crumbly, and filled with apple and cinnamon flavor. This Apple Slab Pie is super easy to whip using ingredients you might already have on hand. And the simple frosting adds an exciting twist to this apple slab pie. And this pie is also excellent for serving a crowd.

Ingredients

3 tbsp all-purpose flour

1 box refrigerated pie crusts, softened as directed on the box

1 c. granulated sugar

1 tsp ground cinnamon

1/4 tsp salt 1 1/2 tbsp lemon juice

1 c. powdered sugar

1/4 tsp ground nutmeg

2 tbsp milk

9 c. thinly sliced, peeled apples (9 medium)

How to make Apple Slab Pie

Step 1: Prepare the oven. Preheat it to 450 degrees. While the oven is preheating, remove the pie crust from its pouches.

Step 2: On a lightly floured surface, unroll the crust and roll them into small triangles. Into the pie pan, place the crust, pressing to fit on the underside and along the edges. Under it, fold the excess crust. Then, crimp the edges.

Step 3: In a bowl, place the flour, granulated sugar, nutmeg, cinnamon, lemon juice, and salt. Mix well until combined. Fold in the apples. Onto the pan, spoon the mixture, evenly distributing it.

Step 4: Place in the preheated oven and bake for about 33 to 38 minutes or until the crust is golden brown and the filling begins to bubble. Remove from the oven when done and transfer onto a cooling rack. Allow the pie to sit for about 45 minutes.

Step 5: To make the glaze, whisk the milk and powdered sugar until blended. Drizzle this over the pie and let the glaze set for about 30 minutes.

Step 6: Once the glaze is set, slice the pie to get around 15 servings. Enjoy!

Apple Slab Pie

Rebecca This Apple Slab Pie is a real treat for everyone who loves apple pie, but wants something different and fun. Delicious, crumbly, and filled with apple and cinnamon flavor. This… General Recipes Apple Slab Pie European Print This
Nutrition facts: 200 calories 20 grams fat
Rating: 5.0/5
( 1 voted )

Ingredients

  • 3 tbsp all-purpose flour
  • 1 box refrigerated pie crusts, softened as directed on the box
  • 1 c. granulated sugar
  • 1 tsp ground cinnamon
  • 1/4 tsp salt 1 1/2 tbsp lemon juice
  • 1 c. powdered sugar
  • 1/4 tsp ground nutmeg
  • 2 tbsp milk
  • 9 c. thinly sliced, peeled apples (9 medium)

Instructions

Step 1: Prepare the oven. Preheat it to 450 degrees. While the oven is preheating, remove the pie crust from its pouches.

Step 2: On a lightly floured surface, unroll the crust and roll them into small triangles. Into the pie pan, place the crust, pressing to fit on the underside and along the edges. Under it, fold the excess crust. Then, crimp the edges.

Step 3: In a bowl, place the flour, granulated sugar, nutmeg, cinnamon, lemon juice, and salt. Mix well until combined. Fold in the apples. Onto the pan, spoon the mixture, evenly distributing it.

Step 4: Place in the preheated oven and bake for about 33 to 38 minutes or until the crust is golden brown and the filling begins to bubble. Remove from the oven when done and transfer onto a cooling rack. Allow the pie to sit for about 45 minutes.

Step 5: To make the glaze, whisk the milk and powdered sugar until blended. Drizzle this over the pie and let the glaze set for about 30 minutes.

Step 6: Once the glaze is set, slice the pie to get around 15 servings. Enjoy!

July 30, 2022 0 comment
0 FacebookTwitterPinterestEmail
General Recipes

Monterey Chicken Spaghetti Bake: An Easy And Delicious Dinner

by Rebecca July 29, 2022
written by Rebecca

Total time: 1 hr | Serves: 6-8

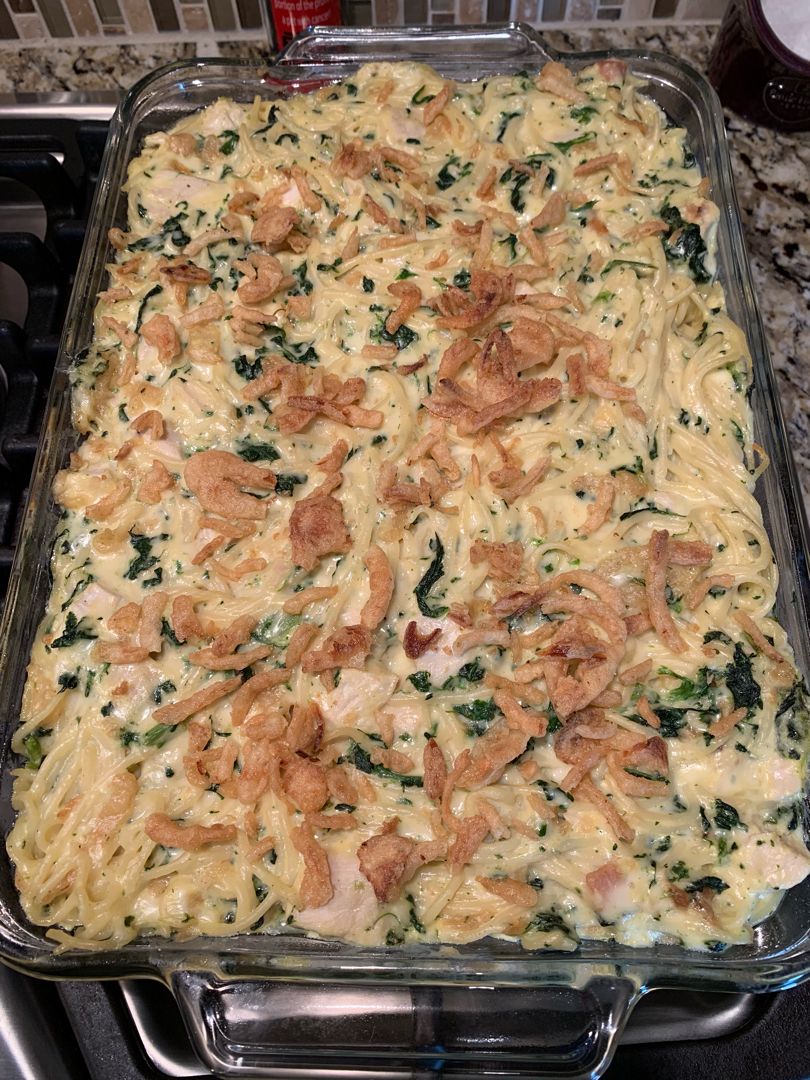
This Monterey Chicken Spaghetti Bake is an incredibly easy and delicious dinner. It is made with only a few readily available ingredients and ready in under an hour. This pasta dish is perfect if you are searching for another filling meal to serve to your loved ones.

Monterey Chicken Spaghetti Bake is a very comforting dish. It combines simple ingredients and makes them into something amazing! It is creamy, cheesy, and insanely delicious!

INGREDIENTS

4 c. cooked chicken, shredded

1 (16 ounces) package spaghetti, cooked and drained

1 (10 ounces) package of frozen spinach, thawed and drained

1 (8 ounces) package of cream cheese, room temperature

1 (8 ounces) container of sour cream

1 (6 ounces) package of fried onions, divided

3 cloves garlic, minced

1 tsp onion powder

1/4 c. Parmesan cheese, grated

2 c. Monterey jack cheese, divided

1 (10.75 ounces) can condensed cream of chicken soup

kosher salt and freshly ground pepper, to taste

How to make Monterey Chicken Spaghetti Bake

Step 1: Prepare the oven. Preheat it to 350 degrees F. Using a non-stick spray, lightly grease a 9 x 13-inch baking dish.

Step 2: Place the soup, sour cream and cream cheese, salt, pepper, garlic, and onion powder in a large bowl. Mix well until combined. Then, add the chicken, spinach, 1 c. Monterey jack cheese and 1/2 fried onions. Mix again until everything is combined.

Step 3: To the large bowl, add the cooked spaghetti. Toss well until evenly coated. Pour everything into the prepared baking dish and top with Parmesan and the rest of the Monterey Jack. Lastly, sprinkle with the rest of the onions.

Step 4: Place in the preheated oven and bake for about 40 minutes or until the cheese is bubbly and golden brown.

Step 5: Remove from the oven when done and serve the Monterey Chicken Spaghetti Bake immediately. Enjoy!

Monterey Chicken Spaghetti Bake: An Easy And Delicious Dinner

Rebecca Total time: 1 hr | Serves: 6-8 This Monterey Chicken Spaghetti Bake is an incredibly easy and delicious dinner. It is made with only a few readily available ingredients and… General Recipes Monterey Chicken Spaghetti Bake: An Easy And Delicious Dinner European Print This
Serves: 6-8
Nutrition facts: 200 calories 20 grams fat
Rating: 5.0/5
( 1 voted )

Ingredients

  • 4 c. cooked chicken, shredded
  • 1 (16 ounces) package spaghetti, cooked and drained
  • 1 (10 ounces) package of frozen spinach, thawed and drained
  • 1 (8 ounces) package of cream cheese, room temperature
  • 1 (8 ounces) container of sour cream
  • 1 (6 ounces) package of fried onions, divided
  • 3 cloves garlic, minced
  • 1 tsp onion powder
  • 1/4 c. Parmesan cheese, grated
  • 2 c. Monterey jack cheese, divided
  • 1 (10.75 ounces) can condensed cream of chicken soup
  • kosher salt and freshly ground pepper, to taste

Instructions

Step 1: Prepare the oven. Preheat it to 350 degrees F. Using a non-stick spray, lightly grease a 9 x 13-inch baking dish.

Step 2: Place the soup, sour cream and cream cheese, salt, pepper, garlic, and onion powder in a large bowl. Mix well until combined. Then, add the chicken, spinach, 1 c. Monterey jack cheese and 1/2 fried onions. Mix again until everything is combined.

Step 3: To the large bowl, add the cooked spaghetti. Toss well until evenly coated. Pour everything into the prepared baking dish and top with Parmesan and the rest of the Monterey Jack. Lastly, sprinkle with the rest of the onions.

Step 4: Place in the preheated oven and bake for about 40 minutes or until the cheese is bubbly and golden brown.

Step 5: Remove from the oven when done and serve the Monterey Chicken Spaghetti Bake immediately. Enjoy!

July 29, 2022 0 comment
0 FacebookTwitterPinterestEmail
General Recipes

HEALTHY TACO STUFFED TOMATOES

by Rebecca July 29, 2022
written by Rebecca

Prep Time: 5 mins | Cook Time: 10 mins | Total Time: 15 mins | Servings: 4

Love tacos? These Healthy Taco Stuffed Tomatoes are a great taco variety. With the same goodness as a taco, but healthy. The presentation, the taste, and everything are just superb!

Making these Healthy Taco Stuffed Tomatoes is super fun! Instead of tortillas, we used fresh tomatoes. Filled them with layers of lettuce, taco meat, onion, and shredded cheese, and topped them with sour cream. This simple recipe is an excellent option if you have tons of tomatoes just waiting to rot.

These taco-stuffed tomatoes are almost like stuffed peppers. The only difference is we skip baking so the tomatoes stay fresh. You can serve these taco-stuffed tomatoes as an amazing appetizer, these are also great as a healthy dinner option, and even as snacks. These are also very inexpensive.

If you love tacos and you have an abundance of tomatoes, then this incredibly easy and quick taco stuffed tomatoes recipe is worth the try. All you need to throw this together are some very simple ingredients. These taco-stuffed tomatoes are also a no-fuss and guarantee to put a smile on everyone’s face!

Ingredients

1 pound of ground beef

4 tomatoes

1 packet Taco Seasoning

Taco sauce for dipping

Shredded Lettuce

Fiesta Mexican blend Shredded Cheese

Onions, diced

Sour Cream

HOW TO MAKE HEALTHY TACO STUFFED TOMATOES

Step 1: Into the top of each tomato, cut an “X” shape and gently pull them apart. In the meantime, brown the hamburger and stir in the taco seasoning.

Step 2: Fill with lettuce the bottom of each tomato. Then, fill it with taco meat followed by the onion and shredded cheese. Top each with sour cream.

Step 3: Serve the healthy taco-stuffed tomatoes right away. Enjoy!

Tips:

Adjust the recipe according to the size and shape of the tomatoes.

You are welcome to prep the filling in advance and simply reheat it in the microwave or a pan.

Nutritional Facts:

Calories: 326 kcal, Carbohydrates: 9g, Protein: 20g, Fat: 22g, Cholesterol: 80mg, Sodium: 788mg, Potassium: 597mg

HEALTHY TACO STUFFED TOMATOES

Rebecca Prep Time: 5 mins | Cook Time: 10 mins | Total Time: 15 mins | Servings: 4 Love tacos? These Healthy Taco Stuffed Tomatoes are a great taco variety. With… General Recipes HEALTHY TACO STUFFED TOMATOES European Print This
Serves: 4 Prep Time: 5 mins Cooking Time: 10 mins 10 mins
Nutrition facts: 326 calories 22 fat
Rating: 5.0/5
( 1 voted )

Ingredients

  • 1 pound of ground beef
  • 4 tomatoes
  • 1 packet Taco Seasoning
  • Taco sauce for dipping
  • Shredded Lettuce
  • Fiesta Mexican blend Shredded Cheese
  • Onions, diced
  • Sour Cream

Instructions

Step 1: Into the top of each tomato, cut an “X” shape and gently pull them apart. In the meantime, brown the hamburger and stir in the taco seasoning.

Step 2: Fill with lettuce the bottom of each tomato. Then, fill it with taco meat followed by the onion and shredded cheese. Top each with sour cream.

Step 3: Serve the healthy taco-stuffed tomatoes right away. Enjoy!

Notes

Adjust the recipe according to the size and shape of the tomatoes. You are welcome to prep the filling in advance and simply reheat it in the microwave or a pan.

July 29, 2022 0 comment
0 FacebookTwitterPinterestEmail
General Recipes

Cheesecake Crescent Rolls

by Rebecca July 29, 2022
written by Rebecca

Prep time: 10 mins | Cook time: 30 mins | Serves: 8

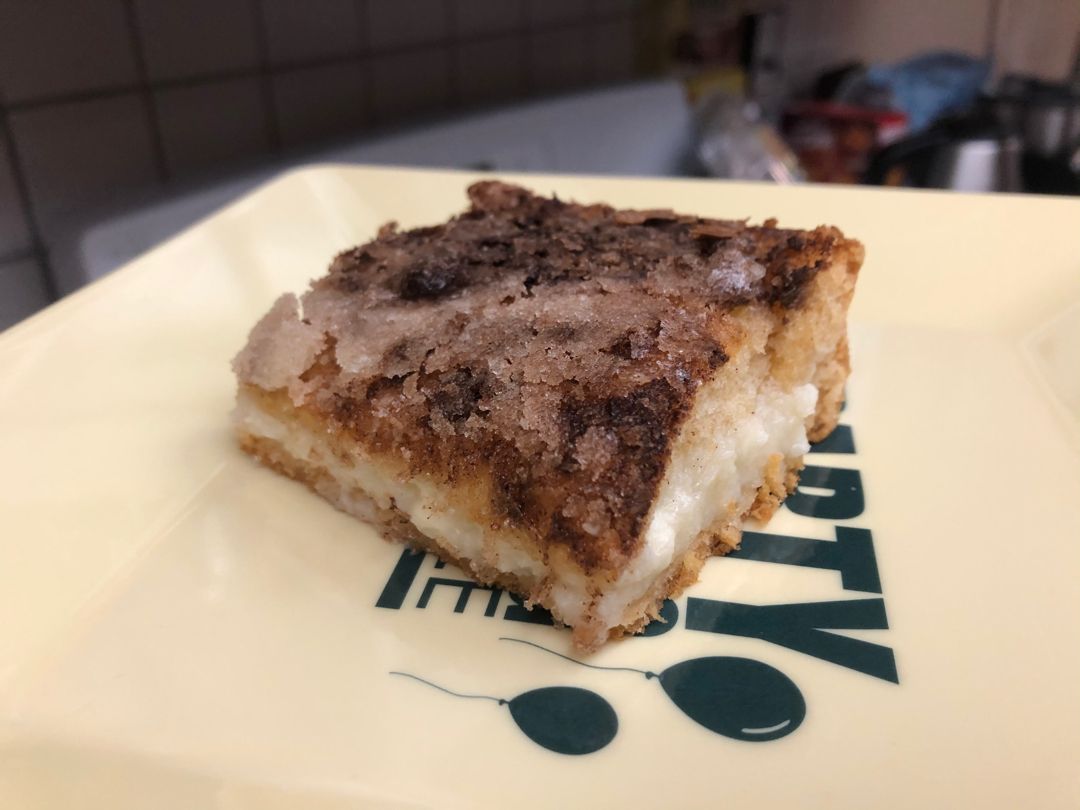
These Cheesecake Crescent Rolls are the easiest and quickest to make. They taste superb! All you need to make this are a few simple ingredients. Mix them, layer them, and bake.

Crescent Rolls are the best! I cannot think of anything that crescent roll can’t do. I always have a stash of them at home. I also have a couple of recipes that involved crescent rolls. One of them is this outrageously delicious dessert bar. Did I mention that these Cheesecake Crescent Rolls are also perfect for breakfast? Yes! You can have this any time of the day!

These Cheesecake Crescent Rolls are a wonderful dish. And it is super easy and fast to make without a fuss.

INGREDIENTS

2 (8 ounces each) packages of cream cheese, at room temperature

2 cans of crescent rolls

1 1/2 c. granulated sugar

1/2 c. (1 stick) butter, melted

1 tsp vanilla extract

1 tsp cinnamon

1/4 tsp salt

How to make Cheesecake Crescent Rolls

Step 1: Prepare the oven. Preheat it to 350 degrees F. Using cooking spray, grease a 9 x 13-inch baking pan.

Step 2: Press, 1 unrolled crescent roll into the bottom of the prepared baking dish.

Step 3: Place the cream cheese, 1 cup of sugar, salt, and vanilla extract in a medium bowl. Beat using an electric mixer until smooth. Then, spread this over the dough.

Step 4: On top of the cream cheese layer, press the second can of the crescent roll.

Step 5: On top, pour the melted butter and brush to evenly cover the top. Combine the rest of the sugar and cinnamon and sprinkle this on top.

Step 6: Place the baking dish in the preheated oven and bake the cheesecake crescent roll for about 30 minutes or until golden brown. Remove from the oven when done and let it cool before slicing into triangles.

Step 7: Serve and enjoy!

Cheesecake Crescent Rolls

Rebecca Prep time: 10 mins | Cook time: 30 mins | Serves: 8 These Cheesecake Crescent Rolls are the easiest and quickest to make. They taste superb! All you need to… General Recipes Cheesecake Crescent Rolls European Print This
Serves: 8 Prep Time: 10 mins Cooking Time: 30 mins 30 mins
Nutrition facts: 200 calories 20 grams fat
Rating: 5.0/5
( 1 voted )

Ingredients

  • 2 (8 ounces each) packages of cream cheese, at room temperature
  • 2 cans of crescent rolls
  • 1 1/2 c. granulated sugar
  • 1/2 c. (1 stick) butter, melted
  • 1 tsp vanilla extract
  • 1 tsp cinnamon
  • 1/4 tsp salt

Instructions

Step 1: Prepare the oven. Preheat it to 350 degrees F. Using cooking spray, grease a 9 x 13-inch baking pan.

Step 2: Press, 1 unrolled crescent roll into the bottom of the prepared baking dish.

Step 3: Place the cream cheese, 1 cup of sugar, salt, and vanilla extract in a medium bowl. Beat using an electric mixer until smooth. Then, spread this over the dough.

Step 4: On top of the cream cheese layer, press the second can of the crescent roll.

Step 5: On top, pour the melted butter and brush to evenly cover the top. Combine the rest of the sugar and cinnamon and sprinkle this on top.

Step 6: Place the baking dish in the preheated oven and bake the cheesecake crescent roll for about 30 minutes or until golden brown. Remove from the oven when done and let it cool before slicing into triangles.

Step 7: Serve and enjoy!

July 29, 2022 0 comment
0 FacebookTwitterPinterestEmail
General Recipes

Stuffed Mushroom Casserole

by Rebecca July 29, 2022
written by Rebecca

Prep time: 20 mins | Cook time: 30 mins | Serves: 7-9

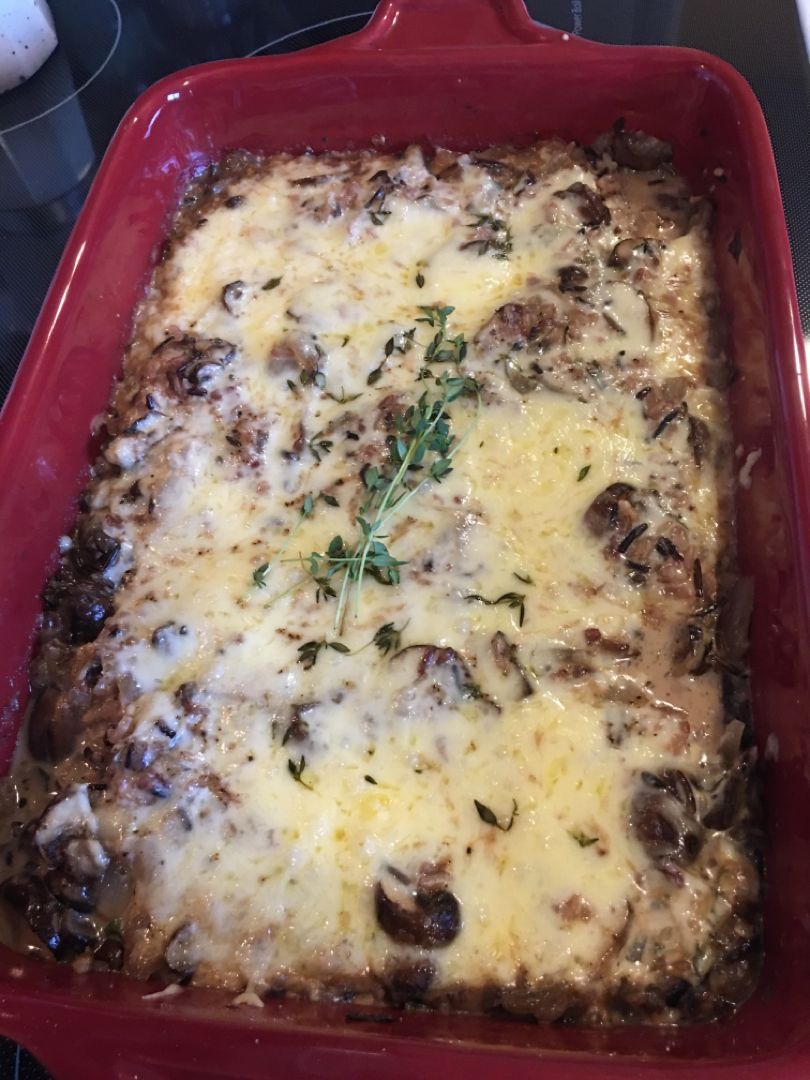
This stuffed mushroom casserole is an amazing appetizer! The combination of earthy and buttery mushrooms, cream cheese, and crispy bread crumbs is just perfect. This casserole is not only very delightful, but incredibly easy and quick to throw together. All you need are a few simple ingredients that you might already have on hand. Have this casserole ready in under thirty minutes, and enjoy the perfect appetizer that even your fussiest eaters will love! Give this Stuffed Mushrooms casserole a try very soon. I guarantee that you’ll love every bite!

INGREDIENTS

1.5 lbs white mushrooms

2 tbsp extra virgin olive oil

6 oz. cream cheese

4 cloves of garlic, minced

½ c. grated mozzarella

½ c. grated Parmesan

3 tbsp fresh parsley

¾ c. bread crumbs

1 ½ tbsp butter, melted

Salt and pepper to taste

How to make Stuffed Mushroom Casserole

Step 1: Prepare the oven. Preheat it to 350 degrees F.

Step 2: In a large skillet, heat the olive oil over medium heat. Once the oil is hot, add the quartered mushrooms to the skillet and season with salt and pepper. Saute the mushrooms for about 7 to 9 minutes or until the mushrooms have softened and most of the water has cooked off.

Step 3: To the mushrooms, add the garlic and cook for about a minute until aromatic.

Step 4: Add the cubed cream cheese and stir until the mushrooms are evenly coated.

Step 5: Take the skillet off the heat and stir in the mozzarella, half cup Panko, and 1/4 cup Parmesan.

Step 6: Into a greased 8 x 8-inch baking dish, pour the mixture.

Step 7: Place the parsley, melted butter, remaining cheese, and Panko in a small bowl. Mix well and sprinkle this over the mushrooms.

Step 8: Place in the preheated oven and bake for about 25 to 30 minutes or until the Panko is golden.

Stuffed Mushroom Casserole

Rebecca Prep time: 20 mins | Cook time: 30 mins | Serves: 7-9 This stuffed mushroom casserole is an amazing appetizer! The combination of earthy and buttery mushrooms, cream cheese, and… General Recipes Stuffed Mushroom Casserole European Print This
Serves: 7-9 Prep Time: 20 mins Cooking Time: 30 mins 30 mins
Nutrition facts: 200 calories 20 grams fat
Rating: 5.0/5
( 1 voted )

Ingredients

  • 1.5 lbs white mushrooms
  • 2 tbsp extra virgin olive oil
  • 6 oz. cream cheese
  • 4 cloves of garlic, minced
  • ½ c. grated mozzarella
  • ½ c. grated Parmesan
  • 3 tbsp fresh parsley
  • ¾ c. bread crumbs
  • 1 ½ tbsp butter, melted
  • Salt and pepper to taste

Instructions

Step 1: Prepare the oven. Preheat it to 350 degrees F.

Step 2: In a large skillet, heat the olive oil over medium heat. Once the oil is hot, add the quartered mushrooms to the skillet and season with salt and pepper. Saute the mushrooms for about 7 to 9 minutes or until the mushrooms have softened and most of the water has cooked off.

Step 3: To the mushrooms, add the garlic and cook for about a minute until aromatic.

Step 4: Add the cubed cream cheese and stir until the mushrooms are evenly coated.

Step 5: Take the skillet off the heat and stir in the mozzarella, half cup Panko, and 1/4 cup Parmesan.

Step 6: Into a greased 8 x 8-inch baking dish, pour the mixture.

Step 7: Place the parsley, melted butter, remaining cheese, and Panko in a small bowl. Mix well and sprinkle this over the mushrooms.

Step 8: Place in the preheated oven and bake for about 25 to 30 minutes or until the Panko is golden.

July 29, 2022 0 comment
0 FacebookTwitterPinterestEmail
General Recipes

One-pot Texas Hash

by Rebecca July 29, 2022
written by Rebecca

Total time: 30 mins | Serves: 4-6

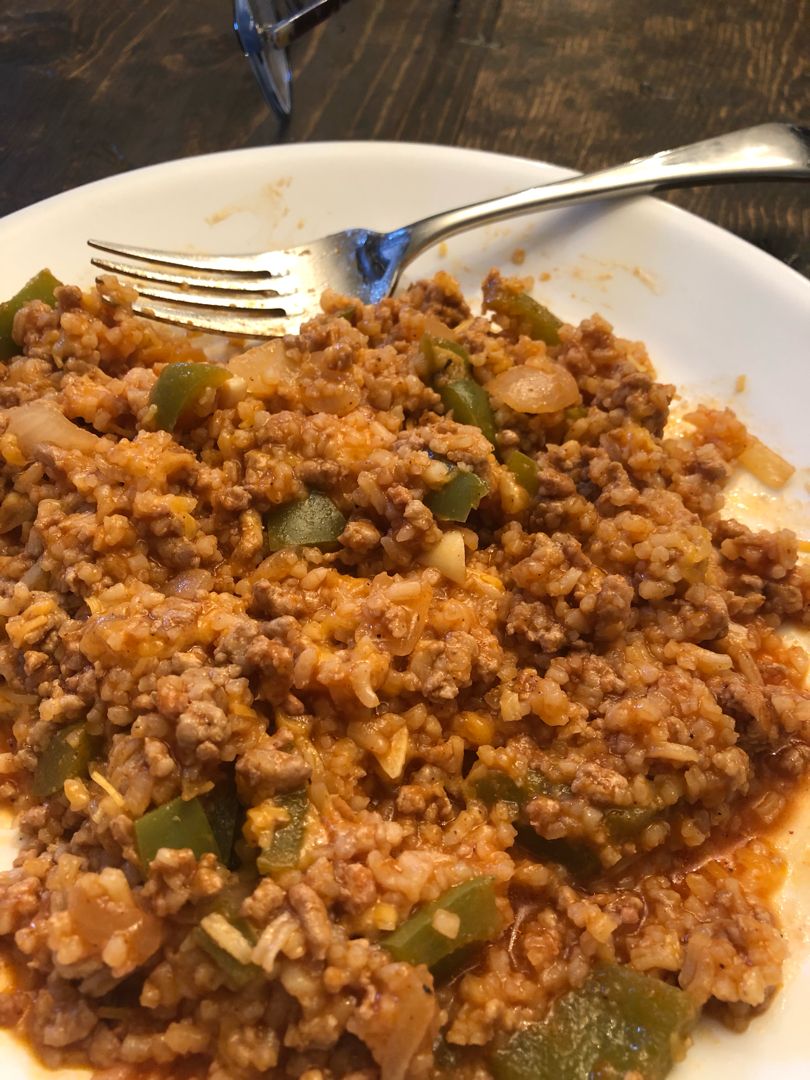
Insanely flavorful and a breeze to make. This One-pot Texas Hash is a great weeknight dinner perfect for everyone!

I have been enjoying this Texas Hash for years. I am already making this even before I got married. It’s one of my favorite and go-to. All you need are just a few simple ingredients. Dump them into your crock pot and set them to cook. In under an hour, you have a complete meal with rice, ground beef, veggies, and melty cheese.

This one-pot Texas Hash is a very comforting meal. Incredibly savory and super easy to make. If you are searching for a meal that you can throw together, even on your busiest days, then you are in luck! This One-pot Texas Hash is everything!

INGREDIENTS

1 lb ground beef

1 c. diced onion

2 tbsp olive oil

1 c. diced green bell pepper

2 tbsp tomato paste

1 tbsp minced fresh garlic

1/2 tsp dry mustard

2 1/2 tsp chili powder

1/2 c. uncooked long grain white rice

1 14.5-oz. can of diced tomatoes with juice

1 1/2 tsp Worcestershire sauce

Grated cheddar or Monterey jack cheese (optional)

1 c. water

2 tsp salt

1/4 tsp freshly ground black pepper

How to make One-pot Texas Hash

Step 1: In a skillet, drizzle the olive oil. Then, add the onion, peppers, garlic, ground beef, dry mustard, chili powder, salt, and pepper. Cook until the ground beef is no longer pink, breaking the meat up to pieces as it cooks.

Step 2: Next, add the rice and tomato paste. Continue to cook for another 3 minutes. Then, add the canned tomatoes and juice along with the water and Worcestershire sauce. Put the lid on and let everything simmer for about 20 minutes.

Step 3: Take the lid off and fluff the hash using a fork. You can cook the dish for 2 minutes more without cover if the mixture is still wet.

Step 4: Before serving, sprinkle the Texas Hash with grated cheese (optional). Enjoy!

One-pot Texas Hash

Rebecca Total time: 30 mins | Serves: 4-6 Insanely flavorful and a breeze to make. This One-pot Texas Hash is a great weeknight dinner perfect for everyone! I have been enjoying… General Recipes One-pot Texas Hash European Print This
Serves: 4-6
Nutrition facts: 200 calories 20 grams fat
Rating: 5.0/5
( 1 voted )

Ingredients

  • 1 lb ground beef
  • 1 c. diced onion
  • 2 tbsp olive oil
  • 1 c. diced green bell pepper
  • 2 tbsp tomato paste
  • 1 tbsp minced fresh garlic
  • 1/2 tsp dry mustard
  • 2 1/2 tsp chili powder
  • 1/2 c. uncooked long grain white rice
  • 1 14.5-oz. can of diced tomatoes with juice
  • 1 1/2 tsp Worcestershire sauce
  • Grated cheddar or Monterey jack cheese (optional)
  • 1 c. water
  • 2 tsp salt
  • 1/4 tsp freshly ground black pepper

Instructions

Step 1: In a skillet, drizzle the olive oil. Then, add the onion, peppers, garlic, ground beef, dry mustard, chili powder, salt, and pepper. Cook until the ground beef is no longer pink, breaking the meat up to pieces as it cooks.

Step 2: Next, add the rice and tomato paste. Continue to cook for another 3 minutes. Then, add the canned tomatoes and juice along with the water and Worcestershire sauce. Put the lid on and let everything simmer for about 20 minutes.

Step 3: Take the lid off and fluff the hash using a fork. You can cook the dish for 2 minutes more without cover if the mixture is still wet.

Step 4: Before serving, sprinkle the Texas Hash with grated cheese (optional). Enjoy!

July 29, 2022 0 comment
0 FacebookTwitterPinterestEmail
General Recipes

My Grandma’s Oven-Baked Chicken Bites Recipe

by Rebecca July 29, 2022
written by Rebecca

Prep time: 5 mins | Cook time: 15 mins | Serves: 4

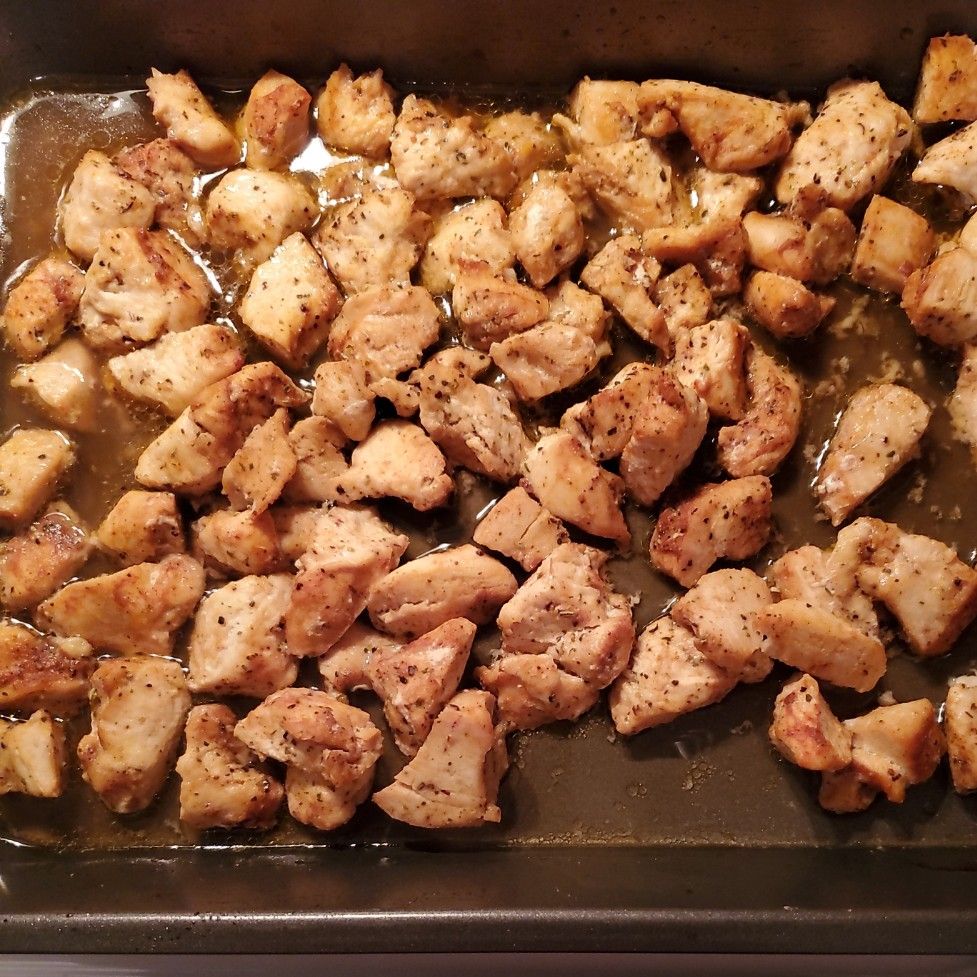
This Oven-Baked Chicken Bites recipe is easy and quick. This delicious dish is perfect if you want something easy and fast on your dinner table. All you need to make this are a few simple ingredients and fifteen minutes.

These chicken bites are very savory, they are super juicy, tender, and incredibly flavorful! I cannot believe how easy this scrumptious dish is to make. For a complete meal, I serve these oven-baked chicken bites with some steamed veggies and mac & cheese. It’s a combo that my kids always wanted!

If you are searching for another dish to make for your family. Then, you have to give these oven-baked chicken bites a try. This is also excellent for busy days as you can throw this together in under fifteen minutes!

INGREDIENTS

1 tbsp olive oil

2 tbsp unsalted butter, cubed

1 pound boneless, skinless chicken breasts, cut into 1” pieces

1/2 tsp paprika

1/2 tsp garlic powder

a pinch of cayenne pepper

1/2 tsp onion powder

Kosher salt and freshly ground black pepper, to taste

1 tsp Italian seasoning

How to make My Grandma’s Oven-Baked Chicken Bites

Step 1: Prepare the oven. Preheat it to 425 degrees F.

Step 2: Place the paprika, cayenne pepper, garlic powder, onion powder, Italian seasoning, salt, and pepper in a small bowl. Mix well until combined.

Step 3: In a 9 x 13-inch baking dish, lay the chicken and sprinkle with the seasoning mix. Drizzle the chicken with olive oil and toss to coat well.

Step 4: Over the chicken, put the butter. Place in the preheated oven and bake for about 16 to 18 minutes or until the chicken is completely cooked, stirring halfway through.

Step 5: When done, take the chicken bites out of the oven and allow it to rest for about 5 minutes.

Step 6: Serve and enjoy!

My Grandma’s Oven-Baked Chicken Bites Recipe

Rebecca Prep time: 5 mins | Cook time: 15 mins | Serves: 4 This Oven-Baked Chicken Bites recipe is easy and quick. This delicious dish is perfect if you want something… General Recipes My Grandma’s Oven-Baked Chicken Bites Recipe European Print This
Serves: 4 Prep Time: 5 mins Cooking Time: 15 mins 15 mins
Nutrition facts: 200 calories 20 grams fat
Rating: 5.0/5
( 1 voted )

Ingredients

  • 1 tbsp olive oil
  • 2 tbsp unsalted butter, cubed
  • 1 pound boneless, skinless chicken breasts, cut into 1” pieces
  • 1/2 tsp paprika
  • 1/2 tsp garlic powder
  • a pinch of cayenne pepper
  • 1/2 tsp onion powder
  • Kosher salt and freshly ground black pepper, to taste
  • 1 tsp Italian seasoning

Instructions

Step 1: Prepare the oven. Preheat it to 425 degrees F.

Step 2: Place the paprika, cayenne pepper, garlic powder, onion powder, Italian seasoning, salt, and pepper in a small bowl. Mix well until combined.

Step 3: In a 9 x 13-inch baking dish, lay the chicken and sprinkle with the seasoning mix. Drizzle the chicken with olive oil and toss to coat well.

Step 4: Over the chicken, put the butter. Place in the preheated oven and bake for about 16 to 18 minutes or until the chicken is completely cooked, stirring halfway through.

Step 5: When done, take the chicken bites out of the oven and allow it to rest for about 5 minutes.

Step 6: Serve and enjoy!

July 29, 2022 0 comment
0 FacebookTwitterPinterestEmail
General Recipes

Garlic Butter Steak and Potatoes Skillet

by Rebecca July 29, 2022
written by Rebecca

Prep time: 10 mins | Cook time: 10 mins | Total time: 20 mins | Serves: 4

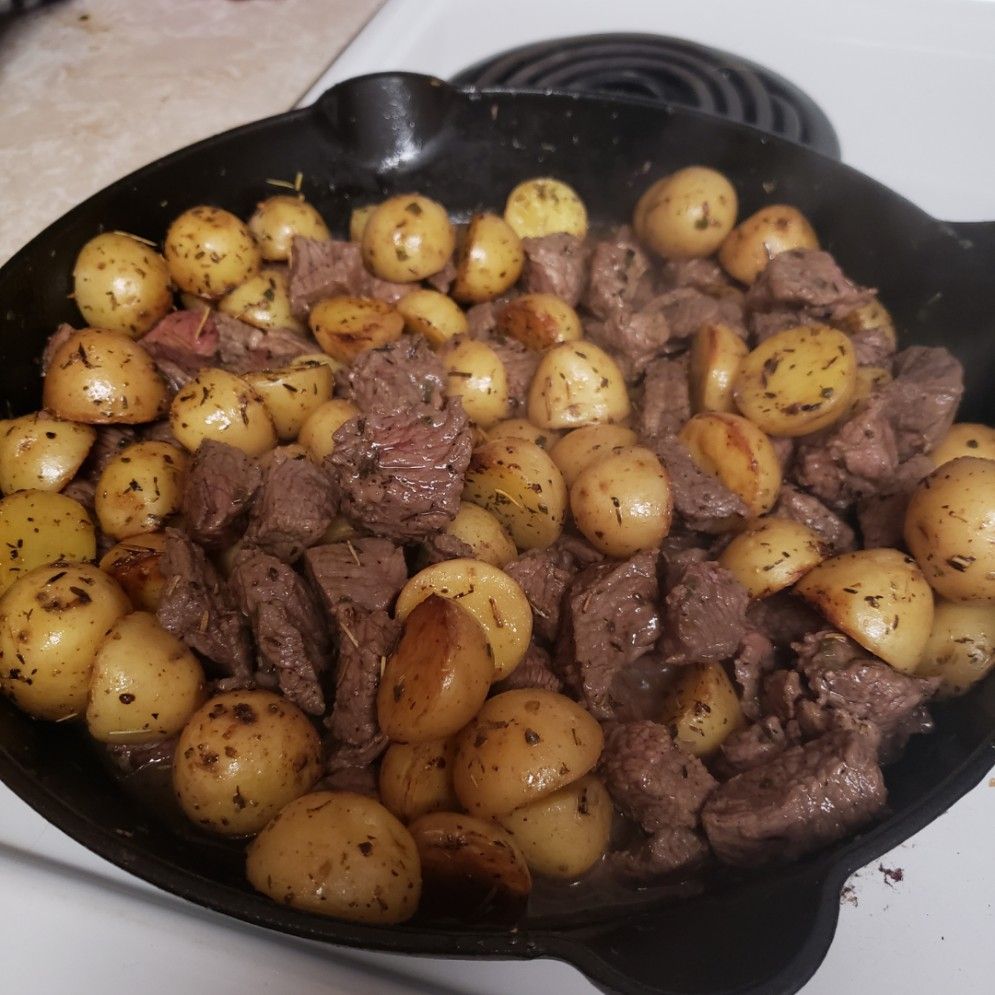
This Garlic Butter Steak and Potatoes Skillet is an amazing dinner option that you can easily and quickly make. This dish has been my go-to and one of my favorites. This steak and potatoes skillet is also a great option to serve on date nights with your preferred wine.

This skillet meal is made with butter, potatoes, oregano, rosemary, and sirloin, among other simple ingredients. Prep this in ten minutes and have this ready in under twenty minutes.

Ingredients

1 ½ lbs sirloin steak, cut into 1-inch cubes

1 tbsp olive oil

1 tsp dried rosemary

4 tbsp butter, divided

4 garlic cloves, minced

1 tsp dried oregano

1 lb Yukon Gold potatoes, diced into 1/2” cubes

Freshly chopped parsley for garnish optional

½ tsp salt

½ tsp pepper

How to make Garlic Butter Steak and Potatoes Skillet

Step 1: To a hot cast-iron skillet over medium-high heat, add the olive oil and 2 tbsp butter.

Step 2: To the skillet, add the potatoes, garlic, rosemary, oregano, salt, and pepper. Let them cook for about 4 minutes, undisturbed. After 4 minutes, stir everything and continue to cook for 3 to 4 minutes more or until tender. In a bowl, transfer everything when done.

Step 3: Adjust the heat to high and add 2 tbsp butter to the now-empty skillet. Once the butter has melted, add the steak bites in a single layer and cook for about a minute. Then, flip or stir the steak bites and cook for an additional 1 to 2 minutes or until cooked to your desired doneness.

Step 4: Take the skillet off the heat and return the cooked potatoes to the skillet. Toss well and season with extra salt and pepper.

Step 5: Before serving, garnish with some fresh chopped parsley if desired. Enjoy!

Tips:

For this recipe, you can also use beef tenderloin or New York strip steak. Or stir fry the meat.

You use red-skinned and fingerling potatoes instead of Yukon gold.

Nutrition Facts:

Calories: 455 kcal (23%), Carbohydrates: 21g (7%), Protein: 40g (80%), Fat: 23g (35%), Saturated Fat: 11g (69%), Cholesterol: 134mg (45%), Sodium: 495 mg (22%), Potassium: 1071mg (31%), Fiber: 3g (13%), Sugar: 1g (1%)

Garlic Butter Steak and Potatoes Skillet

Rebecca Prep time: 10 mins | Cook time: 10 mins | Total time: 20 mins | Serves: 4 This Garlic Butter Steak and Potatoes Skillet is an amazing dinner option that… General Recipes Garlic Butter Steak and Potatoes Skillet European Print This
Serves: 4 Prep Time: 10 mins Cooking Time: 10 mins 10 mins
Nutrition facts: 455 calories 23 fat
Rating: 5.0/5
( 1 voted )

Ingredients

  • 1 ½ lbs sirloin steak, cut into 1-inch cubes
  • 1 tbsp olive oil
  • 1 tsp dried rosemary
  • 4 tbsp butter, divided
  • 4 garlic cloves, minced
  • 1 tsp dried oregano
  • 1 lb Yukon Gold potatoes, diced into 1/2” cubes
  • Freshly chopped parsley for garnish optional
  • ½ tsp salt
  • ½ tsp pepper

Instructions

Step 1: To a hot cast-iron skillet over medium-high heat, add the olive oil and 2 tbsp butter.

Step 2: To the skillet, add the potatoes, garlic, rosemary, oregano, salt, and pepper. Let them cook for about 4 minutes, undisturbed. After 4 minutes, stir everything and continue to cook for 3 to 4 minutes more or until tender. In a bowl, transfer everything when done.

Step 3: Adjust the heat to high and add 2 tbsp butter to the now-empty skillet. Once the butter has melted, add the steak bites in a single layer and cook for about a minute. Then, flip or stir the steak bites and cook for an additional 1 to 2 minutes or until cooked to your desired doneness.

Step 4: Take the skillet off the heat and return the cooked potatoes to the skillet. Toss well and season with extra salt and pepper.

Step 5: Before serving, garnish with some fresh chopped parsley if desired. Enjoy!

Notes

For this recipe, you can also use beef tenderloin or New York strip steak. Or stir fry the meat. You use red-skinned and fingerling potatoes instead of Yukon gold.

July 29, 2022 0 comment
0 FacebookTwitterPinterestEmail
General Recipes

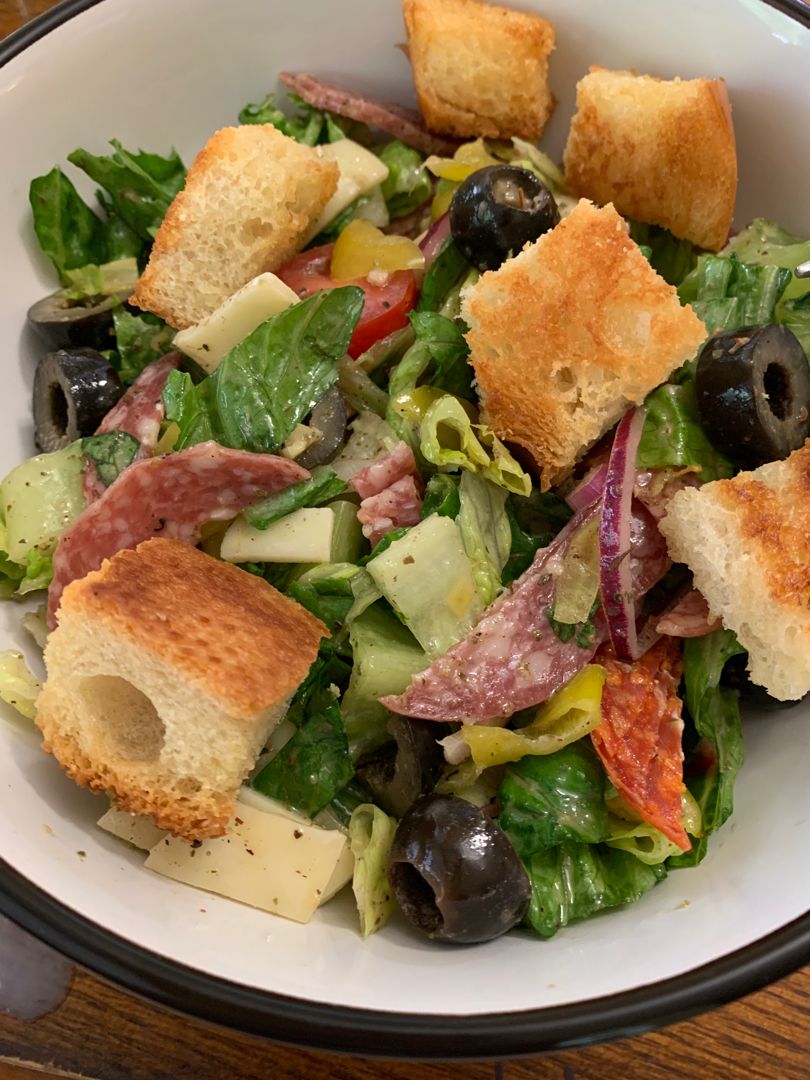
Italian Chop-Chop Salad: The Perfect Dish For A Quick Lunch

by Rebecca July 29, 2022
written by Rebecca

Total time: 25 mins | Serves: 6 – 8

I am all about quick and easy. With my busy schedule, it is super difficult to whip up a grand meal for my family. Thank goodness, because even the simplest dishes can make the best meals! Just like this Italian chop-chop salad. It’s incredibly simple to make using just a few ingredients. After twenty minutes of chilling this salad in the fridge, you can just dig in and enjoy a quick lunch.

I always love salads. They are the easiest to make and guarantee a delicious dish at any time. You can serve them by themselves or as a side to any of your meals. If you also love salads as I do, this Italian Chop-Chop Salad is a must!

INGREDIENTS

Salad:

1/2 lb salami, sliced and cut into small squares

2 hearts of romaine, shredded or roughly chopped

1/2 lb pepperoni, diced into squares

1 c. Parmesan cheese, cubed

1 cucumber, thinly sliced

1 (8 ounces) package of marinated mini mozzarella balls

1 red bell pepper, seeds removed and sliced into strips

1/2 lb provolone cheese, thinly sliced and cut into squares

1 c. white onion, thinly sliced into strips

1 c. sliced banana peppers or pepperoncini peppers

Dressing:

1/2 c. extra-virgin olive oil

1 c. red wine vinegar

1 tbsp dried basil

2 tsp kosher salt

1 tbsp garlic powder

2 tsp black pepper

2 tsp brown sugar, optional

How to make Italian Chop-Chop Salad

Step 1: In a measuring cup or spouted bowl, place the red wine vinegar, olive oil, garlic powder, basil, brown sugar (if using), salt, and pepper. Mix well to make the dressing. Set aside.

Step 2: In a large bowl, place the chopped romaine, salami, pepperoni, provolone, Parmesan, mozzarella, cucumber, bell pepper, onion, and banana peppers.

Step 3: On top, drizzle 3/4 cup of dressing. Toss well and allow the salad to sit for at least 20 minutes before serving. Enjoy!

Italian Chop-Chop Salad: The Perfect Dish For A Quick Lunch

Rebecca Total time: 25 mins | Serves: 6 – 8 I am all about quick and easy. With my busy schedule, it is super difficult to whip up a grand meal… General Recipes Italian Chop-Chop Salad: The Perfect Dish For A Quick Lunch European Print This
Serves: 6-8
Nutrition facts: 200 calories 20 grams fat
Rating: 5.0/5
( 1 voted )

Ingredients

  • Salad:
  • 1/2 lb salami, sliced and cut into small squares
  • 2 hearts of romaine, shredded or roughly chopped
  • 1/2 lb pepperoni, diced into squares
  • 1 c. Parmesan cheese, cubed
  • 1 cucumber, thinly sliced
  • 1 (8 ounces) package of marinated mini mozzarella balls
  • 1 red bell pepper, seeds removed and sliced into strips
  • 1/2 lb provolone cheese, thinly sliced and cut into squares
  • 1 c. white onion, thinly sliced into strips
  • 1 c. sliced banana peppers or pepperoncini peppers
  • Dressing:
  • 1/2 c. extra-virgin olive oil
  • 1 c. red wine vinegar
  • 1 tbsp dried basil
  • 2 tsp kosher salt
  • 1 tbsp garlic powder
  • 2 tsp black pepper
  • 2 tsp brown sugar, optional

Instructions

Step 1: In a measuring cup or spouted bowl, place the red wine vinegar, olive oil, garlic powder, basil, brown sugar (if using), salt, and pepper. Mix well to make the dressing. Set aside.

Step 2: In a large bowl, place the chopped romaine, salami, pepperoni, provolone, Parmesan, mozzarella, cucumber, bell pepper, onion, and banana peppers.

Step 3: On top, drizzle 3/4 cup of dressing. Toss well and allow the salad to sit for at least 20 minutes before serving. Enjoy!

July 29, 2022 0 comment
0 FacebookTwitterPinterestEmail
Newer Posts
Older Posts

Popular Posts

  • 1

    Crispy Crunchy Parmesan Potatoes

    March 21, 2020
  • 2

    CROCK POT SMOTHERED PORK CHOPS

    March 21, 2020
  • Facebook
  • Twitter

@2019 - All Right Reserved.


Back To Top