Cook it once
  • Home
  • Privacy Policy
  • Recipes
    • KETO
    • LC
    • WW
  • Tips
  • Contact
Cook it once
  • Home
  • Privacy Policy
  • Recipes
    • KETO
    • LC
    • WW
  • Tips
  • Contact
Category:

General Recipes

General Recipes

HONEY BUTTER SKILLET CORN

by Rebecca August 2, 2022
written by Rebecca

PREP TIME: 5 mins | COOK TIME: 10 mins | SERVINGS: 6 side dish servings

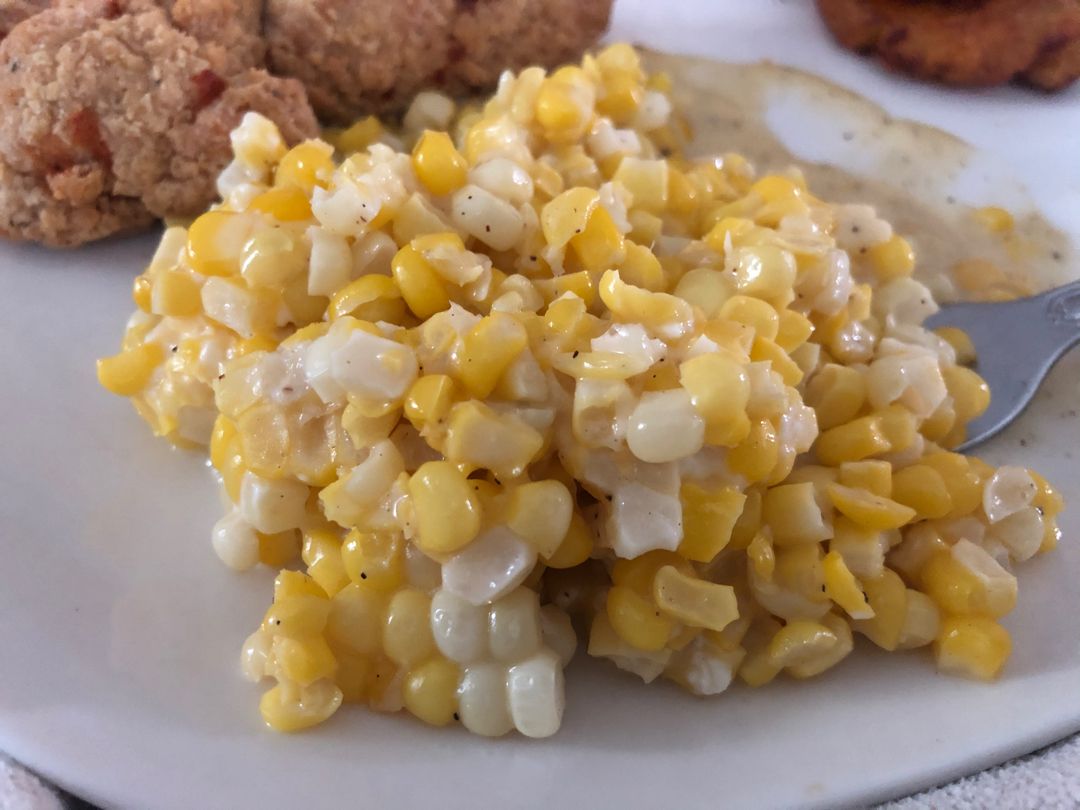
This honey butter skillet corn is made with frozen corn, butter, honey, and cream cheese. It is a fifteen-minute side dish recipe that is super good, sweet, creamy, and incredibly delicious!

This skillet corn has been my favorite since I was little. All you need to throw this together is a few simple ingredients that you already have on hand. For this recipe, I use salted. But you can use unsalted if desired. If so, make sure to add extra salt. I love to use gold n’ white corn for this recipe, but you are welcome to use any frozen corn such as yellow corn, white corn, or sweet yellow corn. There is no need to thaw the frozen corn, just throw it in the skillet. As for the cream cheese, you only need 2 ounces.

I really enjoy this creamy and sweet honey butter skillet corn. This tastes super great, and this is one of the easiest and quickest side dishes I’ve ever made!

INGREDIENTS

2 tbsp honey

1 bag (16 ounces) of frozen corn

¼ tsp salt

2 tbsp butter – I use salted

¼ tsp black pepper

2 oz. cream cheese, cut into chunks

HOW TO MAKE HONEY BUTTER SKILLET CORN

Step 1: Melt the butter and honey in a skillet pan over medium-high heat. Add the frozen corn to the pan once the butter has melted and cooked for about 5 to 8 minutes until completely cooked, stirring often.

Step 2: To the pan, add the cream cheese and season with salt and pepper. Stir well and continue to cook for an additional 3 to 5 minutes, stirring often.

Step 3: Take the pan off the heat when done and serve the honey butter skillet corn right away. For the leftovers, keep them covered in a container and store them in the fridge.

NOTE:

For this recipe, I like to use gold n’ white corn. But you can also use any frozen corn, simply make sure you are using 1 pound or 16-ounce bag of frozen corn.

NUTRITION FACTS:

Calories: 161 kcal, Carbohydrates: 24g, Protein: 3g, Fat: 8g, Saturated Fat: 4g, Cholesterol: 20mg, Sodium: 165mg, Potassium: 235mg, Fiber: 2g, Sugar: 6g, Vitamin A: 244IU, Vitamin C: 5mg, Calcium: 12mg, Iron: 1mg

HONEY BUTTER SKILLET CORN

Rebecca PREP TIME: 5 mins | COOK TIME: 10 mins | SERVINGS: 6 side dish servings This honey butter skillet corn is made with frozen corn, butter, honey, and cream cheese.… General Recipes HONEY BUTTER SKILLET CORN European Print This
Serves: 6 Prep Time: 5 mins Cooking Time: 10 mins 10 mins
Nutrition facts: 161 calories 8 fat
Rating: 5.0/5
( 1 voted )

Ingredients

  • 2 tbsp honey
  • 1 bag (16 ounces) of frozen corn
  • ¼ tsp salt
  • 2 tbsp butter - I use salted
  • ¼ tsp black pepper
  • 2 oz. cream cheese, cut into chunks

Instructions

Step 1: Melt the butter and honey in a skillet pan over medium-high heat. Add the frozen corn to the pan once the butter has melted and cooked for about 5 to 8 minutes until completely cooked, stirring often.

Step 2: To the pan, add the cream cheese and season with salt and pepper. Stir well and continue to cook for an additional 3 to 5 minutes, stirring often.

Step 3: Take the pan off the heat when done and serve the honey butter skillet corn right away. For the leftovers, keep them covered in a container and store them in the fridge.

Notes

For this recipe, I like to use gold n' white corn. But you can also use any frozen corn, simply make sure you are using 1 pound or 16-ounce bag of frozen corn.
August 2, 2022 0 comment
0 FacebookTwitterPinterestEmail
General Recipes

Apple Buttermilk Custard Pie: A Must Make For Your Fourth Of July Celebration

by Rebecca August 2, 2022
written by Rebecca

Total time: 1 hr 30 mins | Serves: 10-12

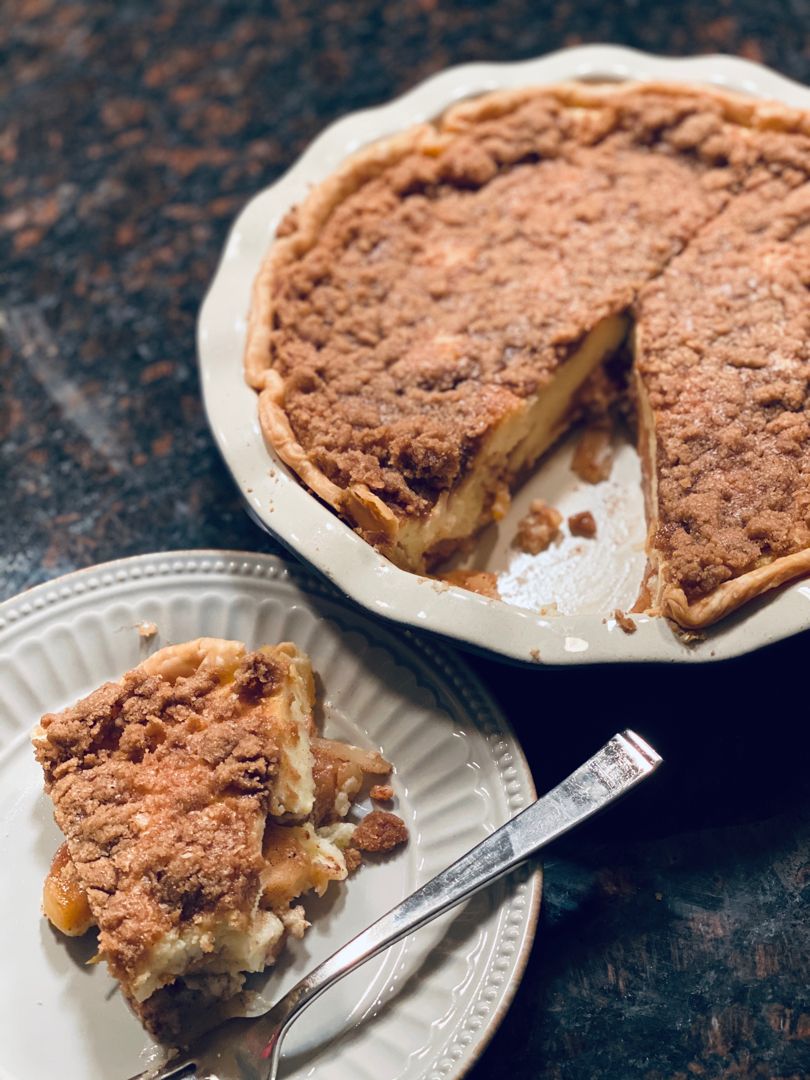
This Apple Buttermilk Custard Pie is an amazing pie with a flaky crust, fresh apples topped with streusel topping. It’s a great pie to serve on any occasion. Plus, this is incredibly easy to whip up using ingredients that you might already have on hand.

INGREDIENTS

1 single pie crust

Filling:

3 large eggs

5 c (about 2 pounds) apples, peeled and sliced (Granny Smith works well)

2 tbsp all-purpose flour

1 c. granulated sugar, divided

1/4 tsp ground nutmeg

1 3/4 c. buttermilk

1/2 tsp ground cinnamon

1/2 tsp vanilla extract

1/4 tsp salt

Topping:

1/2 tsp cinnamon

1/3 c. brown sugar

3 tbsp chilled butter, cut into small cubes

1/3 c. all-purpose flour

How to make Apple Buttermilk Custard Pie

Step 1: Prepare the oven. Preheat it to 325 degrees F.

Step 2: Into a 14-inch circle, roll out the dough, then line a 9-inch deep dish pie pan with it. Fold the edges under and flute them using your fingers. Store in the fridge until ready to use.

Step 3: To make the filling, grease a large nonstick skillet using cooking spray. Add the apples with 1/4 c sugar, cinnamon, and nutmeg. Cook over medium heat for about 10 minutes or until the apples are tender, stirring often. Into the prepared crust, spoon the apple mixture.

Step 4: Place the rest of the flour, flour, salt, eggs, buttermilk, and vanilla in a medium bowl. Mix well until blended, then pour this over the apple mixture.

Step 5: Place in the preheated oven and bake for about 30 minutes.

Step 6: In the meantime, combine 1/3 c flour, brown sugar, and cinnamon to make the topping. With a pastry blender or two knives, cut the butter until you have a crumbly mixture.

Step 7: Remove the pie from the oven, then adjust the oven temperature to 300 degrees F. Over the pie, sprinkle the streusel topping. Return the pie to the oven and resume baking for another 40 minutes or until set.

Step 8: Take the pie out of the oven when done and allow it to cool for about an hour before slicing. Enjoy!

Apple Buttermilk Custard Pie: A Must Make For Your Fourth Of July Celebration

Rebecca Total time: 1 hr 30 mins | Serves: 10-12 This Apple Buttermilk Custard Pie is an amazing pie with a flaky crust, fresh apples topped with streusel topping. It’s a… General Recipes Apple Buttermilk Custard Pie: A Must Make For Your Fourth Of July Celebration European Print This
Serves: 10-12
Nutrition facts: 200 calories 20 grams fat
Rating: 4.5/5
( 2 voted )

Ingredients

  • 1 single pie crust
  • Filling:
  • 3 large eggs
  • 5 c (about 2 pounds) apples, peeled and sliced (Granny Smith works well)
  • 2 tbsp all-purpose flour
  • 1 c. granulated sugar, divided
  • 1/4 tsp ground nutmeg
  • 1 3/4 c. buttermilk
  • 1/2 tsp ground cinnamon
  • 1/2 tsp vanilla extract
  • 1/4 tsp salt
  • Topping:
  • 1/2 tsp cinnamon
  • 1/3 c. brown sugar
  • 3 tbsp chilled butter, cut into small cubes
  • 1/3 c. all-purpose flour

Instructions

Step 1: Prepare the oven. Preheat it to 325 degrees F.

Step 2: Into a 14-inch circle, roll out the dough, then line a 9-inch deep dish pie pan with it. Fold the edges under and flute them using your fingers. Store in the fridge until ready to use.

Step 3: To make the filling, grease a large nonstick skillet using cooking spray. Add the apples with 1/4 c sugar, cinnamon, and nutmeg. Cook over medium heat for about 10 minutes or until the apples are tender, stirring often. Into the prepared crust, spoon the apple mixture.

Step 4: Place the rest of the flour, flour, salt, eggs, buttermilk, and vanilla in a medium bowl. Mix well until blended, then pour this over the apple mixture.

Step 5: Place in the preheated oven and bake for about 30 minutes.

Step 6: In the meantime, combine 1/3 c flour, brown sugar, and cinnamon to make the topping. With a pastry blender or two knives, cut the butter until you have a crumbly mixture.

Step 7: Remove the pie from the oven, then adjust the oven temperature to 300 degrees F. Over the pie, sprinkle the streusel topping. Return the pie to the oven and resume baking for another 40 minutes or until set.

Step 8: Take the pie out of the oven when done and allow it to cool for about an hour before slicing. Enjoy!

August 2, 2022 0 comment
0 FacebookTwitterPinterestEmail
General Recipes

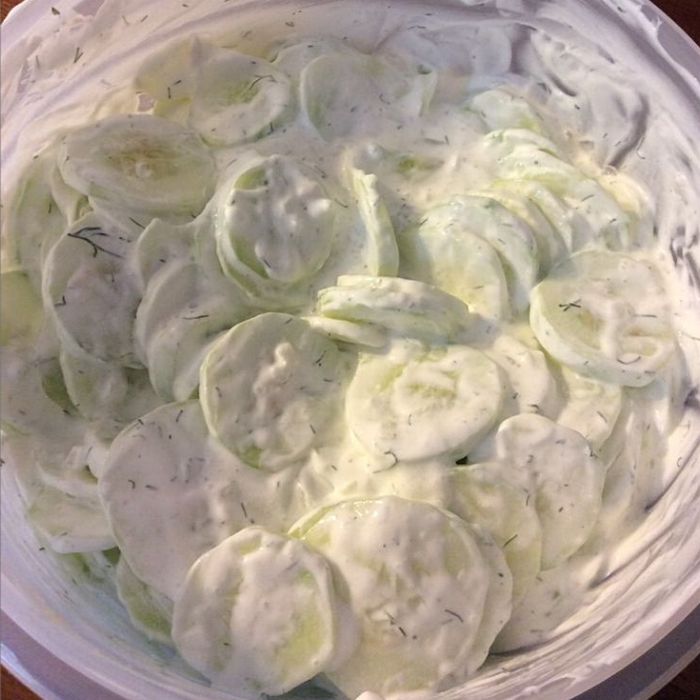
CREAMY CUCUMBER SALAD

by Rebecca August 1, 2022
written by Rebecca

Prep Time: 10 mins | Total Time: 10 mins | Servings: 6 as a side salad

I love cucumbers. I enjoy it every day either on its own, with salt, pepper, and vinegar, or tossed in a simple dressing. I especially love this creamy cucumber salad. It’s perfectly creamy, refreshing, and very delicious. It is a simple, light salad that is made with only a few ingredients that you might already have on hand. All you need is to toss everything together, chill, and serve. This is a pretty simple salad with crisp cucumbers tossed in a creamy sauce and fresh dill.

This easy and quick salad recipe is great if you have an abundance of cucumbers. It’s another great cucumber recipe to add to your favorite list. This creamy cucumber salad is excellent on its own, but you can also pair it with steak, barbecue, or chicken. You can even bring this to potlucks or picnics. And this creamy, light, and tasty salad is a must on summer barbecues!

Ingredients

½ medium purple or yellow onion, thinly slice

1 tablespoon fresh or frozen dill, chopped

2 small garlic cloves, pressed

½ tablespoon fresh lemon juice, from ½ small lemon

1 ½ pounds cucumbers

½ teaspoon sea salt and a pinch of black pepper

¾ c. sour cream

HOW TO MAKE CREAMY CUCUMBER SALAD

Step 1: Mix 3/4 c sour cream with half tablespoon lemon juice, 2 pressed garlic cloves, 1 tablespoon dill, half teaspoon salt, and a pinch of pepper until well combined. Set aside.

Step 2: Into thin rounds, slice the cucumbers. Place them in a mixing bowl along with the sliced onion. Pour in the sauce and toss to coat the cucumbers.

Step 3: Serve and enjoy!

Tips and variations:

You can place this salad in the fridge for 3 to 4 hours before serving.

For a more, crispy taste, add the creamy sour cream dressing to the cucumber just before serving.

If desired, you can use Greek yoghurt in place of lemon.

Nutrition Facts:

Calories: 58Kcl, Fat: 3g, Cholesterol: 10mg, Sodium: 217mg, Potassium: 229mg, Carbohydrates: 5g, Fiber: 1g, Sugar: 2g

CREAMY CUCUMBER SALAD

Rebecca Prep Time: 10 mins | Total Time: 10 mins | Servings: 6 as a side salad I love cucumbers. I enjoy it every day either on its own, with salt,… General Recipes CREAMY CUCUMBER SALAD European Print This
Serves: 6 Prep Time: 10 mins
Nutrition facts: 58 calories 3 fat
Rating: 5.0/5
( 1 voted )

Ingredients

  • ½ medium purple or yellow onion, thinly slice
  • 1 tablespoon fresh or frozen dill, chopped
  • 2 small garlic cloves, pressed
  • ½ tablespoon fresh lemon juice, from ½ small lemon
  • 1 ½ pounds cucumbers
  • ½ teaspoon sea salt and a pinch of black pepper
  • ¾ c. sour cream

Instructions

Step 1: Mix 3/4 c sour cream with half tablespoon lemon juice, 2 pressed garlic cloves, 1 tablespoon dill, half teaspoon salt, and a pinch of pepper until well combined. Set aside.

Step 2: Into thin rounds, slice the cucumbers. Place them in a mixing bowl along with the sliced onion. Pour in the sauce and toss to coat the cucumbers.

Step 3: Serve and enjoy!

Notes

You can place this salad in the fridge for 3 to 4 hours before serving. For a more, crispy taste, add the creamy sour cream dressing to the cucumber just before serving. If desired, you can use Greek yoghurt in place of lemon.

August 1, 2022 0 comment
0 FacebookTwitterPinterestEmail
General Recipes

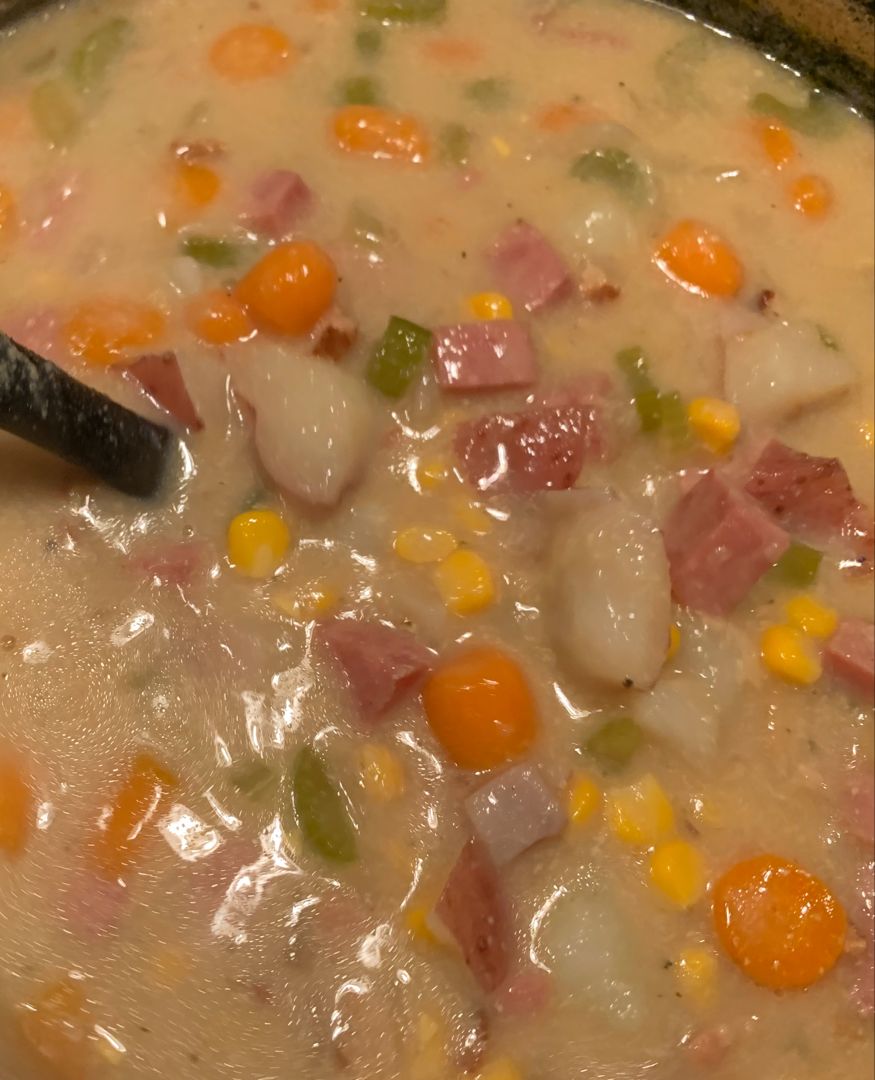
Ham and Potato Corn Chowder

by Rebecca August 1, 2022
written by Rebecca

This homemade ham and potato corn chowder is an amazing soup that you can easily make at any time. It’s a delicious chowder perfect to pair with crunchy rolls or a crusty baguette.

Ingredients

5 medium red potatoes (1 ¾ pound) – diced into 3/4” cubes

2 c. cooked ham – diced into small cubes

1 medium yellow onion – diced

6 slices bacon – cooked crispy and crumble

1/3 c. all-purpose flour

3/4 teaspoon dried oregano

2 celery stalks – diced

2 carrots – peeled and diced

1/2 c. sour cream or heavy cream (I’ve tried and enjoyed both versions)

3 c. milk

5 1/2 tablespoons butter – divided

1 bay leaf

2 (14.5 ounces) cans of low-sodium chicken broth

1/2 teaspoon dried thyme

2 c. fresh corn (or frozen)

Chopped green onions or chives, for serving

Salt and freshly ground black pepper – to taste

How to make Ham and Potato Corn Chowder

Step 1: Melt 1 1/2 tablespoons butter in a large pot over medium heat. Once the butter has melted, add the onion, carrot, and celery to the pot. Cook for about 4 minutes until tender. Pour in the chicken broth and add the potatoes, oregano, thyme, and bay leaf. To taste, season with salt and pepper.

Step 2: Bring everything to a boil over medium-high heat. Then, decrease the heat to medium. Put the lid on and let everything cook for about 15 minutes, stirring often, until the potatoes are almost tender. Next, add the ham and corn. Continue to cook for additional 5 minutes until the potatoes are tender.

Step 3: Melt the rest of the 4 tbsp butter in a medium saucepan over medium heat. Once the butter has melted, add the flour and continue to cook for another 1 1/2 minutes, stirring constantly.

Step 4: Gradually add the milk while whisking constantly. To smooth the lumps, whisk the mixture vigorously. To taste, season with salt and pepper. Bring the mixture to a boil, stirring, until thickened.

Step 5: Take the pan off the heat and whisk in the sour cream or heavy cream.

Step 6: Into the soup mixture once the potatoes are tender, pour in the milk mixture. Stir well.

Step 7: Serve the ham and potato corn chowder warm topped with some bacon and chives. Enjoy!

Ham and Potato Corn Chowder

Rebecca This homemade ham and potato corn chowder is an amazing soup that you can easily make at any time. It’s a delicious chowder perfect to pair with crunchy rolls or… General Recipes Ham and Potato Corn Chowder European Print This
Nutrition facts: 200 calories 20 grams fat
Rating: 5.0/5
( 1 voted )

Ingredients

  • 5 medium red potatoes (1 ¾ pound) – diced into 3/4” cubes
  • 2 c. cooked ham – diced into small cubes
  • 1 medium yellow onion – diced
  • 6 slices bacon – cooked crispy and crumble
  • 1/3 c. all-purpose flour
  • 3/4 teaspoon dried oregano
  • 2 celery stalks – diced
  • 2 carrots – peeled and diced
  • 1/2 c. sour cream or heavy cream (I’ve tried and enjoyed both versions)
  • 3 c. milk
  • 5 1/2 tablespoons butter – divided
  • 1 bay leaf
  • 2 (14.5 ounces) cans of low-sodium chicken broth
  • 1/2 teaspoon dried thyme
  • 2 c. fresh corn (or frozen)
  • Chopped green onions or chives, for serving
  • Salt and freshly ground black pepper – to taste

Instructions

Step 1: Melt 1 1/2 tablespoons butter in a large pot over medium heat. Once the butter has melted, add the onion, carrot, and celery to the pot. Cook for about 4 minutes until tender. Pour in the chicken broth and add the potatoes, oregano, thyme, and bay leaf. To taste, season with salt and pepper.

Step 2: Bring everything to a boil over medium-high heat. Then, decrease the heat to medium. Put the lid on and let everything cook for about 15 minutes, stirring often, until the potatoes are almost tender. Next, add the ham and corn. Continue to cook for additional 5 minutes until the potatoes are tender.

Step 3: Melt the rest of the 4 tbsp butter in a medium saucepan over medium heat. Once the butter has melted, add the flour and continue to cook for another 1 1/2 minutes, stirring constantly.

Step 4: Gradually add the milk while whisking constantly. To smooth the lumps, whisk the mixture vigorously. To taste, season with salt and pepper. Bring the mixture to a boil, stirring, until thickened.

Step 5: Take the pan off the heat and whisk in the sour cream or heavy cream.

Step 6: Into the soup mixture once the potatoes are tender, pour in the milk mixture. Stir well.

Step 7: Serve the ham and potato corn chowder warm topped with some bacon and chives. Enjoy!

August 1, 2022 0 comment
0 FacebookTwitterPinterestEmail
General Recipes

Outback Steakhouse Walkabout Onion Soup

by Rebecca August 1, 2022
written by Rebecca

I am a big fan of Outback Steakhouse. I love their onion soup and to be able to make it in the comfort of my home makes me always super excited! This Outback Steakhouse Walkabout Onion Soup is not difficult to make. This requires only a few simple ingredients that you might already have on hand and easy-to-follow steps to throw together.

Enjoy a hearty onion soup any time with this easy Outback Steakhouse copycat recipe. I have received awesome reviews from everyone I know about this recipe, even before trying it. And this did not disappoint! This really tastes like exactly the real deal! This might not be the complete recipe, but this did the trick! This Outback Steakhouse Walkabout Onion Soup is rocking it!

Ingredients

2 tbsp butter

2 c. yellow sweet onions, thinly sliced

1 (15 oz.) can of chicken broth

2 chicken bouillon cubes

1 1/2-1 3/4 c. white sauce

1/4 c. Velveeta cheese, cubes, diced (compressed in measuring cup)

cheddar cheese, shredded (for garnish)

1/4 tsp salt

1/4 tsp fresh pepper, ground

White Sauce:

3 tbsp flour

3 tbsp butter

1 1/2 c. whole milk

1/4 tsp salt

How to make Outback Steakhouse Walkabout Onion Soup

Step 1: Into a 2-quart pan, place the sliced onions and 3 tbsp butter. Cook over low heat until the onions are translucent, tender, and browned.

Step 2: Pour in the chicken broth along with the bouillon cubes. Season with salt and pepper. Stir well and cook until heated through.

Step 3: To the pan, add the Velveeta cheese and the white sauce. Allow everything to simmer until the cheese has completely melted and the ingredients are blended.

Step 4: Adjust the temperature to warm and continue to cook for an additional 30 to 45 minutes.

Step 5: Serve the Steakhouse Walkabout Onion Soup right away garnished with parsley. Enjoy!

Tips:

To make the thick white sauce, cook the butter and flour in a saucepan over medium heat until the flour has thickened. Slowly add in the milk, stirring constantly until you get a thick pudding consistency.

Make sure to stir constantly to prevent any lumps. Immediately remove the sauce from the heat once done.

Outback Steakhouse Walkabout Onion Soup

Rebecca I am a big fan of Outback Steakhouse. I love their onion soup and to be able to make it in the comfort of my home makes me always super… General Recipes Outback Steakhouse Walkabout Onion Soup European Print This
Nutrition facts: 200 calories 20 grams fat
Rating: 5.0/5
( 1 voted )

Ingredients

  • 2 tbsp butter
  • 2 c. yellow sweet onions, thinly sliced
  • 1 (15 oz.) can of chicken broth
  • 2 chicken bouillon cubes
  • 1 1/2-1 3/4 c. white sauce
  • 1/4 c. Velveeta cheese, cubes, diced (compressed in measuring cup)
  • cheddar cheese, shredded (for garnish)
  • 1/4 tsp salt
  • 1/4 tsp fresh pepper, ground
  • White Sauce:
  • 3 tbsp flour
  • 3 tbsp butter
  • 1 1/2 c. whole milk
  • 1/4 tsp salt

Instructions

Step 1: Into a 2-quart pan, place the sliced onions and 3 tbsp butter. Cook over low heat until the onions are translucent, tender, and browned.

Step 2: Pour in the chicken broth along with the bouillon cubes. Season with salt and pepper. Stir well and cook until heated through.

Step 3: To the pan, add the Velveeta cheese and the white sauce. Allow everything to simmer until the cheese has completely melted and the ingredients are blended.

Step 4: Adjust the temperature to warm and continue to cook for an additional 30 to 45 minutes.

Step 5: Serve the Steakhouse Walkabout Onion Soup right away garnished with parsley. Enjoy!

Notes

To make the thick white sauce, cook the butter and flour in a saucepan over medium heat until the flour has thickened. Slowly add in the milk, stirring constantly until you get a thick pudding consistency. Make sure to stir constantly to prevent any lumps. Immediately remove the sauce from the heat once done.

August 1, 2022 0 comment
0 FacebookTwitterPinterestEmail
General Recipes

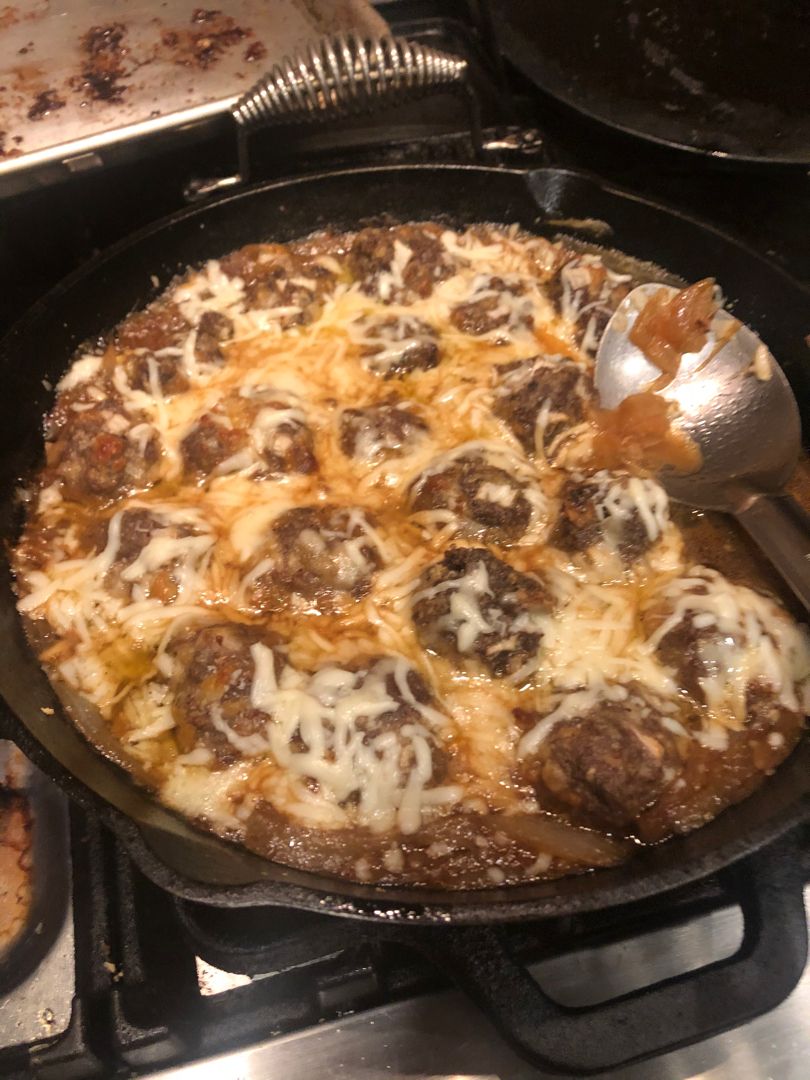
French Onion Meatball Skillet

by Rebecca August 1, 2022
written by Rebecca

Prep Time: 25 mins | Cook Time: 1 hr | Total Time: 1 hr 25 mins | Servings: 8

This French Onion Meatball Skillet is packed with perfectly juicy, cheese-stuffed turkey meatballs, caramelized onions, and gooey melted Gruyere cheese. A mouthwatering meatball dish simmered in a delicious, rich gravy packed with onions and cheese that is excellent to serve with creamy mashed potatoes or fresh bread.

INGREDIENTS

Meatballs:

2 large eggs – beaten

½ onion – minced

½ c. mozzarella cheese – shredded

½ c. Gruyère cheese – shredded

2 lbs ground chicken – or turkey

⅓ c. bread crumbs

5 cloves garlic – minced

1 tsp fresh thyme – chopped

½ tsp black pepper

1.5 tsp kosher salt

French Onion Soup Sauce:

3 tbsp butter

2 tbsp olive oil

1 tsp fresh thyme – minced

4 large yellow onions – thinly sliced

4 cloves garlic – minced

2 c. low-sodium beef broth

½ c. dry sherry – or white wine (optional)

2 c. Gruyère cheese – shredded

1 tsp kosher salt – plus more to taste

black pepper – to taste

How to make French Onion Meatball Skillet

Step 1: Prepare the oven. Preheat it to 400 degrees F. Using the parchment paper, line a large baking sheet.

Step 2: Place the meatball ingredients (ground chicken, onion, cheeses, bread crumbs, garlic, eggs, thyme, salt, and black pepper) in a large bowl. Mix well until just combined. Form the mixture into about 32 meatballs and place them on the prepared baking sheet.

Step 3: Place in the preheated oven and bake for about 20 minutes or until the meatballs are golden and completely cooked or the internal temperature of the meatballs reaches 160 degrees F. Set the meatballs aside when done.

Step 4: In the meantime, whip up the sauce. In a large skillet or Dutch oven, heat the olive oil over medium heat. Then, add the onions and mix well. Let the onions cook for about 5 to 10 minutes, stirring often.

Step 5: Season the onions with salt. Add the butter and cook further until the onions are very tender and golden-brown, stirring as needed to prevent them from burning.

Step 6: To the skillet, add the garlic and cook for a minute more. Pour in the dry sherry (or dry white wine). Scrape the bottom of the pan. Let the alcohol cook until reduced by half. Next, pour in the beef broth and add the fresh thyme. Season with salt and pepper. Bring everything to a boil and decrease the heat to a simmer. Continue to cook for additional 5 minutes until slightly thickened.

Step 7: To the skillet with the sauce, add the cooked meatballs and sprinkle with shredded Gruyere cheese. Put the lid on and continue to cook for 5 to 10 minutes more until the meatballs are warmed through and the cheese has melted.

Step 8: Before serving, garnish the meatballs with some fresh thyme. Enjoy warm with fresh bread or creamy mashed potatoes.

NUTRITIONAL FACTS:

Calories: 513 kcal | Carbohydrates: 13g | Protein: 38g | Fat: 33g | Saturated Fat: 15g | Cholesterol: 206mg | Sodium: 1181mg | Potassium: 920mg | Fiber: 2g | Sugar: 4g | Vitamin A: 639IU | Vitamin C: 7mg | Calcium: 502mg | Iron: 2mg

French Onion Meatball Skillet

Rebecca Prep Time: 25 mins | Cook Time: 1 hr | Total Time: 1 hr 25 mins | Servings: 8 This French Onion Meatball Skillet is packed with perfectly juicy, cheese-stuffed… General Recipes French Onion Meatball Skillet European Print This
Serves: 8 Prep Time: 25 mins Cooking Time: 1 hr 1 hr
Nutrition facts: 513 calories 33 fat
Rating: 5.0/5
( 1 voted )

Ingredients

  • Meatballs:
  • 2 large eggs - beaten
  • ½ onion - minced
  • ½ c. mozzarella cheese - shredded
  • ½ c. Gruyère cheese - shredded
  • 2 lbs ground chicken - or turkey
  • ⅓ c. bread crumbs
  • 5 cloves garlic - minced
  • 1 tsp fresh thyme - chopped
  • ½ tsp black pepper
  • 1.5 tsp kosher salt
  • French Onion Soup Sauce:
  • 3 tbsp butter
  • 2 tbsp olive oil
  • 1 tsp fresh thyme - minced
  • 4 large yellow onions - thinly sliced
  • 4 cloves garlic - minced
  • 2 c. low-sodium beef broth
  • ½ c. dry sherry - or white wine (optional)
  • 2 c. Gruyère cheese - shredded
  • 1 tsp kosher salt - plus more to taste
  • black pepper - to taste

Instructions

Step 1: Prepare the oven. Preheat it to 400 degrees F. Using the parchment paper, line a large baking sheet.

Step 2: Place the meatball ingredients (ground chicken, onion, cheeses, bread crumbs, garlic, eggs, thyme, salt, and black pepper) in a large bowl. Mix well until just combined. Form the mixture into about 32 meatballs and place them on the prepared baking sheet.

Step 3: Place in the preheated oven and bake for about 20 minutes or until the meatballs are golden and completely cooked or the internal temperature of the meatballs reaches 160 degrees F. Set the meatballs aside when done.

Step 4: In the meantime, whip up the sauce. In a large skillet or Dutch oven, heat the olive oil over medium heat. Then, add the onions and mix well. Let the onions cook for about 5 to 10 minutes, stirring often.

Step 5: Season the onions with salt. Add the butter and cook further until the onions are very tender and golden-brown, stirring as needed to prevent them from burning.

Step 6: To the skillet, add the garlic and cook for a minute more. Pour in the dry sherry (or dry white wine). Scrape the bottom of the pan. Let the alcohol cook until reduced by half. Next, pour in the beef broth and add the fresh thyme. Season with salt and pepper. Bring everything to a boil and decrease the heat to a simmer. Continue to cook for additional 5 minutes until slightly thickened.

Step 7: To the skillet with the sauce, add the cooked meatballs and sprinkle with shredded Gruyere cheese. Put the lid on and continue to cook for 5 to 10 minutes more until the meatballs are warmed through and the cheese has melted.

Step 8: Before serving, garnish the meatballs with some fresh thyme. Enjoy warm with fresh bread or creamy mashed potatoes.

August 1, 2022 0 comment
0 FacebookTwitterPinterestEmail
General Recipes

Ruth’s Chris Potatoes Au Gratin Copycat Recipe

by Rebecca August 1, 2022
written by Rebecca

Prep time: 10 mins | Cook time: 25 mins | Serves: 4

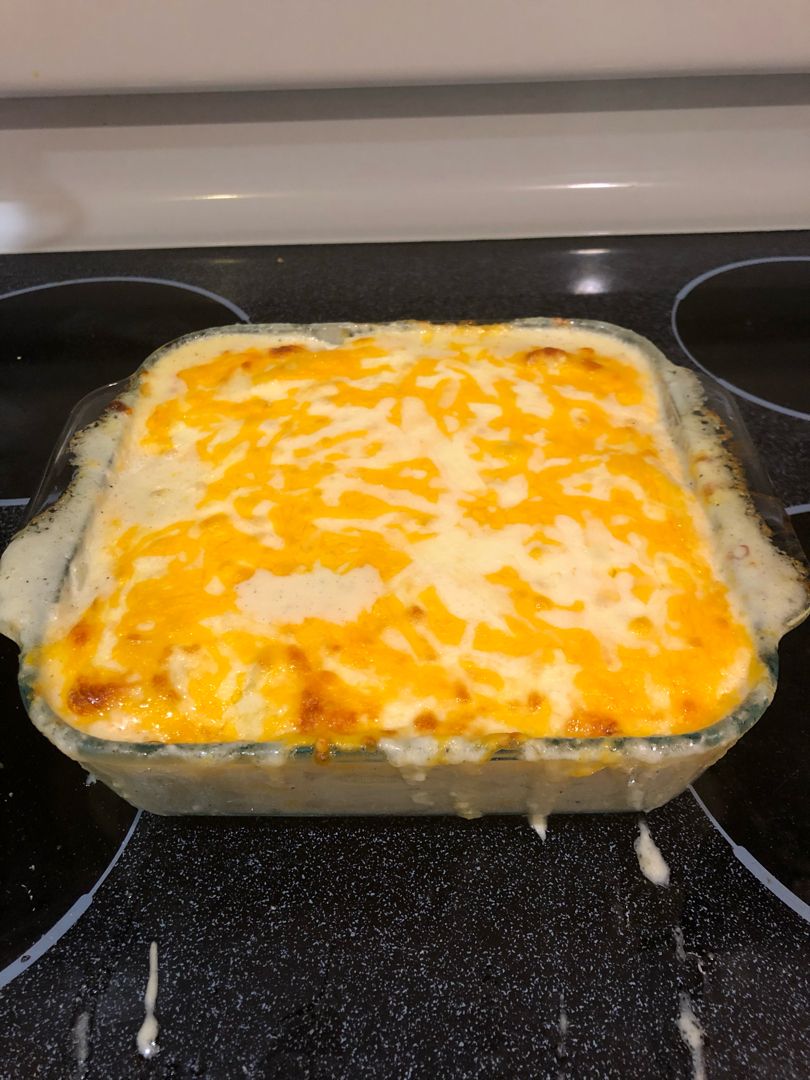
Potato Au Gratin is an amazing side dish. It’s one of my favorites from Ruth’s. Creamy, super rich, and cheesy. This copycat recipe of Ruth’s Potatoes Au Gratin is a fabulous side dish that you can easily and quickly whip up at home at any time! Serve this to your family, friends, and guests and I am pretty sure that you’ll get nothing but praises!

INGREDIENTS

1 1/2 pounds russet potatoes, peeled and sliced 1/8” thick

2 tbsp butter, plus more for greasing the baking dish

2 garlic cloves, minced

1/2 white onion, minced

1/2 c. chicken stock

2 c. cheddar cheese, grated

1/2 c. Parmesan cheese, grated

3/4 c. provolone cheese, grated

Fresh parsley, chopped, for garnish

1 1/4 c. heavy cream, plus more if needed

1 1/2 tsp salt

1/2 tsp freshly ground black pepper

How to make Ruth’s Chris Potatoes Au Gratin

Step 1: Prepare the oven. Preheat it to 425 degrees F. Using butter, grease an 8 x 8-inch baking dish.

Step 2: Melt the butter in a large pot over medium heat. Once the butter has melted, add the onion to the pot and cook for about 5 minutes or until tender and translucent. Then, add the garlic and season with salt and pepper. Continue to cook for additional 30 seconds.

Step 3: Pour in the stock and add the cream and potatoes. Stir well and bring to a low simmer (DO NOT boil). Put the lid on and adjust the heat to medium-low. Allow the potatoes to cook for about 15 to 20 minutes or until tender. Adjust the seasoning according to taste.

Step 4: To a baking dish, transfer the mixture and top with cheese. Place in the preheated oven and bake for about 10 to 15 minutes or until bubbly and the cheese has melted.

Step 5: Remove from the oven when done and serve the Potatoes Au Gratin right away garnished with parsley (optional). Enjoy!

Ruth’s Chris Potatoes Au Gratin Copycat Recipe

Rebecca Prep time: 10 mins | Cook time: 25 mins | Serves: 4 Potato Au Gratin is an amazing side dish. It’s one of my favorites from Ruth’s. Creamy, super rich,… General Recipes Ruth’s Chris Potatoes Au Gratin Copycat Recipe European Print This
Nutrition facts: 200 calories 20 grams fat
Rating: 3.7/5
( 3 voted )

Ingredients

  • 1 1/2 pounds russet potatoes, peeled and sliced 1/8” thick
  • 2 tbsp butter, plus more for greasing the baking dish
  • 2 garlic cloves, minced
  • 1/2 white onion, minced
  • 1/2 c. chicken stock
  • 2 c. cheddar cheese, grated
  • 1/2 c. Parmesan cheese, grated
  • 3/4 c. provolone cheese, grated
  • Fresh parsley, chopped, for garnish
  • 1 1/4 c. heavy cream, plus more if needed
  • 1 1/2 tsp salt
  • 1/2 tsp freshly ground black pepper

Instructions

Step 1: Prepare the oven. Preheat it to 425 degrees F. Using butter, grease an 8 x 8-inch baking dish.

Step 2: Melt the butter in a large pot over medium heat. Once the butter has melted, add the onion to the pot and cook for about 5 minutes or until tender and translucent. Then, add the garlic and season with salt and pepper. Continue to cook for additional 30 seconds.

Step 3: Pour in the stock and add the cream and potatoes. Stir well and bring to a low simmer (DO NOT boil). Put the lid on and adjust the heat to medium-low. Allow the potatoes to cook for about 15 to 20 minutes or until tender. Adjust the seasoning according to taste.

Step 4: To a baking dish, transfer the mixture and top with cheese. Place in the preheated oven and bake for about 10 to 15 minutes or until bubbly and the cheese has melted.

Step 5: Remove from the oven when done and serve the Potatoes Au Gratin right away garnished with parsley (optional). Enjoy!

August 1, 2022 0 comment
0 FacebookTwitterPinterestEmail
General Recipes

CHICKEN CHOW MEIN WITH THE BEST CHOW MEIN SAUCE

by Rebecca August 1, 2022
written by Rebecca

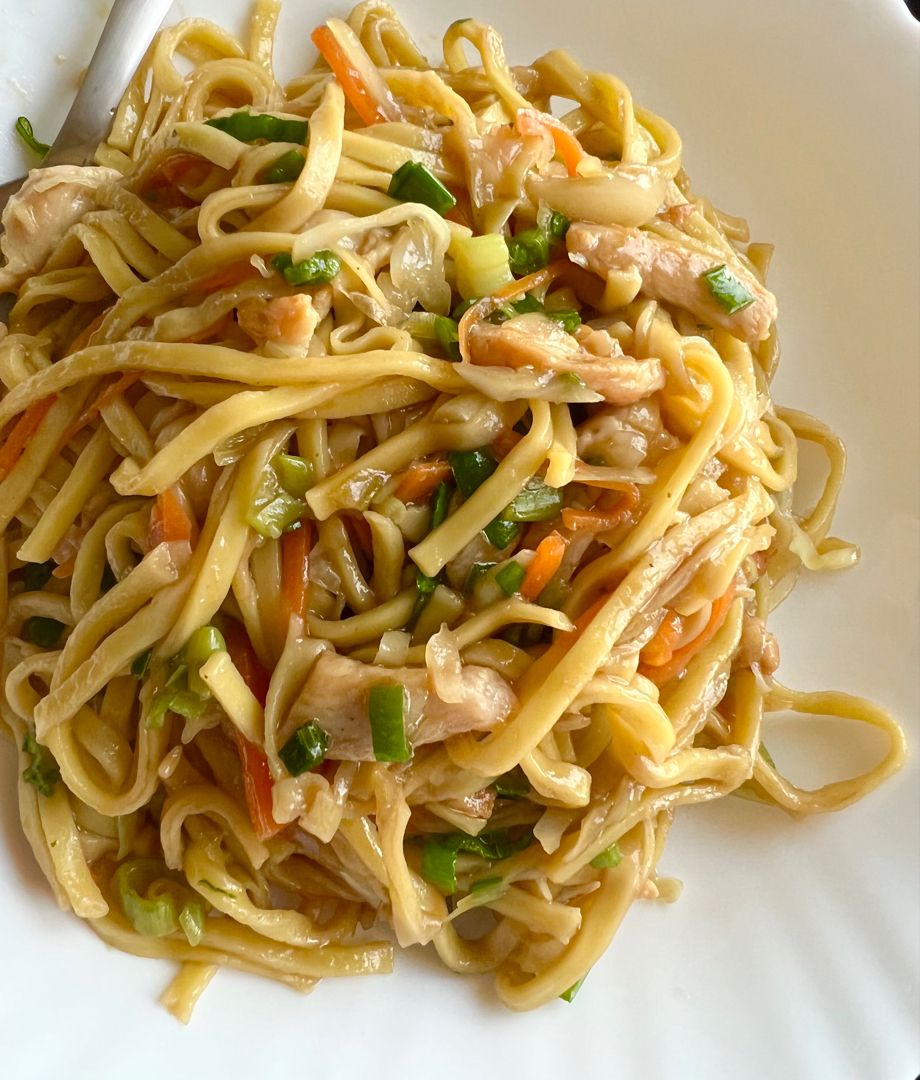
Chow Mein is one of my favorites, and this homemade version is quite a catch. This is super simple to make and guarantees to deliver the best Chow Mein sauce. This recipe is also easily modifiable. You can even make this vegetarian if desired.

Ingredients

3 tablespoons olive oil

1 pound chicken breast, boneless, skinless (cut into bite-sized strips)

1 large carrot, julienned

12 ounces Chow Mein noodles (uncooked)

2 c. cabbage

2 garlic cloves

1/2 bunch green onions – sliced

Chow Mein Sauce:

1 tablespoon granulated sugar

3 tablespoons low sodium soy sauce

1/2 c. chicken broth

6 tablespoons oyster sauce

1 tablespoon cornstarch

3 tablespoons light sesame oil (not toasted)

HOW TO MAKE CHICKEN CHOW MEIN WITH THE BEST CHOW MEIN SAUCE

Step 1: Place the oyster sauce, granulated sugar, sesame oil, soy sauce, chicken broth, and cornstarch in a small mixing bowl. Use a whisk to mix and set aside.

Step 2: Following the package directions, cook the noodles until al dente. Drain when done and rinse with cold water. Set aside.

Step 3: Heat the olive oil in a large wok or large saute pan over medium heat. Add the chicken to the wok/pan once the oil is hot and cook until golden brown. Set the chicken aside when done.

Step 4: To the same wok/pan, saute the carrots, cabbage, and pressed garlic for a couple of minutes until the veggies are a little tender and the cabbage is slightly translucent.

Step 5: Return the chicken to the pan along with the noodles. Pour the sauce over and cook for additional 2 minutes.

Step 6: Before serving, garnish with some chopped green onions. Enjoy!

Notes:

For this recipe, the basic veggies used are carrots, cabbage, and green onions. You can blanch the veggies if desired. You can also use bok choy, bean sprouts, celery, broccoli, spinach, kale, or baby corn.

Instead of chicken, you can use beef, shrimp, or pork.

For a vegetarian variety, use vegetable broth in place of chicken. You can add baked tofu instead of meat.

CHICKEN CHOW MEIN WITH THE BEST CHOW MEIN SAUCE

Rebecca Chow Mein is one of my favorites, and this homemade version is quite a catch. This is super simple to make and guarantees to deliver the best Chow Mein sauce.… General Recipes CHICKEN CHOW MEIN WITH THE BEST CHOW MEIN SAUCE European Print This
Nutrition facts: 200 calories 20 grams fat
Rating: 5.0/5
( 1 voted )

Ingredients

  • 3 tablespoons olive oil
  • 1 pound chicken breast, boneless, skinless (cut into bite-sized strips)
  • 1 large carrot, julienned
  • 12 ounces Chow Mein noodles (uncooked)
  • 2 c. cabbage
  • 2 garlic cloves
  • 1/2 bunch green onions – sliced
  • Chow Mein Sauce:
  • 1 tablespoon granulated sugar
  • 3 tablespoons low sodium soy sauce
  • 1/2 c. chicken broth
  • 6 tablespoons oyster sauce
  • 1 tablespoon cornstarch
  • 3 tablespoons light sesame oil (not toasted)

Instructions

Step 1: Place the oyster sauce, granulated sugar, sesame oil, soy sauce, chicken broth, and cornstarch in a small mixing bowl. Use a whisk to mix and set aside.

Step 2: Following the package directions, cook the noodles until al dente. Drain when done and rinse with cold water. Set aside.

Step 3: Heat the olive oil in a large wok or large saute pan over medium heat. Add the chicken to the wok/pan once the oil is hot and cook until golden brown. Set the chicken aside when done.

Step 4: To the same wok/pan, saute the carrots, cabbage, and pressed garlic for a couple of minutes until the veggies are a little tender and the cabbage is slightly translucent.

Step 5: Return the chicken to the pan along with the noodles. Pour the sauce over and cook for additional 2 minutes.

Step 6: Before serving, garnish with some chopped green onions. Enjoy!

August 1, 2022 0 comment
0 FacebookTwitterPinterestEmail
General Recipes

Cajun Chicken And Broccoli Alfredo

by Rebecca August 1, 2022
written by Rebecca

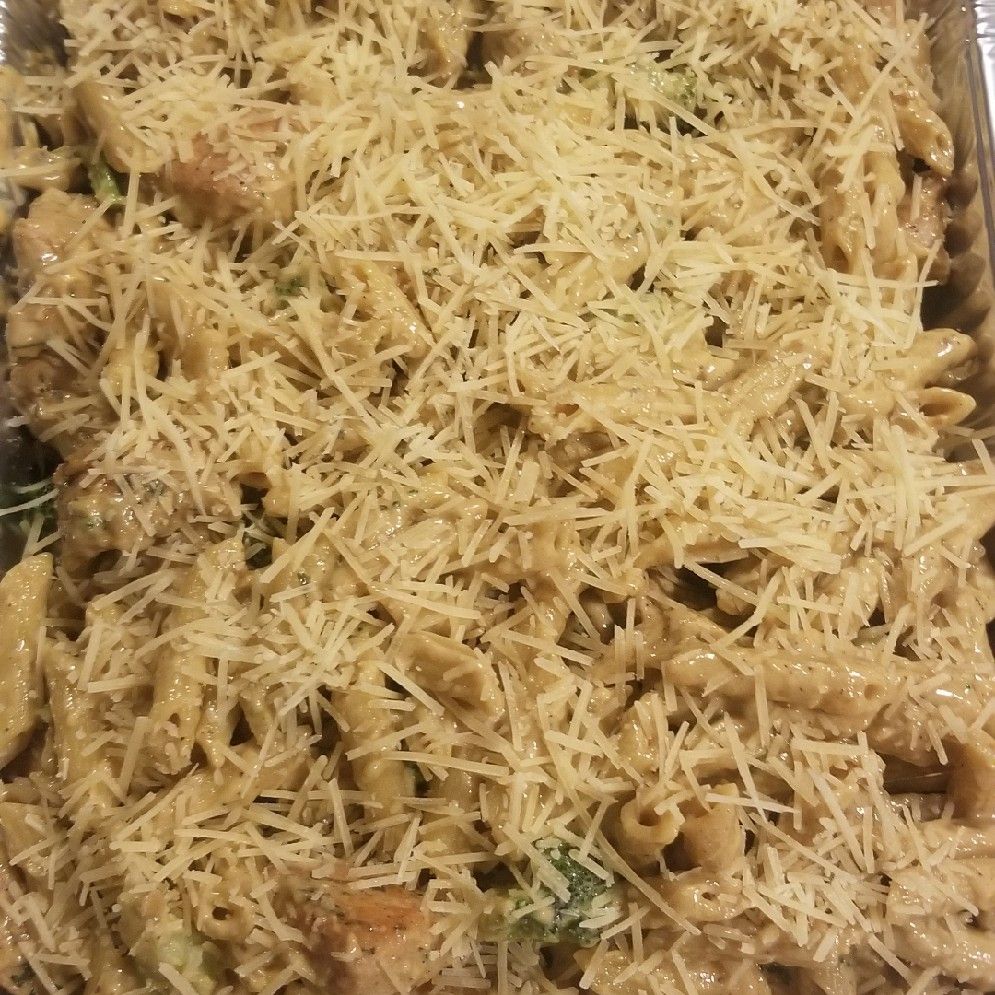
I am a big fan of Pasta Alfredo, thus, my newest obsession – is Cajun Chicken and Broccoli Alfredo. This is a complete version with broccoli, chicken, and pasta. A perfectly creamy pasta Alfredo with a twist that you can easily make in a snap!

INGREDIENTS

2 tbsp olive oil

2 tbsp butter

1 lb penne pasta

1 lb chicken breast cutlets

2 c. broccoli florets

3 cloves garlic, minced

2 c. heavy cream

1/2 c. dry white wine such as Chardonnay

8 oz. Parmesan cheese, shredded, plus more for garnish

salt and freshly ground black pepper

2–3 tbsp Cajun Seasoning – adjust according to taste

How to make Cajun Chicken And Broccoli Alfredo

Step 1: Prepare the oven. Preheat it to 200 degrees F.

Step 2: Bring 4 quarts of water with 1 tbsp salt to a boil in a large pot. Add the pasta and cook for about 9 minutes until al dente. Drain when done, reserving the pasta water.

Step 3: In the same pot with the pasta water, add the broccoli and blanch for about 1 to 2 minutes or until just tender and bright green. Quickly drain the broccoli and place them into a bowl of ice water.

Step 4: Generously sprinkle all sides of the chicken with Cajun Seasoning.

Step 5: Heat the oil in a large skillet. Once the oil is shimmering, add the chicken to the skillet in a single layer. Cook for about 5 minutes per side until the internal temperature of the chicken reaches about 165 degrees F, flipping once.

Step 6: Using foil, tent a clean baking sheet or oven-safe plate. Then, put it in the oven to keep warm.

Step 7: Transfer the cooked chicken to the baking sheet and in the oven to keep them warm.

Step 8: Melt the butter in the same skillet over medium-high heat. Once the butter is foaming, add the garlic and cook for about 30 seconds until aromatic. Stir in the wine and deglaze the pan. Let it simmer for about 2 minutes or until the sauce has reduced by half. Then, add the cream, stir, and simmer for another 2 minutes until the mixture has slightly thickened. Next, add the Parmesan cheese and stir well. To taste, season with salt and pepper.

Step 9: Add the pasta to the skillet and gently toss to coat.

Step 10: In a serving bowl, place the pasta and top with broccoli and chicken. Serve right away garnished with extra Parmesan cheese. Enjoy!

NOTES:

You can use fettuccini, fusilli, farfalle, cavatappi, or rigatoni in place of penne. Simply follow the cooking directions on the packaging.

If using chicken breasts, slice them in half and make them have a similar thickness.

In an airtight container, keep any leftovers and store them in the fridge for up to 4 days.

Freezing this dish is not recommended.

You can double the sauce if you prefer extra saucy Alfredo.

Cajun Chicken And Broccoli Alfredo

Rebecca I am a big fan of Pasta Alfredo, thus, my newest obsession – is Cajun Chicken and Broccoli Alfredo. This is a complete version with broccoli, chicken, and pasta. A… General Recipes Cajun Chicken And Broccoli Alfredo European Print This
Nutrition facts: 200 calories 20 grams fat
Rating: 5.0/5
( 1 voted )

Ingredients

  • 2 tbsp olive oil
  • 2 tbsp butter
  • 1 lb penne pasta
  • 1 lb chicken breast cutlets
  • 2 c. broccoli florets
  • 3 cloves garlic, minced
  • 2 c. heavy cream
  • 1/2 c. dry white wine such as Chardonnay
  • 8 oz. Parmesan cheese, shredded, plus more for garnish
  • salt and freshly ground black pepper
  • 2–3 tbsp Cajun Seasoning – adjust according to taste

Instructions

Step 1: Prepare the oven. Preheat it to 200 degrees F.

Step 2: Bring 4 quarts of water with 1 tbsp salt to a boil in a large pot. Add the pasta and cook for about 9 minutes until al dente. Drain when done, reserving the pasta water.

Step 3: In the same pot with the pasta water, add the broccoli and blanch for about 1 to 2 minutes or until just tender and bright green. Quickly drain the broccoli and place them into a bowl of ice water.

Step 4: Generously sprinkle all sides of the chicken with Cajun Seasoning.

Step 5: Heat the oil in a large skillet. Once the oil is shimmering, add the chicken to the skillet in a single layer. Cook for about 5 minutes per side until the internal temperature of the chicken reaches about 165 degrees F, flipping once.

Step 6: Using foil, tent a clean baking sheet or oven-safe plate. Then, put it in the oven to keep warm.

Step 7: Transfer the cooked chicken to the baking sheet and in the oven to keep them warm.

Step 8: Melt the butter in the same skillet over medium-high heat. Once the butter is foaming, add the garlic and cook for about 30 seconds until aromatic. Stir in the wine and deglaze the pan. Let it simmer for about 2 minutes or until the sauce has reduced by half. Then, add the cream, stir, and simmer for another 2 minutes until the mixture has slightly thickened. Next, add the Parmesan cheese and stir well. To taste, season with salt and pepper.

Step 9: Add the pasta to the skillet and gently toss to coat.

Step 10: In a serving bowl, place the pasta and top with broccoli and chicken. Serve right away garnished with extra Parmesan cheese. Enjoy!

Notes

You can use fettuccini, fusilli, farfalle, cavatappi, or rigatoni in place of penne. Simply follow the cooking directions on the packaging. If using chicken breasts, slice them in half and make them have a similar thickness. In an airtight container, keep any leftovers and store them in the fridge for up to 4 days. Freezing this dish is not recommended. You can double the sauce if you prefer extra saucy Alfredo.

August 1, 2022 0 comment
0 FacebookTwitterPinterestEmail
General Recipes

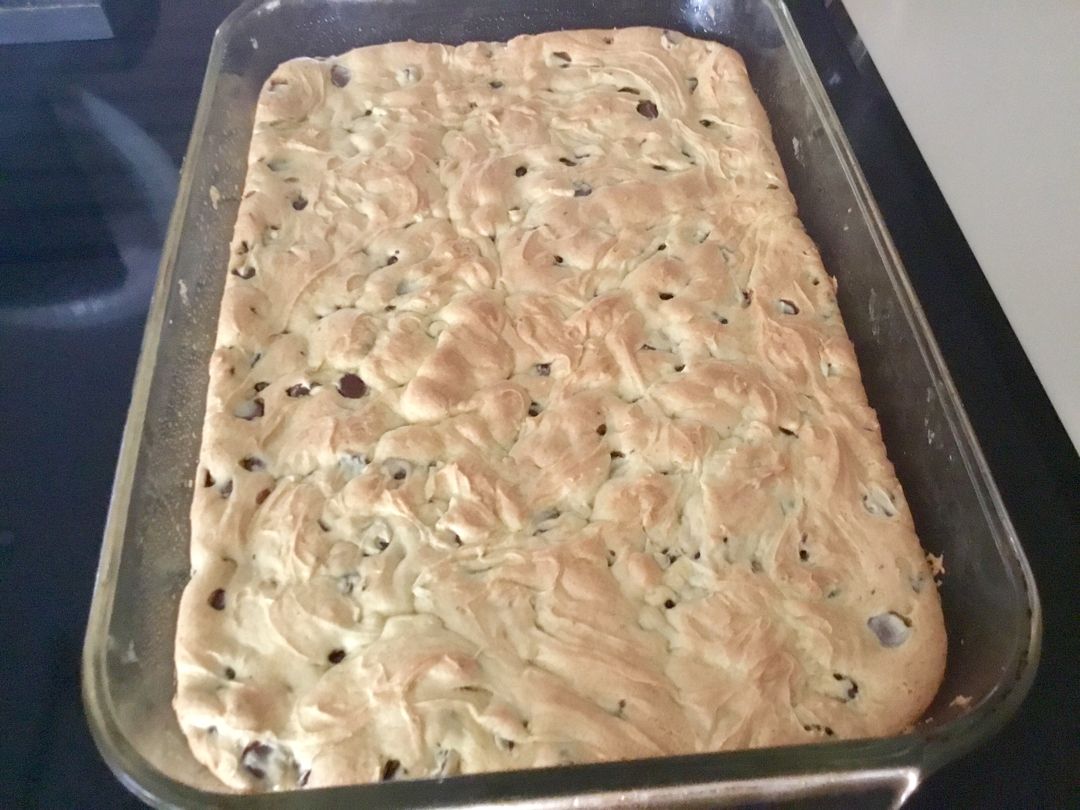
Lazy Chocolate Chip Cookie Bars

by Rebecca August 1, 2022
written by Rebecca

If you are a huge fan of chocolate chips, I am pretty sure that you’ll fall head over heels for these lazy chocolate chip cookie bars! These chocolate chip cookie bars are crazy delicious, decadent, and an amazing treat for all the chocolate lovers out there! Easily whip these bars up using only four ingredients (butter, eggs, cake mix, and semi-sweet chocolate chips). You can also double or triple the recipe if desired.

I am obsessed with these lazy chocolate chip cookie bars! These are my favorite and go-to whenever I am craving something sweet. I make sure to always whip up a big batch because these cookie bars fly fast! I also like that I can throw these bars together in advance. And I can just grab a piece or more whenever I want to. And these lazy chocolate chip cookie bars are awesome either warm or chilled.

Ingredients

2 eggs

1 stick of butter

1 bag of semi-sweet chocolate chips

1 yellow cake mix

How to make Lazy Chocolate Chip Cookie Bars

Step 1: In a bowl, place the butter and let It melt completely. Whisk each egg into the butter mixture until completely blended. Then, add the cake mix and mix until just combined. Fold in the chocolate chips.

Step 2: Into a greased baking pan, pour the batter. Press and evenly spread. Place in 350 degrees preheated oven and bake for about 9 to 13 minutes (if using a large pan) or 25 to 28 minutes (for smaller pans) until lightly browned.

Step 3: Remove from the oven when done and allow this to sit for a few minutes. Slice and serve warm. Or place them in the fridge for about an hour or so.

Step 4: If serving later, store the bars in an airtight container. Or slice, and enjoy warm!

Lazy Chocolate Chip Cookie Bars

Rebecca If you are a huge fan of chocolate chips, I am pretty sure that you’ll fall head over heels for these lazy chocolate chip cookie bars! These chocolate chip cookie… General Recipes Lazy Chocolate Chip Cookie Bars European Print This
Nutrition facts: 200 calories 20 grams fat
Rating: 5.0/5
( 1 voted )

Ingredients

  • 2 eggs
  • 1 stick of butter
  • 1 bag of semi-sweet chocolate chips
  • 1 yellow cake mix

Instructions

Step 1: In a bowl, place the butter and let It melt completely. Whisk each egg into the butter mixture until completely blended. Then, add the cake mix and mix until just combined. Fold in the chocolate chips.

Step 2: Into a greased baking pan, pour the batter. Press and evenly spread. Place in 350 degrees preheated oven and bake for about 9 to 13 minutes (if using a large pan) or 25 to 28 minutes (for smaller pans) until lightly browned.

Step 3: Remove from the oven when done and allow this to sit for a few minutes. Slice and serve warm. Or place them in the fridge for about an hour or so.

Step 4: If serving later, store the bars in an airtight container. Or slice, and enjoy warm!

August 1, 2022 0 comment
0 FacebookTwitterPinterestEmail
Newer Posts
Older Posts

Popular Posts

  • 1

    Crispy Crunchy Parmesan Potatoes

    March 21, 2020
  • 2

    CROCK POT SMOTHERED PORK CHOPS

    March 21, 2020
  • Facebook
  • Twitter

@2019 - All Right Reserved.


Back To Top