Cook it once
  • Home
  • Privacy Policy
  • Recipes
    • KETO
    • LC
    • WW
  • Tips
  • Contact
Cook it once
  • Home
  • Privacy Policy
  • Recipes
    • KETO
    • LC
    • WW
  • Tips
  • Contact
Category:

General Recipes

General Recipes

Crunchy Taco Cups

by Rebecca August 10, 2022
written by Rebecca

Prep Time: 20 mins | Cook Time: 12 mins | Total Time: 32 mins | Yield: 12 taco cups

I am obsessed with these tiny taco cups! This recipe is fun and fairly easy to make. You’ll get both worlds with these taco cups. If you are a big fan of crunchy taco cups, these taco cups will impress you. Loaded with crunchy taco shell, seasoned beef, spicy tomatoes, and melted cheese. And these crunchy taco cups are always a huge hit at the party!

This simple taco cup recipe is made with just five ingredients. Throw these together in under thirty-five minutes. These taco cups are satisfyingly crisp and crunchy on the outside and soft and melty on the inside. Before serving, top these crunchy taco cups with sour cream and garnish with cilantro if desired.

I am a huge fan of these crunchy taco cups. These are the best hand-held snack that I have ever made! These delicious crunchy taco cups are super amazing and the wonton wrappers are such a fantastic idea as they perfectly fit a standard muffin tin.

Ingredients

1 (10 ounces) can Ro-Tel Diced Tomatoes and Green Chiles drained

1 pound lean ground beef, browned and drained

1 envelope (3 tbsp) taco seasoning

24 wonton wrappers

1 1/2 c. sharp cheddar cheese, shredded (or Mexican blend)

How to make Crunchy Taco Cups

Step 1: Prepare the oven. Preheat it to 375 degrees F. Using non-stick cooking spray, generously grease a standard-size muffin.

Step 2: In a bowl, place the cooked beef, taco seasoning, and tomatoes. Mix well until combined.

Step 3: With a wonton wrapper, line each cup of the prepared muffin tin. Then, add 1 1/2 tbsp taco mixture. On top, add 1 tbsp cheese. Press them down. Next, add another layer of wonton wrapper followed by taco mixture and cheese.

Step 4: Place in the preheated oven and bake for about 11 to 13 minutes or until the edges are golden and the cups are heated through.

Nutrition Facts:

Serving Size: 3 taco cups, Serves: 4
Amount Per Serving: Calories 463, Total Fat 18.4g 24%, Cholesterol 114.1mg 38%, Sodium 789.6mg 34%, Total Carbohydrate 32.8g 12%, Sugars 2.4g, Protein 39.8g 80%, Vitamin A19%, Vitamin C11%

Crunchy Taco Cups

Rebecca Prep Time: 20 mins | Cook Time: 12 mins | Total Time: 32 mins | Yield: 12 taco cups I am obsessed with these tiny taco cups! This recipe is… General Recipes Crunchy Taco Cups European Print This
Serves: 12 Prep Time: 20 mins Cooking Time: 12 mins 12 mins
Nutrition facts: 463 calories 18.4 fat
Rating: 5.0/5
( 1 voted )

Ingredients

  • 1 (10 ounces) can Ro-Tel Diced Tomatoes and Green Chiles drained
  • 1 pound lean ground beef, browned and drained
  • 1 envelope (3 tbsp) taco seasoning
  • 24 wonton wrappers
  • 1 1/2 c. sharp cheddar cheese, shredded (or Mexican blend)

Instructions

Step 1: Prepare the oven. Preheat it to 375 degrees F. Using non-stick cooking spray, generously grease a standard-size muffin.

Step 2: In a bowl, place the cooked beef, taco seasoning, and tomatoes. Mix well until combined.

Step 3: With a wonton wrapper, line each cup of the prepared muffin tin. Then, add 1 1/2 tbsp taco mixture. On top, add 1 tbsp cheese. Press them down. Next, add another layer of wonton wrapper followed by taco mixture and cheese.

Step 4: Place in the preheated oven and bake for about 11 to 13 minutes or until the edges are golden and the cups are heated through.


August 10, 2022 0 comment
0 FacebookTwitterPinterestEmail
General Recipes

Hawaiian Grilled Cheese

by Rebecca August 10, 2022
written by Rebecca

Prep time: 5 mins | Cook time: 5 mins | Total time: 10 mins | Servings: 1 sandwich

I love this Hawaiian grilled cheese sandwich. It is one of my ultimate favorite sandwiches that is made with Canadian bacon, Monterey Jack cheese, and pineapple. This tasty Hawaiian Grilled Sandwich resembles our favorite Hawaiian pizza. If you enjoy pineapple pizza as most people do, this grilled sandwich is for you. And just like many grilled sandwich recipes, this is also incredibly easy to make using only a few simple ingredients. This Hawaiian grilled cheese is the perfect easy and quick breakfast or even snack any day!

I am obsessed with the flavor combination of juicy, sweet pineapple and salty bacon. If desired, you can even add a few ingredients to make this even more delicious! I like to add sliced tomatoes as it adds extra sweetness and acidity to this grilled sandwich.

Ingredients

2 tablespoons butter, softened to room temperature

3 slices pineapple, fresh or canned

½ c. Monterey Jack cheese, grated

3 slices of Canadian bacon

Oregano and parsley

4 slices bread

How to make Hawaiian Grilled Cheese

Step 1: Spread one side of each bread with butter. To taste, sprinkle with parsley and oregano. Place the shredded cheese on the non-buttered side of the bread followed by the Canadian bacon and pineapple. Then, top with another slice of bread, buttered-side up.

Step 2: On the stove top on a frying pan or griddle, cook the sandwich. Flip the sandwich once the first side is toasted and continue to cook over low heat until the cheese has melted and the other side is toasted.

Step 3: When done, take the sandwich out and let it cool for a couple of minutes before serving. Enjoy!

Notes:

For this recipe, you can use Havarti cheese. I recommend slicing the Havarti cheese thinly. If not, you can slice it thicker and simply arrange the thicker slices on the bread to cover the surface.

Or simply buy sliced Havarti or fontina cheese.

Hawaiian Grilled Cheese

Rebecca Prep time: 5 mins | Cook time: 5 mins | Total time: 10 mins | Servings: 1 sandwich I love this Hawaiian grilled cheese sandwich. It is one of my… General Recipes Hawaiian Grilled Cheese European Print This
Serves: 1 Prep Time: 5 mins Cooking Time: 5 mins 5 mins
Nutrition facts: 200 calories 20 grams fat
Rating: 5.0/5
( 1 voted )

Ingredients

  • 2 tablespoons butter, softened to room temperature
  • 3 slices pineapple, fresh or canned
  • ½ c. Monterey Jack cheese, grated
  • 3 slices of Canadian bacon
  • Oregano and parsley
  • 4 slices bread

Instructions

Step 1: Spread one side of each bread with butter. To taste, sprinkle with parsley and oregano. Place the shredded cheese on the non-buttered side of the bread followed by the Canadian bacon and pineapple. Then, top with another slice of bread, buttered-side up.

Step 2: On the stove top on a frying pan or griddle, cook the sandwich. Flip the sandwich once the first side is toasted and continue to cook over low heat until the cheese has melted and the other side is toasted.

Step 3: When done, take the sandwich out and let it cool for a couple of minutes before serving. Enjoy!

Notes

For this recipe, you can use Havarti cheese. I recommend slicing the Havarti cheese thinly. If not, you can slice it thicker and simply arrange the thicker slices on the bread to cover the surface. Or simply buy sliced Havarti or fontina cheese.

August 10, 2022 0 comment
0 FacebookTwitterPinterestEmail
General Recipes

GOOD OLD FASHIONED MAC AND CHEESE

by Rebecca August 9, 2022
written by Rebecca

Total prep time: 1 hr 5 mins | Servings: 7

Mac and cheese is the ultimate comfort food for kids and adults. It is a true classic! This old-fashioned Mac and cheese recipe has been one of my mom’s favorites that she passed on to me. It is a foolproof recipe, super easy to throw together, and ready in a breeze. I love this recipe because this is incredibly simple to make and guarantee to deliver the best results! I have tried different varieties of mac and cheese, but I always come back to this good old-fashioned recipe because I love this traditional version for great reasons.

Ingredients

4 tbsp butter

2 c. elbow macaroni

2 tbsp all-purpose flour

¼ onion, minced

2 c. milk

¼ lb processed cheese food

¼ lb Swiss cheese, shredded

¼ lb cheddar cheese, shredded

Salt and pepper, to taste

HOW TO MAKE GOOD OLD-FASHIONED MAC AND CHEESE

Step 1: Following the package directions, cook the elbow macaroni.

Step 2: In the meantime, melt the butter in a small saucepan on medium heat. Once the butter has melted, gradually add the flour, stirring until cream-colored paste forms. Add the milk and keep stirring for about a minute until the mixture has thickened. When done set the mixture aside.

Step 3: Into the bottom of a lightly greased large baking dish, spread half of the cooked macaroni. On top, layer half of the grated onions. Season with salt and pepper. Then, sprinkle with half each of the cheddar cheese and Swiss cheese.

Step 4: Repeat with another layer of macaroni followed by onion, salt, pepper, and cheeses. On top, pour the flour mix and top with light sprinkles of butter.

Step 5: Tent the baking dish and place it in the oven. Bake for about 45 minutes at 350 degrees. When done, remove from the oven and serve the mac and cheese immediately. Enjoy!

Nutrition Facts:

Per Serving: Energy: 401 calories; protein: 18.5g; carbohydrates: 29.1g; fat: 23.3g; cholesterol: 70mg; sodium 450.2mg

GOOD OLD FASHIONED MAC AND CHEESE

Rebecca Total prep time: 1 hr 5 mins | Servings: 7 Mac and cheese is the ultimate comfort food for kids and adults. It is a true classic! This old-fashioned Mac… General Recipes GOOD OLD FASHIONED MAC AND CHEESE European Print This
Serves: 7
Nutrition facts: 401 calories 23.3 fat
Rating: 5.0/5
( 1 voted )

Ingredients

  • 4 tbsp butter
  • 2 c. elbow macaroni
  • 2 tbsp all-purpose flour
  • ¼ onion, minced
  • 2 c. milk
  • ¼ lb processed cheese food
  • ¼ lb Swiss cheese, shredded
  • ¼ lb cheddar cheese, shredded
  • Salt and pepper, to taste

Instructions

Step 1: Following the package directions, cook the elbow macaroni.

Step 2: In the meantime, melt the butter in a small saucepan on medium heat. Once the butter has melted, gradually add the flour, stirring until cream-colored paste forms. Add the milk and keep stirring for about a minute until the mixture has thickened. When done set the mixture aside.

Step 3: Into the bottom of a lightly greased large baking dish, spread half of the cooked macaroni. On top, layer half of the grated onions. Season with salt and pepper. Then, sprinkle with half each of the cheddar cheese and Swiss cheese.

Step 4: Repeat with another layer of macaroni followed by onion, salt, pepper, and cheeses. On top, pour the flour mix and top with light sprinkles of butter.

Step 5: Tent the baking dish and place it in the oven. Bake for about 45 minutes at 350 degrees. When done, remove from the oven and serve the mac and cheese immediately. Enjoy!

August 9, 2022 0 comment
0 FacebookTwitterPinterestEmail
General Recipes

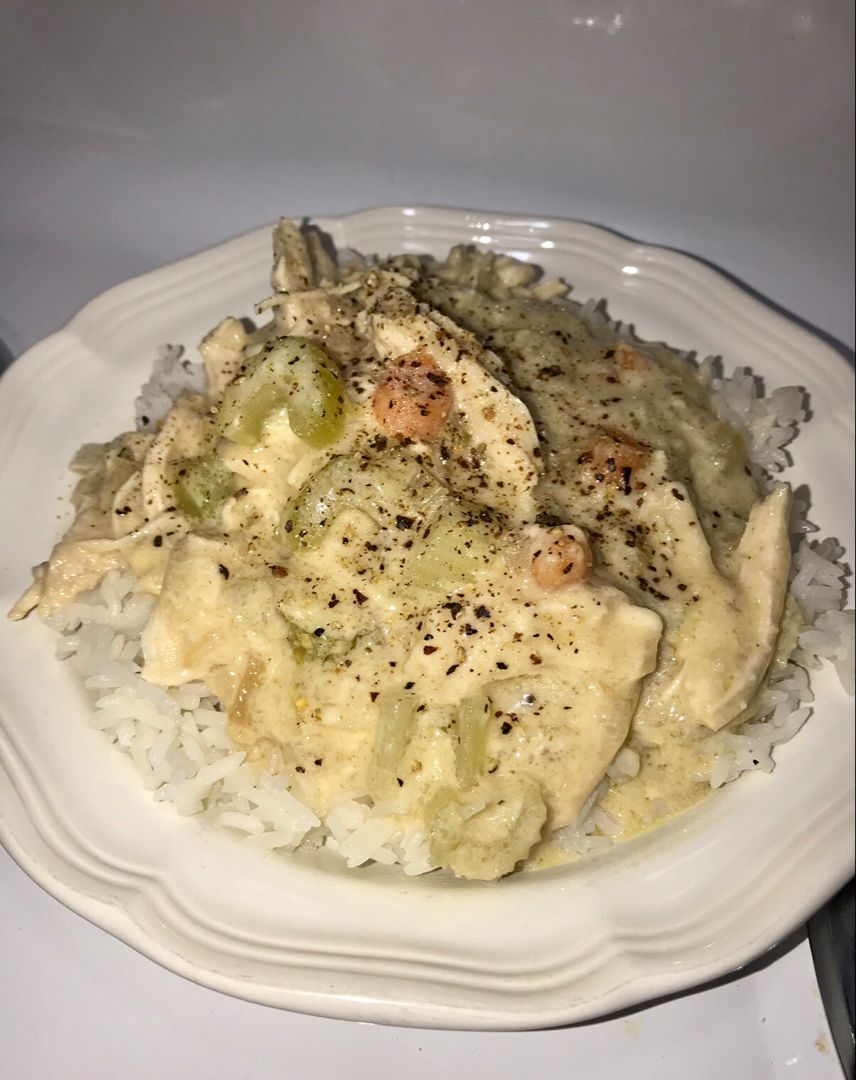
CROCKPOT CHICKEN AND GRAVY

by Rebecca August 9, 2022
written by Rebecca

Prep Time: 5 mins | Cook Time: 5 hrs | Total Time: 5 hrs 5 mins | Yield: 6 servings

Are you searching for another great weeknight dinner option? Then, you have to give this crockpot chicken and gravy a try. Not only that this is incredibly easy to make, but this guarantee one of the best meal you’ll ever make! Tender chicken breasts smothered in a mouthwatering gravy. Serve this over mashed potatoes for a simple yet filling meal any time!

Crockpot recipes are a keeper. There are hundreds and thousands of crockpot recipes available. I have my favorites, and go-to crockpot recipes for every occasion and this chicken and gravy is one of my top favorites. I can easily throw this together using ingredients that I already have. All I need is to dump everything in my crockpot and leave. After a few hours, simply shred the chicken, stir, and viola! Dinner is served! For an easy and filling meal, I like to serve this chicken and gravy over hot steamed rice or mashed potatoes with some veggies on the side.

Ingredients

2 (0.87 ounces) envelopes of chicken gravy mix

3-4 boneless, skinless chicken breasts

Hot steamed rice

½ c. water or chicken broth, optional

1 (10.75 ounces) can cream of chicken soup

HOW TO MAKE CROCKPOT CHICKEN AND GRAVY

Step 1: In a slow cooker, place the chicken and season with salt and pepper. In a bowl, mix the soup, gravy mix, and water until well blended. Then, pour this over the chicken.

Step 2: Set to cook for 4 to 6 hours on low. When done cooking, shred the chicken breasts into small pieces.

Step 3: Serve the chicken and gravy immediately over hot steamed rice. Enjoy!

Notes:

For this recipe, you can swap chicken breasts with chicken thighs or tenderloins.

If desired, you can even use frozen chicken breasts. Keep in mind to cook on the higher end of the cooking time.

You can also add some frozen veggies to the mixture if desired.

CROCKPOT CHICKEN AND GRAVY

Rebecca Prep Time: 5 mins | Cook Time: 5 hrs | Total Time: 5 hrs 5 mins | Yield: 6 servings Are you searching for another great weeknight dinner option? Then,… General Recipes CROCKPOT CHICKEN AND GRAVY European Print This
Serves: 6 Prep Time: 5 mins Cooking Time: 5 hrs 5 hrs
Nutrition facts: 200 calories 20 grams fat
Rating: 5.0/5
( 1 voted )

Ingredients

  • 2 (0.87 ounces) envelopes of chicken gravy mix
  • 3-4 boneless, skinless chicken breasts
  • Hot steamed rice
  • ½ c. water or chicken broth, optional
  • 1 (10.75 ounces) can cream of chicken soup

Instructions

Step 1: In a slow cooker, place the chicken and season with salt and pepper. In a bowl, mix the soup, gravy mix, and water until well blended. Then, pour this over the chicken.

Step 2: Set to cook for 4 to 6 hours on low. When done cooking, shred the chicken breasts into small pieces.

Step 3: Serve the chicken and gravy immediately over hot steamed rice. Enjoy!

Notes

For this recipe, you can swap chicken breasts with chicken thighs or tenderloins. If desired, you can even use frozen chicken breasts. Keep in mind to cook on the higher end of the cooking time. You can also add some frozen veggies to the mixture if desired.

August 9, 2022 0 comment
0 FacebookTwitterPinterestEmail
General Recipes

Crockpot Brown Sugar Balsamic Glazed Pork Tenderloin

by Rebecca August 9, 2022
written by Rebecca

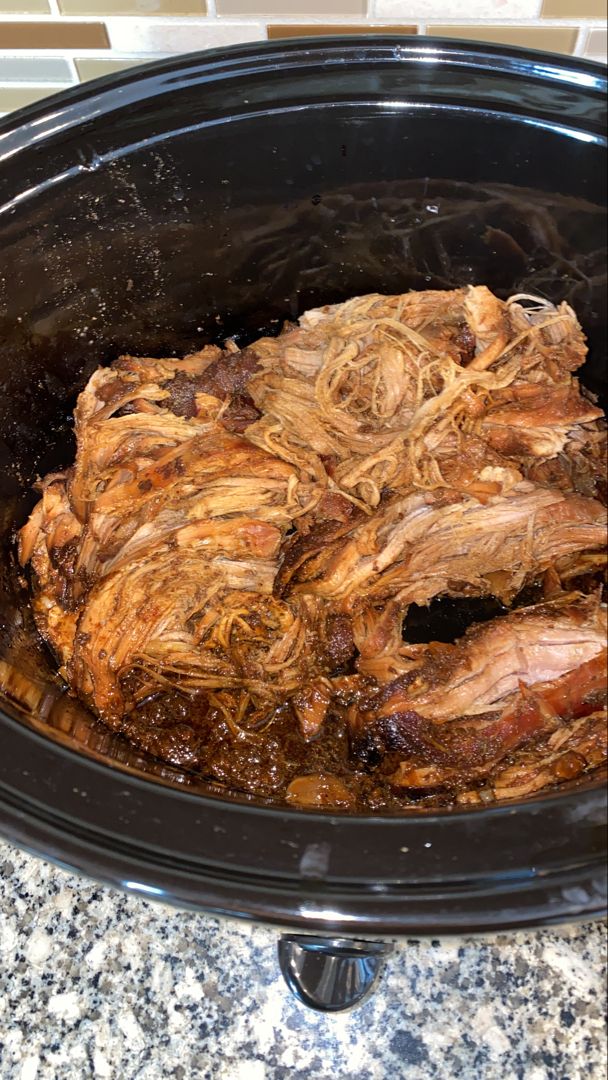
This brown sugar, balsamic glazed pork tenderloin is another of my favorite crockpot recipe. Mouthwatering with superb flavor and a great weeknight meal option if you need something easy, but delightful dinner. Simply throw everything in your crockpot, set it to cook, and in the last hour of cooking brush the roast with the thickened glaze. If you prefer a more caramelized crust, you can broil the roast and brush with the glaze a few times until you have achieved your desired crust. For a filling, incredibly delicious dinner, serve this brown sugar, balsamic glazed pork tenderloin with mashed potatoes and veggies on the side.

Ingredients

1 tsp Ground sage

2 lbs Pork tenderloin

1 clove Garlic; crushed

1 tbsp Cornstarch

½ c. Water

½ c. Brown sugar

¼ c. Balsamic Vinegar

2 tbsp Soy sauce

½ c. Water

½ tsp Salt

¼ tsp Pepper

How to make Crockpot Brown Sugar Balsamic Glazed Pork Tenderloin

Step 1: In a bowl, place the seasonings and mix well. All over the tenderloin, rub the seasonings until completely coated.

Step 2: In the slow cooker, pour in half a cup of water and gradually add the pork tenderloin. If desired, add herbs and sauces. Set to cook for 6 to 8 hours on low.

Step 3: Into a small pan, whisk the glaze ingredients (cornstarch, brown sugar, vinegar, soy sauce, and water). Do this in the last hour of cooking the tenderloin. Heat for about 4 minutes over medium heat while stirring slowly until thickened.

Step 4: Brush the roast with the glaze during the last hour of cooking.

Step 5: If you prefer to have an extra caramelized crust, transfer the roast to a sheet and drizzle with the glaze. Broil for about 1 to 2 minutes or until bubbly and caramelized. Repeat glazing the roast a couple of times until you have achieved your desired crust.

Step 6: When done, serve the tenderloin right away with the glaze on the side. Enjoy!

Crockpot Brown Sugar Balsamic Glazed Pork Tenderloin

Rebecca This brown sugar, balsamic glazed pork tenderloin is another of my favorite crockpot recipe. Mouthwatering with superb flavor and a great weeknight meal option if you need something easy, but… General Recipes Crockpot Brown Sugar Balsamic Glazed Pork Tenderloin European Print This
Nutrition facts: 200 calories 20 grams fat
Rating: 5.0/5
( 1 voted )

Ingredients

  • 1 tsp Ground sage
  • 2 lbs Pork tenderloin
  • 1 clove Garlic; crushed
  • 1 tbsp Cornstarch
  • ½ c. Water
  • ½ c. Brown sugar
  • ¼ c. Balsamic Vinegar
  • 2 tbsp Soy sauce
  • ½ c. Water
  • ½ tsp Salt
  • ¼ tsp Pepper

Instructions

Step 1: In a bowl, place the seasonings and mix well. All over the tenderloin, rub the seasonings until completely coated.

Step 2: In the slow cooker, pour in half a cup of water and gradually add the pork tenderloin. If desired, add herbs and sauces. Set to cook for 6 to 8 hours on low.

Step 3: Into a small pan, whisk the glaze ingredients (cornstarch, brown sugar, vinegar, soy sauce, and water). Do this in the last hour of cooking the tenderloin. Heat for about 4 minutes over medium heat while stirring slowly until thickened.

Step 4: Brush the roast with the glaze during the last hour of cooking.

Step 5: If you prefer to have an extra caramelized crust, transfer the roast to a sheet and drizzle with the glaze. Broil for about 1 to 2 minutes or until bubbly and caramelized. Repeat glazing the roast a couple of times until you have achieved your desired crust.

Step 6: When done, serve the tenderloin right away with the glaze on the side. Enjoy!

August 9, 2022 0 comment
0 FacebookTwitterPinterestEmail
General Recipes

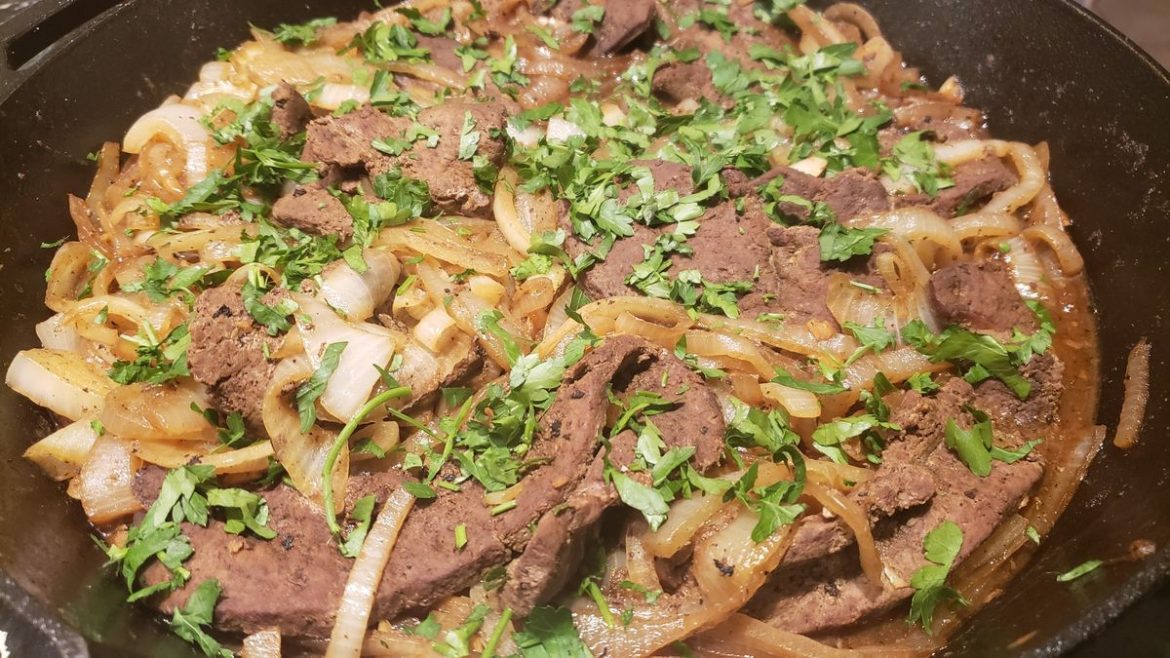
Beef Liver and Onions

by Rebecca August 9, 2022
written by Rebecca

My husband is a big fan of this beef liver and onions. I know most people including myself are not the biggest fan of this dish. But trust me, this delicious beef liver and onions will change your mind. This recipe shares an easy technique to ensure the flavor of the liver is not too strong. This is also incredibly easy and quick to throw together using only a few simple ingredients.

Ingredients

1 pound beef liver

2 c. of thinly sliced onions

¼ c. of flour

¼-½ c. of butter

1-2 tablespoons of fresh minced sage

½ c. of beef stock

1 tablespoon of minced Italian parsley

½ teaspoon of salt

⅛ teaspoon of pepper

¼ c. of dry white wine

Oil to taste

How to make Beef Liver and Onions

Step 1: In a bag, place the flour, pepper, and salt.

Step 2: Into about half an inch pieces, cut the liver and place them in the same bag. Seal the bag and shake until the pieces of liver are coated.

Step 3: Heat the butter and a little amount of oil in a skillet. Then, add the onions and saute over medium-high heat until tender. When you see a tiny sheen of gloss on the onions, transfer them inside a dish and sprinkle them with salt and pepper.

Step 4: In the same skillet, heat another 4 tbsp butter with a small amount of oil. Then, add the liver and cook for about 5 minutes until the liver begins to brown.

Step 5: Return the onions to the skillet and heat for a few minutes.

Step 6: Onto a plate, transfer the liver and onions. Pour stock or wine into the skillet and deglaze. Let the liquid simmer until reduced and you have a thick sauce.

Step 7: On a serving dish, place the liver, onions, and sauce. Before serving, garnish with some parsley. Enjoy!

Beef Liver and Onions

Rebecca My husband is a big fan of this beef liver and onions. I know most people including myself are not the biggest fan of this dish. But trust me, this… General Recipes Beef Liver and Onions European Print This
Nutrition facts: 200 calories 20 grams fat
Rating: 5.0/5
( 1 voted )

Ingredients

  • 1 pound beef liver
  • 2 c. of thinly sliced onions
  • ¼ c. of flour
  • ¼-½ c. of butter
  • 1-2 tablespoons of fresh minced sage
  • ½ c. of beef stock
  • 1 tablespoon of minced Italian parsley
  • ½ teaspoon of salt
  • ⅛ teaspoon of pepper
  • ¼ c. of dry white wine
  • Oil to taste

Instructions

Step 1: In a bag, place the flour, pepper, and salt.

Step 2: Into about half an inch pieces, cut the liver and place them in the same bag. Seal the bag and shake until the pieces of liver are coated.

Step 3: Heat the butter and a little amount of oil in a skillet. Then, add the onions and saute over medium-high heat until tender. When you see a tiny sheen of gloss on the onions, transfer them inside a dish and sprinkle them with salt and pepper.

Step 4: In the same skillet, heat another 4 tbsp butter with a small amount of oil. Then, add the liver and cook for about 5 minutes until the liver begins to brown.

Step 5: Return the onions to the skillet and heat for a few minutes.

Step 6: Onto a plate, transfer the liver and onions. Pour stock or wine into the skillet and deglaze. Let the liquid simmer until reduced and you have a thick sauce.

Step 7: On a serving dish, place the liver, onions, and sauce. Before serving, garnish with some parsley. Enjoy!

August 9, 2022 0 comment
0 FacebookTwitterPinterestEmail
General Recipes

Crazy Good Scalloped Potatoes

by Rebecca August 9, 2022
written by Rebecca

This scalloped potato is a great weeknight dinner that pairs so well with any main dish. It is incredibly easy to make and ready in a snap. This dish is also excellent to serve on holidays or gatherings. And the best option for serving a big crowd! A creamy, cheesy, and crazy good scalloped potatoes that guarantee to exceed everyone’s expectations!

Ingredients

3 tablespoons butter

4–5 pounds of Yukon gold potatoes

1 tablespoon Tastefully Simple Onion Onion

3 tablespoons flour

1 tablespoon Tastefully Simple Garlic Garlic

2 c. of whole milk

1/2 c. Parmesan

2 teaspoons Tastefully Simple Rustic Herb

1 1/2 c. sharp cheddar

1 c. chicken broth

1 teaspoon salt

1/2 teaspoon pepper

How to make Crazy Good Scalloped Potatoes

Step 1: Peel, then slice the potatoes to about 1/8-inch thickness.

Step 2: Into the saucepan, melt the butter and stir in the flour. Cook for a few minutes until the raw flour taste is gone. Then, add the remaining ingredients except for the cheese and continue to cook until the sauce has thickened and creamy, stirring often.

Step 3: On the bottom of a greased baking dish, place half of the potatoes and pour over half of the cream cheese sauce. On top, sprinkle about 1 cup each of cheddar cheese and Parmesan cheese. Top with the rest of the potatoes and the remaining sauce. Top with the remaining cheese.

Step 4: Tent the baking dish with foil. Place in the oven and bake for about 30 minutes at 400 degrees. Uncover and bake for another 25 to 30 minutes or until cooked through. At this point, the potatoes should be lightly browned and the cheese has melted.

Step 5: Remove the baking dish from the oven and allow the scalloped potatoes to sit for a few seconds. If you prefer this whipped and creamy, stir the scalloped potatoes right before serving. Enjoy!

Crazy Good Scalloped Potatoes

Rebecca This scalloped potato is a great weeknight dinner that pairs so well with any main dish. It is incredibly easy to make and ready in a snap. This dish is… General Recipes Crazy Good Scalloped Potatoes European Print This
Nutrition facts: 200 calories 20 grams fat
Rating: 5.0/5
( 1 voted )

Ingredients

  • 3 tablespoons butter
  • 4–5 pounds of Yukon gold potatoes
  • 1 tablespoon Tastefully Simple Onion Onion
  • 3 tablespoons flour
  • 1 tablespoon Tastefully Simple Garlic Garlic
  • 2 c. of whole milk
  • 1/2 c. Parmesan
  • 2 teaspoons Tastefully Simple Rustic Herb
  • 1 1/2 c. sharp cheddar
  • 1 c. chicken broth
  • 1 teaspoon salt
  • 1/2 teaspoon pepper

Instructions

Step 1: Peel, then slice the potatoes to about 1/8-inch thickness.

Step 2: Into the saucepan, melt the butter and stir in the flour. Cook for a few minutes until the raw flour taste is gone. Then, add the remaining ingredients except for the cheese and continue to cook until the sauce has thickened and creamy, stirring often.

Step 3: On the bottom of a greased baking dish, place half of the potatoes and pour over half of the cream cheese sauce. On top, sprinkle about 1 cup each of cheddar cheese and Parmesan cheese. Top with the rest of the potatoes and the remaining sauce. Top with the remaining cheese.

Step 4: Tent the baking dish with foil. Place in the oven and bake for about 30 minutes at 400 degrees. Uncover and bake for another 25 to 30 minutes or until cooked through. At this point, the potatoes should be lightly browned and the cheese has melted.

Step 5: Remove the baking dish from the oven and allow the scalloped potatoes to sit for a few seconds. If you prefer this whipped and creamy, stir the scalloped potatoes right before serving. Enjoy!

August 9, 2022 0 comment
0 FacebookTwitterPinterestEmail
General Recipes

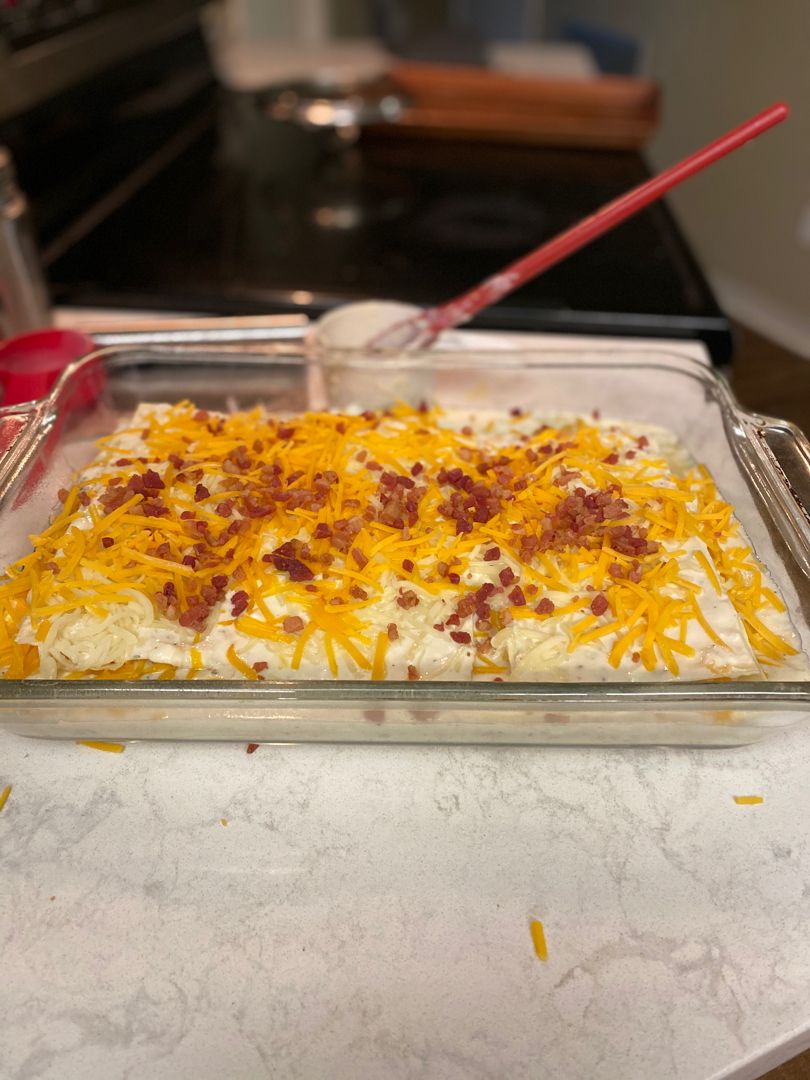
CRACK CHICKEN LASAGNA

by Rebecca August 9, 2022
written by Rebecca

Enjoy a delicious twist on the traditional lasagna with this crack chicken lasagna recipe. You can assemble the lasagna a day ahead, but do not bake. Instead, tightly cover with plastic wrap and keep in the fridge. When ready to bake, let the casserole rest at room temperature for an hour before baking. This lasagna is also an amazing freezer meal, and this will stay fresh in the freezer unbaked for up to 2 months.

Ingredients

1 tablespoon Olive Oil

2 cloves garlic – minced

9 sheets lasagna – you can make a couple extra if you want to in case some tear

1 small onion – finely diced

¼ teaspoon fresh ground black pepper

3 cans of evaporated milk (12 oz. each)

8 ounces cream cheese – softened and cubed

3 c. chopped cooked chicken (about 1 rotisserie chicken if desired)

1 ½ c. sharp cheddar cheese (shredded)

1 ½ c. mozzarella cheese (shredded)

2 packets ranch seasoning mix (total amount needed is 2 ounces)

chopped green onions or fresh parsley for garnishing

3 oz. chopped bacon bits

HOW TO MAKE CRACK CHICKEN LASAGNA

Step 1: Prepare the oven. Preheat it to 350 degrees F. Using cooking spray, grease a 9 x 13-inch baking pan.

Step 2: Following the package directions, cook the lasagna noodles. Drain when done and set aside.

Step 3: If using a block of cheese, grate it now.

Sauce:

Step 4: Heat the olive oil in a saucepan over medium heat. Then, add the onion and cook for about 2 to 3 minutes. Next, add the garlic and stir for another 30 seconds. At this point, adjust the heat to low.

Step 5: Gradually add the evaporated milk. Add the pepper and ranch seasoning. Stir continuously and heat for additional 5 minutes until the mixture begins to thicken. Lastly, add the cream cheese cubes and stir well until smooth.

To Assemble the Lasagna:

Step 6: In the bottom of the baking pan, pour 3/4 c. white sauce. Over the sauce, place a layer of lasagna and sprinkle with half of the chicken on top followed by half c. each of the mozzarella and cheddar cheese. On top, drizzle a cup of sauce.

Step 7: Do the same layers: pasta, the rest of the chicken, half c. of each cheese, and 1 c. sauce.

Step 8: Then, do the last layer of noodles, the rest of the sauce, and top with the rest of the cheeses and chopped bacon.

Step 9: Tent the baking pan and place it in the preheated oven. Bake for about 20 minutes. Remove the cover and continue baking for 10 minutes more or until bubbly and heated through.

Step 10: Remove from the oven when done and let the lasagna rest for about 10 minutes. Before serving, garnish with some green onions or parsley. Enjoy!

CRACK CHICKEN LASAGNA

Rebecca Enjoy a delicious twist on the traditional lasagna with this crack chicken lasagna recipe. You can assemble the lasagna a day ahead, but do not bake. Instead, tightly cover with… General Recipes CRACK CHICKEN LASAGNA European Print This
Nutrition facts: 200 calories 20 grams fat
Rating: 5.0/5
( 1 voted )

Ingredients

  • 1 tablespoon Olive Oil
  • 2 cloves garlic – minced
  • 9 sheets lasagna – you can make a couple extra if you want to in case some tear
  • 1 small onion – finely diced
  • ¼ teaspoon fresh ground black pepper
  • 3 cans of evaporated milk (12 oz. each)
  • 8 ounces cream cheese – softened and cubed
  • 3 c. chopped cooked chicken (about 1 rotisserie chicken if desired)
  • 1 ½ c. sharp cheddar cheese (shredded)
  • 1 ½ c. mozzarella cheese (shredded)
  • 2 packets ranch seasoning mix (total amount needed is 2 ounces)
  • chopped green onions or fresh parsley for garnishing
  • 3 oz. chopped bacon bits

Instructions

Step 1: Prepare the oven. Preheat it to 350 degrees F. Using cooking spray, grease a 9 x 13-inch baking pan.

Step 2: Following the package directions, cook the lasagna noodles. Drain when done and set aside.

Step 3: If using a block of cheese, grate it now.

Sauce:

Step 4: Heat the olive oil in a saucepan over medium heat. Then, add the onion and cook for about 2 to 3 minutes. Next, add the garlic and stir for another 30 seconds. At this point, adjust the heat to low.

Step 5: Gradually add the evaporated milk. Add the pepper and ranch seasoning. Stir continuously and heat for additional 5 minutes until the mixture begins to thicken. Lastly, add the cream cheese cubes and stir well until smooth.

To Assemble the Lasagna:

Step 6: In the bottom of the baking pan, pour 3/4 c. white sauce. Over the sauce, place a layer of lasagna and sprinkle with half of the chicken on top followed by half c. each of the mozzarella and cheddar cheese. On top, drizzle a cup of sauce.

Step 7: Do the same layers: pasta, the rest of the chicken, half c. of each cheese, and 1 c. sauce.

Step 8: Then, do the last layer of noodles, the rest of the sauce, and top with the rest of the cheeses and chopped bacon.

Step 9: Tent the baking pan and place it in the preheated oven. Bake for about 20 minutes. Remove the cover and continue baking for 10 minutes more or until bubbly and heated through.

Step 10: Remove from the oven when done and let the lasagna rest for about 10 minutes. Before serving, garnish with some green onions or parsley. Enjoy!

August 9, 2022 0 comment
0 FacebookTwitterPinterestEmail
General Recipes

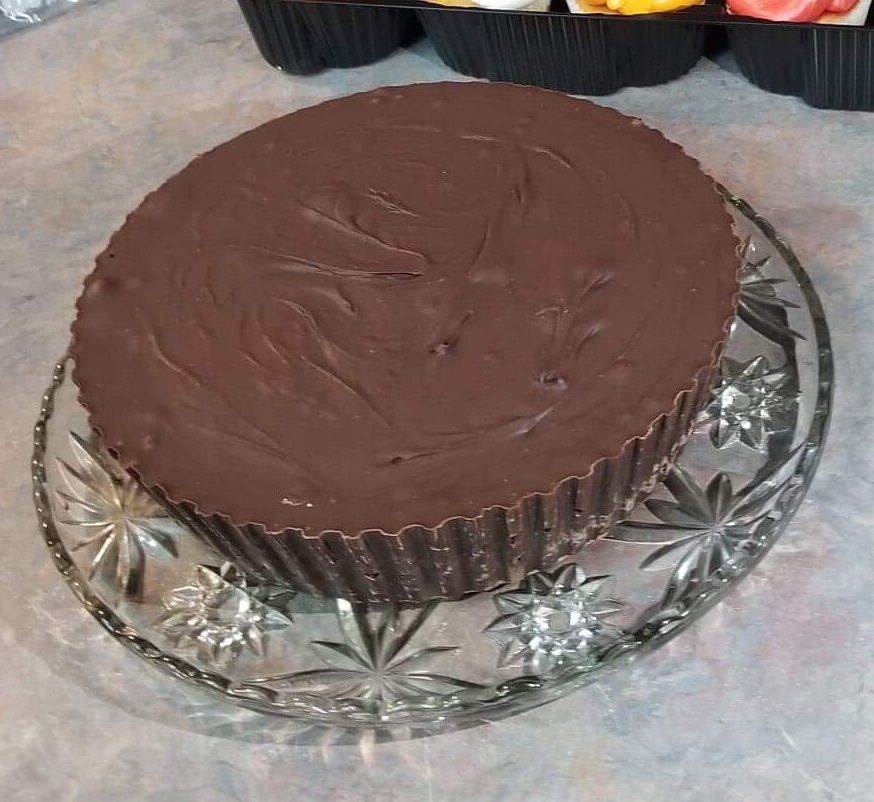
GIANT REESE’S PEANUT BUTTER CUP PIE

by Rebecca August 9, 2022
written by Rebecca

Prep Time: 30 mins | Servings: 10

I am obsessed with Reese’s peanut butter! I especially love the small cups, but I will gladly make an exemption for this gigantic 9-inch diameter chocolate peanut butter cup version! This is an insane treat for everyone who loves peanut butter and chocolate. This pie is an amazing dessert you can serve at any event. You can even give this as a gift. Simply wrap this in a pie box, pizza box, or transparent cellophane. Tie a ribbon and just put personalized notes.

Ingredients

2 c. creamy peanut butter (480 grams)

4 c. milk chocolate chips (700 grams), divided

8 tbsp butter, softened

2 c. powdered sugar (320 grams), sifted

HOW TO MAKE GIANT REESE’S PEANUT BUTTER CUP PIE

Step 1: In a small bowl, place half of the chocolate chips. Heat in the microwave in 30-second intervals, stirring in between until completely melted.

Step 2: Into a tart pan, pour the melted chocolate. Place in the fridge until set.

Step 3: In a large bowl, place the peanut butter, powdered sugar, and softened butter. Mix well until smooth.

Step 4: Into the tart pan, pour the peanut butter and smooth the surface.

Step 5: Melt the rest of the chocolate and pour this over the peanut butter. Store in the fridge for about an hour until set.

Step 6: Slice the pie and serve. Enjoy!

Tips:

Store the peanut butter cup at room temperature for up to 3 days.

You can also freeze the pie. Tightly wrap it in plastic wrap and wrap again in tin foil. Store in the freezer for up to 3 months. Defrost overnight in the fridge, then place on the counter to thaw at room temperature for a couple of hours before unwrapping.

You can wrap this in a pie box, pizza box, or transparent cellophane. Tied the box with a bow and give it as a gift.

Nutrition Facts:

Calories: 878Kcl Fat: 57g Carbs: 80g Fiber: 5g Sugar: 65g Protein: 17g

GIANT REESE’S PEANUT BUTTER CUP PIE

Rebecca Prep Time: 30 mins | Servings: 10 I am obsessed with Reese’s peanut butter! I especially love the small cups, but I will gladly make an exemption for this gigantic… General Recipes GIANT REESE’S PEANUT BUTTER CUP PIE European Print This
Serves: 10 Prep Time: 30 mins
Nutrition facts: 878 calories 57 fat
Rating: 5.0/5
( 1 voted )

Ingredients

  • 2 c. creamy peanut butter (480 grams)
  • 4 c. milk chocolate chips (700 grams), divided
  • 8 tbsp butter, softened
  • 2 c. powdered sugar (320 grams), sifted

Instructions

Step 1: In a small bowl, place half of the chocolate chips. Heat in the microwave in 30-second intervals, stirring in between until completely melted.

Step 2: Into a tart pan, pour the melted chocolate. Place in the fridge until set.

Step 3: In a large bowl, place the peanut butter, powdered sugar, and softened butter. Mix well until smooth.

Step 4: Into the tart pan, pour the peanut butter and smooth the surface.

Step 5: Melt the rest of the chocolate and pour this over the peanut butter. Store in the fridge for about an hour until set.

Step 6: Slice the pie and serve. Enjoy!

Notes

Store the peanut butter cup at room temperature for up to 3 days. You can also freeze the pie. Tightly wrap it in plastic wrap and wrap again in tin foil. Store in the freezer for up to 3 months. Defrost overnight in the fridge, then place on the counter to thaw at room temperature for a couple of hours before unwrapping. You can wrap this in a pie box, pizza box, or transparent cellophane. Tied the box with a bow and give it as a gift.

August 9, 2022 0 comment
0 FacebookTwitterPinterestEmail
General Recipes

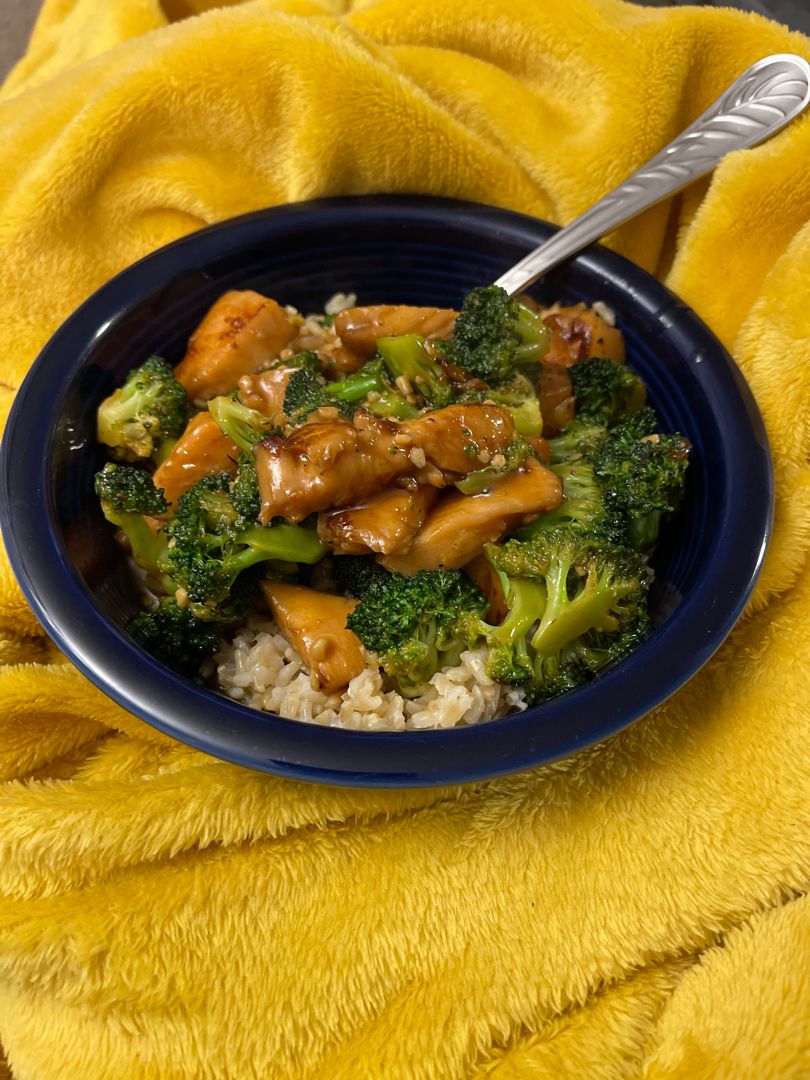
CHICKEN AND BROCCOLI STIR FRY

by Rebecca August 9, 2022
written by Rebecca

This chicken and broccoli stir fry has been one of my ultimate favorite Chinese dishes. Super easy to throw together, quick, and guarantee a filling, delicious meal served over hot white rice.

Ingredients

Chicken and Broccoli:

2 tablespoons cooking oil – I use Avocado Oil – Divided

1 pound boneless, skinless chicken breast – cut into ¾-inch pieces

1 pound broccoli (about 5 c.) – cut into florets

½ pound white button mushrooms – thickly sliced

1 small yellow onion – sliced into strips

Stir Fry Sauce:

1 teaspoon garlic (2 small cloves) – grated

3 tablespoons low sodium soy sauce (or Tamari for gluten-free)

1 tablespoon sesame oil

1 tablespoon corn starch

1 teaspoon fresh ginger – peeled and grated

2 tablespoons light brown sugar – packed (or use honey if desired)

¼ teaspoon black pepper – plus more to season chicken

⅔ c. low sodium chicken broth

HOW TO MAKE CHICKEN AND BROCCOLI STIR FRY

Sauce:

Step 1: Place the sauce ingredients in a small bowl. Mix well until the sugar and cornstarch have dissolved. To help dissolve the sugar faster, slightly warm the broth. Set aside.

Chicken:

Step 2: Into small bite-sized pieces, cut the chicken to no more than 3/4-inch thickness. Then, lightly season the chicken pieces with pepper.

Step 3: Heat 1 tbsp oil in a wok or large, heavy skillet over medium-high heat. Once hot, add the pieces of chicken in a single layer and sear for about a minute, undisturbed. Then, stir fry the chicken pieces for another 5 minutes or until completely cooked and golden brown.

Step 4: To a bowl, transfer the cooked chicken pieces and loosely tent to keep them warm.

Vegetables:

Step 5: Add another 1 tbsp oil to the same wok/skillet. Then, add the broccoli florets, sliced onion, and sliced mushrooms. Stir fry for about 3 minutes or until the broccoli is crisp-tender and the mushrooms have softened. Then, adjust the heat to medium/low.

Assemble:

Step 6: Stir the sauce and pour it over the veggies. Let it simmer for about 3 to 4 minutes or until the sauce has thickened and the flavor of the ginger and garlic have blended. You can add water a tbsp at a time if the sauce is too thick until you reached your desired consistency.

Step 7: Add the chicken to the pan, stir, and cook for 30 seconds more. If needed, add more soy sauce.

Step 8: Serve the chicken and broccoli stir fry immediately over hot white rice. Enjoy!

CHICKEN AND BROCCOLI STIR FRY

Rebecca This chicken and broccoli stir fry has been one of my ultimate favorite Chinese dishes. Super easy to throw together, quick, and guarantee a filling, delicious meal served over hot… General Recipes CHICKEN AND BROCCOLI STIR FRY European Print This
Nutrition facts: 200 calories 20 grams fat
Rating: 5.0/5
( 1 voted )

Ingredients

  • Chicken and Broccoli:
  • 2 tablespoons cooking oil – I use Avocado Oil – Divided
  • 1 pound boneless, skinless chicken breast – cut into ¾-inch pieces
  • 1 pound broccoli (about 5 c.) – cut into florets
  • ½ pound white button mushrooms – thickly sliced
  • 1 small yellow onion – sliced into strips
  • Stir Fry Sauce:
  • 1 teaspoon garlic (2 small cloves) – grated
  • 3 tablespoons low sodium soy sauce (or Tamari for gluten-free)
  • 1 tablespoon sesame oil
  • 1 tablespoon corn starch
  • 1 teaspoon fresh ginger – peeled and grated
  • 2 tablespoons light brown sugar – packed (or use honey if desired)
  • ¼ teaspoon black pepper – plus more to season chicken
  • ⅔ c. low sodium chicken broth

Instructions

Sauce:

Step 1: Place the sauce ingredients in a small bowl. Mix well until the sugar and cornstarch have dissolved. To help dissolve the sugar faster, slightly warm the broth. Set aside.

Chicken:

Step 2: Into small bite-sized pieces, cut the chicken to no more than 3/4-inch thickness. Then, lightly season the chicken pieces with pepper.

Step 3: Heat 1 tbsp oil in a wok or large, heavy skillet over medium-high heat. Once hot, add the pieces of chicken in a single layer and sear for about a minute, undisturbed. Then, stir fry the chicken pieces for another 5 minutes or until completely cooked and golden brown.

Step 4: To a bowl, transfer the cooked chicken pieces and loosely tent to keep them warm.

Vegetables:

Step 5: Add another 1 tbsp oil to the same wok/skillet. Then, add the broccoli florets, sliced onion, and sliced mushrooms. Stir fry for about 3 minutes or until the broccoli is crisp-tender and the mushrooms have softened. Then, adjust the heat to medium/low.

Assemble:

Step 6: Stir the sauce and pour it over the veggies. Let it simmer for about 3 to 4 minutes or until the sauce has thickened and the flavor of the ginger and garlic have blended. You can add water a tbsp at a time if the sauce is too thick until you reached your desired consistency.

Step 7: Add the chicken to the pan, stir, and cook for 30 seconds more. If needed, add more soy sauce.

Step 8: Serve the chicken and broccoli stir fry immediately over hot white rice. Enjoy!

August 9, 2022 0 comment
0 FacebookTwitterPinterestEmail
Newer Posts
Older Posts

Popular Posts

  • 1

    Crispy Crunchy Parmesan Potatoes

    March 21, 2020
  • 2

    CROCK POT SMOTHERED PORK CHOPS

    March 21, 2020
  • Facebook
  • Twitter

@2019 - All Right Reserved.


Back To Top