Cook it once
  • Home
  • Privacy Policy
  • Recipes
    • KETO
    • LC
    • WW
  • Tips
  • Contact
Cook it once
  • Home
  • Privacy Policy
  • Recipes
    • KETO
    • LC
    • WW
  • Tips
  • Contact
Category:

General Recipes

General Recipes

Sweet Blueberry Biscuits

by Rebecca August 19, 2022
written by Rebecca

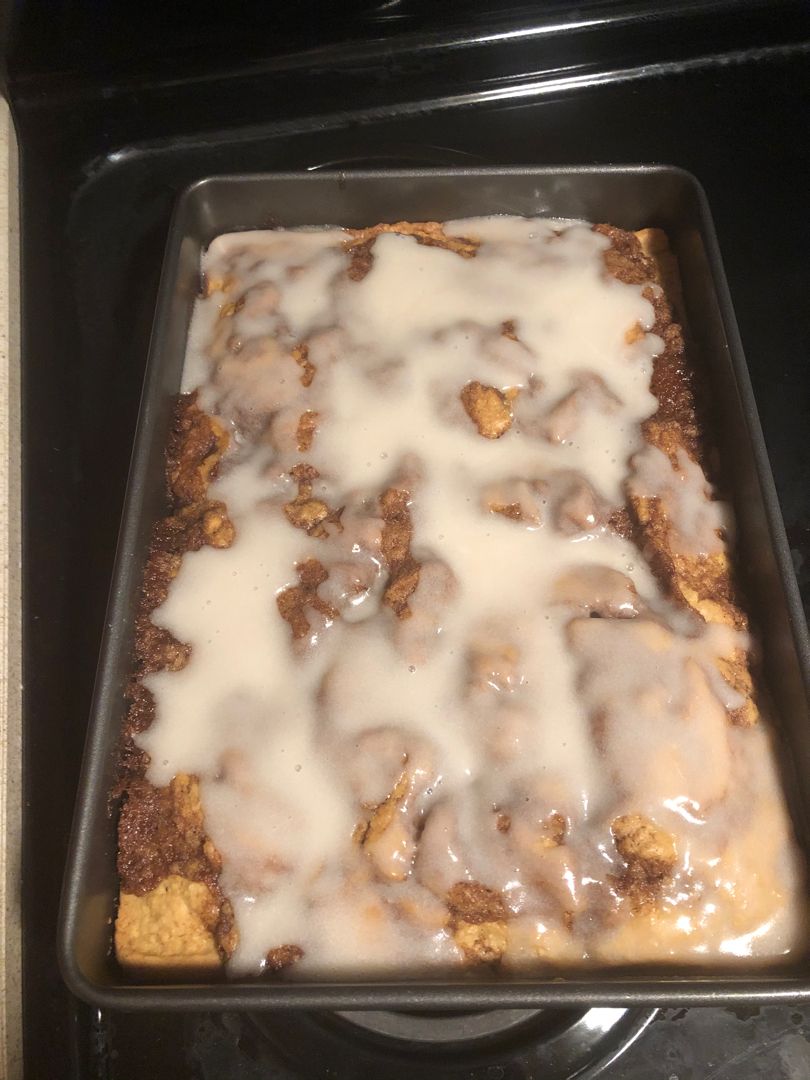
These sweet blueberry biscuits are bursting with fresh blueberries. Great for breakfast, afternoon snack, or even for entertaining. These are wonderful and heavenly, and they smell amazing! Easily whip these luscious sweet blueberry biscuits at home at any time.

Ingredients

Biscuits:

1 tablespoon baking powder

1 stick (8 tablespoons) butter – Very Cold

2 tablespoons sugar

2 c. all-purpose flour

3/4 c. buttermilk

1 teaspoon Salt

4 tablespoons salted butter – melted

1 c. fresh blueberries (could use frozen)

Glaze:

1-2 tsp Lemon Juice

1 c. Powdered Sugar

1 tbsp Milk

1 tsp of Lemon Zest (optional)

How to make Sweet Blueberry Biscuits

Step 1: Into small chunks, cut the butter and put them in the freezer.

Step 2: Using butter, grease a cast-iron skillet or baking sheet. Prepare the oven. Preheat it to 475 degrees F.

Step 3: To make the glaze, whisk the glaze ingredients in a bowl until well blended and set aside.

Step 4: Using a whisk, combine the flour, baking powder, salt, and sugar. Then, cut in the chilled butter using your hands, pastry cutter, or fork until it is about pea-size.

Step 5: To the flour mixture, gradually add the buttermilk until the dough separates from the sides of the bowl. Mix well until just combined. Onto a floured work surface, transfer the dough.

Step 6: Sprinkle flour on top of the dough. Press/roll the dough using your hands or a rolling pin to about half an inch thickness.

Step 7: Over the dough, place the blueberries and fold them over onto themselves, pushing them down, folding them again, and then pushing them down once more. Fold it again and flatten the dough to about 1-inch thickness. Using a 2-inch or 2 1/2 biscuit cutter or a glass, cut the dough into biscuits.

Step 8: In the prepared cast-iron skillet, place the biscuits, ensuring they are touching. Do the same if using a baking tray. Place in the preheated oven and bake for about 10 to 12 minutes. Take the biscuits out at about 6 to 8 minutes and generously brush each biscuit with the melted salted butter. Make sure to brush the tops and any exposed sides of the biscuits. Return the biscuits to the oven and resume baking until the tops of the biscuits turned light brown and the blueberries burst.

Step 9: Remove the biscuits from the oven and allow them to cool in the pan for about 10 minutes. Over the biscuits, drizzle or pour the glaze. Serve the biscuits immediately. Enjoy!

Notes:

The butter should be very cold. Place them in the freezer for at least 10 minutes.

Here is the recipe for a plain glaze (whisk them together): 3 tbsp milk (or more), half tsp vanilla, and 1 c powdered sugar.

In an airtight container, keep any leftover biscuits.

Sweet Blueberry Biscuits

Rebecca These sweet blueberry biscuits are bursting with fresh blueberries. Great for breakfast, afternoon snack, or even for entertaining. These are wonderful and heavenly, and they smell amazing! Easily whip these… General Recipes Sweet Blueberry Biscuits European Print This
Nutrition facts: 200 calories 20 grams fat
Rating: 5.0/5
( 1 voted )

Ingredients

  • Biscuits:
  • 1 tablespoon baking powder
  • 1 stick (8 tablespoons) butter – Very Cold
  • 2 tablespoons sugar
  • 2 c. all-purpose flour
  • 3/4 c. buttermilk
  • 1 teaspoon Salt
  • 4 tablespoons salted butter – melted
  • 1 c. fresh blueberries (could use frozen)
  • Glaze:
  • 1-2 tsp Lemon Juice
  • 1 c. Powdered Sugar
  • 1 tbsp Milk
  • 1 tsp of Lemon Zest (optional)

Instructions

Step 1: Into small chunks, cut the butter and put them in the freezer.

Step 2: Using butter, grease a cast-iron skillet or baking sheet. Prepare the oven. Preheat it to 475 degrees F.

Step 3: To make the glaze, whisk the glaze ingredients in a bowl until well blended and set aside.

Step 4: Using a whisk, combine the flour, baking powder, salt, and sugar. Then, cut in the chilled butter using your hands, pastry cutter, or fork until it is about pea-size.

Step 5: To the flour mixture, gradually add the buttermilk until the dough separates from the sides of the bowl. Mix well until just combined. Onto a floured work surface, transfer the dough.

Step 6: Sprinkle flour on top of the dough. Press/roll the dough using your hands or a rolling pin to about half an inch thickness.

Step 7: Over the dough, place the blueberries and fold them over onto themselves, pushing them down, folding them again, and then pushing them down once more. Fold it again and flatten the dough to about 1-inch thickness. Using a 2-inch or 2 1/2 biscuit cutter or a glass, cut the dough into biscuits.

Step 8: In the prepared cast-iron skillet, place the biscuits, ensuring they are touching. Do the same if using a baking tray. Place in the preheated oven and bake for about 10 to 12 minutes. Take the biscuits out at about 6 to 8 minutes and generously brush each biscuit with the melted salted butter. Make sure to brush the tops and any exposed sides of the biscuits. Return the biscuits to the oven and resume baking until the tops of the biscuits turned light brown and the blueberries burst.

Step 9: Remove the biscuits from the oven and allow them to cool in the pan for about 10 minutes. Over the biscuits, drizzle or pour the glaze. Serve the biscuits immediately. Enjoy!

Notes

The butter should be very cold. Place them in the freezer for at least 10 minutes. Here is the recipe for a plain glaze (whisk them together): 3 tbsp milk (or more), half tsp vanilla, and 1 c powdered sugar. In an airtight container, keep any leftover biscuits.

August 19, 2022 0 comment
0 FacebookTwitterPinterestEmail
General Recipes

Three Meat Crock Pot Cowboy Beans

by Rebecca August 19, 2022
written by Rebecca

PREP TIME: 20 mins | COOK TIME: 6 hrs | TOTAL TIME: 6 hrs 20 mins | YIELD: 18-20 Servings

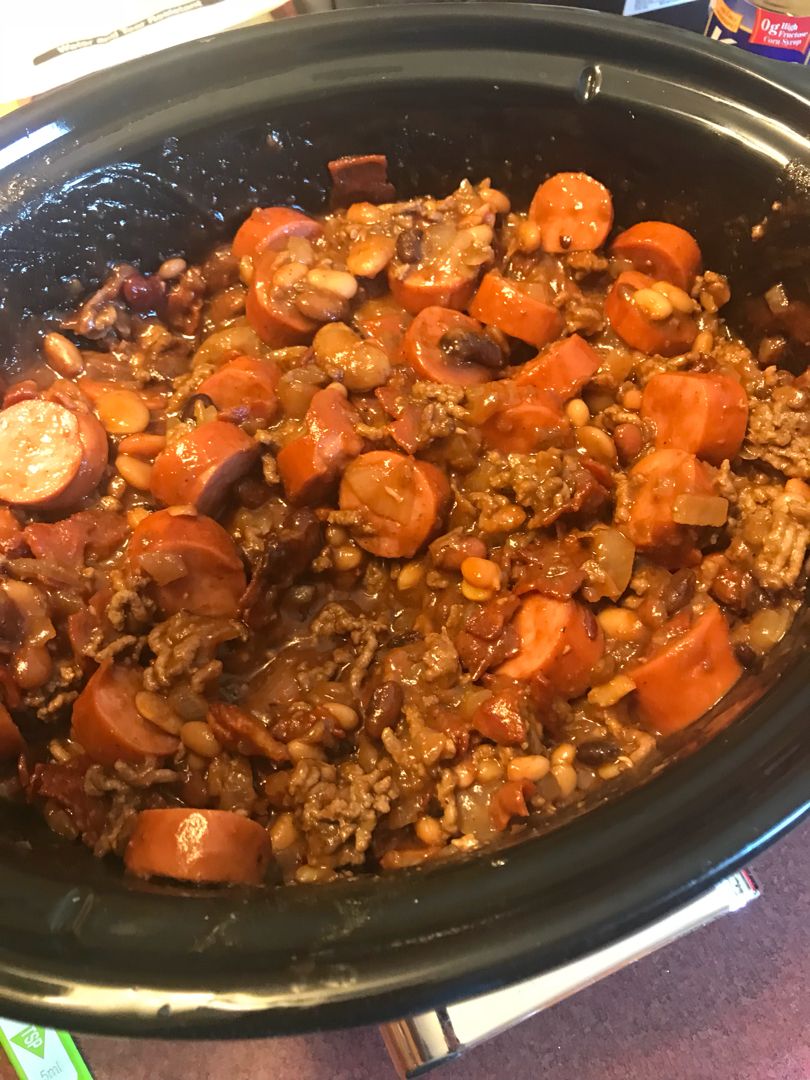
Filling, hearty, and delicious. This slow cooker BBQ bean is another amazing crockpot recipe loaded with sausage, bacon, and ground beef in a scrumptious thickened sauce. These cowboy beans are an excellent side dish option for feeding a crowd. Pair these three meat cowboy beans up with smoked or grilled meats for a fantastic cookout and barbecues.

INGREDIENTS

1 lb. ground beef

1 20-ounces bag Hurst’s 15 Bean Soup dried bean mix

1 large onion, diced

1/4 c. brown sugar

1 lb. bacon

2 lbs smoked sausage

1 c. ketchup

1/4 c. molasses

3 tbsp spicy brown mustard

1 1/2 c. barbeque sauce

1 tsp chili powder

1 tsp garlic powder

1 tsp red pepper flakes (optional)

6 c. water

How to make Three Meat Crock Pot Cowboy Beans

Step 1: To a large crock pot, add the beans with a seasoning packet and pour in the water. Set to cook on high for 4 – 6 hours or until the beans are tender.

Step 2: In the meantime, cook the ground beef with the onions. To taste, season with salt and pepper. Cook the beef until completely cooked. Set aside when done.

Step 3: Into small strips, cut the bacon and cook until browned and crispy. Set the bacon aside when done.

Step 4: Into bite-sized pieces, cut the smoked sausage and set it aside.

Step 5: Ladle out any excess liquid from the cooked beans and set aside. To taste, season the beans with salt and pepper. Add the barbecue sauce and the rest of the ingredients including the ground beef, bacon, and smoked sausage. Stir gently.

Step 6: Pour in the reserved liquid from the beans, half cup at a time. Make sure you have a thick sauce. Cook for additional 1-2 hours on high or until the sausage is completely heated and everything is bubbly and hot.

Three Meat Crock Pot Cowboy Beans

Rebecca PREP TIME: 20 mins | COOK TIME: 6 hrs | TOTAL TIME: 6 hrs 20 mins | YIELD: 18-20 Servings Filling, hearty, and delicious. This slow cooker BBQ bean is… General Recipes Three Meat Crock Pot Cowboy Beans European Print This
Serves: 18-20 Prep Time: 20 mins Cooking Time: 6 hrs 6 hrs
Nutrition facts: 200 calories 20 grams fat
Rating: 5.0/5
( 1 voted )

Ingredients

  • 1 lb. ground beef
  • 1 20-ounces bag Hurst’s 15 Bean Soup dried bean mix
  • 1 large onion, diced
  • 1/4 c. brown sugar
  • 1 lb. bacon
  • 2 lbs smoked sausage
  • 1 c. ketchup
  • 1/4 c. molasses
  • 3 tbsp spicy brown mustard
  • 1 1/2 c. barbeque sauce
  • 1 tsp chili powder
  • 1 tsp garlic powder
  • 1 tsp red pepper flakes (optional)
  • 6 c. water

Instructions

Step 1: To a large crock pot, add the beans with a seasoning packet and pour in the water. Set to cook on high for 4 - 6 hours or until the beans are tender.

Step 2: In the meantime, cook the ground beef with the onions. To taste, season with salt and pepper. Cook the beef until completely cooked. Set aside when done.

Step 3: Into small strips, cut the bacon and cook until browned and crispy. Set the bacon aside when done.

Step 4: Into bite-sized pieces, cut the smoked sausage and set it aside.

Step 5: Ladle out any excess liquid from the cooked beans and set aside. To taste, season the beans with salt and pepper. Add the barbecue sauce and the rest of the ingredients including the ground beef, bacon, and smoked sausage. Stir gently.

Step 6: Pour in the reserved liquid from the beans, half cup at a time. Make sure you have a thick sauce. Cook for additional 1-2 hours on high or until the sausage is completely heated and everything is bubbly and hot.

August 19, 2022 0 comment
0 FacebookTwitterPinterestEmail
General Recipes

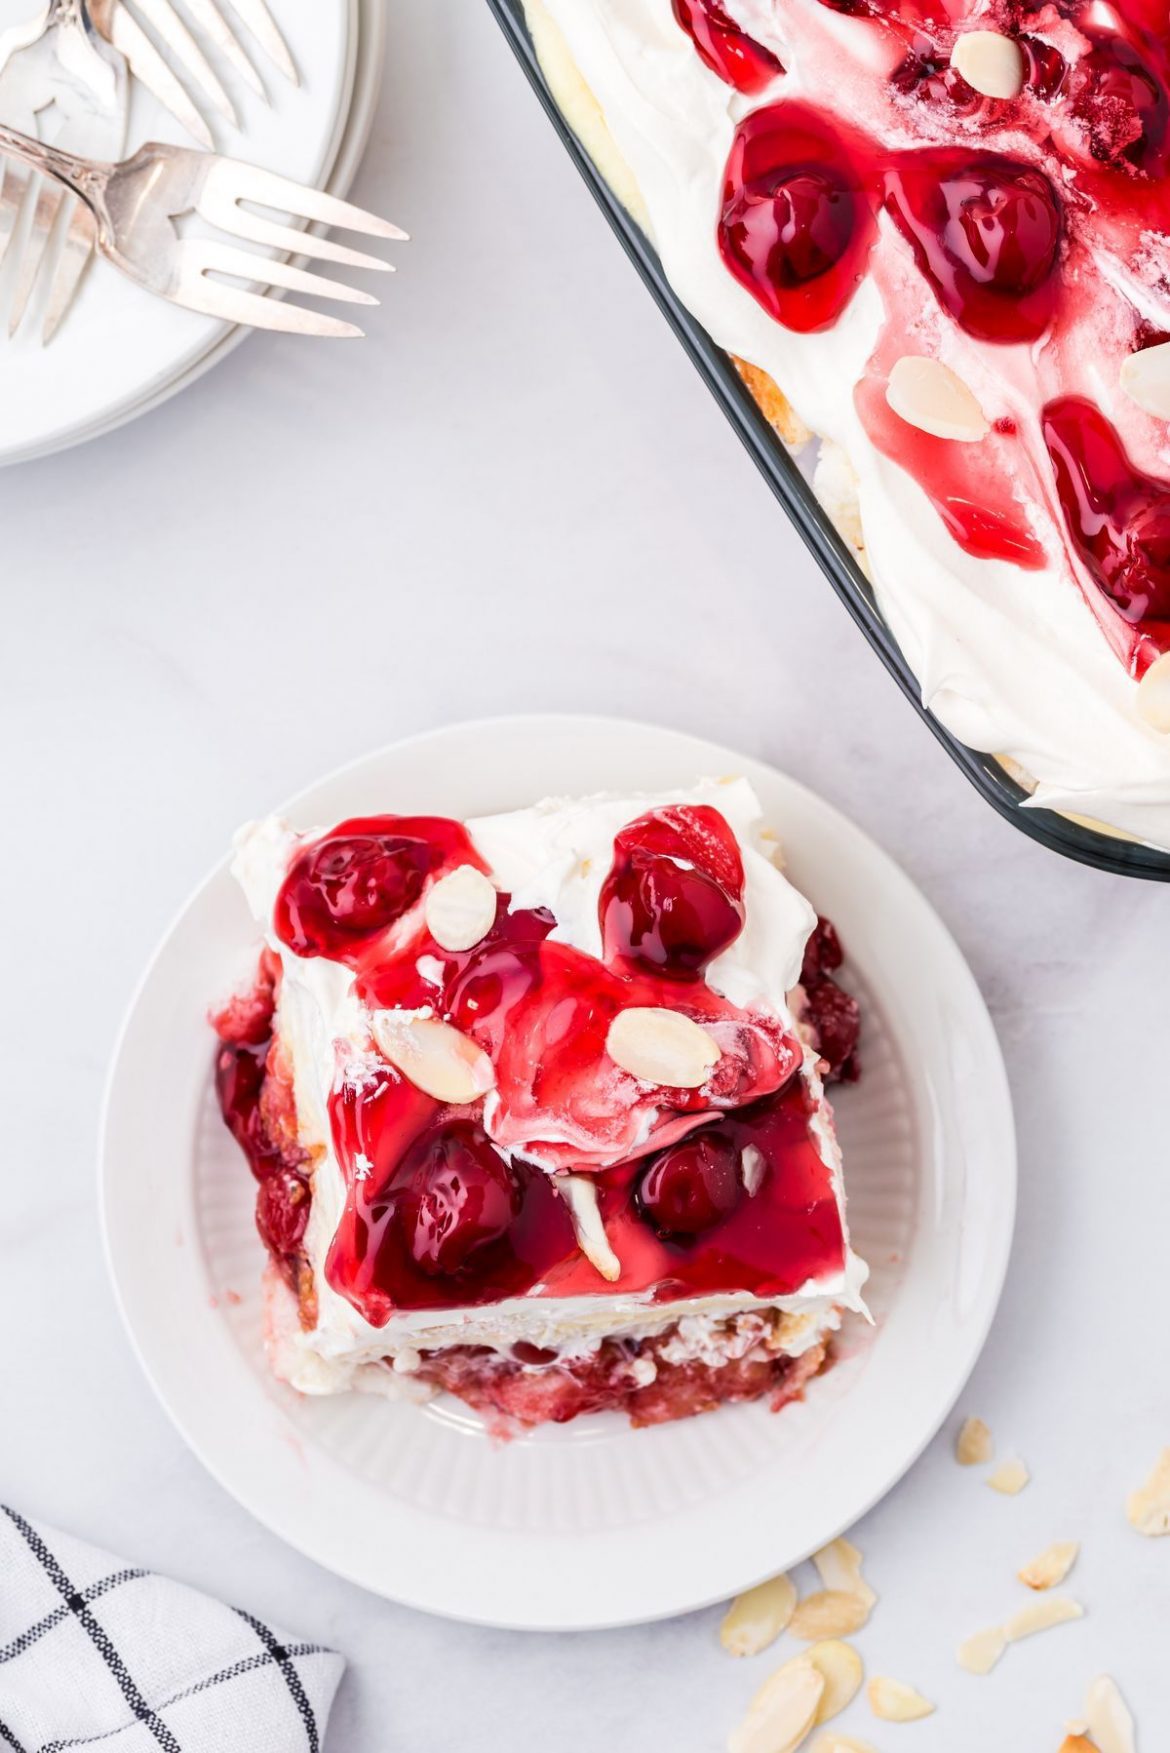
Heaven on Earth Cake A.K.A. Cherry Angel Trifle

by Rebecca August 18, 2022
written by Rebecca

Active: 20 mins | Inactive: 3+ hrs | Serves: 8

This is truly a heaven-on-earth cake! It’s an amazing treat that is perfect any time of the year. A light, decadent cake made with Angel food cake, Instant vanilla pudding, Greek yoghurt, frozen whipped topping, and a can of cherry pie filling. Almond slivers are optional for garnish, but highly recommended. Simply layer the ingredients in a baking dish beginning with a layer of cubed cake followed by a hearty layer of frozen whipped topping. Repeat the layers and top with the optional topping. Chill this decadent dessert in the fridge for a few hours and serve. Although, this heaven or earth cake is better the next day. Thus, I recommend letting this dessert sit in the fridge for a day or two.

INGREDIENTS

1 c. plain Greek yoghurt

1 (3.4 ounces) instant vanilla pudding mix

1 1/2 c. milk

1-2 store-bought angel food cakes, or homemade

1 (21 ounces) can of cherry pie filling, divided

almond slivers, garnish, as needed (toasted, optional)

1 (8 ounces) container of frozen whipped topping, thawed

How to make Heaven on Earth Cake A.K.A. Cherry Angel Trifle

Step 1: Into bite-sized pieces, cube the angel food cake.

Step 2: Place the pudding mix and cold milk in a large bowl. Mix well until combined. Add the Greek yogurt and fold until smooth and blended.

Step 3: In a 9 x 13-inch baking dish, spread half of the cake cubes into an even layer and top with 2/3 of the cherry pie filling. On top of the filling, add the rest of the cake cubes. Pour the pudding mixture and gently spread it into an even layer.

Step 4: Over the pudding layer, spread the frozen whipped topping using an offset spatula. On top, drizzle the rest of the cherry pie filling and sprinkle with slivered almonds.

Step 5: In the fridge, place the dish and allow it to set for 3 hours or so up to overnight.

Heaven on Earth Cake A.K.A. Cherry Angel Trifle

Rebecca Active: 20 mins | Inactive: 3+ hrs | Serves: 8 This is truly a heaven-on-earth cake! It’s an amazing treat that is perfect any time of the year. A light,… General Recipes Heaven on Earth Cake A.K.A. Cherry Angel Trifle European Print This
Serves: 8
Nutrition facts: 200 calories 20 grams fat
Rating: 5.0/5
( 1 voted )

Ingredients

  • 1 c. plain Greek yoghurt
  • 1 (3.4 ounces) instant vanilla pudding mix
  • 1 1/2 c. milk
  • 1-2 store-bought angel food cakes, or homemade
  • 1 (21 ounces) can of cherry pie filling, divided
  • almond slivers, garnish, as needed (toasted, optional)
  • 1 (8 ounces) container of frozen whipped topping, thawed

Instructions

Step 1: Into bite-sized pieces, cube the angel food cake.

Step 2: Place the pudding mix and cold milk in a large bowl. Mix well until combined. Add the Greek yogurt and fold until smooth and blended.

Step 3: In a 9 x 13-inch baking dish, spread half of the cake cubes into an even layer and top with 2/3 of the cherry pie filling. On top of the filling, add the rest of the cake cubes. Pour the pudding mixture and gently spread it into an even layer.

Step 4: Over the pudding layer, spread the frozen whipped topping using an offset spatula. On top, drizzle the rest of the cherry pie filling and sprinkle with slivered almonds.

Step 5: In the fridge, place the dish and allow it to set for 3 hours or so up to overnight.

August 18, 2022 0 comment
0 FacebookTwitterPinterestEmail
General Recipes

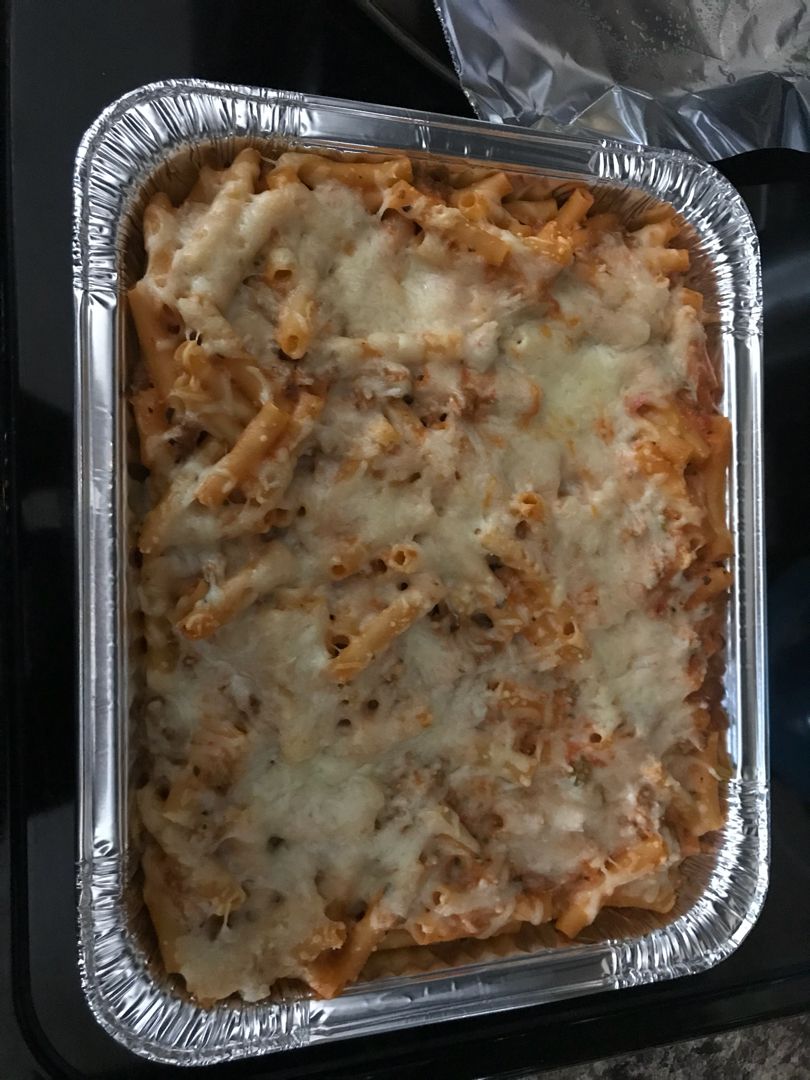
Million Dollar Baked Ziti

by Rebecca August 18, 2022
written by Rebecca

Prep time: 15 mins | Cook time: 50 mins | Serves: 6

This Baked Ziti is a certified crowd-pleasing pasta bake. And this million-dollar version makes it even more special! Rich, creamy, with a slight tang. Indulge yourself with this easy and quick million-dollar version of your favorite baked Ziti right in the comfort of your home!

INGREDIENTS

2 eggs

1 pound mild Italian sausage

1 pound ziti

4 cloves garlic, minced

2 tsp dried oregano

1 (28 ounces) can of tomato sauce

1 tsp granulated sugar

1 (14.5 ounces) can of diced tomatoes

1/2 c. fresh basil, chopped

16 ounces cottage cheese

8 ounces cream cheese, softened

1/2 c. sour cream

1 1/2 c. Parmesan cheese, freshly grated and divided

2 c. mozzarella cheese, chopped into 1/4” cubes and divided

1 tsp dried basil

Kosher salt and freshly ground black pepper, to taste

Fresh basil, chopped, for serving

How to make Million Dollar Baked Ziti

Step 1: Prepare the oven. Preheat it to 375 degrees F. Using a nonstick spray, grease a 9 x 13-inch baking dish, and set aside.

Step 2: Cook the pasta in a large pot with salted boiling water for 2 minutes less than the package directions. Drain when done and drizzle the pasta with a bit of olive oil. Set aside.

Step 3: Cook the sausage in a large skillet over medium-high heat for about 5 minutes until browned. If needed, drain the grease. Then, add the garlic and continue to cook for a minute more until aromatic. Next, add the oregano and basil. To taste, season with salt and pepper.

Step 4: To the sausage mixture, stir in the tomato sauce and diced tomatoes. Adjust the heat to medium and continue to cook until the mixture has bubbles. Then, adjust the heat again to medium-low and simmer for about 10 minutes. Take the skillet off the heat and whisk in the sugar and fresh basil. Set aside.

Step 5: Place the cream cheese in a large bowl. Beat well until smooth. Then, add the eggs, cottage cheese, and sour cream. Mix well until blended. Add 1 cup each Parmesan and mozzarella cheese. Stir well.

Step 6: To the cottage cheese mixture, add 1 c of the red sauce followed by the drained pasta. Mix well and pour everything into the prepared baking dish. On top, place the rest of the red sauce and sprinkle with 1 c. mozzarella and half c. Parmesan.

Step 7: Using a nonstick spray, grease a sheet of aluminium foil and tent the casserole with it. Place in the preheated oven and bake for about 25 minutes. Remove the cover and continue baking for additional 25 minutes. To brown the cheese further, broil for about a minute or two.

Step 8: Remove from the oven when done and allow the baked Ziti to sit for about 10 minutes. Serve garnished with some chopped basil. Enjoy!

Million Dollar Baked Ziti

Rebecca Prep time: 15 mins | Cook time: 50 mins | Serves: 6 This Baked Ziti is a certified crowd-pleasing pasta bake. And this million-dollar version makes it even more special!… General Recipes Million Dollar Baked Ziti European Print This
Serves: 6 Prep Time: 15 mins Cooking Time: 50 mins 50 mins
Nutrition facts: 200 calories 20 grams fat
Rating: 5.0/5
( 1 voted )

Ingredients

  • 2 eggs
  • 1 pound mild Italian sausage
  • 1 pound ziti
  • 4 cloves garlic, minced
  • 2 tsp dried oregano
  • 1 (28 ounces) can of tomato sauce
  • 1 tsp granulated sugar
  • 1 (14.5 ounces) can of diced tomatoes
  • 1/2 c. fresh basil, chopped
  • 16 ounces cottage cheese
  • 8 ounces cream cheese, softened
  • 1/2 c. sour cream
  • 1 1/2 c. Parmesan cheese, freshly grated and divided
  • 2 c. mozzarella cheese, chopped into 1/4” cubes and divided
  • 1 tsp dried basil
  • Kosher salt and freshly ground black pepper, to taste
  • Fresh basil, chopped, for serving

Instructions

Step 1: Prepare the oven. Preheat it to 375 degrees F. Using a nonstick spray, grease a 9 x 13-inch baking dish, and set aside.

Step 2: Cook the pasta in a large pot with salted boiling water for 2 minutes less than the package directions. Drain when done and drizzle the pasta with a bit of olive oil. Set aside.

Step 3: Cook the sausage in a large skillet over medium-high heat for about 5 minutes until browned. If needed, drain the grease. Then, add the garlic and continue to cook for a minute more until aromatic. Next, add the oregano and basil. To taste, season with salt and pepper.

Step 4: To the sausage mixture, stir in the tomato sauce and diced tomatoes. Adjust the heat to medium and continue to cook until the mixture has bubbles. Then, adjust the heat again to medium-low and simmer for about 10 minutes. Take the skillet off the heat and whisk in the sugar and fresh basil. Set aside.

Step 5: Place the cream cheese in a large bowl. Beat well until smooth. Then, add the eggs, cottage cheese, and sour cream. Mix well until blended. Add 1 cup each Parmesan and mozzarella cheese. Stir well.

Step 6: To the cottage cheese mixture, add 1 c of the red sauce followed by the drained pasta. Mix well and pour everything into the prepared baking dish. On top, place the rest of the red sauce and sprinkle with 1 c. mozzarella and half c. Parmesan.

Step 7: Using a nonstick spray, grease a sheet of aluminium foil and tent the casserole with it. Place in the preheated oven and bake for about 25 minutes. Remove the cover and continue baking for additional 25 minutes. To brown the cheese further, broil for about a minute or two.

Step 8: Remove from the oven when done and allow the baked Ziti to sit for about 10 minutes. Serve garnished with some chopped basil. Enjoy!

August 18, 2022 0 comment
0 FacebookTwitterPinterestEmail
General Recipes

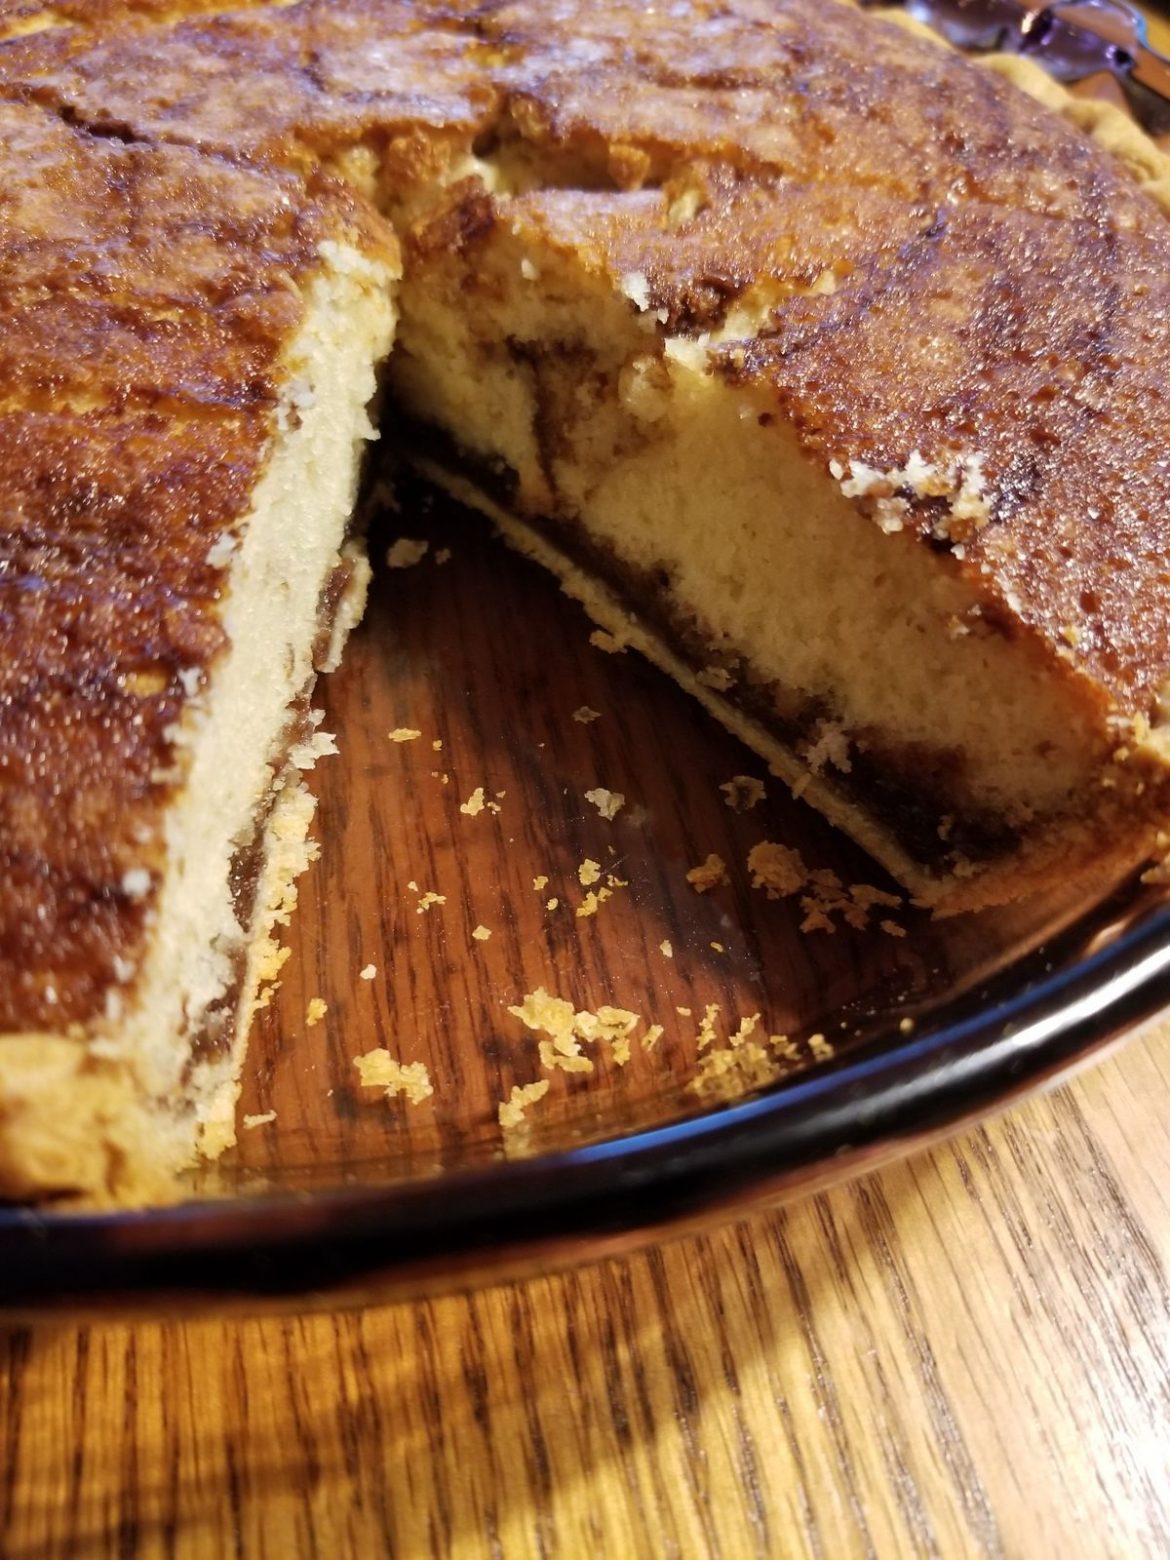
Pennsylvania Dutch Funny Cake

by Rebecca August 18, 2022
written by Rebecca

Prep time: 20 mins | Cook time: 50 mins | Inactive: 40 mins | Yield: 1 9-inch pie

This Pennsylvania Dutch Funny Cake is an amazing dessert that is almost like a pie and a yellow cake and a lava cake combined. To make this even easier, we use a ready-made frozen pie crust. But you are welcome to make your own. It all starts with a chocolate layer that remains slightly gooey when baked. The second layer is a yellow cake that instantly gives this dessert a classic flavor. When baked, this creates the most scrumptious texture. Cakey yet still flaky like a pie crust. And inside is a luscious lava-like syrup surprise!

INGREDIENTS

1 egg

1 c. sugar, divided

1 (9”) unbaked pie shell

3/4 c. milk, divided

1 tsp baking powder

1/8 tsp salt

1/8 c. unsalted butter, softened

1 c. all-purpose flour

1 tsp vanilla extract

1/4 c. baking cocoa

How to make Pennsylvania Dutch Funny Cake

Step 1: Prepare the oven. Preheat it to 350 degrees.

Step 2: In a saucepan, heat 3/8 c milk over medium heat. Add half c. sugar and 1/4 c cocoa. Stir well and bring everything to a boil. Cook for about 2 minutes until the mixture has thickened, stirring continuously.

Step 3: Into the unbaked pastry shell, pour the cocoa mixture. For the chocolate mix to come up the sides halfway, turn the pie. Set aside.

Step 4: Place the flour, baking powder, remaining sugar, and salt in a medium mixing bowl. Mix well until combined. Then, add the egg, butter, the rest of the milk, and vanilla. Beat well until the batter is smooth.

Step 5: Into the pie shell, spoon the batter, making sure the chocolate is completely covered.

Step 6: Place in the preheated oven and bake for about 40 minutes or until a knife inserted in the center of the cake comes out clean.

Step 7: Remove from the oven when done and serve the cake warm or cold with a big dollop of whipped cream. Enjoy!

Pennsylvania Dutch Funny Cake

Rebecca Prep time: 20 mins | Cook time: 50 mins | Inactive: 40 mins | Yield: 1 9-inch pie This Pennsylvania Dutch Funny Cake is an amazing dessert that is almost… General Recipes Pennsylvania Dutch Funny Cake European Print This
Prep Time: 20 mins Cooking Time: 50 mins 50 mins
Nutrition facts: 200 calories 20 grams fat
Rating: 4.5/5
( 2 voted )

Ingredients

  • 1 egg
  • 1 c. sugar, divided
  • 1 (9”) unbaked pie shell
  • 3/4 c. milk, divided
  • 1 tsp baking powder
  • 1/8 tsp salt
  • 1/8 c. unsalted butter, softened
  • 1 c. all-purpose flour
  • 1 tsp vanilla extract
  • 1/4 c. baking cocoa

Instructions

Step 1: Prepare the oven. Preheat it to 350 degrees.

Step 2: In a saucepan, heat 3/8 c milk over medium heat. Add half c. sugar and 1/4 c cocoa. Stir well and bring everything to a boil. Cook for about 2 minutes until the mixture has thickened, stirring continuously.

Step 3: Into the unbaked pastry shell, pour the cocoa mixture. For the chocolate mix to come up the sides halfway, turn the pie. Set aside.

Step 4: Place the flour, baking powder, remaining sugar, and salt in a medium mixing bowl. Mix well until combined. Then, add the egg, butter, the rest of the milk, and vanilla. Beat well until the batter is smooth.

Step 5: Into the pie shell, spoon the batter, making sure the chocolate is completely covered.

Step 6: Place in the preheated oven and bake for about 40 minutes or until a knife inserted in the center of the cake comes out clean.

Step 7: Remove from the oven when done and serve the cake warm or cold with a big dollop of whipped cream. Enjoy!

August 18, 2022 0 comment
0 FacebookTwitterPinterestEmail
General Recipes

Cream Cheese Chicken Chili

by Rebecca August 18, 2022
written by Rebecca

Active time: 10 mins | Inactive: 3+ hrs | Serves: 6

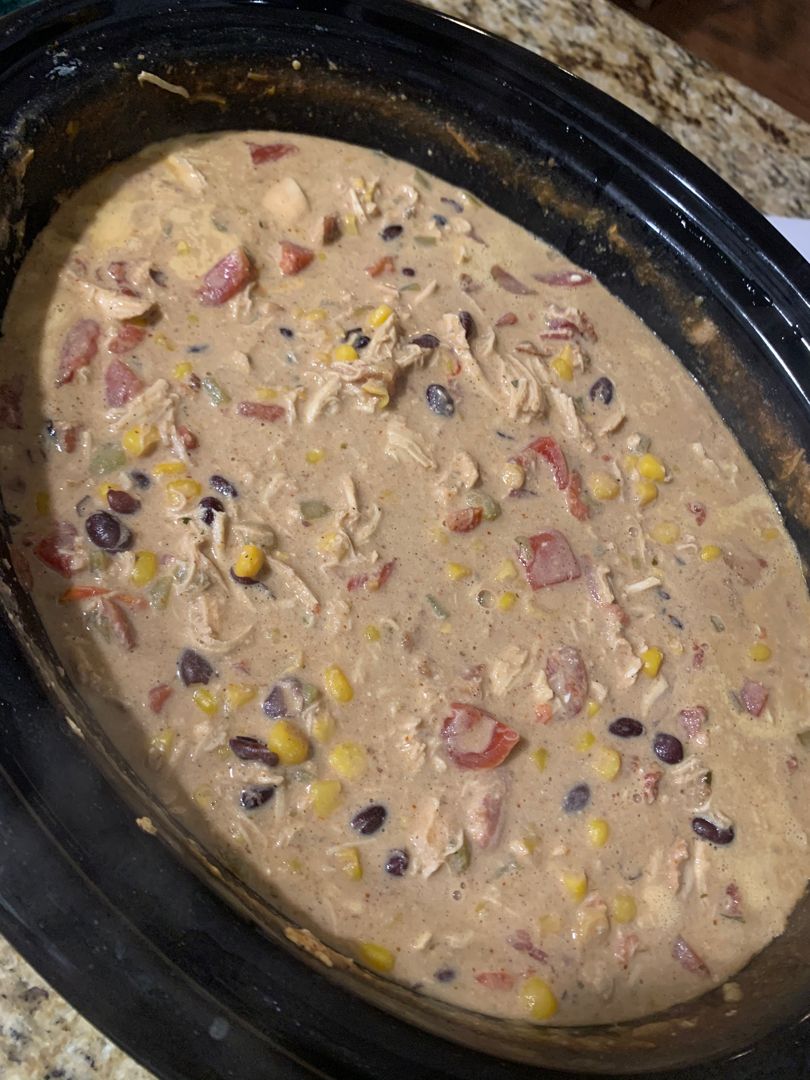
When I first saw this recipe, my heart skipped a beat. Why didn’t I think about it before? The addition of cream cheese to our chili is genius! So the next time you are whipping up a batch of your chili, make sure to do it the right way.

This slow cooker cream cheese chicken chili is an amazing version of our usual chili. It is hearty, filling, and delicious, but with a twist! Plus, this is incredibly easy to make. All you need is to throw everything in your slow cooker and set it to cook.

Serve this cream cheese chicken chili with cornbread, rice, garlic bread, etc for an impressive main dish that your entire family will love! This version is crazy good, you might not have your chili any other way again!

INGREDIENTS

1 (10.75 ounces) can of fire-roasted tomatoes and green peppers

2 boneless, skinless chicken breasts

1 (10. 75 ounces) can of black beans, rinsed and drained

1 (10.75 ounces) can of whole corn kernels, undrained

1 tbsp chili powder

1/2 tsp paprika

1 tsp onion powder

1 tsp cumin

1 tsp garlic powder

1 (8 ounces) package of cream cheese, room temperature

1 (1 ounce) packet of dry ranch dressing mix

rice or cornbread, garnish, optional

kosher salt and freshly ground pepper, to taste

How to make Cream Cheese Chicken Chili

Step 1: In a slow cooker, place the chicken breasts and season with salt and pepper. Then, add the tomatoes, corn, and black beans. Season everything with ranch mix, chili powder, cumin, onion powder, garlic powder, and paprika.

Step 2: On top of everything, place the softened cream cheese. Put the lid on and set it to cook for 6 hours on low or 3 hours on high.

Step 3: Stir the mixture twenty minutes before serving until the cream cheese is smooth and blended.

Step 4: Take the chicken out and shred using two forks.

Step 5: Serve the cream cheese chicken chili right away with rice or cornbread. Enjoy!

Cream Cheese Chicken Chili

Rebecca Active time: 10 mins | Inactive: 3+ hrs | Serves: 6 When I first saw this recipe, my heart skipped a beat. Why didn’t I think about it before? The… General Recipes Cream Cheese Chicken Chili European Print This
Serves: 6
Nutrition facts: 200 calories 20 grams fat
Rating: 5.0/5
( 1 voted )

Ingredients

  • 1 (10.75 ounces) can of fire-roasted tomatoes and green peppers
  • 2 boneless, skinless chicken breasts
  • 1 (10. 75 ounces) can of black beans, rinsed and drained
  • 1 (10.75 ounces) can of whole corn kernels, undrained
  • 1 tbsp chili powder
  • 1/2 tsp paprika
  • 1 tsp onion powder
  • 1 tsp cumin
  • 1 tsp garlic powder
  • 1 (8 ounces) package of cream cheese, room temperature
  • 1 (1 ounce) packet of dry ranch dressing mix
  • rice or cornbread, garnish, optional
  • kosher salt and freshly ground pepper, to taste

Instructions

Step 1: In a slow cooker, place the chicken breasts and season with salt and pepper. Then, add the tomatoes, corn, and black beans. Season everything with ranch mix, chili powder, cumin, onion powder, garlic powder, and paprika.

Step 2: On top of everything, place the softened cream cheese. Put the lid on and set it to cook for 6 hours on low or 3 hours on high.

Step 3: Stir the mixture twenty minutes before serving until the cream cheese is smooth and blended.

Step 4: Take the chicken out and shred using two forks.

Step 5: Serve the cream cheese chicken chili right away with rice or cornbread. Enjoy!

August 18, 2022 0 comment
0 FacebookTwitterPinterestEmail
General Recipes

INDIAN FRY BREAD

by Rebecca August 18, 2022
written by Rebecca

Prep Time: 20 mins | Cook Time: 3 mins | Total Time: 23 mins | Servings: 6

Easy, delicious, and healthy. This traditional Native American delicacy, Indian Fry Bread is a great dessert made with bread, topped with hamburger, lettuce, and sour cream. You can serve these Indian Fry Bread with honey and powdered sugar or simply enjoy them by themselves.

Ingredients

Bread:

3 teaspoon baking powder

2 c. of flour

1 c. of warm water

¾ teaspoon salt

Topping:

1 pound hamburger

Sour cream

Lettuce

Tomatoes

2 c. of pinto beans soaked overnight

HOW TO MAKE INDIAN FRY BREAD

Bread:

Step 1: Place the dry ingredients in a mixing bowl. Mix well and pour into the warm water. Using your hands, mix well until it forms. Let it sit for about 5 minutes before breaking the dough into small balls.

Step 2: Into half-inch, thick circles that are around 6-inches in diameter, roll the dough.

Step 3: In a medium saucepan, heat the oil. Once hot, add the dough ball and fry until all sides are golden. Transfer to a paper towel when done and set aside.

Topping:

Step 4: Place the soaked beans in a crockpot and cover them with water. Set to cook for 4 to 6 hours on low until tender. Add about 2 to 3 slices of chopped bacon to the crockpot 2 hours before the beans are done.

Step 5: In the meantime, cook 1 pound of hamburger.

Step 6: Add the hamburger to the cooked beans, then spread them on top of your desired toppings.

Step 7: Serve the Indian Fry Bread immediately. Enjoy!

Tips:

I do not recommend frying the fry bread ahead. They are best to serve right out of the fryer.

If desired, you can make the dough in advance. Simply store them in a plastic wrap and tightly cover them. Keep them in the fridge overnight. When ready to use, let the dough sit on the counter, then proceed with the recipe.

Nutrition Facts:

Calories: 445Kcl, Fat: 27%, Sodium: 674mg, Potassium: 641mg, Carbohydrates: 85g

INDIAN FRY BREAD

Rebecca Prep Time: 20 mins | Cook Time: 3 mins | Total Time: 23 mins | Servings: 6 Easy, delicious, and healthy. This traditional Native American delicacy, Indian Fry Bread is… General Recipes INDIAN FRY BREAD European Print This
Serves: 6 Prep Time: 20 mins Cooking Time: 3 mins 3 mins
Nutrition facts: 445 calories 20 grams fat
Rating: 5.0/5
( 1 voted )

Ingredients

  • Bread:
  • 3 teaspoon baking powder
  • 2 c. of flour
  • 1 c. of warm water
  • ¾ teaspoon salt
  • Topping:
  • 1 pound hamburger
  • Sour cream
  • Lettuce
  • Tomatoes
  • 2 c. of pinto beans soaked overnight

Instructions

Bread:

Step 1: Place the dry ingredients in a mixing bowl. Mix well and pour into the warm water. Using your hands, mix well until it forms. Let it sit for about 5 minutes before breaking the dough into small balls.

Step 2: Into half-inch, thick circles that are around 6-inches in diameter, roll the dough.

Step 3: In a medium saucepan, heat the oil. Once hot, add the dough ball and fry until all sides are golden. Transfer to a paper towel when done and set aside.

Topping:

Step 4: Place the soaked beans in a crockpot and cover them with water. Set to cook for 4 to 6 hours on low until tender. Add about 2 to 3 slices of chopped bacon to the crockpot 2 hours before the beans are done.

Step 5: In the meantime, cook 1 pound of hamburger.

Step 6: Add the hamburger to the cooked beans, then spread them on top of your desired toppings.

Step 7: Serve the Indian Fry Bread immediately. Enjoy!

Notes

I do not recommend frying the fry bread ahead. They are best to serve right out of the fryer. If desired, you can make the dough in advance. Simply store them in a plastic wrap and tightly cover them. Keep them in the fridge overnight. When ready to use, let the dough sit on the counter, then proceed with the recipe.

August 18, 2022 0 comment
0 FacebookTwitterPinterestEmail
General Recipes

EASY BURRITO CASSEROLE

by Rebecca August 18, 2022
written by Rebecca

Total Prep Time: 40 mins | Yield: 12 servings

Casseroles are very comforting. They are super easy and quick to make using ingredients that we might already have on hand. And this easy Burrito Casserole is no different. It is packed with bold flavors and incredibly filling, and the leftovers are amazing, too! For an even easier dinner, you can prep this casserole ahead and freeze it unbaked. When ready to serve, bake frozen for a few minutes. Then, serve this burrito casserole with your favorite toppings such as sour cream, avocado, or salsa.

Ingredients

1 small onion, chopped

1 lb. of ground beef

1 pack of taco seasoning

1 can cream of mushroom soup, undiluted

1 pack of large flour tortillas

1 can of refried beans

2 ½ c. of shredded Mexican blend cheese

½ c. sour cream

HOW TO MAKE EASY BURRITO CASSEROLE

Step 1: Prepare the oven. Preheat it to 350 degrees F.

Step 2: In a large skillet, cook the ground beef and onion until the beef has browned. Drain when done, then add the taco seasoning along with the refried beans. Continue to cook until heated through.

Step 3: In another bowl, add the sour cream and mushroom soup. Mix well until blended. In the bottom of a baking dish, spread half of the soup mixture. On top, lay three tortillas, tearing and overlapping them.

Step 4: On top, spread the ground beef mixture and cover with a cup of cheese. Do the same layers, ending with the rest of the cheese.

Step 5: Place the baking dish in the preheated oven and bake the casserole for about 20 minutes or until the cheese has melted.

Step 6: Remove from the oven when done and serve the casserole right away. Enjoy!

Tips:

You can prep the casserole in advance and simply store it in the freezer. Place in the oven frozen and bake at 375 degrees for about 45 to 60 minutes.

EASY BURRITO CASSEROLE

Rebecca Total Prep Time: 40 mins | Yield: 12 servings Casseroles are very comforting. They are super easy and quick to make using ingredients that we might already have on hand.… General Recipes EASY BURRITO CASSEROLE European Print This
Serves: 12
Nutrition facts: 200 calories 20 grams fat
Rating: 5.0/5
( 1 voted )

Ingredients

  • 1 small onion, chopped
  • 1 lb. of ground beef
  • 1 pack of taco seasoning
  • 1 can cream of mushroom soup, undiluted
  • 1 pack of large flour tortillas
  • 1 can of refried beans
  • 2 ½ c. of shredded Mexican blend cheese
  • ½ c. sour cream

Instructions

Step 1: Prepare the oven. Preheat it to 350 degrees F.

Step 2: In a large skillet, cook the ground beef and onion until the beef has browned. Drain when done, then add the taco seasoning along with the refried beans. Continue to cook until heated through.

Step 3: In another bowl, add the sour cream and mushroom soup. Mix well until blended. In the bottom of a baking dish, spread half of the soup mixture. On top, lay three tortillas, tearing and overlapping them.

Step 4: On top, spread the ground beef mixture and cover with a cup of cheese. Do the same layers, ending with the rest of the cheese.

Step 5: Place the baking dish in the preheated oven and bake the casserole for about 20 minutes or until the cheese has melted.

Step 6: Remove from the oven when done and serve the casserole right away. Enjoy!

Notes

You can prep the casserole in advance and simply store it in the freezer. Place in the oven frozen and bake at 375 degrees for about 45 to 60 minutes.

August 18, 2022 0 comment
0 FacebookTwitterPinterestEmail
General Recipes

BIG APPLE FRITTERS

by Rebecca August 18, 2022
written by Rebecca

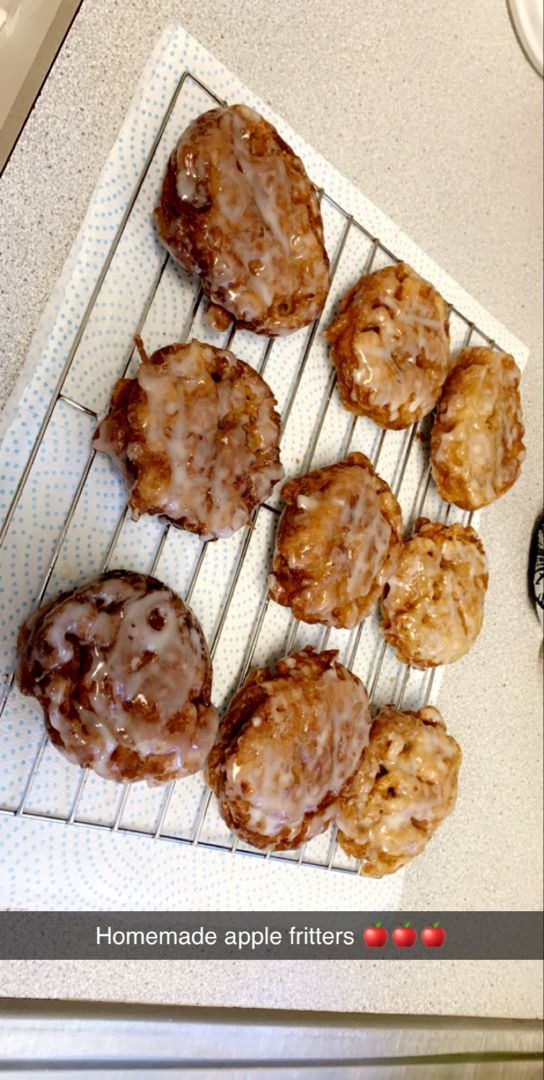
This is the best homemade apple fritter recipe! They are glazed perfectly, delicious, and super easy to whip up. Nothing beats freshly made warm apple fritters!

INGREDIENTS

APPLE FRITTERS:

2 eggs

1/4 c. sugar

2 teaspoons baking powder

3 tbsp applesauce

1 1/2 teaspoon cinnamon

1 1/2 c. all-purpose flour

1/3 c. milk

2 large Granny Smith or Honey Crisp apples, peeled, cored, and diced

Canola oil for frying

1/2 teaspoon salt

GLAZE:

1/4 c. milk

1/2 tsp vanilla

2 c. confectioners’ sugar

HOW TO MAKE BIG APPLE FRITTERS

Step 1: On baking sheets covered in wax paper, place a cooling rack and set aside.

Step 2: In a medium bowl, place the flour, sugar, baking powder, salt, and cinnamon. Mix well until combined. In the center, make a well and add 1/3 c. milk, eggs, and applesauce. Stir well until just mixed. Lastly, fold in the apples.

Step 3: In a heavy cast-iron skillet, heat 1 ½ – 2 inches of oil to 375 degrees F. You can also a Dutch oven or deep fryer. Once the oil is hot, drop about 1/4 c. batter per fritter, making sure to spread them out. Cook for about 2 minutes on each side until golden brown.

Step 3: Transfer the fritters to paper towels to drain.

Step 4: To make the glaze, place 1/4 cup milk, confectioners’ sugar, and vanilla in a large bowl. Mix well until combined.

Step 5: In the glaze, dunk each fritter, turning the fritters over to coat both sides. To wire racks, place the coated fritters to air dry and drip.

NOTES:

DO NOT over-mix the better as it’ll make the fritters tough.

To evenly cook the fritters, make sure not to overcrowd the pan.

To maintain the correct temperature of the oil, use a candy thermometer.

Using a cast-iron or Dutch oven helps the oil hold the temperature.

Loosely wrap the cooled fritters in paper towels and keep them in a brown paper bag.

BIG APPLE FRITTERS

Rebecca This is the best homemade apple fritter recipe! They are glazed perfectly, delicious, and super easy to whip up. Nothing beats freshly made warm apple fritters! INGREDIENTS APPLE FRITTERS: 2… General Recipes BIG APPLE FRITTERS European Print This
Nutrition facts: 200 calories 20 grams fat
Rating: 5.0/5
( 1 voted )

Ingredients

  • APPLE FRITTERS:
  • 2 eggs
  • 1/4 c. sugar
  • 2 teaspoons baking powder
  • 3 tbsp applesauce
  • 1 1/2 teaspoon cinnamon
  • 1 1/2 c. all-purpose flour
  • 1/3 c. milk
  • 2 large Granny Smith or Honey Crisp apples, peeled, cored, and diced
  • Canola oil for frying
  • 1/2 teaspoon salt
  • GLAZE:
  • 1/4 c. milk
  • 1/2 tsp vanilla
  • 2 c. confectioners’ sugar

Instructions

Step 1: On baking sheets covered in wax paper, place a cooling rack and set aside.

Step 2: In a medium bowl, place the flour, sugar, baking powder, salt, and cinnamon. Mix well until combined. In the center, make a well and add 1/3 c. milk, eggs, and applesauce. Stir well until just mixed. Lastly, fold in the apples.

Step 3: In a heavy cast-iron skillet, heat 1 ½ – 2 inches of oil to 375 degrees F. You can also a Dutch oven or deep fryer. Once the oil is hot, drop about 1/4 c. batter per fritter, making sure to spread them out. Cook for about 2 minutes on each side until golden brown.

Step 3: Transfer the fritters to paper towels to drain.

Step 4: To make the glaze, place 1/4 cup milk, confectioners’ sugar, and vanilla in a large bowl. Mix well until combined.

Step 5: In the glaze, dunk each fritter, turning the fritters over to coat both sides. To wire racks, place the coated fritters to air dry and drip.

August 18, 2022 0 comment
0 FacebookTwitterPinterestEmail
General Recipes

HOMEMADE CINNAMON ROLL CAKE

by Rebecca August 18, 2022
written by Rebecca

This homemade cinnamon roll cake always saves the day! It tastes amazing and is super easy to whip up. And the delightful frosting makes this cake stands out.

INGREDIENTS

CAKE:

1 teaspoon baking powder

2 ¼ c. all-purpose flour

1 teaspoon baking soda

1 c. full fat sour cream

10 tablespoons unsalted butter – softened

¾ c. granulated sugar

2 large eggs, room temperature

2 teaspoons pure vanilla extract

3 tablespoons Milk

½ teaspoon salt

CINNAMON FILLING:

⅔ c. packed brown sugar, light or dark

½ c. unsalted butter, very soft but not melted

¼ teaspoon Salt

2 tablespoons all-purpose flour

1 heaping tablespoon ground cinnamon

FROSTING:

1/2 pack softened cream cheese (4 ounces)

1 stick butter – softened

1 teaspoon fresh lemon juice

1 teaspoon vanilla extract

1 c. sifted powdered sugar

HOW TO MAKE HOMEMADE CINNAMON ROLL CAKE

CAKE:

Step 1: Prepare the oven. Place the oven rack in the middle position, then preheat it to 350 degrees F. Then, grease a 13 x 9 x 2-inch baking pan.

Step 2: Place the flour, baking powder, baking soda, and salt in a large bowl. Mix well until blended.

Step 3: Beat the sugar and butter using a hand or stand mixer with the paddle attachment until smooth and creamy. Add 1 egg at a time, beating every after each addition. Add the vanilla extract. Mix well, scraping the sides and bottom of the bowl as needed.

Step 4: In three additions, add the flour and the sour cream in two, starting and ending with the flour.

Step 5: Add the milk once the mixture is blended. Beat until blended. If needed, add the sides and bottom of the bowl.

Step 6: In the prepared pan, evenly spread the batter.

CINNAMON FILLING:

Step 7: Using a fork or rubber spatula, mix the cinnamon filling ingredients until well combined.

Step 8: On top of the cake batter, drop small spoonfuls of the filling and swirl using a thin knife.

BAKE: (at this point, you can already make the Frosting)

Step 9: Place in the preheated oven and bake for about 30 to 40 minutes or until a toothpick inserted in the middle of the cake comes out clean. Check at 25 minutes mark. Loosely tent the cake with foil if the cake starts getting dark.
Step 10: Remove from the oven when done and place the pan on a wire rack. Spread the frosting over the cake while still warm.

FROSTING:

Step 11: Let the butter and cream cheese come to room temperature. Then, cream them using an electric mixer. Gradually add in the powdered sugar, beating constantly for about 5 to 10 minutes until light and fluffy. Add the vanilla along with the lemon juice and beat well until blended.

HOMEMADE CINNAMON ROLL CAKE

Rebecca This homemade cinnamon roll cake always saves the day! It tastes amazing and is super easy to whip up. And the delightful frosting makes this cake stands out. INGREDIENTS CAKE:… General Recipes HOMEMADE CINNAMON ROLL CAKE European Print This
Nutrition facts: 200 calories 20 grams fat
Rating: 5.0/5
( 1 voted )

Ingredients

  • CAKE:
  • 1 teaspoon baking powder
  • 2 ¼ c. all-purpose flour
  • 1 teaspoon baking soda
  • 1 c. full fat sour cream
  • 10 tablespoons unsalted butter – softened
  • ¾ c. granulated sugar
  • 2 large eggs, room temperature
  • 2 teaspoons pure vanilla extract
  • 3 tablespoons Milk
  • ½ teaspoon salt
  • CINNAMON FILLING:
  • ⅔ c. packed brown sugar, light or dark
  • ½ c. unsalted butter, very soft but not melted
  • ¼ teaspoon Salt
  • 2 tablespoons all-purpose flour
  • 1 heaping tablespoon ground cinnamon
  • FROSTING:
  • 1/2 pack softened cream cheese (4 ounces)
  • 1 stick butter – softened
  • 1 teaspoon fresh lemon juice
  • 1 teaspoon vanilla extract
  • 1 c. sifted powdered sugar

Instructions

CAKE:

Step 1: Prepare the oven. Place the oven rack in the middle position, then preheat it to 350 degrees F. Then, grease a 13 x 9 x 2-inch baking pan.

Step 2: Place the flour, baking powder, baking soda, and salt in a large bowl. Mix well until blended.

Step 3: Beat the sugar and butter using a hand or stand mixer with the paddle attachment until smooth and creamy. Add 1 egg at a time, beating every after each addition. Add the vanilla extract. Mix well, scraping the sides and bottom of the bowl as needed.

Step 4: In three additions, add the flour and the sour cream in two, starting and ending with the flour.

Step 5: Add the milk once the mixture is blended. Beat until blended. If needed, add the sides and bottom of the bowl.

Step 6: In the prepared pan, evenly spread the batter.

CINNAMON FILLING:

Step 7: Using a fork or rubber spatula, mix the cinnamon filling ingredients until well combined.

Step 8: On top of the cake batter, drop small spoonfuls of the filling and swirl using a thin knife.

BAKE: (at this point, you can already make the Frosting)

Step 9: Place in the preheated oven and bake for about 30 to 40 minutes or until a toothpick inserted in the middle of the cake comes out clean. Check at 25 minutes mark. Loosely tent the cake with foil if the cake starts getting dark.
Step 10: Remove from the oven when done and place the pan on a wire rack. Spread the frosting over the cake while still warm.

FROSTING:

Step 11: Let the butter and cream cheese come to room temperature. Then, cream them using an electric mixer. Gradually add in the powdered sugar, beating constantly for about 5 to 10 minutes until light and fluffy. Add the vanilla along with the lemon juice and beat well until blended.

August 18, 2022 0 comment
0 FacebookTwitterPinterestEmail
Newer Posts
Older Posts

Popular Posts

  • 1

    Crispy Crunchy Parmesan Potatoes

    March 21, 2020
  • 2

    CROCK POT SMOTHERED PORK CHOPS

    March 21, 2020
  • Facebook
  • Twitter

@2019 - All Right Reserved.


Back To Top