Cook it once
  • Home
  • Privacy Policy
  • Recipes
    • KETO
    • LC
    • WW
  • Tips
  • Contact
Cook it once
  • Home
  • Privacy Policy
  • Recipes
    • KETO
    • LC
    • WW
  • Tips
  • Contact
Category:

General Recipes

General Recipes

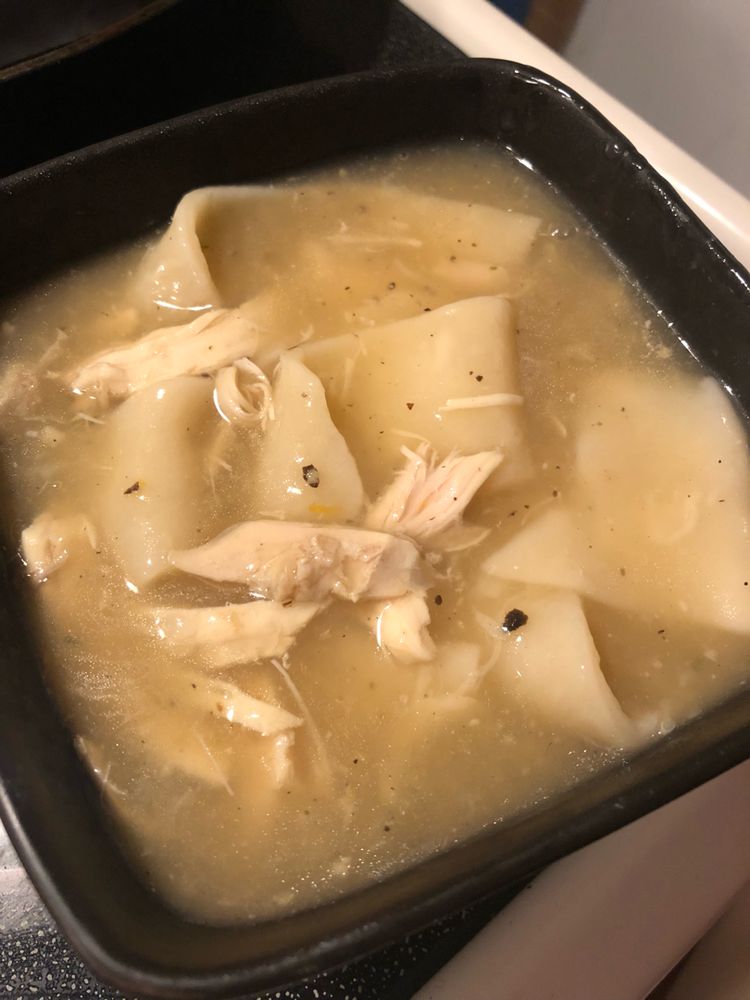
Grandma’s Southern-Style Chicken n’ Dumplings

by Rebecca August 23, 2022
written by Rebecca

Prep Time: 15 mins | Cook Time: 1 hr 15 mins | Total Time: 1 hr 30 mins | Servings: 8

Comforting, filling, and delicious. This Southern-Style Chicken n’ Dumplings recipe is one of the best ways to cosy up on rainy days. Serve this soup hot with some crusty French bread on the side to scoop up all the goodness.

Ingredients

To Cook the Chicken And Make the Broth:

1/2 c. carrots, celery, and onion (OPTIONAL-to flavor the chicken broth)

Water to completely cover chicken in a large stockpot

1 whole chicken, thawed and cleaned (remove and discard giblets from the cavity)

Dumplings:

2 heaping tbsp vegetable shortening

1/2 c. HOT water

1 c. all-purpose flour

1/2 c. plus 2 tbsp all-purpose flour

1 tsp salt

Finish the soup:

1 tbsp butter

Two large chicken bouillon cubes

Salt and Pepper, to taste (approx. 1 tsp salt, 1/2 tsp pepper)

1/4 c. water mixed with 2 tbsp flour

How to make Grandma’s Southern-Style Chicken n’ Dumplings

Step 1: In a large stockpot, place the chicken and veggies (optional). Pour in the water, completely covering the chicken and veggies. Bring to a quick boil and cook for about an hour. To a bowl, transfer the chicken when done. To remove leftover veggies or other particles, strain the broth. Then, place the broth back into the stockpot.

Step 2: Remove the skin of the chicken, then cut the meat into bite-sized pieces. Into the chicken broth, add about 2 1/2 c. Of the chicken pieces. Heat until boiling, then add the bouillon cubes. To taste, season with salt and pepper.

Step 3: To make the dumplings, cut the shortening and salt into the cup of flour in a large bowl, using a pastry blender or two knives until the shortening is the size of small peas. Then, pour in half a cup of hot water and 2 tbsp flour mixture. Stir well until you have a soft dough that is firm enough to roll out. Into 3 equal-sized balls, divide the dough, and allow them to rest for about 10 minutes.

Step 4: Liberally flour your work surface. Roll the dough out one at a time, sprinkling the dough with flour if needed. This will keep the dough from sticking to the work surface. Roll the dough out to approximately the size of a large pie crust. Into about 1-inch wide strips, cut the dough with a knife or pizza cutter. Do the same for the rest of the dough balls.

Step 5: Into the hot boiling chicken/broth mixture, drop the dumplings a few at a time until all the dumplings are added to the pot. Then, add the butter and continue cooking.

Step 6: For the slurry, whisk 1/4 c. water with 2 large tbsp flour until well mixed. Add this to the pot and stir well. Cook for another 10 minutes over high heat until the dumplings are completely cooked. If needed, season with more salt and pepper.

Step 7: Into bowls, ladle the hot soup. Serve right away with some crusty French bread on the side. Enjoy!

Nutrition Facts:

Amount Per Serving (1 serving): Calories 34, 1Calories from Fat 171, Fat 19g29%, Saturated Fat 5g31%, Cholesterol 75mg25%, Sodium 435mg19%, Potassium 230mg7%, Carbohydrates 20g7%, Protein 20g40%, Vitamin A 1515IU30%, Vitamin C 2mg2%, Calcium 15mg2%, Iron 2.1mg12%
Grandma's Southern-Style Chicken n' Dumplings

Rebecca Prep Time: 15 mins | Cook Time: 1 hr 15 mins | Total Time: 1 hr 30 mins | Servings: 8 Comforting, filling, and delicious. This Southern-Style Chicken n’ Dumplings… General Recipes Grandma’s Southern-Style Chicken n’ Dumplings European Print This
Serves: 8 Prep Time: 15 mins Cooking Time: 1 hr 15 mins 1 hr 15 mins
Nutrition facts: 34 calories 19 fat
Rating: 5.0/5
( 1 voted )

Ingredients

  • To Cook the Chicken And Make the Broth:
  • 1/2 c. carrots, celery, and onion (OPTIONAL-to flavor the chicken broth)
  • Water to completely cover chicken in a large stockpot
  • 1 whole chicken, thawed and cleaned (remove and discard giblets from the cavity)
  • Dumplings:
  • 2 heaping tbsp vegetable shortening
  • 1/2 c. HOT water
  • 1 c. all-purpose flour
  • 1/2 c. plus 2 tbsp all-purpose flour
  • 1 tsp salt
  • Finish the soup:
  • 1 tbsp butter
  • Two large chicken bouillon cubes
  • Salt and Pepper, to taste (approx. 1 tsp salt, 1/2 tsp pepper)
  • 1/4 c. water mixed with 2 tbsp flour

Instructions

Step 1: In a large stockpot, place the chicken and veggies (optional). Pour in the water, completely covering the chicken and veggies. Bring to a quick boil and cook for about an hour. To a bowl, transfer the chicken when done. To remove leftover veggies or other particles, strain the broth. Then, place the broth back into the stockpot.

Step 2: Remove the skin of the chicken, then cut the meat into bite-sized pieces. Into the chicken broth, add about 2 1/2 c. Of the chicken pieces. Heat until boiling, then add the bouillon cubes. To taste, season with salt and pepper.

Step 3: To make the dumplings, cut the shortening and salt into the cup of flour in a large bowl, using a pastry blender or two knives until the shortening is the size of small peas. Then, pour in half a cup of hot water and 2 tbsp flour mixture. Stir well until you have a soft dough that is firm enough to roll out. Into 3 equal-sized balls, divide the dough, and allow them to rest for about 10 minutes.

Step 4: Liberally flour your work surface. Roll the dough out one at a time, sprinkling the dough with flour if needed. This will keep the dough from sticking to the work surface. Roll the dough out to approximately the size of a large pie crust. Into about 1-inch wide strips, cut the dough with a knife or pizza cutter. Do the same for the rest of the dough balls.

Step 5: Into the hot boiling chicken/broth mixture, drop the dumplings a few at a time until all the dumplings are added to the pot. Then, add the butter and continue cooking.

Step 6: For the slurry, whisk 1/4 c. water with 2 large tbsp flour until well mixed. Add this to the pot and stir well. Cook for another 10 minutes over high heat until the dumplings are completely cooked. If needed, season with more salt and pepper.

Step 7: Into bowls, ladle the hot soup. Serve right away with some crusty French bread on the side. Enjoy!
August 23, 2022 0 comment
0 FacebookTwitterPinterestEmail
General Recipes

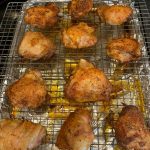
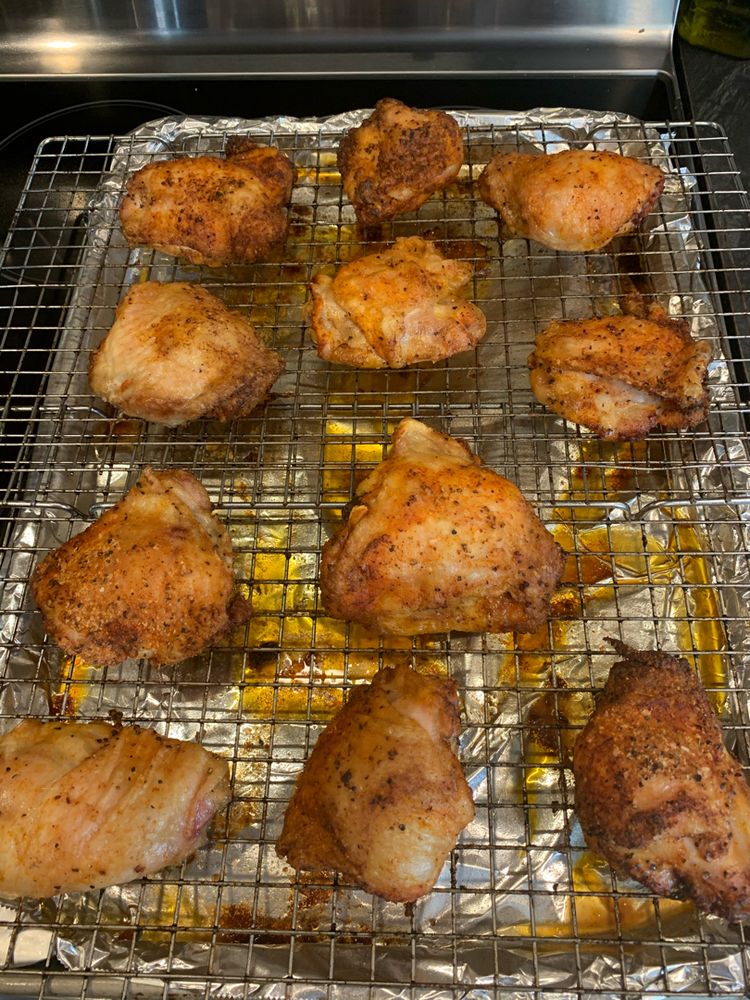
Extra Crispy Oven-Fried Chicken Thighs

by Rebecca August 23, 2022
written by Rebecca

Prep Time: 5 mins | Cook Time: 30 mins | Resting time: 5 mins | Total Time: 35 mins | Servings: 10

You’ll love these extra crispy oven-fried chicken thighs. They are as great as the pan-fried or deep-fried version, but without the greasy mess and shipload of calories and cholesterol.

Ingredients

1 tablespoon BAKING POWDER (do NOT use baking soda, it’s NOT the same)

10 bone-in, skin-on chicken thighs (about 3 pounds, trimmed)

2 teaspoons sweet paprika

2 teaspoons kosher salt (plus more to taste)

3 tablespoons Buffalo wing sauce (plus more to taste)

1 teaspoon black pepper

How to Make Extra Crispy Oven-Fried Chicken Thighs

Step 1: Prepare the oven. Preheat it to 450 degrees F.

Step 2: Using paper towels, pat dry the chicken thighs, then season with salt, paprika, pepper, and baking powder. Using your hands, gently rub the seasonings on the entire chicken thighs, making sure of even coverage.

Step 3: On a cooling rack, lay the chicken thighs, ensuring to leave a bit of space between the pieces. To minimize sticking, you can spray the cooling rack with PAM or grease it with some oil.

Step 4: To a large baking sheet lined with parchment paper and/or aluminium foil, transfer the chicken thighs. Place in the preheated oven. Then, turn the oven to 425 degrees F convection and bake the thighs for about 30 minutes for moderate crispiness and supreme juiciness. If you want ultimate crispiness and fall-off-the-bone tenderness, bake the thighs for about 35 to 40 minutes.

Step 5: When done, take the thighs out of the oven. To ensure that the skin on the chicken thighs retains its crispiness, allow them to rest for about 5 minutes. Then, toss them in the Buffalo wing sauce. You can also toss the thighs in any other sauce or use a combination of hot wing and BBQ sauce. Serve right away. Enjoy!

Note:

You can also serve the chicken thighs with the dipping sauce on the side.

To make these chicken thighs without a convection oven:

Before preheating the oven, adjust the oven racks to the upper-middle and lower-middle position, then preheat the oven to 250 degrees.

On a wire rack placed on a baking sheet, arrange the chicken thighs in one layer. Place on the lower-middle oven rack and bake for about 30 minutes. Then, transfer to the upper-middle rack and adjust the oven temperature to 425 degrees F. Roast the chicken thighs for about 40 to 50 minutes or until the thighs are crisp and golden brown, rotating the sheet halfway through.

When done, take the chicken thighs out of the oven and allow them to stand for about 5 minutes. To a bowl, transfer the thighs and toss in your preferred wing sauce until well coated.

Nutrition Facts:

Calories: 250 kcal | Carbohydrates: 1g | Protein: 18g | Fat: 18g | Saturated Fat: 5g | Cholesterol: 110mg | Sodium: 691mg | Potassium: 361mg | Fiber: 0g | Sugar: 0g | Vitamin A: 285IU | Calcium: 61mg | Iron: 1mg

Extra Crispy Oven-Fried Chicken Thighs

Rebecca Prep Time: 5 mins | Cook Time: 30 mins | Resting time: 5 mins | Total Time: 35 mins | Servings: 10 You’ll love these extra crispy oven-fried chicken thighs.… General Recipes Extra Crispy Oven-Fried Chicken Thighs European Print This
Serves: 10 Prep Time: 5 mins Cooking Time: 30 mins 30 mins
Nutrition facts: 250 calories 18 fat
Rating: 5.0/5
( 1 voted )

Ingredients

  • 1 tablespoon BAKING POWDER (do NOT use baking soda, it's NOT the same)
  • 10 bone-in, skin-on chicken thighs (about 3 pounds, trimmed)
  • 2 teaspoons sweet paprika
  • 2 teaspoons kosher salt (plus more to taste)
  • 3 tablespoons Buffalo wing sauce (plus more to taste)
  • 1 teaspoon black pepper

Instructions

Step 1: Prepare the oven. Preheat it to 450 degrees F.

Step 2: Using paper towels, pat dry the chicken thighs, then season with salt, paprika, pepper, and baking powder. Using your hands, gently rub the seasonings on the entire chicken thighs, making sure of even coverage.

Step 3: On a cooling rack, lay the chicken thighs, ensuring to leave a bit of space between the pieces. To minimize sticking, you can spray the cooling rack with PAM or grease it with some oil.

Step 4: To a large baking sheet lined with parchment paper and/or aluminium foil, transfer the chicken thighs. Place in the preheated oven. Then, turn the oven to 425 degrees F convection and bake the thighs for about 30 minutes for moderate crispiness and supreme juiciness. If you want ultimate crispiness and fall-off-the-bone tenderness, bake the thighs for about 35 to 40 minutes.

Step 5: When done, take the thighs out of the oven. To ensure that the skin on the chicken thighs retains its crispiness, allow them to rest for about 5 minutes. Then, toss them in the Buffalo wing sauce. You can also toss the thighs in any other sauce or use a combination of hot wing and BBQ sauce. Serve right away. Enjoy!

Notes

You can also serve the chicken thighs with the dipping sauce on the side. To make these chicken thighs without a convection oven: Before preheating the oven, adjust the oven racks to the upper-middle and lower-middle position, then preheat the oven to 250 degrees. On a wire rack placed on a baking sheet, arrange the chicken thighs in one layer. Place on the lower-middle oven rack and bake for about 30 minutes. Then, transfer to the upper-middle rack and adjust the oven temperature to 425 degrees F. Roast the chicken thighs for about 40 to 50 minutes or until the thighs are crisp and golden brown, rotating the sheet halfway through. When done, take the chicken thighs out of the oven and allow them to stand for about 5 minutes. To a bowl, transfer the thighs and toss in your preferred wing sauce until well coated.

August 23, 2022 0 comment
0 FacebookTwitterPinterestEmail
General Recipes

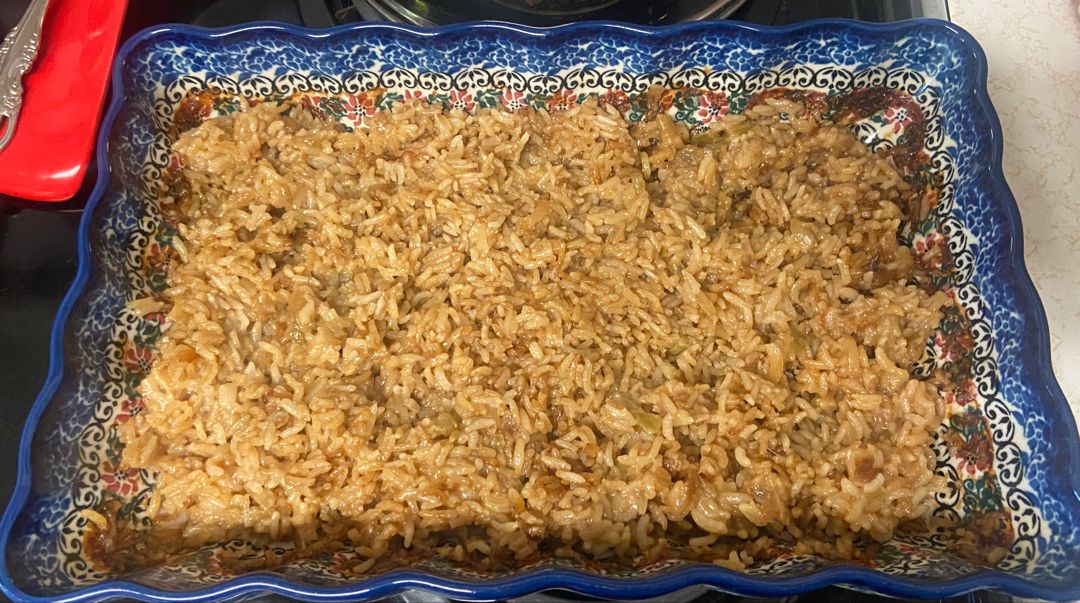
Stick of Butter Baked Rice

by Rebecca August 20, 2022
written by Rebecca

Prep time: 5 mins | Cook time: 1 hr | Serves: 4-6

Rice is a staple at home. Rice is one of the most ideal side dishes. You can have it plain or dress it up. I love how rice can compliment pretty much any dish. Unlike other rice recipes I tried, this baked rice is so much more! It is more than just a side dish, it is incredibly fluffy and seriously flavorful! To make this baked rice all you need are three simple ingredients and yes a whole stick of butter.

I used to cook rice on the stovetop and I admit it is a little stressful. So this bake version, I can say is a lot easier. A no-fuss, pretty straightforward, and guarantee delicious baked rice. You simply need to mix the three ingredients (rice, French onion soup, and beef broth) and top it with slices of butter. Bake in the oven, covered with foil. Without you realizing it, you have the most delicious rice ready for dinner.

This baked rice has a balance of sweet and savory flavor. And the butter makes everything better. No, this baked rice does not require too much effort or time to make. You can easily make this anytime. This baked rice is worth everything!

INGREDIENTS

1 (10 ounces) can of condensed beef broth

1 (10 ounces) can of condensed French Onion soup

1/2 c. (1 stick) unsalted butter, sliced

1 c. long-grain white rice, uncooked

How to make Stick of Butter Baked Rice

Step 1: Prepare the oven. Preheat it to 425 degrees F.

Step 2: Place the rice, soup, and broth in a 9 x 9-inch baking dish. Mix well until combined, then top with slices of butter.

Step 3: Using foil, tightly tent the dish. Place in the preheated oven and bake for about 30 minutes. Uncover and continue to bake for additional 30 minutes.

Step 4: Serve immediately. Enjoy!

Stick of Butter Baked Rice

Rebecca Prep time: 5 mins | Cook time: 1 hr | Serves: 4-6 Rice is a staple at home. Rice is one of the most ideal side dishes. You can have… General Recipes Stick of Butter Baked Rice European Print This
Serves: 4-6 Prep Time: 5 mins Cooking Time: 1 hr 1 hr
Nutrition facts: 200 calories 20 grams fat
Rating: 5.0/5
( 1 voted )

Ingredients

  • 1 (10 ounces) can of condensed beef broth
  • 1 (10 ounces) can of condensed French Onion soup
  • 1/2 c. (1 stick) unsalted butter, sliced
  • 1 c. long-grain white rice, uncooked

Instructions

Step 1: Prepare the oven. Preheat it to 425 degrees F.

Step 2: Place the rice, soup, and broth in a 9 x 9-inch baking dish. Mix well until combined, then top with slices of butter.

Step 3: Using foil, tightly tent the dish. Place in the preheated oven and bake for about 30 minutes. Uncover and continue to bake for additional 30 minutes.

Step 4: Serve immediately. Enjoy!

August 20, 2022 0 comment
0 FacebookTwitterPinterestEmail
General Recipes

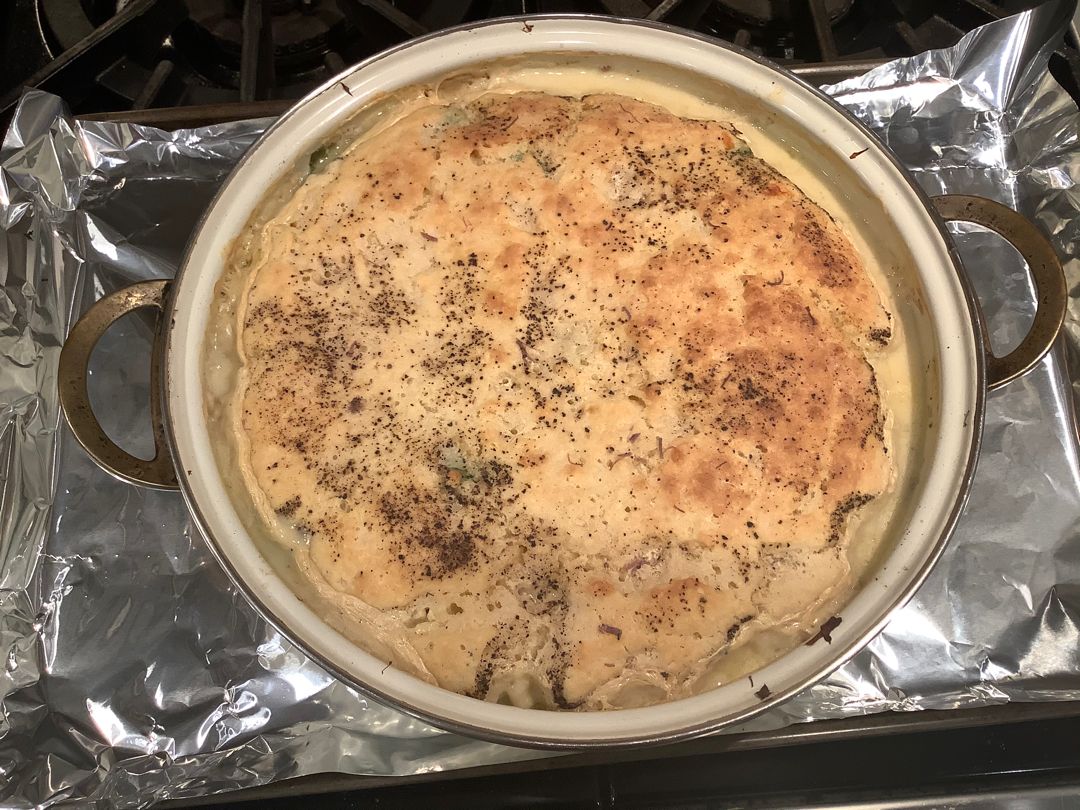
Magic Chicken Pie

by Rebecca August 20, 2022
written by Rebecca

Total time: 1 hr | Serves: 6-8

I am always amazed by this magic Chicken Pie. Just like magic this pie still ends up with an impressive crust-topped pie even without making an actual crust. All it takes are simple ingredients and brilliant layering to get this right. The layers remind me of a pretty classic pot pie filling with the addition of cheese on top. After topping everything off with Bisquick and milk mixture, then a mixture of chicken broth and cream of chicken soup, the magic starts to happen. Once baked, you get an unexpected crust and savory sauce that encircles the veggies and meat.

INGREDIENTS

2 c. cooked chicken, shredded

6 tbsp butter, cubed

1 1/2 c. milk

1 1/2 c. chicken stock

2 c. Bisquick baking mix

1 (10.5 ounces) can cream of chicken soup

2 c. fresh or frozen mixed vegetables

1 c. cheddar cheese, grated

1/2 white onion, chopped

How to make Magic Chicken Pie

Step 1: Prepare the oven. Preheat it to 350 degrees F.

Step 2: In the bottom of a 9 x 13-inch baking dish, place the butter. Put in the oven to melt the butter.

Step 3: In the meantime, place the milk and baking mix in a large bowl. Mix well until blended and set aside.

Step 4: Place the chicken stock and soup in another bowl and mix well until combined. Set aside.

Step 5: In the following layers, arrange the casserole, but DO NOT STIR.

Step 6: On the melted butter, evenly arrange the chicken. Top with vegetables, then onion. On top, evenly sprinkle the cheese. Pour the Bisquick batter over followed by the soup-stock mixture.

Step 7: Return to the oven and bake for additional 45 to 50 minutes until the top of the pie is starting to brown. Remove from the oven when done and allow the pie to rest for about 10 minutes.

Step 8: Slice and serve. Enjoy!

Magic Chicken Pie

Rebecca Total time: 1 hr | Serves: 6-8 I am always amazed by this magic Chicken Pie. Just like magic this pie still ends up with an impressive crust-topped pie even… General Recipes Magic Chicken Pie European Print This
Serves: 6-8
Nutrition facts: 200 calories 20 grams fat
Rating: 5.0/5
( 1 voted )

Ingredients

  • 2 c. cooked chicken, shredded
  • 6 tbsp butter, cubed
  • 1 1/2 c. milk
  • 1 1/2 c. chicken stock
  • 2 c. Bisquick baking mix
  • 1 (10.5 ounces) can cream of chicken soup
  • 2 c. fresh or frozen mixed vegetables
  • 1 c. cheddar cheese, grated
  • 1/2 white onion, chopped

Instructions

Step 1: Prepare the oven. Preheat it to 350 degrees F.

Step 2: In the bottom of a 9 x 13-inch baking dish, place the butter. Put in the oven to melt the butter.

Step 3: In the meantime, place the milk and baking mix in a large bowl. Mix well until blended and set aside.

Step 4: Place the chicken stock and soup in another bowl and mix well until combined. Set aside.

Step 5: In the following layers, arrange the casserole, but DO NOT STIR.

Step 6: On the melted butter, evenly arrange the chicken. Top with vegetables, then onion. On top, evenly sprinkle the cheese. Pour the Bisquick batter over followed by the soup-stock mixture.

Step 7: Return to the oven and bake for additional 45 to 50 minutes until the top of the pie is starting to brown. Remove from the oven when done and allow the pie to rest for about 10 minutes.

Step 8: Slice and serve. Enjoy!

August 20, 2022 0 comment
0 FacebookTwitterPinterestEmail
General Recipes

To-Die-For Rustic Hungarian Mushroom Soup

by Rebecca August 20, 2022
written by Rebecca

PREP TIME: 10 MINS | COOK TIME: 35 MINS | TOTAL TIME: 45 MINS | YIELD: 4-6

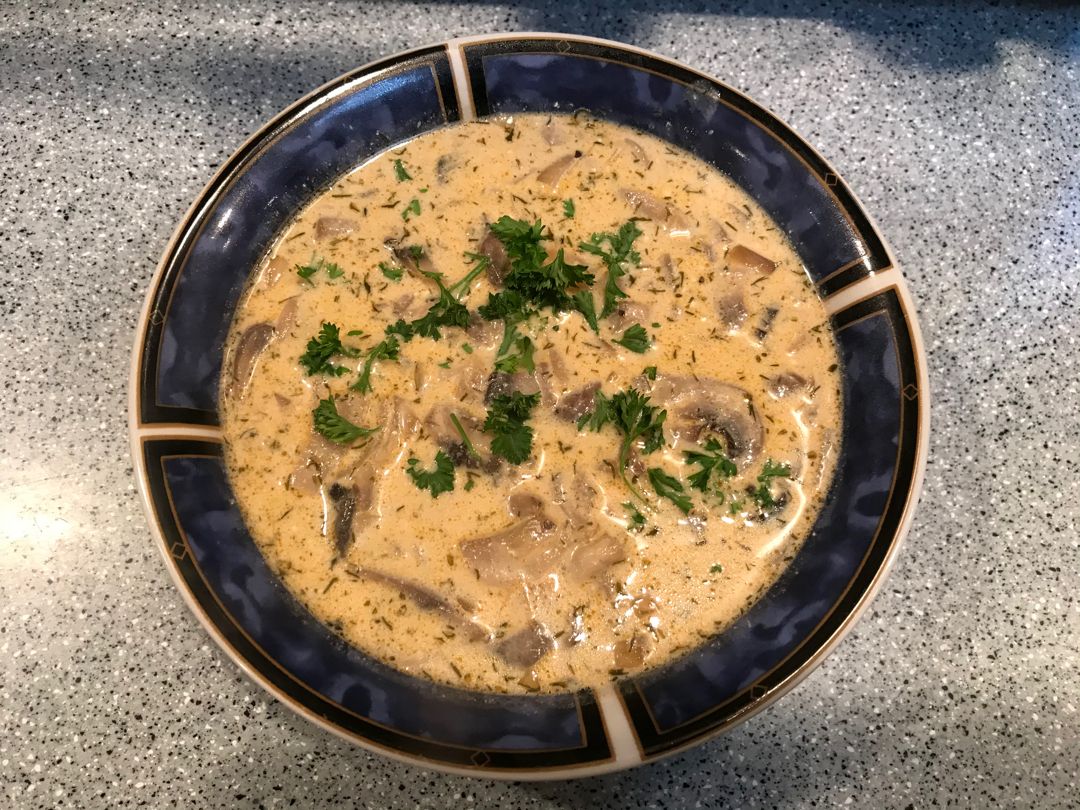
This Rustic Hungarian Mushroom Soup is to die for! A seriously luscious soup that you can easily and quickly make using just a handful of simple ingredients. There are tons of reasons to love this soup. It is packed with nutrients, hydrating, and comforting. If desired, you can sneak in some vegetables and I bet your picky eaters will not mind! This dish is also very inexpensive. A great option for making a delicious, filling meal without breaking the bank.

Ingredients

2 c. chopped onions

3 tbsp butter

2 tsp dried dill weed

1 lb. fresh mushrooms, sliced (any kind – a mix is best)

1 tbsp Hungarian paprika

2 c. chicken or vegetable broth

1 c. milk or plain almond milk

1 tbsp soy sauce or liquid aminos

3 tbsp all-purpose flour

1/2 c. sour cream or Greek yogurt

2 tbsp chopped fresh parsley

ground black pepper to taste

2 tsp lemon juice (you can add more)

How to make Rustic Hungarian Mushroom Soup

Step 1: In a large pot, melt the butter over medium heat. Once the butter has melted, add the onions to the pot and saute for about 5 minutes. Add the mushrooms and cook for another 5 minutes. Next, add the dill, paprika, soy sauce (or liquid aminos), and broth. Stir well. Adjust the heat to low and put the lid on. Let everything simmer for about 15 minutes.

Step 2: In another bowl, place the milk and flour. Mix well, then pour this into the soup. Whisk again. Replace the lid and simmer for additional 15 minutes, stirring often.

Step 3: Whisk in the ground black pepper along with lemon juice and sour cream/Greek yoghurt. Adjust the heat to low and cook for about 5 minutes. DO NOT BOIL.

Step 4: Before serving, garnish with some parsley. Enjoy the Rustic Hungarian Mushroom Soup with crusty warm bread.

Nutrition Facts:

Yield: 6, Serving Size: 1
Amount Per Serving: Calories 312, Total Fat 17g, Saturated Fat 8g, Trans Fat 0g, Unsaturated Fat 7g, Cholesterol 74mg, Sodium 431mg, Carbohydrates 22g, Fiber 4g, Sugar 11g, Protein 19g

To-Die-For Rustic Hungarian Mushroom Soup

Rebecca PREP TIME: 10 MINS | COOK TIME: 35 MINS | TOTAL TIME: 45 MINS | YIELD: 4-6 This Rustic Hungarian Mushroom Soup is to die for! A seriously luscious soup… General Recipes To-Die-For Rustic Hungarian Mushroom Soup European Print This
Serves: 4-6 Prep Time: 10 mins Cooking Time: 35 mins 35 mins
Nutrition facts: 312 calories 17 fat
Rating: 5.0/5
( 1 voted )

Ingredients

  • 2 c. chopped onions
  • 3 tbsp butter
  • 2 tsp dried dill weed
  • 1 lb. fresh mushrooms, sliced (any kind - a mix is best)
  • 1 tbsp Hungarian paprika
  • 2 c. chicken or vegetable broth
  • 1 c. milk or plain almond milk
  • 1 tbsp soy sauce or liquid aminos
  • 3 tbsp all-purpose flour
  • 1/2 c. sour cream or Greek yogurt
  • 2 tbsp chopped fresh parsley
  • ground black pepper to taste
  • 2 tsp lemon juice (you can add more)

Instructions

Step 1: In a large pot, melt the butter over medium heat. Once the butter has melted, add the onions to the pot and saute for about 5 minutes. Add the mushrooms and cook for another 5 minutes. Next, add the dill, paprika, soy sauce (or liquid aminos), and broth. Stir well. Adjust the heat to low and put the lid on. Let everything simmer for about 15 minutes.

Step 2: In another bowl, place the milk and flour. Mix well, then pour this into the soup. Whisk again. Replace the lid and simmer for additional 15 minutes, stirring often.

Step 3: Whisk in the ground black pepper along with lemon juice and sour cream/Greek yoghurt. Adjust the heat to low and cook for about 5 minutes. DO NOT BOIL.

Step 4: Before serving, garnish with some parsley. Enjoy the Rustic Hungarian Mushroom Soup with crusty warm bread.

August 20, 2022 0 comment
0 FacebookTwitterPinterestEmail
General Recipes

Graham Cracker Toffee Bars

by Rebecca August 20, 2022
written by Rebecca

PREP TIME: 5 mins | COOK TIME: 20 mins | TOTAL TIME: 25 mins | SERVINGS: 15

These Graham Cracker Toffee Bars are a simple 5-ingredient treat that you can make in under thirty minutes. My favorite and go-to easy holiday treat that is perfect all year round. This recipe is perfect if you are thinking of a really simple dessert that would be amazing for a crowd, to serve at parties, or as a Christmas treat.

Ingredients

1 c. butter 2 sticks

1 package of honey graham crackers

1 c. chopped pecans

1 c. light brown sugar

14 oz. Hershey’s chocolate bars (I use two large 7 ounces bars)

How to make Graham Cracker Toffee Bars

Step 1: Prepare the oven. Preheat it to 350 degrees F. Using the parchment paper, line a 9 x 13-inch pan or you can grease it with cooking spray.

Step 2: Along the bottom of the prepared pan, place the graham cracker sheets.

Step 3: In a large saucepan, melt the butter over medium heat. Once the butter has melted, add the brown sugar and pecans to the pan and bring to a full boil while stirring. Let the mixture boil for about 5 minutes, stirring constantly. Take the pan off the heat and pour the mixture over the graham crackers. Then, evenly spread. Place in the preheated oven and bake for about 7 minutes.

Step 4: In the meantime, remove the Hershey’s chocolate bars from the wrappers and break them into pieces.

Step 5: Take the bars out of the oven and place the pieces of chocolate very carefully across the top of the toffee layer. Using a lid or aluminium foil, tent the pan and let the chocolate melt for about 5 to 10 minutes.

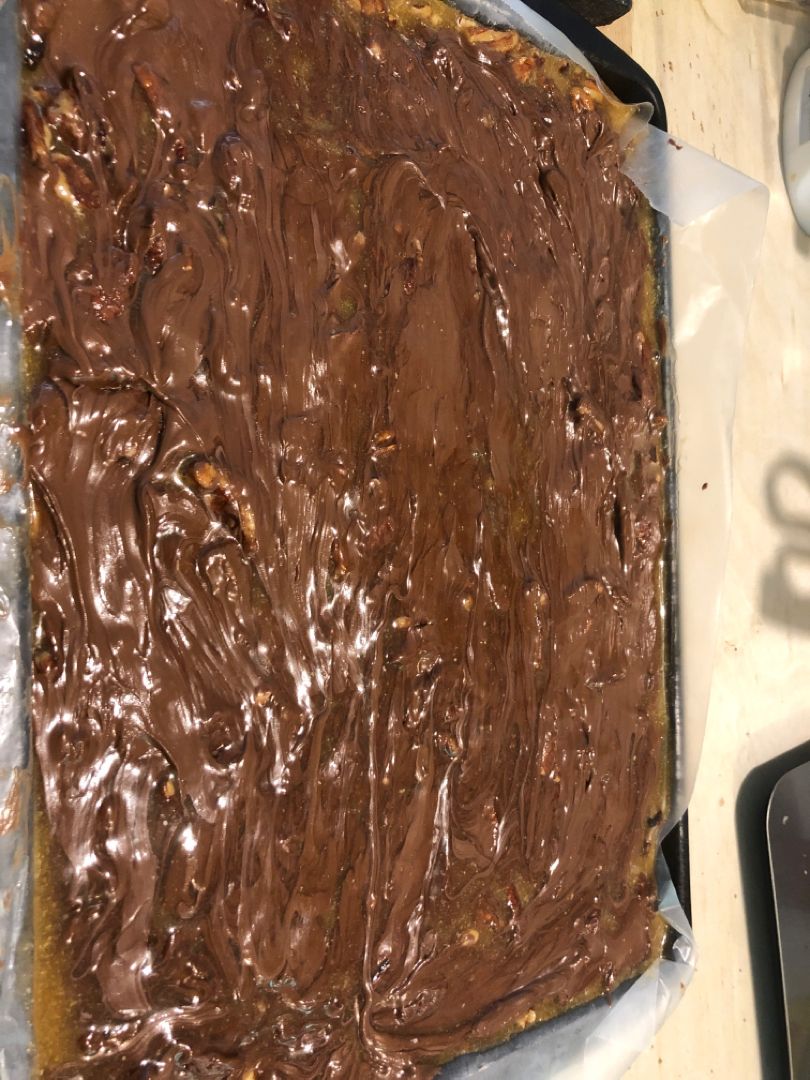
Step 6: Take the lid off once the chocolate has begun to melt. Evenly spread the melted chocolate over the bars using a spatula.

Step 7: Before serving, let the bars cool completely. You can store these bars in the fridge if desired. Before cutting, leave the bars out for about 15 minutes at room temperature.

Nutrition Facts:

Calories: 454 kcal, Carbohydrates: 51g, Protein: 4g, Fat: 27g, Saturated Fat: 13g, Cholesterol: 38mg, Sodium: 313mg, Potassium: 101mg, Fiber: 2g, Sugar: 35g, Vitamin A: 380IU, Vitamin C: 0.1mg, Calcium: 93mg, Iron: 1.7mg

Graham Cracker Toffee Bars

Rebecca PREP TIME: 5 mins | COOK TIME: 20 mins | TOTAL TIME: 25 mins | SERVINGS: 15 These Graham Cracker Toffee Bars are a simple 5-ingredient treat that you can… General Recipes Graham Cracker Toffee Bars European Print This
Serves: 15 Prep Time: 5 mins Cooking Time: 20 mins 20 mins
Nutrition facts: 454 calories 27 fat
Rating: 5.0/5
( 1 voted )

Ingredients

  • 1 c. butter 2 sticks
  • 1 package of honey graham crackers
  • 1 c. chopped pecans
  • 1 c. light brown sugar
  • 14 oz. Hershey's chocolate bars (I use two large 7 ounces bars)

Instructions

Step 1: Prepare the oven. Preheat it to 350 degrees F. Using the parchment paper, line a 9 x 13-inch pan or you can grease it with cooking spray.

Step 2: Along the bottom of the prepared pan, place the graham cracker sheets.

Step 3: In a large saucepan, melt the butter over medium heat. Once the butter has melted, add the brown sugar and pecans to the pan and bring to a full boil while stirring. Let the mixture boil for about 5 minutes, stirring constantly. Take the pan off the heat and pour the mixture over the graham crackers. Then, evenly spread. Place in the preheated oven and bake for about 7 minutes.

Step 4: In the meantime, remove the Hershey's chocolate bars from the wrappers and break them into pieces.

Step 5: Take the bars out of the oven and place the pieces of chocolate very carefully across the top of the toffee layer. Using a lid or aluminium foil, tent the pan and let the chocolate melt for about 5 to 10 minutes.

Step 6: Take the lid off once the chocolate has begun to melt. Evenly spread the melted chocolate over the bars using a spatula.

Step 7: Before serving, let the bars cool completely. You can store these bars in the fridge if desired. Before cutting, leave the bars out for about 15 minutes at room temperature.

August 20, 2022 0 comment
0 FacebookTwitterPinterestEmail
General Recipes

Paula Deen’s Amazing Chicken Casserole

by Rebecca August 20, 2022
written by Rebecca

Prep Time: 20 mins | Total Time: 1 hr

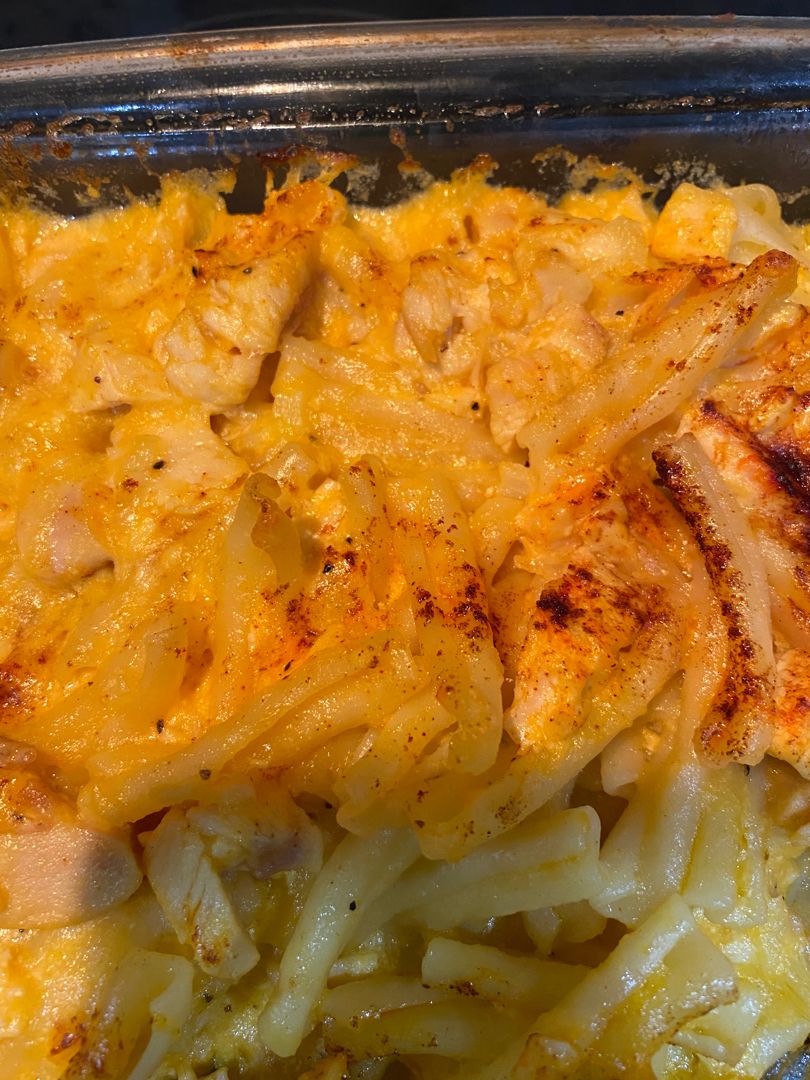
This chicken casserole by Paula Deen is one of my favorite casserole recipes. Tender with creamy sauce and loads of cheese. A delicious casserole with a special creamy texture. The addition of red pepper flakes adds a noteworthy aroma and spice to this already amazing dish. If you like to add more flavor to this chicken casserole, you can add some finely chopped tomatoes or even hot chili. As for the cheese, you are welcome to use one or more varieties. For a simple, filling weeknight meal, pair this casserole up with any vegetable salads or baked vegetables. This chicken casserole is also a great freezer meal. Make sure to let it cool down completely, then cover with foil. You can also keep it in a container with an airtight lid and freeze it for up to 2 to 3 months.

Ingredients

3 tbsp butter

2 garlic cloves, minced

1 small onion, finely chopped

2 c. chicken, cooked, cut into small bite-sized pieces

4 c. pasta, cooked and drained (about 2 c. uncooked); penne, cavatappi, or rigatoni works well

2 tbsp flour

1 c. milk

1/2 tsp red pepper flakes

1/2 c. sour cream

salt and black pepper to taste

3 c. cheese, grated (cheddar, Colby jack, Swiss, or a combination), with 1/2 c. reserved for sprinkling on top

How to make Paula Deen’s Amazing Chicken Casserole

Step 1: In butter, fry the onion and garlic. Stir in the flour and continue to cook for not more than a minute. Whisk in the milk and sour cream until the mixture has thickened. Next, add the cheese and stir well.

Step 2: Then, add the chicken along with the pasta. Season with salt and red pepper flakes. Mix well.

Step 3: In a 9 x 3-inch baking dish, transfer the mixture. Place in a preheated 350 degrees F oven and bake for about 20 to 30 minutes or until the cheese begins to bubble.

Paula Deen’s Amazing Chicken Casserole

Rebecca Prep Time: 20 mins | Total Time: 1 hr This chicken casserole by Paula Deen is one of my favorite casserole recipes. Tender with creamy sauce and loads of cheese.… General Recipes Paula Deen’s Amazing Chicken Casserole European Print This
Prep Time: 20 mins
Nutrition facts: 200 calories 20 grams fat
Rating: 4.3/5
( 3 voted )

Ingredients

  • 3 tbsp butter
  • 2 garlic cloves, minced
  • 1 small onion, finely chopped
  • 2 c. chicken, cooked, cut into small bite-sized pieces
  • 4 c. pasta, cooked and drained (about 2 c. uncooked); penne, cavatappi, or rigatoni works well
  • 2 tbsp flour
  • 1 c. milk
  • 1/2 tsp red pepper flakes
  • 1/2 c. sour cream
  • salt and black pepper to taste
  • 3 c. cheese, grated (cheddar, Colby jack, Swiss, or a combination), with 1/2 c. reserved for sprinkling on top

Instructions

Step 1: In butter, fry the onion and garlic. Stir in the flour and continue to cook for not more than a minute. Whisk in the milk and sour cream until the mixture has thickened. Next, add the cheese and stir well.

Step 2: Then, add the chicken along with the pasta. Season with salt and red pepper flakes. Mix well.

Step 3: In a 9 x 3-inch baking dish, transfer the mixture. Place in a preheated 350 degrees F oven and bake for about 20 to 30 minutes or until the cheese begins to bubble.

August 20, 2022 0 comment
0 FacebookTwitterPinterestEmail
General Recipes

Easy Hungarian Chicken Paprikash

by Rebecca August 20, 2022
written by Rebecca

Prep time: 10 mins | Cook time: 35 mins | Total time: 45 mins | Yield: 6 SERVINGS

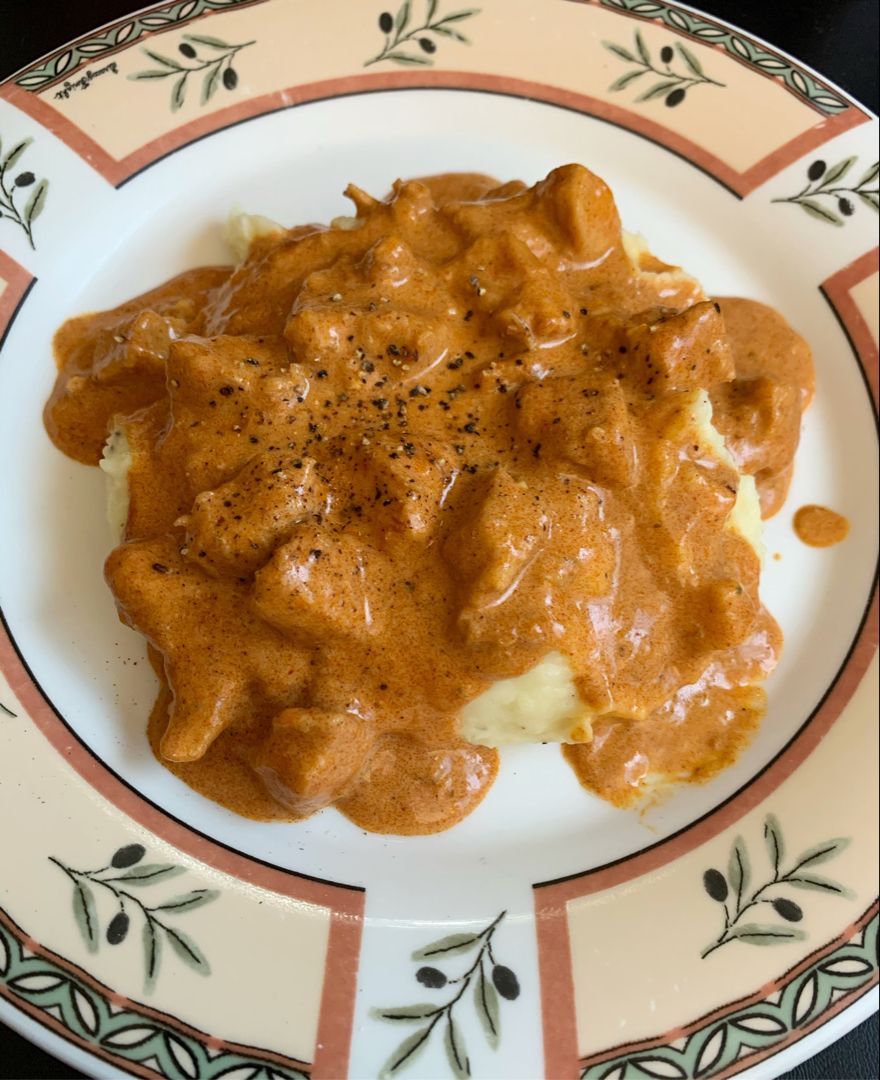
I am obsessed with this Hungarian Chicken Paprikash with a lusciously creamy, spicy sauce served over fluffy No Yolks noodles. This is my favorite weeknight menu rotation without any doubt!

Ingredients

2.5 lbs chicken breasts and thighs

1 (12 ounces) pkg. No Yolks Broad noodles

4 tbsp unsalted butter

1 medium onion

3 tbsp Hungarian sweet paprika

1 1/2 c. chicken broth

3 tbsp flour, divided

1 c. sour cream

1 tsp salt

1/2 tsp freshly ground black pepper

How to make Easy Hungarian Chicken Paprikash

Step 1: Start by dicing the onion. Into bite-sized pieces, slice the chicken breasts and thighs.

Step 2: Melt the butter in a large skillet over medium heat. Then, add the onions and saute until translucent. In the meantime, toss the pieces of diced chicken with around 2 tbsp flour. To the pan, add the coated chicken and cook until all sides are browned. Stir in the sweet paprika, salt, and pepper.

Step 3: To the pan, gradually pour in the chicken broth. Scrape and deglaze the bottom of the skillet using a wooden spoon. Put the lid on and let everything simmer for about 25 minutes on low.

Step 4: Meanwhile, ready the No Yolks following the package directions.

Step 5: To a plate, transfer the chicken. Into the drippings left in the pan, whisk in 1 tbsp flour until the mixture has thickened. Turn the heat off and stir in the sour cream. Return the chicken to the sauce and toss to coat.

Step 6: To taste, season with extra salt. Over the broad egg noodles, serve the Hungarian Chicken Paprikash immediately. Enjoy!

Notes:

Try to add some Hungarian hot paprika if you want a little bit of extra heat. I do not suggest swapping it with sweet paprika.

Make sure to add a little and adjust until you reach your desired results.

Nutrition Facts:

YIELD: 6 servings
Amount Per Serving: CALORIES: 595 | TOTAL FAT: 23.5g | SATURATED FAT: 13.3g | CHOLESTEROL: 163.8mg | SODIUM: 1019.9mg | CARBOHYDRATES: 49.2g | FIBER: 3.5g | SUGAR: 7.3g | PROTEIN: 44.2g

Easy Hungarian Chicken Paprikash

Rebecca Prep time: 10 mins | Cook time: 35 mins | Total time: 45 mins | Yield: 6 SERVINGS I am obsessed with this Hungarian Chicken Paprikash with a lusciously creamy,… General Recipes Easy Hungarian Chicken Paprikash European Print This
Serves: 6 Prep Time: 10 mins Cooking Time: 35 mins 35 mins
Nutrition facts: 595 calories 23.5 fat
Rating: 5.0/5
( 1 voted )

Ingredients

  • 2.5 lbs chicken breasts and thighs
  • 1 (12 ounces) pkg. No Yolks Broad noodles
  • 4 tbsp unsalted butter
  • 1 medium onion
  • 3 tbsp Hungarian sweet paprika
  • 1 1/2 c. chicken broth
  • 3 tbsp flour, divided
  • 1 c. sour cream
  • 1 tsp salt
  • 1/2 tsp freshly ground black pepper

Instructions

Step 1: Start by dicing the onion. Into bite-sized pieces, slice the chicken breasts and thighs.

Step 2: Melt the butter in a large skillet over medium heat. Then, add the onions and saute until translucent. In the meantime, toss the pieces of diced chicken with around 2 tbsp flour. To the pan, add the coated chicken and cook until all sides are browned. Stir in the sweet paprika, salt, and pepper.

Step 3: To the pan, gradually pour in the chicken broth. Scrape and deglaze the bottom of the skillet using a wooden spoon. Put the lid on and let everything simmer for about 25 minutes on low.

Step 4: Meanwhile, ready the No Yolks following the package directions.

Step 5: To a plate, transfer the chicken. Into the drippings left in the pan, whisk in 1 tbsp flour until the mixture has thickened. Turn the heat off and stir in the sour cream. Return the chicken to the sauce and toss to coat.

Step 6: To taste, season with extra salt. Over the broad egg noodles, serve the Hungarian Chicken Paprikash immediately. Enjoy!

Notes

Try to add some Hungarian hot paprika if you want a little bit of extra heat. I do not suggest swapping it with sweet paprika. Make sure to add a little and adjust until you reach your desired results.

August 20, 2022 0 comment
0 FacebookTwitterPinterestEmail
General Recipes

Knock You Naked Bars

by Rebecca August 20, 2022
written by Rebecca

Prep time: 20 mins | Cook time: 30 mins | Total time: 50 mins | Yield: 20 bars

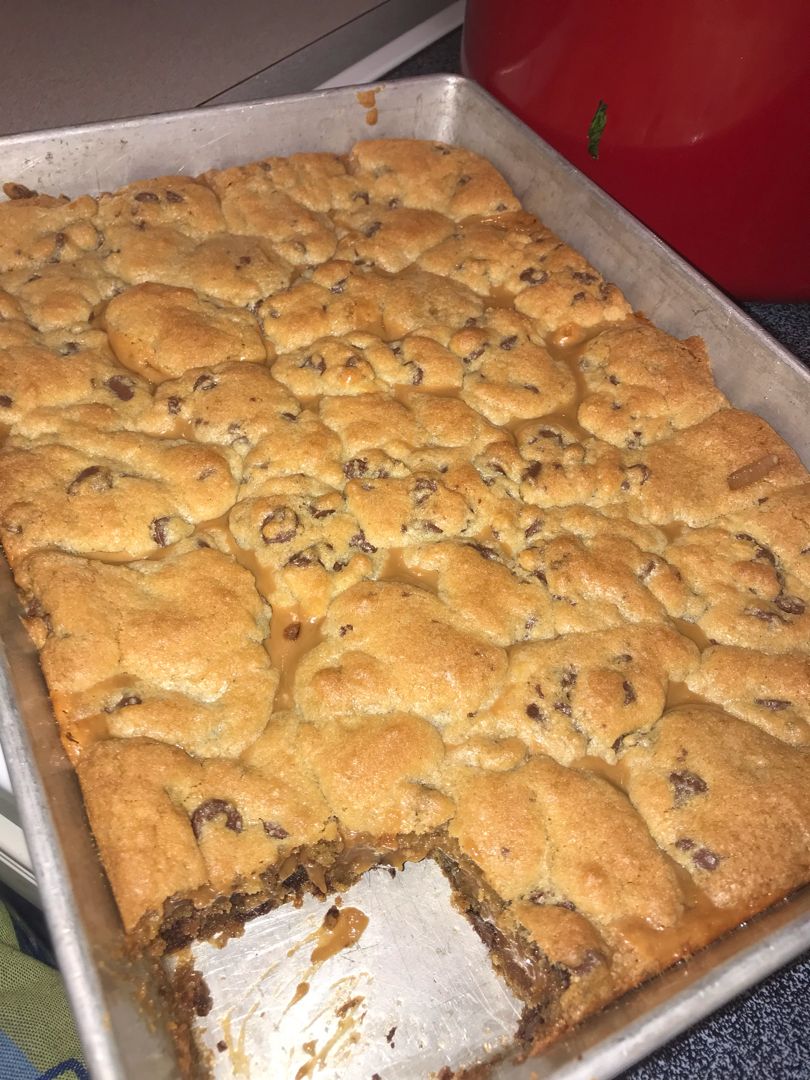
Epic cookie bars with a layer of amazing gooey caramel stuffed in better layers with a swoosh of peanut butter. One bite is enough for anyone to fall head over heels to these heavenly Knock You Naked Bars! Easily throw these luscious bars any time with this easy and quick recipe. And make sure to whip up a huge batch as these delicious bars disappear fast! You might also be tempted to hide the entire pan for yourself!

INGREDIENTS

Bars:

2 eggs

1 teaspoon baking soda

2 1/4 cups all-purpose flour

1 cup butter, softened

3/4 cup packed brown sugar

3/4 cup sugar

1 teaspoon vanilla extract

2 cups semi-sweet chocolate chips

1 teaspoon salt

Caramel Sauce:

1 bag of 14-ounces caramels

1/2 cup peanut butter

5 ounces evaporated milk

How to make Knock You Naked Bars

Step 1: Prepare the oven. Preheat it to 375 degrees. Ready a 9 x 13-inch pan. Grease and set aside.

Step 2: In a small bowl, place the flour, baking soda, and salt. Mix well until blended. In a large mixing bowl, beat the butter, sugar, brown sugar, and vanilla until creamy. Then, add the eggs, a piece at a time, beating every after each addition. Next, slowly whisk in the flour mixture. Lastly, fold in the chocolate chips.

Step 3: Into the prepared pan, spread half of the cookie dough. Place in the preheated oven and bake for about 8 to 10 minutes.

Step 4: In the meantime, place the caramels and evaporated milk in a double boiler, then melt. Once the caramels are melted, add the peanut butter and let it melt completely. Then, spread this over the baked cookie dough base. Drop the rest of the cookie dough by spoonfuls on top.

Step 5: Return to the oven and resume baking for additional 15 to 20 minutes or until light golden brown.

NUTRITION FACTS:

Serving: 1, Calories: 439 kcal (22%), Carbohydrates: 52g (17%), Protein: 6g (12%), Fat: 22g (34%), Saturated Fat: 12g (75%), Cholesterol: 45mg (15%), Sodium: 311mg (14%), Potassium: 243mg (7%), Fiber: 2g (8%), Sugar: 27g (30%), Vitamin A: 350IU (7%), Vitamin C: 0.2mg, Calcium: 53mg (5%), Iron: 3mg (17%)

Knock You Naked Bars

Rebecca Prep time: 20 mins | Cook time: 30 mins | Total time: 50 mins | Yield: 20 bars Epic cookie bars with a layer of amazing gooey caramel stuffed in… General Recipes Knock You Naked Bars European Print This
Serves: 20 Prep Time: 20 mins Cooking Time: 30 mins 30 mins
Nutrition facts: 439 calories 22 fat
Rating: 5.0/5
( 1 voted )

Ingredients

  • Bars:
  • 2 eggs
  • 1 teaspoon baking soda
  • 2 1/4 cups all-purpose flour
  • 1 cup butter, softened
  • 3/4 cup packed brown sugar
  • 3/4 cup sugar
  • 1 teaspoon vanilla extract
  • 2 cups semi-sweet chocolate chips
  • 1 teaspoon salt
  • Caramel Sauce:
  • 1 bag of 14-ounces caramels
  • 1/2 cup peanut butter
  • 5 ounces evaporated milk

Instructions

Step 1: Prepare the oven. Preheat it to 375 degrees. Ready a 9 x 13-inch pan. Grease and set aside.

Step 2: In a small bowl, place the flour, baking soda, and salt. Mix well until blended. In a large mixing bowl, beat the butter, sugar, brown sugar, and vanilla until creamy. Then, add the eggs, a piece at a time, beating every after each addition. Next, slowly whisk in the flour mixture. Lastly, fold in the chocolate chips.

Step 3: Into the prepared pan, spread half of the cookie dough. Place in the preheated oven and bake for about 8 to 10 minutes.

Step 4: In the meantime, place the caramels and evaporated milk in a double boiler, then melt. Once the caramels are melted, add the peanut butter and let it melt completely. Then, spread this over the baked cookie dough base. Drop the rest of the cookie dough by spoonfuls on top.

Step 5: Return to the oven and resume baking for additional 15 to 20 minutes or until light golden brown.

August 20, 2022 0 comment
0 FacebookTwitterPinterestEmail
General Recipes

3-Ingredient BBQ Little Smokies (Slow Cooker and Stovetop)

by Rebecca August 20, 2022
written by Rebecca

Prep time: 5 mins | Cook time: 5 mins | Serves: 9

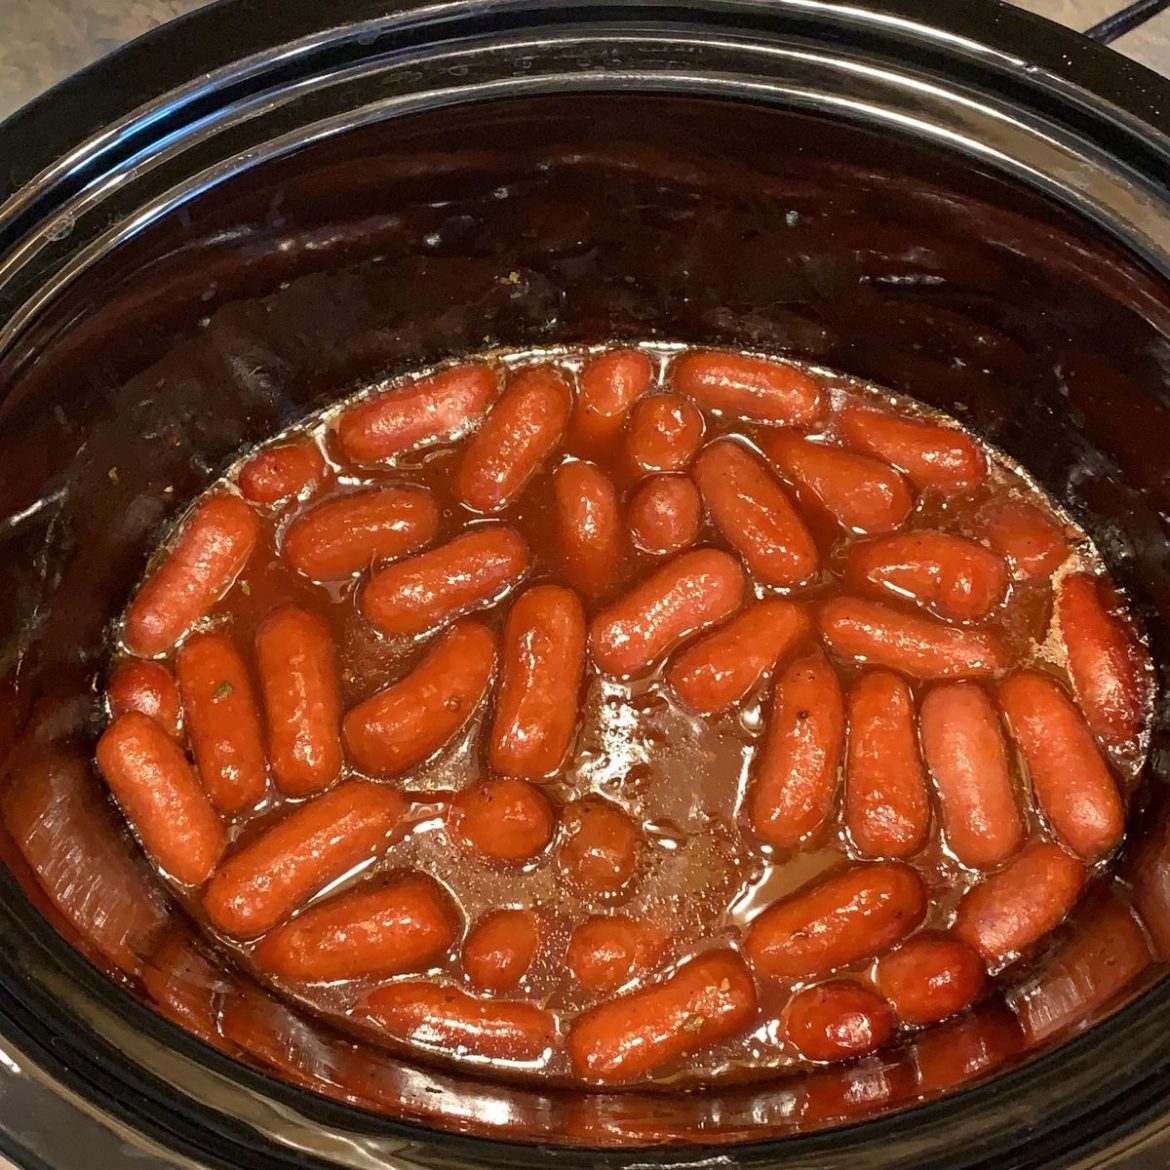
I never expected these BBQ Little Smokies to be this great! My kids are obsessed and I can say the same for myself. I like how I can easily make these in my slow cooker or stovetop using just three simple ingredients. And the orange zest is optional, but highly recommended.

These saucy tiny cocktail weenies are coated in sweet and tangy barbecue flavor with a perfect citrusy twist. One bite and I am head over heels! Either you make these in your slow cooker or stovetop, and know that the result will be insanely good!

I love to serve these BBQ little smokies for parties and entertaining. Everyone adores these because they are not only delicious, but also super fun to eat. Really, these BBQ little smokies are great for any occasion! Make sure to whip up a huge batch because these little smokies go fast. Kids and adults love these BBQ little smokies. The best part is you can use any of your favorite barbecue sauces for this recipe.

INGREDIENTS

1/2 c. orange marmalade

2 packages of little smokies (smoked cocktail wienies)

Orange zest, for serving (optional)

1/2 c. barbecue sauce

How to make 3-Ingredient BBQ Little Smokies (Slow Cooker and Stovetop)

STOVETOP:

Step 1: Place the sausages, orange marmalade, and barbecue sauce in a medium saucepan. Mix well until combined. Allow the mixture to simmer on medium heat until the sauce is smooth and the smokies are hot.

Step 2: To a serving dish, transfer the BBQ Little Smokies. If using, top with orange zest. Enjoy!

SLOW COOKER:

Step 1: In a slow cooker, mix all the ingredients. Put the lid on and set to cook for 3 to 4 hours on low until the sauce is smooth and the smokies are completely heated. Then, turn the setting to warm until ready to serve.

Step 2: Before serving, top with some orange zest (optional). Enjoy!

3-Ingredient BBQ Little Smokies (Slow Cooker and Stovetop)

Rebecca Prep time: 5 mins | Cook time: 5 mins | Serves: 9 I never expected these BBQ Little Smokies to be this great! My kids are obsessed and I can… General Recipes 3-Ingredient BBQ Little Smokies (Slow Cooker and Stovetop) European Print This
Serves: 9 Prep Time: 5 mins Cooking Time: 5 mins 5 mins
Nutrition facts: 200 calories 20 grams fat
Rating: 5.0/5
( 3 voted )

Ingredients

  • 1/2 c. orange marmalade
  • 2 packages of little smokies (smoked cocktail wienies)
  • Orange zest, for serving (optional)
  • 1/2 c. barbecue sauce

Instructions

STOVETOP:

Step 1: Place the sausages, orange marmalade, and barbecue sauce in a medium saucepan. Mix well until combined. Allow the mixture to simmer on medium heat until the sauce is smooth and the smokies are hot.

Step 2: To a serving dish, transfer the BBQ Little Smokies. If using, top with orange zest. Enjoy!

SLOW COOKER:

Step 1: In a slow cooker, mix all the ingredients. Put the lid on and set to cook for 3 to 4 hours on low until the sauce is smooth and the smokies are completely heated. Then, turn the setting to warm until ready to serve.

Step 2: Before serving, top with some orange zest (optional). Enjoy!

August 20, 2022 0 comment
0 FacebookTwitterPinterestEmail
Newer Posts
Older Posts

Popular Posts

  • 1

    Crispy Crunchy Parmesan Potatoes

    March 21, 2020
  • 2

    CROCK POT SMOTHERED PORK CHOPS

    March 21, 2020
  • Facebook
  • Twitter

@2019 - All Right Reserved.


Back To Top