Cook it once
  • Home
  • Privacy Policy
  • Recipes
    • KETO
    • LC
    • WW
  • Tips
  • Contact
Cook it once
  • Home
  • Privacy Policy
  • Recipes
    • KETO
    • LC
    • WW
  • Tips
  • Contact
Category:

General Recipes

General Recipes

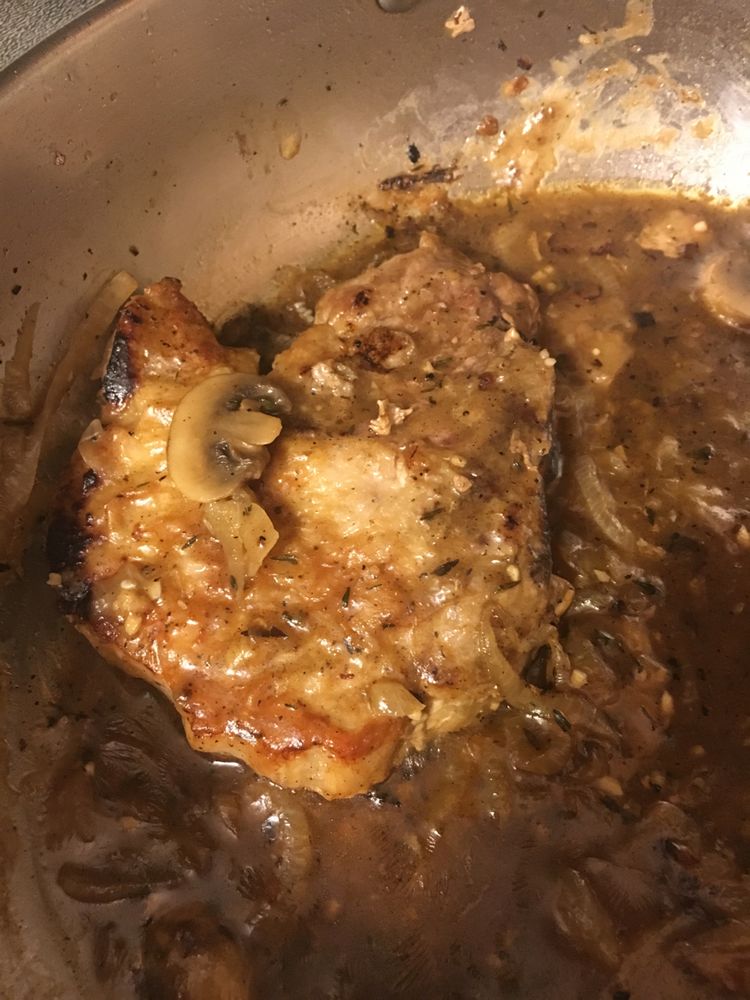
French Onion Pork Chops

by Rebecca August 26, 2022
written by Rebecca

Prep time: 10 mins | Cook time: 1 hr 10 mins | Total time: 1 hr 20 mins | Servings: 4 PEOPLE

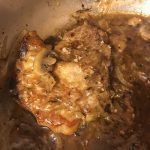
Pan-fried or baked juicy and tender pork chops smothered in a thick, very flavorful French Onion sauce with gravy and mushrooms. For extra satisfaction, top the chops with cheese while hot and let the cheese melt. Serve these delicious French Onion Pork Chops over mashed potatoes with a side of roasted veggies or any of your favorite side dishes for a filling weeknight meal perfect for everyone!

Ingredients

Pork Chops:

2 tbsp olive oil

4 pork chops, center cut, bone-in

2 tbsp flour

4 slices Gruyere or Swiss cheese, optional

Salt/Pepper, to taste

French Onion Sauce:

2 large yellow onions, sliced 1/4” thick

6 tbsp butter, divided

1 tbsp flour

2 cloves garlic, minced

8 ounces button mushrooms, sliced

1/3 c. dry white wine

1 sprig of fresh Thyme, or 1 teaspoon of dried thyme

1 ¼ c. chicken broth

How to make French Onion Pork Chops

Pork Chops:

Step 1: Prepare the oven. Preheat it to 400 degrees.

Step 2: Sprinkle the pork chops with salt and pepper. Then, dredge all sides with flour.

Step 3: In a large cast-iron skillet, heat 2 tbsp olive oil over medium-high heat. Once the oil is hot, add the pork chops to the skillet and sear for about 2 minutes on each side. To a baking dish, transfer the pork chops and allow them to rest while preparing the sauce.

French Onion Sauce:

Step 4: In the now-empty skillet, melt 4 tbsp butter over medium-low heat. Cleaning the pan in between is not required.

Step 5: Once the butter has melted, add the onions to the skillet and toss. Cook for about 45 to 60 minutes or until caramelized. Stirring often using a silicone spatula.

Step 6: Adjust the heat to medium-high and pour in the white wine. Cook for about 4 minutes until the wine has reduced by half. Deglaze the pan using the same silicone spatula.

Step 7: In 1 tbsp flour, toss the onions and continue to heat for an additional 1 to 2 minutes. Next, add the mushrooms and the rest of the 2 tbsp butter. Heat for another 5 minutes before stirring in the garlic. Continue to cook for a minute more.

Step 8: To the pan, pour in the chicken broth and add the fresh thyme. Bring everything to a gentle boil, then decrease to a simmer. Allow the mixture to simmer until reduced.

Step 9: In the meantime, bake the pork chops for about 10 to 15 minutes. Place the pork chops back into the skillet and spoon the sauce over. If using thinner (about 3/4-inch pork chops), you can cook them in the sauce instead.

Step 10: Add the cheese on top of each pork chop and allow the cheese to melt in the oven. Alternatively, you can tent the dish with foil to melt the cheese. This step is optional but recommended.

Notes:

Once the internal temperature of the chops reaches 145 degrees, the pork chops are done.

You can replace wine with chicken or beef broth.

If using thinner pork chops, you can add them to the skillet once the chicken broth has been added and cook them right in the skillet.

Nutrition Facts:

Calories: 540 kcal, Carbohydrates: 13g, Protein: 39g, Fat: 35g, Saturated Fat: 16g, Cholesterol: 162mg, Sodium: 518mg, Potassium: 915mg, Fiber: 2g, Sugar: 4g, Vitamin A: 549IU, Vitamin C: 12mg, Calcium: 57mg, Iron: 2mg
French Onion Pork Chops

Rebecca Prep time: 10 mins | Cook time: 1 hr 10 mins | Total time: 1 hr 20 mins | Servings: 4 PEOPLE Pan-fried or baked juicy and tender pork chops… General Recipes French Onion Pork Chops European Print This
Serves: 4 Prep Time: 10 mins Cooking Time: 1 hr 10 mins 1 hr 10 mins
Nutrition facts: 540 calories 35 fat
Rating: 5.0/5
( 1 voted )

Ingredients

  • Pork Chops:
  • 2 tbsp olive oil
  • 4 pork chops, center cut, bone-in
  • 2 tbsp flour
  • 4 slices Gruyere or Swiss cheese, optional
  • Salt/Pepper, to taste
  • French Onion Sauce:
  • 2 large yellow onions, sliced 1/4” thick
  • 6 tbsp butter, divided
  • 1 tbsp flour
  • 2 cloves garlic, minced
  • 8 ounces button mushrooms, sliced
  • 1/3 c. dry white wine
  • 1 sprig of fresh Thyme, or 1 teaspoon of dried thyme
  • 1 ¼ c. chicken broth

Instructions

Pork Chops:

Step 1: Prepare the oven. Preheat it to 400 degrees.

Step 2: Sprinkle the pork chops with salt and pepper. Then, dredge all sides with flour.

Step 3: In a large cast-iron skillet, heat 2 tbsp olive oil over medium-high heat. Once the oil is hot, add the pork chops to the skillet and sear for about 2 minutes on each side. To a baking dish, transfer the pork chops and allow them to rest while preparing the sauce.

French Onion Sauce:

Step 4: In the now-empty skillet, melt 4 tbsp butter over medium-low heat. Cleaning the pan in between is not required.

Step 5: Once the butter has melted, add the onions to the skillet and toss. Cook for about 45 to 60 minutes or until caramelized. Stirring often using a silicone spatula.

Step 6: Adjust the heat to medium-high and pour in the white wine. Cook for about 4 minutes until the wine has reduced by half. Deglaze the pan using the same silicone spatula.

Step 7: In 1 tbsp flour, toss the onions and continue to heat for an additional 1 to 2 minutes. Next, add the mushrooms and the rest of the 2 tbsp butter. Heat for another 5 minutes before stirring in the garlic. Continue to cook for a minute more.

Step 8: To the pan, pour in the chicken broth and add the fresh thyme. Bring everything to a gentle boil, then decrease to a simmer. Allow the mixture to simmer until reduced.

Step 9: In the meantime, bake the pork chops for about 10 to 15 minutes. Place the pork chops back into the skillet and spoon the sauce over. If using thinner (about 3/4-inch pork chops), you can cook them in the sauce instead.

Step 10: Add the cheese on top of each pork chop and allow the cheese to melt in the oven. Alternatively, you can tent the dish with foil to melt the cheese. This step is optional but recommended.

Notes

Once the internal temperature of the chops reaches 145 degrees, the pork chops are done. You can replace wine with chicken or beef broth. If using thinner pork chops, you can add them to the skillet once the chicken broth has been added and cook them right in the skillet.
August 26, 2022 0 comment
0 FacebookTwitterPinterestEmail
General Recipes

Marinated Grilled Shrimp

by Rebecca August 26, 2022
written by Rebecca

Prep time: 15 mins | Cook time: 5 mins | Additional time: 30 mins | Total time: 50 mins | Servings: 6

This is a superb recipe that guarantees the best marinated grilled shrimp! Super delicious, easy, and quick to make, you do not even need cocktail sauce. To make this even easier, use frozen shrimp. I do prefer fresh shrimp, but you can use frozen if that is what is available. You can easily make this marinated grilled shrimp using your indoor electric grill if grilling outdoors is not possible. Serve this amazing, flavor-packed grilled shrimp with a baked potato, salad, and garlic bread. I am pretty sure everyone will be fighting for the last piece!

These grilled shrimps are very nice! They have an outstanding flavor that everyone is always raving about. This recipe is very versatile. You can adjust or add ingredients to suit your taste. I love these grilled shrimps as they are, but do not be afraid to experiment. One thing is for sure, fresh basil is a must so make sure not to skip it!

Ingredients

2 lbs fresh shrimp, peeled and deveined

⅓ c. olive oil

3 cloves garlic, minced

½ tsp salt

2 tbsp red wine vinegar

2 tbsp chopped fresh basil

¼ tsp cayenne pepper

6 each skewer

¼ c. tomato sauce

How to make Marinated Grilled Shrimp

Step 1: In a large bowl, place the olive oil, tomato sauce, garlic, and red wine vinegar. Mix well until blended and season with basil, salt, and cayenne pepper. Next, add the shrimp and toss until evenly coated. Cover the bowl and keep in the fridge for at least 30 minutes to an hour, stirring once or twice.

Step 2: Prepare the grill. Preheat it to medium and lightly grease the grate.

Step 3: Onto the skewers, thread the shrimp. Pierce the shrimp once near the tail and once near the head. When done, discard the marinade.

Step 4: On the preheated grill, cook the shrimp for about 2 to 3 minutes on each side until opaque.

Nutrition Facts:

Per Serving:

273 calories; protein 31g; carbohydrates 2.8g; fat 14.7g; cholesterol 230mg; sodium 471.8mg.

Marinated Grilled Shrimp

Rebecca Prep time: 15 mins | Cook time: 5 mins | Additional time: 30 mins | Total time: 50 mins | Servings: 6 This is a superb recipe that guarantees the… General Recipes Marinated Grilled Shrimp European Print This
Serves: 6 Prep Time: 15 mins Cooking Time: 35 mins 35 mins
Nutrition facts: 273 calories 14.7 fat
Rating: 5.0/5
( 1 voted )

Ingredients

  • 2 lbs fresh shrimp, peeled and deveined
  • ⅓ c. olive oil
  • 3 cloves garlic, minced
  • ½ tsp salt
  • 2 tbsp red wine vinegar
  • 2 tbsp chopped fresh basil
  • ¼ tsp cayenne pepper
  • 6 each skewer
  • ¼ c. tomato sauce

Instructions

Step 1: In a large bowl, place the olive oil, tomato sauce, garlic, and red wine vinegar. Mix well until blended and season with basil, salt, and cayenne pepper. Next, add the shrimp and toss until evenly coated. Cover the bowl and keep in the fridge for at least 30 minutes to an hour, stirring once or twice.

Step 2: Prepare the grill. Preheat it to medium and lightly grease the grate.

Step 3: Onto the skewers, thread the shrimp. Pierce the shrimp once near the tail and once near the head. When done, discard the marinade.

Step 4: On the preheated grill, cook the shrimp for about 2 to 3 minutes on each side until opaque.

August 26, 2022 0 comment
0 FacebookTwitterPinterestEmail
General Recipes

Seafood Gumbo

by Rebecca August 25, 2022
written by Rebecca

PREP TIME: 20 mins | COOK TIME: 2 hrs 10 mins | TOTAL TIME: 2 hrs 30 mins | SERVINGS: 10

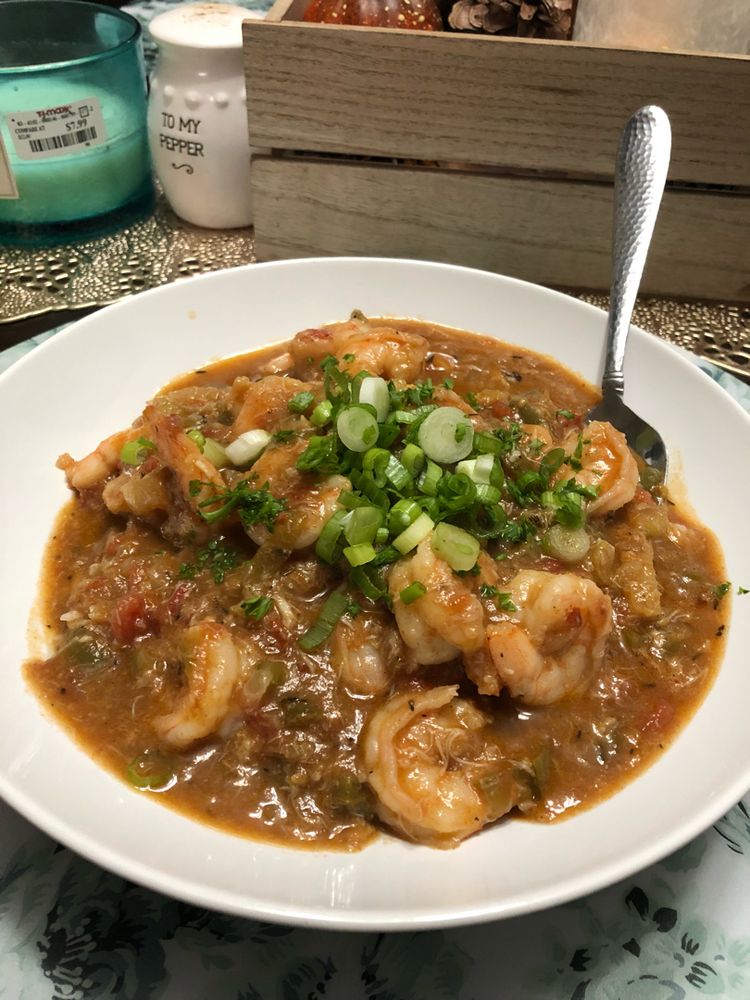
This Seafood Gumbo is an excellent dish packed with shrimp and crab. Super delicious with a nice spicy kick. Serve this with rice for an easy and quick meal anytime!

Ingredients

1 lb andouille sausage, sliced

1 lb lump crabmeat

1/2 c. vegetable oil

1/2 c. butter, divided

2 lbs unpeeled fresh large shrimp

2 (32 oz.) cartons of chicken broth

1 c. all-purpose flour

1 c. finely chopped green bell pepper

2 c. finely chopped yellow onion

1 c. finely chopped celery

2 tbsp minced garlic

2 tsp Worcestershire sauce

1 tbsp Cajun seasoning

1 tsp dried thyme

1/2 c. green onion tops

1 (12 oz.) bottle of amber beer

1/4 c. chopped fresh parsley

Cooked rice for serving

2 bay leaves

How to make Seafood Gumbo

Step 1: In a large pot, place the peeled and deveined shrimp. Keep in the fridge until needed.

Step 2: Melt 1/4 c. butter in a large pot over medium heat. Once the butter has melted, add the shrimp shells and cook until pink. Then, pour in the broth. Bring to a boil, then decrease the heat. Let everything simmer for about 15 minutes. Take off the heat and keep the broth warm until needed.

Step 3: Cook the sausage in a large Dutch oven until browned. Set the cooked sausage aside when done.

Step 4: To the Dutch oven, add the oil and the rest of the 1.4 c butter. Melt the butter over medium heat. Then, add the flour and whisk well using a wooden spoon until smooth.

Step 5: Adjust the heat to medium-low and cook for about 30 to 40 minutes until the roux is dark caramel, stirring often. Next, add the onion and continue to cook for additional 5 minutes, stirring occasionally.

Step 6: Next, add the green pepper along with the celery. Continue to cook for additional 5 minutes, stirring often. Add the garlic and cook for another minute. Pour in the beer and stir well.

Step 7: Through a fine-meshed sieve, pour the shrimp stock into the Dutch oven. Add the Cajun seasoning along with the Worcestershire sauce, thyme, and bay leaves. Then, add the andouille sausage. Bring everything to a boil, then adjust the heat to medium-low. Put the lid on and simmer for 1 1/2 hours.

Step 8: Next, add the green onions along with parsley and shrimp. Once the shrimps are pink, take the pot off the heat and stir in the crab meat.

Step 9: Serve the Seafood Gumbo right away with white rice. Enjoy!

Seafood Gumbo

Rebecca PREP TIME: 20 mins | COOK TIME: 2 hrs 10 mins | TOTAL TIME: 2 hrs 30 mins | SERVINGS: 10 This Seafood Gumbo is an excellent dish packed with… General Recipes Seafood Gumbo European Print This
Serves: 10 Prep Time: 20 mins Cooking Time: 2 hrs 10 mins 2 hrs 10 mins
Nutrition facts: 200 calories 20 grams fat
Rating: 5.0/5
( 1 voted )

Ingredients

  • 1 lb andouille sausage, sliced
  • 1 lb lump crabmeat
  • 1/2 c. vegetable oil
  • 1/2 c. butter, divided
  • 2 lbs unpeeled fresh large shrimp
  • 2 (32 oz.) cartons of chicken broth
  • 1 c. all-purpose flour
  • 1 c. finely chopped green bell pepper
  • 2 c. finely chopped yellow onion
  • 1 c. finely chopped celery
  • 2 tbsp minced garlic
  • 2 tsp Worcestershire sauce
  • 1 tbsp Cajun seasoning
  • 1 tsp dried thyme
  • 1/2 c. green onion tops
  • 1 (12 oz.) bottle of amber beer
  • 1/4 c. chopped fresh parsley
  • Cooked rice for serving
  • 2 bay leaves

Instructions

Step 1: In a large pot, place the peeled and deveined shrimp. Keep in the fridge until needed.

Step 2: Melt 1/4 c. butter in a large pot over medium heat. Once the butter has melted, add the shrimp shells and cook until pink. Then, pour in the broth. Bring to a boil, then decrease the heat. Let everything simmer for about 15 minutes. Take off the heat and keep the broth warm until needed.

Step 3: Cook the sausage in a large Dutch oven until browned. Set the cooked sausage aside when done.

Step 4: To the Dutch oven, add the oil and the rest of the 1.4 c butter. Melt the butter over medium heat. Then, add the flour and whisk well using a wooden spoon until smooth.

Step 5: Adjust the heat to medium-low and cook for about 30 to 40 minutes until the roux is dark caramel, stirring often. Next, add the onion and continue to cook for additional 5 minutes, stirring occasionally.

Step 6: Next, add the green pepper along with the celery. Continue to cook for additional 5 minutes, stirring often. Add the garlic and cook for another minute. Pour in the beer and stir well.

Step 7: Through a fine-meshed sieve, pour the shrimp stock into the Dutch oven. Add the Cajun seasoning along with the Worcestershire sauce, thyme, and bay leaves. Then, add the andouille sausage. Bring everything to a boil, then adjust the heat to medium-low. Put the lid on and simmer for 1 1/2 hours.

Step 8: Next, add the green onions along with parsley and shrimp. Once the shrimps are pink, take the pot off the heat and stir in the crab meat.

Step 9: Serve the Seafood Gumbo right away with white rice. Enjoy!

August 25, 2022 0 comment
0 FacebookTwitterPinterestEmail
General Recipes

Best Banana Bread Recipe with Sour Cream

by Rebecca August 25, 2022
written by Rebecca

Prep time: 15 mins | Cook time: 55 mins | Total time: 1 hr 10 mins | Servings: 12

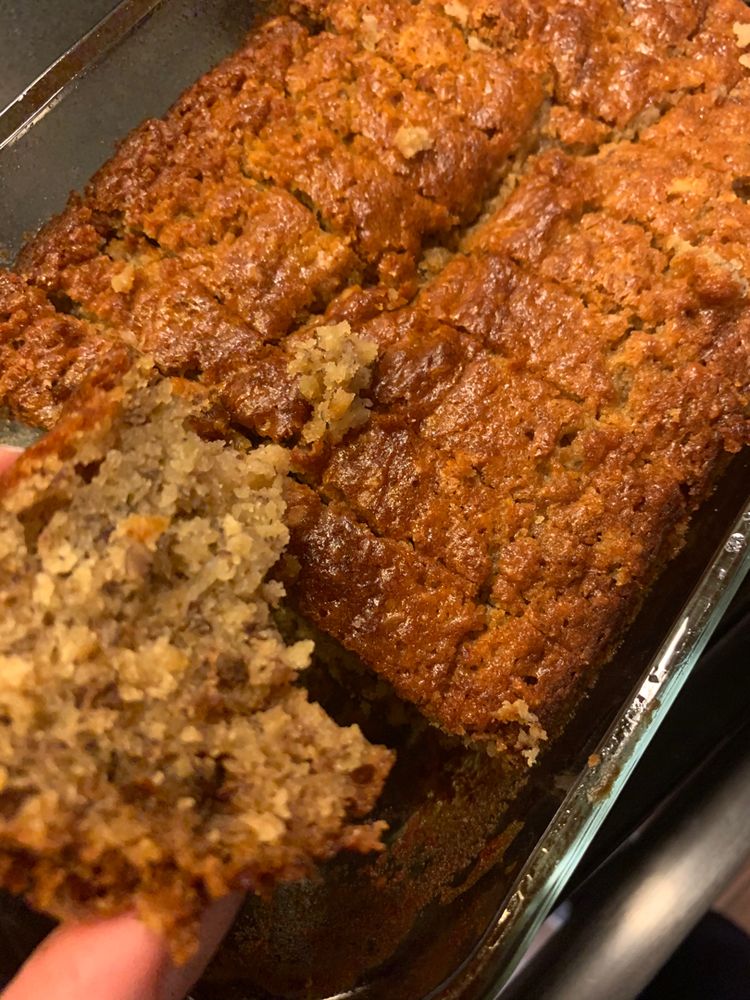
I love banana bread! I have tried different banana bread recipes, but this one is the best! It is a simple recipe that guarantees a super moist and excellently fluffy loaf that is bursting with tons of banana flavor!

Ingredients

2 large eggs

1/2 c. butter, 1 stick, softened

1/2 c. granulated sugar

2 tsp vanilla extract

1 c. mashed ripe banana, 9 oz., about 2 and 1/2 medium bananas

1 c. all-purpose flour, spooned and leveled

1/2 c. brown sugar, packed

1/2 c. old-fashioned oats, blended into a powder

2 & 1/2 tsp baking powder

1/2 c. sour cream

3/4 tsp kosher salt

1 tsp baking soda

1/4 tsp cinnamon, optional

1/2 to 3/4 c. toasted pecans or walnuts, optional

1/8 tsp nutmeg, optional

1/8 tsp cloves, optional

How to make the Best Banana Bread with Sour Cream

Step 1: Prepare the oven. Preheat it to 350 degrees F. Using a nonstick spray, grease a 9 x 5-inch loaf pan. Or you can simply line the pan with parchment paper.

Step 2: At this point, you can toast the nuts (if using) and let them cool. To do this, add 1/3 or 3/4 c chopped nuts (you can use walnuts or pecans) to a dry baking sheet. Place in the oven and bake for about 5 to 7 minutes at 350 degrees, stirring every 2 minutes. Once aromatic the nuts are done. Remove from the oven and set aside to cool.

Step 3: Place the butter in a large bowl or stand mixer. Beat until smooth, scraping the sides of the bowl. Then, add half c brown sugar along with half c, white sugar. Beat for about 2 minutes or until fluffy. Make sure to scrape the sides and bottom of the bowl.

Step 4: Next, add 2 eggs along with 2 tsp vanilla. Beat well until blended, scraping the sides of the bowl.

Step 5: Place about 2 1/2 very ripe bananas into a small bowl. Mash the bananas using a fork or potato masher. You can make about 1 c of mashed ripe bananas. To the butter mixer, add the mashed bananas and fold in until blended.

Step 6: To the bowl, add 1 c flour. DO NOT SIR yet.

Step 7: To a blender or food processor, add half c old-fashioned oats. Blend until the oats turned into powder. To the bowl, add the oat flour. DO NOT STIR.

Step 8: Into the flour, add 1 tsp baking soda, 2 1/2 tsp baking powder, and 3/4 tsp kosher salt. Stir well until the clumps are gone. Then, add 1/4 tsp cinnamon and 1/8 tsp of each clove and nutmeg.

Step 9: Into the wet ingredients, combine the dry ingredients until well blended, scraping the sides and bottom of the bowl. Then, fold in half c sour cream.

Step 10: If using nuts, fold them into the batter now and make sure to reserve at least 1/4 c. to sprinkle on top of the bread before baking.

Step 11: Into the prepared pan, pour the batter, and smooth the top out.

Step 12: Place in the preheated oven and bake for about 55 to 65 minutes or until a toothpick inserted in the middle of the bread comes out clean. The bread is done when the top is brown and pulled away from the sides of the pan.

Step 13: Remove from the oven when done and onto a cooling rack. Allow the bread to cool completely. This takes about 20 minutes or so. Slice and serve with butter. Enjoy!

Notes:

You can keep the bread for up to 2 days on the counter, covered.

To freeze, wrap the whole loaf in foil and place in a Ziplock. If desired, you can freeze the individual portions of the loaf. On the counter, thaw the frozen loaf. To get rid of the extra moisture, toast the thawed slices for a minute before serving.

Nutrition Facts:

Serving: 1 slice, calories: 257 kcal, carbohydrates: 32 g, protein: 3 g, fat: 14 g, saturated fat: 7 g, polyunsaturated fat: 2 g, monounsaturated fat: 5 g, trans fat: 1 g, cholesterol: 53 mg, sodium: 414 mg, potassium: 125 mg, fiber: 1 g, sugar: 19 g, vitamin a: 346 iu, vitamin c: 1 mg, calcium: 81 mg, iron: 1 mg

Best Banana Bread Recipe with Sour Cream

Rebecca Prep time: 15 mins | Cook time: 55 mins | Total time: 1 hr 10 mins | Servings: 12 I love banana bread! I have tried different banana bread recipes,… General Recipes Best Banana Bread Recipe with Sour Cream European Print This
Serves: 12 Prep Time: 15 mins Cooking Time: 55 mins 55 mins
Nutrition facts: 257 calories 14 fat
Rating: 5.0/5
( 1 voted )

Ingredients

  • 2 large eggs
  • 1/2 c. butter, 1 stick, softened
  • 1/2 c. granulated sugar
  • 2 tsp vanilla extract
  • 1 c. mashed ripe banana, 9 oz., about 2 and 1/2 medium bananas
  • 1 c. all-purpose flour, spooned and leveled
  • 1/2 c. brown sugar, packed
  • 1/2 c. old-fashioned oats, blended into a powder
  • 2 & 1/2 tsp baking powder
  • 1/2 c. sour cream
  • 3/4 tsp kosher salt
  • 1 tsp baking soda
  • 1/4 tsp cinnamon, optional
  • 1/2 to 3/4 c. toasted pecans or walnuts, optional
  • 1/8 tsp nutmeg, optional
  • 1/8 tsp cloves, optional

Instructions

Step 1: Prepare the oven. Preheat it to 350 degrees F. Using a nonstick spray, grease a 9 x 5-inch loaf pan. Or you can simply line the pan with parchment paper.

Step 2: At this point, you can toast the nuts (if using) and let them cool. To do this, add 1/3 or 3/4 c chopped nuts (you can use walnuts or pecans) to a dry baking sheet. Place in the oven and bake for about 5 to 7 minutes at 350 degrees, stirring every 2 minutes. Once aromatic the nuts are done. Remove from the oven and set aside to cool.

Step 3: Place the butter in a large bowl or stand mixer. Beat until smooth, scraping the sides of the bowl. Then, add half c brown sugar along with half c, white sugar. Beat for about 2 minutes or until fluffy. Make sure to scrape the sides and bottom of the bowl.

Step 4: Next, add 2 eggs along with 2 tsp vanilla. Beat well until blended, scraping the sides of the bowl.

Step 5: Place about 2 1/2 very ripe bananas into a small bowl. Mash the bananas using a fork or potato masher. You can make about 1 c of mashed ripe bananas. To the butter mixer, add the mashed bananas and fold in until blended.

Step 6: To the bowl, add 1 c flour. DO NOT SIR yet.

Step 7: To a blender or food processor, add half c old-fashioned oats. Blend until the oats turned into powder. To the bowl, add the oat flour. DO NOT STIR.

Step 8: Into the flour, add 1 tsp baking soda, 2 1/2 tsp baking powder, and 3/4 tsp kosher salt. Stir well until the clumps are gone. Then, add 1/4 tsp cinnamon and 1/8 tsp of each clove and nutmeg.

Step 9: Into the wet ingredients, combine the dry ingredients until well blended, scraping the sides and bottom of the bowl. Then, fold in half c sour cream.

Step 10: If using nuts, fold them into the batter now and make sure to reserve at least 1/4 c. to sprinkle on top of the bread before baking.

Step 11: Into the prepared pan, pour the batter, and smooth the top out.

Step 12: Place in the preheated oven and bake for about 55 to 65 minutes or until a toothpick inserted in the middle of the bread comes out clean. The bread is done when the top is brown and pulled away from the sides of the pan.

Step 13: Remove from the oven when done and onto a cooling rack. Allow the bread to cool completely. This takes about 20 minutes or so. Slice and serve with butter. Enjoy!

Notes

You can keep the bread for up to 2 days on the counter, covered. To freeze, wrap the whole loaf in foil and place in a Ziplock. If desired, you can freeze the individual portions of the loaf. On the counter, thaw the frozen loaf. To get rid of the extra moisture, toast the thawed slices for a minute before serving.

August 25, 2022 0 comment
0 FacebookTwitterPinterestEmail
General Recipes

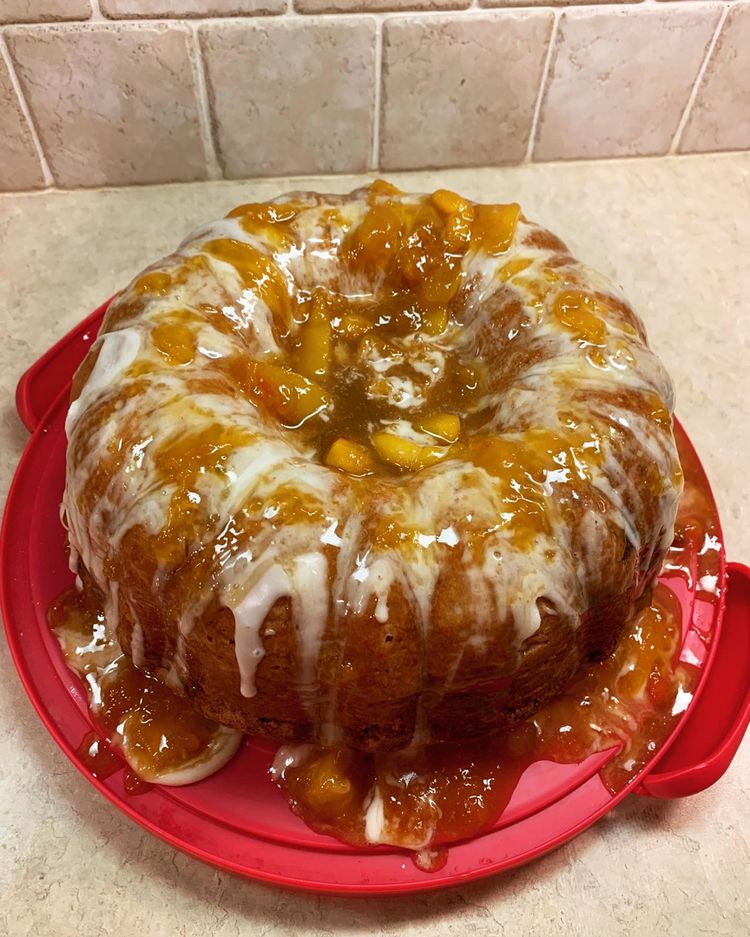
Southern Peach Pound Cake

by Rebecca August 25, 2022
written by Rebecca

Cook time: 1 HR 8 MINS | Total time: 1 HR 8 MINS | Servings: 1 CAKE

This is a decadent cake with a velvety soft finish and bursting with authentic peach flavor. It is the perfect treat for all peach lovers. Also, an amazing option if you have a surplus of peaches. Serve a slice with a big scoop of vanilla ice cream and some sliced peaches on the side for the ultimate dessert everyone will love!

Ingredients

5 eggs, room temperature

1 1/2 c. butter, 3 sticks

3 c. all-purpose flour, sifted

3 c. granulated sugar

2 tsp vanilla extract

1 tsp baking powder

1/2 c. sour cream

1 pound frozen sliced peaches, thawed, lightly pureed (I used a little over 2 1/4 c.)

zest of 1 lemon

1 c. confectioners sugar

1/2 tsp salt

1 tbsp milk, make need more

1/2 tsp vanilla extract

How to make Southern Peach Pound Cake

Step 1: Prepare the oven. Preheat it to 325 degrees F.

Step 2: Ready a bundt pan. Grease, flour, and set aside.

Step 3: Cream the butter and sugar, then whisk in the eggs, one piece at a time. Add the vanilla extract and stir well.

Step 4: Sift the flour, baking powder, and salt. To the wet ingredients, add the dry ingredients. Then, stir in the sour cream. Next, fold in the lemon zest along with the peaches.

Step 5: Into the prepared pan, spoon the batter. Place in the preheated oven and bake for about 1 hour and 8 to 10 minutes.

Step 6: Remove from the oven when done and allow the cake to cool in the pan. Then, transfer the cake to a cooling rack to finish cooling.

Step 7: In a bowl, whisk the powdered sugar, vanilla, and milk until well blended. You can add enough milk to get a glaze consistency.

Step 8: On top of the cake, drizzle the glaze and let it harden before slicing the cake. Serve a slice with a scoop of vanilla ice cream and some sliced peaches. Enjoy!

Southern Peach Pound Cake

Rebecca Cook time: 1 HR 8 MINS | Total time: 1 HR 8 MINS | Servings: 1 CAKE This is a decadent cake with a velvety soft finish and bursting with… General Recipes Southern Peach Pound Cake European Print This
Cooking Time: 1 hr 8 mins 1 hr 8 mins
Nutrition facts: 200 calories 20 grams fat
Rating: 5.0/5
( 1 voted )

Ingredients

  • 5 eggs, room temperature
  • 1 1/2 c. butter, 3 sticks
  • 3 c. all-purpose flour, sifted
  • 3 c. granulated sugar
  • 2 tsp vanilla extract
  • 1 tsp baking powder
  • 1/2 c. sour cream
  • 1 pound frozen sliced peaches, thawed, lightly pureed (I used a little over 2 1/4 c.)
  • zest of 1 lemon
  • 1 c. confectioners sugar
  • 1/2 tsp salt
  • 1 tbsp milk, make need more
  • 1/2 tsp vanilla extract

Instructions

Step 1: Prepare the oven. Preheat it to 325 degrees F.

Step 2: Ready a bundt pan. Grease, flour, and set aside.

Step 3: Cream the butter and sugar, then whisk in the eggs, one piece at a time. Add the vanilla extract and stir well.

Step 4: Sift the flour, baking powder, and salt. To the wet ingredients, add the dry ingredients. Then, stir in the sour cream. Next, fold in the lemon zest along with the peaches.

Step 5: Into the prepared pan, spoon the batter. Place in the preheated oven and bake for about 1 hour and 8 to 10 minutes.

Step 6: Remove from the oven when done and allow the cake to cool in the pan. Then, transfer the cake to a cooling rack to finish cooling.

Step 7: In a bowl, whisk the powdered sugar, vanilla, and milk until well blended. You can add enough milk to get a glaze consistency.

Step 8: On top of the cake, drizzle the glaze and let it harden before slicing the cake. Serve a slice with a scoop of vanilla ice cream and some sliced peaches. Enjoy!

August 25, 2022 0 comment
0 FacebookTwitterPinterestEmail
General Recipes

Amaretto-Almond Pound Cake

by Rebecca August 25, 2022
written by Rebecca

Total time: 3 hrs 5 mins | Yield: 12 servings

This delightful Amaretto-Almond Pound Cake is a decadent cake perfect for all occasions! Moist, rich, and luscious almond-flavored pound cake drizzled with a simple homemade amaretto glaze. Give the glaze a chance to soak into the cake before you spoon the rest until the glaze is all used. I make sure to make the extra glaze so I have more to drizzle on top of the cake. This cake is just delicious!

Ingredients

6 large eggs

1 ¼ c. butter, softened

1 tbsp vanilla extract

1 (3 ounces) package of cream cheese, softened

3 tbsp almond liqueur

2 ½ c. all-purpose flour

⅓ c. sliced almonds

Amaretto Glaze

2 ½ c. sugar

How to make Amaretto-Almond Pound Cake

Step 1: Prepare the oven. Preheat it to 325 degrees.

Step 2: Using a heavy-duty electric stand mixer, beat the butter and cream cheese at medium speed until creamy. Slowly add in the sugar, beating until light and fluffy. Next, add the liqueur and vanilla. Beat until just combined. To the butter mixture, slowly add the flour, beating at low speed every after each addition until combined.

Step 3: Beat in the egg, one at a time at low speed until incorporated.

Step 4: On the bottom of a greased and floured 12-cup Bundt pan, sprinkle the almonds, then pour the batter over.

Step 5: Place in the preheated oven and bake for about 1 hour and 5 minutes to 1 hour and 10 minutes or until a toothpick inserted in the middle of the cake comes out clean.

Step 6: Ready the Amaretto Glaze during the last 10 minutes of baking the cake.

Step 7: Take the cake out of the oven when done and slowly spoon the hot Amaretto Glaze over the cake in the pan. Do this until all of the glazes are used, letting the glaze soak into the cake. Allow the cake to cool completely in the pan on a wire rack. This takes about 1 hour and 30 minutes.

Amaretto-Almond Pound Cake

Rebecca Total time: 3 hrs 5 mins | Yield: 12 servings This delightful Amaretto-Almond Pound Cake is a decadent cake perfect for all occasions! Moist, rich, and luscious almond-flavored pound cake… General Recipes Amaretto-Almond Pound Cake European Print This
Serves: 12
Nutrition facts: 200 calories 20 grams fat
Rating: 5.0/5
( 1 voted )

Ingredients

  • 6 large eggs
  • 1 ¼ c. butter, softened
  • 1 tbsp vanilla extract
  • 1 (3 ounces) package of cream cheese, softened
  • 3 tbsp almond liqueur
  • 2 ½ c. all-purpose flour
  • ⅓ c. sliced almonds
  • Amaretto Glaze
  • 2 ½ c. sugar

Instructions

Step 1: Prepare the oven. Preheat it to 325 degrees.

Step 2: Using a heavy-duty electric stand mixer, beat the butter and cream cheese at medium speed until creamy. Slowly add in the sugar, beating until light and fluffy. Next, add the liqueur and vanilla. Beat until just combined. To the butter mixture, slowly add the flour, beating at low speed every after each addition until combined.

Step 3: Beat in the egg, one at a time at low speed until incorporated.

Step 4: On the bottom of a greased and floured 12-cup Bundt pan, sprinkle the almonds, then pour the batter over.

Step 5: Place in the preheated oven and bake for about 1 hour and 5 minutes to 1 hour and 10 minutes or until a toothpick inserted in the middle of the cake comes out clean.

Step 6: Ready the Amaretto Glaze during the last 10 minutes of baking the cake.

Step 7: Take the cake out of the oven when done and slowly spoon the hot Amaretto Glaze over the cake in the pan. Do this until all of the glazes are used, letting the glaze soak into the cake. Allow the cake to cool completely in the pan on a wire rack. This takes about 1 hour and 30 minutes.

August 25, 2022 0 comment
0 FacebookTwitterPinterestEmail
General Recipes

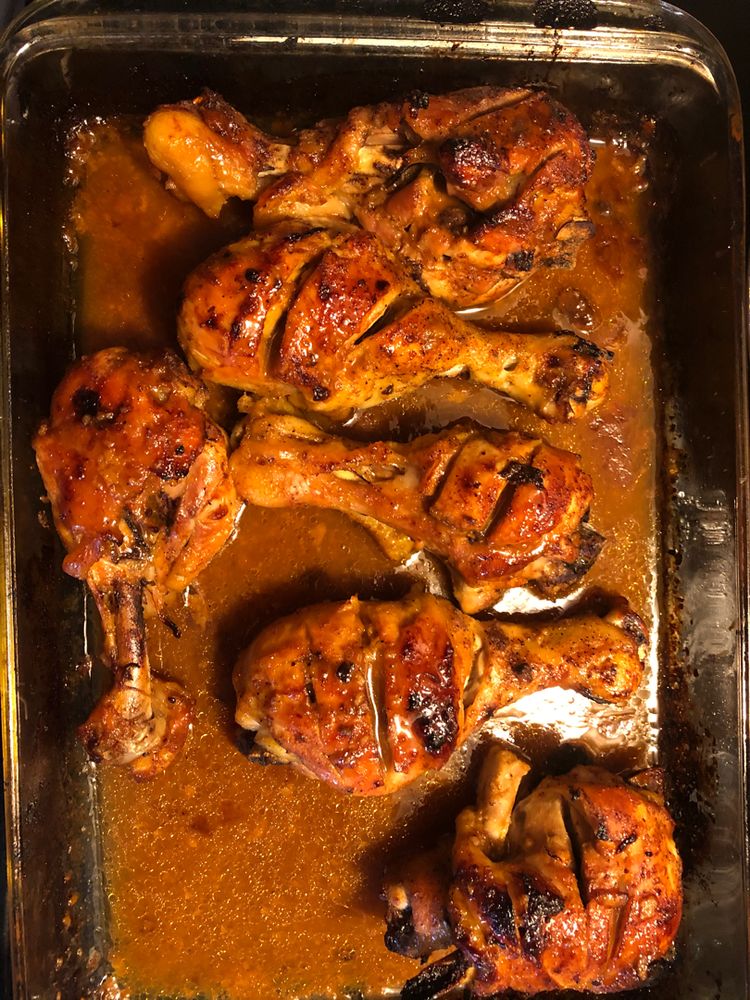
Honey Mustard Baked Chicken Drumsticks

by Rebecca August 25, 2022
written by Rebecca

Yield: 4 servings

These are the best Honey Mustard Bake Drumsticks! Juicy, crispy chicken with a tangy bite. This has been my family’s favorite for years! A regular on our weekly menu rotation. Incredibly easy to make using just a few simple ingredients. The chicken drumsticks are lightly seasoned with salt and pepper and clothed in a simple honey mustard combo, then baked to crispy perfection!

If you love chicken drumsticks, you’ll surely enjoy this easy recipe. It is one of the easiest and quickest chicken recipe that guarantee superb results all the time! These Honey Mustard Bake Drumsticks not only taste great but smell so good, too! And yes, we used two varieties of mustard (whole grain Dijon mustard and Dijon mustard) and this makes this dish a whole lot better!

Ingredients

1/3 c. raw honey

2 tablespoons Dijon mustard

1 teaspoon onion powder

1 teaspoon garlic powder

12 chicken drumsticks, about 1 1/2 pounds

2 teaspoons smoked paprika

2 tablespoons whole grain Dijon mustard

a small handful of fresh parsley leaves, chopped as garnish

sea salt and fresh ground black pepper, to taste (about a 1/8-1/4 tsp each)

How to make Honey Mustard Baked Chicken Drumsticks

Step 1: Prepare the oven. Preheat it to 375 degrees F. Using cooking oil, lightly grease a large baking dish. Using paper towels, pat dry the chicken drumsticks.

Step 2: Into the prepared baking dish, place the chicken drumsticks and season with salt and pepper.

Step 3: Place the mustard, honey, paprika and garlic, and onion powder in a small bowl. Mix well until combined. Over the chicken, evenly pour the mixture and gently toss.

Step 4: Place in the preheated oven and bake for about 35 to 40 minutes or until the internal temperature of the chicken reaches 165 degrees. For a nice glaze on top, broil the chicken for about 2 to 3 minutes until crisp.

Step 5: Take the chicken out of the oven when done and serve right away garnish with parsley (optional). Enjoy!

Honey Mustard Baked Chicken Drumsticks

Rebecca Yield: 4 servings These are the best Honey Mustard Bake Drumsticks! Juicy, crispy chicken with a tangy bite. This has been my family’s favorite for years! A regular on our… General Recipes Honey Mustard Baked Chicken Drumsticks European Print This
Serves: 4
Nutrition facts: 200 calories 20 grams fat
Rating: 5.0/5
( 1 voted )

Ingredients

  • 1/3 c. raw honey
  • 2 tablespoons Dijon mustard
  • 1 teaspoon onion powder
  • 1 teaspoon garlic powder
  • 12 chicken drumsticks, about 1 1/2 pounds
  • 2 teaspoons smoked paprika
  • 2 tablespoons whole grain Dijon mustard
  • a small handful of fresh parsley leaves, chopped as garnish
  • sea salt and fresh ground black pepper, to taste (about a 1/8-1/4 tsp each)

Instructions

Step 1: Prepare the oven. Preheat it to 375 degrees F. Using cooking oil, lightly grease a large baking dish. Using paper towels, pat dry the chicken drumsticks.

Step 2: Into the prepared baking dish, place the chicken drumsticks and season with salt and pepper.

Step 3: Place the mustard, honey, paprika and garlic, and onion powder in a small bowl. Mix well until combined. Over the chicken, evenly pour the mixture and gently toss.

Step 4: Place in the preheated oven and bake for about 35 to 40 minutes or until the internal temperature of the chicken reaches 165 degrees. For a nice glaze on top, broil the chicken for about 2 to 3 minutes until crisp.

Step 5: Take the chicken out of the oven when done and serve right away with garnish.

August 25, 2022 0 comment
0 FacebookTwitterPinterestEmail
General Recipes

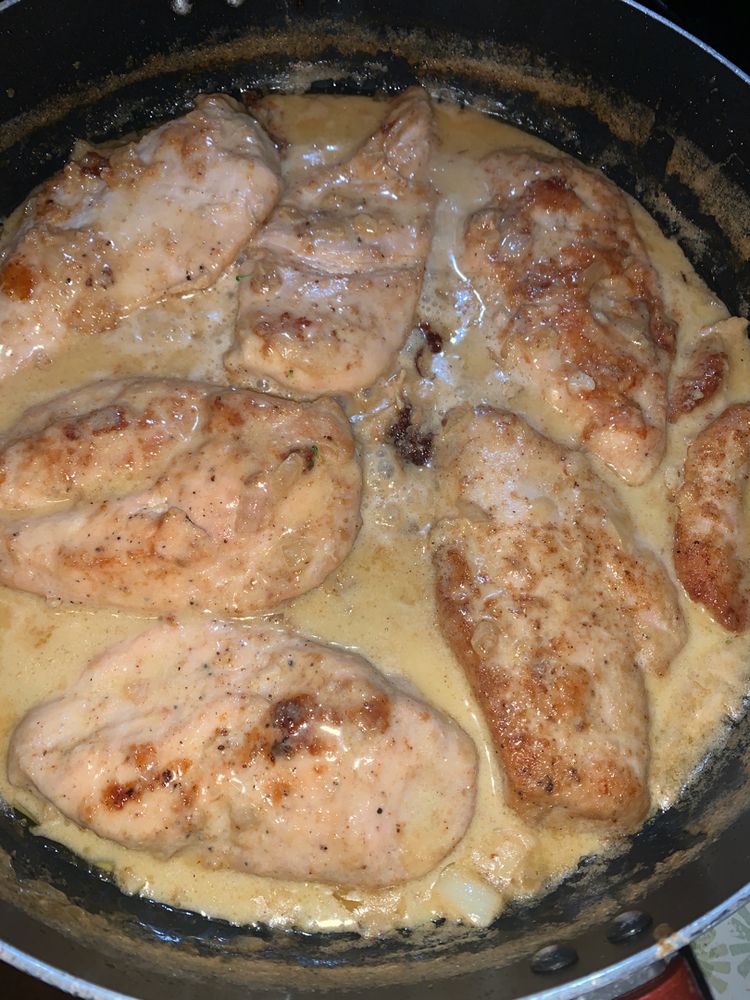
Creamy Garlic Chicken

by Rebecca August 25, 2022
written by Rebecca

PREP TIME: 10 mins | COOK TIME: 20 mins | TOTAL TIME: 30 mins | SERVINGS: 4

Easy and quick. This luscious, creamy garlic chicken is another amazing weeknight dinner option that you can make at home any time without a fuss. Juicy, tender chicken breasts smothered in an irresistible creamy garlic sauce. This dish is a must especially if the chicken is a staple at your home and you are a garlic lover. Enjoy this comforting, creamy garlic chicken with mashed potatoes and green beans on the side for a simple yet filling meal that your entire family will love!

INGREDIENTS

1 tbsp olive oil

2 large chicken breasts, cut in half lengthwise

1 whole head of garlic, cloves peeled

2 tbsp butter, divided

1/2 c. chicken broth or stock

1/4 tsp garlic powder

1/2 tsp lemon juice

1 c. heavy/whipping cream

Flour for dredging

Parsley, chopped (optional)

Salt & pepper to taste

How to make Creamy Garlic Chicken

Step 1: In half lengthwise, slice the chicken to make 4 smaller cutlets. Sprinkle the cutlets with salt and pepper. Then, toss them in the flour until coated.

Step 2: Into a skillet, heat the olive oil and 1 tbsp butter. Add the chicken to the pan once hot and saute for about 4 to 5 minutes on each side until golden. Set the chicken aside when done.

Step 3: Adjust the heat to medium, then add the remaining butter to the pan. If using a cast iron, set the heat to medium-low. Allow the butter to melt, then add the garlic cloves. Cook for about 3 to 4 minutes until lightly browned. Make sure to stir often.

Step 4: Into the pan, add the chicken broth along with the lemon juice and garlic powder. Simmer for about 4 minutes or until the liquid has reduced.

Step 5: Next, add the cream and stir. Return the chicken to the pan and cook for additional 5 minutes or until the sauce has reduced and the chicken is completely cooked.

Step 6: Remove from the heat when done and serve the creamy garlic chicken right away garnished with some freshly chopped parsley. Enjoy!

NUTRITION FACTS:

Calories: 435 kcal, Carbohydrates: 6g, Protein: 26g, Fat: 34g, Saturated Fat: 18g, Cholesterol: 169mg, Sodium: 313mg, Potassium: 514mg, Fiber: 1g, Sugar: 1g, Vitamin A: 1083IU, Vitamin C: 6mg, Calcium: 57mg, Iron: 1mg

Creamy Garlic Chicken

Rebecca PREP TIME: 10 mins | COOK TIME: 20 mins | TOTAL TIME: 30 mins | SERVINGS: 4 Easy and quick. This luscious, creamy garlic chicken is another amazing weeknight dinner… General Recipes Creamy Garlic Chicken European Print This
Serves: 4 Prep Time: 10 mins Cooking Time: 20 mins 20 mins
Nutrition facts: 435 calories 34 fat
Rating: 5.0/5
( 1 voted )

Ingredients

  • 1 tbsp olive oil
  • 2 large chicken breasts, cut in half lengthwise
  • 1 whole head of garlic, cloves peeled
  • 2 tbsp butter, divided
  • 1/2 c. chicken broth or stock
  • 1/4 tsp garlic powder
  • 1/2 tsp lemon juice
  • 1 c. heavy/whipping cream
  • Flour for dredging
  • Parsley, chopped (optional)
  • Salt & pepper to taste

Instructions

Step 1: In half lengthwise, slice the chicken to make 4 smaller cutlets. Sprinkle the cutlets with salt and pepper. Then, toss them in the flour until coated.

Step 2: Into a skillet, heat the olive oil and 1 tbsp butter. Add the chicken to the pan once hot and saute for about 4 to 5 minutes on each side until golden. Set the chicken aside when done.

Step 3: Adjust the heat to medium, then add the remaining butter to the pan. If using a cast iron, set the heat to medium-low. Allow the butter to melt, then add the garlic cloves. Cook for about 3 to 4 minutes until lightly browned. Make sure to stir often.

Step 4: Into the pan, add the chicken broth along with the lemon juice and garlic powder. Simmer for about 4 minutes or until the liquid has reduced.

Step 5: Next, add the cream and stir. Return the chicken to the pan and cook for additional 5 minutes or until the sauce has reduced and the chicken is completely cooked.

Step 6: Remove from the heat when done and serve the creamy garlic chicken right away garnished with some freshly chopped parsley. Enjoy!

August 25, 2022 0 comment
0 FacebookTwitterPinterestEmail
General Recipes

Ginger Garlic Noodle Soup with Bok Choy

by Rebecca August 25, 2022
written by Rebecca

Prep Time: 5 mins | Cook Time: 15 mins | Total Time: 20 mins | Servings: 2

This nutritious Ginger Garlic Noodle Soup with Bok Choy is a very comforting dish that you can easily make at home in under twenty minutes. It is my favorite flu-fighting recipe made with homemade vegetarian broth, noodles, mushrooms, and baby bok choy. A versatile recipe that is perfect as is. If you desire, you can also add shrimp, chicken, some spicy chilies, or your preferred vegetables.

INGREDIENTS

3 shallots – diced

1 tbsp olive oil

4 cloves garlic – minced

1 bunch of green onions – chopped, green and white divided

2 tbsp ginger – fresh, minced

6 ounces rice noodles

5.5 c. low sodium chicken broth – or vegetable broth for vegan

2 whole star anise

10 ounces crimini mushrooms – sliced

2 tbsp soy sauce – or Tamari for a Gluten Free option

1.5 heads bok choy – roughly chopped

red pepper flakes – topping

sesame seeds – topping

How to make Ginger Garlic Noodle Soup with Bok Choy

Step 1: In a medium-sized stockpot, heat 1 to 2 tbsp olive oil over medium heat. Once the oil is hot, add the diced shallots to the pot. Stir and cook for about 4 to 5 minutes until the shallots are translucent and begin to soften.

Step 2: After chopping the end of each green onion, divide the white part from the green part. Chop and set aside. In the meantime, finely chop the white part of the green onion.

Step 3: To the shallots in the pot, add the white part of the green onions, minced garlic, and ginger. Cook for another 1 to 2 minutes, stirring often until the garlic and ginger are aromatic.

Step 4: Into the pot, pour in the chicken stock or water. Or you can add both. Bring to a simmer. Then, add the star anise along with the soy sauce. Put the lid on and simmer for about 10 minutes. Uncover and take/discard the star anise.

Step 5: To the pot, add the sliced mushrooms along with the uncooked noodles, and bok choy. Let everything simmer for an additional 5 to 8 minutes or until the noodles and bok choy are tender. At this point, season according to taste.

Step 6: Between bowls, divide the soup and garnish each serving with sesame seeds, the green parts of green onions, and red pepper flakes (optional). Serve and enjoy!

NUTRITIONAL FACTS:

Calories: 647kcal | Carbohydrates: 110g | Protein: 32g | Fat: 13g | Saturated Fat: 2g | Cholesterol: 0mg | Sodium: 1781mg | Potassium: 3055mg | Fiber: 10g | Sugar: 14g | Vitamin A: 28270IU | Vitamin C: 290.6mg | Calcium: 768mg | Iron: 9.1mg

Ginger Garlic Noodle Soup with Bok Choy

Rebecca Prep Time: 5 mins | Cook Time: 15 mins | Total Time: 20 mins | Servings: 2 This nutritious Ginger Garlic Noodle Soup with Bok Choy is a very comforting… General Recipes Ginger Garlic Noodle Soup with Bok Choy European Print This
Serves: 2 Prep Time: 5 mins Cooking Time: 15 mins 15 mins
Nutrition facts: 200 calories 20 grams fat
Rating: 5.0/5
( 1 voted )

Ingredients

  • 3 shallots - diced
  • 1 tbsp olive oil
  • 4 cloves garlic - minced
  • 1 bunch of green onions - chopped, green and white divided
  • 2 tbsp ginger - fresh, minced
  • 6 ounces rice noodles
  • 5.5 c. low sodium chicken broth - or vegetable broth for vegan
  • 2 whole star anise
  • 10 ounces crimini mushrooms - sliced
  • 2 tbsp soy sauce - or Tamari for a Gluten Free option
  • 1.5 heads bok choy - roughly chopped
  • red pepper flakes - topping
  • sesame seeds - topping

Instructions

Step 1: In a medium-sized stockpot, heat 1 to 2 tbsp olive oil over medium heat. Once the oil is hot, add the diced shallots to the pot. Stir and cook for about 4 to 5 minutes until the shallots are translucent and begin to soften.

Step 2: After chopping the end of each green onion, divide the white part from the green part. Chop and set aside. In the meantime, finely chop the white part of the green onion.

Step 3: To the shallots in the pot, add the white part of the green onions, minced garlic, and ginger. Cook for another 1 to 2 minutes, stirring often until the garlic and ginger are aromatic.

Step 4: Into the pot, pour in the chicken stock or water. Or you can add both. Bring to a simmer. Then, add the star anise along with the soy sauce. Put the lid on and simmer for about 10 minutes. Uncover and take/discard the star anise.

Step 5: To the pot, add the sliced mushrooms along with the uncooked noodles, and bok choy. Let everything simmer for an additional 5 to 8 minutes or until the noodles and bok choy are tender. At this point, season according to taste.

Step 6: Between bowls, divide the soup and garnish each serving with sesame seeds, the green parts of green onions, and red pepper flakes (optional). Serve and enjoy!

August 25, 2022 0 comment
0 FacebookTwitterPinterestEmail
General Recipes

Korean Chicken Bao

by Rebecca August 25, 2022
written by Rebecca

PREP TIME: 1 hr | COOK TIME: 30 mins | PROVING TIME: 2 hrs 30 mins | TOTAL TIME: 4 hrs

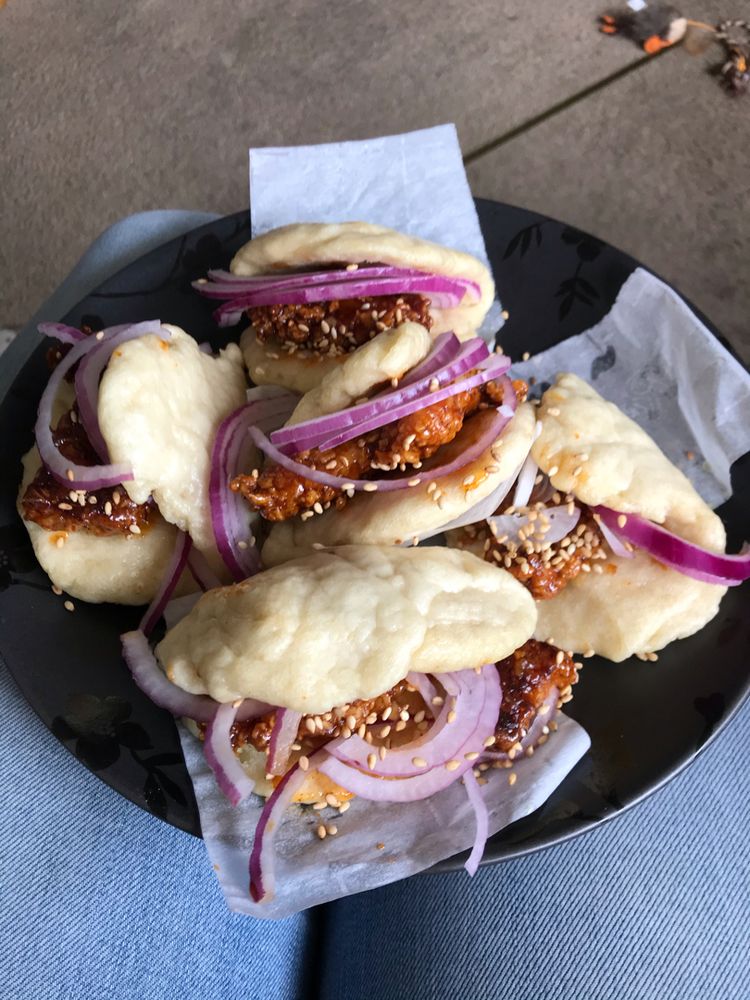
This Korean Chicken Bao is an impressive party food idea with soft and fluffy steamed bao buns stuffed with crispy Korean chicken. These are pretty impressive Korean Chicken Bao that everyone will be raving about!

INGREDIENTS

Bao Buns:

2 tablespoons caster sugar

3 ¾ c. (450 grams) plain (all-purpose) flour

½ teaspoon salt

3 tablespoons whole milk

3 tablespoons unsalted butter, very soft

¾ c. + 2 tablespoons (210ml altogether) warm water

1 tablespoon olive oil

2 teaspoons (equivalent to one packet or 7 grams) of instant dried yeast

Chicken and marinade:

¼ teaspoon garlic salt

4 chicken breasts, sliced into bite-size chunks

½ teaspoon salt

¼ teaspoon white pepper

1 c. (240ml) buttermilk

Crispy Coating:

vegetable oil for deep frying – at least 1 litre/4 c.

1 ½ c. (180 grams) plain (all-purpose) flour

1 teaspoon ground black pepper

1 teaspoon dried thyme

1 teaspoon baking powder

1 teaspoon paprika

1 teaspoon chili flakes

1 teaspoon salt

½ teaspoon garlic salt

½ teaspoon celery salt

Korean Sauce:

1 tablespoon vegetable oil

2 cloves garlic, peeled and minced

1 tablespoon sesame oil

2 tablespoons gochujang paste

2 tablespoons honey

4 tablespoons soy sauce

2 teaspoons minced ginger

4 tablespoons brown sugar

To Serve:

¼ cucumber – chopped into small pieces

1 small red onion – thinly sliced

2 teaspoons black and white sesame seeds

A small bunch of fresh coriander – cilantro, roughly chopped

How to make Korean Chicken Bao

Step 1: To make the bao buns, combine the flour, sugar, salt, and yeast in a bowl. To a jug, add the milk, warm water, and butter. Mix well until the butter has melted. Into the flour mixture, whisk in the liquid mixture using a spoon, then with your hands. Onto a floured surface, turn out the dough, and knead for about 10 minutes. Or do this in a mixer fitted with a dough hook. In an oiled bowl, place the dough and tent with a damp tea towel or cling film. Set aside for about 90 minutes to 2 hours until the size doubles.

Step 2: In the meantime, begin with the Korean Chicken. In a bowl, place the chicken and add the buttermilk. Season with salt, pepper, and garlic salt. Mix well, cover, and keep in the fridge for at least 1 hour.

Step 3: Onto a floured surface, tip out the dough after it has proved, and knead. Then, split the dough into 20 balls. On a work surface, lay a piece of baking parchment. One by one, roll each dough into about 6 x 9 cm. Oval using a rolling pin.

Step 4: With olive oil, brush the ovals. Using a chopstick in the middle, fold them over one by one, leaving a bit of space in the fold. Then, remove the chopstick. Onto a small piece of baking parchment, place each bun.

Step 5: On the trays, place the baking parchment with the buns. Using a cling film or carrier bag, cover each tray and leave the buns to prove for another hour until they puffed up.

Sep 6: Prepare the oven. Preheat it to low. In a large pan, heat about 4 litres of vegetable oil (or preheat a deep fat fryer).

Step 7: In a small bowl, whisk the crispy coating ingredients until combined. Remove the chicken from the fridge. Take 1 piece of chicken from the buttermilk and let the excess drop off. In the crispy coating mixture, dredge the chicken, coating it completely. Place the coated chicken on a tray and do the same for the rest of the chicken.

Step 8: Add about 10 to 12 pieces of chicken to the hot oil and cook for about 3 to 5 minutes or until golden brown and cooked in the center. Once the chicken is no longer pink in the middle once you cut it open, then the chicken is done.

Step 9: Transfer the cooked chicken to the tray in the oven to keep them warm. Repeat until all the chicken pieces are cooked.

Step 10: In the meantime, place the buns into the boiling large steamer pan. Steam the buns, then transfer them to a warm plate when done.

Step 11: To make the sauce, whisk the gochujang, honey, sugar, soy sauce, garlic, ginger, vegetable oil, and sesame oil in a saucepan. Bring the mixture to a boil, then let the sauce simmer for about 5 minutes until thickened.

Step 12: In a bowl, place the cooked chicken. Pour the sauce over and toss to coat. If preferred, you can slice the chicken up or leave the chunks whole.

Step 13: Open the steamed bao buns carefully, then stuff each with the Korean chicken. Garnish with red onion, cucumber, fresh coriander (cilantro), and sesame seeds. Enjoy!

NUTRITION FACTS:

Calories: 289 kcal, Carbohydrates: 32g, Protein: 14g, Fat: 11g, Saturated Fat: 7g, Cholesterol: 35mg, Sodium: 650mg, Potassium: 279mg, Fiber: 1g, Sugar: 7g, Vitamin A: 183IU, Vitamin C: 1mg, Calcium: 42mg, Iron: 2mg

Korean Chicken Bao

Rebecca PREP TIME: 1 hr | COOK TIME: 30 mins | PROVING TIME: 2 hrs 30 mins | TOTAL TIME: 4 hrs This Korean Chicken Bao is an impressive party food… General Recipes Korean Chicken Bao European Print This
Prep Time: 1 hr Cooking Time: 30 mins 30 mins
Nutrition facts: 289 calories 11 fat
Rating: 5.0/5
( 1 voted )

Ingredients

  • Bao Buns:
  • 2 tablespoons caster sugar
  • 3 ¾ c. (450 grams) plain (all-purpose) flour
  • ½ teaspoon salt
  • 3 tablespoons whole milk
  • 3 tablespoons unsalted butter, very soft
  • ¾ c. + 2 tablespoons (210ml altogether) warm water
  • 1 tablespoon olive oil
  • 2 teaspoons (equivalent to one packet or 7 grams) of instant dried yeast
  • Chicken and marinade:
  • ¼ teaspoon garlic salt
  • 4 chicken breasts, sliced into bite-size chunks
  • ½ teaspoon salt
  • ¼ teaspoon white pepper
  • 1 c. (240ml) buttermilk
  • Crispy Coating:
  • vegetable oil for deep frying - at least 1 litre/4 c.
  • 1 ½ c. (180 grams) plain (all-purpose) flour
  • 1 teaspoon ground black pepper
  • 1 teaspoon dried thyme
  • 1 teaspoon baking powder
  • 1 teaspoon paprika
  • 1 teaspoon chili flakes
  • 1 teaspoon salt
  • ½ teaspoon garlic salt
  • ½ teaspoon celery salt
  • Korean Sauce:
  • 1 tablespoon vegetable oil
  • 2 cloves garlic, peeled and minced
  • 1 tablespoon sesame oil
  • 2 tablespoons gochujang paste
  • 2 tablespoons honey
  • 4 tablespoons soy sauce
  • 2 teaspoons minced ginger
  • 4 tablespoons brown sugar
  • To Serve:
  • ¼ cucumber - chopped into small pieces
  • 1 small red onion - thinly sliced
  • 2 teaspoons black and white sesame seeds
  • A small bunch of fresh coriander - cilantro, roughly chopped

Instructions

Step 1: To make the bao buns, combine the flour, sugar, salt, and yeast in a bowl. To a jug, add the milk, warm water, and butter. Mix well until the butter has melted. Into the flour mixture, whisk in the liquid mixture using a spoon, then with your hands. Onto a floured surface, turn out the dough, and knead for about 10 minutes. Or do this in a mixer fitted with a dough hook. In an oiled bowl, place the dough and tent with a damp tea towel or cling film. Set aside for about 90 minutes to 2 hours until the size doubles.

Step 2: In the meantime, begin with the Korean Chicken. In a bowl, place the chicken and add the buttermilk. Season with salt, pepper, and garlic salt. Mix well, cover, and keep in the fridge for at least 1 hour.

Step 3: Onto a floured surface, tip out the dough after it has proved, and knead. Then, split the dough into 20 balls. On a work surface, lay a piece of baking parchment. One by one, roll each dough into about 6 x 9 cm. Oval using a rolling pin.

Step 4: With olive oil, brush the ovals. Using a chopstick in the middle, fold them over one by one, leaving a bit of space in the fold. Then, remove the chopstick. Onto a small piece of baking parchment, place each bun.

Step 5: On the trays, place the baking parchment with the buns. Using a cling film or carrier bag, cover each tray and leave the buns to prove for another hour until they puffed up.

Sep 6: Prepare the oven. Preheat it to low. In a large pan, heat about 4 litres of vegetable oil (or preheat a deep fat fryer).

Step 7: In a small bowl, whisk the crispy coating ingredients until combined. Remove the chicken from the fridge. Take 1 piece of chicken from the buttermilk and let the excess drop off. In the crispy coating mixture, dredge the chicken, coating it completely. Place the coated chicken on a tray and do the same for the rest of the chicken.

Step 8: Add about 10 to 12 pieces of chicken to the hot oil and cook for about 3 to 5 minutes or until golden brown and cooked in the center. Once the chicken is no longer pink in the middle once you cut it open, then the chicken is done.

Step 9: Transfer the cooked chicken to the tray in the oven to keep them warm. Repeat until all the chicken pieces are cooked.

Step 10: In the meantime, place the buns into the boiling large steamer pan. Steam the buns, then transfer them to a warm plate when done.

Step 11: To make the sauce, whisk the gochujang, honey, sugar, soy sauce, garlic, ginger, vegetable oil, and sesame oil in a saucepan. Bring the mixture to a boil, then let the sauce simmer for about 5 minutes until thickened.

Step 12: In a bowl, place the cooked chicken. Pour the sauce over and toss to coat. If preferred, you can slice the chicken up or leave the chunks whole.

Step 13: Open the steamed bao buns carefully, then stuff each with the Korean chicken. Garnish with red onion, cucumber, fresh coriander (cilantro), and sesame seeds. Enjoy!

August 25, 2022 0 comment
0 FacebookTwitterPinterestEmail
Newer Posts
Older Posts

Popular Posts

  • 1

    Crispy Crunchy Parmesan Potatoes

    March 21, 2020
  • 2

    CROCK POT SMOTHERED PORK CHOPS

    March 21, 2020
  • Facebook
  • Twitter

@2019 - All Right Reserved.


Back To Top