Cook it once
  • Home
  • Privacy Policy
  • Recipes
    • KETO
    • LC
    • WW
  • Tips
  • Contact
Cook it once
  • Home
  • Privacy Policy
  • Recipes
    • KETO
    • LC
    • WW
  • Tips
  • Contact
Category:

General Recipes

General Recipes

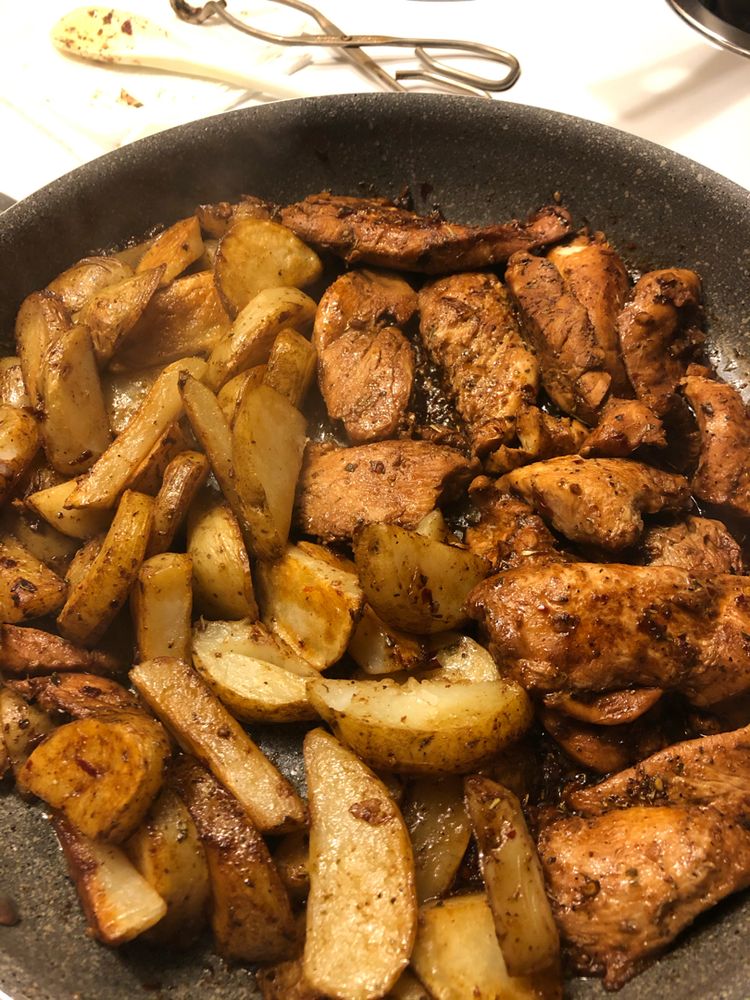
Garlic Butter Chicken and Potatoes Skillet

by Rebecca August 27, 2022
written by Rebecca

PREP TIME: 10 mins | COOK TIME: 20 mins | YIELD: 4 servings

This scrumptious Garlic Butter Chicken and Potatoes is an amazing one-skillet meal that you can easily make at any time. It is one of the best and tastiest weeknight dinners that you can make in just thirty minutes from start to finish.

INGREDIENTS

1 tbsp olive oil

3 tbsp butter, divided

1 1/2 pound (650 grams) chicken breast, cut into strips

1 1/2 pound (650 grams) baby yellow potatoes, quartered

1 tsp fresh thyme, chopped

5 garlic cloves, minced

1 tsp fresh rosemary, chopped

1 tsp fresh oregano, chopped

Crushed red chili pepper flakes, optional

Salt and fresh cracked pepper

Marinade:

1 tbsp olive oil

1/4 c. soy sauce (use coconut amino for strictly paleo)

Fresh cracked pepper

1 tbsp hot sauce (we used Sriracha)

How to make Garlic Butter Chicken and Potatoes Skillet

Step 1: Place the chicken strips with soy sauce, olive oil, pepper, and hot sauce in a large bowl. Toss well and set aside.

Step 2: In boiling salted water, parboil the potatoes for about 8 minutes.

Step 3: Heat 1 tbsp of each olive oil and butter in a large skillet over medium-high heat. Once the butter has melted, add the drained potatoes to the skillet and cook for about 4 minutes. Stir and continue to cook the potatoes for another 4 to 5 minutes or until fork-tender and golden. To a plate, transfer the potatoes and set them aside.

Step 4: Add the rest of the 2 tbsp butter to the same skillet and melt over medium heat. In the skillet, lay the chicken strips in a single layer. Set the drained marinade aside for later. To the chicken, add the garlic and red chili pepper flakes. Cook the chicken on each side for about 1 minute until nicely browned.

Step 5: To the chicken, stir in the reserved marinade and cook further until the marinade is cooked. Then, add the fresh herbs and stir. Return the potatoes to the skillet and cook until heated through. If needed, adjust the salt and pepper.

Step 6: Take the garlic butter chicken and potatoes from the heat and serve right away garnished with extra crushed chili pepper, fresh herbs, and a sprinkle of Parmesan cheese. Enjoy!

Nutrition Facts:

Energy 624.01 cal, Fat 32.95 g, Protein 43.71 g, Carbs 39.2 g, Saturated Fat 11.35 g, Polyunsat Fat 4.73 g, Monounsat Fat 14.62 g, Sugar 4.24 g, Cholesterol 132.19 mg, Sodium 241.42 mg, Potassium 1468.06 mg, Fiber 5.25 g
Garlic Butter Chicken and Potatoes Skillet

Rebecca PREP TIME: 10 mins | COOK TIME: 20 mins | YIELD: 4 servings This scrumptious Garlic Butter Chicken and Potatoes is an amazing one-skillet meal that you can easily make… General Recipes Garlic Butter Chicken and Potatoes Skillet European Print This
Serves: 4 Prep Time: 10 mins Cooking Time: 20 mins 20 mins
Nutrition facts: 624.01 calories 32.95 fat
Rating: 5.0/5
( 1 voted )

Ingredients

  • 1 tbsp olive oil
  • 3 tbsp butter, divided
  • 1 1/2 pound (650 grams) chicken breast, cut into strips
  • 1 1/2 pound (650 grams) baby yellow potatoes, quartered
  • 1 tsp fresh thyme, chopped
  • 5 garlic cloves, minced
  • 1 tsp fresh rosemary, chopped
  • 1 tsp fresh oregano, chopped
  • Crushed red chili pepper flakes, optional
  • Salt and fresh cracked pepper
  • Marinade:
  • 1 tbsp olive oil
  • 1/4 c. soy sauce (use coconut amino for strictly paleo)
  • Fresh cracked pepper
  • 1 tbsp hot sauce (we used Sriracha)

Instructions

Step 1: Place the chicken strips with soy sauce, olive oil, pepper, and hot sauce in a large bowl. Toss well and set aside.

Step 2: In boiling salted water, parboil the potatoes for about 8 minutes.

Step 3: Heat 1 tbsp of each olive oil and butter in a large skillet over medium-high heat. Once the butter has melted, add the drained potatoes to the skillet and cook for about 4 minutes. Stir and continue to cook the potatoes for another 4 to 5 minutes or until fork-tender and golden. To a plate, transfer the potatoes and set them aside.

Step 4: Add the rest of the 2 tbsp butter to the same skillet and melt over medium heat. In the skillet, lay the chicken strips in a single layer. Set the drained marinade aside for later. To the chicken, add the garlic and red chili pepper flakes. Cook the chicken on each side for about 1 minute until nicely browned.

Step 5: To the chicken, stir in the reserved marinade and cook further until the marinade is cooked. Then, add the fresh herbs and stir. Return the potatoes to the skillet and cook until heated through. If needed, adjust the salt and pepper.

Step 6: Take the garlic butter chicken and potatoes from the heat and serve right away garnished with extra crushed chili pepper, fresh herbs, and a sprinkle of Parmesan cheese. Enjoy!
August 27, 2022 0 comment
0 FacebookTwitterPinterestEmail
General Recipes

Spring Rolls

by Rebecca August 27, 2022
written by Rebecca

Prep Time: 10 mins | Cook Time: 30 mins | Total Time: 40 mins | Yield: 24 spring rolls

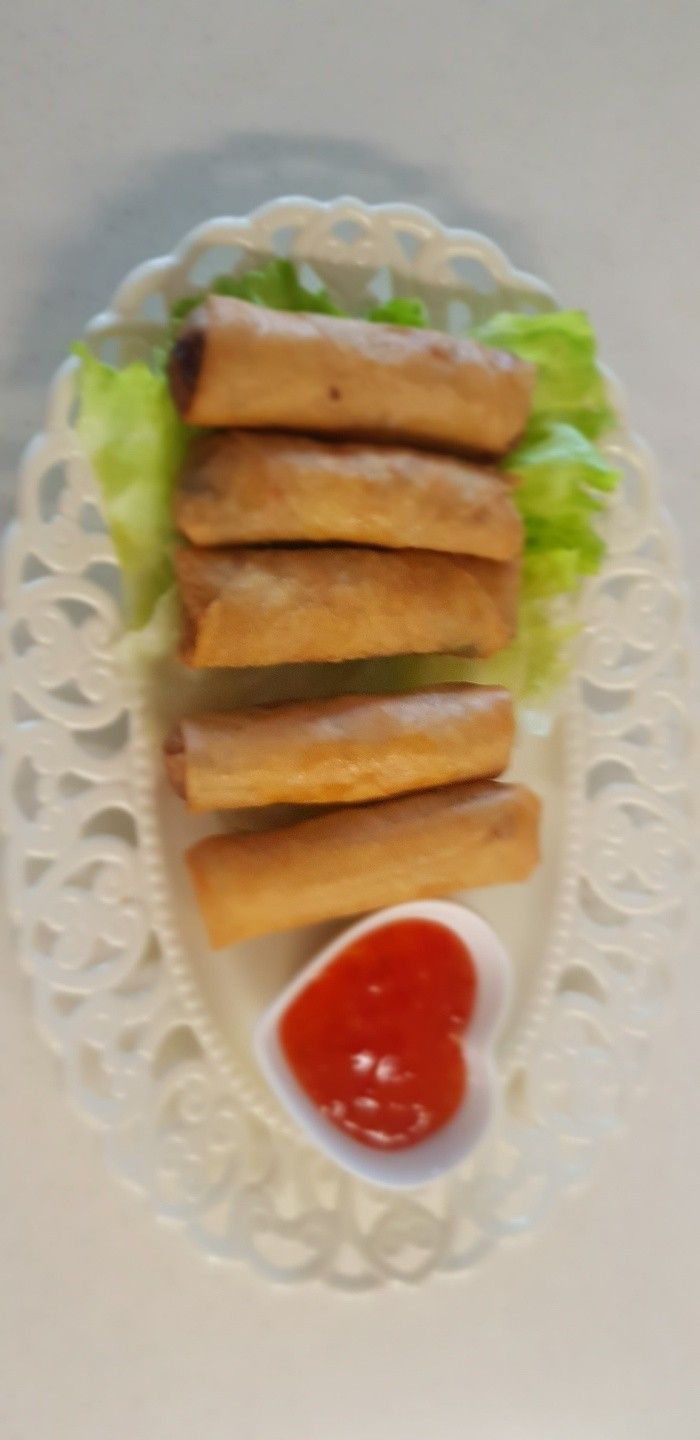
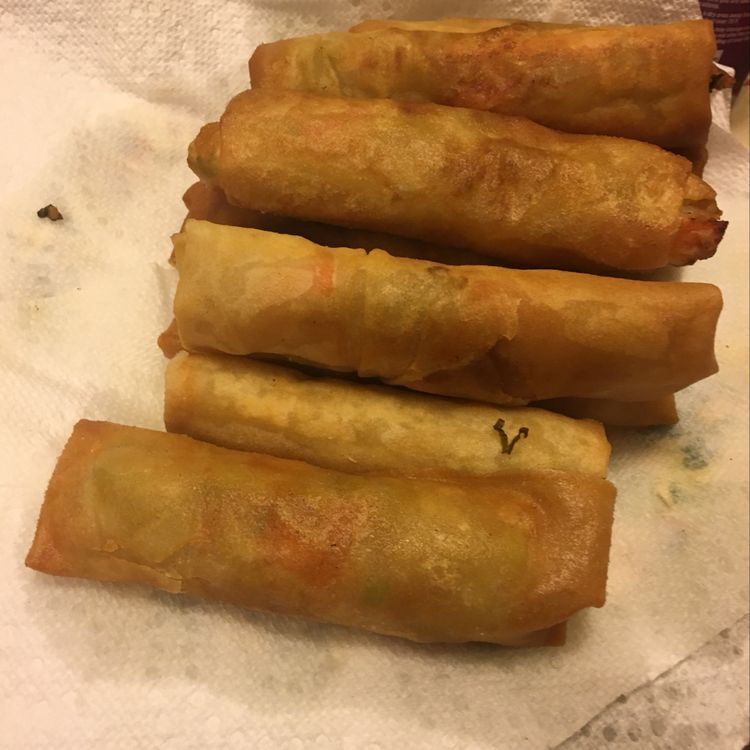
Spring rolls are my favorite! They are crispy, super light, and tender vegetarian appetizers that I can easily and quickly make whenever! These spring rolls are great to make in advance and freezer-friendly. I love these spring rolls by themselves, but these are amazing with Sweet and Sour Sauce and Chinese Hot Mustard for dipping.

For best results, I do not recommend substituting the spring roll wrappers. These wrappers are thinner than our traditional egg roll wrappers. When filling the rolls, ensure not to overfill them. I only use about 2 tbsp of filling for each wrapper. This also will help keep the rolls thin enough to fry well even after freezing. If making these rolls ahead, keep these filled rolls in one layer to prevent them from sticking together.

Ingredients

2 carrots, sliced thinly

1/4 c. canola oil, divided

2 cloves garlic, minced

8 oz. bamboo shoots, sliced thinly

2 tbsp cornstarch

2 tbsp mirin

canola oil, for frying

1/4 c. low sodium soy sauce

2 tsp sesame oil

8 c. napa cabbage, sliced thinly

24 8” square spring roll wrappers

How to make Spring Rolls

Step 1: Into a large, heavy skillet, heat half of the canola oil over medium-high heat. Once hot, add the napa cabbage and cook for about 8 to 10 minutes, stirring until most of the liquid has cooked off.

Step 2: To the napa cabbage in the skillet, add the garlic, carrots, and bamboo shoots. Continue to cook for another minute, stirring. Then, add the mirin along with the soy sauce and sesame oil. Stir well and cook further until done. Remove from the heat and allow the filling to cool completely.

Step 3: Whisk the cornstarch with 2 tbsp water until the lumps are gone.

Step 4: Around the edges of each spring roll wrapper, brush the slurry. In a long rectangular shape, add about 2 tbsp of the filling. Then, fold the sides of the wrapper and tightly roll it closed.

Step 5: In a Dutch oven, heat 3 inches of oil to 325 degrees. Add the spring rolls to the hot oil and fry for about 2 to 3 minutes until golden brown.

Nutrition Facts:

Calories: 143 kcal | Carbohydrates: 14g | Protein: 2g | Fat: 3g | Cholesterol: 1mg | Sodium: 214mg | Potassium: 104mg | Sugar: 1g | Vitamin A: 930IU | Vitamin C: 7.3mg | Calcium: 32mg | Iron: 0.8mg

Spring Rolls

Rebecca Prep Time: 10 mins | Cook Time: 30 mins | Total Time: 40 mins | Yield: 24 spring rolls Spring rolls are my favorite! They are crispy, super light, and… General Recipes Spring Rolls European Print This
Serves: 24 Prep Time: 10 mins Cooking Time: 30 mins 30 mins
Nutrition facts: 143 calories 3 fat
Rating: 5.0/5
( 1 voted )

Ingredients

  • 2 carrots, sliced thinly
  • 1/4 c. canola oil, divided
  • 2 cloves garlic, minced
  • 8 oz. bamboo shoots, sliced thinly
  • 2 tbsp cornstarch
  • 2 tbsp mirin
  • canola oil, for frying
  • 1/4 c. low sodium soy sauce
  • 2 tsp sesame oil
  • 8 c. napa cabbage, sliced thinly
  • 24 8” square spring roll wrappers

Instructions

Step 1: Into a large, heavy skillet, heat half of the canola oil over medium-high heat. Once hot, add the napa cabbage and cook for about 8 to 10 minutes, stirring until most of the liquid has cooked off.

Step 2: To the napa cabbage in the skillet, add the garlic, carrots, and bamboo shoots. Continue to cook for another minute, stirring. Then, add the mirin along with the soy sauce and sesame oil. Stir well and cook further until done. Remove from the heat and allow the filling to cool completely.

Step 3: Whisk the cornstarch with 2 tbsp water until the lumps are gone.

Step 4: Around the edges of each spring roll wrapper, brush the slurry. In a long rectangular shape, add about 2 tbsp of the filling. Then, fold the sides of the wrapper and tightly roll it closed.

Step 5: In a Dutch oven, heat 3 inches of oil to 325 degrees. Add the spring rolls to the hot oil and fry for about 2 to 3 minutes until golden brown.

August 27, 2022 0 comment
0 FacebookTwitterPinterestEmail
General Recipes

Keto Breakfast Tacos

by Rebecca August 26, 2022
written by Rebecca

Yield: 3 servings of Keto Breakfast Tacos

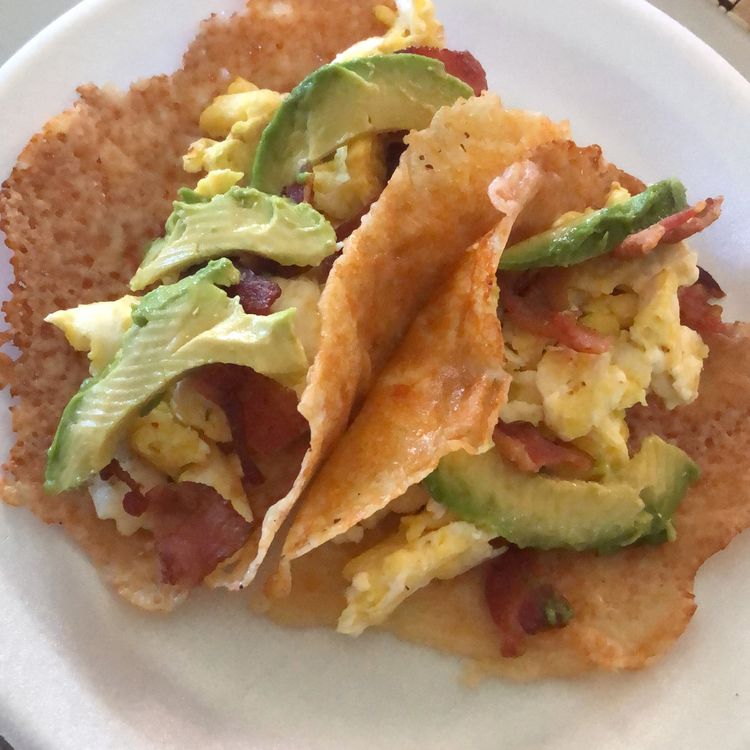
These Keto Breakfast Tacos are not your ordinary tacos. The shells are made with cheese for that over-the-top crunchy shell. If you have not tried cheese chips yet, you are already missing out! When cooked through, cheese gets very crunchy and they stay solid. Bonus, they also taste amazing! These shells once cooled make the perfect vessel for tacos or just about anything!

Surprise everyone with the best shells on Taco nights with these cheese shells. Follow this simple recipe for the best, scrumptious, Keto Breakfast Tacos that everyone will always be raving about!

Ingredients

6 large eggs

1 c. shredded mozzarella cheese

3 strips bacon

2 tbsp butter

½ small avocado

Salt and Pepper to taste

1 oz. cheddar cheese, shredded

How to make Keto Breakfast Tacos

Step 1: Using foil, line a baking sheet. Place 3 strips of bacon on the baking sheet and bake the bacon at 375 degrees for about 15 to 20 minutes.

Step 2: In the meantime, place 1/3 c. of mozzarella at a time and heat on a clean pan over medium heat. This takes about 2 to 3 minutes until the cheese is browned on the edges. To unstick the taco shells, slide a spatula under them.

Step 3: Lift the shell using a pair of tongs and drape it on a wooden spoon resting on a pot. Repeat with the remaining cheese. Make sure to work in batches of 1/3 c.

Step 4: In the butter, cook the eggs, stirring often until done. Then, season with salt and pepper.

Step 5: Into each hardened taco shell, spoon 1/3 of the scrambled eggs and top with sliced avocados. Do the same when adding the bacon (use whole strips or chopped).

Step 6: On top of the breakfast tacos, sprinkle the cheddar cheese. If desired, drizzle with hot sauce and sprinkle with some cilantro. Enjoy!

Note:

Each Keto breakfast taco has 443.67 Calories, 35.68g of Fats, 2.38g of Net Carbs, and 26.41g of Protein.

Keto Breakfast Tacos

Rebecca Yield: 3 servings of Keto Breakfast Tacos These Keto Breakfast Tacos are not your ordinary tacos. The shells are made with cheese for that over-the-top crunchy shell. If you have… General Recipes Keto Breakfast Tacos European Print This
Nutrition facts: 443.67 calories 2.38 fat
Rating: 5.0/5
( 1 voted )

Ingredients

  • 6 large eggs
  • 1 c. shredded mozzarella cheese
  • 3 strips bacon
  • 2 tbsp butter
  • ½ small avocado
  • Salt and Pepper to taste
  • 1 oz. cheddar cheese, shredded

Instructions

Step 1: Using foil, line a baking sheet. Place 3 strips of bacon on the baking sheet and bake the bacon at 375 degrees for about 15 to 20 minutes.

Step 2: In the meantime, place 1/3 c. of mozzarella at a time and heat on a clean pan over medium heat. This takes about 2 to 3 minutes until the cheese is browned on the edges. To unstick the taco shells, slide a spatula under them.

Step 3: Lift the shell using a pair of tongs and drape it on a wooden spoon resting on a pot. Repeat with the remaining cheese. Make sure to work in batches of 1/3 c.

Step 4: In the butter, cook the eggs, stirring often until done. Then, season with salt and pepper.

Step 5: Into each hardened taco shell, spoon 1/3 of the scrambled eggs and top with sliced avocados. Do the same when adding the bacon (use whole strips or chopped).

Step 6: On top of the breakfast tacos, sprinkle the cheddar cheese. If desired, drizzle with hot sauce and sprinkle with some cilantro. Enjoy!

August 26, 2022 0 comment
0 FacebookTwitterPinterestEmail
General Recipes

Keto Chicken Broccoli Casserole

by Rebecca August 26, 2022
written by Rebecca

Prep Time: 5 mins | Cook Time: 16 mins | Total Time: 21 mins | Servings: 6

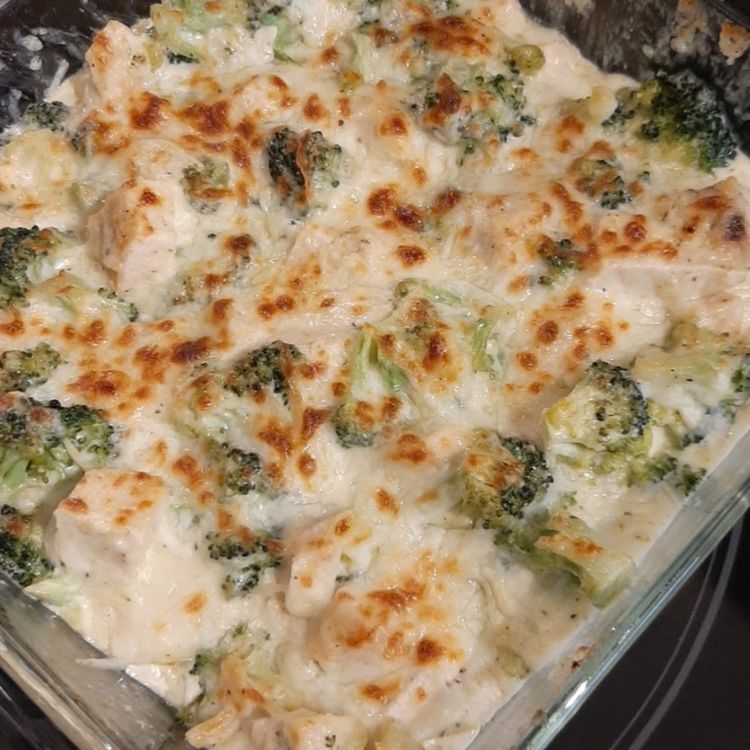
This casserole is a delicious keto dinner that is stunningly easy to make. Throw this keto chicken broccoli casserole together in less than twenty-five minutes and enjoy a healthy meal with less than 5 grams of net carbs in each serving. This casserole is one of the best casserole recipes I’ve tried and this has been proven to please even the fussiest eaters!

We broil the casserole to melt the cheese, but you can also bake it for about 15 to 20 minutes at 350 degrees until the cheese has melted. And speaking of cheese, you are welcome to use any cheese that melts well like cheddar, Gruyere, or Fontana. You can even add all of them if desired!

Ingredients

2 cloves garlic, minced

¼ c. butter, divided

1 ½ c. shredded mozzarella, divided

12 oz. broccoli, coarsely chopped

1 c. heavy whipping cream

½ c. grated Parmesan cheese

3 c. cooked chopped chicken (about 1 ¼ pound)

Salt and pepper

How to make Keto Chicken Broccoli Casserole

Step 1: Melt 2 tbsp butter in a 10-inch ovenproof skillet over medium heat. Add the broccoli to the skillet once the butter has melted and saute for about 4 minutes until bright green and just tender. To a bowl, transfer the broccoli.

Step 2: In the pan, melt the rest of the butter. Once melted, add the garlic to the pan and cook for about 1 minute until aromatic. Then, add the cream and bring to simmer. Continue to cook for another 3 to 5 minutes or until reduced by about half.

Step 3: Whisk in half c mozzarella and all of the Parmesan cheese until melted. To taste, season with salt and pepper. Next, add the broccoli and chicken. Stir well and top with the rest of the 1 c mozzarella cheese.

Step 4: Prepare the broiler and preheat it. Place the pan around 6 inches from the heat and broil for about 2 to 3 minutes until the cheese is starting to brown.

Nutrition Facts:

Amount Per Serving (1 serving ⅙th of the recipe): Calories 493, Calories from Fat 312, Fat 34.7g53%, Carbohydrates 6.1g2%, Fiber 1.5g6%, Protein 27.2g54%

Keto Chicken Broccoli Casserole

Rebecca Prep Time: 5 mins | Cook Time: 16 mins | Total Time: 21 mins | Servings: 6 This casserole is a delicious keto dinner that is stunningly easy to make.… General Recipes Keto Chicken Broccoli Casserole European Print This
Serves: 6 Prep Time: 5 mins Cooking Time: 16 mins 16 mins
Nutrition facts: 493 calories 34.7 fat
Rating: 5.0/5
( 1 voted )

Ingredients

  • 2 cloves garlic, minced
  • ¼ c. butter, divided
  • 1 ½ c. shredded mozzarella, divided
  • 12 oz. broccoli, coarsely chopped
  • 1 c. heavy whipping cream
  • ½ c. grated Parmesan cheese
  • 3 c. cooked chopped chicken (about 1 ¼ pound)
  • Salt and pepper

Instructions

Step 1: Melt 2 tbsp butter in a 10-inch ovenproof skillet over medium heat. Add the broccoli to the skillet once the butter has melted and saute for about 4 minutes until bright green and just tender. To a bowl, transfer the broccoli.

Step 2: In the pan, melt the rest of the butter. Once melted, add the garlic to the pan and cook for about 1 minute until aromatic. Then, add the cream and bring to simmer. Continue to cook for another 3 to 5 minutes or until reduced by about half.

Step 3: Whisk in half c mozzarella and all of the Parmesan cheese until melted. To taste, season with salt and pepper. Next, add the broccoli and chicken. Stir well and top with the rest of the 1 c mozzarella cheese.

Step 4: Prepare the broiler and preheat it. Place the pan around 6 inches from the heat and broil for about 2 to 3 minutes until the cheese is starting to brown.

August 26, 2022 0 comment
0 FacebookTwitterPinterestEmail
General Recipes

Creamy Cauliflower Salad Recipe

by Rebecca August 26, 2022
written by Rebecca

Prep Time: 15 mins | Cook Time: 15 mins | Total Time: 30 mins | Servings: 8

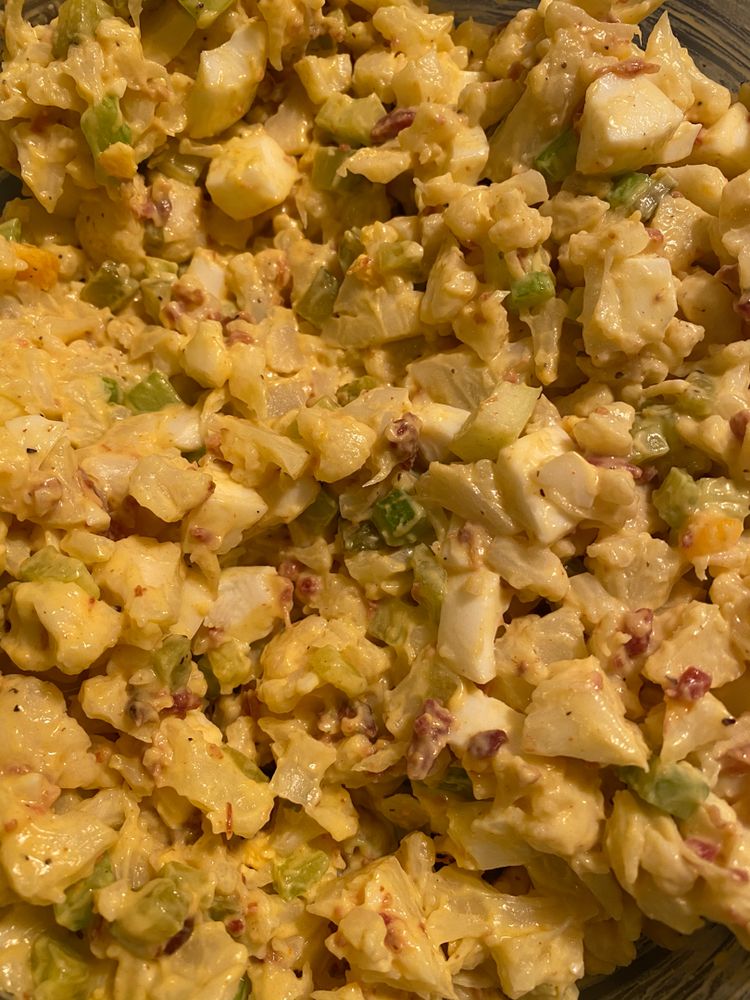
Enjoy summer all year round with this cauliflower salad recipe. Easily whip this salad up using fresh ingredients that are easy to find. For the perfect Keto side dish, serve a bowl of this flavorful, creamy, and delicious salad. Before serving, make sure to chill this salad in the fridge for about 30 minutes. I like to serve this salad, fresh but if you have any leftovers, you can keep them in a covered container and store them in the fridge for up to 4 days.

I love this salad recipe. It is straightforward and has all the flavors of the classic potato salad and more! This salad is the perfect creamy summer salad. Light, fresh, and very indulging!

Ingredients

2 ribs celery, sliced

3 large eggs

1 large head cauliflower, cut into bite-sized pieces

½ c. mayonnaise

6 slices of cooked bacon, chopped

2 medium green onions, white and light green parts only, chopped

2 tbsp Dijon mustard

¼ tsp paprika

1 tbsp lemon juice

Salt and pepper to taste

How to make Creamy Cauliflower Salad

Step 1: Bring 2 quarts of water to a boil in a large pot over medium-high heat. Into the boiling water, gently lower the eggs, and cook for about 12 minutes.

Step 2: In the meantime, fill a medium bowl with ice and water. Immediately transfer the eggs to the ice batch once cooked and allow them to sit for about 10 minutes. Then, peel the eggs and chop 2 of the eggs. Slice the other egg.

Step 3: Place the cauliflower florets in a different large pot. Fill the pot halfway with water. Bring to a coil and cook the florets for about 3 minutes until just fork tender. When done, drain the florets in a colander and allow them to cool.

Step 4: Place the chopped eggs, cauliflower, celery, bacon, and green onions in a large bowl. Mix well, then add the mayonnaise along with the Dijon, lemon juice, and paprika. Stir until combined and the cauliflower florets are evenly coated.

Step 5: To a serving bowl, transfer the salad and top with the sliced eggs. Serve and enjoy!

Nutrition Facts:

Amount Per Serving (1 serving about ¾ c.): Calories 238, Calories from Fat 180, Fat 20g31%, Carbohydrates 6.5g2%, Fiber 2.5g10%, Protein 7.5g15%

Creamy Cauliflower Salad Recipe

Rebecca Prep Time: 15 mins | Cook Time: 15 mins | Total Time: 30 mins | Servings: 8 Enjoy summer all year round with this cauliflower salad recipe. Easily whip this… General Recipes Creamy Cauliflower Salad Recipe European Print This
Serves: 8 Prep Time: 15 mins Cooking Time: 15 mins 15 mins
Nutrition facts: 238 calories 20 fat
Rating: 5.0/5
( 1 voted )

Ingredients

  • 2 ribs celery, sliced
  • 3 large eggs
  • 1 large head cauliflower, cut into bite-sized pieces
  • ½ c. mayonnaise
  • 6 slices of cooked bacon, chopped
  • 2 medium green onions, white and light green parts only, chopped
  • 2 tbsp Dijon mustard
  • ¼ tsp paprika
  • 1 tbsp lemon juice
  • Salt and pepper to taste

Instructions

Step 1: Bring 2 quarts of water to a boil in a large pot over medium-high heat. Into the boiling water, gently lower the eggs, and cook for about 12 minutes.

Step 2: In the meantime, fill a medium bowl with ice and water. Immediately transfer the eggs to the ice batch once cooked and allow them to sit for about 10 minutes. Then, peel the eggs and chop 2 of the eggs. Slice the other egg.

Step 3: Place the cauliflower florets in a different large pot. Fill the pot halfway with water. Bring to a coil and cook the florets for about 3 minutes until just fork tender. When done, drain the florets in a colander and allow them to cool.

Step 4: Place the chopped eggs, cauliflower, celery, bacon, and green onions in a large bowl. Mix well, then add the mayonnaise along with the Dijon, lemon juice, and paprika. Stir until combined and the cauliflower florets are evenly coated.

Step 5: To a serving bowl, transfer the salad and top with the sliced eggs. Serve and enjoy!

August 26, 2022 0 comment
0 FacebookTwitterPinterestEmail
General Recipes

Keto Snowball Cookies

by Rebecca August 26, 2022
written by Rebecca

Prep Time: 15 mins | Cook Time: 18 mins | Total Time: 33 mins | Servings: 15 (about 30 cookies)

Christmas is just around the corner and I have the best surprise, especially for the kids! These Keto Snowball Cookies with crushed walnuts and a splash of cardamom or cinnamon are sure to make everyone happy! These cookies are the perfect sugar-free holiday treat excellent for everyone!

To make things easier and quicker, prep these cookies ahead. In an airtight container, store the cookies and keep them in the freezer for up to 2 months. To prevent the cookies from getting soggy, thaw them and remove them from the container. Spread the cookies out, making sure that they don’t touch each other.

Ingredients

1 c. walnut pieces finely chopped (almost ground)

1 ¾ c. almond flour

1 tsp baking powder

2 tbsp coconut flour

¾ – 1 tsp ground cardamom (or ½ tsp cinnamon)

½ c. Swerve Sweetener (granular or)

½ c. butter, softened

1 large egg, at room temperature

¼ tsp salt

½ c. powdered Swerve Sweetener

1 tsp vanilla extract

How to make Keto Snowball Cookies

Step 1: Prepare the oven. Preheat it to 325 degrees F. Using silicone liners or parchment paper, line 2 baking sheets.

Step 2: Place the almond flour, chopped walnuts, coconut flour, cardamom, baking powder, and salt in a medium bowl. Mix well until combined.

Step 3: Beat the butter and sweetener in a large bowl for about 2 minutes until light and fluffy. Add the egg and vanilla extract. Mix well before stirring in the almond flour mixture. Beat until the dough comes together.

Step 4: Into 1-inch balls, roll the dough and put them on the prepared baking sheets about 1-inch apart. Place in the preheated oven and bake for about 16 to 18 minutes or until the cookies are just lightly golden brown. Take the cookies out of the oven and allow the cookies to cool on the pan.

Step 5: In a small shallow bowl, place the powdered sweetener. Roll each completely cooked cookie in the powdered sweetener until fully coated.

Nutrition Facts:

Amount Per Serving (2 cookies): Calories 194, Calories from Fat 156, Fat 17.3g27%, Carbohydrates 4.4g1%, Fiber 2.3g9%, Protein 5.4g11%

Keto Snowball Cookies

Rebecca Prep Time: 15 mins | Cook Time: 18 mins | Total Time: 33 mins | Servings: 15 (about 30 cookies) Christmas is just around the corner and I have the… General Recipes Keto Snowball Cookies European Print This
Serves: 15 Prep Time: 15 mins Cooking Time: 18 mins 18 mins
Nutrition facts: 194 calories 17.3 fat
Rating: 5.0/5
( 1 voted )

Ingredients

  • 1 c. walnut pieces finely chopped (almost ground)
  • 1 ¾ c. almond flour
  • 1 tsp baking powder
  • 2 tbsp coconut flour
  • ¾ - 1 tsp ground cardamom (or ½ tsp cinnamon)
  • ½ c. Swerve Sweetener (granular or)
  • ½ c. butter, softened
  • 1 large egg, at room temperature
  • ¼ tsp salt
  • ½ c. powdered Swerve Sweetener
  • 1 tsp vanilla extract

Instructions

Step 1: Prepare the oven. Preheat it to 325 degrees F. Using silicone liners or parchment paper, line 2 baking sheets.

Step 2: Place the almond flour, chopped walnuts, coconut flour, cardamom, baking powder, and salt in a medium bowl. Mix well until combined.

Step 3: Beat the butter and sweetener in a large bowl for about 2 minutes until light and fluffy. Add the egg and vanilla extract. Mix well before stirring in the almond flour mixture. Beat until the dough comes together.

Step 4: Into 1-inch balls, roll the dough and put them on the prepared baking sheets about 1-inch apart. Place in the preheated oven and bake for about 16 to 18 minutes or until the cookies are just lightly golden brown. Take the cookies out of the oven and allow the cookies to cool on the pan.

Step 5: In a small shallow bowl, place the powdered sweetener. Roll each completely cooked cookie in the powdered sweetener until fully coated.

August 26, 2022 0 comment
0 FacebookTwitterPinterestEmail
General Recipes

Egg Roll Recipe

by Rebecca August 26, 2022
written by Rebecca

Prep Time: 30 mins | Cook Time: 45 mins | Total Time: 1 hr 15 mins | Servings: 40 egg rolls

These egg rolls are my mom’s favorite. Super crispy with a delicious filling. These egg rolls are a great option for meal planning as they are freezer-friendly and reheat well. Throw together a big batch and serve with your favorite dipping.

Ingredients

3 ounces vermicelli rice noodles, (Chinese angel hair rice sticks)

40 frozen egg roll or spring roll wrappers, (8 x 8-inch), thawed

1 medium onion, finely chopped

1 pound ground pork

4 c. green cabbage, thinly sliced

8 ounces mushrooms, brown or white

2 medium carrots, grated or cut into matchsticks

2 teaspoons salt, or to taste, (divided)

1 1/2 tablespoon soy sauce

1 teaspoon sesame oil

1 egg, (beaten) for sealing the egg rolls

Peanut oil or Canola Oil for frying, (2-3” of oil)

1/2 teaspoon black pepper, or to taste

How to make Egg Rolls

Step 1: In a large heatproof bowl, place the noodles. Over the noodles, pour the steaming hot water. Pull the noodles apart using forks and allow them to rest for about 5 to 7 minutes until tender. To cool, rinse the noodles with cold water, then drain well. To about 1-inch pieces, chop the rice noodles and place them into a large mixing bowl.

Step 2: Heat 1 tbsp oil in a deep skillet over medium-high heat. Once hot, add the ground pork to the skillet. Season with half tsp salt and saute until completely cooked. Into the mixing bowl with the noodles, transfer the cooked ground beef.

Step 3: Add 2 tbsp oil to the same skillet along with the sliced mushrooms, diced onions, and shredded carrots. Cook for about 5 to 6 minutes, stirring often until softened. Then, add 4 c cabbage and continue to cook for additional 2 minutes until just wilted. To taste, season with half tsp salt and transfer the mixture to the bowl with the noodles.

Step 4: Now, sprinkle the egg roll mixture with 1 tsp salt, half tsp black pepper, 1 1/2 tbsp soy sauce, and 1 tsp sesame oil. If needed, drain any excess liquid.

Step 5: After peeling back 1 egg roll wrapper, lay it in a triangle shape on a clean working surface. To keep the rest of the egg roll wrapper from drying out, keep them covered with a damp paper towel. Onto the bottom of the wrapper, add 1/4 c. of the filling. Over the filling, fold the bottom corner of the wrapper and tuck it underneath. Tightly roll towards the middle, then fold in the sides. Roll it again and lightly brush the last flap with the beaten egg. Then, roll to seal. Do the same for the rest of the egg rolls. Cover the shaped egg rolls with plastic wrap to keep them from drying out.

Step 6: In a Dutch oven or fryer, heat the oil to 350 degrees F. Fry the egg rolls 5 to 7 pieces at a time for about 5 to 6 minutes or until crispy and golden brown. While frying, make sure to keep the oil temperature between 340 to 350 degrees F. To a wire rack, transfer the fried egg rolls and allow them to cool for about 15 minutes. Then, serve the egg rolls with your preferred sauce. Enjoy!

Nutrition Facts:

Amount Per Serving: Calories 130, Calories from Fat 72, Fat 8g12%, Saturated Fat 2g13%, Cholesterol 9mg3%, Sodium 242mg11%, Potassium 88mg3%, Carbohydrates 10g3%, Fiber 1g4%, Sugar 1g1%, Protein 4g8%, Vitamin A 518IU10%, Vitamin C 3mg4%, Calcium 13mg1%, Iron 1mg6%

Egg Roll Recipe

Rebecca Prep Time: 30 mins | Cook Time: 45 mins | Total Time: 1 hr 15 mins | Servings: 40 egg rolls These egg rolls are my mom’s favorite. Super crispy… General Recipes Egg Roll Recipe European Print This
Serves: 40 Prep Time: 30 mins Cooking Time: 45 mins 45 mins
Nutrition facts: 130 calories 8 fat
Rating: 5.0/5
( 1 voted )

Ingredients

  • 3 ounces vermicelli rice noodles, (Chinese angel hair rice sticks)
  • 40 frozen egg roll or spring roll wrappers, (8 x 8-inch), thawed
  • 1 medium onion, finely chopped
  • 1 pound ground pork
  • 4 c. green cabbage, thinly sliced
  • 8 ounces mushrooms, brown or white
  • 2 medium carrots, grated or cut into matchsticks
  • 2 teaspoons salt, or to taste, (divided)
  • 1 1/2 tablespoon soy sauce
  • 1 teaspoon sesame oil
  • 1 egg, (beaten) for sealing the egg rolls
  • Peanut oil or Canola Oil for frying, (2-3” of oil)
  • 1/2 teaspoon black pepper, or to taste

Instructions

Step 1: In a large heatproof bowl, place the noodles. Over the noodles, pour the steaming hot water. Pull the noodles apart using forks and allow them to rest for about 5 to 7 minutes until tender. To cool, rinse the noodles with cold water, then drain well. To about 1-inch pieces, chop the rice noodles and place them into a large mixing bowl.

Step 2: Heat 1 tbsp oil in a deep skillet over medium-high heat. Once hot, add the ground pork to the skillet. Season with half tsp salt and saute until completely cooked. Into the mixing bowl with the noodles, transfer the cooked ground beef.

Step 3: Add 2 tbsp oil to the same skillet along with the sliced mushrooms, diced onions, and shredded carrots. Cook for about 5 to 6 minutes, stirring often until softened. Then, add 4 c cabbage and continue to cook for additional 2 minutes until just wilted. To taste, season with half tsp salt and transfer the mixture to the bowl with the noodles.

Step 4: Now, sprinkle the egg roll mixture with 1 tsp salt, half tsp black pepper, 1 1/2 tbsp soy sauce, and 1 tsp sesame oil. If needed, drain any excess liquid.

Step 5: After peeling back 1 egg roll wrapper, lay it in a triangle shape on a clean working surface. To keep the rest of the egg roll wrapper from drying out, keep them covered with a damp paper towel. Onto the bottom of the wrapper, add 1/4 c. of the filling. Over the filling, fold the bottom corner of the wrapper and tuck it underneath. Tightly roll towards the middle, then fold in the sides. Roll it again and lightly brush the last flap with the beaten egg. Then, roll to seal. Do the same for the rest of the egg rolls. Cover the shaped egg rolls with plastic wrap to keep them from drying out.

Step 6: In a Dutch oven or fryer, heat the oil to 350 degrees F. Fry the egg rolls 5 to 7 pieces at a time for about 5 to 6 minutes or until crispy and golden brown. While frying, make sure to keep the oil temperature between 340 to 350 degrees F. To a wire rack, transfer the fried egg rolls and allow them to cool for about 15 minutes. Then, serve the egg rolls with your preferred sauce. Enjoy!

August 26, 2022 0 comment
0 FacebookTwitterPinterestEmail
General Recipes

Coconut Shrimp with 2-Ingredient Dipping Sauce

by Rebecca August 26, 2022
written by Rebecca

Prep Time: 15 mins | Cook Time: 15 mins | Total Time: 30 mins | Servings: 6 as an appetizer

I am obsessed with these coconut-coated shrimps! They are superbly crunchy with a touch of tropical flavor. Serve these with the simple two ingredients of coconut shrimp sauce for a crowd-pleasing appetizer at your next gathering.

Ingredients

Coconut Shrimp:

light olive oil, vegetable oil, or coconut oil

1 pound large shrimp, 21-25 count, peeled and deveined with tails left on

1/2 teaspoon garlic powder

2 large eggs, beaten with a fork

1/4 c. all-purpose flour

1 1/2 c. sweetened shredded coconut

1/2 c. panko bread crumbs

1 lime, cut into wedges, to serve

1/2 teaspoon salt

Shrimp Dipping Sauce:

1/4 c. apricot preserves or apricot fruit spread

1/4 c. sweet chili sauce

How to make Coconut Shrimp with 2-Ingredient Dipping Sauce

Step 1: In cold water, rinse the shrimp and pat dry using paper towels.

Step 2: Ready three shallow bowls. Mix 1/4 c. flour with 1/2 tsp garlic powder and 1/2 tsp salt in the first bowl. In the next bowl, beat 2 eggs using a fork. Combine 1 1/2 c. coconut flakes with half c. panko bread crumbs in the third bowl.

Step 3: In flour, dredge the shrimp. Dip the shrimp in the beaten eggs and coat in the crumb mixture, pressing the coconut crumb mixture onto the shrimp using your hands. On a platter, place the breaded shrimp. Do the same for the remaining shrimp. You can keep the breaded shrimp in the fridge for later or cook it right away.

Step 4: Add enough oil to a large pan, enough to cover the bottom (about 1/4-inch deep). Add the shrimp to the pan once the oil reaches 350 degrees F and saute for about 2 minutes on each side until golden brown and the shrimp is pink and completely cooked. I recommend cooking the shrimp in batches to prevent overcrowding the pan.

Step 5: Once the shrimps are done, whisk 1/4 c. sweet chili sauce and 1/4 c. apricot preserves until well blended.

Step 6: Serve the coconut shrimp immediately with the dipping sauce on the side and squeeze some fresh lime juice over the shrimp. Enjoy!

Nutrition Facts:

Amount Per Serving: Calories 316, Calories from Fat 135, Fat 15g23%, Saturated Fat 8g50%, Cholesterol 245mg82%, Sodium 1004mg44%, Potassium 177mg5%, Carbohydrates 25g8%, Fiber 1g4%, Sugar 15g17%, Protein 19g38%, Vitamin A 80IU2%, Vitamin C 6.5mg8%, Calcium 134mg13%, Iron 2.8mg16%

Coconut Shrimp with 2-Ingredient Dipping Sauce

Rebecca Prep Time: 15 mins | Cook Time: 15 mins | Total Time: 30 mins | Servings: 6 as an appetizer I am obsessed with these coconut-coated shrimps! They are superbly… General Recipes Coconut Shrimp with 2-Ingredient Dipping Sauce European Print This
Serves: 6 Prep Time: 15 mins Cooking Time: 15 mins 15 mins
Nutrition facts: 316 calories 15 fat
Rating: 5.0/5
( 1 voted )

Ingredients

  • Coconut Shrimp:
  • light olive oil, vegetable oil, or coconut oil
  • 1 pound large shrimp, 21-25 count, peeled and deveined with tails left on
  • 1/2 teaspoon garlic powder
  • 2 large eggs, beaten with a fork
  • 1/4 c. all-purpose flour
  • 1 1/2 c. sweetened shredded coconut
  • 1/2 c. panko bread crumbs
  • 1 lime, cut into wedges, to serve
  • 1/2 teaspoon salt
  • Shrimp Dipping Sauce:
  • 1/4 c. apricot preserves or apricot fruit spread
  • 1/4 c. sweet chili sauce

Instructions

Step 1: In cold water, rinse the shrimp and pat dry using paper towels.

Step 2: Ready three shallow bowls. Mix 1/4 c. flour with 1/2 tsp garlic powder and 1/2 tsp salt in the first bowl. In the next bowl, beat 2 eggs using a fork. Combine 1 1/2 c. coconut flakes with half c. panko bread crumbs in the third bowl.

Step 3: In flour, dredge the shrimp. Dip the shrimp in the beaten eggs and coat in the crumb mixture, pressing the coconut crumb mixture onto the shrimp using your hands. On a platter, place the breaded shrimp. Do the same for the remaining shrimp. You can keep the breaded shrimp in the fridge for later or cook it right away.

Step 4: Add enough oil to a large pan, enough to cover the bottom (about 1/4-inch deep). Add the shrimp to the pan once the oil reaches 350 degrees F and saute for about 2 minutes on each side until golden brown and the shrimp is pink and completely cooked. I recommend cooking the shrimp in batches to prevent overcrowding the pan.

Step 5: Once the shrimps are done, whisk 1/4 c. sweet chili sauce and 1/4 c. apricot preserves until well blended.

Step 6: Serve the coconut shrimp immediately with the dipping sauce on the side and squeeze some fresh lime juice over the shrimp. Enjoy!

August 26, 2022 0 comment
0 FacebookTwitterPinterestEmail
General Recipes

SHRIMP IN ROASTED PEPPER SAUCE

by Rebecca August 26, 2022
written by Rebecca

PREP TIME: 10 MINS | COOK TIME: 20 MINS | TOTAL TIME: 30 MINS | SERVINGS: 4

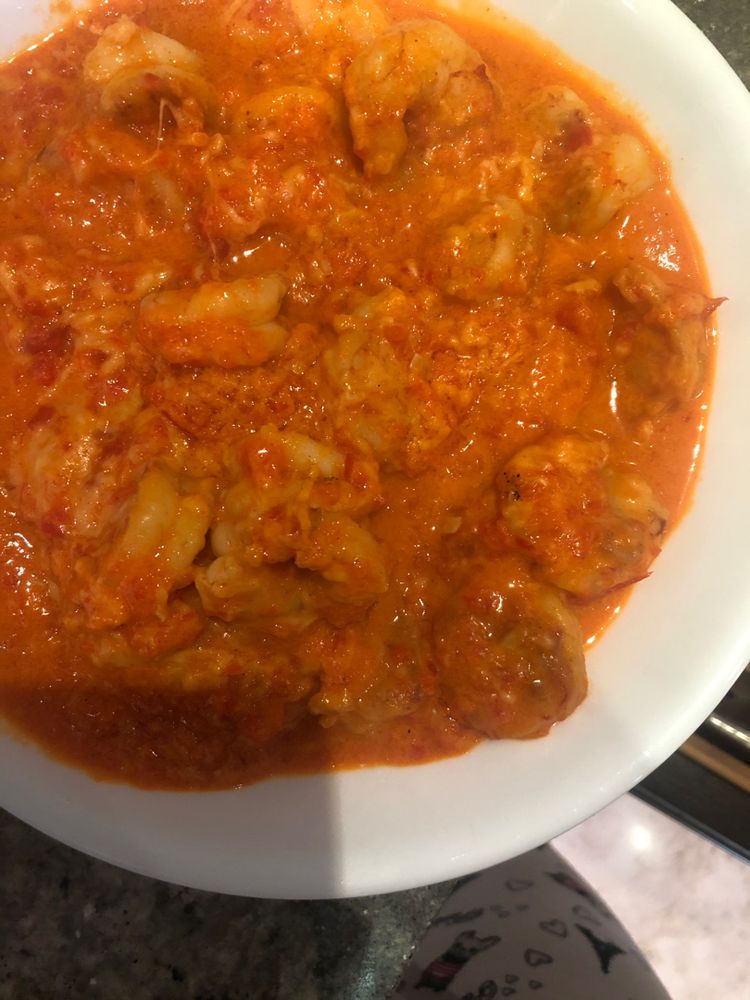
This dish is one of the best I’ve made! Lip-smacking good with sweet roasted bell pepper partnered with cream and Parmesan cheese. This amazing combination creates a distinctive and mouthwatering sauce that is very hard to pass. Serve this delicious shrimp in roasted pepper sauce with rice, mashed potatoes, steamed veggies, polenta, or couscous. Or directly add pasta to the sauce and toss until well coated. This dish is also great as is.

INGREDIENTS

3 tablespoons butter

1 pound peeled, deveined shrimps

½ tablespoon paprika

2 garlic cloves

¾ c. Half and Half or heavy cream

12-ounces jar of roasted peppers

¾ c. Parmesan cheese, shredded

chopped parsley to garnish

½ teaspoon red pepper flakes, optional

salt to taste

HOW TO MAKE SHRIMP IN ROASTED PEPPER SAUCE

Step 1: Into a blender or smoothie cup, place the roasted peppers along with the liquid from the jar and process until smooth.

Step 2: Melt the butter in a large skillet over medium-high heat. Once the butter has melted, add the shrimp to the skillet and sprinkle with paprika and red pepper flakes. Cook the shrimp for about 5 minutes.

Step 3: Adjust the heat to low and add the garlic and salt to the skillet. Continue to cook for another minute. Then, set the shrimps aside.

Step 4: In the now-empty skillet, add the roasted pepper puree. Adjust the heat to medium and cook the puree for about 7 to 10 minutes until most of the liquid has evaporated.

Step 5: Next, add the half-and-half along with the Parmesan. Stir well and bring everything to a gentle simmer.

Step 6: Add the shrimp back to the skillet. Stir well and continue to cook for an additional 1 to 2 minutes until the shrimp are heated through.

Step 7: Before serving, garnish the shrimp in roasted pepper sauce with some chopped parsley and Parmesan. Enjoy with a slice of fresh and crunchy bread.

NUTRITION FACTS:

Calories: 255 kcal, Carbohydrates: 12g, Protein: 10g, Fat: 19g, Saturated Fat: 12g, Cholesterol: 53mg, Sodium: 1736mg, Potassium: 467mg, Fiber: 3g, Sugar: 3g, Vitamin A: 2250IU, Vitamin C: 51mg, Calcium: 349mg, Iron: 2.4mg

SHRIMP IN ROASTED PEPPER SAUCE

Rebecca PREP TIME: 10 MINS | COOK TIME: 20 MINS | TOTAL TIME: 30 MINS | SERVINGS: 4 This dish is one of the best I’ve made! Lip-smacking good with sweet… General Recipes SHRIMP IN ROASTED PEPPER SAUCE European Print This
Serves: 4 Prep Time: 10 mins Cooking Time: 20 mins 20 mins
Nutrition facts: 255 calories 19 fat
Rating: 5.0/5
( 1 voted )

Ingredients

  • 3 tablespoons butter
  • 1 pound peeled, deveined shrimps
  • ½ tablespoon paprika
  • 2 garlic cloves
  • ¾ c. Half and Half or heavy cream
  • 12-ounces jar of roasted peppers
  • ¾ c. Parmesan cheese, shredded
  • chopped parsley to garnish
  • ½ teaspoon red pepper flakes, optional
  • salt to taste

Instructions

Step 1: Into a blender or smoothie cup, place the roasted peppers along with the liquid from the jar and process until smooth.

Step 2: Melt the butter in a large skillet over medium-high heat. Once the butter has melted, add the shrimp to the skillet and sprinkle with paprika and red pepper flakes. Cook the shrimp for about 5 minutes.

Step 3: Adjust the heat to low and add the garlic and salt to the skillet. Continue to cook for another minute. Then, set the shrimps aside.

Step 4: In the now-empty skillet, add the roasted pepper puree. Adjust the heat to medium and cook the puree for about 7 to 10 minutes until most of the liquid has evaporated.

Step 5: Next, add the half-and-half along with the Parmesan. Stir well and bring everything to a gentle simmer.

Step 6: Add the shrimp back to the skillet. Stir well and continue to cook for an additional 1 to 2 minutes until the shrimp are heated through.

Step 7: Before serving, garnish the shrimp in roasted pepper sauce with some chopped parsley and Parmesan. Enjoy with a slice of fresh and crunchy bread.

August 26, 2022 0 comment
0 FacebookTwitterPinterestEmail
General Recipes

Crispy Honey Lemon Chicken

by Rebecca August 26, 2022
written by Rebecca

Prep Time: 15 mins | Cook Time: 15 mins | Total Time: 30 mins | Servings: 4

This crispy honey, lemon chicken is a simple dish you can easily make at home in under thirty minutes. Sticky, crispy chicken packed with honey, lemon flavor. This restaurant-quality meal is a great dinner option. Pair this with rice and with a side of some slices of lemon.

Ingredients

1/2 c. canola oil

1 lb chicken thighs, cut into 1” chunks

1/3 c. cornstarch

3 cloves garlic, minced

1/2 tsp red pepper flakes

1 tbsp ginger, minced

Sauce:

zest of one large lemon

1/2 c. honey

1/2 lemon, juiced

2 tbsp soy sauce

1 tbsp cornstarch

1/2 c. water

Garnish:

sesame seeds

lemon zest

green onions

How to make Crispy Honey Lemon Chicken

Step 1: Place the chicken thighs and cornstarch in a large bowl or ziplock bag. Seal the bag and toss to coat the thighs well. Set aside.

Step 2: Into a bowl, place the sauce ingredients and mix well until blended. Set aside.

Step 3: To a large pan, heat the vegetable oil over medium-high heat. Add the chicken to the pan once the oil is hot and fry for a few minutes over medium-high heat until golden and crispy.

Step 4: Set the chicken aside, keeping 1 tbsp of oil in the pan. Discard the rest of the oil.

Step 5: In the same pan with the reserved 1 tbsp oil, add the garlic, ginger, and red pepper flakes. Cook for about 30 seconds over low heat until the garlic is fragrant, stirring constantly. Return the chicken to the pan and toss.

Step 6: Stir the sauce and pour the sauce into the pan. Stir well until the chicken is well-coated. Continue to cook for additional 30 seconds to 1 minute or until the sauce has thickened.

Step 7: Before serving, garnish with some chopped green onions, sesame seeds, and fresh lemon zest. Enjoy the crispy honey, lemon chicken right away with rice.

Crispy Honey Lemon Chicken

Rebecca Prep Time: 15 mins | Cook Time: 15 mins | Total Time: 30 mins | Servings: 4 This crispy honey, lemon chicken is a simple dish you can easily make… General Recipes Crispy Honey Lemon Chicken European Print This
Serves: 4 Prep Time: 15 mins Cooking Time: 15 mins 15 mins
Nutrition facts: 200 calories 20 grams fat
Rating: 5.0/5
( 2 voted )

Ingredients

  • 1/2 c. canola oil
  • 1 lb chicken thighs, cut into 1” chunks
  • 1/3 c. cornstarch
  • 3 cloves garlic, minced
  • 1/2 tsp red pepper flakes
  • 1 tbsp ginger, minced
  • Sauce:
  • zest of one large lemon
  • 1/2 c. honey
  • 1/2 lemon, juiced
  • 2 tbsp soy sauce
  • 1 tbsp cornstarch
  • 1/2 c. water
  • Garnish:
  • sesame seeds
  • lemon zest
  • green onions

Instructions

Step 1: Place the chicken thighs and cornstarch in a large bowl or ziplock bag. Seal the bag and toss to coat the thighs well. Set aside.

Step 2: Into a bowl, place the sauce ingredients and mix well until blended. Set aside.

Step 3: To a large pan, heat the vegetable oil over medium-high heat. Add the chicken to the pan once the oil is hot and fry for a few minutes over medium-high heat until golden and crispy.

Step 4: Set the chicken aside, keeping 1 tbsp of oil in the pan. Discard the rest of the oil.

Step 5: In the same pan with the reserved 1 tbsp oil, add the garlic, ginger, and red pepper flakes. Cook for about 30 seconds over low heat until the garlic is fragrant, stirring constantly. Return the chicken to the pan and toss.

Step 6: Stir the sauce and pour the sauce into the pan. Stir well until the chicken is well-coated. Continue to cook for additional 30 seconds to 1 minute or until the sauce has thickened.

Step 7: Before serving, garnish with some chopped green onions, sesame seeds, and fresh lemon zest. Enjoy the crispy honey, lemon chicken right away with rice.

August 26, 2022 0 comment
0 FacebookTwitterPinterestEmail
Newer Posts
Older Posts

Popular Posts

  • 1

    Crispy Crunchy Parmesan Potatoes

    March 21, 2020
  • 2

    CROCK POT SMOTHERED PORK CHOPS

    March 21, 2020
  • Facebook
  • Twitter

@2019 - All Right Reserved.


Back To Top