Cook it once
  • Home
  • Privacy Policy
  • Recipes
    • KETO
    • LC
    • WW
  • Tips
  • Contact
Cook it once
  • Home
  • Privacy Policy
  • Recipes
    • KETO
    • LC
    • WW
  • Tips
  • Contact
Category:

General Recipes

General Recipes

Traditional Irish Boxty Recipe

by Rebecca September 1, 2022
written by Rebecca

Yield: 12-16 boxty | Prep time: 2 hrs | Cook time: 15 mins

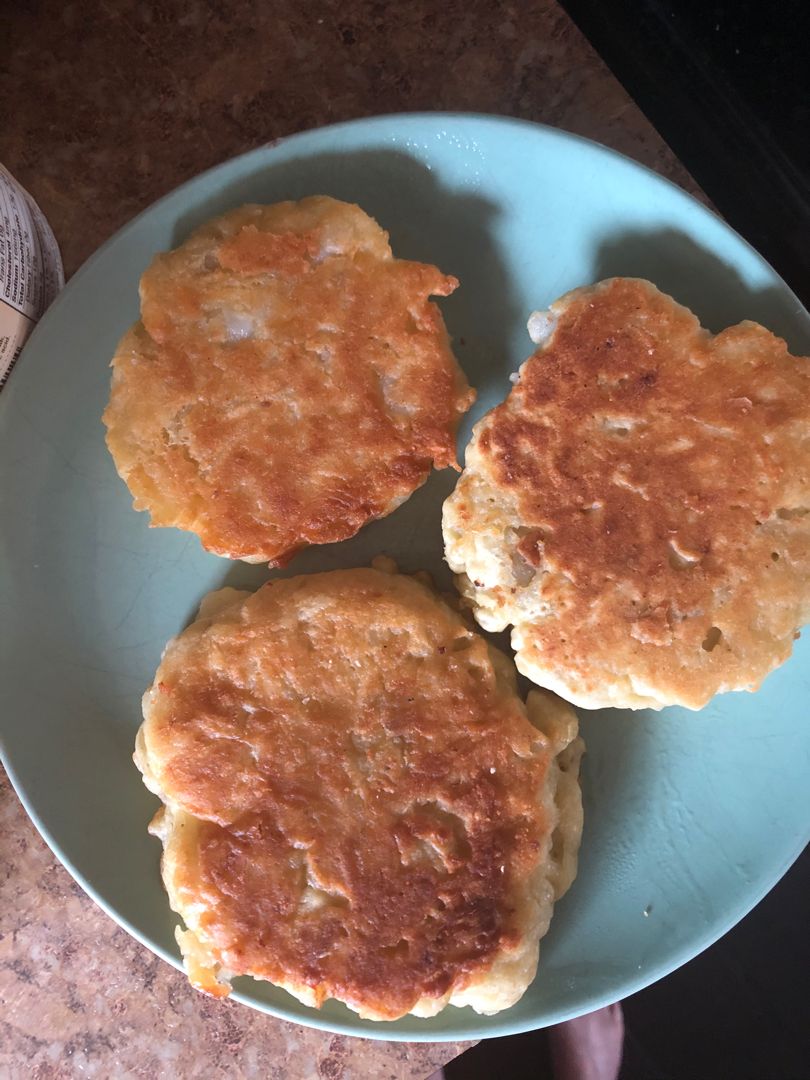
Potato lovers will lose their minds before this Traditional Irish boxty. This boxty is made with mashed and raw potatoes with buttermilk for that dreamy, simple meal that everyone will love! This Irish Boxty is also known as Irish potato cakes, but I prefer to call it boxty. Boxty is a holy grain of pancakes and is most popular during St. Patrick’s Day. If you have not tried Irish boxty, this is the perfect time to make them! Incredibly simple, yet super delicious! I love this boxty so much. In my opinion, this boxty is the best potato pancake ever!

INGREDIENTS

1/4 c. vegetable oil

3 Russet potatoes, divided

2 1/2 tsp salt, divided

2 c. all-purpose flour

1 1/2–2 c. buttermilk

1 tsp baking soda

1/2 c. sour cream, for garnish

2 green onions, chopped, for garnish

How to make Traditional Irish Boxty

Step 1: After peeling two potatoes, slice them into cubes. In a pot, place the potatoes and pour in just enough water to cover them. Season with 1 tsp salt. Cook the potatoes until fork tender. Drain when done and mash the potatoes. Keep in the fridge for about 1 to 2 hours.

Step 2: Peel and grate the remaining potatoes. Put the potatoes in paper towels, then wring to get rid of the excess moisture.

Step 3: In a large bowl, place the mashed potatoes, grated potatoes, flour, salt, baking soda, and 1 1/2 cups buttermilk. Mix well until combined. You can add a splash of buttermilk if the mixture ends up too dry.

Step 4: In a frying pan, heat the oil over medium-high heat. Once the oil is hot, drop large spoonfuls of the potato mixture into the pan, pressing down to flatten each. Fry for about 4 to 5 minutes per side or until browned. When done, transfer the Boxty on paper towels to drain.

Step 5: Serve the Irish Boxty right away with a dollop of sour cream and sprinkles of some green onions on top. Enjoy!

Traditional Irish Boxty Recipe

Rebecca Yield: 12-16 boxty | Prep time: 2 hrs | Cook time: 15 mins Potato lovers will lose their minds before this Traditional Irish boxty. This boxty is made with mashed… General Recipes Traditional Irish Boxty Recipe European Print This
Serves: 12-16 Prep Time: 2 hrs Cooking Time: 15 mins 15 mins
Nutrition facts: 200 calories 20 grams fat
Rating: 5.0/5
( 1 voted )

Ingredients

  • 1/4 c. vegetable oil
  • 3 Russet potatoes, divided
  • 2 1/2 tsp salt, divided
  • 2 c. all-purpose flour
  • 1 1/2–2 c. buttermilk
  • 1 tsp baking soda
  • 1/2 c. sour cream, for garnish
  • 2 green onions, chopped, for garnish

Instructions

Step 1: After peeling two potatoes, slice them into cubes. In a pot, place the potatoes and pour in just enough water to cover them. Season with 1 tsp salt. Cook the potatoes until fork tender. Drain when done and mash the potatoes. Keep in the fridge for about 1 to 2 hours.

Step 2: Peel and grate the remaining potatoes. Put the potatoes in paper towels, then wring to get rid of the excess moisture.

Step 3: In a large bowl, place the mashed potatoes, grated potatoes, flour, salt, baking soda, and 1 1/2 cups buttermilk. Mix well until combined. You can add a splash of buttermilk if the mixture ends up too dry.

Step 4: In a frying pan, heat the oil over medium-high heat. Once the oil is hot, drop large spoonfuls of the potato mixture into the pan, pressing down to flatten each. Fry for about 4 to 5 minutes per side or until browned. When done, transfer the Boxty on paper towels to drain.

Step 5: Serve the Irish Boxty right away with a dollop of sour cream and sprinkles of some green onions on top. Enjoy!
September 1, 2022 0 comment
0 FacebookTwitterPinterestEmail
General Recipes

Jalapeño Popper Breakfast Casserole

by Rebecca September 1, 2022
written by Rebecca

Total time: 50 mins | Servings: 6-8

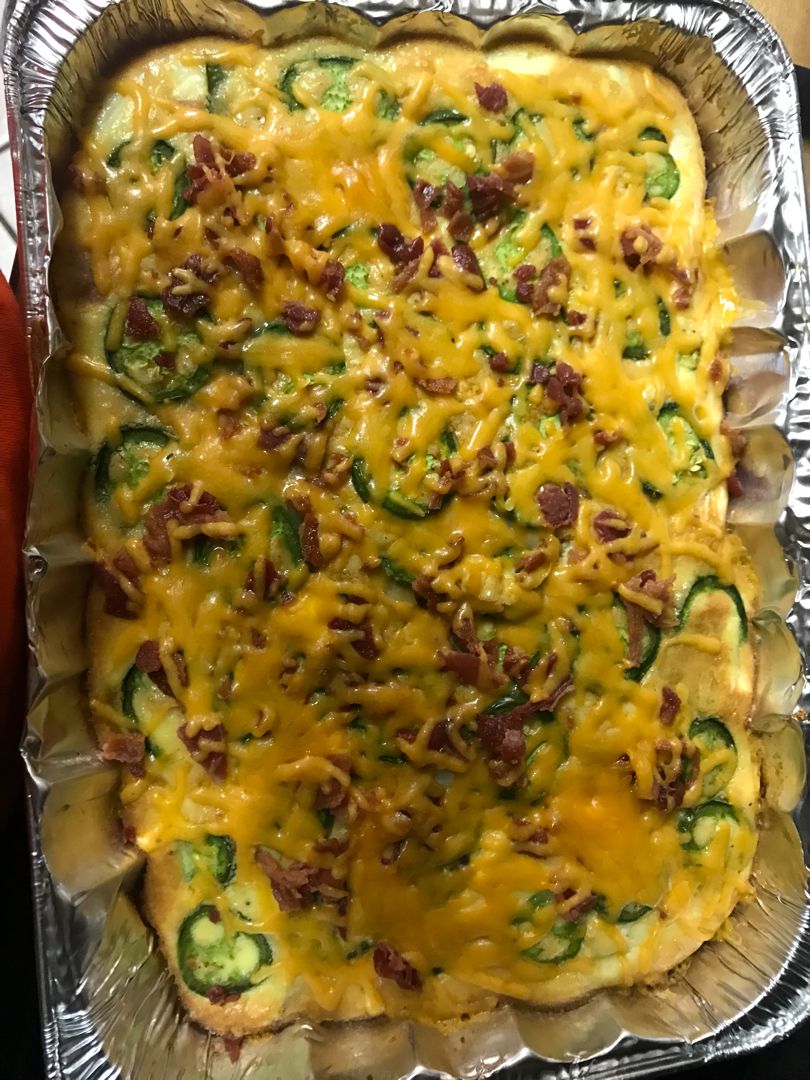
All your favorite jalapeno poppers flavors are present in this Jalapeno Popper Breakfast Casserole! So good, super easy to make, and bursting with spicy jalapenos along with velvety cream cheese, crispy bacon, and melty cheddar. This casserole has been my family’s ultimate favorite for years! We love this for breakfast/brunch. And you can absolutely serve this to a crowd! Leftovers are also amazing and reheat wonderfully for an even easier and quicker hot breakfast! If you love casserole and jalapeno poppers, this recipe will surely be your newest favorite!

Casseroles are one of my favorite things in the world! I have my list of favorites and go-to and this Jalapeno Popper Breakfast Casserole is on my top ten! It is a must-try and (without a doubt) a keeper!

INGREDIENTS

1/2 lb bacon, cooked and crumbled

1 dozen eggs

5 fresh jalapenos, seeds removed, sliced, plus more for garnish (optional)

1 c. heavy cream

1/2 (8 ounces) package of cream cheese, cubed

1/2 tsp onion powder

1 1/2 c. cheddar cheese, grated, divided

1/2 tsp garlic powder

fresh cilantro, optional

kosher salt and freshly ground pepper, to taste

How to make Jalapeño Popper Breakfast Casserole

Step 1: Prepare the oven. Preheat it to 350 degrees F. Ready a 9 x 13-inch baking dish. Lightly grease and set aside.

Step 2: In a large bowl, place the eggs, heavy cream, and 1/2 cup cheese. Mix well and season with onion, garlic powder, salt, and pepper.

Step 3: Into the prepared baking dish, pour the egg mixture and drop the cubed cream cheese on top followed by the sliced jalapenos.

Step 4: Bake in the preheated oven for about 30 minutes. After 30 minutes, sprinkle the rest of the cheese on top along with the crumbled bacon. Resume baking for additional 15 minutes or until the center is set and the cheese has melted.

Step 5: Remove from the oven when done and serve the Jalapeno Popper Breakfast Casserole hot garnished with cilantro. Enjoy!

Jalapeño Popper Breakfast Casserole

Rebecca Total time: 50 mins | Servings: 6-8 All your favorite jalapeno poppers flavors are present in this Jalapeno Popper Breakfast Casserole! So good, super easy to make, and bursting with… General Recipes Jalapeño Popper Breakfast Casserole European Print This
Serves: 6-8
Nutrition facts: 200 calories 20 grams fat
Rating: 5.0/5
( 1 voted )

Ingredients

  • 1/2 lb bacon, cooked and crumbled
  • 1 dozen eggs
  • 5 fresh jalapenos, seeds removed, sliced, plus more for garnish (optional)
  • 1 c. heavy cream
  • 1/2 (8 ounces) package of cream cheese, cubed
  • 1/2 tsp onion powder
  • 1 1/2 c. cheddar cheese, grated, divided
  • 1/2 tsp garlic powder
  • fresh cilantro, optional
  • kosher salt and freshly ground pepper, to taste

Instructions

Step 1: Prepare the oven. Preheat it to 350 degrees F. Ready a 9 x 13-inch baking dish. Lightly grease and set aside.

Step 2: In a large bowl, place the eggs, heavy cream, and 1/2 cup cheese. Mix well and season with onion, garlic powder, salt, and pepper.

Step 3: Into the prepared baking dish, pour the egg mixture and drop the cubed cream cheese on top followed by the sliced jalapenos.

Step 4: Bake in the preheated oven for about 30 minutes. After 30 minutes, sprinkle the rest of the cheese on top along with the crumbled bacon. Resume baking for additional 15 minutes or until the center is set and the cheese has melted.

Step 5: Remove from the oven when done and serve the Jalapeno Popper Breakfast Casserole hot garnished with cilantro. Enjoy!

September 1, 2022 0 comment
0 FacebookTwitterPinterestEmail
General Recipes

FROZEN BERRIES, CAKE MIX AND SPRITE

by Rebecca August 31, 2022
written by Rebecca

I am a big fan of this dessert. It is loaded with fruits, perfectly sweet, and easy to whip up. A great dessert option perfect to serve by itself or top with vanilla ice cream, homemade whipped cream, or a dollop of cool whip.

INGREDIENTS

1 box white cake (or yellow cake mix)

2 1/2 c. mixed frozen berries (or any other type of frozen fruit will work great!)

2 to 2 1/2 c. Sprite (or other lemon-lime soda)

HOW TO MAKE FROZEN BERRIES, CAKE MIX, AND SPRITE

Step 1: Prepare the oven. Preheat it to 350 degrees F.

Step 2: Using cooking spray or butter, lightly grease a 9 x 13-inch baking dish and set aside.

Step 3: In the bottom of the prepared baking dish, evenly spread the frozen fruit. Over the fruit, evenly sprinkle the whole bag of the dry cake mix, pressing it gently.

Step 4: On top of the cake mix, evenly pour 2 c. of Sprite. DO NOT MIX. You can add a little more Sprite if you notice some dry spots.

Step 5: Tent using foil and place in the preheated oven. Bake for about 20 minutes. Uncover and continue to bake for an additional 30 to 35 minutes or until the top is golden.

Step 6: Remove from the oven when done and allow to cool for approximately 10 to 15 minutes. Serve top with a big scoop of vanilla ice cream. Enjoy!

Notes:

Make sure to just add enough soda to cover all the dry patches.

After removing the foil, spray the top with a bit of cooking spray. Do this if you want a crispier top.

If you want to cut back on the sugar, use diet/zero Sugar Sprite, or any lemon-lime soda.

Serve the cobbler with a big scoop of vanilla ice cream, homemade whipped cream, or a dollop of cool whip on top.

If desired, use fresh fruit like strawberries, raspberries, blackberries, and blueberries. Or use all! I suggest sprinkling sugar over the fruit.

For this recipe, you can also use Gluten-free cake.

You can also use frozen blueberries, peaches, raspberries, blackberries, or strawberries. Or use a mix of these fruits.

FROZEN BERRIES, CAKE MIX AND SPRITE

Rebecca I am a big fan of this dessert. It is loaded with fruits, perfectly sweet, and easy to whip up. A great dessert option perfect to serve by itself or… General Recipes FROZEN BERRIES, CAKE MIX AND SPRITE European Print This
Nutrition facts: 200 calories 20 grams fat
Rating: 3.5/5
( 2 voted )

Ingredients

  • 1 box white cake (or yellow cake mix)
  • 2 1/2 c. mixed frozen berries (or any other type of frozen fruit will work great!)
  • 2 to 2 1/2 c. Sprite (or other lemon-lime soda)

Instructions

Step 1: Prepare the oven. Preheat it to 350 degrees F.

Step 2: Using cooking spray or butter, lightly grease a 9 x 13-inch baking dish and set aside.

Step 3: In the bottom of the prepared baking dish, evenly spread the frozen fruit. Over the fruit, evenly sprinkle the whole bag of the dry cake mix, pressing it gently.

Step 4: On top of the cake mix, evenly pour 2 c. of Sprite. DO NOT MIX. You can add a little more Sprite if you notice some dry spots.

Step 5: Tent using foil and place in the preheated oven. Bake for about 20 minutes. Uncover and continue to bake for an additional 30 to 35 minutes or until the top is golden.

Step 6: Remove from the oven when done and allow to cool for approximately 10 to 15 minutes. Serve top with a big scoop of vanilla ice cream. Enjoy!

Notes

Make sure to just add enough soda to cover all the dry patches. After removing the foil, spray the top with a bit of cooking spray. Do this if you want a crispier top. If you want to cut back on the sugar, use diet/zero Sugar Sprite, or any lemon-lime soda. Serve the cobbler with a big scoop of vanilla ice cream, homemade whipped cream, or a dollop of cool whip on top. If desired, use fresh fruit like strawberries, raspberries, blackberries, and blueberries. Or use all! I suggest sprinkling sugar over the fruit. For this recipe, you can also use Gluten-free cake. You can also use frozen blueberries, peaches, raspberries, blackberries, or strawberries. Or use a mix of these fruits.

August 31, 2022 0 comment
0 FacebookTwitterPinterestEmail
General Recipes

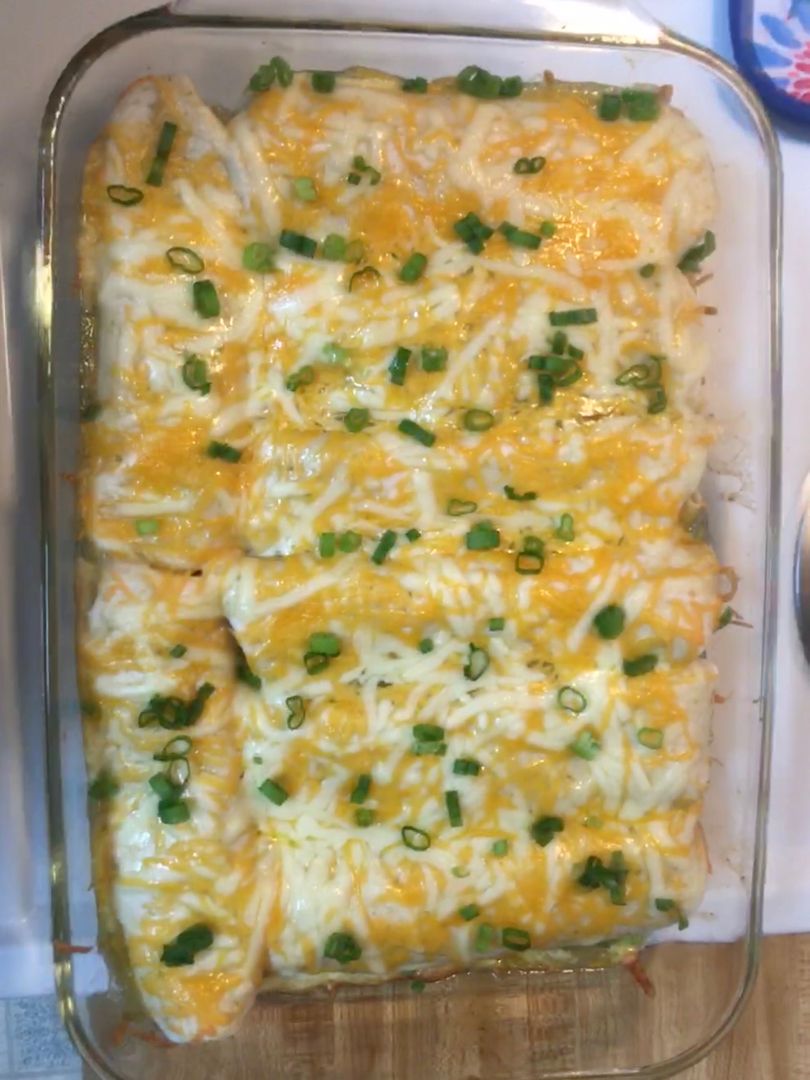
Cream Cheese Chicken Enchiladas

by Rebecca August 31, 2022
written by Rebecca

These delightful cream cheese chicken enchiladas are my husband’s favorite! They are stuffed with creamy chicken, and corn filling and topped with salsa and melty cheese. A great dinner option that is also excellent for entertaining!

I have been obsessed with these Cream Cheese Chicken Enchiladas. They are incredibly easy to whip up and ready in a snap! This simple enchilada recipe is a must-try, hard, to miss, and a keeper!

Ingredients

2 c. cooked, shredded chicken

1/4 c. sour cream

5 ounces cream cheese, softened

1 (16 ounces) jar of prepared salsa

1 c. shredded pepper jack cheese, divided

1 c. shredded cheddar cheese, divided

1/2 tsp cumin

1/2 tsp chili powder

1 c. frozen corn kernels, thawed

8 (8”) flour tortillas

4 green onions, thinly sliced, divided

How to make Cream Cheese Chicken Enchiladas

Step 1: Prepare the oven. Preheat it to 325 degrees. Using a cooking spray, grease a baking dish and set it aside.

Step 2: Place the sour cream and cream cheese in a medium-sized bowl. Mix well and add in half a cup of the salsa along with a half cup of cream cheese, half a cup of pepper Jack cheese, cumin, and chili powder. Mix well until just blended.

Step 3: Into the bowl, place the chicken, half of the green onions, and corn. Mix again.

Step 4: In the bottom of the prepared baking dish, spread a half cup of the salsa.

Step 5: In the middle of one of the tortillas, place about a half cup of the chicken mixture. Roll the tortilla and put it in the baking dish, seam-side-down. Do the same for the rest of the tortillas and filling.

Step 6: Over the enchiladas, pour the rest of the salsa and sprinkle the remaining cheese on top.

Step 7: Place in the preheated oven and bake for about 20 to 25 minutes or until the enchiladas are completely heated and the cheese has melted.

Step 8: Remove the enchiladas from the oven when done and garnish with the rest of the green onions. Serve and enjoy!

Cream Cheese Chicken Enchiladas

Rebecca These delightful cream cheese chicken enchiladas are my husband’s favorite! They are stuffed with creamy chicken, and corn filling and topped with salsa and melty cheese. A great dinner option… General Recipes Cream Cheese Chicken Enchiladas European Print This
Nutrition facts: 200 calories 20 grams fat
Rating: 5.0/5
( 1 voted )

Ingredients

  • 2 c. cooked, shredded chicken
  • 1/4 c. sour cream
  • 5 ounces cream cheese, softened
  • 1 (16 ounces) jar of prepared salsa
  • 1 c. shredded pepper jack cheese, divided
  • 1 c. shredded cheddar cheese, divided
  • 1/2 tsp cumin
  • 1/2 tsp chili powder
  • 1 c. frozen corn kernels, thawed
  • 8 (8”) flour tortillas
  • 4 green onions, thinly sliced, divided

Instructions

Step 1: Prepare the oven. Preheat it to 325 degrees. Using a cooking spray, grease a baking dish and set it aside.

Step 2: Place the sour cream and cream cheese in a medium-sized bowl. Mix well and add in half a cup of the salsa along with a half cup of cream cheese, half a cup of pepper Jack cheese, cumin, and chili powder. Mix well until just blended.

Step 3: Into the bowl, place the chicken, half of the green onions, and corn. Mix again.

Step 4: In the bottom of the prepared baking dish, spread a half cup of the salsa.

Step 5: In the middle of one of the tortillas, place about a half cup of the chicken mixture. Roll the tortilla and put it in the baking dish, seam-side-down. Do the same for the rest of the tortillas and filling.

Step 6: Over the enchiladas, pour the rest of the salsa and sprinkle the remaining cheese on top.

Step 7: Place in the preheated oven and bake for about 20 to 25 minutes or until the enchiladas are completely heated and the cheese has melted.

Step 8: Remove the enchiladas from the oven when done and garnish with the rest of the green onions. Serve and enjoy!

August 31, 2022 0 comment
0 FacebookTwitterPinterestEmail
General Recipes

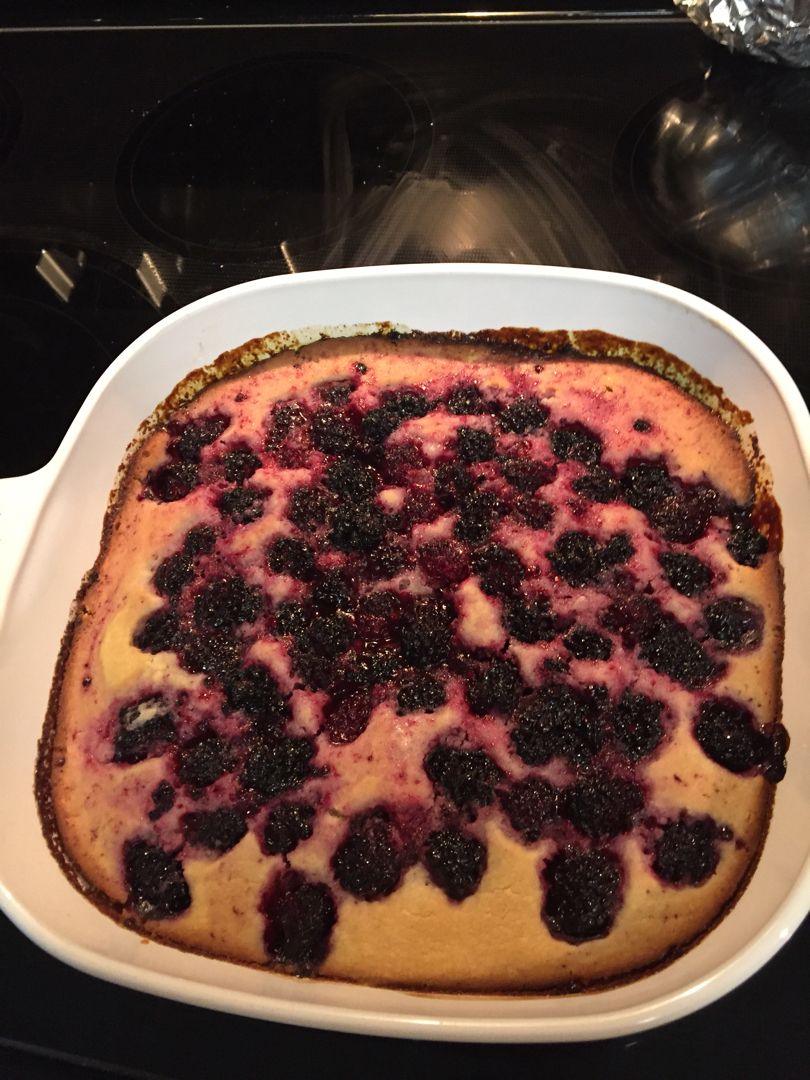
Blackberry Cobbler

by Rebecca August 31, 2022
written by Rebecca

Enjoy summer all year round with this delicious homemade cobbler packed with tasty blackberries! I love to use fresh fruit, but you can also use frozen berries. Serve this cobbler with a big scoop of vanilla ice cream or whipped cream for a special dessert that you deserve!

Ingredients

1 c. sugar

2 1/2 c. fresh or frozen (thawed and drained) blackberries (do not use blueberries)

1 c. Gold Medal™ all-purpose flour

1/2 c. butter, melted

2 tsp baking powder

1 c. milk

Cream, whipped cream, or ice cream, if desired

1/2 tsp salt

How to make Blackberry Cobbler

Step 1: Place the sugar and blackberries in a medium-sized bowl. Mix well and allow this to sit for about 20 minutes or until you have a fruit syrup.

Step 2: Prepare the oven. Preheat it to 375 degrees.

Step 3: Place the salt, milk, flour, and baking powder in a large bowl. Mix well, then whisk in the melted butter until well blended.

Step 4: Pour the mixture into an ungreased 8-inch square pan, evenly spreading the mixture. Over the batter, spoon the blackberry mixture.

Step 5: Place in the preheated oven and bake for about 45 to 55 minutes or until dough rises and the top of the cobbler is golden.

Step 6: Remove from the oven when done and serve the blackberry cobbler warm with cream. Enjoy!

Tips:

To make a basic blackberry cobbler dough: Mix the dough with a light hand. This will ensure the dough will rise through the berry mixture and guarantee the cobbler will have a light texture. Make sure to mix until just the dry ingredients are moistened.

For an aromatic edge, you can add half tsp of warm baking spice, cinnamon, ginger, nutmeg, or cardamom. If you want to enhance the natural sweetness of the berries, stir 1 tsp of pure vanilla into the berries.

For a different flavor, try adding raspberries to the blackberries.

For a fresh flavor twist, mix grated lemon or lime zest with the fruit before baking.

Blackberry Cobbler

Rebecca Enjoy summer all year round with this delicious homemade cobbler packed with tasty blackberries! I love to use fresh fruit, but you can also use frozen berries. Serve this cobbler… General Recipes Blackberry Cobbler European Print This
Nutrition facts: 200 calories 20 grams fat
Rating: 5.0/5
( 1 voted )

Ingredients

  • 1 c. sugar
  • 2 1/2 c. fresh or frozen (thawed and drained) blackberries (do not use blueberries)
  • 1 c. Gold Medal™ all-purpose flour
  • 1/2 c. butter, melted
  • 2 tsp baking powder
  • 1 c. milk
  • Cream, whipped cream, or ice cream, if desired
  • 1/2 tsp salt

Instructions

Step 1: Place the sugar and blackberries in a medium-sized bowl. Mix well and allow this to sit for about 20 minutes or until you have a fruit syrup.

Step 2: Prepare the oven. Preheat it to 375 degrees.

Step 3: Place the salt, milk, flour, and baking powder in a large bowl. Mix well, then whisk in the melted butter until well blended.

Step 4: Pour the mixture into an ungreased 8-inch square pan, evenly spreading the mixture. Over the batter, spoon the blackberry mixture.

Step 5: Place in the preheated oven and bake for about 45 to 55 minutes or until dough rises and the top of the cobbler is golden.

Step 6: Remove from the oven when done and serve the blackberry cobbler warm with cream. Enjoy!

Notes

To make a basic blackberry cobbler dough: Mix the dough with a light hand. This will ensure the dough will rise through the berry mixture and guarantee the cobbler will have a light texture. Make sure to mix until just the dry ingredients are moistened. For an aromatic edge, you can add half tsp of warm baking spice, cinnamon, ginger, nutmeg, or cardamom. If you want to enhance the natural sweetness of the berries, stir 1 tsp of pure vanilla into the berries. For a different flavor, try adding raspberries to the blackberries. For a fresh flavor twist, mix grated lemon or lime zest with the fruit before baking.

August 31, 2022 0 comment
0 FacebookTwitterPinterestEmail
General Recipes

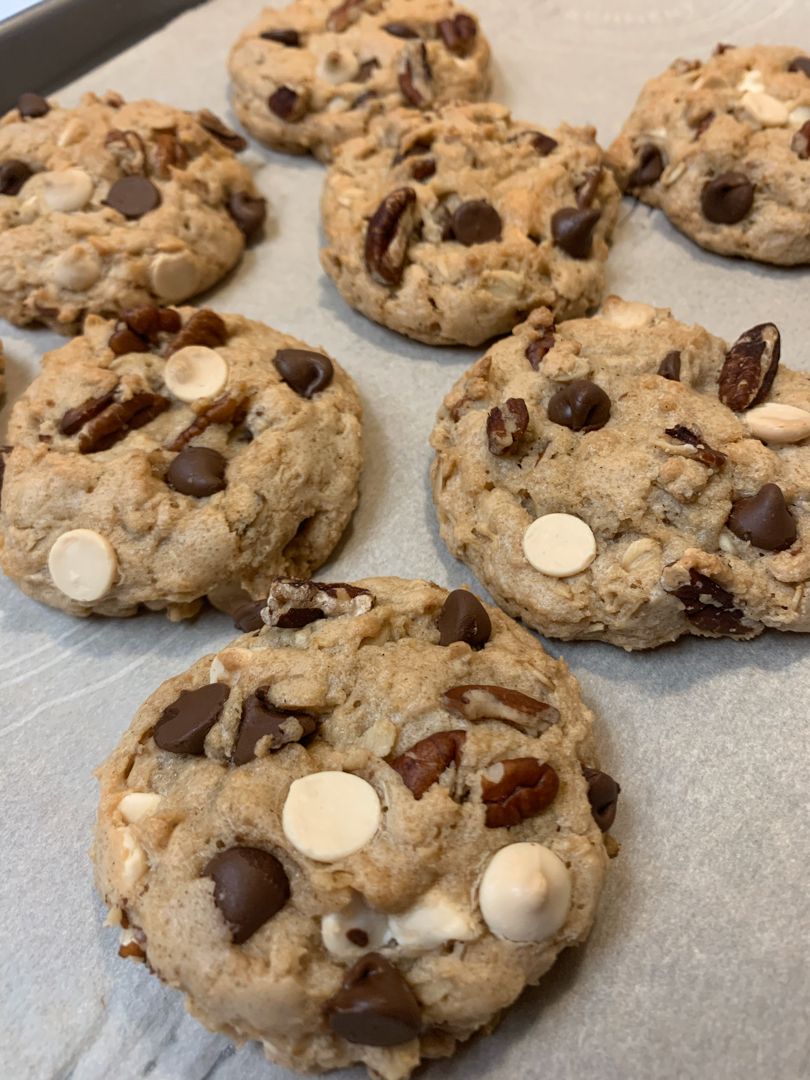
I want to Marry You Cookies

by Rebecca August 31, 2022
written by Rebecca

These decadent cookies are one of the best cookies I’ve made in years! They are filled with two kinds of chocolate chips, oats, and pecans. Super good, easy to whip up, and the perfect treat for everyone! Everyone calls these the DREAM cookies known to evoke marriage proposals!

Ingredients

1 tsp pure vanilla extract

1 c. butter

1⁄2 c. granulated sugar

1 c. dark brown sugar (may add up to 1/4 c. more if desired)

1 egg

1 egg yolk

2 c. flour

1⁄2 tsp baking soda

1 c. white chocolate chips

1⁄4 tsp ground cinnamon

1 c. uncooked rolled oats

1 c. chocolate chips (I like dark)

1⁄2 tsp salt

How to make I want to Marry You Cookies

Step 1: Melt the butter in a medium saucepan. Once the butter has melted and is smooth, take the pan off the heat.

Step 2: In a bowl, place the dark brown sugar and granulated sugar. Add the melted butter and mix well until blended and smooth. Place in the fridge for 10 minutes. After 10 minutes, remove the bowl from the fridge and add the egg yolk, egg, and vanilla. Next, add the oats along with the flour, baking soda, cinnamon, and half tsp salt. Mix well until just combined.

Step 3: Fold in the chocolate chips.

Step 4: Shape the batter into 24 small or medium balls. Place the dough balls on a lightly greased cookie sheet. Allow the dough balls to chill in the fridge for at least 30 minutes.

Step 5: Prepare the oven. Preheat it to 325 degrees.

Step 6: Bake in the preheated oven for about 12 to 14 minutes or until browned. Remove the cookies from the oven when done and let them cool on a wire rack. Serve the cookies or store them in an airtight container for later.

I want to Marry You Cookies

Rebecca These decadent cookies are one of the best cookies I’ve made in years! They are filled with two kinds of chocolate chips, oats, and pecans. Super good, easy to whip… General Recipes I want to Marry You Cookies European Print This
Nutrition facts: 200 calories 20 grams fat
Rating: 5.0/5
( 2 voted )

Ingredients

  • 1 tsp pure vanilla extract
  • 1 c. butter
  • 1⁄2 c. granulated sugar
  • 1 c. dark brown sugar (may add up to 1/4 c. more if desired)
  • 1 egg
  • 1 egg yolk
  • 2 c. flour
  • 1⁄2 tsp baking soda
  • 1 c. white chocolate chips
  • 1⁄4 tsp ground cinnamon
  • 1 c. uncooked rolled oats
  • 1 c. chocolate chips (I like dark)
  • 1⁄2 tsp salt

Instructions

Step 1: Melt the butter in a medium saucepan. Once the butter has melted and is smooth, take the pan off the heat.

Step 2: In a bowl, place the dark brown sugar and granulated sugar. Add the melted butter and mix well until blended and smooth. Place in the fridge for 10 minutes. After 10 minutes, remove the bowl from the fridge and add the egg yolk, egg, and vanilla. Next, add the oats along with the flour, baking soda, cinnamon, and half tsp salt. Mix well until just combined.

Step 3: Fold in the chocolate chips.

Step 4: Shape the batter into 24 small or medium balls. Place the dough balls on a lightly greased cookie sheet. Allow the dough balls to chill in the fridge for at least 30 minutes.

Step 5: Prepare the oven. Preheat it to 325 degrees.

Step 6: Bake in the preheated oven for about 12 to 14 minutes or until browned. Remove the cookies from the oven when done and let them cool on a wire rack. Serve the cookies or store them in an airtight container for later.

August 31, 2022 0 comment
0 FacebookTwitterPinterestEmail
General Recipes

SAUSAGE HASHBROWN BITES

by Rebecca August 31, 2022
written by Rebecca

I am sure everyone will love these cheesy, crispy mini sausage hash brown bites! They are an excellent breakfast/brunch or appetizer. Throw these delicious bad boys easily and at any time and serve them with your favorite dipping sauce. I particularly love these with hollandaise sauce, but if you want some kick, these are great with salsa or hot sauce, too!

These delectable sausages, hash brown bites are one of the favorites and go-to quick grab-and-go breakfast. They are a no-fuss to make. These delicious bites are also a wonderful freezer meal.

I usually whip up a big batch and freeze the other half for later.

INGREDIENTS

8 ounces cream cheese, softened

1 pound ground breakfast sausage, uncooked

1 1/2 c. Bisquick

4 c. shredded, frozen hash browns

1 1/2 c. cheddar cheese, shredded

HOW TO MAKE SAUSAGE HASHBROWN BITES

Step 1: Prepare the oven. Preheat it to 400 degrees. Using parchment paper, line a baking sheet and set it aside.

Step 2: Place the cream cheese, sausage, biscuit mix, hash browns, and cheddar cheese in a medium bowl. Mix well until combined.

Step 3: Into about 1 1/2-inch ball, divide the mixture, and place them on the prepared baking sheet. Place in the preheated oven and bake for about 20 to 25 minutes or until the hash brown bites are browned. Remove from the oven when done and allow the bites to cool.

Step 4: Serve and enjoy!

Tips:

Serve these hashbrown bites with hollandaise sauce or any of your preferred sauces such as salsa or hot sauce.

To make these hashbrown bites ahead, prep according to the steps provided. Keep the hashbrown balls in an airtight container at room temperature or in the fridge if planning to keep them a little longer. When ready to serve, place in the oven or microwave for a couple of minutes.

Serve these hashbrown bites for breakfast or snacks. These hashbrown bites are a great option for a quick pick-me-up.

SAUSAGE HASHBROWN BITES

Rebecca I am sure everyone will love these cheesy, crispy mini sausage hash brown bites! They are an excellent breakfast/brunch or appetizer. Throw these delicious bad boys easily and at any… General Recipes SAUSAGE HASHBROWN BITES European Print This
Nutrition facts: 200 calories 20 grams fat
Rating: 5.0/5
( 1 voted )

Ingredients

  • 8 ounces cream cheese, softened
  • 1 pound ground breakfast sausage, uncooked
  • 1 1/2 c. Bisquick
  • 4 c. shredded, frozen hash browns
  • 1 1/2 c. cheddar cheese, shredded

Instructions

Step 1: Prepare the oven. Preheat it to 400 degrees. Using parchment paper, line a baking sheet and set it aside.

Step 2: Place the cream cheese, sausage, biscuit mix, hash browns, and cheddar cheese in a medium bowl. Mix well until combined.

Step 3: Into about 1 1/2-inch ball, divide the mixture, and place them on the prepared baking sheet. Place in the preheated oven and bake for about 20 to 25 minutes or until the hash brown bites are browned. Remove from the oven when done and allow the bites to cool.

Step 4: Serve and enjoy!

Notes

Serve these hashbrown bites with hollandaise sauce or any of your preferred sauces such as salsa or hot sauce. To make these hashbrown bites ahead, prep according to the steps provided. Keep the hashbrown balls in an airtight container at room temperature or in the fridge if planning to keep them a little longer. When ready to serve, place in the oven or microwave for a couple of minutes. Serve these hashbrown bites for breakfast or snacks. These hashbrown bites are a great option for a quick pick-me-up.


August 31, 2022 0 comment
0 FacebookTwitterPinterestEmail
General Recipes

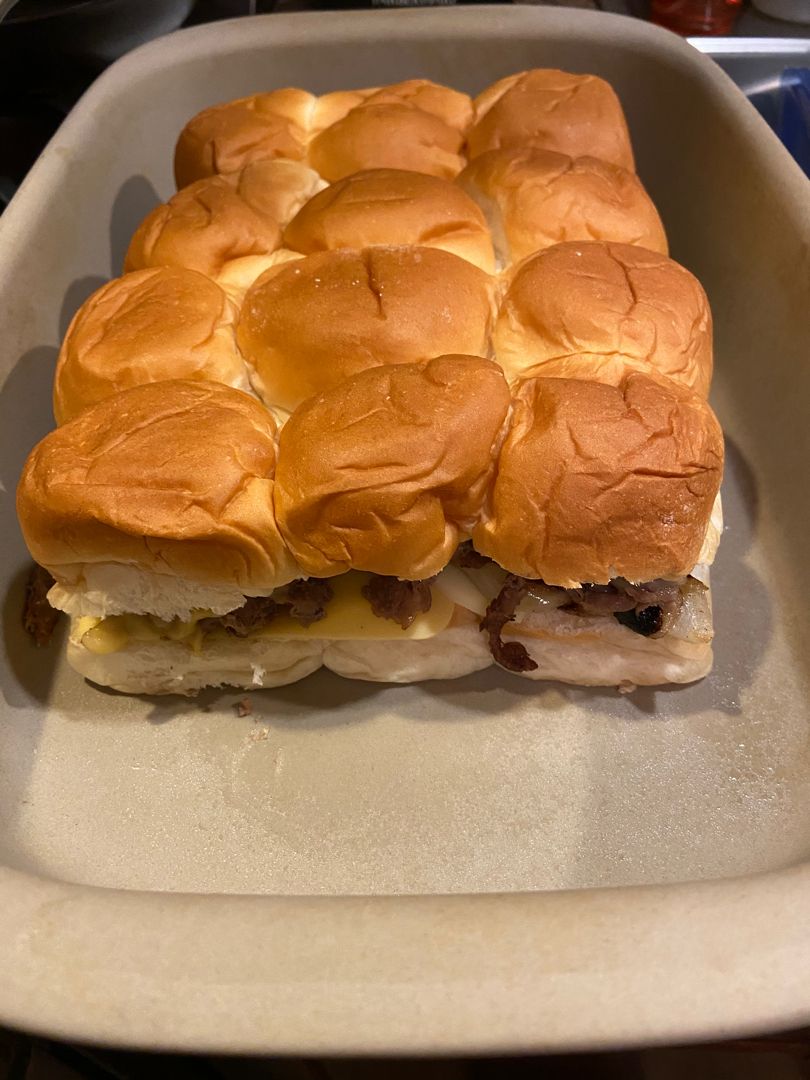
Philly Cheesesteak Sliders

by Rebecca August 31, 2022
written by Rebecca

These Philly Cheesesteak Sliders are a tasty, fun dish that you can easily make at any time. Perfectly cooked thinly sliced steak smothered in melty cheese sandwiched on soft slider buns. These sliders are excellent for feeding a big crowd!

INGREDIENTS

12 Hawaiian Rolls

1 pound sirloin steak thinly sliced

1/2 medium yellow onion, sliced

1/2 large green bell pepper sliced

1 clove garlic, minced

2 ounces fresh mushrooms, minced

1 tablespoon Worcestershire sauce

1/2 teaspoon smoked paprika

1/3 cup mayonnaise

6 slices provolone cheese

3/4 cup Cheez Whiz

1/2 teaspoon salt

1/8 teaspoon ground black pepper

2 tablespoons bacon grease

Garlic Butter:

1 tablespoon Italian parsley, minced

1/4 teaspoon roasted garlic powder

3 tablespoons salted butter, melted

How to make Philly Cheesesteak Sliders

Step 1: Mince the garlic and mushrooms. Slice the bell peppers and onions as thinly as possible.

Step 2: Into small strips, slice the steak. To keep the fat intact, slice the steak against the grain.

Step 3: Heat the olive oil or the bacon grease in a skillet. Then, add the vegetables and cook until tender. Set the veggies aside when done.

Step 4: In the same skillet, add the steak, pepper, salt, smoked paprika, and Worcestershire sauce. Cook until everything is completely cooked. Return the veggies to the skillet, stir, and simmer until the meat is cooked through.

Step 5: At this point, slice the rolls. Lay the sliced rolls in a greased baking dish. Spread each roll with mayo. Add the cheese and top with the veggies and meat mixture.

Step 6: In the meantime, combine the roasted garlic with melted butter and minced parsley. Brush the top of the rolls with this and sprinkle each with extra parsley.

Step 7: Cover with foil and bake for about 15 minutes at 350 degrees or until the cheese has melted. Uncover and continue baking for additional 10 minutes.

Step 8: Remove from the oven when done and serve the sliders right away with fries or salad on the side. Enjoy!

Philly Cheesesteak Sliders

Rebecca These Philly Cheesesteak Sliders are a tasty, fun dish that you can easily make at any time. Perfectly cooked thinly sliced steak smothered in melty cheese sandwiched on soft slider… General Recipes Philly Cheesesteak Sliders European Print This
Nutrition facts: 200 calories 20 grams fat
Rating: 5.0/5
( 1 voted )

Ingredients

  • 12 Hawaiian Rolls
  • 1 pound sirloin steak thinly sliced
  • 1/2 medium yellow onion, sliced
  • 1/2 large green bell pepper sliced
  • 1 clove garlic, minced
  • 2 ounces fresh mushrooms, minced
  • 1 tablespoon Worcestershire sauce
  • 1/2 teaspoon smoked paprika
  • 1/3 cup mayonnaise
  • 6 slices provolone cheese
  • 3/4 cup Cheez Whiz
  • 1/2 teaspoon salt
  • 1/8 teaspoon ground black pepper
  • 2 tablespoons bacon grease
  • Garlic Butter:
  • 1 tablespoon Italian parsley, minced
  • 1/4 teaspoon roasted garlic powder
  • 3 tablespoons salted butter, melted

Instructions

Step 1: Mince the garlic and mushrooms. Slice the bell peppers and onions as thinly as possible.

Step 2: Into small strips, slice the steak. To keep the fat intact, slice the steak against the grain.

Step 3: Heat the olive oil or the bacon grease in a skillet. Then, add the vegetables and cook until tender. Set the veggies aside when done.

Step 4: In the same skillet, add the steak, pepper, salt, smoked paprika, and Worcestershire sauce. Cook until everything is completely cooked. Return the veggies to the skillet, stir, and simmer until the meat is cooked through.

Step 5: At this point, slice the rolls. Lay the sliced rolls in a greased baking dish. Spread each roll with mayo. Add the cheese and top with the veggies and meat mixture.

Step 6: In the meantime, combine the roasted garlic with melted butter and minced parsley. Brush the top of the rolls with this and sprinkle each with extra parsley.

Step 7: Cover with foil and bake for about 15 minutes at 350 degrees or until the cheese has melted. Uncover and continue baking for additional 10 minutes.

Step 8: Remove from the oven when done and serve the sliders right away with fries or salad on the side. Enjoy!

August 31, 2022 0 comment
0 FacebookTwitterPinterestEmail
General Recipes

One Pot Mexican Rice Casserole

by Rebecca August 31, 2022
written by Rebecca

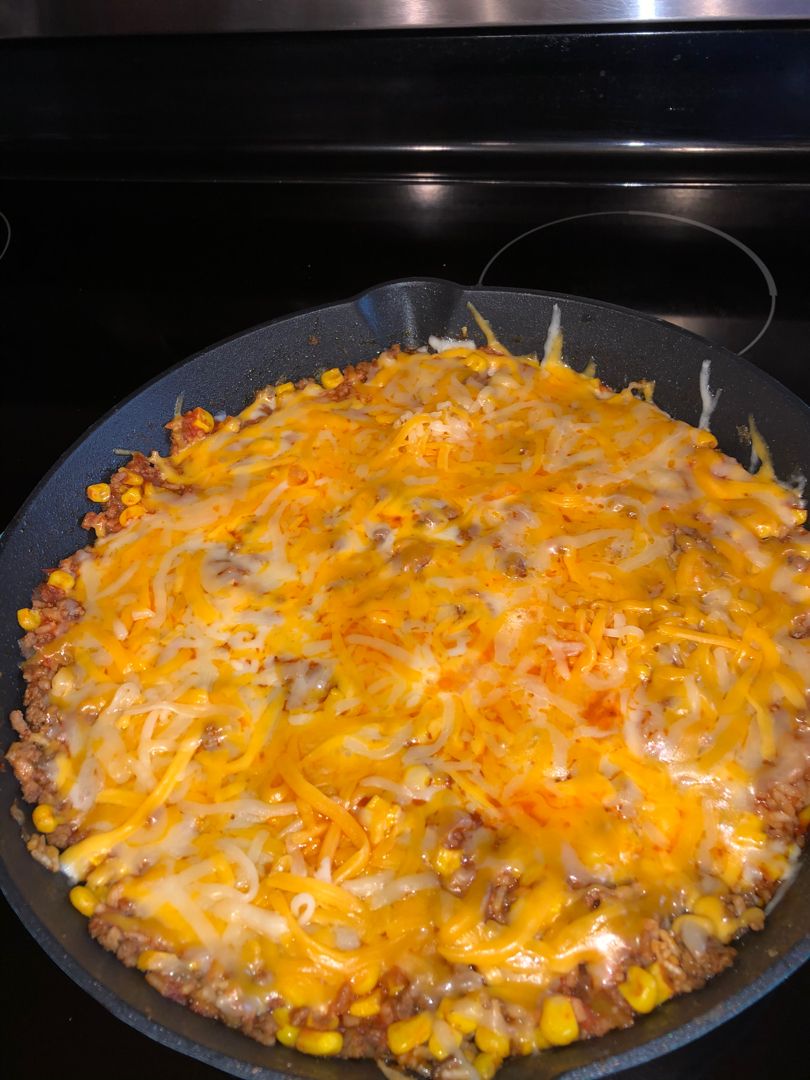
I adore this one-pot Mexican Rice Casserole. Just like my other fave casserole recipes, this too is very easy to make. A pretty simple casserole recipe that requires only a few ingredients to make. This casserole is perfect for everyone, even your fussiest eaters will surely enjoy every bit of this delicious casserole!

My entire family is obsessed with one-pot meals! It’s a great option for busy days and moms like me. Mexican dishes also is very near to our hearts. This casserole has everything we love in a single pot! And this recipe is easily customizable to your liking. I suggest adding more veggies. I guarantee your picky eaters will not mind! To make this recipe, you can swap long-grain white rice with brown rice for a healthier option. Either way, this casserole is an amazing, filling dish!

INGREDIENTS

1 small onion, diced

1 pound of ground beef

2 tablespoons Taco seasoning

1 c. long-grain white rice

1 15-ounces can of corn, drained

1 1/2 c. beef broth

8 ounces tomato sauce

1 teaspoon garlic powder

1 c. shredded cheese

1/2 c. salsa

salt & pepper, to taste

How to make One Pot Mexican Rice Casserole

Step 1: Place the ground beef, salt, and pepper in a large skillet over medium-high heat. Cook until the meat is no longer pink. Drain the excess grease when done.

Step 2: Return the pan to the stove. Add the garlic powder and taco seasoning to the browned ground beef. Mix well until blended.

Step 3: Add the rice to the pan with the beef. Mix well and add the broth, corn, salsa, and tomato sauce. Stir well until the ingredients are combined.

Step 4: Let the mixture boil. Then, put the lid on and adjust the heat to low. Simmer for about 19 to 20 minutes or until the rice is tender.

Step 5: Top everything with cheese. Replace the lid and continue to cook for an additional 2 to 3 minutes or until the cheese has melted.

Tips:

You can keep this dish in the fridge for no more than a week. For best results, consume immediately.

Feel free to add extra ingredients such as peppers or chorizo for a little bit of spice. Other herbs are great, too!

One Pot Mexican Rice Casserole

Rebecca I adore this one-pot Mexican Rice Casserole. Just like my other fave casserole recipes, this too is very easy to make. A pretty simple casserole recipe that requires only a… General Recipes One Pot Mexican Rice Casserole European Print This
Nutrition facts: 200 calories 20 grams fat
Rating: 5.0/5
( 1 voted )

Ingredients

  • 1 small onion, diced
  • 1 pound of ground beef
  • 2 tablespoons Taco seasoning
  • 1 c. long-grain white rice
  • 1 15-ounces can of corn, drained
  • 1 1/2 c. beef broth
  • 8 ounces tomato sauce
  • 1 teaspoon garlic powder
  • 1 c. shredded cheese
  • 1/2 c. salsa
  • salt & pepper, to taste

Instructions

Step 1: Place the ground beef, salt, and pepper in a large skillet over medium-high heat. Cook until the meat is no longer pink. Drain the excess grease when done.

Step 2: Return the pan to the stove. Add the garlic powder and taco seasoning to the browned ground beef. Mix well until blended.

Step 3: Add the rice to the pan with the beef. Mix well and add the broth, corn, salsa, and tomato sauce. Stir well until the ingredients are combined.

Step 4: Let the mixture boil. Then, put the lid on and adjust the heat to low. Simmer for about 19 to 20 minutes or until the rice is tender.

Step 5: Top everything with cheese. Replace the lid and continue to cook for an additional 2 to 3 minutes or until the cheese has melted.

Notes

You can keep this dish in the fridge for no more than a week. For best results, consume immediately. Feel free to add extra ingredients such as peppers or chorizo for a little bit of spice. Other herbs are great, too!

August 31, 2022 0 comment
0 FacebookTwitterPinterestEmail
General Recipes

FRENCH DIP CROCK POT DINNER

by Rebecca August 31, 2022
written by Rebecca

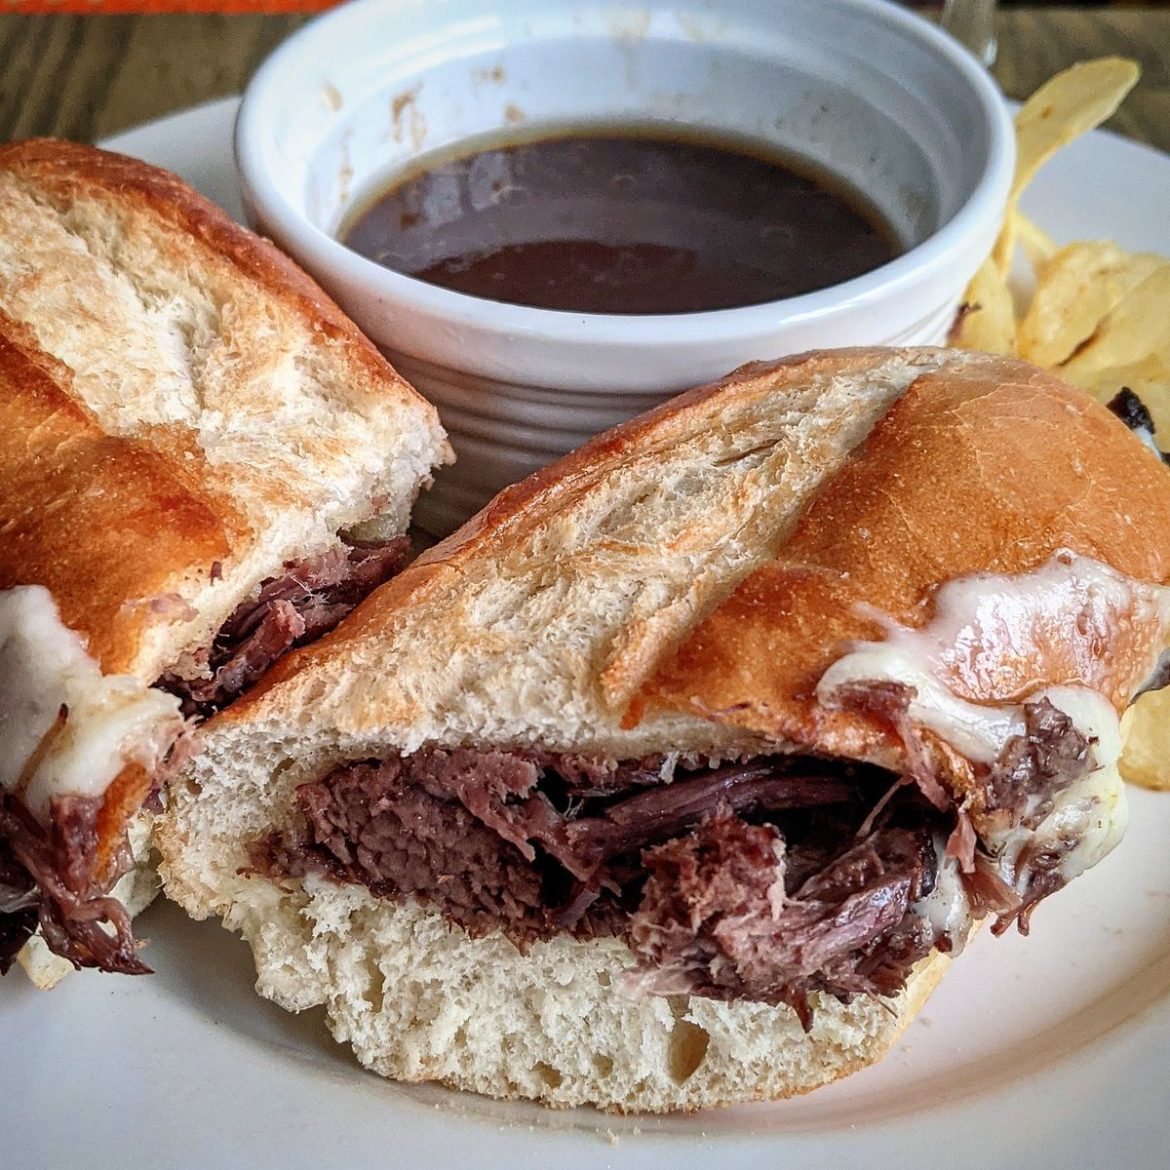
These French Dip sandwiches are insanely amazing! Super easy to throw together using just basic ingredients. Leftovers are wonderful, too! Serve these mouthwatering sandwiches with the au jus for dipping and enjoy a simple, filling meal perfect any time!

Ingredients

2 tbsp olive oil

4 c. beef stock

2-3 lbs chuck roast

4-5 French bread or hoagie rolls

1 packet onion soup mix (1.9 ounces packet)

8 slices of Swiss or mozzarella cheese

Salt and Pepper

HOW TO MAKE FRENCH DIP CROCK POT DINNER

Step 1: With salt and pepper, generously season both sides of the roast.

Step 2: Heat the olive oil in a large skillet (cast-iron) over medium-high heat. Once the oil is hot, add the roast to the skillet and sear for about 3 to 4 minutes until golden-brown crust forms.

Step 3: Into the crockpot, transfer the roast. Pour in the beef stock and add the onion soup mix. Set to cook for 8 to 10 hours on low or 5 to 7 hours on high.

Step 4: To a large bowl, transfer the roast. Using two forks, shred the meat and return the shredded meat to the crockpot.

Step 5: Slice the French loaf to the sandwich size. If using hoagie rolls, slice them as well. On a baking sheet, lay the pieces of bread, and open sides up. On one side of the bread, place the beef and cover the meat with the cheese.

Step 6: Put the baking sheet under the broiler in the oven for 1 minute or until the tops are brown and the cheese has melted. Remove from the oven when done.

Step 7: Into small bowls, ladle the juice from the crockpot. For thicker au jus, whisk 2 tbsp cornstarch and 4 tbsp of the au jus juice until well mixed. To a saucepan, transfer the juice from the crockpot and add the cornstarch mixture. Let it simmer, then allow this to sit for a couple of minutes.

Step 8: Serve the sandwiches immediately with the au jus for dipping. Enjoy!

FRENCH DIP CROCK POT DINNER

Rebecca These French Dip sandwiches are insanely amazing! Super easy to throw together using just basic ingredients. Leftovers are wonderful, too! Serve these mouthwatering sandwiches with the au jus for dipping… General Recipes FRENCH DIP CROCK POT DINNER European Print This
Nutrition facts: 200 calories 20 grams fat
Rating: 5.0/5
( 1 voted )

Ingredients

  • 2 tbsp olive oil
  • 4 c. beef stock
  • 2-3 lbs chuck roast
  • 4-5 French bread or hoagie rolls
  • 1 packet onion soup mix (1.9 ounces packet)
  • 8 slices of Swiss or mozzarella cheese
  • Salt and Pepper

Instructions

Step 1: With salt and pepper, generously season both sides of the roast.

Step 2: Heat the olive oil in a large skillet (cast-iron) over medium-high heat. Once the oil is hot, add the roast to the skillet and sear for about 3 to 4 minutes until golden-brown crust forms.

Step 3: Into the crockpot, transfer the roast. Pour in the beef stock and add the onion soup mix. Set to cook for 8 to 10 hours on low or 5 to 7 hours on high.

Step 4: To a large bowl, transfer the roast. Using two forks, shred the meat and return the shredded meat to the crockpot.

Step 5: Slice the French loaf to the sandwich size. If using hoagie rolls, slice them as well. On a baking sheet, lay the pieces of bread, and open sides up. On one side of the bread, place the beef and cover the meat with the cheese.

Step 6: Put the baking sheet under the broiler in the oven for 1 minute or until the tops are brown and the cheese has melted. Remove from the oven when done.

Step 7: Into small bowls, ladle the juice from the crockpot. For thicker au jus, whisk 2 tbsp cornstarch and 4 tbsp of the au jus juice until well mixed. To a saucepan, transfer the juice from the crockpot and add the cornstarch mixture. Let it simmer, then allow this to sit for a couple of minutes.

Step 8: Serve the sandwiches immediately with the au jus for dipping. Enjoy!

August 31, 2022 0 comment
0 FacebookTwitterPinterestEmail
Newer Posts
Older Posts

Popular Posts

  • 1

    Crispy Crunchy Parmesan Potatoes

    March 21, 2020
  • 2

    CROCK POT SMOTHERED PORK CHOPS

    March 21, 2020
  • Facebook
  • Twitter

@2019 - All Right Reserved.


Back To Top