Cook it once
  • Home
  • Privacy Policy
  • Recipes
    • KETO
    • LC
    • WW
  • Tips
  • Contact
Cook it once
  • Home
  • Privacy Policy
  • Recipes
    • KETO
    • LC
    • WW
  • Tips
  • Contact
Category:

General Recipes

General Recipes

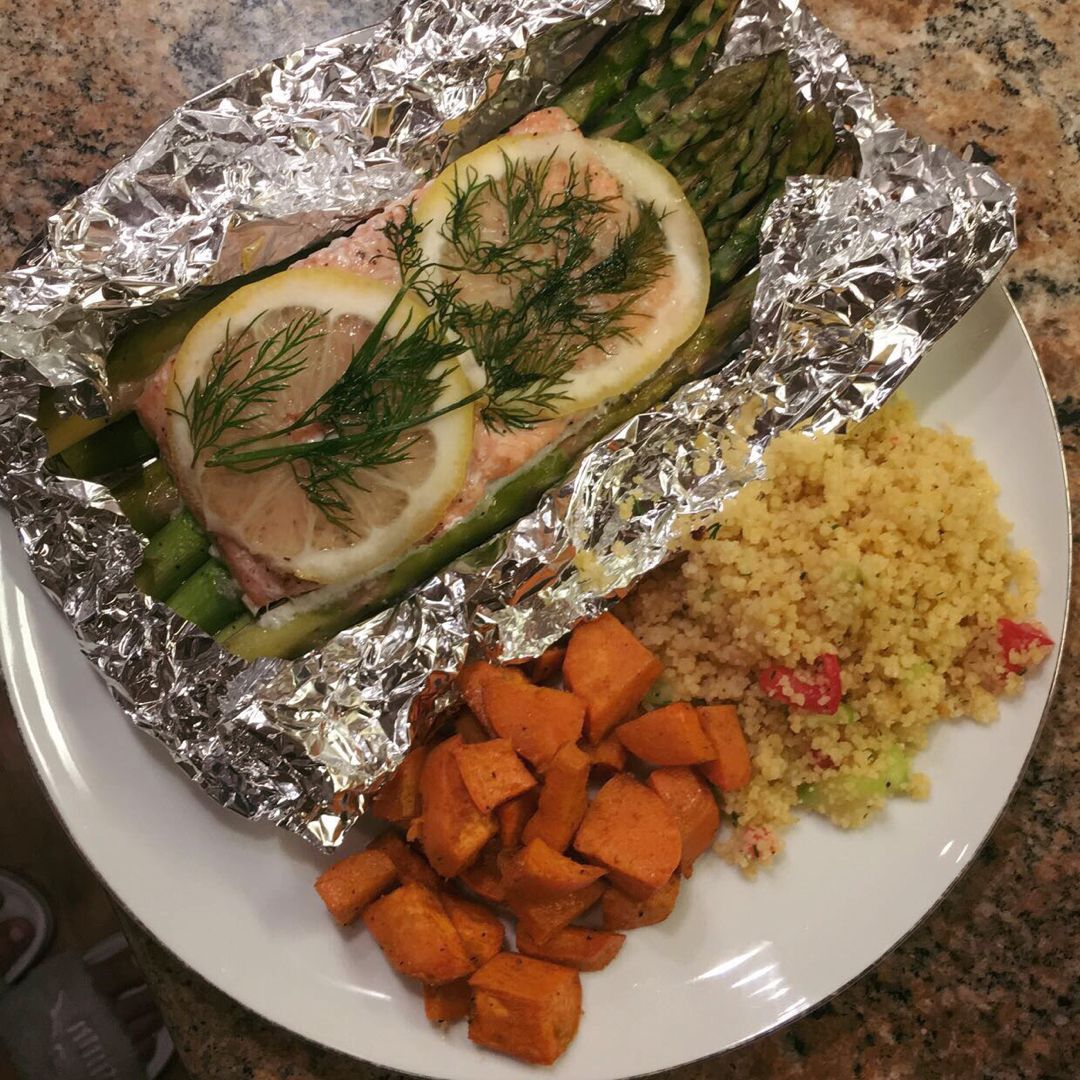
Baked Salmon in Foil with Asparagus and Garlic Lemon Butter Sauce

by Rebecca September 2, 2022
written by Rebecca

Baked Salmon with asparagus in garlic butter sauce is an amazing dish great for a fancy dinner and entertaining. The salmon is wrapped in foil and baked until perfectly done.

Ingredients

4 tsp minced garlic (4 cloves)

2 salmon fillets

2 tbsp vegetable broth or chicken broth

1 tbsp of your favorite hot sauce (we used Sriracha)

2 tbsp fresh chopped parsley or cilantro

3–4 tbsp butter, diced into small cubes (or ghee)

1 1/2 tbsp fresh lemon juice, or to taste

1 pound (450 grams) medium-thick asparagus, woody ends trimmed

Salt and fresh ground black pepper, to taste

How to make Baked Salmon in Foil with Asparagus and Garlic Lemon Butter Sauce

Step 1: Ready the salmon. Place them in different little foil packs. Prepare the oven. Preheat it to 425 degrees.

Step 2: On the countertop, lay a few sheets of foil (make two sheets).

Step 3: Place the broth, lemon juice, and hot sauce in a small bowl. Mix well to make the garlic butter sauce.

Step 4: Sprinkle some pepper and salt on both sides of the fillets. Divide the salmon and place each near the middle of the foil. On one side, place the trimmed asparagus. You can season the fillet with more salt and pepper if needed. Then, place the garlic on top. Drizzle the fillets and asparagus with a generous amount of garlic butter. Among the foil packets, divide the pieces of butter, layering them over the fillet and asparagus.

Step 5: Wrap the salmon and asparagus with the foil, crimping the foil edges. Make sure not to wrap the salmon too tight, instead leave a little space. On the baking sheet, place the foil packs of salmon. Place in the preheated oven and bake for about 9 to 12 minutes or until the salmon is completely cooked.

Step 6: Remove from the oven when done and unwrap the salmon. Drizzle more lemon juice and garnish the salmon with parsley, cilantro, and slices of lemon. If needed, add a little more lemon and garlic butter.

Step 7: Serve and enjoy!

Baked Salmon in Foil with Asparagus and Garlic Lemon Butter Sauce

Rebecca Baked Salmon with asparagus in garlic butter sauce is an amazing dish great for a fancy dinner and entertaining. The salmon is wrapped in foil and baked until perfectly done.… General Recipes Baked Salmon in Foil with Asparagus and Garlic Lemon Butter Sauce European Print This
Nutrition facts: 200 calories 20 grams fat
Rating: 5.0/5
( 1 voted )

Ingredients

  • 4 tsp minced garlic (4 cloves)
  • 2 salmon fillets
  • 2 tbsp vegetable broth or chicken broth
  • 1 tbsp of your favorite hot sauce (we used Sriracha)
  • 2 tbsp fresh chopped parsley or cilantro
  • 3–4 tbsp butter, diced into small cubes (or ghee)
  • 1 1/2 tbsp fresh lemon juice, or to taste
  • 1 pound (450 grams) medium-thick asparagus, woody ends trimmed
  • Salt and fresh ground black pepper, to taste

Instructions

Step 1: Ready the salmon. Place them in different little foil packs. Prepare the oven. Preheat it to 425 degrees.

Step 2: On the countertop, lay a few sheets of foil (make two sheets).

Step 3: Place the broth, lemon juice, and hot sauce in a small bowl. Mix well to make the garlic butter sauce.

Step 4: Sprinkle some pepper and salt on both sides of the fillets. Divide the salmon and place each near the middle of the foil. On one side, place the trimmed asparagus. You can season the fillet with more salt and pepper if needed. Then, place the garlic on top. Drizzle the fillets and asparagus with a generous amount of garlic butter. Among the foil packets, divide the pieces of butter, layering them over the fillet and asparagus.

Step 5: Wrap the salmon and asparagus with the foil, crimping the foil edges. Make sure not to wrap the salmon too tight, instead leave a little space. On the baking sheet, place the foil packs of salmon. Place in the preheated oven and bake for about 9 to 12 minutes or until the salmon is completely cooked.

Step 6: Remove from the oven when done and unwrap the salmon. Drizzle more lemon juice and garnish the salmon with parsley, cilantro, and slices of lemon. If needed, add a little more lemon and garlic butter.

Step 7: Serve and enjoy!
September 2, 2022 0 comment
0 FacebookTwitterPinterestEmail
General Recipes

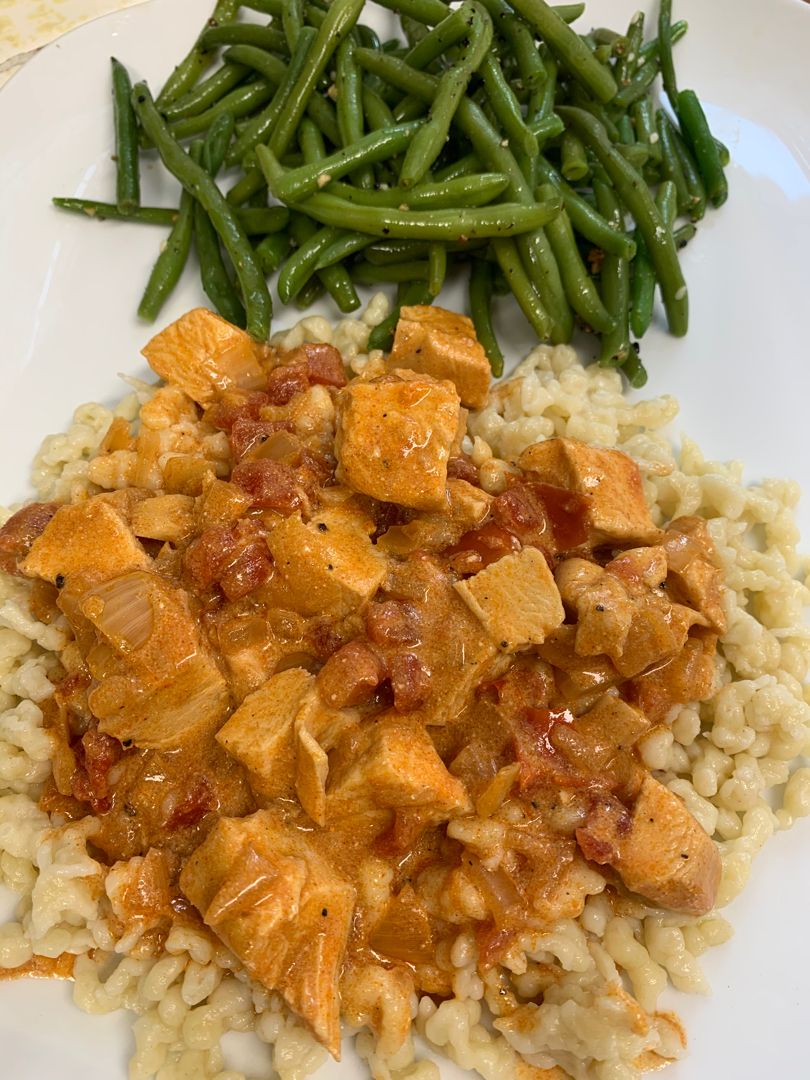
My Grandmother’s Hungarian Chicken Paprikash Recipe

by Rebecca September 2, 2022
written by Rebecca

This Hungarian Chicken Paprikash is a very comforting dish with dumplings and pieces of chicken in a flavor-packed broth. This dish is a no-fuss to make. Creamy, delightful, and the perfect meal to warm you up during the cold days.

Ingredients

1 whole cut-up chicken (skin intact)

1 Vidalia onion, chopped

3 tablespoons vegetable oil

3 chicken bullion cubes (or more to taste; 1 per c. of water added)

2 tablespoons sweet paprika

ADD THESE LATER TO THE BROTH:

4 tablespoons flour (or more to thicken if you like)

1 pt sour cream

3 teaspoons Lawry’s seasoning salt (optional, but adds flavor!)

1/2 pt water

DUMPLINGS:

6 cups all-purpose flour

3 cups water

1 teaspoon salt

4 eggs

How to make My Grandmother’s Hungarian Chicken Paprikash

Step 1: In a big pot, place the oil along with the chopped onion. Put the lid on and cook over medium/high heat until the onion is translucent. Take the pot off the heat, add the paprika to the onion, and mix well.

Step 2: In the pot, add the chicken and cook until a little bit browned. I bought a whole chicken, slice it into pieces, and made sure that the skin is intact.

Step 3: Pour water into the pot enough to cover the chicken. Bring to a boil. Add the chicken bullion cubes and Lawry’s seasoning salt. Put the lid on and simmer for about 25 minutes if using a regular pot or 15 to 20 minutes if making in a pressure cooker.

Step 4: In the meantime, whisk the sour cream, water, and flour using a hand mixer or Kitchen-Aid mixer until smooth. Set aside.

Step 5: To a colander, transfer the chicken pieces when done. Into the broth, gradually add the sour cream mixture, stirring constantly until blended. If desired, you can de-bone the chicken or just leave them intact.

Step 6: To make the dumplings, bring a large pot of water to a boil. Beat the eggs, water, flour, and salt in a mixer until you have a soupy dough. Into the water, scrape the dough a spoonful at a time. Cook for about 7 minutes until the dumplings rise to the surface,

Step 7: To serve, place the dumplings into serving bowls. Pour the sauce over and top with the whole piece of de-boned chicken. Enjoy!

My Grandmother’s Hungarian Chicken Paprikash Recipe

Rebecca This Hungarian Chicken Paprikash is a very comforting dish with dumplings and pieces of chicken in a flavor-packed broth. This dish is a no-fuss to make. Creamy, delightful, and the… General Recipes My Grandmother’s Hungarian Chicken Paprikash Recipe European Print This
Nutrition facts: 200 calories 20 grams fat
Rating: 5.0/5
( 1 voted )

Ingredients

  • 1 whole cut-up chicken (skin intact)
  • 1 Vidalia onion, chopped
  • 3 tablespoons vegetable oil
  • 3 chicken bullion cubes (or more to taste; 1 per c. of water added)
  • 2 tablespoons sweet paprika
  • ADD THESE LATER TO THE BROTH:
  • 4 tablespoons flour (or more to thicken if you like)
  • 1 pt sour cream
  • 3 teaspoons Lawry’s seasoning salt (optional, but adds flavor!)
  • 1/2 pt water
  • DUMPLINGS:
  • 6 cups all-purpose flour
  • 3 cups water
  • 1 teaspoon salt
  • 4 eggs

Instructions

Step 1: In a big pot, place the oil along with the chopped onion. Put the lid on and cook over medium/high heat until the onion is translucent. Take the pot off the heat, add the paprika to the onion, and mix well.

Step 2: In the pot, add the chicken and cook until a little bit browned. I bought a whole chicken, slice it into pieces, and made sure that the skin is intact.

Step 3: Pour water into the pot enough to cover the chicken. Bring to a boil. Add the chicken bullion cubes and Lawry’s seasoning salt. Put the lid on and simmer for about 25 minutes if using a regular pot or 15 to 20 minutes if making in a pressure cooker.

Step 4: In the meantime, whisk the sour cream, water, and flour using a hand mixer or Kitchen-Aid mixer until smooth. Set aside.

Step 5: To a colander, transfer the chicken pieces when done. Into the broth, gradually add the sour cream mixture, stirring constantly until blended. If desired, you can de-bone the chicken or just leave them intact.

Step 6: To make the dumplings, bring a large pot of water to a boil. Beat the eggs, water, flour, and salt in a mixer until you have a soupy dough. Into the water, scrape the dough a spoonful at a time. Cook for about 7 minutes until the dumplings rise to the surface,

Step 7: To serve, place the dumplings into serving bowls. Pour the sauce over and top with the whole piece of de-boned chicken. Enjoy!

September 2, 2022 0 comment
0 FacebookTwitterPinterestEmail
General Recipes

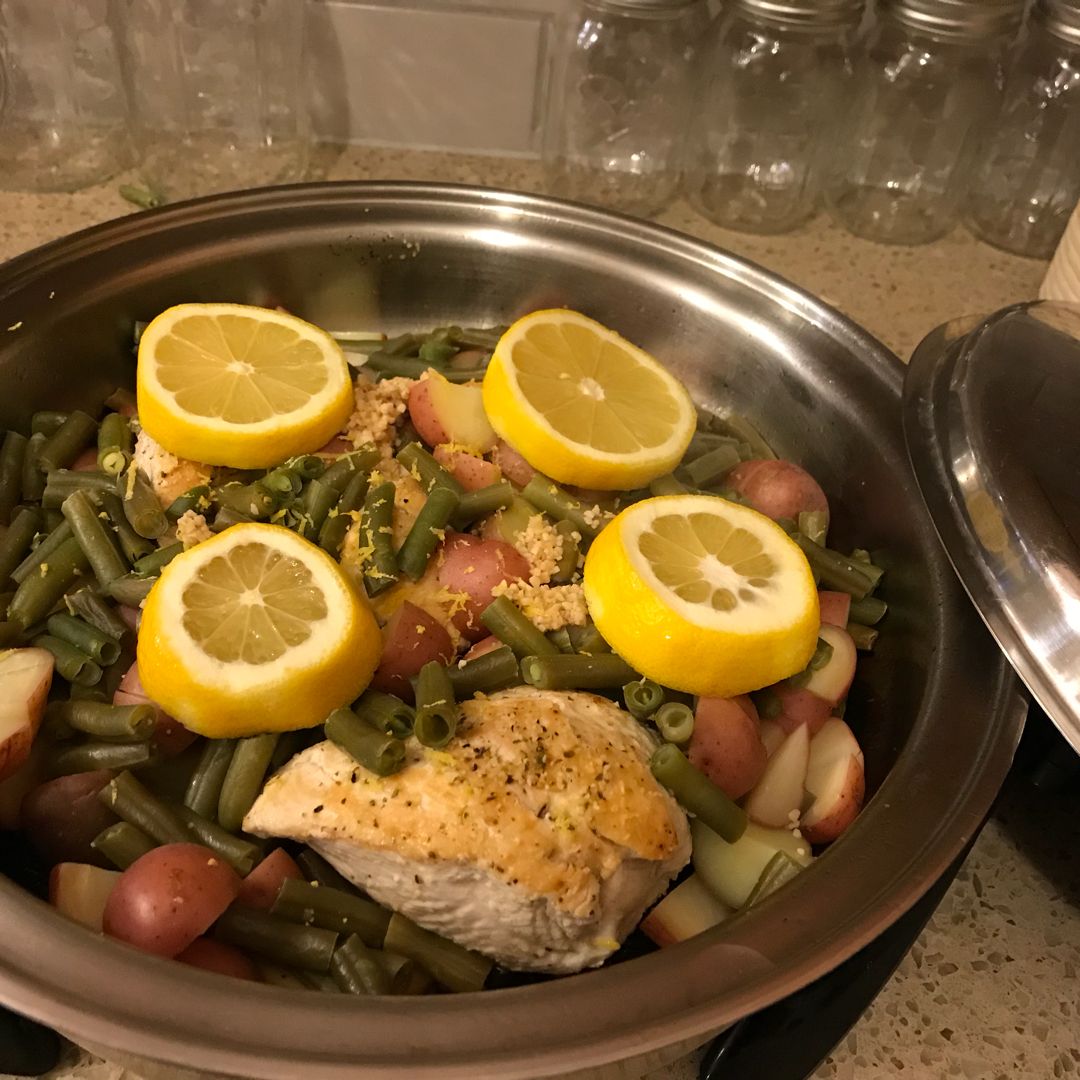
GARLIC and LEMON CHICKEN WITH GREEN BEANS and RED POTATOES

by Rebecca September 1, 2022
written by Rebecca

Juicy and tender chicken with green beans and tender red potatoes. This one-skillet meal is a delightful dinner that you can easily make at any time. Smells awesome and tastes superb. It is no doubt why everyone loves this delicious dish!

Ingredients

4 chicken breasts – bone-in with skin (this will be about 3 ¼ pounds of chicken)

6 tablespoons olive oil – Divided (1 tablespoon and 5 tablespoons)

4 cloves garlic – minced

¾ pound trimmed green beans

2 lemons – 1 very thinly sliced and 1 juiced

8 small red potatoes – quartered (make sure you use small red potatoes)

1 teaspoon salt

½ teaspoon freshly ground black pepper

HOW TO MAKE GARLIC and LEMON CHICKEN WITH GREEN BEANS and RED POTATOES

Marinate the chicken overnight – Recommended:

Step 1: Place 5 tbsp olive oil, lemon juice, garlic, salt, and pepper in a large bowl. Mix well until combined.

Step 2: To the olive oil and lemon mixture, add the chicken and toss to coat every piece well. Cover the bowl and marinate the chicken overnight. Stir the chicken a couple of times during the marinating.

Step 3: In the next day, take the chicken out of the marinade. Coat the green beans and potatoes in the same olive-oil mixture.

Step 4: Prepare the oven. Preheat it to 400 degrees F.

Step 5: Using 1 tbsp olive oil, grease a large baking dish or cast-iron skillet. In a single layer at the bottom of the prepared baking dish/skillet, arrange the lemon slices.

If Not Marinate the Chicken Overnight: After mixing the marinade, toss in the green beans until coated. Remove the green beans from the marinade and arrange them on top of the lemon slices. Add the potatoes to the same olive oil mixture and toss to coat. Along the inside edge of the dish over the green beans, arrange the potatoes. Coat the chicken in the same mixture, then place them in the dish/skillet, skin-side up. Over the chicken, pour the rest of the olive-oil mixture.

Step 6: Using foil, tent the baking dish/skillet and put it in the preheated oven. Bake for about 30 minutes. Remove the foil and continue baking for another 20 minutes or until the internal temperature of the chicken reaches 165 degrees F.

Step 7: Transfer the chicken to a plate and set it aside.

Step 8: Return the beans and potatoes to the oven and bake for additional 10 minutes or until the potatoes are tender.

Step 9: Serve the garlic and lemon chicken with green beans and red potatoes immediately with some crusty rolls or baguette and with a side of salad. Enjoy!

GARLIC and LEMON CHICKEN WITH GREEN BEANS and RED POTATOES

Rebecca Juicy and tender chicken with green beans and tender red potatoes. This one-skillet meal is a delightful dinner that you can easily make at any time. Smells awesome and tastes… General Recipes GARLIC and LEMON CHICKEN WITH GREEN BEANS and RED POTATOES European Print This
Nutrition facts: 200 calories 20 grams fat
Rating: 5.0/5
( 1 voted )

Ingredients

  • 4 chicken breasts – bone-in with skin (this will be about 3 ¼ pounds of chicken)
  • 6 tablespoons olive oil – Divided (1 tablespoon and 5 tablespoons)
  • 4 cloves garlic – minced
  • ¾ pound trimmed green beans
  • 2 lemons – 1 very thinly sliced and 1 juiced
  • 8 small red potatoes – quartered (make sure you use small red potatoes)
  • 1 teaspoon salt
  • ½ teaspoon freshly ground black pepper

Instructions

Marinate the chicken overnight – Recommended:

Step 1: Place 5 tbsp olive oil, lemon juice, garlic, salt, and pepper in a large bowl. Mix well until combined.

Step 2: To the olive oil and lemon mixture, add the chicken and toss to coat every piece well. Cover the bowl and marinate the chicken overnight. Stir the chicken a couple of times during the marinating.

Step 3: In the next day, take the chicken out of the marinade. Coat the green beans and potatoes in the same olive-oil mixture.

Step 4: Prepare the oven. Preheat it to 400 degrees F.

Step 5: Using 1 tbsp olive oil, grease a large baking dish or cast-iron skillet. In a single layer at the bottom of the prepared baking dish/skillet, arrange the lemon slices.

If Not Marinate the Chicken Overnight: After mixing the marinade, toss in the green beans until coated. Remove the green beans from the marinade and arrange them on top of the lemon slices. Add the potatoes to the same olive oil mixture and toss to coat. Along the inside edge of the dish over the green beans, arrange the potatoes. Coat the chicken in the same mixture, then place them in the dish/skillet, skin-side up. Over the chicken, pour the rest of the olive-oil mixture.

Step 6: Using foil, tent the baking dish/skillet and put it in the preheated oven. Bake for about 30 minutes. Remove the foil and continue baking for another 20 minutes or until the internal temperature of the chicken reaches 165 degrees F.

Step 7: Transfer the chicken to a plate and set it aside.

Step 8: Return the beans and potatoes to the oven and bake for additional 10 minutes or until the potatoes are tender.

Step 9: Serve the garlic and lemon chicken with green beans and red potatoes immediately with some crusty rolls or baguette and with a side of salad. Enjoy!

September 1, 2022 0 comment
0 FacebookTwitterPinterestEmail
General Recipes

Best Cinnamon Rolls

by Rebecca September 1, 2022
written by Rebecca

Cinnamon rolls are my favorite! They are super soft, fluffy, and gooey. These divine, melt-in-your-mouth cinnamon rolls are amazing and this homemade version guarantees the best results!

Ingredients

1 c. warm whole milk (110 to 115 degrees)

1/3 c. butter, melted

1/2 c. sugar

2 large eggs, room temperature

1 package (1/4 oz.) of active dry yeast

4 to 4-1/2 c. of all-purpose flour

1 tsp salt

Filling:

1/4 c. butter, melted, divided

2 tbsp ground cinnamon

3/4 c. packed brown sugar

Frosting:

1/2 c. butter, softened

1-1/2 c. confectioners’ sugar

1/4 c. cream cheese, softened

1/2 tsp vanilla extract

1/8 tsp salt

How to make the Best Cinnamon Rolls

Step 1: Dissolve the yeast into the warm milk. Place the sugar, butter, eggs, salt, yeast mixture, and 2 c. flour in another bowl and cream on medium speed until smooth. Whisk in enough flour until you have a soft dough.

Step 2: Onto a floured surface, turn the dough, and knead for about 6 to 8 minutes or until elastic and smooth. Transfer the dough to a greased mixing bowl, turning once to grease the top. Tent the bowl and keep it aside for 1 hour in a warm place until the size doubles.

Step 3: Mix the brown sugar and cinnamon. After an hour, punch down the dough and divide it in half. Into an 11 x 8-inch rectangle, roll one portion of the dough on a lightly floured surface. Brush the dough with 2 tbsp melted butter and sprinkle with half of the brown sugar mixture to within half an inch of the edges.

Step 4: Roll the dough, jellyroll style beginning with the long side, pinching the seam to seal. Into 8 slices, cut the roll, and place them in a greased 13 x 9-inch baking dish, cut-side down. Then, wrap the rolls with a kitchen towel. Do the same with the remaining dough and filling. Let the rolls rise for about 1 hour in a warm place or until doubled.

Step 5: Prepare the oven. Preheat it to 350 degrees F.

Step 6: Place the baking dish in the preheated oven and bake the cinnamon rolls for about 20 to 25 minutes or until golden brown. Remove from the oven when done and allow the rolls to cool on wire racks.

Step 7: For the frosting, cream the butter, cream cheese, vanilla, and salt until smooth. Then, slowly add in the confectioners’ sugar. Sprinkle this over the rolls.

Best Cinnamon Rolls

Rebecca Cinnamon rolls are my favorite! They are super soft, fluffy, and gooey. These divine, melt-in-your-mouth cinnamon rolls are amazing and this homemade version guarantees the best results! Ingredients 1 c.… General Recipes Best Cinnamon Rolls European Print This
Nutrition facts: 200 calories 20 grams fat
Rating: 5.0/5
( 1 voted )

Ingredients

  • 1 c. warm whole milk (110 to 115 degrees)
  • 1/3 c. butter, melted
  • 1/2 c. sugar
  • 2 large eggs, room temperature
  • 1 package (1/4 oz.) of active dry yeast
  • 4 to 4-1/2 c. of all-purpose flour
  • 1 tsp salt
  • Filling:
  • 1/4 c. butter, melted, divided
  • 2 tbsp ground cinnamon
  • 3/4 c. packed brown sugar
  • Frosting:
  • 1/2 c. butter, softened
  • 1-1/2 c. confectioners’ sugar
  • 1/4 c. cream cheese, softened
  • 1/2 tsp vanilla extract
  • 1/8 tsp salt

Instructions

Step 1: Dissolve the yeast into the warm milk. Place the sugar, butter, eggs, salt, yeast mixture, and 2 c. flour in another bowl and cream on medium speed until smooth. Whisk in enough flour until you have a soft dough.

Step 2: Onto a floured surface, turn the dough, and knead for about 6 to 8 minutes or until elastic and smooth. Transfer the dough to a greased mixing bowl, turning once to grease the top. Tent the bowl and keep it aside for 1 hour in a warm place until the size doubles.

Step 3: Mix the brown sugar and cinnamon. After an hour, punch down the dough and divide it in half. Into an 11 x 8-inch rectangle, roll one portion of the dough on a lightly floured surface. Brush the dough with 2 tbsp melted butter and sprinkle with half of the brown sugar mixture to within half an inch of the edges.

Step 4: Roll the dough, jellyroll style beginning with the long side, pinching the seam to seal. Into 8 slices, cut the roll, and place them in a greased 13 x 9-inch baking dish, cut-side down. Then, wrap the rolls with a kitchen towel. Do the same with the remaining dough and filling. Let the rolls rise for about 1 hour in a warm place or until doubled.

Step 5: Prepare the oven. Preheat it to 350 degrees F.

Step 6: Place the baking dish in the preheated oven and bake the cinnamon rolls for about 20 to 25 minutes or until golden brown. Remove from the oven when done and allow the rolls to cool on wire racks.

Step 7: For the frosting, cream the butter, cream cheese, vanilla, and salt until smooth. Then, slowly add in the confectioners’ sugar. Sprinkle this over the rolls.

September 1, 2022 0 comment
0 FacebookTwitterPinterestEmail
General Recipes

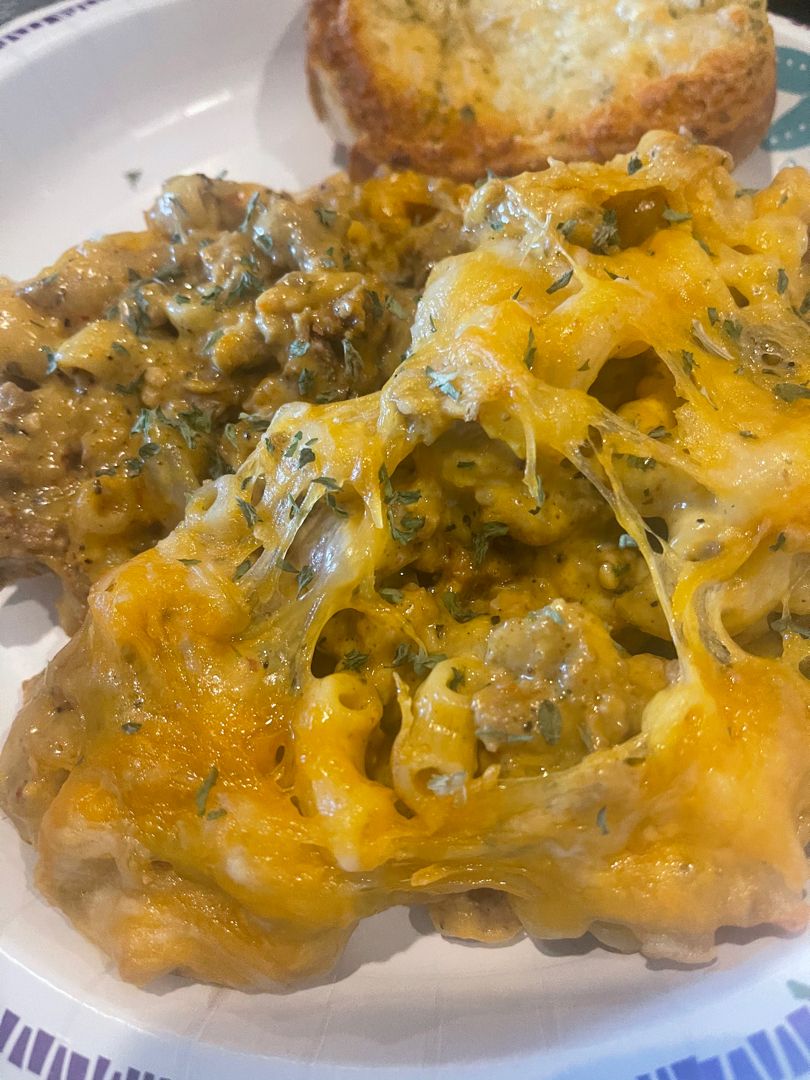
MACARONI AND BEEF WITH CHEESE

by Rebecca September 1, 2022
written by Rebecca

Total preparation time: 1 hr | Yield: 8 servings

This macaroni and beef with cheese are bursting with amazing flavors! A great dinner option that you can easily throw together any time using just a couple of simple ingredients. I have been making this macaroni and beef with cheese for a long time and this is always a big hit! Everyone loves this and they have a blast every time! Creamy, delightful, and an excellent family meal. Serve this by itself or with a simple side salad for a simple yet filling meal.

Macaroni and beef with cheese is the ultimate comfort food! This is crazy good without the need for any fancy ingredients. A no-fuss recipe that you can whip up even with your busy schedule.

Ingredients

2 pounds lean ground beef

1 tbsp canola oil

1 large onion, diced

Chopped garlic

1 can of whole tomatoes, pureed in the can with a hand blender

1 box macaroni

1 tbsp fish sauce

1 c. grated cheddar cheese

1 c. grated mozzarella cheese

Salt

Black pepper (or any seasoning of your choice)

HOW TO MAKE MACARONI AND BEEF WITH CHEESE

Step 1: In canola oil, saute the onions, seasoned with salt. Then, add the beef and continue to cook, breaking the meat up until small chunks. Season with salt and black pepper. Add the chopped garlic, fish sauce, and pureed tomatoes. Let everything simmer for about 1 hour over low heat.

Step 2: In another pot, cook the macaroni until half done. Drain and add the half-cooked macaroni to the simmering sauce. Stir well and season with salt and your preferred seasoning. Put the lid on and continue to cook until done.

Step 3: Once the pasta is completely cooked, pour everything into a large baking dish and tent it with foil. Place in a preheated 400 degrees oven and bake for about 45 minutes. Uncover and sprinkle the cheese on top.

Step 4: Serve the macaroni and beef with cheese immediately. Enjoy!

Variations:

For an even more kick, use chili powder in place of black pepper.

You can substitute the beef with mashed turkey or chicken.

Nutrition Facts:

Energy: 537 cal; Carbs: 48g; Protein: 30g; Fat: 24g; Cholesterol: 85mg; Vitamin A: 800IU

MACARONI AND BEEF WITH CHEESE

Rebecca Total preparation time: 1 hr | Yield: 8 servings This macaroni and beef with cheese are bursting with amazing flavors! A great dinner option that you can easily throw together… General Recipes MACARONI AND BEEF WITH CHEESE European Print This
Serves: 8 Prep Time: 1 hr
Nutrition facts: 537 calories 24 fat
Rating: 5.0/5
( 1 voted )

Ingredients

  • 2 pounds lean ground beef
  • 1 tbsp canola oil
  • 1 large onion, diced
  • Chopped garlic
  • 1 can of whole tomatoes, pureed in the can with a hand blender
  • 1 box macaroni
  • 1 tbsp fish sauce
  • 1 c. grated cheddar cheese
  • 1 c. grated mozzarella cheese
  • Salt
  • Black pepper (or any seasoning of your choice)

Instructions

Step 1: In canola oil, saute the onions, seasoned with salt. Then, add the beef and continue to cook, breaking the meat up until small chunks. Season with salt and black pepper. Add the chopped garlic, fish sauce, and pureed tomatoes. Let everything simmer for about 1 hour over low heat.

Step 2: In another pot, cook the macaroni until half done. Drain and add the half-cooked macaroni to the simmering sauce. Stir well and season with salt and your preferred seasoning. Put the lid on and continue to cook until done.

Step 3: Once the pasta is completely cooked, pour everything into a large baking dish and tent it with foil. Place in a preheated 400 degrees oven and bake for about 45 minutes. Uncover and sprinkle the cheese on top.

Step 4: Serve the macaroni and beef with cheese immediately. Enjoy!

Variations:

For an even more kick, use chili powder in place of black pepper.

You can substitute the beef with mashed turkey or chicken.

September 1, 2022 0 comment
0 FacebookTwitterPinterestEmail
General Recipes

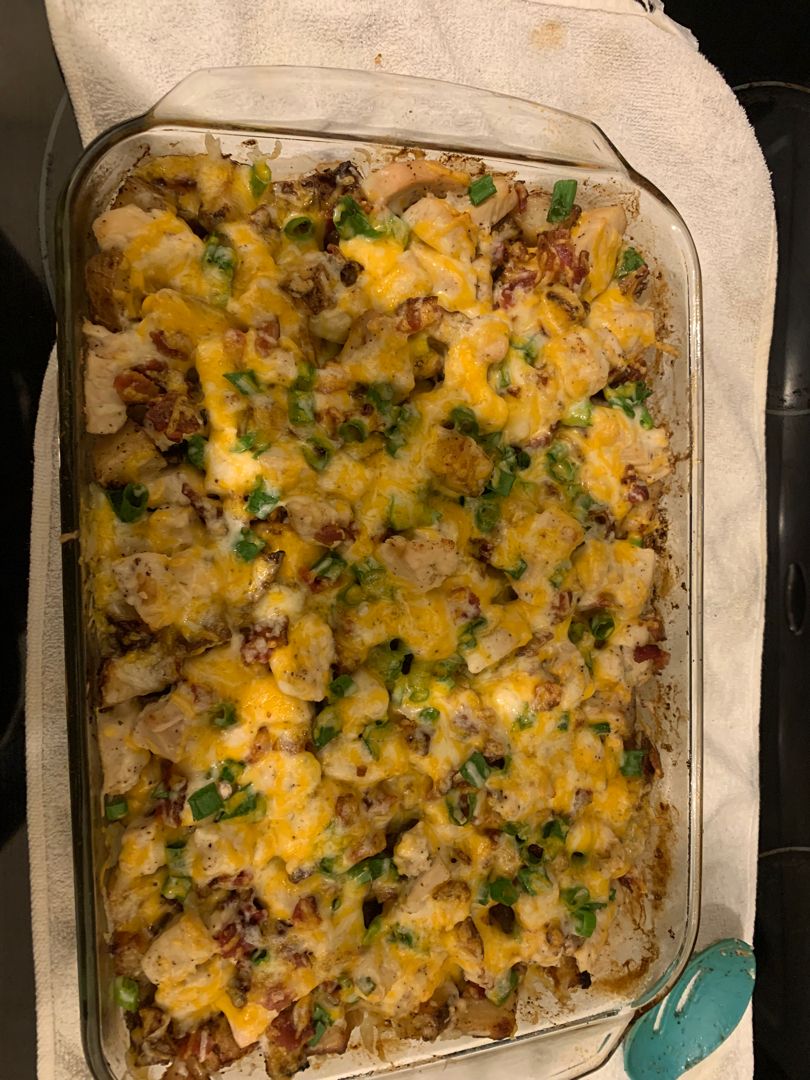
Chicken Bacon Ranch Potato Bake

by Rebecca September 1, 2022
written by Rebecca

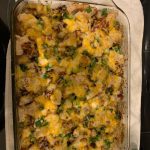
Incredibly delicious with tons of exciting flavors and textures! This Chicken Bacon Ranch Potato Bake has been one of my favorites for years! This is loaded with soft potatoes, juicy chicken, crispy bacon, and cheese. Easily make this any time and impress everyone with this ONE DISH that has it all!

If you are looking for an easy meal to fix even on your busiest days, then look no more! This filling Chicken Bacon Ranch Potato Bake is the perfect dish! Serve this with extra ranch dressing or sour cream on top for that extra goodness.

Ingredients

14 medium potatoes, cubed

1/2 c. olive oil

1 c. crumbled bacon

1 ranch dressing mix (dry powder)

3 chicken breast, cubed

1 c. green onions, chopped

2 1/2 c. shredded cheese

1 teaspoon black pepper

1 teaspoon salt

How to make Chicken Bacon Ranch Potato Bake

Step 1: Prepare the oven. Preheat it to 500 degrees. Using cooking spray, grease a baking dish.

Step 2: Place the oil, pepper, and salt in a large bowl. Add the ranch dressing mix and potatoes. Mix well.

Step 3: In the prepared baking dish, place the potatoes, leaving as much oil as you can. Place the potatoes in the preheated oven and roast for about 1 hour, stirring every 15 minutes until crispy.

Step 4: Into bite-sized pieces, cut the raw chicken. Drizzle with olive oil and toss until coated.

Step 5: Combine the bacon, cheese, and onions until well-mixed.

Step 6: Remove the potatoes from the oven and adjust the oven temperature to 400 degrees.

Step 7: Cover the potatoes with the cheese mixture, followed by the raw chicken. Return to the oven and resume baking for 15 to 20 minutes more until the bacon is a little crispy and the chicken is completely cooked.

Step 8: Allow the potato to bake to cool for at least 10 minutes on a wire rack. Then, serve with extra ranch dressing or sour cream on top. Enjoy!

Chicken Bacon Ranch Potato Bake

Rebecca Incredibly delicious with tons of exciting flavors and textures! This Chicken Bacon Ranch Potato Bake has been one of my favorites for years! This is loaded with soft potatoes, juicy… General Recipes Chicken Bacon Ranch Potato Bake European Print This
Nutrition facts: 200 calories 20 grams fat
Rating: 5.0/5
( 1 voted )

Ingredients

  • 14 medium potatoes, cubed
  • 1/2 c. olive oil
  • 1 c. crumbled bacon
  • 1 ranch dressing mix (dry powder)
  • 3 chicken breast, cubed
  • 1 c. green onions, chopped
  • 2 1/2 c. shredded cheese
  • 1 teaspoon black pepper
  • 1 teaspoon salt

Instructions

Step 1: Prepare the oven. Preheat it to 500 degrees. Using cooking spray, grease a baking dish.

Step 2: Place the oil, pepper, and salt in a large bowl. Add the ranch dressing mix and potatoes. Mix well.

Step 3: In the prepared baking dish, place the potatoes, leaving as much oil as you can. Place the potatoes in the preheated oven and roast for about 1 hour, stirring every 15 minutes until crispy.

Step 4: Into bite-sized pieces, cut the raw chicken. Drizzle with olive oil and toss until coated.

Step 5: Combine the bacon, cheese, and onions until well-mixed.

Step 6: Remove the potatoes from the oven and adjust the oven temperature to 400 degrees.

Step 7: Cover the potatoes with the cheese mixture followed by the raw chicken. Return to the oven and resume baking for 15 to 20 minutes more until the bacon is a little crispy and the chicken is completely cooked.

Step 8: Allow the potato to bake to cool for at least 10 minutes on a wire rack. Then, serve with extra ranch dressing or sour cream on top. Enjoy!

September 1, 2022 0 comment
0 FacebookTwitterPinterestEmail
General Recipes

Lemon-Buttermilk Pound Cake with Lemon Glaze

by Rebecca September 1, 2022
written by Rebecca

Prep time: 20 mins | Cook time: 1 hr | Additional time: 10 mins | Total time: 1 hr 30 mins | Servings: 12 | Yield: 1 pound cake

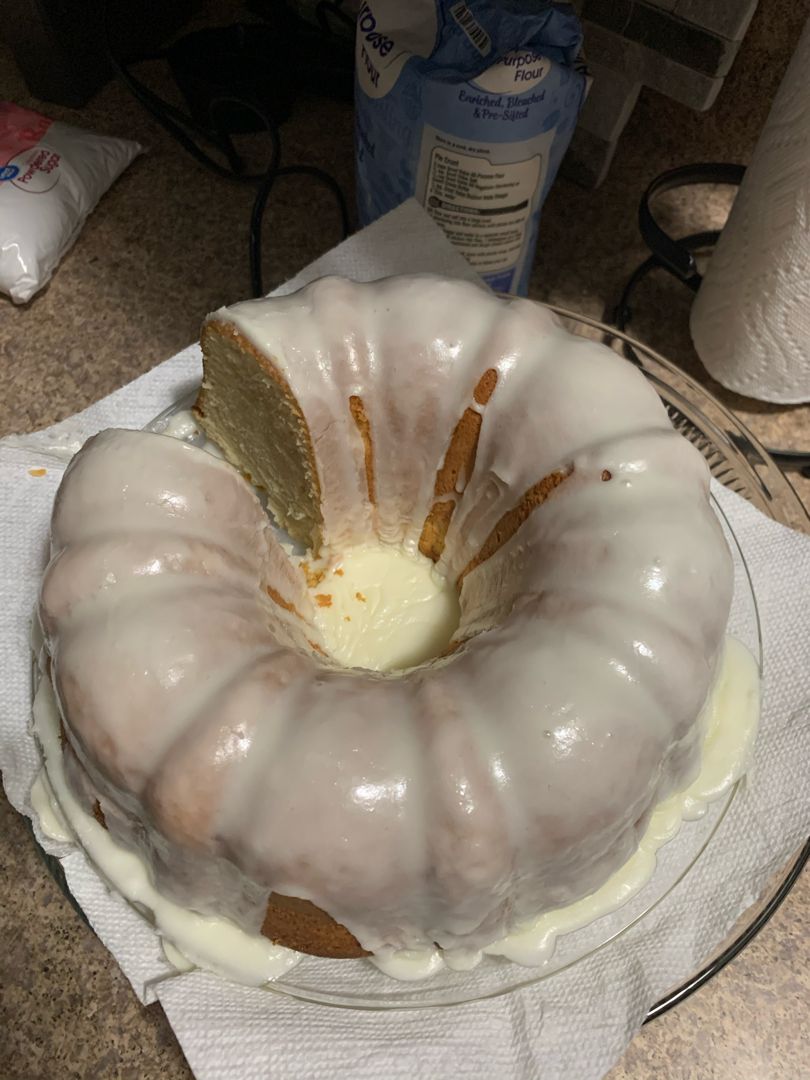
Tender crumb, moist cake with a splash of lemon and buttermilk glaze. This pound cake is a very decadent, heavenly cake that is so easy to whip up and great for all occasions!

Ingredients

Cake:

1 ½ c. butter, softened

2 ½ c. white sugar

4 eggs

1 c. buttermilk

3 ½ c. all-purpose flour

½ tsp baking soda

1 tsp lemon extract

½ tsp salt

Glaze:

2 tbsp butter, softened

¼ c. lemon juice

2 c. confectioners’ sugar

1 tbsp lemon zest

How to make Lemon-Buttermilk Pound Cake with Lemon Glaze

Step 1: Prepare the oven. Preheat it to 350 degrees F or 175 degrees C. Ready a fluted tube pan. Grease, flour, and set aside.

Step 2: In a bowl, place the white sugar and 1 1/2 c butter. Beat using an electric mixer for about 10 minutes or until light and fluffy. Add the eggs, one at a time, beating well after each addition.

Step 3: In a bowl, sift the flour, salt, and baking soda. To the buttermilk mixture, add 1/3 of the flour mixture. Mix well and add in half of the buttermilk. Mix again until blended. Add the rest of the flour mixture and buttermilk, beating well after each addition, ending with the flour mixture. Next, whisk in the lemon extract. Into the prepared tube pan, pour the batter.

Step 4: Adjust the oven temperature to 325 degrees F or 165 degrees C.

Step 5: Place the pan in the preheated oven and bake the cake for about 60 to 75 minutes or until a toothpick inserted in the middle of the cake comes out clean. Remove from the oven when done and allow the cake to cool for about 10 minutes in the pan, then invert to a plate or cake platter.

Step 6: To make the glaze, whisk the confectioner’s sugar, lemon juice, 2 tablespoons butter, and lemon zest in a bowl until smooth. Over the cake, pour half the glaze. Allow this to cool before pouring the rest of the glaze on top.

Nutrition Facts:

Per Serving: 630 calories; protein 6.8g; carbohydrates 91.9g; fat 27.2g; cholesterol 128.9mg; sodium 372.2mg.

Lemon-Buttermilk Pound Cake with Lemon Glaze

Rebecca Prep time: 20 mins | Cook time: 1 hr | Additional time: 10 mins | Total time: 1 hr 30 mins | Servings: 12 | Yield: 1 pound cake Tender… General Recipes Lemon-Buttermilk Pound Cake with Lemon Glaze European Print This
Serves: 12 Prep Time: 20 mins Cooking Time: 1 hr 10 mins 1 hr 10 mins
Nutrition facts: 630 calories 27.2 fat
Rating: 5.0/5
( 1 voted )

Ingredients

  • Cake:
  • 1 ½ c. butter, softened
  • 2 ½ c. white sugar
  • 4 eggs
  • 1 c. buttermilk
  • 3 ½ c. all-purpose flour
  • ½ tsp baking soda
  • 1 tsp lemon extract
  • ½ tsp salt
  • Glaze:
  • 2 tbsp butter, softened
  • ¼ c. lemon juice
  • 2 c. confectioners’ sugar
  • 1 tbsp lemon zest

Instructions

Step 1: Prepare the oven. Preheat it to 350 degrees F or 175 degrees C. Ready a fluted tube pan. Grease, flour, and set aside.

Step 2: In a bowl, place the white sugar and 1 1/2 c butter. Beat using an electric mixer for about 10 minutes or until light and fluffy. Add the eggs, one at a time, beating well after each addition.

Step 3: In a bowl, sift the flour, salt, and baking soda. To the buttermilk mixture, add 1/3 of the flour mixture. Mix well and add in half of the buttermilk. Mix again until blended. Add the rest of the flour mixture and buttermilk, beating well after each addition, ending with the flour mixture. Next, whisk in the lemon extract. Into the prepared tube pan, pour the batter.

Step 4: Adjust the oven temperature to 325 degrees F or 165 degrees C.

Step 5: Place the pan in the preheated oven and bake the cake for about 60 to 75 minutes or until a toothpick inserted in the middle of the cake comes out clean. Remove from the oven when done and allow the cake to cool for about 10 minutes in the pan, then invert to a plate or cake platter.

Step 6: To make the glaze, whisk the confectioner’s sugar, lemon juice, 2 tablespoons butter, and lemon zest in a bowl until smooth. Over the cake, pour half the glaze. Allow this to cool before pouring the rest of the glaze on top.

September 1, 2022 0 comment
0 FacebookTwitterPinterestEmail
General Recipes

Homemade French Onion Dip

by Rebecca September 1, 2022
written by Rebecca

Prep time: 5 mins | Inactive: 8 | Servings: 8

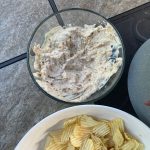
This homemade French Onion Dip is an incredibly easy dip, you can make from scratch. I love this homemade version because the truth is I cannot get the same amazing flavor from the store-bought dip. The best part is this homemade French Onion Dip is inexpensive. You do not need any fancy ingredients and to make this, all you need is to mix everything. This homemade French Onion Dip is seriously incredible! No doubt why everyone is nuts over this dip. Enjoy this dip with plain crinkle potato chips. I think it is a classic combo that has been tested over time!

I shared this recipe with some of my closest friends and they love it! We all agree that there are no secrets to making this homemade French Onion Dip. It is pretty straightforward. Surely a no-fuss. The taste is superb and nothing short of what I am expecting this to be. If you have not tried this homemade French Onion Dip, I suggest giving this a go very soon! This recipe has been my favorite for many, many years. Simply follow the exact recipe and you are all good.

I like to pair this dip with plain crinkle potato chips, but you can serve this with anything! This dip is excellent to serve with veggies and crackers, too. Once you’ve tried this homemade French Onion Dip, there is no going back! I am very sure that you’ll give this slide five stars. I know I do, every time!

INGREDIENTS

1/4 c. dried minced onion

16 ounces sour cream

1 tsp onion powder

1/2 c. mayonnaise

1 tbsp Worcestershire sauce, plus more to taste

1/2 tsp celery salt

1/2 tsp parsley flakes

1/8 tsp paprika

Potato chips, for serving

1/8 tsp ground black pepper

Kosher salt, to taste

How to make Homemade French Onion Dip

Step 1: Mix all the ingredients. Tent with plastic wrap and allow the dip to cool for at least 1 hour.

Homemade French Onion Dip

Rebecca Prep time: 5 mins | Inactive: 8 | Servings: 8 This homemade French Onion Dip is an incredibly easy dip, you can make from scratch. I love this homemade version… General Recipes Homemade French Onion Dip European Print This
Serves: 8 Prep Time: 5 mins
Nutrition facts: 200 calories 20 grams fat
Rating: 5.0/5
( 1 voted )

Ingredients

  • 1/4 c. dried minced onion
  • 16 ounces sour cream
  • 1 tsp onion powder
  • 1/2 c. mayonnaise
  • 1 tbsp Worcestershire sauce, plus more to taste
  • 1/2 tsp celery salt
  • 1/2 tsp parsley flakes
  • 1/8 tsp paprika
  • Potato chips, for serving
  • 1/8 tsp ground black pepper
  • Kosher salt, to taste

Instructions

Step 1: Mix all the ingredients. Tent with plastic wrap and allow the dip to cool for at least 1 hour.

September 1, 2022 0 comment
0 FacebookTwitterPinterestEmail
General Recipes

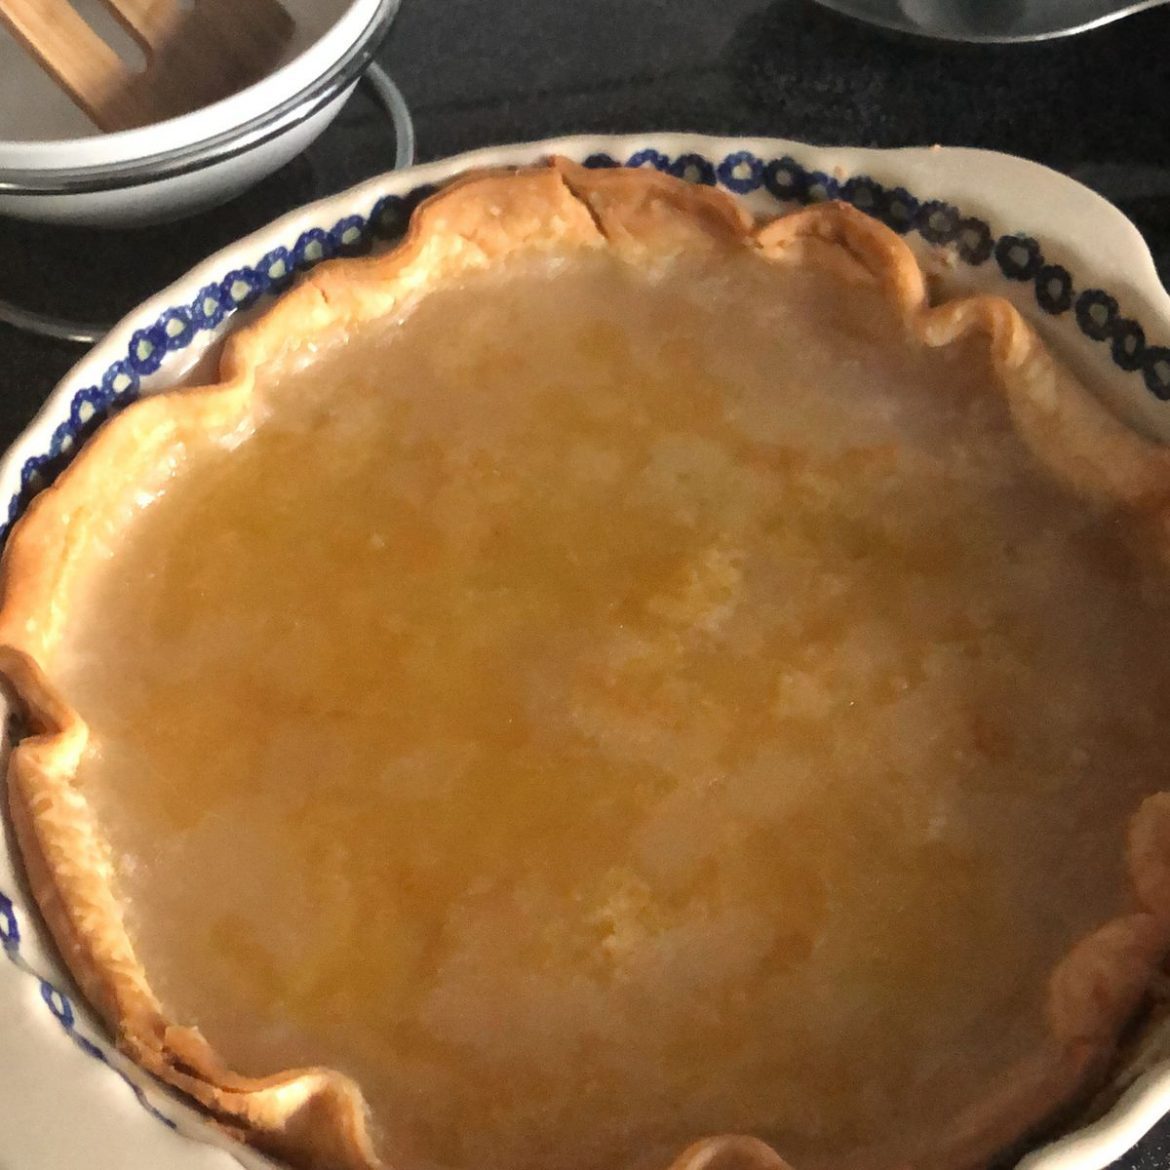
Depression Era Water Pie

by Rebecca September 1, 2022
written by Rebecca

Total time: 1 hr 15 mins | Servings: 8

This Water Pie is the newest addition to my pie recipe collection. To make this pie, all you need are just a few simple ingredients. I admire people who always find a workaround to make amazing dishes despite limited resources. This pie is one of those recipes you can make without the use of any fancy ingredients, but still manages to create something delightful. This water pie in my opinion is still one of the best treats I’ve made in years! Sweet, very delightful, and perfectly creamy. If you are looking for a simple, easy, yet impressive pie to make all year round, then you have to give this Depression Era Water Pie a try. I promise this pie will not disappoint!

INGREDIENTS

5 tbsp butter, sliced

1 deep dish 9” pie crust, unbaked

4 tbsp all-purpose flour

1/2 tsp salt

1 c. granulated sugar

2 tsp vanilla extract

1 1/2 c. water

How to make Depression Era Water Pie

Step 1: Prepare the oven. Preheat it to 400 degrees F.

Step 2: On a baking sheet, place a pie crust. Into the pie crust, pour 1 1/2 cups of water.

Step 3: Place the flour, sugar, and salt in a small bowl. Mix well and sprinkle this over the water in the pie crust. DO NOT STIR.

Step 4: Over the pie, drizzle the vanilla and place the pats of the butter evenly on top.

Step 5: Place in the preheated oven and bake for about 30 minutes. After 30 minutes, adjust the oven temperature to 375 degrees F and bake for another 30 minutes. If the top is browning too quickly, tent the crust with foil.

Step 6: Remove from the oven when done and let the pie cool at room temperature. Then, chill in the fridge.

Step 7: Once the pie is ready, slice and serve. Enjoy!

Depression Era Water Pie

Rebecca Total time: 1 hr 15 mins | Servings: 8 This Water Pie is the newest addition to my pie recipe collection. To make this pie, all you need are just… General Recipes Depression Era Water Pie European Print This
Serves: 8
Nutrition facts: 200 calories 20 grams fat
Rating: 5.0/5
( 1 voted )

Ingredients

  • 5 tbsp butter, sliced
  • 1 deep dish 9” pie crust, unbaked
  • 4 tbsp all-purpose flour
  • 1/2 tsp salt
  • 1 c. granulated sugar
  • 2 tsp vanilla extract
  • 1 1/2 c. water

Instructions

Step 1: Prepare the oven. Preheat it to 400 degrees F.

Step 2: On a baking sheet, place a pie crust. Into the pie crust, pour 1 1/2 cups of water.

Step 3: Place the flour, sugar, and salt in a small bowl. Mix well and sprinkle this over the water in the pie crust. DO NOT STIR.

Step 4: Over the pie, drizzle the vanilla and place the pats of the butter evenly on top.

Step 5: Place in the preheated oven and bake for about 30 minutes. After 30 minutes, adjust the oven temperature to 375 degrees F and bake for another 30 minutes. If the top is browning too quickly, tent the crust with foil.

Step 6: Remove from the oven when done and let the pie cool at room temperature. Then, chill in the fridge.

Step 7: Once the pie is ready, slice and serve. Enjoy!

September 1, 2022 0 comment
0 FacebookTwitterPinterestEmail
General Recipes

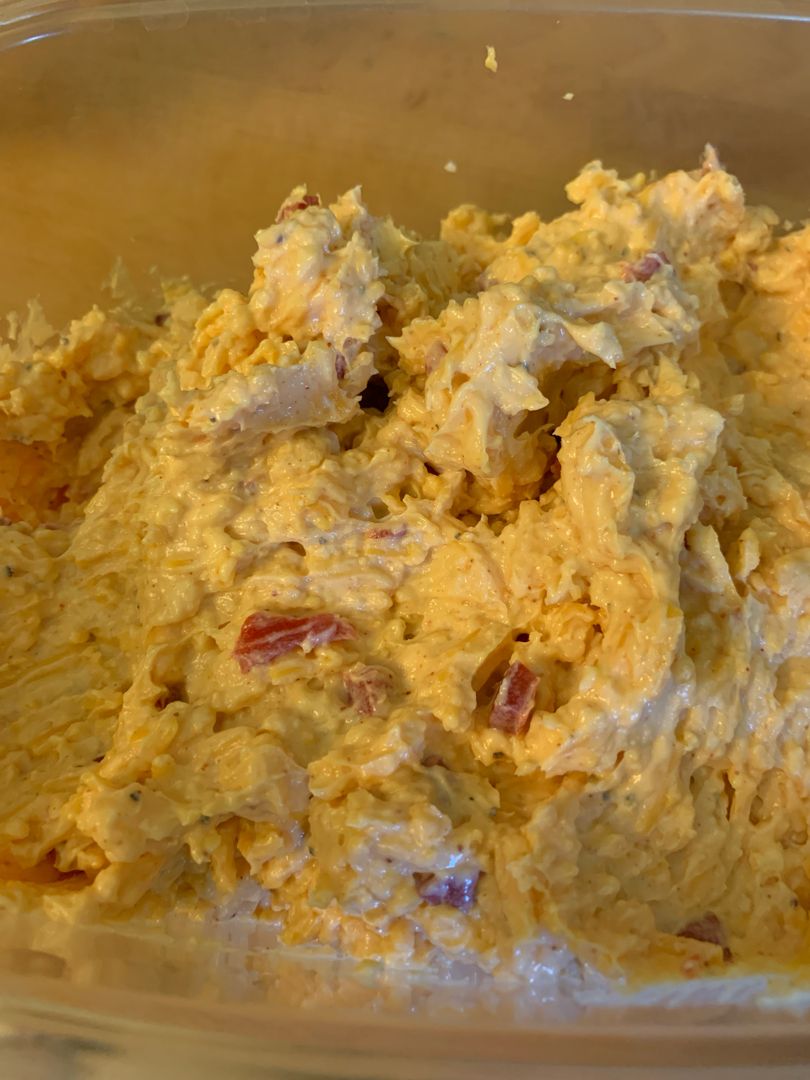
Southern Pimento Cheese

by Rebecca September 1, 2022
written by Rebecca

Total time: 10 mins | Servings: 10

Pimiento cheese has been one of my ultimate favorites for years! It is super easy to make using just a couple of simple ingredients. I love to serve this delicious Southern Pamineto cheese crackers and vegetables or in sandwiches.

This Southern Pamineto cheese is a popular dip all over the world! Creamy, cheesy, peppery, and tangy with an impressive spreadable texture. I also like mine with a little spice. I think this pimiento cheese is way better with a bit of kick!

Pimiento cheese is a favorite at home. I cannot remember how many times I’ve made this. It is a Southern classic that is loved by millions!

To make this Southern Pimiento Cheese, all you need are a few simple ingredients that you might already have on hand. For best results, I recommend avoiding strange preservatives. So the flavor shines, I always use a variety of extra-sharp cheese. I grate the cheese and I DO NOT buy pre-shredded cheese. And for irresistible savoriness, I use a combination of garlic powder and onion powder. If you also like your Pimiento with a bit of kick, you can include cayenne peppers, too.

INGREDIENTS

4 ounces cream cheese, softened

1/2 c. mayonnaise

1/2 tsp garlic powder

1/4 tsp Old Bay seasoning

2 c. sharp cheddar cheese, grated

2 tsp yellow onion, grated

1/4 tsp paprika

Kosher salt and freshly ground black pepper, to taste

4 ounces jar pimentos, drained, 1 tbsp juice reserved

How to make Southern Pimento Cheese

Step 1: Place the mayonnaise, cream cheese, garlic powder, paprika, and Old Bay in a medium bowl. Mix well until blended and smooth.

Step 2: To the bowl, add the pimentos and reserved juice, onion, and cheddar cheese. Stir and season with salt and pepper.

Step 3: Place in the fridge until cold.

Step 4: Serve the Southern Pimento Cheese as a dip with celery and crackers. You can also spread this on burgers and sandwiches. Enjoy!

Southern Pimento Cheese

Rebecca Total time: 10 mins | Servings: 10 Pimiento cheese has been one of my ultimate favorites for years! It is super easy to make using just a couple of simple… General Recipes Southern Pimento Cheese European Print This
Serves: 10
Nutrition facts: 200 calories 20 grams fat
Rating: 5.0/5
( 1 voted )

Ingredients

  • 4 ounces cream cheese, softened
  • 1/2 c. mayonnaise
  • 1/2 tsp garlic powder
  • 1/4 tsp Old Bay seasoning
  • 2 c. sharp cheddar cheese, grated
  • 2 tsp yellow onion, grated
  • 1/4 tsp paprika
  • Kosher salt and freshly ground black pepper, to taste
  • 4 ounces jar pimentos, drained, 1 tbsp juice reserved

Instructions

Step 1: Place the mayonnaise, cream cheese, garlic powder, paprika, and Old Bay in a medium bowl. Mix well until blended and smooth.

Step 2: To the bowl, add the pimentos and reserved juice, onion, and cheddar cheese. Stir and season with salt and pepper.

Step 3: Place in the fridge until cold.

Step 4: Serve the Southern Pimento Cheese as a dip with celery and crackers. You can also spread this on burgers and sandwiches. Enjoy!


September 1, 2022 0 comment
0 FacebookTwitterPinterestEmail
Newer Posts
Older Posts

Popular Posts

  • 1

    Crispy Crunchy Parmesan Potatoes

    March 21, 2020
  • 2

    CROCK POT SMOTHERED PORK CHOPS

    March 21, 2020
  • Facebook
  • Twitter

@2019 - All Right Reserved.


Back To Top