Cook it once
  • Home
  • Privacy Policy
  • Recipes
    • KETO
    • LC
    • WW
  • Tips
  • Contact
Cook it once
  • Home
  • Privacy Policy
  • Recipes
    • KETO
    • LC
    • WW
  • Tips
  • Contact
Category:

General Recipes

General Recipes

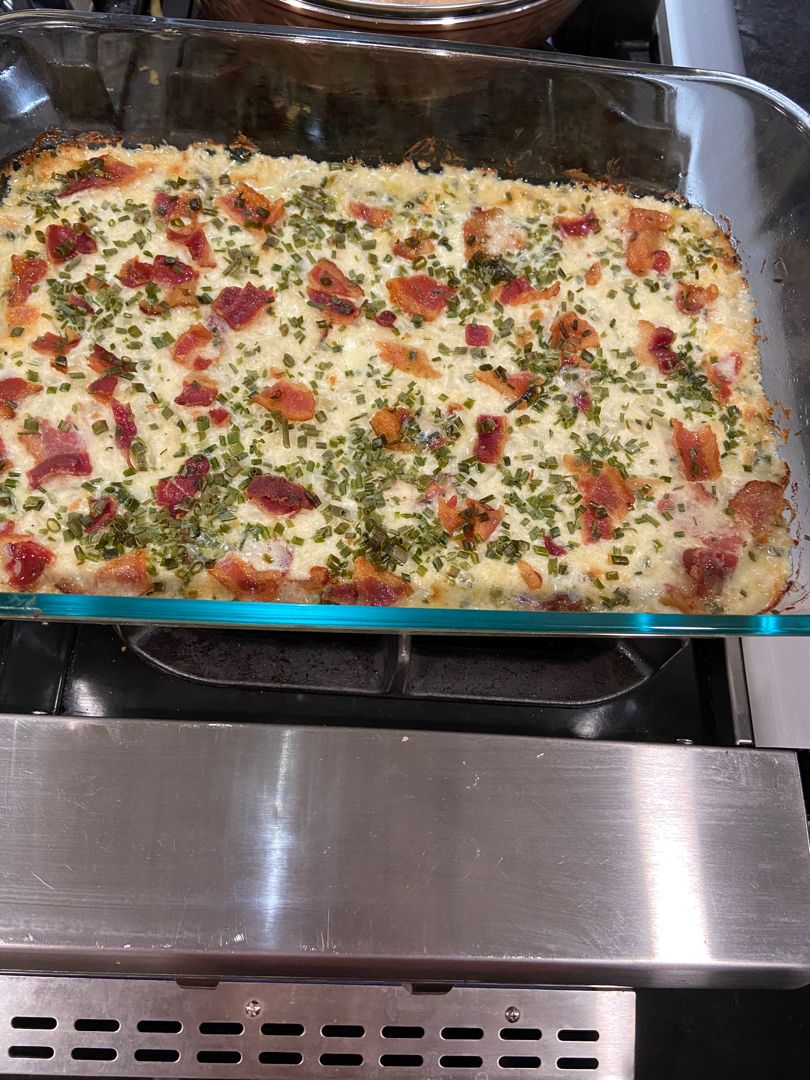
LOADED CAULIFLOWER CASSEROLE

by Rebecca September 3, 2022
written by Rebecca

Prep Time: 15 mins | Cook Time: 30 mins | Total Time: 45 mins | Yield: 12 servings

This is a simple, yet delicious casserole loaded with steamed/blanched cauliflower smothered in a mixture of cream cheese, sour cream, sharp cheddar, Monterey Jack, bacon, and green onions. A guilt-free, healthy, and easy weeknight dinner that even your fussiest eaters will love!

Ingredients

4 tablespoons heavy cream

8 ounces shredded Monterrey Jack cheese, divided

8 ounces block cream cheese, softened

6 slices of bacon, cooked and crumbled

1½ c. green onions, sliced

1 clove of garlic, minced

½ teaspoon Salt

2 pounds Fresh cauliflower florets

Freshly ground black pepper

8 ounces shredded sharp cheddar cheese, divided

HOW TO MAKE LOADED CAULIFLOWER CASSEROLE

Step 1: Prepare the oven. Preheat it to 350 degrees F.

Step 2: In the meantime, steam the cauliflower florets until tender.

Step 3: Cream 6 ounces of the shredded cheddar, 6 ounces of the Monterrey Jack, cream cheese, and heavy cream. Add the sliced green onions along with the chopped bacon and garlic. Stir well and set aside.

Step 4: After draining the steamed cauliflower florets, toss them into the cheese mixture. To taste, season with salt and pepper.

Step 5: Into a 3-quart casserole dish, pour the mixture and sprinkle the rest of the cheddar and Monterey cheese on top. Using foil, tent the dish. Place in the preheated oven and bake for about 25 minutes. Uncover and continue baking until the cheese is bubbly.

Step 6: Serve the casserole immediately. Enjoy!

Tips:

For this recipe, you can go with frozen cauliflower instead of fresh. Steam as directed above and drain.

You can blanch the cauliflower instead of steaming it. Soak the cauliflower in boiling water for about 5 minutes, then soak them quickly in ice or running water.

If short in time, make this casserole in advance. Once completely cooled, cover with plastic wrap, and place in the fridge. Let it sit on the tabletop for about 30 minutes before reheating.

LOADED CAULIFLOWER CASSEROLE

Rebecca Prep Time: 15 mins | Cook Time: 30 mins | Total Time: 45 mins | Yield: 12 servings This is a simple, yet delicious casserole loaded with steamed/blanched cauliflower smothered… General Recipes LOADED CAULIFLOWER CASSEROLE European Print This
Serves: 12 Prep Time: 15 mins Cooking Time: 30 mins 30 mins
Nutrition facts: 200 calories 20 grams fat
Rating: 5.0/5
( 1 voted )

Ingredients

  • 4 tablespoons heavy cream
  • 8 ounces shredded Monterrey Jack cheese, divided
  • 8 ounces block cream cheese, softened
  • 6 slices of bacon, cooked and crumbled
  • 1½ c. green onions, sliced
  • 1 clove of garlic, minced
  • ½ teaspoon Salt
  • 2 pounds Fresh cauliflower florets
  • Freshly ground black pepper
  • 8 ounces shredded sharp cheddar cheese, divided

Instructions

Step 1: Prepare the oven. Preheat it to 350 degrees F.

Step 2: In the meantime, steam the cauliflower florets until tender.

Step 3: Cream 6 ounces of the shredded cheddar, 6 ounces of the Monterrey Jack, cream cheese, and heavy cream. Add the sliced green onions along with the chopped bacon and garlic. Stir well and set aside.

Step 4: After draining the steamed cauliflower florets, toss them into the cheese mixture. To taste, season with salt and pepper.

Step 5: Into a 3-quart casserole dish, pour the mixture and sprinkle the rest of the cheddar and Monterey cheese on top. Using foil, tent the dish. Place in the preheated oven and bake for about 25 minutes. Uncover and continue baking until the cheese is bubbly.

Step 6: Serve the casserole immediately. Enjoy!

Notes

For this recipe, you can go with frozen cauliflower instead of fresh. Steam as directed above and drain. You can blanch the cauliflower instead of steaming it. Soak the cauliflower in boiling water for about 5 minutes, then soak them quickly in ice or running water. If short in time, make this casserole in advance. Once completely cooled, cover with plastic wrap, and place in the fridge. Let it sit on the tabletop for about 30 minutes before reheating.
September 3, 2022 0 comment
0 FacebookTwitterPinterestEmail
General Recipes

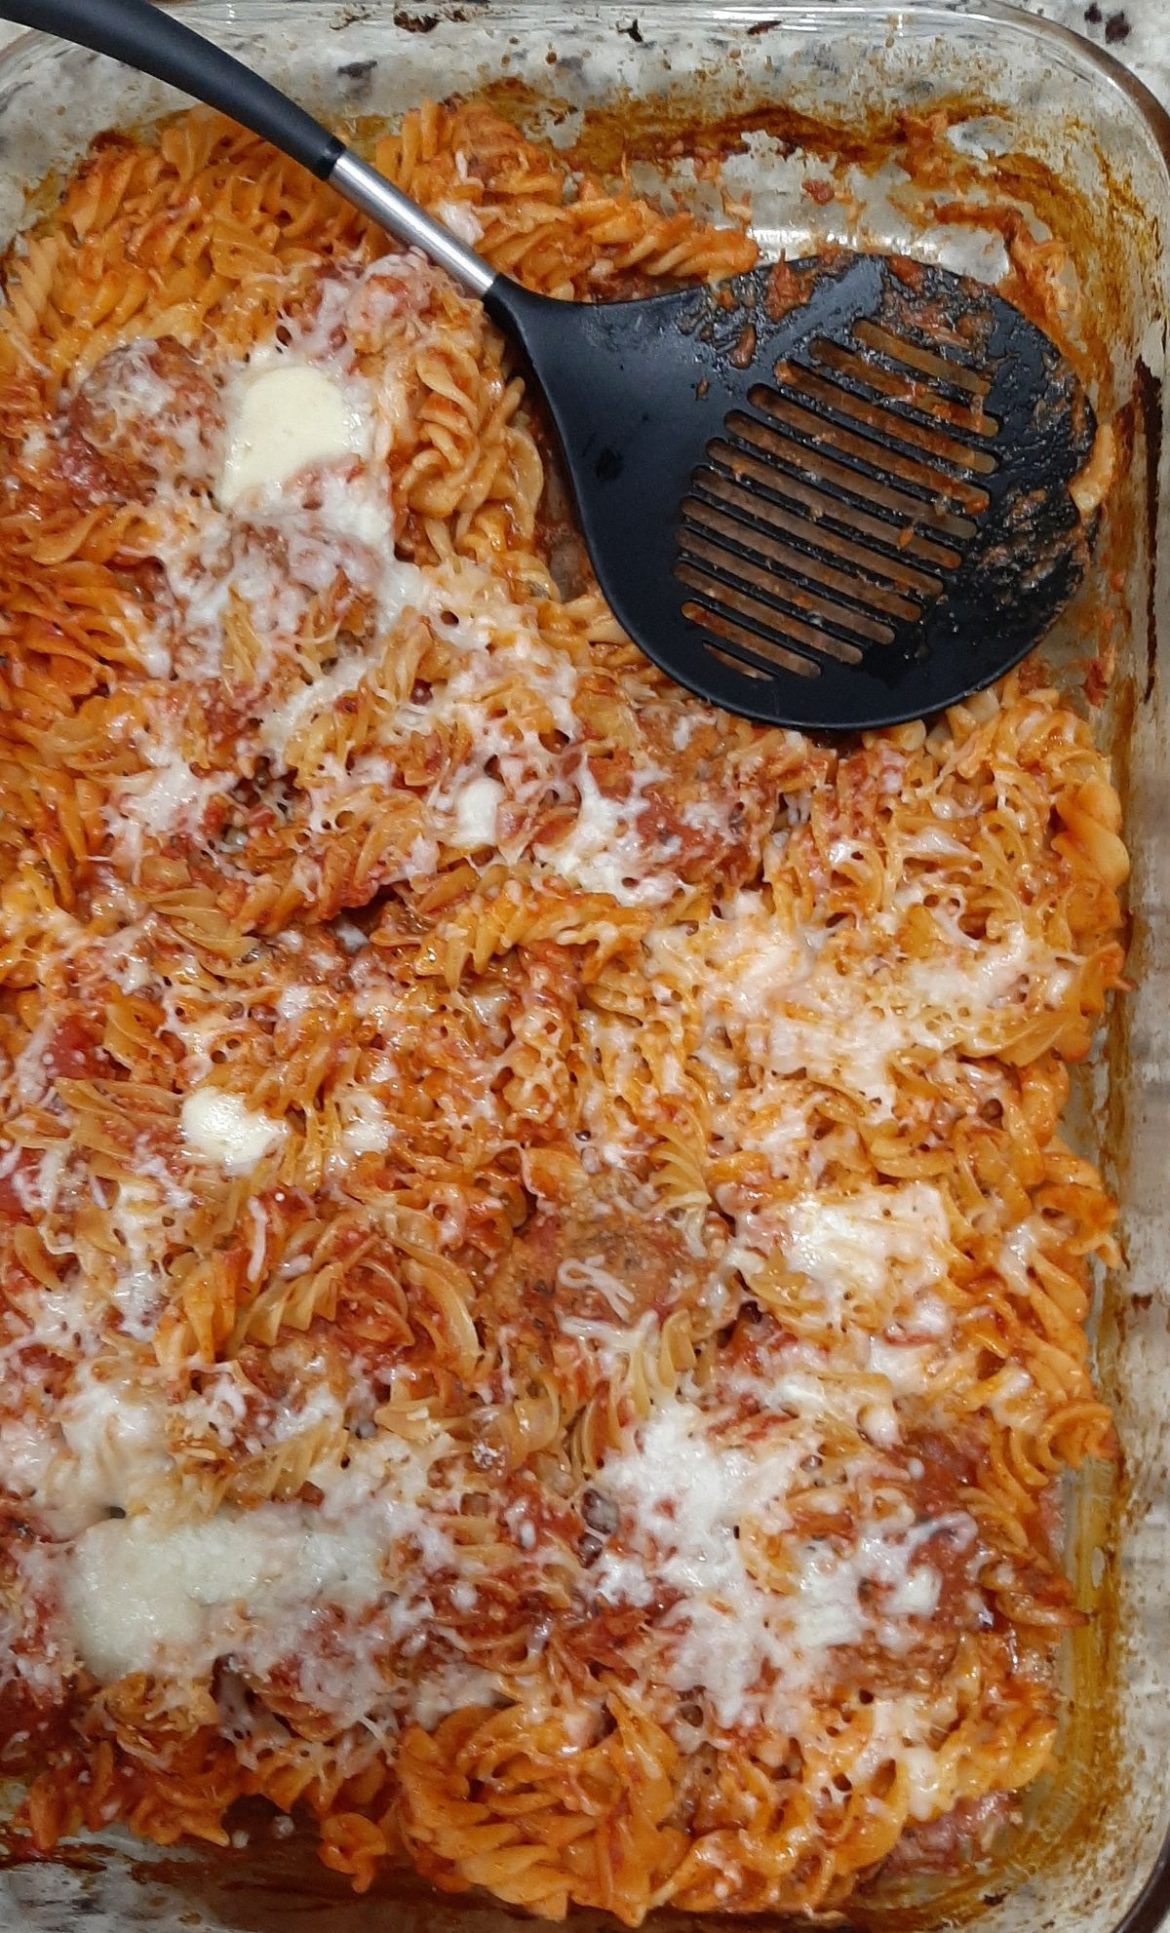
DUMP AND BAKE YOUR WAY TO A FANTASTIC MEATBALL CASSEROLE

by Rebecca September 3, 2022
written by Rebecca

This is a fantastic meatball casserole that you can easily make at any time! A dump and bake kind of recipe. A no-fuss, yet guarantee a delicious weeknight meal perfect for everyone! Pair this casserole with salad and some garlic bread for an effortless, delicious dinner.

Ingredients

1 24-25-ounces jar of Marinara sauce

1 16-ounces package of Rotini pasta – uncooked

1 14-ounces bag of fully cooked, frozen meatballs (thawed)

2 c. shredded mozzarella

3 c. water

HOW TO MAKE MEATBALL CASSEROLE

Step 1: Prepare the oven. Preheat it to 425 degrees F.

Step 2: Combine the uncooked pasta, marinara sauce, water, and thawed meatballs in a 9 x 13-inch baking dish. Using foil, tightly cover the dish. Place in the preheated oven and bake for about 35 minutes.

Step 3: Uncover and stir the pasta. If the pasta is not al dente, tent the dish again and continue to bake until done. Remove from the oven and sprinkle the cheese on top.

Step 4: Place the casserole back into the oven and resume baking for additional 5 to 10 minutes or until the cheese has melted and the pasta is tender.

Step 5: Before serving, allow the casserole to rest for about 5 to 10 minutes.

Notes:

For an extra layer of flavor, garnish the casserole with some chopped fresh basil and sprinkle with extra freshly grated Parmesan cheese on top.

If serving a smaller family, half the recipe and bake in a 9 x 8-inch baking dish.

Into an airtight container, keep any leftovers and store them in the fridge for up to 3 to 4 days. Before reheating, add a little amount of marinara.

If desired, you can use small, cocktail-sized meatballs. You are also welcome to use your favorite meatballs such as Turkey meatballs, Italian meatballs, beef, chicken, or pork meatballs. Thaw the meatballs before adding them to the casserole.

For this recipe, you can use elbow pasta in place of Penne.

DUMP AND BAKE YOUR WAY TO A FANTASTIC MEATBALL CASSEROLE

Rebecca This is a fantastic meatball casserole that you can easily make at any time! A dump and bake kind of recipe. A no-fuss, yet guarantee a delicious weeknight meal perfect… General Recipes DUMP AND BAKE YOUR WAY TO A FANTASTIC MEATBALL CASSEROLE European Print This
Nutrition facts: 200 calories 20 grams fat
Rating: 5.0/5
( 1 voted )

Ingredients

  • 1 24-25-ounces jar of Marinara sauce
  • 1 16-ounces package of Rotini pasta – uncooked
  • 1 14-ounces bag of fully cooked, frozen meatballs (thawed)
  • 2 c. shredded mozzarella
  • 3 c. water

Instructions

Step 1: Prepare the oven. Preheat it to 425 degrees F.

Step 2: Combine the uncooked pasta, marinara sauce, water, and thawed meatballs in a 9 x 13-inch baking dish. Using foil, tightly cover the dish. Place in the preheated oven and bake for about 35 minutes.

Step 3: Uncover and stir the pasta. If the pasta is not al dente, tent the dish again and continue to bake until done. Remove from the oven and sprinkle the cheese on top.

Step 4: Place the casserole back into the oven and resume baking for additional 5 to 10 minutes or until the cheese has melted and the pasta is tender.

Step 5: Before serving, allow the casserole to rest for about 5 to 10 minutes.

September 3, 2022 0 comment
0 FacebookTwitterPinterestEmail
General Recipes

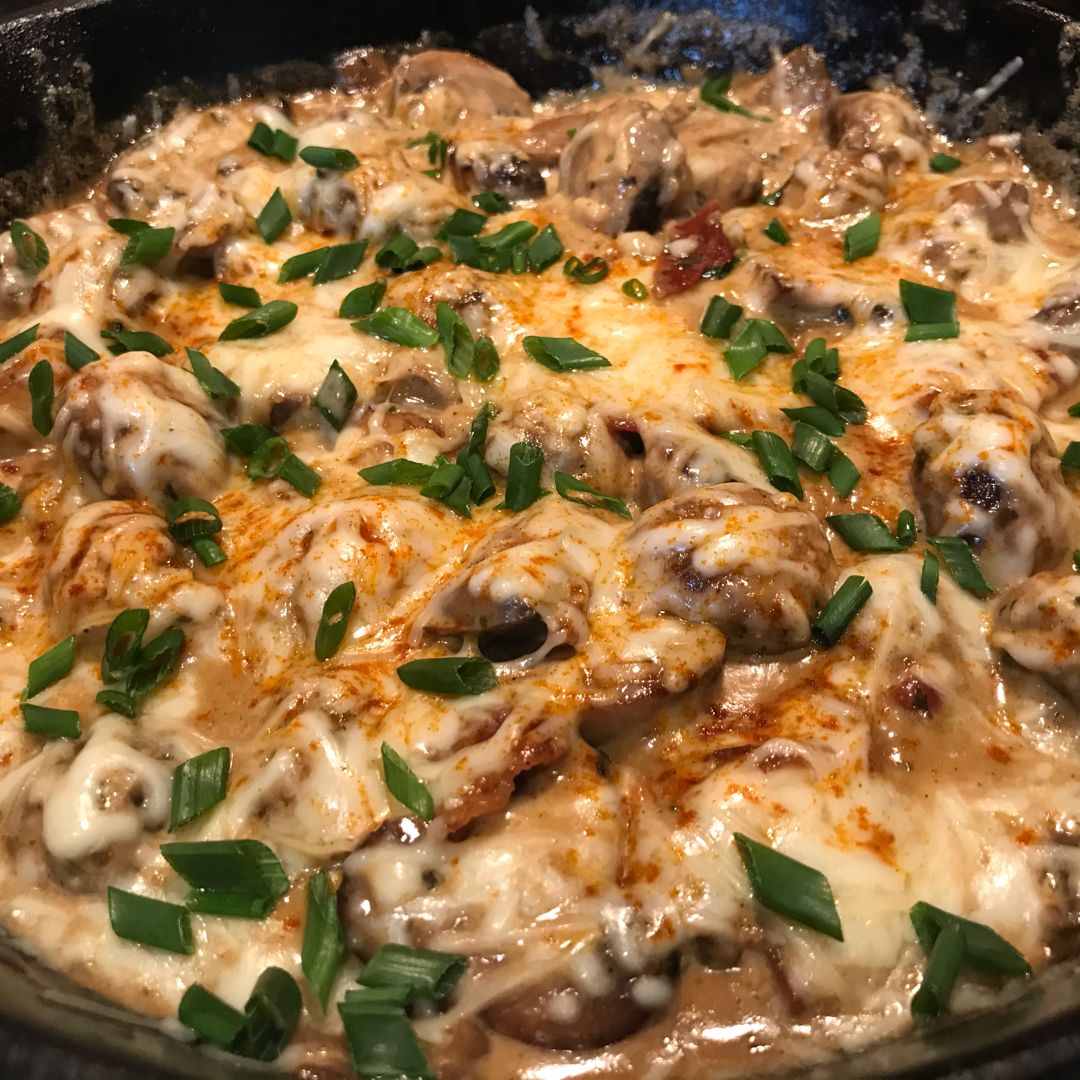
Creamy Garlic Mushrooms with Bacon

by Rebecca September 2, 2022
written by Rebecca

This creamy garlic mushroom with bacon is a mouthwatering dish perfect to serve as a side or main. Incredibly easy to throw together and ready in a snap! This dish has been one of my favorites for years! It is super filling, exceptionally delightful, and the best recipe to use mushrooms!

INGREDIENTS

1 tbsp olive oil

8 oz (250 grams) bacon, cut into strips

26 oz (750 g) brown mushrooms – washed (pat dry with a paper towel)

2 tbsp butter

6 cloves garlic, finely chopped

1 tbsp fresh chopped parsley

1/4 c. dry white wine (or chicken broth/stock)

1 tsp fresh chopped thyme

1/2 c. fresh shredded or grated mozzarella

1/4 c. fresh shredded or grated Parmesan cheese

1 1/2 c (400 ml) heavy cream, (thickened cream or evaporated milk)

Salt and pepper to season

How to make Creamy Garlic Mushrooms with Bacon

Step 1: In an oven-safe skillet, fry the bacon over medium heat until crispy. On a paper towel, transfer the crispy bacon to the drain.

Step 2: Add the butter to the same pan and let it melt. Then, add the mushrooms. Drizzle in some oil and cook the mushrooms until browned.

Step 3: Pour in the wine and broth. Allow everything to simmer for about 2 minutes or until the mixture has reduced, stirring often.

Step 4: Into the mushroom, stir in the garlic, and continue to cook until the garlic is fragrant. Add the herbs and cream. Adjust the heat to low and simmer for about 4 to 5 minutes until the sauce has thickened. To taste, season with salt and pepper.

Step 5: Return the bacon to the skillet and stir well. Then, sprinkle the mozzarella on top along with the Parmesan cheese.

Step 6: Place in the broiler for about 3 to 5 minutes until the cheese has melted and bubbled.

Step 7: Remove from the oven when done and serve the creamy garlic mushrooms with bacon immediately. Enjoy!

Creamy Garlic Mushrooms with Bacon

Rebecca This creamy garlic mushroom with bacon is a mouthwatering dish perfect to serve as a side or main. Incredibly easy to throw together and ready in a snap! This dish… General Recipes Creamy Garlic Mushrooms with Bacon European Print This
Nutrition facts: 200 calories 20 grams fat
Rating: 5.0/5
( 1 voted )

Ingredients

  • 1 tbsp olive oil
  • 8 oz (250 grams) bacon, cut into strips
  • 26 oz (750 g) brown mushrooms - washed (pat dry with a paper towel)
  • 2 tbsp butter
  • 6 cloves garlic, finely chopped
  • 1 tbsp fresh chopped parsley
  • 1/4 c. dry white wine (or chicken broth/stock)
  • 1 tsp fresh chopped thyme
  • 1/2 c. fresh shredded or grated mozzarella
  • 1/4 c. fresh shredded or grated Parmesan cheese
  • 1 1/2 c (400 ml) heavy cream, (thickened cream or evaporated milk)
  • Salt and pepper to season

Instructions

Step 1: In an oven-safe skillet, fry the bacon over medium heat until crispy. On a paper towel, transfer the crispy bacon to the drain.

Step 2: Add the butter to the same pan and let it melt. Then, add the mushrooms. Drizzle in some oil and cook the mushrooms until browned.

Step 3: Pour in the wine and broth. Allow everything to simmer for about 2 minutes or until the mixture has reduced, stirring often.

Step 4: Into the mushroom, stir in the garlic, and continue to cook until the garlic is fragrant. Add the herbs and cream. Adjust the heat to low and simmer for about 4 to 5 minutes until the sauce has thickened. To taste, season with salt and pepper.

Step 5: Return the bacon to the skillet and stir well. Then, sprinkle the mozzarella on top along with the Parmesan cheese.

Step 6: Place in the broiler for about 3 to 5 minutes until the cheese has melted and bubbled.

Step 7: Remove from the oven when done and serve the creamy garlic mushrooms with bacon immediately. Enjoy!

September 2, 2022 0 comment
0 FacebookTwitterPinterestEmail
General Recipes

Apple Slab Pie

by Rebecca September 2, 2022
written by Rebecca

I love to make this Apple Slab Pie all the time! It has been my family’s favorite and a huge hit during Fall. Crumbly, super delightful, and the perfect pie to serve to any gatherings! And this pie is big enough to feed fifteen people. I always add extra glaze because this pie is much better with more glaze!

Ingredients

3 tbsp all-purpose flour

1 box refrigerated pie crusts, softened as directed on the box

1 c. granulated sugar

1 tsp ground cinnamon

2 tbsp milk

1/4 tsp ground nutmeg

9 c. thinly sliced, peeled apples (9 medium)

1/4 tsp salt 1 1/2 tbsp lemon juice

1 c. powdered sugar

How to make Apple Slab Pie

Step 1: Prepare the oven. Preheat it to 450 degrees.

Step 2: Remove the pie crust from the pouches. Unroll the pie crust and neatly lay them on a lightly floured surface. Into small rectangles, roll the pie crust and place it into a pie pan. Press the crust so it fits into the pie pan and along the edges. Then, fold the excess crust under and crimp the edges.

Step 3: Into a bowl, place the flour, granulated sugar, nutmeg, cinnamon, lemon juice, and salt. Mix well until blended. Add the apples and toss to coat. Onto a pan, spoon the mixture, ensuring everything is evenly distributed.

Step 4: Place in the preheated oven and bake for about 33 to 38 minutes or until the crust is golden brown and the filling begins to bubble.

Step 5: Remove from the oven when done and allow the pie to cool for about 45 minutes on a cooling rack.

Step 6: In the meantime, whisk the milk and powdered sugar until well-mixed. Over the pie, drizzle the glaze and let it sit for about 30 minutes until the glaze is set. If desired, add an extra glaze.

Step 7: Slice the Apple Slab Pie and serve. Enjoy!

Apple Slab Pie

Rebecca I love to make this Apple Slab Pie all the time! It has been my family’s favorite and a huge hit during Fall. Crumbly, super delightful, and the perfect pie… General Recipes Apple Slab Pie European Print This
Nutrition facts: 200 calories 20 grams fat
Rating: 5.0/5
( 1 voted )

Ingredients

  • 3 tbsp all-purpose flour
  • 1 box refrigerated pie crusts, softened as directed on the box
  • 1 c. granulated sugar
  • 1 tsp ground cinnamon
  • 2 tbsp milk
  • 1/4 tsp ground nutmeg
  • 9 c. thinly sliced, peeled apples (9 medium)
  • 1/4 tsp salt 1 1/2 tbsp lemon juice
  • 1 c. powdered sugar

Instructions

Step 1: Prepare the oven. Preheat it to 450 degrees.

Step 2: Remove the pie crust from the pouches. Unroll the pie crust and neatly lay them on a lightly floured surface. Into small rectangles, roll the pie crust and place it into a pie pan. Press the crust so it fits into the pie pan and along the edges. Then, fold the excess crust under and crimp the edges.

Step 3: Into a bowl, place the flour, granulated sugar, nutmeg, cinnamon, lemon juice, and salt. Mix well until blended. Add the apples and toss to coat. Onto a pan, spoon the mixture, ensuring everything is evenly distributed.

Step 4: Place in the preheated oven and bake for about 33 to 38 minutes or until the crust is golden brown and the filling begins to bubble.

Step 5: Remove from the oven when done and allow the pie to cool for about 45 minutes on a cooling rack.

Step 6: In the meantime, whisk the milk and powdered sugar until well-mixed. Over the pie, drizzle the glaze and let it sit for about 30 minutes until the glaze is set. If desired, add an extra glaze.

Step 7: Slice the Apple Slab Pie and serve. Enjoy!

September 2, 2022 0 comment
0 FacebookTwitterPinterestEmail
General Recipes

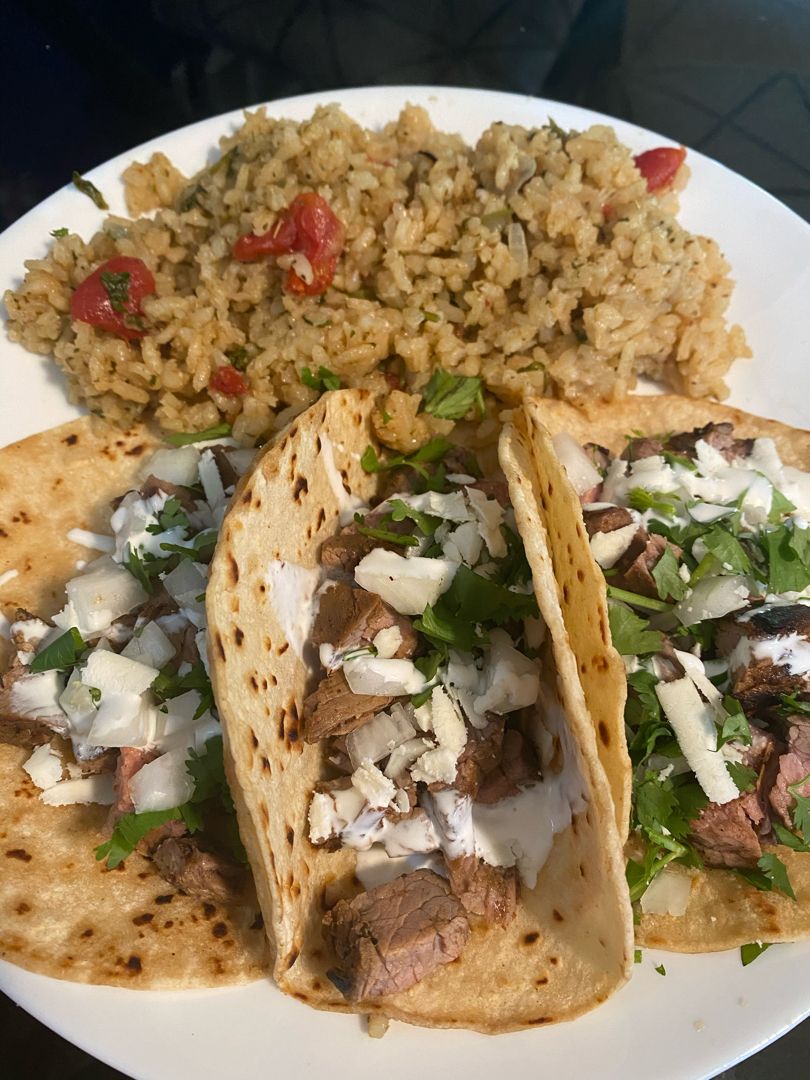
MEXICAN STREET TACOS

by Rebecca September 2, 2022
written by Rebecca

Make your favorite authentic Asada street tacos at home with this Mexican Street Tacos recipe. It is super easy, quick, and loaded with flavor! Make sure to top these tacos with onion, cilantro, and drizzles of fresh lime juices for that nerve-wracking experience!

I am super hype whenever I make these Mexican Street Tacos! I enjoy how easy and quick they come together with just little to no effort. The steak is mouthwatering! I prefer to marinate the steak for a few hours, but if you are slightly short in time, you can leave the steak for at least an hour. But marinating for about 4 hours makes a huge difference!

INGREDIENTS

1 1/2 lbs skirt steak, cut into 1/2” pieces

3/4 c. diced red onion

2 tbsp freshly squeezed lime juice

1 tsp dried oregano

2 tbsp canola oil, divided

3 cloves garlic, minced

1 tsp ground cumin

2 tbsp reduced-sodium soy sauce

12 mini flour tortillas, warmed

2 tsp chili powder

1 lime, cut into wedges

1/2 c. chopped fresh cilantro leaves

HOW TO MAKE MEXICAN STREET TACOS

Step 1: Place the lime juice, chili powder, soy sauce, canola oil, oregano, and cumin in a bowl. Mix well until combined.

Step 2: In a bag or a bowl, place the steak and soy sauce mixture. Toss and place in the fridge to marinate the steak for at least an hour. If you prefer a richer marinade, I suggest marinating the steak for about 4 hours, stirring the mixture every so often.

Step 3: Into a skillet, heat the remaining canola oil over medium-high. Once the oil is hot, add the marinade and steak to the skillet and cook until the steak is browned and the marinade has reduced, stirring constantly.

Step 4: Once the steak is cooked to your desired doneness, slice the steak into smaller pieces and place them on the tortillas. Top the steak with some lime, cilantro, onion, and your favorite sauces like salsa. Serve the Mexican Street Tacos right away with some chips and salsa. Enjoy!

MEXICAN STREET TACOS

Rebecca Make your favorite authentic Asada street tacos at home with this Mexican Street Tacos recipe. It is super easy, quick, and loaded with flavor! Make sure to top these tacos… General Recipes MEXICAN STREET TACOS European Print This
Nutrition facts: 200 calories 20 grams fat
Rating: 5.0/5
( 1 voted )

Ingredients

  • 1 1/2 lbs skirt steak, cut into 1/2” pieces
  • 3/4 c. diced red onion
  • 2 tbsp freshly squeezed lime juice
  • 1 tsp dried oregano
  • 2 tbsp canola oil, divided
  • 3 cloves garlic, minced
  • 1 tsp ground cumin
  • 2 tbsp reduced-sodium soy sauce
  • 12 mini flour tortillas, warmed
  • 2 tsp chili powder
  • 1 lime, cut into wedges
  • 1/2 c. chopped fresh cilantro leaves

Instructions

Step 1: Place the lime juice, chili powder, soy sauce, canola oil, oregano, and cumin in a bowl. Mix well until combined.

Step 2: In a bag or a bowl, place the steak and soy sauce mixture. Toss and place in the fridge to marinate the steak for at least an hour. If you prefer a richer marinade, I suggest marinating the steak for about 4 hours, stirring the mixture every so often.

Step 3: Into a skillet, heat the remaining canola oil over medium-high. Once the oil is hot, add the marinade and steak to the skillet and cook until the steak is browned and the marinade has reduced, stirring constantly.

Step 4: Once the steak is cooked to your desired doneness, slice the steak into smaller pieces and place them on the tortillas. Top the steak with some lime, cilantro, onion, and your favorite sauces like salsa. Serve the Mexican Street Tacos right away with some chips and salsa. Enjoy!

September 2, 2022 0 comment
0 FacebookTwitterPinterestEmail
General Recipes

Philly Cheesesteak Quesadilla

by Rebecca September 2, 2022
written by Rebecca

Cook Time: 15 mins | Total Time: 25 mins | Servings: 2

These Philly Cheesesteak quesadillas are amazing! Incredibly easy to make and ready in less than thirty minutes. These homemade quesadillas with crispy tortillas are filled with beef, peppers, onions, and mushrooms, and packed with melty cheese! If you prefer your quesadilla with a kick, you are welcome to add hot sauce or sriracha to the mayo before spreading it over the tortillas. I use my skillet to cook these quesadillas, but you can also use a griddle. I love that these quesadillas are freezer-friendly. Assemble, freeze, and then completely thaw before reheating until the filling is hot.

Ingredients

½ pound beef, (rib eye or top round), thinly sliced or diced

2 flour tortillas, medium/ burrito-sized

½ red pepper, diced

½ medium onion, chopped

½ green pepper, diced

1 tablespoon light olive oil, divided

3 slices provolone cheese, sliced in half

1 garlic clove, minced

2 teaspoons mayo, optional

6 ounces mushrooms, diced

¼ teaspoon sea salt, or to taste

⅛ teaspoon ground black pepper, or to taste

How to make Philly Cheesesteak Quesadilla

Step 1: In a large skillet, heat 2 tsp of oil. Then, add the chopped meat and sprinkle it with salt and pepper. Cook the meat until cooked through. Set aside when done and cover to keep the meat warm.

Step 2: In the same skillet, place the finely chopped onion, diced mushrooms, and pepper. Saute until tender. If needed, add another tsp of oil. Return the meat to the skillet. Add the minced garlic and continue to cook until the meat is reheated.

Step 3: On the tortillas, spread the mayo. Between the tortillas, divide the filling and add them to one side of the tortilla. On top of the filling, lay the sliced cheese. Then, close the tortilla.

Step 4: Heat a skillet over medium heat. For a crispier tortilla, drizzle a little oil into the pan. Then, add the tortilla and cook, flipping once, until the cheese has melted and the tortilla is golden and crispy.

Step 5: Slice the quesadilla and serve immediately. Enjoy!

Nutrition Facts:

Calories: 662 Kcal, Fat: 46g 71%, Saturated Fat: 18g113%, Cholesterol: 111mg 37%, Sodium: 974mg42%, Potassium: 835mg24%, Carbohydrates: 25g8%, Fiber: 3g13%, Sugar: 6g7%, Protein: 36g72%, Vitamin C: 66mg80%, Calcium: 376mg38%, Iron: 4mg22%

Philly Cheesesteak Quesadilla

Rebecca Cook Time: 15 mins | Total Time: 25 mins | Servings: 2 These Philly Cheesesteak quesadillas are amazing! Incredibly easy to make and ready in less than thirty minutes. These… General Recipes Philly Cheesesteak Quesadilla European Print This
Serves: 2 Cooking Time: 15 mins 15 mins
Nutrition facts: 662 calories 46 fat
Rating: 5.0/5
( 1 voted )

Ingredients

  • ½ pound beef, (rib eye or top round), thinly sliced or diced
  • 2 flour tortillas, medium/ burrito-sized
  • ½ red pepper, diced
  • ½ medium onion, chopped
  • ½ green pepper, diced
  • 1 tablespoon light olive oil, divided
  • 3 slices provolone cheese, sliced in half
  • 1 garlic clove, minced
  • 2 teaspoons mayo, optional
  • 6 ounces mushrooms, diced
  • ¼ teaspoon sea salt, or to taste
  • ⅛ teaspoon ground black pepper, or to taste

Instructions

Step 1: In a large skillet, heat 2 tsp of oil. Then, add the chopped meat and sprinkle it with salt and pepper. Cook the meat until cooked through. Set aside when done and cover to keep the meat warm.

Step 2: In the same skillet, place the finely chopped onion, diced mushrooms, and pepper. Saute until tender. If needed, add another tsp of oil. Return the meat to the skillet. Add the minced garlic and continue to cook until the meat is reheated.

Step 3: On the tortillas, spread the mayo. Between the tortillas, divide the filling and add them to one side of the tortilla. On top of the filling, lay the sliced cheese. Then, close the tortilla.

Step 4: Heat a skillet over medium heat. For a crispier tortilla, drizzle a little oil into the pan. Then, add the tortilla and cook, flipping once, until the cheese has melted and the tortilla is golden and crispy.

Step 5: Slice the quesadilla and serve immediately. Enjoy!

September 2, 2022 0 comment
0 FacebookTwitterPinterestEmail
General Recipes

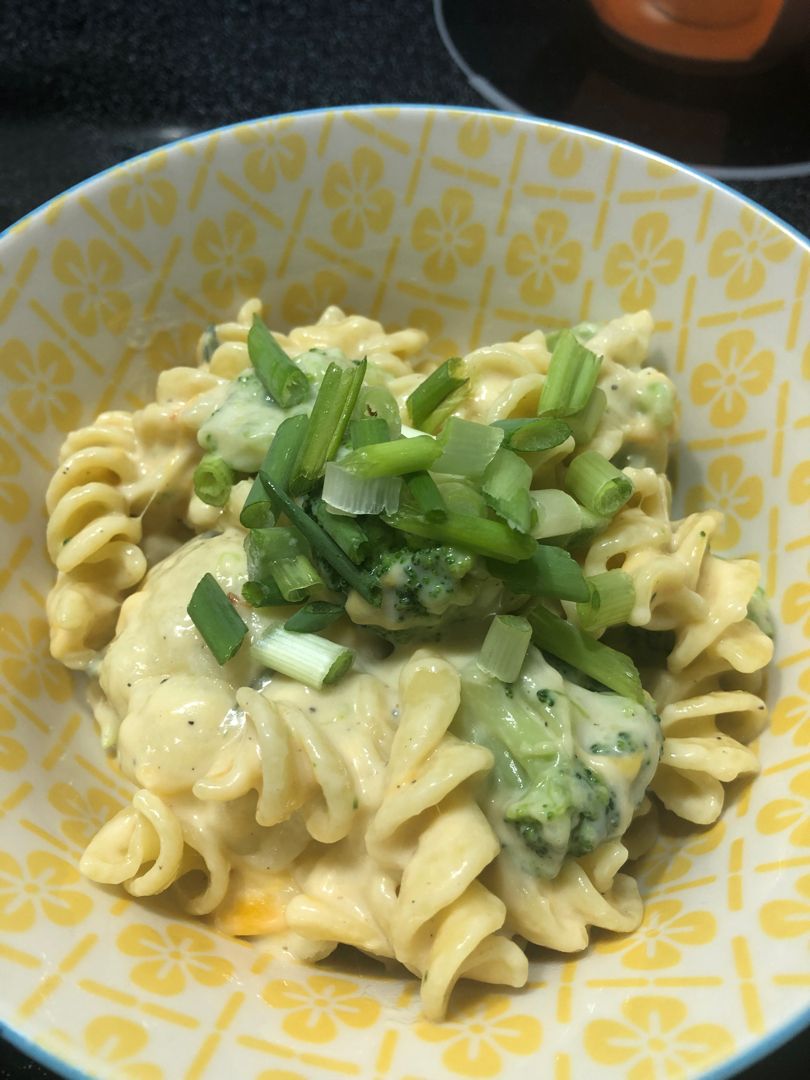
Chicken Broccoli Macaroni and Cheese with Bacon

by Rebecca September 2, 2022
written by Rebecca

If you are searching for an easy and quick dinner, then you have to give this Chicken Broccoli Macaroni and Cheese with Bacon a try. It is crazy easy to whip up and ready in a breeze. This mac and cheese are loaded with chicken, broccoli, and yes, bacon! This is not your usual mac and cheese. It is an amazing take on our favorite traditional mac and cheese.

This Chicken Broccoli Macaroni and Cheese is a fantastic dish excellent for everyone! I am pretty sure your picky eaters will absolutely love this! To make this, all you need is a few simple ingredients. For that extra melty cheese goodness, broil the mac and cheese for a couple of minutes.

Ingredients

12 oz. skinless chicken breasts, cut into 1/2” thick

1 tablespoon garlic powder or minced garlic

6 oz. of uncooked pasta of your choice

3 slice bacon, coarsely chopped

1 teaspoon salt

1 1/4 c. milk

1 c. chicken broth

3 c. fresh pre-chopped broccoli florets

5 oz. of cheddar cheese, shredded

1/4 c. all-purpose flour

How to make Chicken Broccoli Macaroni and Cheese with Bacon

Step 1: Following the package directions, cook the pasta until al dente. Then, add some broccoli to the pasta in the last 2 minutes of cooking. When done, drain the pasta and broccoli.

Step 2: In a skillet, cook the bacon for about 4 to 6 minutes over medium heat until crispy. Using a slotted spoon, remove the bacon from the skillet and set it aside.

Step 3: In the same skillet with the bacon grease, place the chicken and season with garlic, about 1 tbsp salt, and some garlic. Cook the chicken for about 6 to 8 minutes.

Step 4: Whisk 3/4 tsp salt, stock, milk, and flour until well combined. Pour this into the pan. Let the mixture come to a boil, stirring. Cook for a few minutes until the mixture has thickened.

Step 5: Into the skillet, add about 2 ounces of cheese. Toss well. Then, add the bacon. Broil for a few minutes until the cheese has melted.

Step 6: Before serving, give the dish one final stir. If desired, season with extra salt and pepper. Enjoy!

Chicken Broccoli Macaroni and Cheese with Bacon

Rebecca If you are searching for an easy and quick dinner, then you have to give this Chicken Broccoli Macaroni and Cheese with Bacon a try. It is crazy easy to… General Recipes Chicken Broccoli Macaroni and Cheese with Bacon European Print This
Nutrition facts: 200 calories 20 grams fat
Rating: 5.0/5
( 1 voted )

Ingredients

  • 12 oz. skinless chicken breasts, cut into 1/2” thick
  • 1 tablespoon garlic powder or minced garlic
  • 6 oz. of uncooked pasta of your choice
  • 3 slice bacon, coarsely chopped
  • 1 teaspoon salt
  • 1 1/4 c. milk
  • 1 c. chicken broth
  • 3 c. fresh pre-chopped broccoli florets
  • 5 oz. of cheddar cheese, shredded
  • 1/4 c. all-purpose flour

Instructions

Step 1: Following the package directions, cook the pasta until al dente. Then, add some broccoli to the pasta in the last 2 minutes of cooking. When done, drain the pasta and broccoli.

Step 2: In a skillet, cook the bacon for about 4 to 6 minutes over medium heat until crispy. Using a slotted spoon, remove the bacon from the skillet and set it aside.

Step 3: In the same skillet with the bacon grease, place the chicken and season with garlic, about 1 tbsp salt, and some garlic. Cook the chicken for about 6 to 8 minutes.

Step 4: Whisk 3/4 tsp salt, stock, milk, and flour until well combined. Pour this into the pan. Let the mixture come to a boil, stirring. Cook for a few minutes until the mixture has thickened.

Step 5: Into the skillet, add about 2 ounces of cheese. Toss well. Then, add the bacon. Broil for a few minutes until the cheese has melted.

Step 6: Before serving, give the dish one final stir. If desired, season with extra salt and pepper. Enjoy!

September 2, 2022 0 comment
0 FacebookTwitterPinterestEmail
General Recipes

Boston Cream Poke Cake

by Rebecca September 2, 2022
written by Rebecca

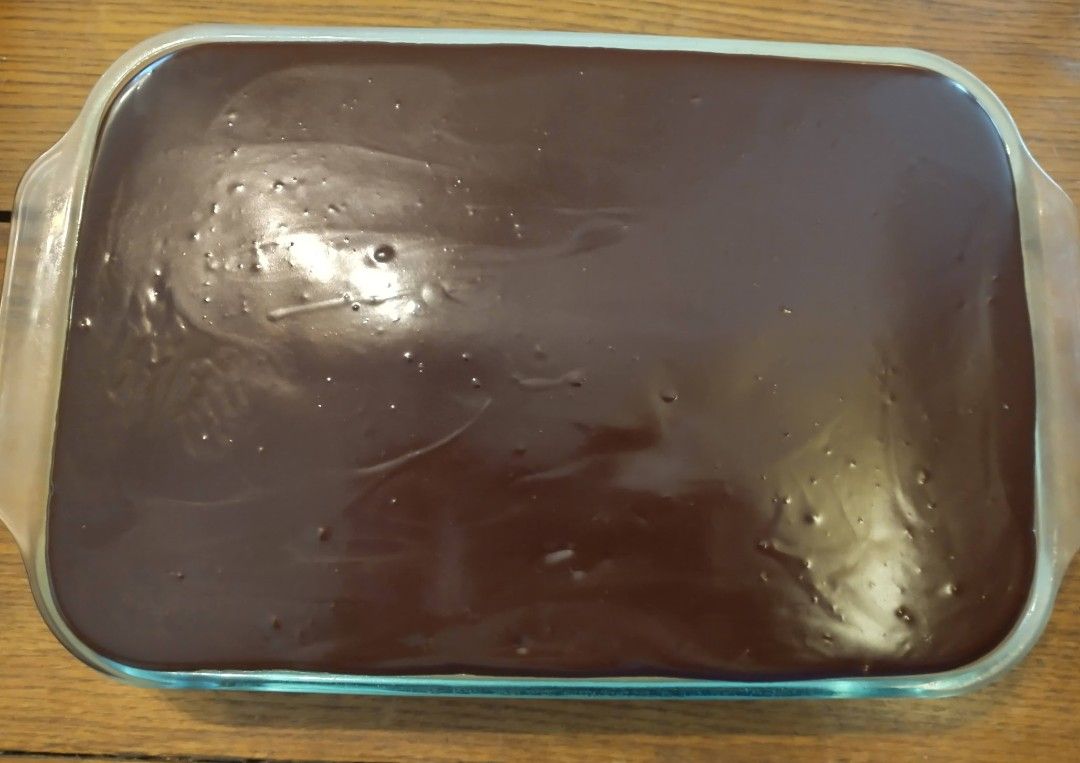
I have a few poke cake recipes that I love! I especially enjoy this Boston Cream Poke Cake. Not only that this is insanely easy to whip up, but this is also a super fun dessert with a big surprise inside! This Boston Cream Poke Cake is an excellent treat to bring to parties or potlucks. Also amazing for just any day or when you find yourself craving an easy and quick pick-me-up dessert.

This Boston Cream Poke Cake is indeed a show-stopping dessert! An excellent dessert choice that no doubt everyone will be raving about! This Boston Cream Poke Cake has a lovely combination of yellow cake, vanilla pudding custard, and chocolate glaze. A one-pan dessert that you can easily whip up at any time!

My husband and I are obsessed with any dessert with custard. I think it is one of the many reasons why we are in love with this Boston Cream Poke Cake. This custard-filled cake is one heck of a glorious dessert with mesmerizing shiny chocolate on top!

Ingredients

4 c. Milk

1 box Yellow Cake Mix (plus box ingredients)

1 container of Chocolate Frosting

2 small boxes (3.4 ounces) of Instant Vanilla Pudding Mix

How to make Boston Cream Poke Cake

Step 1: Following the box direction, prepare the yellow cake mix and bake as directed. When done, allow the cake to cool until slightly warm. Poke tiny holes in the cake using the handle of a spoon.

Step 2: Whisk the milk and pudding until blended and smooth. Pour the pudding mix into the holes on the cake.

Step 3: Place the cake in the fridge until the pudding is set.

Step 4: To make the frosting, place the frosting in a bowl. Heat in the microwave for about 15 seconds, slightly stirring. Microwave the frosting until pourable.

Step 5: Once the pudding is set, take the cake out of the fridge and pour the frosting on top. Spread the frosting using a spatula to cover the entire cake.

Step 6: Store in the fridge for a couple of hours before serving. Enjoy!

Boston Cream Poke Cake

Rebecca I have a few poke cake recipes that I love! I especially enjoy this Boston Cream Poke Cake. Not only that this is insanely easy to whip up, but this… General Recipes Boston Cream Poke Cake European Print This
Nutrition facts: 200 calories 20 grams fat
Rating: 5.0/5
( 1 voted )

Ingredients

  • 4 c. Milk
  • 1 box Yellow Cake Mix (plus box ingredients)
  • 1 container of Chocolate Frosting
  • 2 small boxes (3.4 ounces) of Instant Vanilla Pudding Mix

Instructions

Step 1: Following the box direction, prepare the yellow cake mix and bake as directed. When done, allow the cake to cool until slightly warm. Poke tiny holes in the cake using the handle of a spoon.

Step 2: Whisk the milk and pudding until blended and smooth. Pour the pudding mix into the holes on the cake.

Step 3: Place the cake in the fridge until the pudding is set.

Step 4: To make the frosting, place the frosting in a bowl. Heat in the microwave for about 15 seconds, slightly stirring. Microwave the frosting until pourable.

Step 5: Once the pudding is set, take the cake out of the fridge and pour the frosting on top. Spread the frosting using a spatula to cover the entire cake.

Step 6: Store in the fridge for a couple of hours before serving. Enjoy!

September 2, 2022 0 comment
0 FacebookTwitterPinterestEmail
General Recipes

Orange Creamsicle Cake

by Rebecca September 2, 2022
written by Rebecca

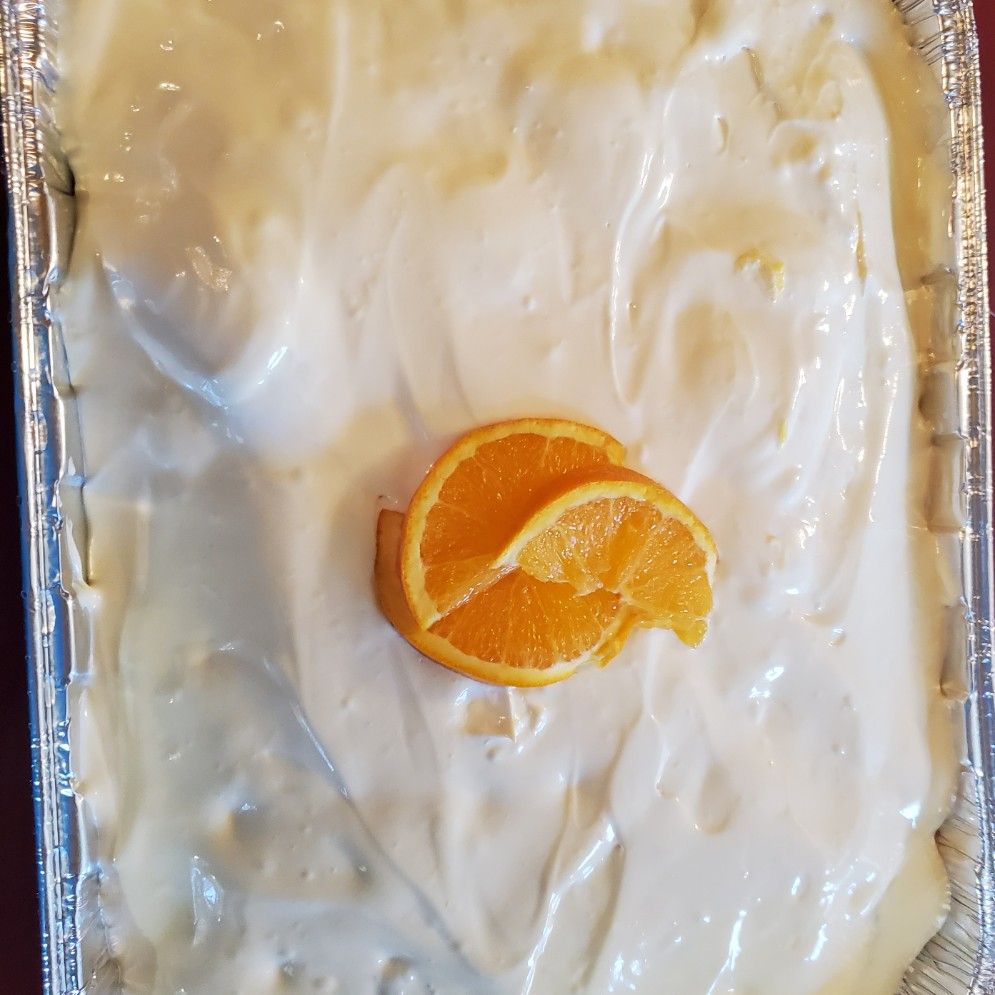
I love parties, especially summer parties! And this refreshing Orange Creamsicle Cake is always on the list of everyone’s favorite desserts! This is a decadent vanilla cake that is bursting with orange flavor. On top is a fluffy orange and vanilla frosting that no one can say no to! Serve this right after a meal to complete the entire course!

The lovely combination of orange and vanilla is hard to miss and so magical! I also love the fun contrast in the colors of this cake. And to achieve that, you do not need magic. All you need is jello! Jello adds some bright color and flavor to this amazing cake. This Orange Creamsicle Cake is incredibly easy to make using just a few simple (pantry) ingredients and guarantees a very moist and luscious dessert.

Ingredients

1 box of Orange Jello

1 box of Orange Cake Mix prepared according to the directions

1 box of Vanilla Pudding

1 c. of boiling water

1 regular tub of Cool Whip

1 c. of cold milk

How to make Orange Creamsicle Cake

Step 1: Following the package directions, prepare the orange cake mix and bake. Remove from the oven when done and allow the cake to cool. Using the end of a spoon, poke some holes within the cake once it is warm enough. You can also use a skewer.

Step 2: In boiling water, mix the jello until it looks slightly gelatinous. Pour the jello into the entire cake. Then, place the cake in the fridge.

Step 3: In a bowl, place the cold milk and vanilla pudding. Mix well until creamy. Then, fold in the cool whip.

Step 4: Take the cake out of the fridge and spread the topping on top.

Step 5: If desired, you can garnish the cake with some slices of orange. You can keep this cake in the fridge for later. Enjoy!

Orange Creamsicle Cake

Rebecca I love parties, especially summer parties! And this refreshing Orange Creamsicle Cake is always on the list of everyone’s favorite desserts! This is a decadent vanilla cake that is bursting… General Recipes Orange Creamsicle Cake European Print This
Nutrition facts: 200 calories 20 grams fat
Rating: 5.0/5
( 1 voted )

Ingredients

  • 1 box of Orange Jello
  • 1 box of Orange Cake Mix prepared according to the directions
  • 1 box of Vanilla Pudding
  • 1 c. of boiling water
  • 1 regular tub of Cool Whip
  • 1 c. of cold milk

Instructions

Step 1: Following the package directions, prepare the orange cake mix and bake. Remove from the oven when done and allow the cake to cool. Using the end of a spoon, poke some holes within the cake once it is warm enough. You can also use a skewer.

Step 2: In boiling water, mix the jello until it looks slightly gelatinous. Pour the jello into the entire cake. Then, place the cake in the fridge.

Step 3: In a bowl, place the cold milk and vanilla pudding. Mix well until creamy. Then, fold in the cool whip.

Step 4: Take the cake out of the fridge and spread the topping on top.

Step 5: If desired, you can garnish the cake with some slices of orange. You can keep this cake in the fridge for later. Enjoy!

September 2, 2022 0 comment
0 FacebookTwitterPinterestEmail
General Recipes

Strawberry-Banana Cheesecake Salad

by Rebecca September 2, 2022
written by Rebecca

This strawberry-banana cheesecake salad is one of my ultimate favorite salads! Incredibly easy to whip up and ready in a snap! You can even make this 1 day ahead and just store the fruits and the cheesecake mixture separately. This salad is crazy good no one cannot resist a serving or two! The perfect salad to quench your cheesecake cravings!

INGREDIENTS

3 tablespoons honey

1 (8 ounces) package cream cheese – softened

1/4 c. heavy cream

1 teaspoon vanilla extract

3 tablespoons fresh lemon juice

3 bananas – peeled and cut into rounds

2 pounds (about 4 ½ c.) strawberries – washed, hulled, and sliced

How to make Strawberry-Banana Cheesecake Salad

Step 1: Start by rinsing the strawberries, making sure to remove the dirt or sand. Using paper towels, pat away any moisture. Then, hull the strawberries. Into thin slices, cut the strawberries and place them in a large mixing bowl.

Step 2: Cut the peeled bananas into rounds and add them to the strawberries.

Step 3: Mix the fruits and pour in the lemon juice. Toss to coat the fruits. Set aside.

Cheesecake mixture:

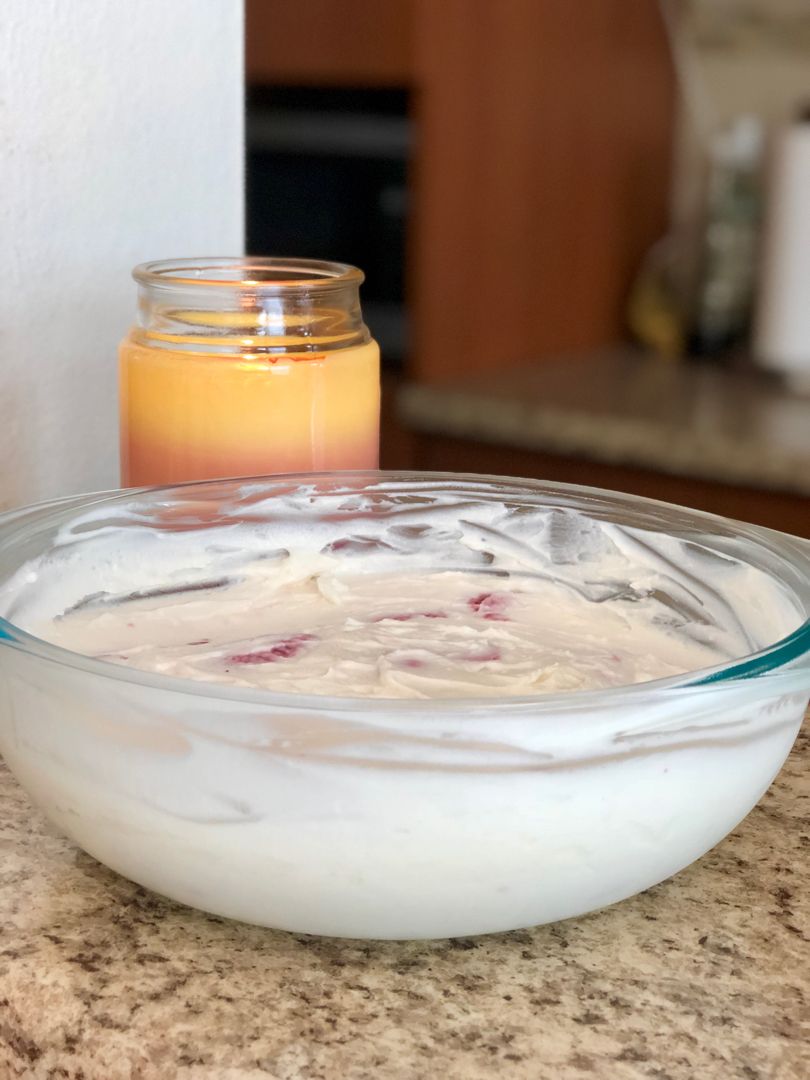
Step 4: Add the softened cream cheese, honey, and vanilla extract to another bowl. Whip using an electric mixer for about 3 to 4 minutes.

Step 5: Using a spatula, scrape down the sides of the bowl as needed.

Step 6: To the bowl, add the heavy cream about 1-2 tbsp, whipping until the mixture is blended and smooth.

To Assemble the fruit salad:

Step 7: Into the fruit, gently fold the cream cheese mixture. Before serving, garnish the salad with sliced strawberries and banana coins (optional). Enjoy right away!

NOTES:

Feel free to make this salad one day in advance. Make sure to store the cheesecake mixture and fruit separately. Before serving, assemble the salad.

You can substitute honey with agave syrup.

Store any leftovers for up to 2 days, covered.

Strawberry-Banana Cheesecake Salad

Rebecca This strawberry-banana cheesecake salad is one of my ultimate favorite salads! Incredibly easy to whip up and ready in a snap! You can even make this 1 day ahead and… General Recipes Strawberry-Banana Cheesecake Salad European Print This
Nutrition facts: 200 calories 20 grams fat
Rating: 5.0/5
( 1 voted )

Ingredients

  • 3 tablespoons honey
  • 1 (8 ounces) package cream cheese – softened
  • 1/4 c. heavy cream
  • 1 teaspoon vanilla extract
  • 3 tablespoons fresh lemon juice
  • 3 bananas – peeled and cut into rounds
  • 2 pounds (about 4 ½ c.) strawberries – washed, hulled, and sliced

Instructions

Step 1: Start by rinsing the strawberries, making sure to remove the dirt or sand. Using paper towels, pat away any moisture. Then, hull the strawberries. Into thin slices, cut the strawberries and place them in a large mixing bowl.

Step 2: Cut the peeled bananas into rounds and add them to the strawberries.

Step 3: Mix the fruits and pour in the lemon juice. Toss to coat the fruits. Set aside.

Cheesecake mixture:

Step 4: Add the softened cream cheese, honey, and vanilla extract to another bowl. Whip using an electric mixer for about 3 to 4 minutes.

Step 5: Using a spatula, scrape down the sides of the bowl as needed.

Step 6: To the bowl, add the heavy cream about 1-2 tbsp, whipping until the mixture is blended and smooth.

To Assemble the fruit salad:

Step 7: Into the fruit, gently fold the cream cheese mixture. Before serving, garnish the salad with sliced strawberries and banana coins (optional). Enjoy right away!

Notes

Feel free to make this salad one day in advance. Make sure to store the cheesecake mixture and fruit separately. Before serving, assemble the salad. You can substitute honey with agave syrup. Store any leftovers for up to 2 days, covered.

September 2, 2022 0 comment
0 FacebookTwitterPinterestEmail
Newer Posts
Older Posts

Popular Posts

  • 1

    Crispy Crunchy Parmesan Potatoes

    March 21, 2020
  • 2

    CROCK POT SMOTHERED PORK CHOPS

    March 21, 2020
  • Facebook
  • Twitter

@2019 - All Right Reserved.


Back To Top