Cook it once
  • Home
  • Privacy Policy
  • Recipes
    • KETO
    • LC
    • WW
  • Tips
  • Contact
Cook it once
  • Home
  • Privacy Policy
  • Recipes
    • KETO
    • LC
    • WW
  • Tips
  • Contact
Monthly Archives

June 2020

Main Dish Recipes

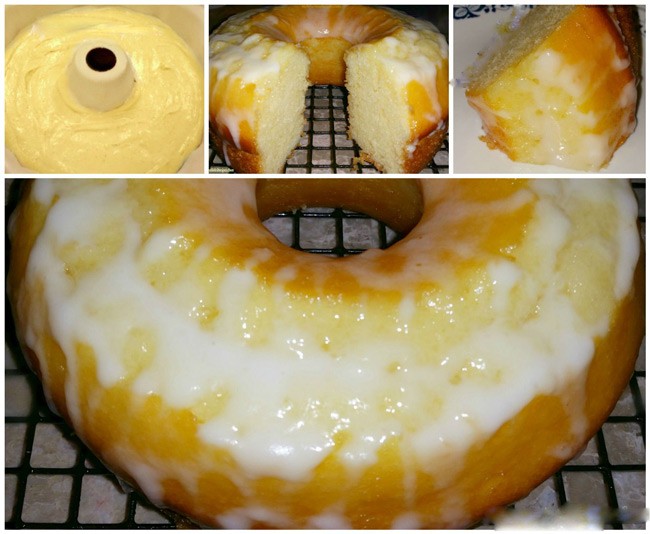
Easy Lemon 7Up Cake!

by Rebecca June 4, 2020
written by Rebecca

This easy lemon cake is undeniably delicious. And a simple glaze is drizzled over this amazing cake to make it more interesting. There are two ways to make this – from scratch or using a box cake mix. Either way, the result is astonishing!

Ingredients (from scratch)

5 eggs

3 c. self-rising flour

3/4 lb. butter, softened (3/4 lb. of butter equals to 3 sticks)

3 c. sugar

2 tbsps lemon juice (real or squeeze kind is fine) or extract if you want a deeper lemon flavor

3/4 c. carbonated lemon-lime beverage any brand

If using a Box Cake Mix

1 box of yellow cake mix

4 eggs

3/4 c. of vegetable oil

14 ounces box of instant lemon pudding

3/4 c. of carbonated lemon-lime soda of your choice/any brand

Lemon Glaze Ingredients

1/2 c. powdered sugar

2 tbsps lemon juice

1 tsp of milk

How to make Easy Lemon 7Up Cake! from scratch

Step 1: Combine the butter and sugar for about 10 minutes.

Step 2: Add in the eggs one at a time while beating after each addition.

Step 3: Stir in the flour and lemon juice or lemon extract.

Step 4: Then, fold in the lemon-lime soda of your choice.

Step 5: Carefully pour the mixture into a well-greased 12 cup bundt pan.

Step 6: Place inside the oven and bake for an hour or an hour and fifteen minutes at 325 degrees until fully set.

Step 7: Once done, remove from the oven and transfer to a wire rack to cool completely.

Step 8: Once cooled, drizzle the cake. Serve and enjoy!

Using a Box Cake Mix

Step 1: Prepare the oven. Preheat it to 325 degrees F.

Step 2: Greased well the bundt pan.

Step 3: Combine the cake mix ingredients and the pudding, followed by the soda. Mix until incorporated.

Step 4: Carefully pour the batter into the well-greased bundt pan.

Step 5: Place inside the preheated oven and bake for to minutes or until set.

Step 6: Once done, remove from the oven and allow the cake to cool in the pan completely. Once cooled, remove from the pan.

Step 7: Glaze the cake. Serve and enjoy!

To make the Lemon Glaze, mix the powdered sugar, lemon juice, and milk until incorporated. Then, drizzle the glaze over the cooled cake. You can either make this glaze or use the same easy and delicious glaze from the box mix.

Easy Lemon 7Up Cake!

Rebecca This easy lemon cake is undeniably delicious. And a simple glaze is drizzled over this amazing cake to make it more interesting. There are two ways to make this –… Main Dish Recipes Easy Lemon 7Up Cake! European Print This
Nutrition facts: 200 calories 20 grams fat
Rating: 5.0/5
( 1 voted )

Ingredients

  • 5 eggs
  • 3 c. self-rising flour
  • 3/4 lb. butter, softened (3/4 lb. of butter equals to 3 sticks)
  • 3 c. sugar
  • 2 tbsps lemon juice (real or squeeze kind is fine) or extract if you want a deeper lemon flavor
  • 3/4 c. carbonated lemon-lime beverage any brand
  • If using a Box Cake Mix
  • 1 box of yellow cake mix
  • 4 eggs
  • 3/4 c. of vegetable oil
  • 14 ounces box of instant lemon pudding
  • 3/4 c. of carbonated lemon-lime soda of your choice/any brand
  • Lemon Glaze Ingredients
  • 1/2 c. powdered sugar
  • 2 tbsps lemon juice
  • 1 tsp of milk

Instructions

Step 1: Combine the butter and sugar for about 10 minutes.

Step 2: Add in the eggs one at a time while beating after each addition.

Step 3: Stir in the flour and lemon juice or lemon extract.

Step 4: Then, fold in the lemon-lime soda of your choice.

Step 5: Carefully pour the mixture into a well-greased 12 cup bundt pan.

Step 6: Place inside the oven and bake for an hour or an hour and fifteen minutes at 325 degrees until fully set.

Step 7: Once done, remove from the oven and transfer to a wire rack to cool completely.

Step 8: Once cooled, drizzle the cake. Serve and enjoy!

Using a Box Cake Mix

Step 1: Prepare the oven. Preheat it to 325 degrees F.

Step 2: Greased well the bundt pan.

Step 3: Combine the cake mix ingredients and the pudding, followed by the soda. Mix until incorporated.

Step 4: Carefully pour the batter into the well-greased bundt pan.

Step 5: Place inside the preheated oven and bake for to minutes or until set.

Step 6: Once done, remove from the oven and allow the cake to cool in the pan completely. Once cooled, remove from the pan.

Step 7: Glaze the cake. Serve and enjoy!

To make the Lemon Glaze, mix the powdered sugar, lemon juice, and milk until incorporated. Then, drizzle the glaze over the cooled cake. You can either make this glaze or use the same easy and delicious glaze from the box mix.
June 4, 2020 0 comment
0 FacebookTwitterPinterestEmail
Main Dish Recipes

The Famous “Woolworth” Ice Box Cheesecake

by Rebecca June 4, 2020
written by Rebecca

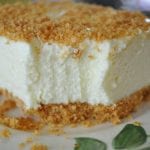
A very refreshing treat for hot weather. Yesterday I was craving for something cold and sweet. At first, I thought about eating ice cream but I remembered this recipe. It was on TV the other night and it was a good thing that I was able to write down all the ingredients. As to the steps, I kind of did it myself. The idea is pretty easy so you will get it immediately. For quick and easy procedures though, you can just follow these steps that I have provided for you. Make it today! Your dessert is gonna be amazing tonight! By the way, you can add your preferred additional ingredients. For example, try adding fresh and sweet mangoes. It really gives a different yet amazing twist to this dessert. Enjoy!

INGREDIENTS

1 (3 ounces) package lemon Jell-O

1 cup boiling water

8 ounces cream cheese

1 cup granulated sugar

5 tablespoons lemon juice

1 can Carnation evaporated milk, well chilled

Graham crackers, crushed

How to make The Famous “Woolworth” Ice Box Cheesecake

Step 1: Place a medium round casserole on the stove and pour water then bring to boil.

Step 2: Add the Jell-O and dissolve in the boiling water then turn the heat to low until the texture becomes thick.

Step 3: In a medium bowl, combine lemon juice, cheese, and sugar. Beat until well-mixed and smooth.

Step 4: Add in the cooked Jell-O into the cream cheese mixture and beat until well-mixed.

Step 5: Pour the Carnation milk in a large bowl and beat until it becomes fluffy.

Step 6: Add the Jell-O mixture and cream cheese mixture into the large bowl with the Carnation milk. Mix until well-blended.

Step 7: In a 9×13 pan, add crushed Graham crackers and line on the bottom part of the pan.

Step 8: Add all the ingredients into the pan and spread crushed Graham crackers on top.

Step 9: Refrigerate for at least 1 hour. Serve and Enjoy!

The Famous "Woolworth" Ice Box Cheesecake

Rebecca A very refreshing treat for hot weather. Yesterday I was craving for something cold and sweet. At first, I thought about eating ice cream but I remembered this recipe. It… Main Dish Recipes The Famous “Woolworth” Ice Box Cheesecake European Print This
Nutrition facts: 200 calories 20 grams fat
Rating: 5.0/5
( 1 voted )

Ingredients

  • 1 (3 ounces) package lemon Jell-O
  • 1 cup boiling water
  • 8 ounces cream cheese
  • 1 cup granulated sugar
  • 5 tablespoons lemon juice
  • 1 can Carnation evaporated milk, well chilled
  • Graham crackers, crushed
June 4, 2020 0 comment
0 FacebookTwitterPinterestEmail
Main Dish Recipes

GRANNY’S DOUGHNUTS

by Rebecca June 4, 2020
written by Rebecca

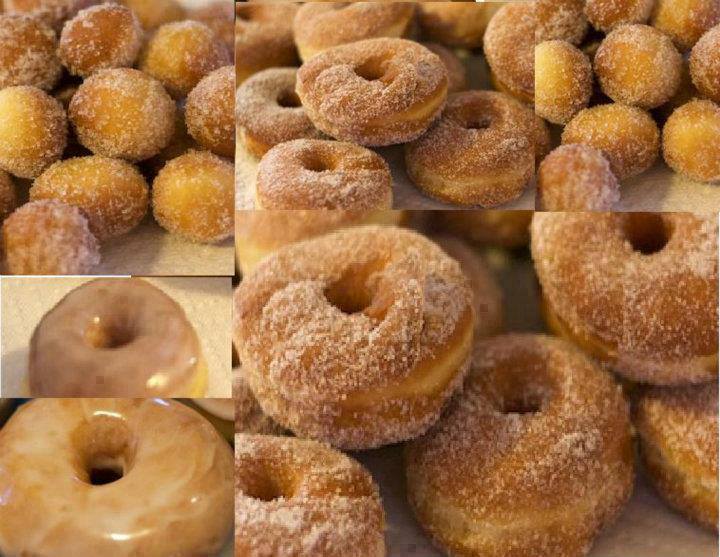
This is one of the easiest and quickest recipes I’ve made for a long time. This is a classic Granny’s doughnuts that I haven’t made for such a long time. It’s been around for ages, and many have made modifications already but this is the traditional recipe that our grandmothers used. Even the glaze is simple and straightforward. Don’t be intimated because even if these donuts are easy to make, the result will surprise you.

My kids are not used to these simple and plain donuts but when they tasted it they love it as much! It’s a nice change for all the frosting treats they typically consume. Indeed, we will always come back to the original, speaking for these lovely and delicious donuts. My husband is in love with these gorgeous donuts and he’s always craving for it ever since I made this. I can’t blame him, this is the donut we grew up with.

Ingredients

1 cup of sugar

1 teaspoon nutmeg

1 teaspoon baking soda

½ teaspoon salt

2 eggs

1 tablespoon shortening

1 cup of sour milk

6 cups of flour

HOW TO MAKE GRANNY’S DOUGHNUTS

Step 1: In a bowl, mix the sugar, nutmeg, soda, salt, eggs, milk, and shortening. Mix enough flour and roll out the dough on a floured surface. With a donut cutter, cut the dough.

Step 2: Drop the donuts in 1 tablespoon of hot shortening (heat to 375 degrees F). And make sure to turn the donuts several times.

Step 3: Once done, transfer the donuts on some crumped paper soft and let them cool.

Step 4: Dust the donuts with powdered sugar or granulated sugar or with cinnamon. You can drizzle them with glaze if desired.

To make the white donut glaze, mix the 2 cups of powdered sugar, 1 tsp. vanilla, and 4 to 6 tablespoons of milk in a bowl using a fork until you reached your desired consistency. Thicken the glaze with powdered sugar or thin down with milk.

GRANNY’S DOUGHNUTS

Rebecca This is one of the easiest and quickest recipes I’ve made for a long time. This is a classic Granny’s doughnuts that I haven’t made for such a long time.… Main Dish Recipes GRANNY’S DOUGHNUTS European Print This
Nutrition facts: 200 calories 20 grams fat
Rating: 5.0/5
( 1 voted )

Ingredients

  • 1 cup of sugar
  • 1 teaspoon nutmeg
  • 1 teaspoon baking soda
  • ½ teaspoon salt
  • 2 eggs
  • 1 tablespoon shortening
  • 1 cup of sour milk
  • 6 cups of flour

Instructions

Step 1: In a bowl, mix the sugar, nutmeg, soda, salt, eggs, milk, and shortening. Mix enough flour and roll out the dough on a floured surface. With a donut cutter, cut the dough.

Step 2: Drop the donuts in 1 tablespoon of hot shortening (heat to 375 degrees F). And make sure to turn the donuts several times.

Step 3: Once done, transfer the donuts on some crumped paper soft and let them cool.

Step 4: Dust the donuts with powdered sugar or granulated sugar or with cinnamon. You can drizzle them with glaze if desired.

To make the white donut glaze, mix the 2 cups of powdered sugar, 1 tsp. vanilla, and 4 to 6 tablespoons of milk in a bowl using a fork until you reached your desired consistency. Thicken the glaze with powdered sugar or thin down with milk.

June 4, 2020 0 comment
0 FacebookTwitterPinterestEmail
Main Dish Recipes

Pineapple Upside-Down Cake Fudge

by Rebecca June 4, 2020
written by Rebecca

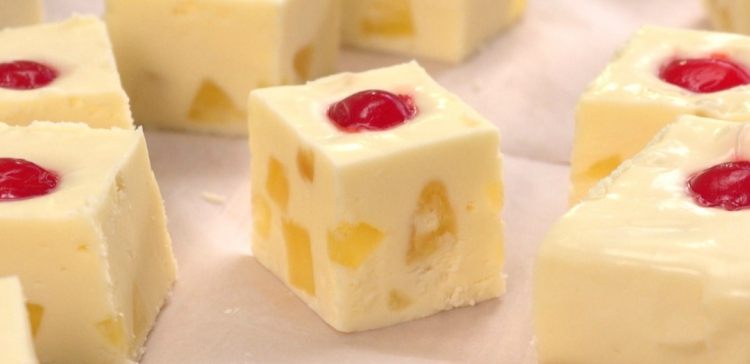
Whoever thought of this treat is genius! This is exactly like a tropical cake with a twist. These little beauties taste incredible, fudgy, with real chunks of pineapple and maraschino cherries. It’s the tasty combination that we’ve always dreamed about – the burst of freshness from the pineapples and cherries, and the fudgy delight comes together in a bite of pure bliss!

INGREDIENTS

2 cups of sugar

½ cup of unsalted butter

¾ cup of heavy cream

2 cups of white chocolate chips

2 tsp. pineapple juice

4 tbsp. yellow cake mix

7 ounces marshmallow creme

1-¼ cups of dried pineapple, diced

13 maraschino cherries, cut in half

How to make Pineapple Upside-Down Cake Fudge

Step 1: Line a parchment paper on an 8 x 8-inch baking dish leaving enough extension so the fudge can be lifted easily after it has set.

Step 2: Combine the sugar, butter, and heavy cream in a medium saucepan. Bring the mixture to a boil over medium heat. Then, reduce the heat to low and continue cooking for 7 to 10 minutes while regularly stirring until a candy or instant-read thermometer reach 234 degrees Fahrenheit or 112 degrees Celsius.

Step 3: Once a soft-ball stage is reached remove from the heat and stir in the white chocolate until melted and the mixture is smooth.

Step 4: Mix in the pineapple juice, cake mix, and marshmallow creme until incorporated.

Step 5: Then, fold in the diced dried pineapple.

Step 6: Carefully pour the fudge mixture into the lined baking dish.

Step 7: Cut the cherry in halves and place them evenly spaced on top of the fudge. For five rows of five cherry pieces will yield 25 pieces when cut.

Step 8: Chill the fudge in the fridge for at least 2 to 3 hours until firm. Once the fudge is firm, carefully lift the parchment from the pan.

Step 9: Cut into pieces making sure to get 1 cheery piece per slice. Serve and enjoy!

Pineapple Upside-Down Cake Fudge

Rebecca Whoever thought of this treat is genius! This is exactly like a tropical cake with a twist. These little beauties taste incredible, fudgy, with real chunks of pineapple and maraschino cherries.… Main Dish Recipes Pineapple Upside-Down Cake Fudge European Print This
Nutrition facts: 200 calories 20 grams fat
Rating: 5.0/5
( 1 voted )

Ingredients

  • 2 cups of sugar
  • ½ cup of unsalted butter
  • ¾ cup of heavy cream
  • 2 cups of white chocolate chips
  • 2 tsp. pineapple juice
  • 4 tbsp. yellow cake mix
  • 7 ounces marshmallow creme
  • 1-¼ cups of dried pineapple, diced
  • 13 maraschino cherries, cut in half

Instructions

Step 1: Line a parchment paper on an 8 x 8-inch baking dish leaving enough extension so the fudge can be lifted easily after it has set.

Step 2: Combine the sugar, butter, and heavy cream in a medium saucepan. Bring the mixture to a boil over medium heat. Then, reduce the heat to low and continue cooking for 7 to 10 minutes while regularly stirring until a candy or instant-read thermometer reach 234 degrees Fahrenheit or 112 degrees Celsius.

Step 3: Once a soft-ball stage is reached remove from the heat and stir in the white chocolate until melted and the mixture is smooth.

Step 4: Mix in the pineapple juice, cake mix, and marshmallow creme until incorporated.

Step 5: Then, fold in the diced dried pineapple.

Step 6: Carefully pour the fudge mixture into the lined baking dish.

Step 7: Cut the cherry in halves and place them evenly spaced on top of the fudge. For five rows of five cherry pieces will yield 25 pieces when cut.

Step 8: Chill the fudge in the fridge for at least 2 to 3 hours until firm. Once the fudge is firm, carefully lift the parchment from the pan.

Step 9: Cut into pieces making sure to get 1 cheery piece per slice. Serve and enjoy!

June 4, 2020 0 comment
0 FacebookTwitterPinterestEmail
Main Dish Recipes

CRAB & CREAM CHEESE SNACKS

by Rebecca June 4, 2020
written by Rebecca

A wonderful dinner idea or appetizer that everyone will enjoy. This crab and cream cheese snacks are pretty easy to put together and quick to make, you’ll have it in your dinner table in no time. These golden crescent rolls are filled with cream cheese and tender pieces of crab, it’s sure will not disappoint and will provide you with rich flavor that you are undeniably scrumptious.

I’ve gone through every recipe of seafood crescent rolls and this recipe by far is the most loved, and easiest to follow. These rolls are very comforting, the cream cheese and seafood filling are wrap in convenient crescent doughs and are baked to perfection. You can either use chopped crabs or cooked shrimps and it’s still delightful. This a must try and certainly a keeper.

INGREDIENTS

1-8 ounces tube crescent roll dough

3 ounces cream cheese, softened

1/4 cup of mayonnaise

3/4 cup of cooked crabmeat, chopped or shrimp cooked

2 green onions, chopped

1/8- 1/4 teaspoon of cayenne pepper

salt and pepper, to taste

HOW TO MAKE CRAB & CREAM CHEESE SNACKS

Step 1: Prepare the oven. Preheat it to 375 degrees F. And with a cooking spray, spray or grease a baking pan.

Step 2: Mix the cream cheese, mayo, crab meat, onion, and red pepper in a small bowl. Sprinkle some salt and pepper to taste.

Step 3: Lay half of the crescent dough on a greased baking pan. Evenly spread the seafood mixture over and top with the other half of the dough.

Step 4: Place inside the preheated oven and bake until puffed and browned. Once done, remove from the oven and let it sit for a couple of minutes before cutting. As an appetizer, separately roll each crescent dough and scoop a small amount of mixture in the center and roll. Then, place in the oven to bake until puffed and browned.

CRAB & CREAM CHEESE SNACKS

Rebecca A wonderful dinner idea or appetizer that everyone will enjoy. This crab and cream cheese snacks are pretty easy to put together and quick to make, you’ll have it in… Main Dish Recipes CRAB & CREAM CHEESE SNACKS European Print This
Nutrition facts: 200 calories 20 grams fat
Rating: 5.0/5
( 1 voted )

Ingredients

  • 1-8 ounces tube crescent roll dough
  • 3 ounces cream cheese, softened
  • 1/4 cup of mayonnaise
  • 3/4 cup of cooked crabmeat, chopped or shrimp cooked
  • 2 green onions, chopped
  • 1/8- 1/4 teaspoon of cayenne pepper
  • salt and pepper, to taste

Instructions

Step 1: Prepare the oven. Preheat it to 375 degrees F. And with a cooking spray, spray or grease a baking pan.

Step 2: Mix the cream cheese, mayo, crab meat, onion, and red pepper in a small bowl. Sprinkle some salt and pepper to taste.

Step 3: Lay half of the crescent dough on a greased baking pan. Evenly spread the seafood mixture over and top with the other half of the dough.

Step 4: Place inside the preheated oven and bake until puffed and browned. Once done, remove from the oven and let it sit for a couple of minutes before cutting. As an appetizer, separately roll each crescent dough and scoop a small amount of mixture in the center and roll. Then, place in the oven to bake until puffed and browned.

June 4, 2020 0 comment
0 FacebookTwitterPinterestEmail
Main Dish Recipes

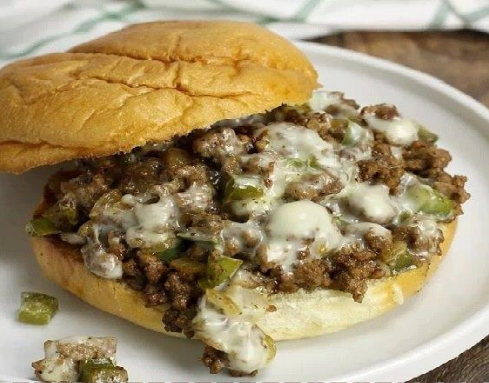
CHEESESTEAK STYLE SLOPPY JOES

by Rebecca June 4, 2020
written by Rebecca

For a fantastic, low-cost alternative for the traditional cheesesteak sandwich, this recipe for a cheesesteak style sloppy joes would be a great choice. It’s made with simple and easy to find ingredients, plus this can easily be customized. Want to spice things up? Add a splash of hot sauce or cayenne pepper, you can even dice some jalapeno and add it with your onions and bell pepper. Mushrooms work best as well, saute it along with the onions and bell pepper. This super delicious, full of flavor sloppy joes is an excellent weeknight meal for the whole family.

Ingredients

1 pound ground beef

1 tsp. salt

1/2 tsp. black pepper

2 tbsp. unsalted butter

1 small onion diced

1 green bell pepper diced

1/4 tsp. garlic powder or 2 cloves garlic, minced

1 tbsp. Worcestershire sauce

1/2 cup beef broth

1 tbsp. cornstarch

4 slices white American or provolone cheese

4 rolls

HOW TO MAKE CHEESESTEAK STYLE SLOPPY JOES

Step 1: In a saute pan, cook the ground beef over medium heat. Crumble and season with salt and pepper. Cook for about 5 minutes until browned. Once browned, remove from the pan and set aside.

Step 2: Melt butter in the same pan, add onion, and bell pepper. Saute for about 4 to 5 minutes or until the vegetables begin to brown and the onion is translucent.

Step 3: Lower the heat and return the ground beef into the pan. Sprinkle the garlic powder, add in the Worcestershire sauce, and beef broth. Make sure to scrape the bottom of the pan as you are incorporating the ingredients.

Step 4: Stir in the cornstarch until dissolved. Cornstarch helps thicken the broth and creates a sauce. If the beef looks dry, you can add 1 to 2 tbsps. of water.

Step 5: Once set, remove the pan from the heat. Then, place the cheese slices on top of the meat mixture and let it sit for 1 to 2 minutes until the cheese is melted. Spoon the sloppy joes onto the rolls and serve quickly. Enjoy! For any leftovers, store in a sealed container and can keep it in the fridge for 2 to 3 days.

CHEESESTEAK STYLE SLOPPY JOES

Rebecca For a fantastic, low-cost alternative for the traditional cheesesteak sandwich, this recipe for a cheesesteak style sloppy joes would be a great choice. It’s made with simple and easy to… Main Dish Recipes CHEESESTEAK STYLE SLOPPY JOES European Print This
Nutrition facts: 200 calories 20 grams fat
Rating: 5.0/5
( 1 voted )

Ingredients

  • 1 pound ground beef
  • 1 tsp. salt
  • 1/2 tsp. black pepper
  • 2 tbsp. unsalted butter
  • 1 small onion diced
  • 1 green bell pepper diced
  • 1/4 tsp. garlic powder or 2 cloves garlic, minced
  • 1 tbsp. Worcestershire sauce
  • 1/2 cup beef broth
  • 1 tbsp. cornstarch
  • 4 slices white American or provolone cheese
  • 4 rolls

Instructions

Step 1: In a saute pan, cook the ground beef over medium heat. Crumble and season with salt and pepper. Cook for about 5 minutes until browned. Once browned, remove from the pan and set aside.

Step 2: Melt butter in the same pan, add onion, and bell pepper. Saute for about 4 to 5 minutes or until the vegetables begin to brown and the onion is translucent.

Step 3: Lower the heat and return the ground beef into the pan. Sprinkle the garlic powder, add in the Worcestershire sauce, and beef broth. Make sure to scrape the bottom of the pan as you are incorporating the ingredients.

Step 4: Stir in the cornstarch until dissolved. Cornstarch helps thicken the broth and creates a sauce. If the beef looks dry, you can add 1 to 2 tbsps. of water.

Step 5: Once set, remove the pan from the heat. Then, place the cheese slices on top of the meat mixture and let it sit for 1 to 2 minutes until the cheese is melted. Spoon the sloppy joes onto the rolls and serve quickly. Enjoy! For any leftovers, store in a sealed container and can keep it in the fridge for 2 to 3 days.

June 4, 2020 0 comment
0 FacebookTwitterPinterestEmail
Main Dish Recipes

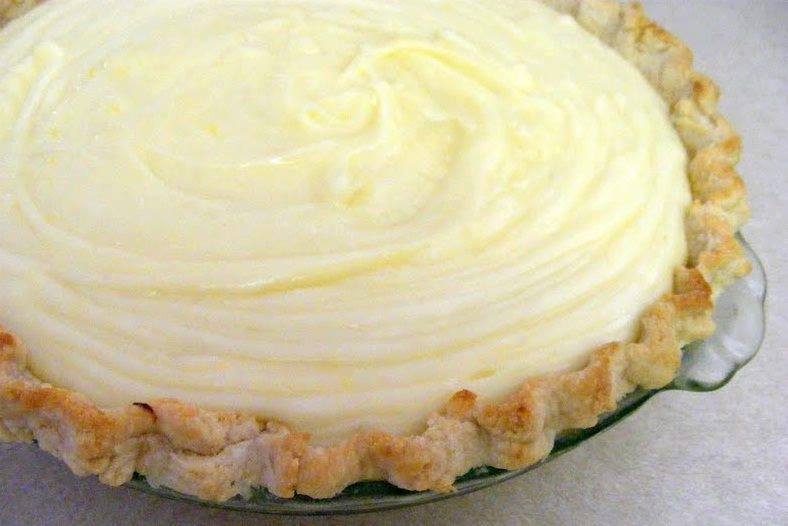
CREAM CHEESE LEMONADE PIE

by Rebecca June 3, 2020
written by Rebecca

This pie is all you need for a summer vibe all year round. It’s refreshing, super delicious, and a creamy one of a kind dessert that everyone loves. This beauty is tart, creamy, and is packed with lemon flavor. A satisfying, lemony goodness, you want to have it all just for yourself. If you want a refreshingly delicious pie you should try this, take it from me, you’ll never regret it. Don’t be intimidated by its look because it’s so easy to put together. Enjoy!

Ingredients

For the Creamy Pie:

1 5 oz can Evaporated milk

1 3.4 oz box of instant lemon pudding mix, one small box

2 8 oz packages of cream cheese

3/4 cup of frozen lemonade concentrate

For the Pie Crust:

2 1/2 cup of graham cracker crumbs

1/3 cup of sugar

2/3 cup of butter, melted

Or you can use 1 graham cracker crust, 9 inch (making this a no-bake dessert)

HOW TO MAKE CREAM CHEESE LEMONADE PIE

Step 1: Prepare the oven. Preheat it to 350 degrees.

To make the Pie Crust

Step 2: Combine the graham cracker crumbs, sugar, and melted butter in a mixing bowl. Whisk until incorporated.

Step 3: Pour and press the graham cracker crumbs into a deep pie dish including the sides.

Step 4: Place inside the preheated oven and bake for 10 to 12 minutes. Remove the pie dish from the oven and let it cool.

For the Creamy Pie

Step 5: Combine the 5 ounces can of evaporated milk and the pudding mix in a small mixing bowl. Beat for 2 minutes on medium speed until the mixture is thickened.

Step 6: Put the cream cheese in a medium mixing bowl and beat for 3 minutes until light and fluffy.

Step 7: Slowly beat in the concentrated lemonade and the pudding mixture next.

Step 8: Pour the mixture into the cooled or pre-made graham cracker pie crust.

Step 9: refrigerate for at least 4 hours, covered.

CREAM CHEESE LEMONADE PIE

Rebecca This pie is all you need for a summer vibe all year round. It’s refreshing, super delicious, and a creamy one of a kind dessert that everyone loves. This beauty… Main Dish Recipes CREAM CHEESE LEMONADE PIE European Print This
Nutrition facts: 200 calories 20 grams fat
Rating: 5.0/5
( 1 voted )

Ingredients

  • For the Creamy Pie:
  • 1 5 oz can Evaporated milk
  • 1 3.4 oz box of instant lemon pudding mix, one small box
  • 2 8 oz packages of cream cheese
  • 3/4 cup of frozen lemonade concentrate
  • For the Pie Crust:
  • 2 1/2 cup of graham cracker crumbs
  • 1/3 cup of sugar
  • 2/3 cup of butter, melted
  • Or you can use 1 graham cracker crust, 9 inch (making this a no-bake dessert)

Instructions

Step 1: Prepare the oven. Preheat it to 350 degrees.

To make the Pie Crust

Step 2: Combine the graham cracker crumbs, sugar, and melted butter in a mixing bowl. Whisk until incorporated.

Step 3: Pour and press the graham cracker crumbs into a deep pie dish including the sides.

Step 4: Place inside the preheated oven and bake for 10 to 12 minutes. Remove the pie dish from the oven and let it cool.

For the Creamy Pie

Step 5: Combine the 5 ounces can of evaporated milk and the pudding mix in a small mixing bowl. Beat for 2 minutes on medium speed until the mixture is thickened.

Step 6: Put the cream cheese in a medium mixing bowl and beat for 3 minutes until light and fluffy.

Step 7: Slowly beat in the concentrated lemonade and the pudding mixture next.

Step 8: Pour the mixture into the cooled or pre-made graham cracker pie crust.

Step 9: refrigerate for at least 4 hours, covered.

June 3, 2020 0 comment
0 FacebookTwitterPinterestEmail
Main Dish Recipes

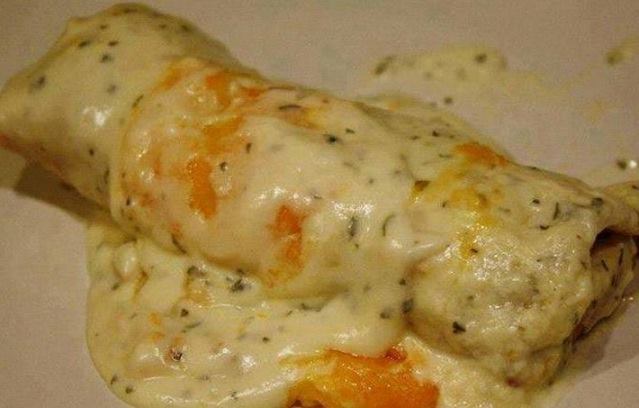
SOUR CREAM CHICKEN ENCHILADAS RECIPE

by Rebecca June 3, 2020
written by Rebecca

This Sour cream enchiladas will be your favorite dish. I am sure of that!  How can you say no to that good looking piece of heaven? I learned to make this in my early 20’s when I was working as a waitress at a restaurant. I was pretty much in and out of the kitchen and one day, I saw the chef cooked this. He was more gracious enough to let me sit and watch him do his thing. I was so impressed with the way he prepared the ingredients. One particular dish he cooked that day was this Sour cream enchiladas. He taught me everything and I was able to take notes that is why here we are now! I am very happy to share this with you! Everyone should get a chance to taste this amazing food! You are welcome! Anyway, Enjoy!

Ingredients

16 oz. sour cream

1 can cream of chicken soup

1 tablespoon fresh chopped cilantro (1/2 tablespoon dried)

2 1/2 cups of cooked shredded chicken breast

1 can Rotel

1 cup of chopped onions

8 tortillas

1 cup of shredded pepper jack and Colby cheese blend

1 can of diced green chiles

HOW TO MAKE SOUR CREAM CHICKEN ENCHILADAS RECIPE

Step 1: Combine soup, cilantro, and sour cream in a saucepan. Stir until well-mixed.

Step 2: Bring to boil then set aside.

Step 3: Apply cooking spray in a pan and add the chicken, green chiles, onions, and the can of Rotel.

Step 4: Cook until onions are translucent.

Step 5: Heat the tortillas until cooked through.

Step 6: Spoon out about 2 tablespoons of the chicken mixture and fill each of the tortillas. Sprinkle 1/2 tablespoons of cheese on top.

Step 7: Roll up the tortillas and put inside the greased baking dish. Place the tortillas with the seam on the side down.

Step 8: Spread the sour cream on top of the tortillas and sprinkle with the other half of the cheese.

Step 9: Place in the oven and bake for 20 to 30 minutes at 350 degrees F or until the cheese has melted and the texture turns bubbly.

Step 10: Serve hot. Enjoy!

SOUR CREAM CHICKEN ENCHILADAS RECIPE

Rebecca This Sour cream enchiladas will be your favorite dish. I am sure of that!  How can you say no to that good looking piece of heaven? I learned to make… Main Dish Recipes SOUR CREAM CHICKEN ENCHILADAS RECIPE European Print This
Nutrition facts: 200 calories 20 grams fat
Rating: 4.5/5
( 2 voted )

Ingredients

  • 16 oz. sour cream
  • 1 can cream of chicken soup
  • 1 tablespoon fresh chopped cilantro (1/2 tablespoon dried)
  • 2 1/2 cups of cooked shredded chicken breast
  • 1 can Rotel
  • 1 cup of chopped onions
  • 8 tortillas
  • 1 cup of shredded pepper jack and Colby cheese blend
  • 1 can of diced green chiles

Instructions

Step 1: Combine soup, cilantro, and sour cream in a saucepan. Stir until well-mixed.

Step 2: Bring to boil then set aside.

Step 3: Apply cooking spray in a pan and add the chicken, green chiles, onions, and the can of Rotel.

Step 4: Cook until onions are translucent.

Step 5: Heat the tortillas until cooked through.

Step 6: Spoon out about 2 tablespoons of the chicken mixture and fill each of the tortillas. Sprinkle 1/2 tablespoons of cheese on top.

Step 7: Roll up the tortillas and put inside the greased baking dish. Place the tortillas with the seam on the side down.

Step 8: Spread the sour cream on top of the tortillas and sprinkle with the other half of the cheese.

Step 9: Place in the oven and bake for 20 to 30 minutes at 350 degrees F or until the cheese has melted and the texture turns bubbly.

Step 10: Serve hot. Enjoy!

June 3, 2020 0 comment
0 FacebookTwitterPinterestEmail
Main Dish Recipes

My Granddaddy’s Favorite Brown Sugar Caramel Pound Cake For Those Who Enjoy Flavor

by Rebecca June 3, 2020
written by Rebecca

A glorious cake that is covered with maple glaze. Everybody wants a taste, and why not? It’s super easy to make. Dig in and enjoy!

Ingredients

1 1/2 cups of butter softened

2 cups of light brown sugar, packed

1 cup of granulated sugar

5 large eggs

3 cups of all-purpose flour

1 tsp. baking powder

1/2 tsp. salt

1 cup of whole milk

1 8 ounces bag toffee chips (I use Heath)

1 cup of pecans, chopped

For the Caramel Drizzle

1-14 oz can sweetened condensed milk

1 cup of brown sugar

2 tbsp. butter

1/2 tsp. vanilla extract

How to make Brown Sugar Caramel Pound Cake

Step 1: Prepare the oven. Preheat it to 325 degrees. Spray with cooking spray or grease and dust with flour a 12 cup Bundt pan.

Step 2: In a bowl, beat the butter until creamy. Add in the brown sugar, and granulated sugar. Beat in the eggs one at a time.

Step 3: Combine the flour, baking powder, and salt in a medium bowl.

Step 4: Gradually add the flour mix to the batter, alternately with milk. Beat until just combined. Then, stir in the toffee chips and pecans.

Step 5: Scoop the batter into the greased pan. Place inside the preheated oven and bake for 85 minutes. Insert a toothpick in the middle, when it comes out clean the cake is done. Tip: Cover the cake with foil while baking to prevent excess browning.

Step 6: When done, remove the pan from the oven and let the cake cool for 10 minutes.

Step 7: Remove the cake from the pan and let it cool completely on a wire rack. Before serving drizzle over the caramel over the cooled cake.

How to make the Caramel Drizzle

Step 1: Combine the condensed milk and brown sugar in a medium saucepan.

Step 2: Heat over medium-high heat and bring to a boil while whisking frequently.

Step 3: Lower the heat and simmer for 8 minutes, still whisking frequently.

Step 4: Remove the pan saucepan from the heat and whisk in the butter and vanilla.

Step 5: Let the caramel drizzle cool for 5 minutes before using. Tip: Don’t over cool, drizzle the caramel while it is still hot.

My Granddaddy's Favorite Brown Sugar Caramel Pound Cake For Those Who Enjoy Flavor

Rebecca A glorious cake that is covered with maple glaze. Everybody wants a taste, and why not? It’s super easy to make. Dig in and enjoy! Ingredients 1 1/2 cups of… Main Dish Recipes My Granddaddy’s Favorite Brown Sugar Caramel Pound Cake For Those Who Enjoy Flavor European Print This
Nutrition facts: 200 calories 20 grams fat
Rating: 4.0/5
( 8 voted )

Ingredients

  • 1 1/2 cups of butter softened
  • 2 cups of light brown sugar, packed
  • 1 cup of granulated sugar
  • 5 large eggs
  • 3 cups of all-purpose flour
  • 1 tsp. baking powder
  • 1/2 tsp. salt
  • 1 cup of whole milk
  • 1 8 ounces bag toffee chips (I use Heath)
  • 1 cup of pecans, chopped
  • For the Caramel Drizzle
  • 1-14 oz can sweetened condensed milk
  • 1 cup of brown sugar
  • 2 tbsp. butter
  • 1/2 tsp. vanilla extract

Instructions

Step 1: Prepare the oven. Preheat it to 325 degrees. Spray with cooking spray or grease and dust with flour a 12 cup Bundt pan.

Step 2: In a bowl, beat the butter until creamy. Add in the brown sugar, and granulated sugar. Beat in the eggs one at a time.

Step 3: Combine the flour, baking powder, and salt in a medium bowl.

Step 4: Gradually add the flour mix to the batter, alternately with milk. Beat until just combined. Then, stir in the toffee chips and pecans.

Step 5: Scoop the batter into the greased pan. Place inside the preheated oven and bake for 85 minutes. Insert a toothpick in the middle, when it comes out clean the cake is done. Tip: Cover the cake with foil while baking to prevent excess browning.

Step 6: When done, remove the pan from the oven and let the cake cool for 10 minutes.

Step 7: Remove the cake from the pan and let it cool completely on a wire rack. Before serving drizzle over the caramel over the cooled cake.

How to make the Caramel Drizzle

Step 1: Combine the condensed milk and brown sugar in a medium saucepan.

Step 2: Heat over medium-high heat and bring to a boil while whisking frequently.

Step 3: Lower the heat and simmer for 8 minutes, still whisking frequently.

Step 4: Remove the pan saucepan from the heat and whisk in the butter and vanilla.

Step 5: Let the caramel drizzle cool for 5 minutes before using. Tip: Don't over cool, drizzle the caramel while it is still hot.

June 3, 2020 0 comment
0 FacebookTwitterPinterestEmail
Main Dish Recipes

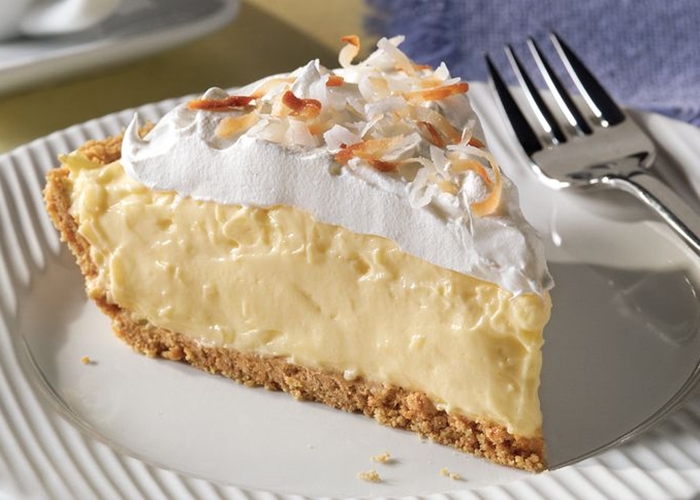
Great Grandma’s Coconut Cream Pie

by Rebecca June 3, 2020
written by Rebecca

I had a very awesome childhood because of my grandma! She cooked and baked pretty much everything that I wanted to eat. Well, I was her favorite grandchild. She taught me everything I know in the kitchen so what better way to thank her but to bake the same cake she used to bake for me. This was her favorite. I know why, because the flavors will immediately tell you that it deserves to your favorite! By the way, always toast the coconut flakes for the garnish. It is the best! Have fun with this recipe. I hope it brings a smile to your face!

Ingredients

1 cup of milk

1 cup of sweetened, flaked coconut

1 cup of light cream

1/2 cup of sugar

2 tablespoons of corn starch

2 eggs, separated

1 teaspoon of vanilla

1 pre-made pie crust

8 oz whipped cream

How to make Great Grandma’s Coconut Cream Pie

Step 1: Follow the instructions on the pie crust package and let it sit to cool.

Step 2: Pour light cream and milk in a double boiler. If light cream is not available, you can mix 3 tbsp of melted butter and 1 cup of whole milk. Whisk until creamy.

Step 3: Adf in the sugar and let it boil.

Step 4: Crack eggs. Separate egg yolk from white. Pour the egg yolk into a small bowl, beat until creamy.

Step 5: In the same bowl with the egg yolk, add the corn starch and whisk until well-mixed.

Step 6: Pour the egg mixture into the double boiler with the milk mixture. Cook for 5 minutes while stirring continuously.

Step 7: Turn off the heat and add the coconut and vanilla.

Step 8: Stir until the coconut and vanilla are well combined with the rest of the ingredients. Let it sit for 30 minutes.

Step 9: Pour the batter into the cooked crust.

Step 10: Let it cool for about 30 minutes covered with plastic wrap.

Step 11: Remove the cover and spread coconut flakes and whipped cream. (Toast the coconut flakes for additional flavor.) Enjoy!

Great Grandma's Coconut Cream Pie

Rebecca I had a very awesome childhood because of my grandma! She cooked and baked pretty much everything that I wanted to eat. Well, I was her favorite grandchild. She taught… Main Dish Recipes Great Grandma’s Coconut Cream Pie European Print This
Nutrition facts: 200 calories 20 grams fat
Rating: 5.0/5
( 1 voted )

Ingredients

  • 1 cup of milk
  • 1 cup of sweetened, flaked coconut
  • 1 cup of light cream
  • 1/2 cup of sugar
  • 2 tablespoons of corn starch
  • 2 eggs, separated
  • 1 teaspoon of vanilla
  • 1 pre-made pie crust
  • 8 oz whipped cream

Instructions

Step 1: Follow the instructions on the pie crust package and let it sit to cool.

Step 2: Pour light cream and milk in a double boiler. If light cream is not available, you can mix 3 tbsp of melted butter and 1 cup of whole milk. Whisk until creamy.

Step 3: Adf in the sugar and let it boil.

Step 4: Crack eggs. Separate egg yolk from white. Pour the egg yolk into a small bowl, beat until creamy.

Step 5: In the same bowl with the egg yolk, add the corn starch and whisk until well-mixed.

Step 6: Pour the egg mixture into the double boiler with the milk mixture. Cook for 5 minutes while stirring continuously.

Step 7: Turn off the heat and add the coconut and vanilla.

Step 8: Stir until the coconut and vanilla are well combined with the rest of the ingredients. Let it sit for 30 minutes.

Step 9: Pour the batter into the cooked crust.

Step 10: Let it cool for about 30 minutes covered with plastic wrap.

Step 11: Remove the cover and spread coconut flakes and whipped cream. (Toast the coconut flakes for additional flavor.) Enjoy!

June 3, 2020 0 comment
0 FacebookTwitterPinterestEmail
Newer Posts
Older Posts

Popular Posts

  • 1

    Crispy Crunchy Parmesan Potatoes

    March 21, 2020
  • 2

    CROCK POT SMOTHERED PORK CHOPS

    March 21, 2020
  • Facebook
  • Twitter

@2019 - All Right Reserved.


Back To Top