Cook it once
  • Home
  • Privacy Policy
  • Recipes
    • KETO
    • LC
    • WW
  • Tips
  • Contact
Cook it once
  • Home
  • Privacy Policy
  • Recipes
    • KETO
    • LC
    • WW
  • Tips
  • Contact
Monthly Archives

June 2020

Main Dish Recipes

Crack Proof: New York Style Cheesecake

by Rebecca June 12, 2020
written by Rebecca

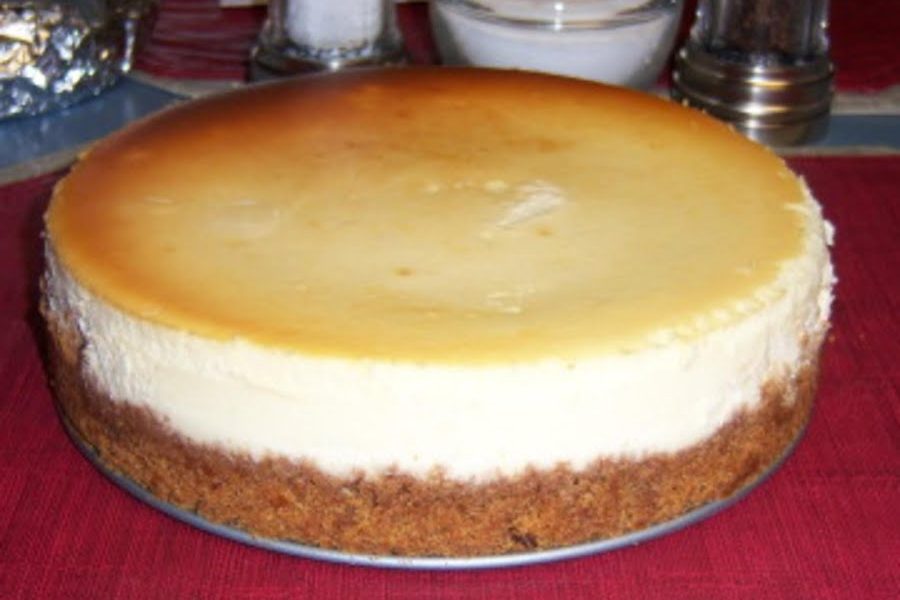
Add this recipe to your dessert menu for a lifetime experience of New York right on your dining table. This easy to make New York Style Cheesecake has an authentic creamy texture, is beautifully flavored, with citrus-infused goodness that will surely satisfy your cravings. It’s a heavenly dessert that’s perfect for everyday baking.

INGREDIENTS

FOR THE CRUST

2 cups finely ground graham crackers (about 30 squares)

1/2 teaspoon ground cinnamon

1/2 cup unsalted butter, melted (1 stick)

FOR THE FILLING

4- (8) oz blocks cream cheese, room temperature

1 cup of sugar

4 eggs

1 1/2 teaspoons vanilla extract

1 lemon, zest finely grated

1 cup sour cream

FOR THE TOPPING

1-pint strawberries

1-pint raspberries

2 tablespoons butter

3/4 cup granulated sugar

1 teaspoon corn starch

1 lemon, juiced

How to make New York Style Cheesecake

For the crust, combine the graham crackers, ground cinnamon, and unsalted melted butter in a mixing bowl. Whisk with a fork until evenly moistened.

Lightly grease with a non-stick cooking spray the bottom and sides of a 9-inch springform pan.

Pour the mixture in the pan and firmly press the mixture with your finger or the bottom of glass over the bottom with an inch up the sides.

Place the crust inside the fridge.

For the filling, place the cream cheese in a large bowl and beat on low speed for a minute or until smooth.

Slowly add the sugar and beat for 1 to minutes until creamy while scraping down the sides of the bowl and beaters regularly.

Add in the egg one at a time and continue beating slowly until well combined.

Mix in the vanilla and the lemon zest. Then blend in the sour cream until incorporated but do not overbeat.

Pour everything into the crust-lined pan. Use a spatula to smooth the top of the crust.

For the water bath, with a double piece of aluminum foil, set the pan and fold up the sides to prevent the water from seeping into the springform pan seams.

Delicately set the cake in a large roasting pan and pour some boiling water into the roasting pan about halfway through the side.

Meanwhile, preheat the oven to 325 degrees. Then, reduce the heat to 300 degrees and place the pan inside the oven to bake for an hour and 20 minutes. The cheesecakes should jiggle, and you don’t have to check the doneness with a toothpick as it will make a crack on the crack.

Run a thin metal spatula around the insides of the rim to loosen the cheesecake but don’t remove it yet from the pan. Let the cake cool first for 30 minutes. Once cooled the cake will firm up, then chill for at least 4 hours in the fridge, loosely covered.

Transfer the cake to a cake plate and slice with a thin non-stick knife. use a knife that has been dipped in hot water and make sure to wipe dry after each cut.

For the topping, combine the strawberries, raspberries, butter, sugar, corn starch, and lemon juice in a 2-quart saucepan over medium-high heat. Stir the mixture gently and bring up to a slow boil until the berries break down to release their natural juices. Make sure to still have a chunky consistency, then, cool the topping to room temperature. Drizzle over the top of the cheesecake. Serve and enjoy!

Crack Proof: New York Style Cheesecake

Rebecca Add this recipe to your dessert menu for a lifetime experience of New York right on your dining table. This easy to make New York Style Cheesecake has an authentic… Main Dish Recipes Crack Proof: New York Style Cheesecake European Print This
Nutrition facts: 200 calories 20 grams fat
Rating: 5.0/5
( 1 voted )

Ingredients

  • FOR THE CRUST
  • 2 cups finely ground graham crackers (about 30 squares)
  • 1/2 teaspoon ground cinnamon
  • 1/2 cup unsalted butter, melted (1 stick)
  • FOR THE FILLING
  • 4- (8) oz blocks cream cheese, room temperature
  • 1 cup of sugar
  • 4 eggs
  • 1 1/2 teaspoons vanilla extract
  • 1 lemon, zest finely grated
  • 1 cup sour cream
  • FOR THE TOPPING
  • 1-pint strawberries
  • 1-pint raspberries
  • 2 tablespoons butter
  • 3/4 cup granulated sugar
  • 1 teaspoon corn starch
  • 1 lemon, juiced

Instructions

For the crust, combine the graham crackers, ground cinnamon, and unsalted melted butter in a mixing bowl. Whisk with a fork until evenly moistened.

Lightly grease with a non-stick cooking spray the bottom and sides of a 9-inch springform pan.

Pour the mixture in the pan and firmly press the mixture with your finger or the bottom of glass over the bottom with an inch up the sides.

Place the crust inside the fridge.

For the filling, place the cream cheese in a large bowl and beat on low speed for a minute or until smooth.

Slowly add the sugar and beat for 1 to minutes until creamy while scraping down the sides of the bowl and beaters regularly.

Add in the egg one at a time and continue beating slowly until well combined.

Mix in the vanilla and the lemon zest. Then blend in the sour cream until incorporated but do not overbeat.

Pour everything into the crust-lined pan. Use a spatula to smooth the top of the crust.

For the water bath, with a double piece of aluminum foil, set the pan and fold up the sides to prevent the water from seeping into the springform pan seams.

Delicately set the cake in a large roasting pan and pour some boiling water into the roasting pan about halfway through the side.

Meanwhile, preheat the oven to 325 degrees. Then, reduce the heat to 300 degrees and place the pan inside the oven to bake for an hour and 20 minutes. The cheesecakes should jiggle, and you don't have to check the doneness with a toothpick as it will make a crack on the crack.

Run a thin metal spatula around the insides of the rim to loosen the cheesecake but don't remove it yet from the pan. Let the cake cool first for 30 minutes. Once cooled the cake will firm up, then chill for at least 4 hours in the fridge, loosely covered.

Transfer the cake to a cake plate and slice with a thin non-stick knife. use a knife that has been dipped in hot water and make sure to wipe dry after each cut.

For the topping, combine the strawberries, raspberries, butter, sugar, corn starch, and lemon juice in a 2-quart saucepan over medium-high heat. Stir the mixture gently and bring up to a slow boil until the berries break down to release their natural juices. Make sure to still have a chunky consistency, then, cool the topping to room temperature. Drizzle over the top of the cheesecake. Serve and enjoy!
June 12, 2020 0 comment
0 FacebookTwitterPinterestEmail
Main Dish Recipes

Pineapple Lemonade

by Rebecca June 12, 2020
written by Rebecca

It’s summer all over again. And what’s the best way to spend the summer? Beach and refreshments! I have been obsessed with Pineapple lemonade. Its ingredients are well, simple, and easy to find. And it’s very straightforward, you just need to mix everything, easy right? It’s super refreshing, sweet, and tangy at the same time. A tropical wonder that quenches your summer thirst.

We have been planning to go to the beach since the summer started. I haven’t had much time to go out but I promise the kids that we will go this weekend. I already prepared everything, from the food to desserts, and all that we need to bring. And of course, for the refreshment, I will be making my favorite Pineapple lemonade. To set the record straight, it’s not just me, the kids are crazy about this drink, too. I make this all year round, and I make a lot because the kids can’t stop drinking! My youngest was so funny, just this week I made this pineapple lemonade. I told him to get his share but he said to put it inside the fridge first because he’s busy playing games. Then, when he opened the fridge and did not find the pitcher he was so furious, he cried. He’s 4 by the way. So to stop him from crying I make another just for him and he did not share! We so love this pineapple lemonade, it’s like summer all year round whenever we have this. With only 4 simple ingredients and a very easy recipe, you’ll never say no to this!

INGREDIENTS

1 cup Country Time Lemonade Mix

3 cups Coldwater

1 can of chilled pineapple juice ( 46 oz)

2 cans of Sprite

How to make Pineapple Lemonade

Step 1: Mix the lemonade mix, coldwater, chilled pineapple juice, and sprite.

Step 2: Add in some lemon slices if desired. And put ice.

Step 3: Serve and enjoy!

Pineapple Lemonade

Rebecca It’s summer all over again. And what’s the best way to spend the summer? Beach and refreshments! I have been obsessed with Pineapple lemonade. Its ingredients are well, simple, and… Main Dish Recipes Pineapple Lemonade European Print This
Nutrition facts: 200 calories 20 grams fat
Rating: 5.0/5
( 1 voted )

Ingredients

  • 1 cup Country Time Lemonade Mix
  • 3 cups Coldwater
  • 1 can of chilled pineapple juice ( 46 oz)
  • 2 cans of Sprite

Instructions

Step 1: Mix the lemonade mix, coldwater, chilled pineapple juice, and sprite.

Step 2: Add in some lemon slices if desired. And put ice.

Step 3: Serve and enjoy!

June 12, 2020 0 comment
0 FacebookTwitterPinterestEmail
Main Dish Recipes

The sweetness of this bread will cast a spell on you, And you will not even try to resist – AMISH CINNAMON BREAD

by Rebecca June 12, 2020
written by Rebecca

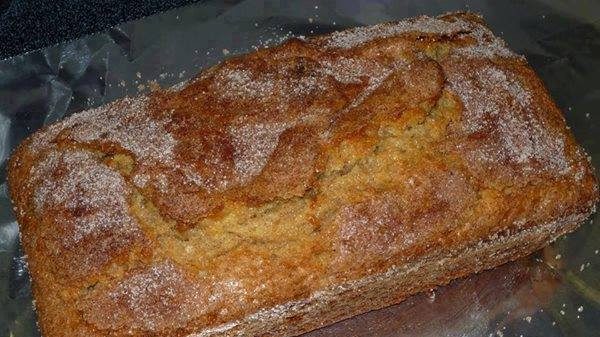
I used to watch my grandma make this Amish Cinnamon Bread. I remembered her telling me that when I grow older she will teach me how to make it and that she did! I have been making this ever since. This recipe is a keeper and will always have a special place in my heart. It’s super easy to make, you don’t need to knead the dough, just dump everything in loaf pans, sprinkle with cinnamon, and bake. It’s perfect to serve for breakfast and dessert, but I eat it whenever I want! This sweet bread is what every family needs and you got to share this with your loved ones and friends to show them how much you love them.

INGREDIENTS

For the Batter

1 cup butter, softened

2 cups of sugar

2 eggs

2 cups buttermilk or 2 cups milk plus 2 tablespoons vinegar or lemon juice

4 cups flour

2 teaspoons baking soda

Cinnamon/sugar mixture

2/3 cups sugar

2 teaspoons cinnamon

TO MAKE AMISH CINNAMON BREAD

Step 1: Place the butter, sugar, and eggs in a mixing bowl and cream.

Step 2: Stir in the milk, flour, and baking soda.

Step 3: Put half of the batter or maybe a little less into greased loaf pans. About 1/4 batter in each pan.

Step 3: In another bowl, mix the 2/3 cup of sugar and cinnamon.

Step 4: Then, sprinkle at least 3/4 of the cinnamon mixture over the half of the batter in each pan.

Step 5: For the remaining batter, add it to the pans and sprinkle with the rest of the cinnamon.

Step 6: Use a knife to swirl the top of the batter.

Step 7: Place inside the oven and bake for 45 to 50 minutes at 350 degrees. Insert a toothpick in the center, when it comes out clean the bread is done.

Step 8: Remove from the oven and let the bread cool in the pan for 20 minutes. Then, transfer to a bread plate.

The sweetness of this bread will cast a spell on you, And you will not even try to resist – AMISH CINNAMON BREAD

Rebecca I used to watch my grandma make this Amish Cinnamon Bread. I remembered her telling me that when I grow older she will teach me how to make it and… Main Dish Recipes The sweetness of this bread will cast a spell on you, And you will not even try to resist – AMISH CINNAMON BREAD European Print This
Nutrition facts: 200 calories 20 grams fat
Rating: 5.0/5
( 1 voted )

Ingredients

  • For the Batter
  • 1 cup butter, softened
  • 2 cups of sugar
  • 2 eggs
  • 2 cups buttermilk or 2 cups milk plus 2 tablespoons vinegar or lemon juice
  • 4 cups flour
  • 2 teaspoons baking soda
  • Cinnamon/sugar mixture
  • 2/3 cups sugar
  • 2 teaspoons cinnamon

Instructions

Step 1: Place the butter, sugar, and eggs in a mixing bowl and cream.

Step 2: Stir in the milk, flour, and baking soda.

Step 3: Put half of the batter or maybe a little less into greased loaf pans. About 1/4 batter in each pan.

Step 3: In another bowl, mix the 2/3 cup of sugar and cinnamon.

Step 4: Then, sprinkle at least 3/4 of the cinnamon mixture over the half of the batter in each pan.

Step 5: For the remaining batter, add it to the pans and sprinkle with the rest of the cinnamon.

Step 6: Use a knife to swirl the top of the batter.

Step 7: Place inside the oven and bake for 45 to 50 minutes at 350 degrees. Insert a toothpick in the center, when it comes out clean the bread is done.

Step 8: Remove from the oven and let the bread cool in the pan for 20 minutes. Then, transfer to a bread plate.

June 12, 2020 0 comment
0 FacebookTwitterPinterestEmail
Main Dish Recipes

LIME AND COCONUT CAKE RECIPE

by Rebecca June 12, 2020
written by Rebecca

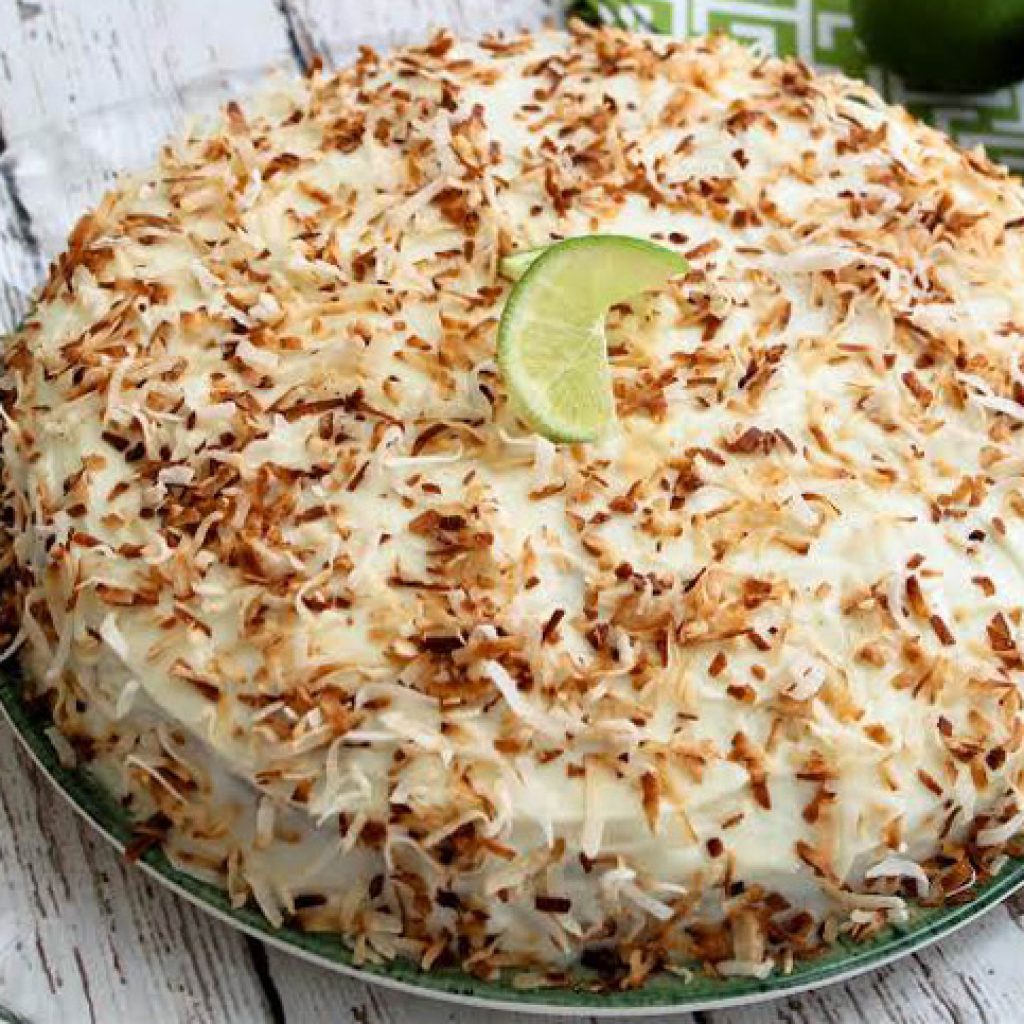
I made the perfect cake today! I am so proud to share this with you today. It’s pretty different from the cake we all love that’s why it’s special. Think about lime and coconut in 1 cake? Great, right? I have simplified the steps for you. Don’t worry, it might be a lot but it’s really easy to follow. Enjoy!

INGREDIENTS

2 large eggs

1 zest of lime, minced

1 tablespoon lime juice

1/2 cup buttermilk

3 bananas, very ripe, mashed

3/4 cup unsalted butter, softened

1 1/2 cup granulated sugar

2 call-purpose flour

1/2 teaspoon baking soda

2/3 cup shredded coconut

HOW TO MAKE LIME AND COCONUT CAKE

To make the cake

Step 1: Ready the oven and preheat to 350 degrees.

Step 2: Apply cooking spray in a 9-inch springform pan. Add parchment paper and line it in the pan.

Step 3: Mix eggs, buttermilk, mashed bananas, zest, and lime juice in a medium bowl. Whisk until well-mixed.

Step 4: Add the butter and sugar in a large bowl. Beat using an electric mixer until it becomes fluffy.

Step 5: Transfer the banana mixture into the bowl with the butter and sugar. Beat at low speed until blended.

Step 6: Whisk baking soda and flour in a separate bowl. Whisk until blended then transfer the mixture into the buttermilk and banana mixture. Whisk again until all ingredients are incorporated.

Step 7: Add the coconut and mix using a metal spoon until well blended.

Step 8: Transfer the batter into the greased springform pan.

Step 9: Place inside the oven and bake for 50 minutes or until the color turns golden brown and once the inserted toothpick in the middle comes out clean.

Step 10: Remove from the oven and let it sit for 10 minutes at room temperature before moving to the wire rack to completely cool.

Step 11: Place a pan on the stove and turn the heat to medium. Add the rest of the shredded coconut and cook until toasted or golden. Remember to stir occasionally to prevent the coconuts from burning.

To make the icing

Step 1: Add powdered sugar and cream cheese in a medium bowl. Use an electric mixer to mix the ingredients. Mix until the texture becomes smooth and creamy.

Step 2: Spread the icing on top of the cake.

Step 3: Top with the toasted shredded coconut. Serve and enjoy!

LIME AND COCONUT CAKE RECIPE

Rebecca I made the perfect cake today! I am so proud to share this with you today. It’s pretty different from the cake we all love that’s why it’s special. Think… Main Dish Recipes LIME AND COCONUT CAKE RECIPE European Print This
Nutrition facts: 200 calories 20 grams fat
Rating: 5.0/5
( 1 voted )

Ingredients

  • 2 large eggs
  • 1 zest of lime, minced
  • 1 tablespoon lime juice
  • 1/2 cup buttermilk
  • 3 bananas, very ripe, mashed
  • 3/4 cup unsalted butter, softened
  • 1 1/2 cup granulated sugar
  • 2 call-purpose flour
  • 1/2 teaspoon baking soda
  • 2/3 cup shredded coconut

Instructions

To make the cake

Step 1: Ready the oven and preheat to 350 degrees.

Step 2: Apply cooking spray in a 9-inch springform pan. Add parchment paper and line it in the pan.

Step 3: Mix eggs, buttermilk, mashed bananas, zest, and lime juice in a medium bowl. Whisk until well-mixed.

Step 4: Add the butter and sugar in a large bowl. Beat using an electric mixer until it becomes fluffy.

Step 5: Transfer the banana mixture into the bowl with the butter and sugar. Beat at low speed until blended.

Step 6: Whisk baking soda and flour in a separate bowl. Whisk until blended then transfer the mixture into the buttermilk and banana mixture. Whisk again until all ingredients are incorporated.

Step 7: Add the coconut and mix using a metal spoon until well blended.

Step 8: Transfer the batter into the greased springform pan.

Step 9: Place inside the oven and bake for 50 minutes or until the color turns golden brown and once the inserted toothpick in the middle comes out clean.

Step 10: Remove from the oven and let it sit for 10 minutes at room temperature before moving to the wire rack to completely cool.

Step 11: Place a pan on the stove and turn the heat to medium. Add the rest of the shredded coconut and cook until toasted or golden. Remember to stir occasionally to prevent the coconuts from burning.

To make the icing

Step 1: Add powdered sugar and cream cheese in a medium bowl. Use an electric mixer to mix the ingredients. Mix until the texture becomes smooth and creamy.

Step 2: Spread the icing on top of the cake.

Step 3: Top with the toasted shredded coconut. Serve and enjoy!

June 12, 2020 0 comment
0 FacebookTwitterPinterestEmail
Main Dish Recipes

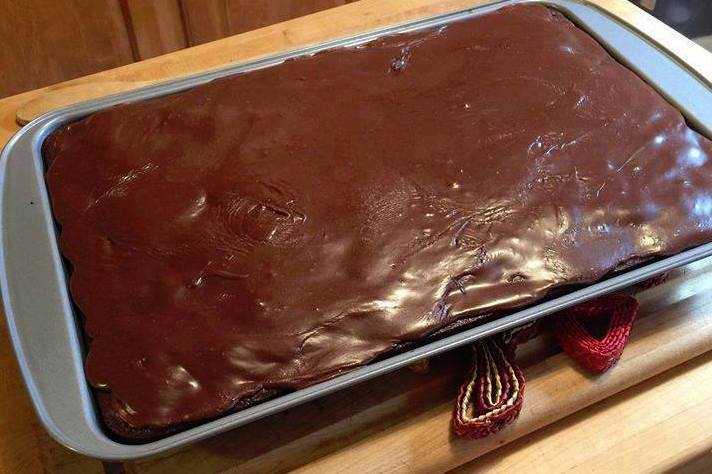
Double fudge cake

by Rebecca June 12, 2020
written by Rebecca

The cake that makes your day perfect! This Double Fudge Cake will be the highlight of your day. Take my word for it. I made this amazing cake yesterday and I never thought it would be so good. To tell you honestly, I had second thoughts whether I was gonna make it but at the last minute, I gave it a try. I’m so glad that I did because I never would have tasted the perfect fudge cake. I kid you not, it’s awesome! The kids were hooked they almost finish the whole thing! Give this a try and indulge yourself with a heavenly moist cake that will put a smile on your face. These are the ingredients and steps you will be needing for this Double Fudge Cake. I hope this makes you happy today!

INGREDIENTS

1 pkg. (4 oz.) BAKER’S Unsweetened Chocolate

1 ¾ cups sugar, divided

½ cup of water

1 ⅔ cups flour

1 teaspoon baking soda

¼ teaspoon salt

½ cup butter or margarine softened

3 eggs

¾ cup milk

1 teaspoon vanilla

How to make Double fudge cake

Step 1: Put the chocolate, water, and 1/2 cup sugar in a microwavable bowl. Place inside the microwave and turn the setting to high and let it melt for 2 minutes. Stir in between the 2 minutes.

Step 2: Remove from the oven and let cool then add baking soda, salt, and flour.

Step 3: In a large bowl, add the butter and the rest of the sugar. Use a hand mixer to mix the ingredients. Beat until combined.

Step 4: Add 1 egg at a time while beating until the mixture becomes fluffy.

Step 5: Add the flour mixture and pour milk in turns then add the vanilla and melted chocolate mixture. Mix until blended.

Step 6: Transfer the mixtures into a 9-inch round pan.

Step 7: Place inside the oven and bake for 30 to 35 minutes or until the inserted toothpick in the middle comes out neat.

Step 8: Remove from the oven and let it sit for 10 mins before moving to the wire rack.

Step 9: Add the Easy Chocolate Frosting on top. Serve and enjoy!

Double fudge cake

Rebecca The cake that makes your day perfect! This Double Fudge Cake will be the highlight of your day. Take my word for it. I made this amazing cake yesterday and… Main Dish Recipes Double fudge cake European Print This
Nutrition facts: 200 calories 20 grams fat
Rating: 5.0/5
( 1 voted )

Ingredients

  • 1 pkg. (4 oz.) BAKER’S Unsweetened Chocolate
  • 1 ¾ cups sugar, divided
  • ½ cup of water
  • 1 ⅔ cups flour
  • 1 teaspoon baking soda
  • ¼ teaspoon salt
  • ½ cup butter or margarine softened
  • 3 eggs
  • ¾ cup milk
  • 1 teaspoon vanilla

Instructions

Step 1: Put the chocolate, water, and 1/2 cup sugar in a microwavable bowl. Place inside the microwave and turn the setting to high and let it melt for 2 minutes. Stir in between the 2 minutes.

Step 2: Remove from the oven and let cool then add baking soda, salt, and flour.

Step 3: In a large bowl, add the butter and the rest of the sugar. Use a hand mixer to mix the ingredients. Beat until combined.

Step 4: Add 1 egg at a time while beating until the mixture becomes fluffy.

Step 5: Add the flour mixture and pour milk in turns then add the vanilla and melted chocolate mixture. Mix until blended.

Step 6: Transfer the mixtures into a 9-inch round pan.

Step 7: Place inside the oven and bake for 30 to 35 minutes or until the inserted toothpick in the middle comes out neat.

Step 8: Remove from the oven and let it sit for 10 mins before moving to the wire rack.

Step 9: Add the Easy Chocolate Frosting on top. Serve and enjoy!

June 12, 2020 0 comment
0 FacebookTwitterPinterestEmail
Main Dish Recipes

BEST EASY MEATLOAF RECIPE

by Rebecca June 12, 2020
written by Rebecca

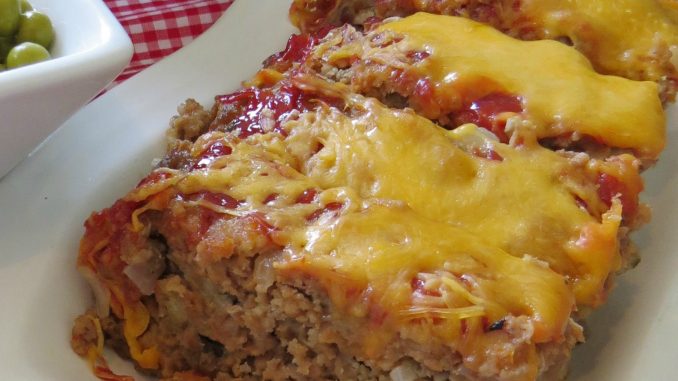
Homemade meatloaf! Every Thanksgiving, I make this amazing meatloaf. It’s my kid’s favorite! I usually top it with cheese and let it melt on top. It is really good. It makes them very excited! I did not include it on the recipe because some might not like it. It’s awesome though so I highly recommend it. My mom taught me this recipe. She is very skillful when it comes to the kitchen. One time, as I was watching her do her thing, I was so fascinated with the way she moved around the kitchen. It was like a choreographed performance on broadway. Everything was in place and every move was calculated. That’s when I decided to be as good around the kitchen just like my mom. I will never be as good as my mom but somehow I learned a lot from her. This recipe I am sharing with you today is just one of the recipes she loves to cook. It also became my favorite dish to serve on special occasions hence, thanksgiving! It’s the one day my family gets together so I always cook Meatloaf to remind them of the good old days. Anyway, I’m sorry for the long introduction. Here you go! The best meatloaf you will ever taste!

INGREDIENTS

2 lbs. extra-lean ground beef

1/4 cup of Zesty Italian dressing

1 large onion, finely chopped

ketchup

1 pkg. chicken flavored stuffing mix

2 eggs

1/2 cup shredded sharp cheddar cheese

HOW TO MAKE BEST EASY MEATLOAF

Step 1: Ready the oven and preheat to 375 degrees.

Step 2: Place a skillet on the stove and turn the heat to low. Add the dressing and onion. Cook until it becomes a little brown.

Step 3: Combine stuffing mix, eggs, 1 cup of water, onions, ground beef, and 1/4 cup of ketchup. Stir until well-mixed.

Step 4: Transfer the mixture into a 13×9 baking dish. Create a big loaf shape from the mixture.

Step 5: Spread 1 layer of ketchup over the mixture.

Step 6: Place inside the oven and bake for 1 hour or until completely cooked.

Rebecca Homemade meatloaf! Every Thanksgiving, I make this amazing meatloaf. It’s my kid’s favorite! I usually top it with cheese and let it melt on top. It is really good. It… Main Dish Recipes BEST EASY MEATLOAF RECIPE European Print This
Nutrition facts: 200 calories 20 grams fat
Rating: 5.0/5
( 1 voted )

Ingredients

  • 2 lbs. extra-lean ground beef
  • 1/4 cup of Zesty Italian dressing
  • 1 large onion, finely chopped
  • ketchup
  • 1 pkg. chicken flavored stuffing mix
  • 2 eggs
  • 1/2 cup shredded sharp cheddar cheese

Instructions

Step 1: Ready the oven and preheat to 375 degrees.

Step 2: Place a skillet on the stove and turn the heat to low. Add the dressing and onion. Cook until it becomes a little brown.

Step 3: Combine stuffing mix, eggs, 1 cup of water, onions, ground beef, and 1/4 cup of ketchup. Stir until well-mixed.

Step 4: Transfer the mixture into a 13x9 baking dish. Create a big loaf shape from the mixture.

Step 5: Spread 1 layer of ketchup over the mixture.

Step 6: Place inside the oven and bake for 1 hour or until completely cooked.

June 12, 2020 0 comment
0 FacebookTwitterPinterestEmail
Main Dish Recipes

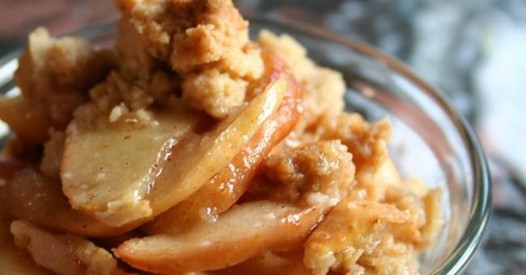
Grandma’s Apple Crisp

by Rebecca June 12, 2020
written by Rebecca

I miss you, grandma! See, she loved making this amazing treat when I was a kid. It’s one of the reasons why grade school and middle school were awesome! It’s a good thing that she taught me the recipe for this Apple Crisp! Now, that I am an adult and have 2 kids, it’s my time to pass on the legacy my grandma left me. The aroma alone will let you know what the taste will be like. Your home is gonna smell like heaven once you open the oven! Try it now!

INGREDIENTS

1/2 cup all-purpose flour, plus 2 Tbsp

1/2 cup old fashioned oats (not instant)

1/4 cup packed brown sugar

1/2 teaspoon ground ginger

1/4 teaspoon cinnamon

1 pinch salt

3 tablespoons light stick butter, diced

1 teaspoon water

1/4 cup granulated sugar

1/4 teaspoon ground nutmeg

1 pinch ground cloves

3 lbs Jonathan apples, peeled and thinly sliced

1 teaspoon vanilla extract

How to make Grandma’s Apple Crisp

Step 1: Ready the oven and preheat to 375 degrees F.

Step 2: Apply nonstick cooking spray in a shallow 1 1/2-quart baking dish.

To make the topping: 

Step 1: In a medium bowl, mix the oats, ginger, brown sugar, 1/2 cup of flour, salt, and cinnamon. Whisk until well-combined.

Step 2: Use a pastry blender to cut coarse crumbs-like forms. Pour water and press mixture hard to make clumps.

To make the filling: 

Step 1: In a large bowl, combine 2 tablespoons of flour, cloves of garlic, nutmeg, and granulated sugar. Whisk until well-combined.

Step 2: Toss in the apple and vanilla into the bowl and mix until all the ingredients are well-blended.

Step 3: Pour the mixture into the greased baking dish. Spread the topping on top of the filling.

Step 4: Place inside the oven and bake for 50 minutes to 1 hour or until the topping appears to be golden and the filling is bubbly.

Step 5: Let it sit to cool at room temperature before serving. Enjoy!

Grandma’s Apple Crisp

Rebecca I miss you, grandma! See, she loved making this amazing treat when I was a kid. It’s one of the reasons why grade school and middle school were awesome! It’s… Main Dish Recipes Grandma’s Apple Crisp European Print This
Nutrition facts: 200 calories 20 grams fat
Rating: 5.0/5
( 1 voted )

Ingredients

  • 1/2 cup all-purpose flour, plus 2 Tbsp
  • 1/2 cup old fashioned oats (not instant)
  • 1/4 cup packed brown sugar
  • 1/2 teaspoon ground ginger
  • 1/4 teaspoon cinnamon
  • 1 pinch salt
  • 3 tablespoons light stick butter, diced
  • 1 teaspoon water
  • 1/4 cup granulated sugar
  • 1/4 teaspoon ground nutmeg
  • 1 pinch ground cloves
  • 3 lbs Jonathan apples, peeled and thinly sliced
  • 1 teaspoon vanilla extract

Instructions

Step 1: Ready the oven and preheat to 375 degrees F.

Step 2: Apply nonstick cooking spray in a shallow 1 1/2-quart baking dish.

To make the topping: 

Step 1: In a medium bowl, mix the oats, ginger, brown sugar, 1/2 cup of flour, salt, and cinnamon. Whisk until well-combined.

Step 2: Use a pastry blender to cut coarse crumbs-like forms. Pour water and press mixture hard to make clumps.

To make the filling: 

Step 1: In a large bowl, combine 2 tablespoons of flour, cloves of garlic, nutmeg, and granulated sugar. Whisk until well-combined.

Step 2: Toss in the apple and vanilla into the bowl and mix until all the ingredients are well-blended.

Step 3: Pour the mixture into the greased baking dish. Spread the topping on top of the filling.

Step 4: Place inside the oven and bake for 50 minutes to 1 hour or until the topping appears to be golden and the filling is bubbly.

Step 5: Let it sit to cool at room temperature before serving. Enjoy!

June 12, 2020 0 comment
0 FacebookTwitterPinterestEmail
Main Dish Recipes

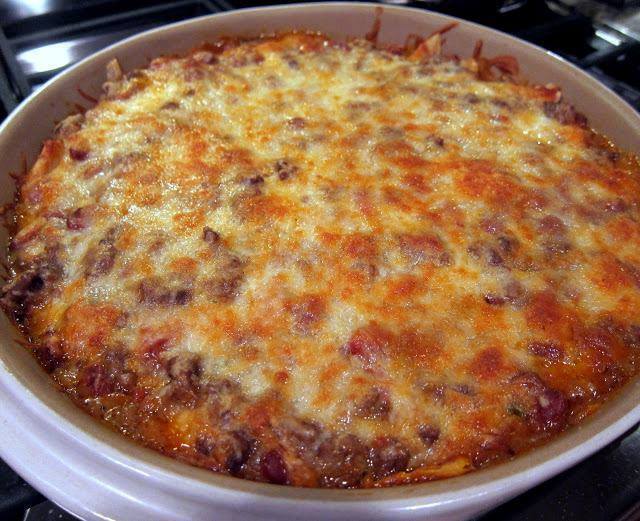
EASY MEXICAN CASSEROLE

by Rebecca June 12, 2020
written by Rebecca

This food never gets old for me. This has always been my go-to-food whenever I feel sad and happy which is pretty much every time! Aside from the incredible taste that this has, it is also really easy to make. Ten easy steps to guide you to perfection. I did my best to simplify the instructions for you to follow and enjoy the process at the same time. It’s always important to enjoy the things we do so we would not get bored. This will surely be a part of your top picks for go-to-foods!

INGREDIENTS

1 pound lean ground beef

1 can Ranch Style beans

1 10-12 ounce bag tortilla chips, crushed

1 can Ro-tel tomatoes

1 small onion, chopped

2 cups shredded cheddar cheese, divided

1 package taco seasoning

1 can cream of chicken soup

1/2 cup water

sour cream and salsa for serving

HOW TO MAKE EASY MEXICAN CASSEROLE

Step 1: Ready the oven and preheat to 325 degrees.

Step 2: Place a skillet on the stove and turn the heat to medium. Add the meat and cook until the fat comes out and the color turns brown. Remove the fat.

Step 3: Add the onion, tomato, water, soup, taco seasoning, and beans. Stir until well-mixed.

Step 4: Turn the heat to medium-low and simmer the mixture until cooked.

Step 5: Apply cooking spray into a 9×13 casserole dish.

Step 6: Arrange the crushed tortilla chips to a layer on the bottom part of the dish. Next, arrange a layer of the meat mixture followed by half of the cheddar cheese. Repeat this process until you use all the ingredients.

Step 7: Cover the casserole dish with aluminum foil.

Step 8: Place in the oven and bake for 20 to 30 minutes. When it appears to be bubbly, you’re done!

Step 9: Remove from the oven and let it sit on a wire rack to cool for 5 to 10 minutes.

Step 10: Pour the salsa and sour cream on top. Serve and enjoy!

EASY MEXICAN CASSEROLE

Rebecca This food never gets old for me. This has always been my go-to-food whenever I feel sad and happy which is pretty much every time! Aside from the incredible taste… Main Dish Recipes EASY MEXICAN CASSEROLE European Print This
Nutrition facts: 200 calories 20 grams fat
Rating: 5.0/5
( 1 voted )

Ingredients

  • 1 pound lean ground beef
  • 1 can Ranch Style beans
  • 1 10-12 ounce bag tortilla chips, crushed
  • 1 can Ro-tel tomatoes
  • 1 small onion, chopped
  • 2 cups shredded cheddar cheese, divided
  • 1 package taco seasoning
  • 1 can cream of chicken soup
  • 1/2 cup water
  • sour cream and salsa for serving

Instructions

Step 1: Ready the oven and preheat to 325 degrees.

Step 2: Place a skillet on the stove and turn the heat to medium. Add the meat and cook until the fat comes out and the color turns brown. Remove the fat.

Step 3: Add the onion, tomato, water, soup, taco seasoning, and beans. Stir until well-mixed.

Step 4: Turn the heat to medium-low and simmer the mixture until cooked.

Step 5: Apply cooking spray into a 9x13 casserole dish.

Step 6: Arrange the crushed tortilla chips to a layer on the bottom part of the dish. Next, arrange a layer of the meat mixture followed by half of the cheddar cheese. Repeat this process until you use all the ingredients.

Step 7: Cover the casserole dish with aluminum foil.

Step 8: Place in the oven and bake for 20 to 30 minutes. When it appears to be bubbly, you're done!

Step 9: Remove from the oven and let it sit on a wire rack to cool for 5 to 10 minutes.

Step 10: Pour the salsa and sour cream on top. Serve and enjoy!

June 12, 2020 0 comment
0 FacebookTwitterPinterestEmail
Main Dish Recipes

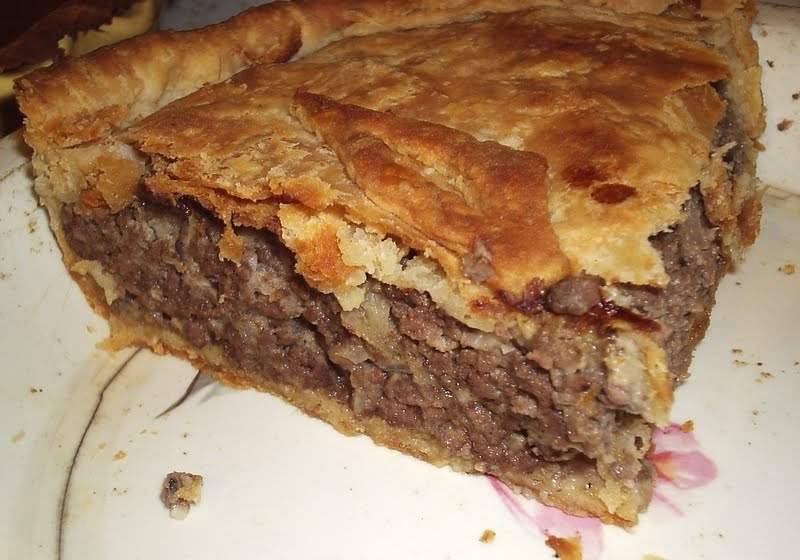
FRENCH MEATPIE

by Rebecca June 12, 2020
written by Rebecca

French Meat Pie is a traditional French-Canadian delicacy. It is loved and enjoyed throughout Canada and New England. The onion, mashed potato, ground beef and pork, and poultry seasoning are combined perfectly and baked in a traditional pie crust. I don’t normally make this French Meat Pie, only when I have guests coming over, or during special occasions and pot luck. And this pie is by far one of the tastiest I ever had. It’s loaded with flavor, it’s fulfilling, and hands down delicious!

INGREDIENTS

5-6 rustic potatoes-cooked and mashed-plain – boil the potatoes while making the meat mixture so they will stay warm

2 lbs ground beef

1 lb ground pork

1 large onion diced

1-2 tablespoons Poultry seasoning (Bells)

1/2 teaspoon ground cloves

1 tablespoon butter

some milk

salt and pepper

HOW TO MAKE FRENCH MEAT PIE

Step 1: Prepare the oven. Preheat it to 375 degrees. And line two pie plates with pie crusts.

Step 2: Melt the butter in a large frypan. Saute the onion until translucent.

Step 3: Add in the ground pork and cook for a few minutes before adding the ground beef. Cook until the meat is no longer pink. Drain excess fat but leave a bit for flavor.

Step 4: Add enough mashed potato to bind the meat.

Step 5: Mix in the cloves, salt, pepper, and poultry seasoning. Make sure you put enough seasoning. Taste to adjust to your liking.

Step 6: Fill the pie and place the pie crust on top.

Step 7: With a knife, make slits and lightly brush the top with milk. This will help the crust brown.

Step 8: Place inside the preheated oven and bake for an hour until the crust is nice and brown.

Step 9: Once done, remove from the oven, slice, and serve hot. Enjoy!

Note: For the leftover pies, you can wrap them individually in aluminum foil and freeze.

FRENCH MEATPIE

Rebecca French Meat Pie is a traditional French-Canadian delicacy. It is loved and enjoyed throughout Canada and New England. The onion, mashed potato, ground beef and pork, and poultry seasoning are… Main Dish Recipes FRENCH MEATPIE European Print This
Nutrition facts: 200 calories 20 grams fat
Rating: 5.0/5
( 1 voted )

Ingredients

  • 5-6 rustic potatoes-cooked and mashed-plain - boil the potatoes while making the meat mixture so they will stay warm
  • 2 lbs ground beef
  • 1 lb ground pork
  • 1 large onion diced
  • 1-2 tablespoons Poultry seasoning (Bells)
  • 1/2 teaspoon ground cloves
  • 1 tablespoon butter
  • some milk
  • salt and pepper

Instructions

Step 1: Prepare the oven. Preheat it to 375 degrees. And line two pie plates with pie crusts.

Step 2: Melt the butter in a large frypan. Saute the onion until translucent.

Step 3: Add in the ground pork and cook for a few minutes before adding the ground beef. Cook until the meat is no longer pink. Drain excess fat but leave a bit for flavor.

Step 4: Add enough mashed potato to bind the meat.

Step 5: Mix in the cloves, salt, pepper, and poultry seasoning. Make sure you put enough seasoning. Taste to adjust to your liking.

Step 6: Fill the pie and place the pie crust on top.

Step 7: With a knife, make slits and lightly brush the top with milk. This will help the crust brown.

Step 8: Place inside the preheated oven and bake for an hour until the crust is nice and brown.

Step 9: Once done, remove from the oven, slice, and serve hot. Enjoy!

Note: For the leftover pies, you can wrap them individually in aluminum foil and freeze.

June 12, 2020 0 comment
0 FacebookTwitterPinterestEmail
Main Dish Recipes

Hershey’s Syrup Brownies Recipe

by Rebecca June 11, 2020
written by Rebecca

This is one of my all-time favorite brownies. It’s very moist, chocolatey, and delicious! These gorgeous can be stored in an airtight container for later consumption. And the Hershey’s syrup gives these brownies excellent chocolate, rich, and super moist texture. Enjoy every bite, I’m sure you’ll be asking for more!

Ingredients

1/2 cup butter ( no substitutes, melt in microwave)

1 cup granulated sugar

4 eggs

1 teaspoon vanilla extract

1 cup flour

1 (16 ounce) cans Hershey’s syrup

1 cup chopped nuts (optional) Icing

3 cups confectioners’ sugar

1/2 cup butter, melted ( no subs)

4 tablespoons cocoa

4 tablespoons milk

1 teaspoon vanilla extract

How to make Hershey’s Syrup Brownies Recipe

Step 1: Prepare the oven. Preheat it to 350 degrees.

Step 2: Grease a 10 x 15-inch pan.

Step 3: Melt the butter in the microwave. Then, cream the sugar and butter. And add the eggs one at a time making sure to beat every after each addition.

Step 4: Mix in the vanilla extra and flour until well combined.

Step 5: Add in the Hershey syrup and mix again until incorporated.

Step 6: Top with chopped nuts if using.

Step 7: Then, pour the batter into a greased pan. Place inside the preheated oven and bake for 35 to 40 minutes. It is done when the toothpick inserted in the middle comes out clean.

Step 8: Meanwhile, prepare the icing. Boil in the microwave the butter, cocoa, and 1 tablespoon milk.

Step 9: Add the confectioner’s sugar in a mixing bowl, followed by the cocoa mixture and beat until well combined.

Step 10: Mix in the vanilla extract and the remaining milk. Make sure to add enough milk until you reach your desired spreading consistency.

Step 11: One the brownies are done, remove from the oven and let it cook for about 5 to 10 minutes.

Step 12: Generously spread the icing on the brownies and sprinkle more chopped nuts.

Step 13: Let the brownies cool completely and the icing hardens to a fudge-like consistency before cutting into squares.

Hershey’s Syrup Brownies Recipe

Rebecca This is one of my all-time favorite brownies. It’s very moist, chocolatey, and delicious! These gorgeous can be stored in an airtight container for later consumption. And the Hershey’s syrup… Main Dish Recipes Hershey’s Syrup Brownies Recipe European Print This
Nutrition facts: 200 calories 20 grams fat
Rating: 4.5/5
( 2 voted )

Ingredients

  • 1/2 cup butter ( no substitutes, melt in microwave)
  • 1 cup granulated sugar
  • 4 eggs
  • 1 teaspoon vanilla extract
  • 1 cup flour
  • 1 (16 ounce) cans Hershey’s syrup
  • 1 cup chopped nuts (optional) Icing
  • 3 cups confectioners’ sugar
  • 1/2 cup butter, melted ( no subs)
  • 4 tablespoons cocoa
  • 4 tablespoons milk
  • 1 teaspoon vanilla extract

Instructions

Step 1: Prepare the oven. Preheat it to 350 degrees.

Step 2: Grease a 10 x 15-inch pan.

Step 3: Melt the butter in the microwave. Then, cream the sugar and butter. And add the eggs one at a time making sure to beat every after each addition.

Step 4: Mix in the vanilla extra and flour until well combined.

Step 5: Add in the Hershey syrup and mix again until incorporated.

Step 6: Top with chopped nuts if using.

Step 7: Then, pour the batter into a greased pan. Place inside the preheated oven and bake for 35 to 40 minutes. It is done when the toothpick inserted in the middle comes out clean.

Step 8: Meanwhile, prepare the icing. Boil in the microwave the butter, cocoa, and 1 tablespoon milk.

Step 9: Add the confectioner's sugar in a mixing bowl, followed by the cocoa mixture and beat until well combined.

Step 10: Mix in the vanilla extract and the remaining milk. Make sure to add enough milk until you reach your desired spreading consistency.

Step 11: One the brownies are done, remove from the oven and let it cook for about 5 to 10 minutes.

Step 12: Generously spread the icing on the brownies and sprinkle more chopped nuts.

Step 13: Let the brownies cool completely and the icing hardens to a fudge-like consistency before cutting into squares.

June 11, 2020 0 comment
0 FacebookTwitterPinterestEmail
Newer Posts
Older Posts

Popular Posts

  • 1

    Crispy Crunchy Parmesan Potatoes

    March 21, 2020
  • 2

    CROCK POT SMOTHERED PORK CHOPS

    March 21, 2020
  • Facebook
  • Twitter

@2019 - All Right Reserved.


Back To Top