Cook it once
  • Home
  • Privacy Policy
  • Recipes
    • KETO
    • LC
    • WW
  • Tips
  • Contact
Cook it once
  • Home
  • Privacy Policy
  • Recipes
    • KETO
    • LC
    • WW
  • Tips
  • Contact
Monthly Archives

June 2020

Main Dish Recipes

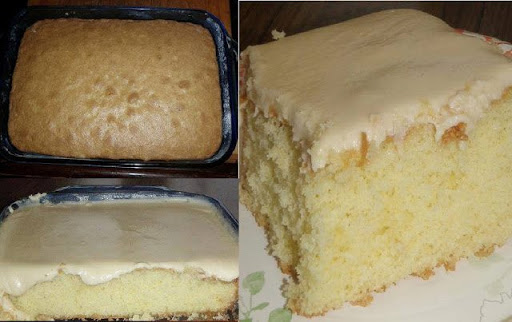
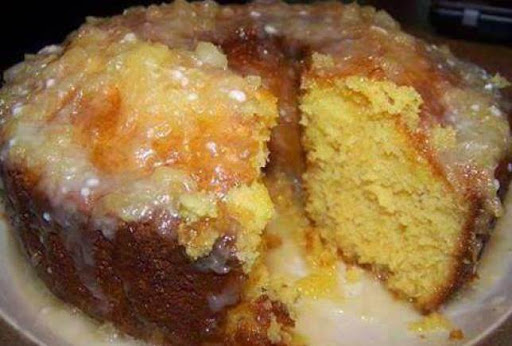
Pineapple Cake

by Rebecca June 16, 2020
written by Rebecca

I’ve never known that Pineapple cake is a classic Taiwanese pastry. I mean, wow! That got me thinking, what else do I not know about the food I eat. LOL. This cake is so refreshing, seriously smooth, with a rich pineapple flavor that I so darn adore. And what I like about this is it’s not hard to make, and the ingredients are simple enough to find anywhere. It’s made with butter, flour, egg, sugar, and pineapple jam or slices that are combined for a summery vibe all year round. Satisfy your cravings with this pineapple cake. Have a slice and enjoy the season with a light, sweet, and super refreshing dessert. This sweet cake is for the pineapple lovers out there. I’m sure you guys will be excited with just the aroma of this cult favorite Pineapple Cake, what more if you taste it. Big smile!

INGREDIENTS

1 yellow cake mix

1 small box vanilla pudding mix

4 eggs

1/3 cup oil

20 oz. can crush pineapple, divided

For the Glaze

¼ cup butter

¾ cup crushed pineapple

2 cups powder sugar

How to make Pineapple Cake

Step 1: Prepare the oven. Preheat it to 350 degrees F.

Step 2: Lightly grease and flour a bundt pan or an angel food cake pan.

Step 3: Reserve 3/4 cup of crushed pineapple for the glaze.

Step 4: Combine the cake mix, pudding mix, eggs, oil, and pineapple in a large mixing bowl.

Step 5: Beat on medium speed for about 3 minutes.

Step 6: Pour the batter into the prepared pan.

Step 7: Place inside the preheated oven and bake for 45 to 55 minutes. Insert a toothpick in the middle to check for doneness. Once the toothpick comes out clean, the cake is done.

To make the glaze

Step 8: Melt the butter in a small saucepan. Then, add in the reserved crushed pineapple and powder sugar. Stir the ingredients until the sugar is completely dissolved.

Step 9: Finally, generously glaze the cooled cake.
Pineapple Cake

Rebecca I’ve never known that Pineapple cake is a classic Taiwanese pastry. I mean, wow! That got me thinking, what else do I not know about the food I eat. LOL.… Main Dish Recipes Pineapple Cake European Print This
Nutrition facts: 200 calories 20 grams fat
Rating: 5.0/5
( 1 voted )

Ingredients

  • 1 yellow cake mix
  • 1 small box vanilla pudding mix
  • 4 eggs
  • 1/3 cup oil
  • 20 oz. can crush pineapple, divided
  • For the Glaze
  • ¼ cup butter
  • ¾ cup crushed pineapple
  • 2 cups powder sugar

Instructions

Step 1: Prepare the oven. Preheat it to 350 degrees F.

Step 2: Lightly grease and flour a bundt pan or an angel food cake pan.

Step 3: Reserve 3/4 cup of crushed pineapple for the glaze.

Step 4: Combine the cake mix, pudding mix, eggs, oil, and pineapple in a large mixing bowl.

Step 5: Beat on medium speed for about 3 minutes.

Step 6: Pour the batter into the prepared pan.

Step 7: Place inside the preheated oven and bake for 45 to 55 minutes. Insert a toothpick in the middle to check for doneness. Once the toothpick comes out clean, the cake is done.

To make the glaze

Step 8: Melt the butter in a small saucepan. Then, add in the reserved crushed pineapple and powder sugar. Stir the ingredients until the sugar is completely dissolved.

Step 9: Finally, generously glaze the cooled cake.
June 16, 2020 0 comment
0 FacebookTwitterPinterestEmail
Main Dish Recipes

Seven Layer Salad

by Rebecca June 16, 2020
written by Rebecca

If you are looking for an American salad to impress your guests, well, this Seven Layer Salad is all that you need. The name itself is impressive enough, seven layers! How is that? It is a grand salad with a colorful combination of seven layers of ingredients;  iceberg lettuce, tomatoes, cucumbers, onions, sweet peas, hard-boiled eggs, sharp cheddar cheese, and bacon pieces. And topped with mayonnaise dressing or sour cream. Your guests will be jealous, as well as impress on how this salad looks so pretty and taste so refreshingly delicious!

I’ve been serving this gorgeous for a while now and every time I get the same reaction. It really is a crowd-pleaser. I make a lot of this baby, well, there’s never too much because everyone loves it! As we all know salads are very easy to make and I can say exactly with this seven-layer salad.

Ingredients

In a pretty tall glass bowl:

1 A layer of Mixed Romaine and Iceberg

1 Ground Salt & Pepper

1 A layer of Chopped Hard-Boiled Egg

1 A sprinkling of Green Onion

1 Ground Salt & Pepper

1 A layer of Mixed Romaine and Iceberg

1 Thick Layer of Frozen Baby Peas (rinsed with luke

1 A layer of Red Pepper (the green and red contrast)

1 A layer of Romaine & Iceberg

1 Ground Salt and Pepper

1 A layer of Chopped Hard-Boiled Egg

1 Ground Salt & Pepper

1 A sprinkling of Green Onion

1 A layer of Romaine and Iceberg

How to make Seven Layer Salad

Step 1: To make the dressing, mix the Miracle Whip and white sugar. Don’t be afraid to add a little more sugar because this salad is supposed to be sweet.

Step 2: Top the salad with Miracle Whip Dressing.

Step 3: Pour the dressing until the salad is covered from top to edges.

Step 4: Sprinkle over a thick layer of shredded cheddar.

Step 5: And top with REAL bacon bits. Serve and enjoy!

Seven Layer Salad

Rebecca If you are looking for an American salad to impress your guests, well, this Seven Layer Salad is all that you need. The name itself is impressive enough, seven layers!… Main Dish Recipes Seven Layer Salad European Print This
Nutrition facts: 200 calories 20 grams fat
Rating: 5.0/5
( 1 voted )

Ingredients

  • In a pretty tall glass bowl:
  • 1 A layer of Mixed Romaine and Iceberg
  • 1 Ground Salt & Pepper
  • 1 A layer of Chopped Hard-Boiled Egg
  • 1 A sprinkling of Green Onion
  • 1 Ground Salt & Pepper
  • 1 A layer of Mixed Romaine and Iceberg
  • 1 Thick Layer of Frozen Baby Peas (rinsed with luke
  • 1 A layer of Red Pepper (the green and red contrast)
  • 1 A layer of Romaine & Iceberg
  • 1 Ground Salt and Pepper
  • 1 A layer of Chopped Hard-Boiled Egg
  • 1 Ground Salt & Pepper
  • 1 A sprinkling of Green Onion
  • 1 A layer of Romaine and Iceberg

Instructions

Step 1: To make the dressing, mix the Miracle Whip and white sugar. Don't be afraid to add a little more sugar because this salad is supposed to be sweet.

Step 2: Top the salad with Miracle Whip Dressing.

Step 3: Pour the dressing until the salad is covered from top to edges.

Step 4: Sprinkle over a thick layer of shredded cheddar.

Step 5: And top with REAL bacon bits. Serve and enjoy!

June 16, 2020 0 comment
0 FacebookTwitterPinterestEmail
Main Dish Recipes

THE BEST SWEET POTATO CASSEROLE

by Rebecca June 16, 2020
written by Rebecca

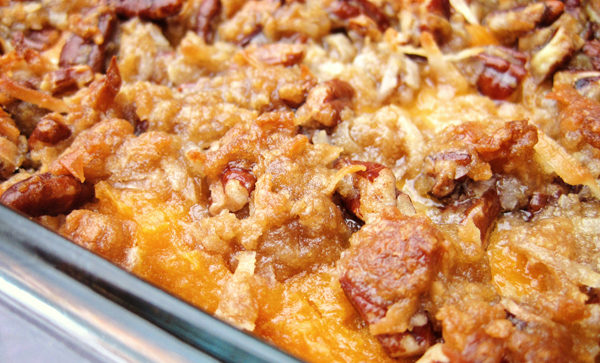
This is the best sweet potato casserole you’ll ever have with a crunchy brown sugar topping that will complete your day!

It’s amazing how we have everything we need before Thanksgiving yet we panic last minute thinking about all the preparation we need. Well, this recipe will save you through the hassle of a last-minute Thanksgiving bustle. It’s simple, pretty easy to put together, and no-doubt delicious. This casserole is rich, comforting, with an unbelievable crunchy brown sugar topping that pleases the crowd. Admittingly, I make it even on a regular day. It’s so good I don’t want to wait for Thanksgiving to have this on my dining table. My family loves this, they are addicted to this sweet potato casserole. Well, who doesn’t? It’ darn good and it is the best! It such a luscious side dish that’s great with mashed potato and gravy or turkey. Strangely, this sweet potato casserole is very much a dessert, a mini side dessert that you will love more than the actual dessert.

INGREDIENTS

3 cups mashed sweet potatoes

1 cup brown sugar

2 eggs, lightly beaten

1 teaspoon vanilla

½ cup milk

½ cup melted butter

For the Topping

½ cup brown sugar

⅓ cup flour

⅓ cup melted butter

1 cup chopped pecans

HOW TO MAKE SWEET POTATO CASSEROLE

Step 1: Prepare the oven. Preheat it to 350 degrees. Grease with a cooking spray a 1½ to a 2-quart casserole dish. Set aside.

Step 2: Combine the mashed sweet potatoes, born sugar, eggs, vanilla, milk, and melted butter in a large mixing bowl.

Step 3: Pour the mixture into the greased casserole dish.

Step 4: For the topping, mix the brown sugar, flour, melted butter, and chopped pecans.

Step 5: Sprinkle the topping evenly over the top of the casserole.

Step 6: Place inside the preheated oven and bake for 30 to 40 minutes or until cooked through and the top is lightly browned.

THE BEST SWEET POTATO CASSEROLE

Rebecca This is the best sweet potato casserole you’ll ever have with a crunchy brown sugar topping that will complete your day! It’s amazing how we have everything we need before… Main Dish Recipes THE BEST SWEET POTATO CASSEROLE European Print This
Nutrition facts: 200 calories 20 grams fat
Rating: 5.0/5
( 2 voted )

Ingredients

  • 3 cups mashed sweet potatoes
  • 1 cup brown sugar
  • 2 eggs, lightly beaten
  • 1 teaspoon vanilla
  • ½ cup milk
  • ½ cup melted butter
  • For the Topping
  • ½ cup brown sugar
  • ⅓ cup flour
  • ⅓ cup melted butter
  • 1 cup chopped pecans

Instructions

Step 1: Prepare the oven. Preheat it to 350 degrees. Grease with a cooking spray a 1½ to a 2-quart casserole dish. Set aside.

Step 2: Combine the mashed sweet potatoes, born sugar, eggs, vanilla, milk, and melted butter in a large mixing bowl.

Step 3: Pour the mixture into the greased casserole dish.

Step 4: For the topping, mix the brown sugar, flour, melted butter, and chopped pecans.

Step 5: Sprinkle the topping evenly over the top of the casserole.

Step 6: Place inside the preheated oven and bake for 30 to 40 minutes or until cooked through and the top is lightly browned.

June 16, 2020 0 comment
0 FacebookTwitterPinterestEmail
Main Dish Recipes

APPLE FRITTER CAKE

by Rebecca June 16, 2020
written by Rebecca

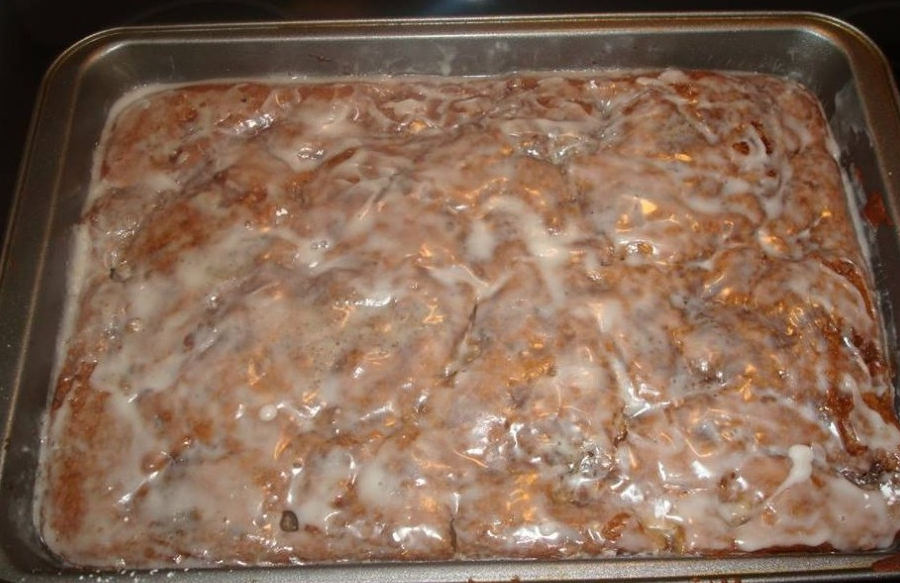
I’d always say yes to a cake form of my favorite old fashioned donut. This soft apple-filled cake tastes exactly the same with a crumbly sugar glaze. Apple Fritter is a cake to die for!

INGREDIENTS

What to use for Filling

1 heaping cup of sliced apples (I cored and quartered and then sliced)

1/3 c. sugar

1/4 tsp. cinnamon

small pinch freshly grated nutmeg

2 tbsp. cornstarch

2 tsp. water

Plus

1/2 cup brown sugar (I used a 1/4 cup each of dark and light)

1/2 tsp. cinnamon

What to use for Cake

1/3 c. butter

3/4 c. sugar

1/2 c. applesauce

1 tsp. vanilla

2 eggs

2 1/4 c. flour

1 tsp. baking powder

1 tsp. baking soda

1 tsp. salt

1 tsp. cinnamon

1 c. greek yogurt (you could use plain yogurt as well or sour cream)

What to use for Glaze

2 c. powdered sugar

1 tsp. vanilla

6 tbsp. milk

HOW TO MAKE APPLE FRITTER CAKE

To make the filling

Combine the apples, sugar, water, cinnamon, and cornstarch in a small saucepan.

Cook for 5 to 7 minutes on low heat. Constantly stir until thickened and the apples are a little soft. Set aside.

Add the sugar and cinnamon in a small bowl. Mix until incorporated. Set aside.

To make the Cake

Prepare the oven. Preheat it to 350 degrees.

Grease and flour a 9 x 13-inch baking dish and set aside.

Cream the butter and sugar for 3 minutes or until light and fluffy.

Mix in the apple sauce and vanilla until well combined.

Beat in the eggs, one at a time. Make sure to beat well every after each addition.

Sift the flour, baking powder, baking soda, and salt.

In 3 parts, add the dry ingredients into the batter alternately with the yogurt in 2 parts, and make sure to begin and end with the dry ingredients. Beat the mixture until just combined.

Use a spoon to transfer half of the batter into the prepared pan. And the cooled apple mixture over the batter. Carefully and evenly spread apple mixture.

Sprinkle the top with the remaining brown sugar-cinnamon mixture.

Place inside the preheated oven and bake for 45 to 55 minutes. Insert a toothpick in the middle, once it comes out clean the cake is done.

To make the  Glaze

Make the gale while waiting for the cake to bake. To do that you have to mix the powdered sugar, vanilla, and milk. Beat until you achieve your desired consistency.

Pour the glaze as evenly as possible over the hot cake and let it sit for the glaze to set.

APPLE FRITTER CAKE

Rebecca I’d always say yes to a cake form of my favorite old fashioned donut. This soft apple-filled cake tastes exactly the same with a crumbly sugar glaze. Apple Fritter is… Main Dish Recipes APPLE FRITTER CAKE European Print This
Nutrition facts: 200 calories 20 grams fat
Rating: 5.0/5
( 1 voted )

Ingredients

  • What to use for Filling
  • 1 heaping cup of sliced apples (I cored and quartered and then sliced)
  • 1/3 c. sugar
  • 1/4 tsp. cinnamon
  • small pinch freshly grated nutmeg
  • 2 tbsp. cornstarch
  • 2 tsp. water
  • Plus
  • 1/2 cup brown sugar (I used a 1/4 cup each of dark and light)
  • 1/2 tsp. cinnamon
  • What to use for Cake
  • 1/3 c. butter
  • 3/4 c. sugar
  • 1/2 c. applesauce
  • 1 tsp. vanilla
  • 2 eggs
  • 2 1/4 c. flour
  • 1 tsp. baking powder
  • 1 tsp. baking soda
  • 1 tsp. salt
  • 1 tsp. cinnamon
  • 1 c. greek yogurt (you could use plain yogurt as well or sour cream)
  • What to use for Glaze
  • 2 c. powdered sugar
  • 1 tsp. vanilla
  • 6 tbsp. milk

Instructions

To make the filling

Combine the apples, sugar, water, cinnamon, and cornstarch in a small saucepan.

Cook for 5 to 7 minutes on low heat. Constantly stir until thickened and the apples are a little soft. Set aside.

Add the sugar and cinnamon in a small bowl. Mix until incorporated. Set aside.

To make the Cake

Prepare the oven. Preheat it to 350 degrees.

Grease and flour a 9 x 13-inch baking dish and set aside.

Cream the butter and sugar for 3 minutes or until light and fluffy.

Mix in the apple sauce and vanilla until well combined.

Beat in the eggs, one at a time. Make sure to beat well every after each addition.

Sift the flour, baking powder, baking soda, and salt.

In 3 parts, add the dry ingredients into the batter alternately with the yogurt in 2 parts, and make sure to begin and end with the dry ingredients. Beat the mixture until just combined.

Use a spoon to transfer half of the batter into the prepared pan. And the cooled apple mixture over the batter. Carefully and evenly spread apple mixture.

Sprinkle the top with the remaining brown sugar-cinnamon mixture.

Place inside the preheated oven and bake for 45 to 55 minutes. Insert a toothpick in the middle, once it comes out clean the cake is done.

To make the  Glaze

Make the gale while waiting for the cake to bake. To do that you have to mix the powdered sugar, vanilla, and milk. Beat until you achieve your desired consistency.

Pour the glaze as evenly as possible over the hot cake and let it sit for the glaze to set.

June 16, 2020 0 comment
0 FacebookTwitterPinterestEmail
Main Dish Recipes

Dreamsicle Trifle

by Rebecca June 16, 2020
written by Rebecca

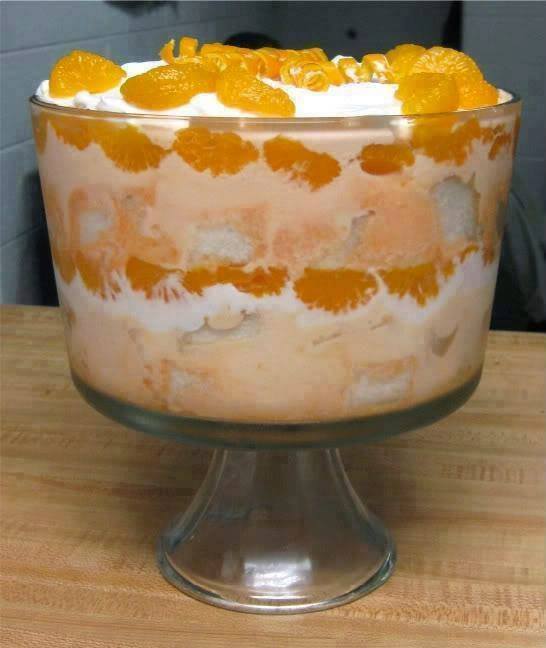
Trifle is a traditional English dessert. And we are giving it a spin with this Dreamsicle Trifle. This you can effortlessly pull off, with simple ingredients that are layered, and tastes better the longer this trifle sits. It has a sweet yet tangy flavor that makes my mouth water when I see it. The aroma from the mandarin oranges is so refreshing and inviting. You can make this amazing dessert a day before so the flavor sits in perfectly. This will certainly make your guests awe in excitement. And the kids, ow, they will love this, they will be obsessed. Take it from me, my kids are crazy in love with this Dreamsicle Trifle, always asking for more whenever I make it. And I love how easy this is to assemble, it is a no-fuss, foolproof dessert that pleases the crowd. Give it a try and don’t forget to share!

INGREDIENTS

2 large cans mandarin oranges

1 small pkg. orange gelatin

1-pint orange sherbet

1 cup whip cream

1 angel food cake, cubed

How to make Dreamsicle Trifle

Step 1: Get at a cup of liquid from the mandarin oranges. Microwave and bring to a boil.

Step 2: Add in the gelatin and stir until dissolved.

Step 3: Cool the gelatin mixture until just warm.

Step 4: Mix in the orange sherbet until well combined.

Step 5: Then, fold in the whipped cream.

Step 6: In a trifle dish with a tight layer, add in half of the cake cubes.

Step 7: Add onto the top of the cake cubes the orange mixture.

Step 8: Spread a thin layer of whipped topping.

Step 9: Next, add a layer of mandarin oranges.

Step 10: Repeat the steps in the same order.

Step 11: Place inside the fridge to set for at least 2 hours before serving.

Garnish tip: You can use some stops of orange peel for prettier orange curls.

Dreamsicle Trifle

Rebecca Trifle is a traditional English dessert. And we are giving it a spin with this Dreamsicle Trifle. This you can effortlessly pull off, with simple ingredients that are layered, and… Main Dish Recipes Dreamsicle Trifle European Print This
Nutrition facts: 200 calories 20 grams fat
Rating: 5.0/5
( 1 voted )

Ingredients

  • 2 large cans mandarin oranges
  • 1 small pkg. orange gelatin
  • 1-pint orange sherbet
  • 1 cup whip cream
  • 1 angel food cake, cubed

Instructions

Step 1: Get at a cup of liquid from the mandarin oranges. Microwave and bring to a boil.

Step 2: Add in the gelatin and stir until dissolved.

Step 3: Cool the gelatin mixture until just warm.

Step 4: Mix in the orange sherbet until well combined.

Step 5: Then, fold in the whipped cream.

Step 6: In a trifle dish with a tight layer, add in half of the cake cubes.

Step 7: Add onto the top of the cake cubes the orange mixture.

Step 8: Spread a thin layer of whipped topping.

Step 9: Next, add a layer of mandarin oranges.

Step 10: Repeat the steps in the same order.

Step 11: Place inside the fridge to set for at least 2 hours before serving.

Garnish tip: You can use some stops of orange peel for prettier orange curls.

June 16, 2020 0 comment
0 FacebookTwitterPinterestEmail
Main Dish Recipes

Coconut Cream Pie Deluxe

by Rebecca June 16, 2020
written by Rebecca

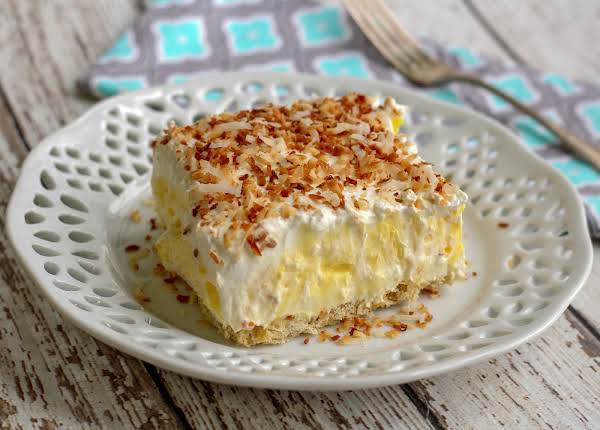
This indeed is a deluxe pie, it has a nutty crust with a cream pie filling and topped with toasted coconut. It is a delightful treat that is always a winner!

INGREDIENTS

1 cup walnuts, chopped fine

1 cup all-purpose flour

1 stick butter, softened

8 oz cream cheese, softened

1 cup powdered sugar

16 oz Cool Whip lite, thawed

3 3/4 cup half and half

2 pkg coconut cream pie filling/pudding (the kind you cook), 3.4 oz each

1 cup shredded coconut

How to make Coconut Cream Pie Deluxe

Step 1: Prepare the oven. Preheat it to 350 degrees. Lightly grease a 13 x 9-inch glass pan.

Step 2: Mix a stick of softened butter, a cup of flour, and a cup of minced walnuts. Combine until incorporated.

Step 3: Pour the mixture and press evenly in the bottom of the greased pan.

Step 4: Place inside the preheated oven and bake for about 13 to 15 minutes. Cooking time will depend on whatever oven you use.

Step 5: Make sure to just slightly brown the edges. Then, remove from the oven, and it cool.

Step 6: Lightly toast 1 cup of shredded coconut in a small skillet and set aside to cool.

Step 7: In a mixing bowl, place 1 package of the softened cream cheese with a cup of powdered sugar. use your hand to mix, then, whip for a few minutes with an electric mixer until the mixture is fluffy.

Step 8: Now, fold in 1/3 of the whipped topping into the mixture. Set aside.

Step 9: Spread using smooth strokes the Cool Whip or cream cheese mixture onto the cooled crust.

Step 10: Place both packages of the coconut cream pudding and milk in a heavy bottom pot. Whisk and bring to a boil. Be careful not to burn the bottom.

Step 11: Then, evenly spread the cooled pudding on top of the crust mixture.

Step 12: And spread the remaining cool whip on top.

Step 13: Garnish with toasted coconut.

Step 14: Place in the fridge to chill for at least 2 hours or overnight. This pie can even be kept for days.

Coconut Cream Pie Deluxe

Rebecca This indeed is a deluxe pie, it has a nutty crust with a cream pie filling and topped with toasted coconut. It is a delightful treat that is always a… Main Dish Recipes Coconut Cream Pie Deluxe European Print This
Nutrition facts: 200 calories 20 grams fat
Rating: 5.0/5
( 1 voted )

Ingredients

  • 1 cup walnuts, chopped fine
  • 1 cup all-purpose flour
  • 1 stick butter, softened
  • 8 oz cream cheese, softened
  • 1 cup powdered sugar
  • 16 oz Cool Whip lite, thawed
  • 3 3/4 cup half and half
  • 2 pkg coconut cream pie filling/pudding (the kind you cook), 3.4 oz each
  • 1 cup shredded coconut

Instructions

Step 1: Prepare the oven. Preheat it to 350 degrees. Lightly grease a 13 x 9-inch glass pan.

Step 2: Mix a stick of softened butter, a cup of flour, and a cup of minced walnuts. Combine until incorporated.

Step 3: Pour the mixture and press evenly in the bottom of the greased pan.

Step 4: Place inside the preheated oven and bake for about 13 to 15 minutes. Cooking time will depend on whatever oven you use.

Step 5: Make sure to just slightly brown the edges. Then, remove from the oven, and it cool.

Step 6: Lightly toast 1 cup of shredded coconut in a small skillet and set aside to cool.

Step 7: In a mixing bowl, place 1 package of the softened cream cheese with a cup of powdered sugar. use your hand to mix, then, whip for a few minutes with an electric mixer until the mixture is fluffy.

Step 8: Now, fold in 1/3 of the whipped topping into the mixture. Set aside.

Step 9: Spread using smooth strokes the Cool Whip or cream cheese mixture onto the cooled crust.

Step 10: Place both packages of the coconut cream pudding and milk in a heavy bottom pot. Whisk and bring to a boil. Be careful not to burn the bottom.

Step 11: Then, evenly spread the cooled pudding on top of the crust mixture.

Step 12: And spread the remaining cool whip on top.

Step 13: Garnish with toasted coconut.

Step 14: Place in the fridge to chill for at least 2 hours or overnight. This pie can even be kept for days.

June 16, 2020 0 comment
0 FacebookTwitterPinterestEmail
Main Dish Recipes

Easy Homemade Divinity Candy

by Rebecca June 16, 2020
written by Rebecca

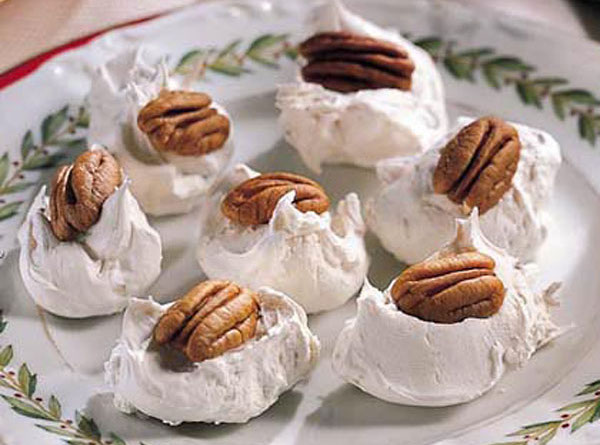
Divinity candy is another Southern confection that’s made with just a few simple ingredients; sugar, corn syrup, egg whites, and vanilla extract. These delicious homemade candies are surprisingly great. They are divine! So far the best-tasting, and the simplest divinity recipe I’ve ever known. They are great even without the garnish, but with the garnish, they look prettier, would you agree? Divinity candy is a classic, it’s a chewy and soft vanilla treat that is topped with toasted pecans. If you haven’t tried it, I would suggest you give it a shot. Just remember, don’t rush it. Wink.

INGREDIENTS

21/2 cups sugar

½ cup of water

½ cup light corn syrup

¼ teaspoon salt

2 egg whites

1 teaspoon vanilla extract

1 cup chopped pecans, toasted

Garnish: toasted pecan halves

How to make Easy Homemade Divinity Candy

Step 1: In a heavy 2-quart saucepan, cook the sugar, water, corn syrup, and salt over low heat for about 15 minutes or until the sugar is dissolved. If using a candy thermometer, once it registers 248 degrees, remove the mixture from the heat.

Step 2: Separate the yolk and the egg whites. Beat the egg whites with an electric mixer over high speed until stiff peaks form.

Step 3: Mix half of the hot syrup in a thin stream over the egg whites while beating continually for about 5 minutes at high speed.

Step 4: Now, for the remaining syrup, cook it over medium heat and stir occasionally for about 4 to 5 minutes or until the candy thermometer reaches 272 degrees.

Step 5: Moderately pour the hot syrup and vanilla extract over the egg white mixture. Beat over high speed for about 6 to 8 minutes or until the mixture holds its shape.

Step 6: Then, stir in a cup of chopped pecans.

Step 7: Drop a spoonful of the mixture quickly onto a lightly greased wax paper.

Step 8: Garnish as desired and let the candy cool.

Easy Homemade Divinity Candy

Rebecca Divinity candy is another Southern confection that’s made with just a few simple ingredients; sugar, corn syrup, egg whites, and vanilla extract. These delicious homemade candies are surprisingly great. They… Main Dish Recipes Easy Homemade Divinity Candy European Print This
Nutrition facts: 200 calories 20 grams fat
Rating: 5.0/5
( 1 voted )

Ingredients

  • 21/2 cups sugar
  • ½ cup of water
  • ½ cup light corn syrup
  • ¼ teaspoon salt
  • 2 egg whites
  • 1 teaspoon vanilla extract
  • 1 cup chopped pecans, toasted
  • Garnish: toasted pecan halves

Instructions

Step 1: In a heavy 2-quart saucepan, cook the sugar, water, corn syrup, and salt over low heat for about 15 minutes or until the sugar is dissolved. If using a candy thermometer, once it registers 248 degrees, remove the mixture from the heat.

Step 2: Separate the yolk and the egg whites. Beat the egg whites with an electric mixer over high speed until stiff peaks form.

Step 3: Mix half of the hot syrup in a thin stream over the egg whites while beating continually for about 5 minutes at high speed.

Step 4: Now, for the remaining syrup, cook it over medium heat and stir occasionally for about 4 to 5 minutes or until the candy thermometer reaches 272 degrees.

Step 5: Moderately pour the hot syrup and vanilla extract over the egg white mixture. Beat over high speed for about 6 to 8 minutes or until the mixture holds its shape.

Step 6: Then, stir in a cup of chopped pecans.

Step 7: Drop a spoonful of the mixture quickly onto a lightly greased wax paper.

Step 8: Garnish as desired and let the candy cool.

June 16, 2020 0 comment
0 FacebookTwitterPinterestEmail
Main Dish Recipes

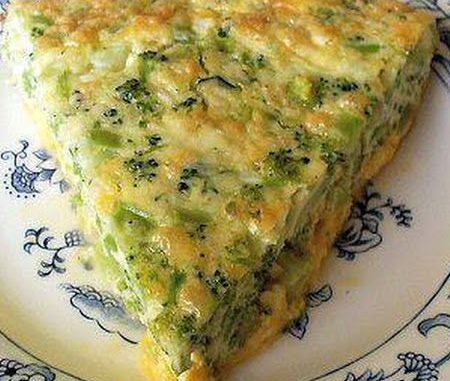
Crustless Broccoli Cheddar Quiche

by Rebecca June 16, 2020
written by Rebecca

This Broccoli Cheddar Quiche is a healthy and easy grab and goes breakfast. There is no better way to start your day but with a slice of this crustless and delicious Quiche. Quiche is a traditional French food that’s originally made with milk and a pastry crust. But we pump it up a notch for a healthier and low carb version. Ergo, this recipe for a Crustless Broccoli Cheddar Quiche. This too is a foolproof way to let your picky eaters eat healthily. For any leftover, this is great even when reheated. So this can be included in your meal prep for the week.

INGREDIENTS

1 refrigerated pie crust (homemade also works great)

3-4 cups broccoli, cut into bite-sized pieces

2 cups shredded cheese (I like using a mix of provolone and cheddar)

8 eggs

1/2 cup half and half

2 tablespoons flour

1/2 teaspoon salt

1/4 teaspoon pepper

HOW TO MAKE BROCCOLI CHEESE QUICHE

Step 1: Prepare the oven. Preheat it to 375 degrees.

Step 2: Place the pie crust into a pie dish, press, and shape as you like.

Step 3: Put the broccoli into a microwave-safe bowl. Pour half-inch of water to the bowl. Then, cover with plastic wrap and microwave for 2 to 3 minutes or until the broccoli is tender and bright green.

Step 4: Remove the broccoli from the oven and drain.

Step 5: Evenly spread the broccoli into the prepared pie crust.

Step 6: Sprinkle over half of the shredded cheese.

Step 7: Whisk the eggs, half and half, flour, salt, and pepper into a medium bowl or large measuring cup. Mix until incorporated.

Step 8: Pour the egg mixture over the broccoli.

Step 9: And sprinkle the top with the remaining cheese.

Step 10: Place inside the preheated oven and bake for about 35 to 40 minutes or until the top is lightly golden and the quiche jiggles slightly when shaken gently.

Step 11: Serve immediately. Enjoy!

Crustless Broccoli Cheddar Quiche

Rebecca This Broccoli Cheddar Quiche is a healthy and easy grab and goes breakfast. There is no better way to start your day but with a slice of this crustless and… Main Dish Recipes Crustless Broccoli Cheddar Quiche European Print This
Nutrition facts: 200 calories 20 grams fat
Rating: 5.0/5
( 1 voted )

Ingredients

  • 1 refrigerated pie crust (homemade also works great)
  • 3-4 cups broccoli, cut into bite-sized pieces
  • 2 cups shredded cheese (I like using a mix of provolone and cheddar)
  • 8 eggs
  • 1/2 cup half and half
  • 2 tablespoons flour
  • 1/2 teaspoon salt
  • 1/4 teaspoon pepper

Instructions

Step 1: Prepare the oven. Preheat it to 375 degrees.

Step 2: Place the pie crust into a pie dish, press, and shape as you like.

Step 3: Put the broccoli into a microwave-safe bowl. Pour half-inch of water to the bowl. Then, cover with plastic wrap and microwave for 2 to 3 minutes or until the broccoli is tender and bright green.

Step 4: Remove the broccoli from the oven and drain.

Step 5: Evenly spread the broccoli into the prepared pie crust.

Step 6: Sprinkle over half of the shredded cheese.

Step 7: Whisk the eggs, half and half, flour, salt, and pepper into a medium bowl or large measuring cup. Mix until incorporated.

Step 8: Pour the egg mixture over the broccoli.

Step 9: And sprinkle the top with the remaining cheese.

Step 10: Place inside the preheated oven and bake for about 35 to 40 minutes or until the top is lightly golden and the quiche jiggles slightly when shaken gently.

Step 11: Serve immediately. Enjoy!

June 16, 2020 0 comment
0 FacebookTwitterPinterestEmail
Main Dish Recipes

GRANNY’S OLD FASHIONED BUTTER CAKE WITH BUTTER CREAM FROSTING

by Rebecca June 16, 2020
written by Rebecca

Nothing beats an old fashioned butter cake with buttercream frosting. This cake is one of a kind, it’s moist, sweet, and a keeper. It’s delightful, a crowds favorite, and one of the easiest cake to make. So if you are looking for a classic cake to make, this is highly recommended. A must-try, and makes a perfect dessert. Check the complete recipe below and give it a try. I’m sure you’ll thank me later. Happy baking!

INGREDIENTS

3 cups all-purpose flour

1 teaspoon baking powder

1 teaspoon salt

1/2 teaspoon baking soda

1 cup butter

2 cup of sugar

4 eggs

1 cup buttermilk or cream

2 teaspoons vanilla extract

For the Butter Cream Frosting

1 cup butter, soft

1/2 cup milk or cream

2 teaspoons vanilla extract

5 cups powdered sugar

HOW TO MAKE GRANNY’S OLD FASHIONED BUTTER CAKE WITH BUTTERCREAM FROSTING

Step 1: Prepare the oven. Preheat it to 350 degrees F. And grease and flour a 9 x 13-inch baking pan or bundt pan.

Step 2: In a mixing bowl, sift the flour, baking powder, baking soda, and salt. Set aside.

Step 3: In a different bowl, cream the butter and sugar. Add in the eggs and vanilla. Mix until incorporated.

Step 4: Alternately blend the buttermilk with the flour mixture into the creamed mixture.

Step 5: Pour the blended mixture into the greased and floured pan.

Step 6: Place the pan inside the preheated oven and bake for an hour.

Step 7: Once done, remove from the oven and let it cool.

To make the Frosting

Step 1: In a mixing bowl, cream the butter and vanilla until smooth.

Step 2: Alternately, mix the sugar with milk a little at a time. Blend well until you reach your desired consistency.

Variation: You can use half a cup of butter and half a cup of shortening in place of 1 cup butter.
Step 3: Get the cooled cake and frost. Slice and serve. Enjoy!

GRANNY’S OLD FASHIONED BUTTER CAKE WITH BUTTER CREAM FROSTING

Rebecca Nothing beats an old fashioned butter cake with buttercream frosting. This cake is one of a kind, it’s moist, sweet, and a keeper. It’s delightful, a crowds favorite, and one… Main Dish Recipes GRANNY’S OLD FASHIONED BUTTER CAKE WITH BUTTER CREAM FROSTING European Print This
Nutrition facts: 200 calories 20 grams fat
Rating: 5.0/5
( 1 voted )

Ingredients

  • 3 cups all-purpose flour
  • 1 teaspoon baking powder
  • 1 teaspoon salt
  • 1/2 teaspoon baking soda
  • 1 cup butter
  • 2 cup of sugar
  • 4 eggs
  • 1 cup buttermilk or cream
  • 2 teaspoons vanilla extract
  • For the Butter Cream Frosting
  • 1 cup butter, soft
  • 1/2 cup milk or cream
  • 2 teaspoons vanilla extract
  • 5 cups powdered sugar

Instructions

Step 1: Prepare the oven. Preheat it to 350 degrees F. And grease and flour a 9 x 13-inch baking pan or bundt pan.

Step 2: In a mixing bowl, sift the flour, baking powder, baking soda, and salt. Set aside.

Step 3: In a different bowl, cream the butter and sugar. Add in the eggs and vanilla. Mix until incorporated.

Step 4: Alternately blend the buttermilk with the flour mixture into the creamed mixture.

Step 5: Pour the blended mixture into the greased and floured pan.

Step 6: Place the pan inside the preheated oven and bake for an hour.

Step 7: Once done, remove from the oven and let it cool.

To make the Frosting
Step 1: In a mixing bowl, cream the butter and vanilla until smooth.

Step 2: Alternately, mix the sugar with milk a little at a time. Blend well until you reach your desired consistency.

Variation: You can use half a cup of butter and half a cup of shortening in place of 1 cup butter.
Step 3: Get the cooled cake and frost. Slice and serve. Enjoy!

June 16, 2020 0 comment
0 FacebookTwitterPinterestEmail
Main Dish Recipes

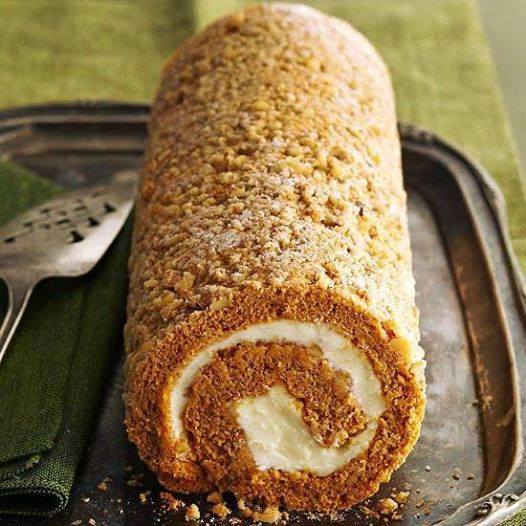
PUMPKIN CAKE ROLL

by Rebecca June 15, 2020
written by Rebecca

A quick and inexpensive dessert that won my family’s heart. This Pumpkin Cake Roll is a classic recipe with delicious pumpkin flavor and a heavenly thick cream cheese filling. A delightful and easy dessert to make that is a keeper!

INGREDIENTS

3 eggs

3/4 cup all-purpose flour+1 cup finely chopped walnuts

2 tsp ground cinnamon+1 tsp baking powder

1 tsp ground ginger+1/2 tsp ground nutmeg

1/2 tsp salt+1 tsp lemon juice

1 cup granulated sugar+2/3 cup canned pumpkin

Powdered sugar

1 8 ounces package cream cheese, softened

1/3 cup butter, softened+1/2 cups powdered sugar

1/2 teaspoon vanilla

HOW TO MAKE PUMPKIN CAKE ROLL

Step 1: Let the eggs settle into room temperature for 30 minutes. Grease a 15 x 10 x 1-inch baking pan and line with waxed paper or parchment paper on the bottom. Set aside.

Step 2: Stir the flour, cinnamon, baking powder, ginger, salt, and nutmeg in a small bowl.

Step 3: Prepare the oven. Preheat it to 375 degrees F.

Step 4: Crack the eggs into a large mixing bowl and beat using an electric mixer on high for about 5 minutes or until thick.

Step 5: Slowly add the granulated sugar. Mix on medium speed until light and fluffy.

Step 6: Mix in the pumpkin and lemon juice.

Step 7: On low speed, mix in the flour mixture until just combined.

Step 8: Evenly spread the batter into the prepared baking dish and top with walnuts.

Step 9: Place inside the preheated oven and bake for about 15 minutes or until the cake is bouncy.

Step 10: Remove from the oven and transfer the cake onto a clean kitchen towel that has been sprinkled with powdered sugar. Then, remove the wax paper and roll the towel with the cake into a spiral. Cool the cake on a wire rack.

Step 11: To make the filling, combine the cream cheese, butter, and vanilla in a medium mixing bowl. Beat on high until smooth. And constantly beat in 1 1/2 cups of powdered sugar.

Step 12: Now, unroll the cooled cake and remove the towel. Spread the filling an inch from the edges. After frosting, roll up the cake and trim the edges. Cover and place in the fridge to chill for at least 2 to 48 hours.

PUMPKIN CAKE ROLL

Rebecca A quick and inexpensive dessert that won my family’s heart. This Pumpkin Cake Roll is a classic recipe with delicious pumpkin flavor and a heavenly thick cream cheese filling. A… Main Dish Recipes PUMPKIN CAKE ROLL European Print This
Nutrition facts: 200 calories 20 grams fat
Rating: 5.0/5
( 1 voted )

Ingredients

  • 3 eggs
  • 3/4 cup all-purpose flour+1 cup finely chopped walnuts
  • 2 tsp ground cinnamon+1 tsp baking powder
  • 1 tsp ground ginger+1/2 tsp ground nutmeg
  • 1/2 tsp salt+1 tsp lemon juice
  • 1 cup granulated sugar+2/3 cup canned pumpkin
  • Powdered sugar
  • 1 8 ounces package cream cheese, softened
  • 1/3 cup butter, softened+1/2 cups powdered sugar
  • 1/2 teaspoon vanilla

Instructions

Step 1: Let the eggs settle into room temperature for 30 minutes. Grease a 15 x 10 x 1-inch baking pan and line with waxed paper or parchment paper on the bottom. Set aside.

Step 2: Stir the flour, cinnamon, baking powder, ginger, salt, and nutmeg in a small bowl.

Step 3: Prepare the oven. Preheat it to 375 degrees F.

Step 4: Crack the eggs into a large mixing bowl and beat using an electric mixer on high for about 5 minutes or until thick.

Step 5: Slowly add the granulated sugar. Mix on medium speed until light and fluffy.

Step 6: Mix in the pumpkin and lemon juice.

Step 7: On low speed, mix in the flour mixture until just combined.

Step 8: Evenly spread the batter into the prepared baking dish and top with walnuts.

Step 9: Place inside the preheated oven and bake for about 15 minutes or until the cake is bouncy.

Step 10: Remove from the oven and transfer the cake onto a clean kitchen towel that has been sprinkled with powdered sugar. Then, remove the wax paper and roll the towel with the cake into a spiral. Cool the cake on a wire rack.

Step 11: To make the filling, combine the cream cheese, butter, and vanilla in a medium mixing bowl. Beat on high until smooth. And constantly beat in 1 1/2 cups of powdered sugar.

Step 12: Now, unroll the cooled cake and remove the towel. Spread the filling an inch from the edges. After frosting, roll up the cake and trim the edges. Cover and place in the fridge to chill for at least 2 to 48 hours.

June 15, 2020 0 comment
0 FacebookTwitterPinterestEmail
Newer Posts
Older Posts

Popular Posts

  • 1

    Crispy Crunchy Parmesan Potatoes

    March 21, 2020
  • 2

    CROCK POT SMOTHERED PORK CHOPS

    March 21, 2020
  • Facebook
  • Twitter

@2019 - All Right Reserved.


Back To Top