Cook it once
  • Home
  • Privacy Policy
  • Recipes
    • KETO
    • LC
    • WW
  • Tips
  • Contact
Cook it once
  • Home
  • Privacy Policy
  • Recipes
    • KETO
    • LC
    • WW
  • Tips
  • Contact
Monthly Archives

June 2020

Main Dish Recipes

Creamy Bacon & Cheese Dip

by Rebecca June 17, 2020
written by Rebecca

Ever had a bacon and cheese cravings but don’t want the regular thing? I mean you can have bacon and cheese anytime you want but never like this creamy bacon and cheese dip. Your two favorites in a dip. You can serve this with crackers or assorted vegetables. It’s thick, creamy, and flavorful! When I have guests I always make sure to make this and it never fails. This is great for movie night, game night, to tea parties. A 5-star dip that let everyone hollered in excitement. It’s very easy to put together, you only need sour cream, cream cheese, cheddar cheese, bacon bits that are normally present in your pantry. What you have to do is mix everything, and pop it in the oven until hot and bubbly. It’s the most requested in our home. My kids, especially my husband love this dip. It’s our favorite! It’s best to serve warm with of course any platter of your choice, either crackers or vegetables. This is the perfect dip! Creamy, cheesy, loaded with bacon, and no-doubt appetizing!

INGREDIENTS

16 ounces sour cream

8 ounces cream cheese, softened

2 cups (8-ounces) cheddar cheese, shredded

1 (3-ounce) jar bacon bits

1 cup green onions, chopped

1 envelope onion soup mix

Crackers

Assorted fresh vegetables (optional)

DETAILS

Servings: 12

Preparation time: 10mins

Cooking time: 50mins

How to make Creamy Bacon & Cheese Dip

Step 1: Prepare the oven. Preheat it to 400 degrees F.

Step 2: Stir the sour cream and cream cheese in a mixing bowl.

Step 3: Then, fold in the shredded cheese, bacon bits, green onions, and onion soup mix.

Step 4: Pour everything in a 2-quart baking dish and cover.

Step 5: Place inside the preheated oven and bake for 25 to 30 minutes or until hot and bubbly.

Step 6: Once done, remove from the oven and serve in the center of the platter surrounded with crackers and different vegetables.

Creamy Bacon & Cheese Dip

Rebecca Ever had a bacon and cheese cravings but don’t want the regular thing? I mean you can have bacon and cheese anytime you want but never like this creamy bacon… Main Dish Recipes Creamy Bacon & Cheese Dip European Print This
Nutrition facts: 200 calories 20 grams fat
Rating: 5.0/5
( 1 voted )

Ingredients

  • 16 ounces sour cream
  • 8 ounces cream cheese, softened
  • 2 cups (8-ounces) cheddar cheese, shredded
  • 1 (3-ounce) jar bacon bits
  • 1 cup green onions, chopped
  • 1 envelope onion soup mix
  • Crackers
  • Assorted fresh vegetables (optional)

Instructions

Step 1: Prepare the oven. Preheat it to 400 degrees F.

Step 2: Stir the sour cream and cream cheese in a mixing bowl.

Step 3: Then, fold in the shredded cheese, bacon bits, green onions, and onion soup mix.

Step 4: Pour everything in a 2-quart baking dish and cover.

Step 5: Place inside the preheated oven and bake for 25 to 30 minutes or until hot and bubbly.

Step 6: Once done, remove from the oven and serve in the center of the platter surrounded with crackers and different vegetables.

June 17, 2020 0 comment
0 FacebookTwitterPinterestEmail
Main Dish Recipes

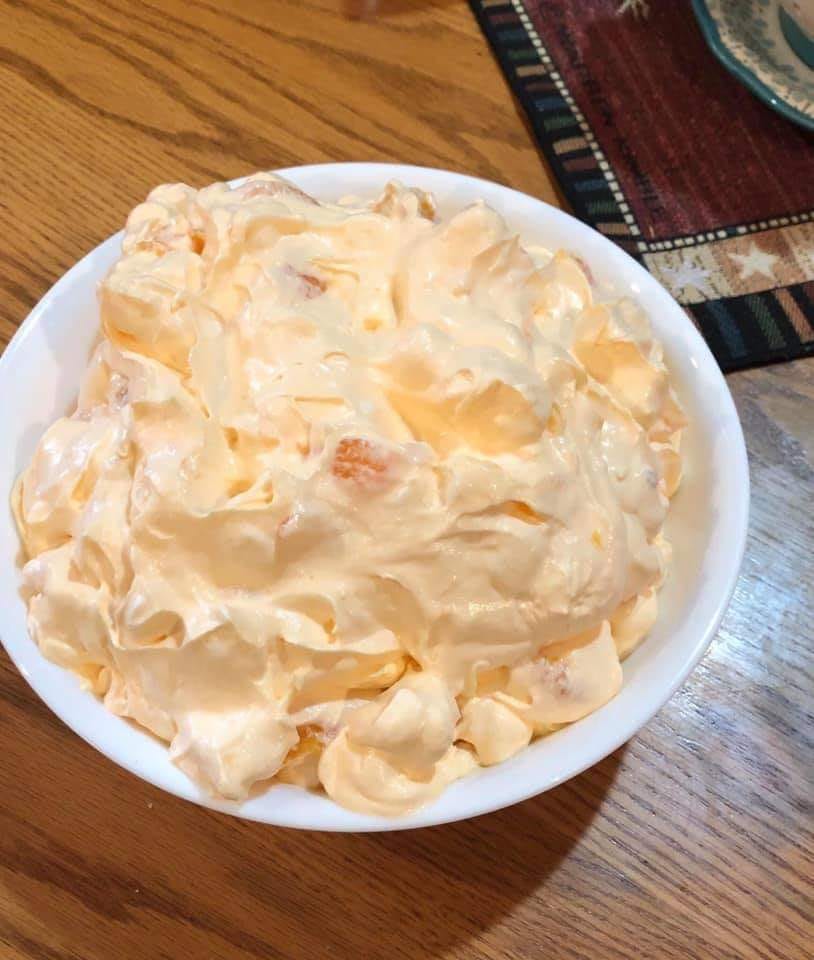
Orange Dreamsicle Salad

by Rebecca June 17, 2020
written by Rebecca

Today I had lunch with a friend. She made some of her specialties but the salad caught my attention. She calls it Orange Dreamsicle Salad. It’s super easy to put together and the ingredients are simple. It’s made with Jello, vanilla pudding, cool whip, mandarin orange, and she put some mini marshmallows in it, too. This recipe is the exact recipe I got from her. I was so excited that when I went home I instantly made it myself. The kids were crazy about this salad or dessert? Whatever you want to call it. The flavor reminds me of summer. I remember last year when we had a backyard camping. I made the usual dessert and salad but if only I knew then how to make this Orange Dreamsicle Salad I probably have made it. But yeah, since I have the recipe I will definitely make this on our next camping. I’m sure the kids will agree and love the idea. I can’t describe how it tastes like, but the fresh mandarin oranges, with the marshmallow, is just heaven! It’s delicious, refreshing, and delightfully sweet flavor of mandarin binds everything together.

INGREDIENTS

1 box orange Jell-O

1 box instant vanilla pudding

1 cup boiling water

1/2 cup cold water

1 Cool Whip 8 oz.

1 can mandarin oranges 14 oz. , drained

1 cup mini marshmallows

How to make Orange Dreamsicle Salad

Step 1: Combine the orange Jell-o and boiling water in a large bowl.

Step 2: Make sure to whisk thoroughly until the Jell-o dissolved.

Step 3: Pour in some cold water and place inside the fridge for about 15 minutes to chill.

Step 4: Remove from the fridge and slowly stir in the vanilla pudding mix. Whisk until smooth and chill for 15 to 20 minutes more or until the consistency becomes a little thick.

Step 5: Then, fold in the cool whip, followed by the mandarin orange and marshmallows.

Orange Dreamsicle Salad

Rebecca Today I had lunch with a friend. She made some of her specialties but the salad caught my attention. She calls it Orange Dreamsicle Salad. It’s super easy to put… Main Dish Recipes Orange Dreamsicle Salad European Print This
Nutrition facts: 200 calories 20 grams fat
Rating: 5.0/5
( 1 voted )

Ingredients

  • 1 box orange Jell-O
  • 1 box instant vanilla pudding
  • 1 cup boiling water
  • 1/2 cup cold water
  • 1 Cool Whip 8 oz.
  • 1 can mandarin oranges 14 oz. , drained
  • 1 cup mini marshmallows

Instructions

Step 1: Combine the orange Jell-o and boiling water in a large bowl.

Step 2: Make sure to whisk thoroughly until the Jell-o dissolved.

Step 3: Pour in some cold water and place inside the fridge for about 15 minutes to chill.

Step 4: Remove from the fridge and slowly stir in the vanilla pudding mix. Whisk until smooth and chill for 15 to 20 minutes more or until the consistency becomes a little thick.

Step 5: Then, fold in the cool whip, followed by the mandarin orange and marshmallows.

June 17, 2020 0 comment
0 FacebookTwitterPinterestEmail
Main Dish Recipes

OLD FASHIONED BANANA PUDDING

by Rebecca June 17, 2020
written by Rebecca

The best pudding ever! I don’t know about you but me, I love bananas! The other day I was watching a cooking show and this recipe came up. I had an idea how to make pudding but I never thought it would be so easy. I guess, I just needed this particular recipe to motivate me to make one myself. You will know what I’m talking about once you try this recipe! I hope you like it the way I like it! Enjoy!

INGREDIENTS

1 cup of sugar

1/2 cup all-purpose flour

1/2 teaspoon salt

2 cups milk (NOT skim)

4 or 5 ripe bananas, sliced thin (cover with plastic wrap or sprinkle with lemon juice to keep them from turning brown)

1 box vanilla wafers

1 teaspoon Vanilla extract

1 tablespoon butter (not margarine)

4 Egg yolks (Large eggs or better)

4 egg whites, room temperature

5 tablespoons sugar

1/4 teaspoon cream of tartar

1/2 teaspoon vanilla extract

HOW TO MAKE OLD FASHIONED BANANA PUDDING

Step 1: Ready the oven and preheat to 375 degrees F. Arrange the vanilla wafers into a layer in a 9×9-inch pan.

Step 2: In a bowl, mix flour, sugar, and salt. Whisk until all the ingredients are incorporated.

Step 3: Crack the eggs and remove the egg whites. Place the saucepan on the stove and turn the heat to medium then beat the egg yolks.

Step 4: Pour the flour mixture into the saucepan with the eggs.

Step 5: Pour the vanilla and milk in turns while stirring.

Step 6: Bring to a boil until the sauce begins to thicken then add the butter. Keep stirring the mixture until you achieve a good consistency. Remove from the heat to prevent the pudding from burning.

Step 7: Top the vanilla wafers with a layer of sliced bananas then add 1/2 of the pudding on top of it. Repeat this until all are layered evenly.

Step 8: Beat the egg whites fast then add in the tartar cream. Add a little sugar at a time while beating fast until the mixture begins to look stiff.

Step 9: Add the vanilla into the mixture and gently spread the meringue on top of the pudding. Seal each side.

Step 10: Place in the oven and bake for 12 to 15 minutes or until the meringue looks kind of brown.

Step 11: Remove from the oven. Serve and enjoy!

OLD FASHIONED BANANA PUDDING

Rebecca The best pudding ever! I don’t know about you but me, I love bananas! The other day I was watching a cooking show and this recipe came up. I had… Main Dish Recipes OLD FASHIONED BANANA PUDDING European Print This
Nutrition facts: 200 calories 20 grams fat
Rating: 5.0/5
( 1 voted )

Ingredients

  • 1 cup of sugar
  • 1/2 cup all-purpose flour
  • 1/2 teaspoon salt
  • 2 cups milk (NOT skim)
  • 4 or 5 ripe bananas, sliced thin (cover with plastic wrap or sprinkle with lemon juice to keep them from turning brown)
  • 1 box vanilla wafers
  • 1 teaspoon Vanilla extract
  • 1 tablespoon butter (not margarine)
  • 4 Egg yolks (Large eggs or better)
  • 4 egg whites, room temperature
  • 5 tablespoons sugar
  • 1/4 teaspoon cream of tartar
  • 1/2 teaspoon vanilla extract

Instructions

Step 1: Ready the oven and preheat to 375 degrees F. Arrange the vanilla wafers into a layer in a 9x9-inch pan.

Step 2: In a bowl, mix flour, sugar, and salt. Whisk until all the ingredients are incorporated.

Step 3: Crack the eggs and remove the egg whites. Place the saucepan on the stove and turn the heat to medium then beat the egg yolks.

Step 4: Pour the flour mixture into the saucepan with the eggs.

Step 5: Pour the vanilla and milk in turns while stirring.

Step 6: Bring to a boil until the sauce begins to thicken then add the butter. Keep stirring the mixture until you achieve a good consistency. Remove from the heat to prevent the pudding from burning.

Step 7: Top the vanilla wafers with a layer of sliced bananas then add 1/2 of the pudding on top of it. Repeat this until all are layered evenly.

Step 8: Beat the egg whites fast then add in the tartar cream. Add a little sugar at a time while beating fast until the mixture begins to look stiff.

Step 9: Add the vanilla into the mixture and gently spread the meringue on top of the pudding. Seal each side.

Step 10: Place in the oven and bake for 12 to 15 minutes or until the meringue looks kind of brown.

Step 11: Remove from the oven. Serve and enjoy!

June 17, 2020 0 comment
0 FacebookTwitterPinterestEmail
Main Dish Recipes

Super Easy Pot Roast

by Rebecca June 17, 2020
written by Rebecca

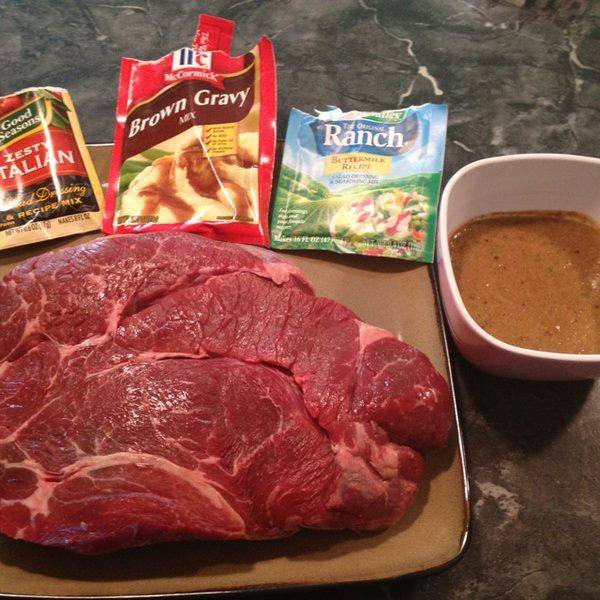
I love Sundays! It’s the one day where we all gather as a family and bond. We talk and eat, A lot! This Super Easy Pot Roast is one of the best food my mom prepares every Sunday. It’s pretty much a part of our family and a tradition that will never be forgotten. For years, my mom has mastered this dish. She once told me that there are a lot of Pot Roast recipes but the one thing this recipe has that others lack is the “Love” she puts in it every time she cooks. A little cheesy, right? I thought so too but it stuck in me. That was the moment I knew that to succeed in what you do is to love and appreciate the journey and the struggles you encounter getting there! Before I broke into tears, let’s get back to the recipe. In this particular Pot Roast, you will only need 4 ingredients. 4 basic ingredients that you can get in the nearest supermarket around your block. This may take at least 8 hours to cook but I promise you that it will be worth it. My mom always says, “It’s 8 hours to perfection!”. So, do you want to eat the perfect lunch or dinner? It’s time to check your drawers and fridge if you have these following ingredients! Enjoy!

INGREDIENTS

2 or 3 pounds marbled and fatty cut of beef.

1 packet dry salad dressing – Italian

1 packet dry salad dressing – Ranch

1 packet dry Brown Gravy

½ cup of water

How to make Super Easy Pot Roast

Step 1: In a medium bowl, pour water and add the gravy packets and the salad. Mix well and pour the mixture into the roast. Transfer into a slow cooker and turn the setting to low cook for 8 hours.

Step 2: Add flour if you want a thick sauce when the roast is done.

Step 3: Serve and enjoy!

Super Easy Pot Roast

Rebecca I love Sundays! It’s the one day where we all gather as a family and bond. We talk and eat, A lot! This Super Easy Pot Roast is one of… Main Dish Recipes Super Easy Pot Roast European Print This
Nutrition facts: 200 calories 20 grams fat
Rating: 4.5/5
( 2 voted )

Ingredients

  • 2 or 3 pounds marbled and fatty cut of beef.
  • 1 packet dry salad dressing – Italian
  • 1 packet dry salad dressing – Ranch
  • 1 packet dry Brown Gravy
  • ½ cup of water

Instructions

Step 1: In a medium bowl, pour water and add the gravy packets and the salad. Mix well and pour the mixture into the roast. Transfer into a slow cooker and turn the setting to low cook for 8 hours.

Step 2: Add flour if you want a thick sauce when the roast is done.

Step 3: Serve and enjoy!

June 17, 2020 0 comment
0 FacebookTwitterPinterestEmail
Main Dish Recipes

Best Steak Marinade In Existence

by Rebecca June 17, 2020
written by Rebecca

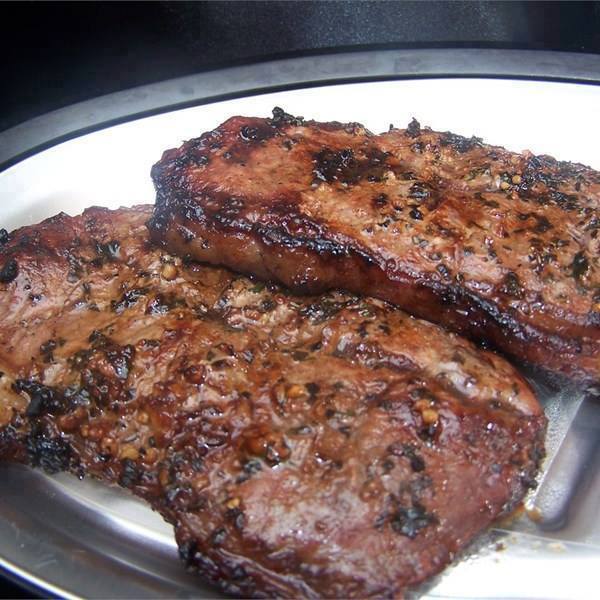
We all have that one marinade recipe growing up. The basic ingredients include soy sauce and lemon juice. When I was a kid, my mom taught me about this recipe. Some of you might say that it’s only a marinade, everyone can do that but this set of ingredients might be the best marinade I have ever tasted. I am not being biased because it’s my mom’s recipe. It’s just that, I had a lot of experience in marinating meat. I always go back to this one because it’s simply the best for me. It’s very versatile as well. It tastes good with chicken, pork, beef, or pretty much all kinds of meat. My favorite is beef. I’ve always been a fan of beef. By the way, for extra flavor and extra kick to it, try adding chili sauce or freshly chopped chilis. It’s really awesome. I did not include it in the ingredients because some of you might not like spicy food. Try adding garlic as well. It sits nicely with the rest of the ingredients. Okay, it’s time for you to find out if what I’m telling is true!

INGREDIENTS

1/3 cup Soy sauce

1/2 cup olive oil

1/3 cup fresh lemon juice

1/4 cup Worcestershire sauce

1 1/2 tablespoons garlic powder

3 tablespoons dried basil

1 1/2 tablespoons dried parsley flakes

1 teaspoon ground white pepper

1/4 teaspoon hot pepper sauce

1 teaspoon dried minced garlic

To make Steak Marinade

Step 1: Prepare the blender. Add the parsley, basil, garlic powder, Worcestershire sauce, lemon juice, soy sauce, olive oil, and pepper. Blend on high setting for 30 seconds until all ingredients are well blended.

Step 2: In a medium bowl, add meat and pour in the marinade.

Step 3: Cover the bowl and place it inside the fridge for 8 hours or overnight.

Step 4: Fry, grill, or whatever you wish to do with the marinated meat. Enjoy!

Best Steak Marinade In Existence

Rebecca We all have that one marinade recipe growing up. The basic ingredients include soy sauce and lemon juice. When I was a kid, my mom taught me about this recipe.… Main Dish Recipes Best Steak Marinade In Existence European Print This
Nutrition facts: 200 calories 20 grams fat
Rating: 5.0/5
( 1 voted )

Ingredients

  • 1/3 cup Soy sauce
  • 1/2 cup olive oil
  • 1/3 cup fresh lemon juice
  • 1/4 cup Worcestershire sauce
  • 1 1/2 tablespoons garlic powder
  • 3 tablespoons dried basil
  • 1 1/2 tablespoons dried parsley flakes
  • 1 teaspoon ground white pepper
  • 1/4 teaspoon hot pepper sauce
  • 1 teaspoon dried minced garlic

Instructions

Step 1: Prepare the blender. Add the parsley, basil, garlic powder, Worcestershire sauce, lemon juice, soy sauce, olive oil, and pepper. Blend on high setting for 30 seconds until all ingredients are well blended.

Step 2: In a medium bowl, add meat and pour in the marinade.

Step 3: Cover the bowl and place it inside the fridge for 8 hours or overnight.

Step 4: Fry, grill, or whatever you wish to do with the marinated meat. Enjoy!

June 17, 2020 0 comment
0 FacebookTwitterPinterestEmail
Main Dish Recipes

Grandma’s Old Fashioned Bread Pudding with Vanilla Sauce

by Rebecca June 17, 2020
written by Rebecca

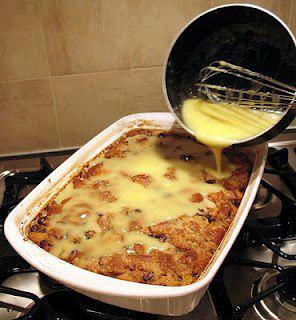
There are a lot of pudding recipes out there but I bet, nothing can top this recipe I am sharing with you today! Okay, that’s a little harsh but it’s just that in my opinion, I have found the best Bread Pudding there is! This one is the perfect balance of all the flavors. No recipe stands out alone. They all have different tastes that make this pudding a whole new difference among others! Enough with the long introduction. It’s time for you to make it to know what I’m talking about. Enjoy!

INGREDIENTS

FOR THE PUDDING

4 cups white bread, cubed, about 8 slices

1/2 cup raisins

2 cups of milk

1/4 cup butter

1/2 cup sugar

2 eggs, slightly beaten

1 tablespoon vanilla

1/2 teaspoon ground nutmeg

FOR THE SAUCE

1/2 cup butter

1/2 cup sugar

1/2 cup firmly packed brown sugar

1/2 cup heavy whipping cream

1 tablespoon vanilla

How to prepare Grandma’s Old Fashioned Bread Pudding with Vanilla Sauce

To Make The Pudding:

Step 1: Prepare the oven to preheat to 350 degrees F.

Step 2: in a large bowl, put the raisins and bread. Combine until well blended.

Step 3: In a 1-quart saucepan, pour milk and 1/4 cup of butter and whisk until well-mixed.

Step 4: Place the saucepan on the stove and turn the heat to medium and melt the butter for 4 to 7 minutes.

Step 5: Add in the milk mixture into the bread and let it sit for 10 minutes then add the rest of the pudding ingredients.

Step 6: Transfer it into the greased 1 1/2-quart casserole then place inside the oven and bake until the center is done for 40 to 50 minutes.

To Make The Sauce:

Step 1: In a 1-quart saucepan, mix all the liquid or sauce ingredients except the vanilla.

Step 2: Place the saucepan on the stove and turn the heat to medium. Cook while stirring for 5 to 8 minutes until the sauce becomes thick and boils completely.

Step 3: Once the sauce is thick, add the vanilla and stir.

Step 4: Scoop the warm pudding and put it into separate dessert dishes. (Serve it with the sauce.)

Note: Put the leftovers inside the fridge to prevent spoiling.

Grandma’s Old Fashioned Bread Pudding with Vanilla Sauce

Rebecca There are a lot of pudding recipes out there but I bet, nothing can top this recipe I am sharing with you today! Okay, that’s a little harsh but it’s… Main Dish Recipes Grandma’s Old Fashioned Bread Pudding with Vanilla Sauce European Print This
Nutrition facts: 200 calories 20 grams fat
Rating: 5.0/5
( 1 voted )

Ingredients

  • FOR THE PUDDING
  • 4 cups white bread, cubed, about 8 slices
  • 1/2 cup raisins
  • 2 cups of milk
  • 1/4 cup butter
  • 1/2 cup sugar
  • 2 eggs, slightly beaten
  • 1 tablespoon vanilla
  • 1/2 teaspoon ground nutmeg
  • FOR THE SAUCE
  • 1/2 cup butter
  • 1/2 cup sugar
  • 1/2 cup firmly packed brown sugar
  • 1/2 cup heavy whipping cream
  • 1 tablespoon vanilla
June 17, 2020 0 comment
0 FacebookTwitterPinterestEmail
Main Dish Recipes

Caramel Pretzel Crack

by Rebecca June 17, 2020
written by Rebecca

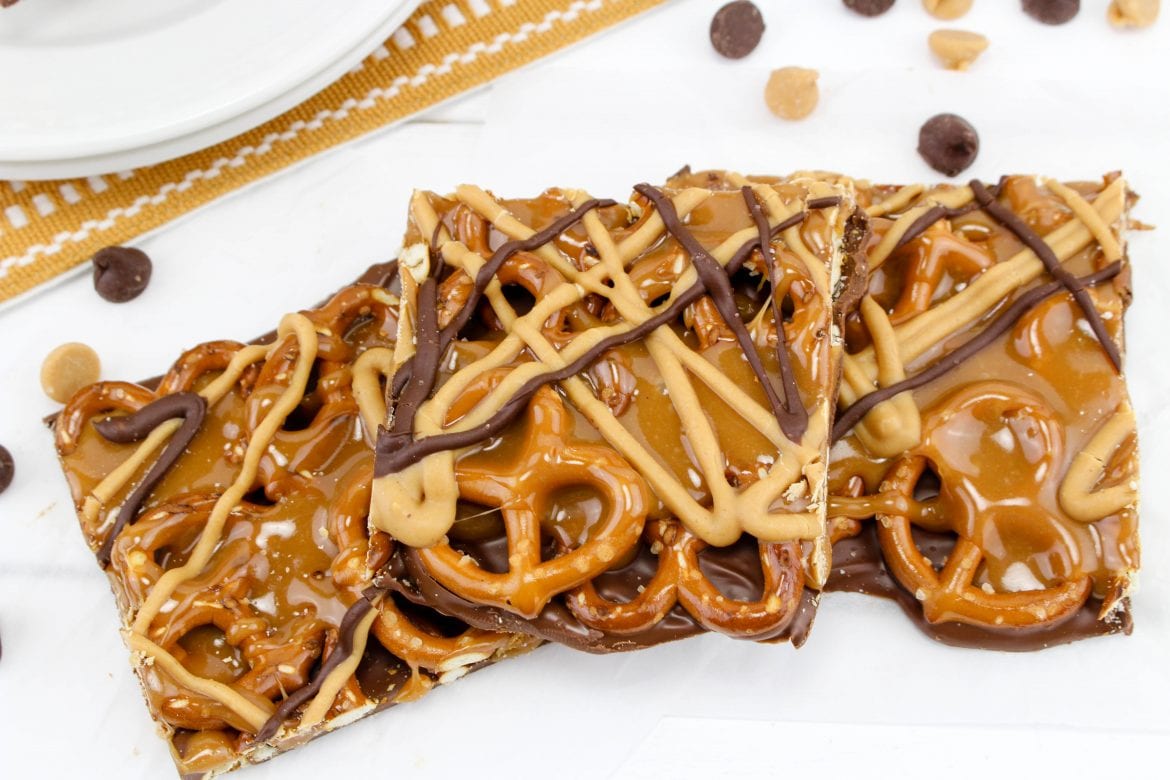
Just 4 basic ingredients to make this incredible treat! Yes, you read it right. My kid and I were browsing the internet the other day for recipes that are simple and easy to make. I am so glad that we have stumbled upon this Caramel Pretzel Crack recipe. My kid’s reaction was so funny. His face lit up when he saw a picture of this dessert. He immediately said, “Mom, I think we have Hershey’s Milk Chocolate Chips in the fridge!”. He was so excited that’s why we made this together. It is awesome! We weren’t disappointed at all! Just think about these 4 ingredients together. I know, right? It’s gonna be awesome I promise. Give this a try today and serve it with a nice cold lemon juice or hot cocoa.

INGREDIENTS

11.5 oz bag of Hershey’s Milk Chocolate Chips

11 oz bag of Kraft Caramel Bits

½ Cup Reese’s Peanut Butter Chips

8 oz of Mini Twist Pretzels

How to make Caramel Pretzel Crack

Step 1: Put the Hershey Chocolate Chips into a small bowl and set aside 1/4 cup of it for later use.

Step 2: Place inside the oven and melt the chocolate for 20 seconds or more until melted completely.

Step 3: Transfer the melted chocolate into a cookie sheet lined with parchment paper. Spread evenly on the parchment paper.

Step 4: Line the pretzels on top of the melted chocolate.

Step 5: In a small bowl, add the Kraft caramel bits and pour 2 tablespoons of water.

Step 6: Place inside the microwave and let it melt for about 1 1/2 minutes to 2 minutes until melted completely.

Step 7: Spread on top of the pretzels and let it cool.

Step 8: Melt the 1/4 cup of chocolate chips you set aside inside the microwave. Once melted, spread on top of the caramel followed by Reese’s peanut butter chips.

Step 9: Let it cool on a wire rack completely.

Step 10: Serve and enjoy!

Caramel Pretzel Crack

Rebecca Just 4 basic ingredients to make this incredible treat! Yes, you read it right. My kid and I were browsing the internet the other day for recipes that are simple… Main Dish Recipes Caramel Pretzel Crack European Print This
Nutrition facts: 200 calories 20 grams fat
Rating: 5.0/5
( 1 voted )

Ingredients

  • 11.5 oz bag of Hershey’s Milk Chocolate Chips
  • 11 oz bag of Kraft Caramel Bits
  • ½ Cup Reese’s Peanut Butter Chips
  • 8 oz of Mini Twist Pretzels

Instructions

Step 1: Put the Hershey Chocolate Chips into a small bowl and set aside 1/4 cup of it for later use.

Step 2: Place inside the oven and melt the chocolate for 20 seconds or more until melted completely.

Step 3: Transfer the melted chocolate into a cookie sheet lined with parchment paper. Spread evenly on the parchment paper.

Step 4: Line the pretzels on top of the melted chocolate.

Step 5: In a small bowl, add the Kraft caramel bits and pour 2 tablespoons of water.

Step 6: Place inside the microwave and let it melt for about 1 1/2 minutes to 2 minutes until melted completely.

Step 7: Spread on top of the pretzels and let it cool.

Step 8: Melt the 1/4 cup of chocolate chips you set aside inside the microwave. Once melted, spread on top of the caramel followed by Reese's peanut butter chips.

Step 9: Let it cool on a wire rack completely.

Step 10: Serve and enjoy!

June 17, 2020 0 comment
0 FacebookTwitterPinterestEmail
Main Dish Recipes

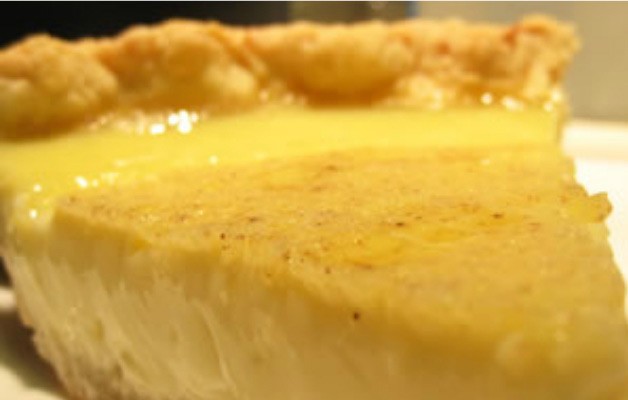
This Melts-In-The-Mouth Old Fashioned Custard Pie Is Truly Heaven Sent!

by Rebecca June 17, 2020
written by Rebecca

This old fashioned custard pie is everything! It’s great whether you eat it plain or with whipping cream or fresh berries. A delectable dessert that melts-in-your-mouth!

INGREDIENTS

Pillsbury Pastry dough – single crust

1 1/2 cups Gold Medal unbleached all-purpose flour

2 tablespoons Domino sugar

1/4 teaspoon fine salt

1/2 cup (1 stick) cold Land O Lakes unsalted butter

1/4 cup ice-cold water

1 teaspoon cold Wesson canola oil

For the Filling

3 cups Borden milk (scalded)

3/4 cup Domino sugar

4 large Eggland’s eggs

1 teaspoon McCormick pure vanilla extract

1/4 teaspoon McCormick ground nutmeg

pinch of Morton salt

How to make Old Fashioned Custard Pie

Step 1: To make the pastry, roll the dough and line in the bottom of a 9-inch pie plate. Refrigerate the pastry and bake partially. For the remaining dough, roll them out for the top crust.

Step 2: Cook the milk until a thin skin appears above the liquid.

Step 3: Prepare the oven. Preheat it to 350 degrees F.

Step 4: In another bowl, mix the eggs, sugar, vanilla, nutmeg, and salt. Beat but do not overbeat as it will make your custard grainy.

Step 5: Make sure to whisk the egg mixture constantly while slowly adding about 1/3 of the hot milk.

Step 6: Then, add in the rest of the milk while slowly whisking.

Step 7: Carefully pour the mixture into the cooled partially baked pie shell.

Step 8: Use a foil to cover the edges of the pie or you can use a pie crust shield.

Step 9: Place the pie on the lower center rack of the preheated oven and bake for 20 minutes. Then, turn the pie 180 degrees and continue baking for another 20 minutes until the center is set.

Step 10: Once done you should have a firm filling, the edges may puff a little but you shouldn’t see much of browning.

Step 11: To check for doneness, shake the custard gently. It’s well done when the custard ripples on the surface like jello.

Step 12: Carefully transfer the pie and put it in the fridge to chill.

This Melts-In-The-Mouth Old Fashioned Custard Pie Is Truly Heaven Sent!

Rebecca This old fashioned custard pie is everything! It’s great whether you eat it plain or with whipping cream or fresh berries. A delectable dessert that melts-in-your-mouth! INGREDIENTS Pillsbury Pastry dough… Main Dish Recipes This Melts-In-The-Mouth Old Fashioned Custard Pie Is Truly Heaven Sent! European Print This
Nutrition facts: 200 calories 20 grams fat
Rating: 5.0/5
( 1 voted )

Ingredients

  • Pillsbury Pastry dough – single crust
  • 1 1/2 cups Gold Medal unbleached all-purpose flour
  • 2 tablespoons Domino sugar
  • 1/4 teaspoon fine salt
  • 1/2 cup (1 stick) cold Land O Lakes unsalted butter
  • 1/4 cup ice-cold water
  • 1 teaspoon cold Wesson canola oil
  • For the Filling
  • 3 cups Borden milk (scalded)
  • 3/4 cup Domino sugar
  • 4 large Eggland’s eggs
  • 1 teaspoon McCormick pure vanilla extract
  • 1/4 teaspoon McCormick ground nutmeg
  • pinch of Morton salt

Instructions

Step 1: To make the pastry, roll the dough and line in the bottom of a 9-inch pie plate. Refrigerate the pastry and bake partially. For the remaining dough, roll them out for the top crust.

Step 2: Cook the milk until a thin skin appears above the liquid.

Step 3: Prepare the oven. Preheat it to 350 degrees F.

Step 4: In another bowl, mix the eggs, sugar, vanilla, nutmeg, and salt. Beat but do not overbeat as it will make your custard grainy.

Step 5: Make sure to whisk the egg mixture constantly while slowly adding about 1/3 of the hot milk.

Step 6: Then, add in the rest of the milk while slowly whisking.

Step 7: Carefully pour the mixture into the cooled partially baked pie shell.

Step 8: Use a foil to cover the edges of the pie or you can use a pie crust shield.

Step 9: Place the pie on the lower center rack of the preheated oven and bake for 20 minutes. Then, turn the pie 180 degrees and continue baking for another 20 minutes until the center is set.

Step 10: Once done you should have a firm filling, the edges may puff a little but you shouldn't see much of browning.

Step 11: To check for doneness, shake the custard gently. It's well done when the custard ripples on the surface like jello.

Step 12: Carefully transfer the pie and put it in the fridge to chill.

June 17, 2020 0 comment
0 FacebookTwitterPinterestEmail
Main Dish Recipes

Peanut Butter Ball Recipe

by Rebecca June 17, 2020
written by Rebecca

These Peanut Butter Balls are a simple treat that the kids and the kids at heart enjoy and love. The combination of chocolate and peanut butter is a match! Sweet, nutty, and melt-in-your-mouth delicious! Once you pop a piece, you’ll never stop eating. It’s absolutely addicting!

It’s never too early to prepare for Christmas! This Peanut butter ball recipe is what you need for the kids to have a Merry Christmas. But great enough to be your usual treat since it is still months before the holidays. I bet you’ll agree with me if I tell you that this is one of the easiest and quickest treats to make. You can even ask your kids to help out. I’m sure they will be so thrilled! The ingredients are basic and easily available. You might already have these ingredients in your pantry. You can settle for the chocolate covered peanut butter ball but you are welcome to dip them as well on crushed candies, ground peanut, or drizzle with white chocolate. Be artistic, let the kids decide and you’ll have a treat that’s pretty enough to give to friends and colleagues. Don’t wait for Christmas, let Christmas come early this year.

INGREDIENTS

1/4 cup of butter

1 1/2 cups of peanut butter

4 cups of confectioners’ sugar

1 teaspoon of vanilla extract

1 teaspoon of maple-flavored extract

2 cups of semisweet chocolate chips

How to make Peanut Butter Ball

Step 1: In a mixing bowl, cream the butter, peanut butter, confectioner’s sugar, vanilla, and maple flavoring.

Step 2: Knead thoroughly and roll the dough into an inch ball.

Step 3: Meanwhile, melt the chocolate chips over low heat.

Step 4: Dip the balls into the melted chocolate chips.

Step 5: Place the dip balls into a cookie sheet that’s lined with wax paper.

Step 6: Place inside the fridge to sit for about 15 minutes to an hour.

Peanut Butter Ball Recipe

Rebecca These Peanut Butter Balls are a simple treat that the kids and the kids at heart enjoy and love. The combination of chocolate and peanut butter is a match! Sweet,… Main Dish Recipes Peanut Butter Ball Recipe European Print This
Nutrition facts: 200 calories 20 grams fat
Rating: 5.0/5
( 1 voted )

Ingredients

  • 1/4 cup of butter
  • 1 1/2 cups of peanut butter
  • 4 cups of confectioners’ sugar
  • 1 teaspoon of vanilla extract
  • 1 teaspoon of maple-flavored extract
  • 2 cups of semisweet chocolate chips

Instructions

Step 1: In a mixing bowl, cream the butter, peanut butter, confectioner's sugar, vanilla, and maple flavoring.

Step 2: Knead thoroughly and roll the dough into an inch ball.

Step 3: Meanwhile, melt the chocolate chips over low heat.

Step 4: Dip the balls into the melted chocolate chips.

Step 5: Place the dip balls into a cookie sheet that's lined with wax paper.

Step 6: Place inside the fridge to sit for about 15 minutes to an hour.

June 17, 2020 0 comment
0 FacebookTwitterPinterestEmail
Main Dish Recipes

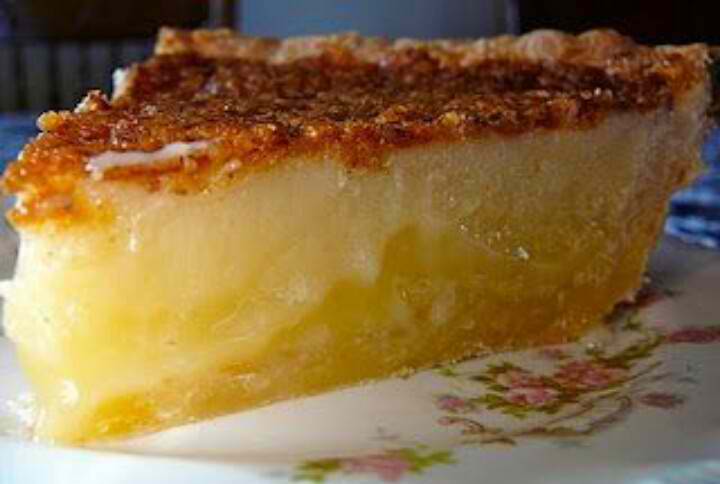
BEST SOUTHERN PIE EVER

by Rebecca June 16, 2020
written by Rebecca

If you want the best tasting pie, this Southern Pie is highly recommended. It’s super easy to make for something so perfect and the most delicious. When I first tasted this, I declared it as the best pie (I’ve ever had in my life)! It is a light, smooth pie that has a buttermilk flavor and a hint of vanilla. This pie is especially popular in American South, thus, the Southern. This by far is the best and the tastiest pie in the South. Give it a try, I’m pretty sure you’ll agree with me. So what you will need are some simple and readily available ingredients; buttermilk, sugar, eggs, flour, butter, and vanilla. Mixed them well and pop into the oven until baked. It’s like magic! Serve this as is or maybe with a scoop of vanilla ice cream or whipped cream and no one can be able to resist this good-old Southern Pie. I cannot think of a better way to celebrate the South but with this simple, delicious traditional pie that has been around since. Many thanks to everyone who will share this recipe!

INGREDIENTS

½ cup of buttermilk

1 ¾ cups of sugar

2 large eggs

3 tablespoons of flour

A pinch of salt

1 stick of butter

1 teaspoon of vanilla

HOW TO MAKE SOUTHERN PIE

Step 1: Prepare the oven. Preheat it to 400 degrees.

Step 2: Place the buttermilk, sugar, eggs, flour, salt, butter, and vanilla in a large bowl. Mix until well combined.

Step 3: Pour the mixture over an unbaked 9-inch pie shell.

Step 4: Then, top the pie with some nutmeg.

Step 5: Place inside the preheated oven and bake for 15 minutes.

Step 6: Lower the temperature to 350 degrees and continue to bake for another 45 minutes.

Step 7: Once done, remove the pie from the oven and let it cool completely before serving. Slice and enjoy it!

BEST SOUTHERN PIE EVER

Rebecca If you want the best tasting pie, this Southern Pie is highly recommended. It’s super easy to make for something so perfect and the most delicious. When I first tasted… Main Dish Recipes BEST SOUTHERN PIE EVER European Print This
Nutrition facts: 200 calories 20 grams fat
Rating: 4.5/5
( 2 voted )

Ingredients

  • ½ cup of buttermilk
  • 1 ¾ cups of sugar
  • 2 large eggs
  • 3 tablespoons of flour
  • A pinch of salt
  • 1 stick of butter
  • 1 teaspoon of vanilla

Instructions

Step 1: Prepare the oven. Preheat it to 400 degrees.

Step 2: Place the buttermilk, sugar, eggs, flour, salt, butter, and vanilla in a large bowl. Mix until well combined.

Step 3: Pour the mixture over an unbaked 9-inch pie shell.

Step 4: Then, top the pie with some nutmeg.

Step 5: Place inside the preheated oven and bake for 15 minutes.

Step 6: Lower the temperature to 350 degrees and continue to bake for another 45 minutes.

Step 7: Once done, remove the pie from the oven and let it cool completely before serving. Slice and enjoy it!

June 16, 2020 0 comment
0 FacebookTwitterPinterestEmail
Newer Posts
Older Posts

Popular Posts

  • 1

    Crispy Crunchy Parmesan Potatoes

    March 21, 2020
  • 2

    CROCK POT SMOTHERED PORK CHOPS

    March 21, 2020
  • Facebook
  • Twitter

@2019 - All Right Reserved.


Back To Top