Cook it once
  • Home
  • Privacy Policy
  • Recipes
    • KETO
    • LC
    • WW
  • Tips
  • Contact
Cook it once
  • Home
  • Privacy Policy
  • Recipes
    • KETO
    • LC
    • WW
  • Tips
  • Contact
Monthly Archives

May 2020

Main Dish Recipes

Chicken Pot Pie With Biscuits

by Rebecca May 1, 2020
written by Rebecca

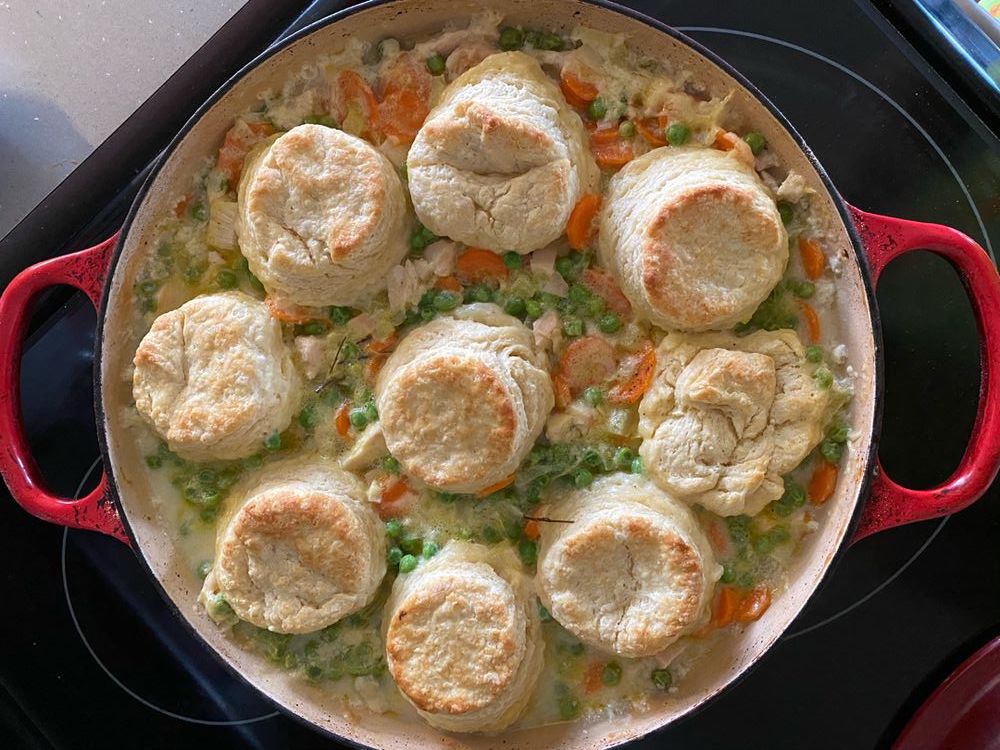
Nothing beats a nice and hot chicken pot pie with homemade biscuits! I remember when I was a kid, my mom used to make this during Wednesday night. It was amazing! It’s a good thing that my mom taught me this recipe because now, I got to share it with you! Follow these simple steps and you’ll have the perfect dinner! Have fun and I hope you like it because I do.

INGREDIENTS

Biscuits

2 c flour

1 Tbsp. baking powder

1 Tbsp. sugar

1/2 tsp. kosher salt

6 Tbsp. of very cold Land O Lakes® Salted Butter

3/4 c whole milk

Filling

4 Tbsp. Land O Lakes® Salted Butter

a few sprigs of thyme

2 shallots

4 carrots, peeled and sliced thinly (about 2 cups)

4 celery stalks, chopped (about 1 cup)

1/4 c flour

splash of dry white wine (optional)

2 c whole milk

1 1/2 cups of chicken broth

4 cups shredded chicken (I use a rotisserie chicken)

2 cups of frozen peas

1 tsp. salt

a squeeze of lemon juice, black pepper, etc.

How to make Chicken Pot Pie With Biscuits

Ready the oven. Preheat to 425 degrees.

Biscuits

In a medium-sized bowl, add baking powder, flour, salt, and sugar together and whisk until well-mixed. Grate the butter and add it into the bowl of dry mix. (Use your hands to mix) Add the milk. Use a fork to mix all the ingredients. Put the dough in a clean counter. Fold the dough over 3-5 times to get a 1-2 inch thick layer. You can cut 6-10 biscuits off this dough. Use a biscuit cutter or a knife as long as you can cut it evenly.

Filling

Melt the butter in a pan or any oven-safe pan. Add the shallots and thyme then saute for 5 minutes. Now, add the celery and carrots and saute for 5 minutes as well. Add flour and saute for a minute or two. Add a little amount of wine and let sizzle to burn the alcohol content. Gradually add the chicken broth and milk. (Stir every time you add the two ingredients.) You should get a thick and creamy soup. Add the peas and chicken then season with pepper, salt, and lemon juice to taste.

Bake

Arrange the biscuits and the filling. Brush with butter or milk to have a nice brown colour. Bake for 15-20 minutes until cooked through.

Chicken Pot Pie With Biscuits

Rebecca Nothing beats a nice and hot chicken pot pie with homemade biscuits! I remember when I was a kid, my mom used to make this during Wednesday night. It was… Main Dish Recipes Chicken Pot Pie With Biscuits European Print This
Nutrition facts: 200 calories 20 grams fat
Rating: 5.0/5
( 1 voted )

Ingredients

  • Biscuits
  • 2 c flour
  • 1 Tbsp. baking powder
  • 1 Tbsp. sugar
  • 1/2 tsp. kosher salt
  • 6 Tbsp. of very cold Land O Lakes® Salted Butter
  • 3/4 c whole milk
  • Filling
  • 4 Tbsp. Land O Lakes® Salted Butter
  • a few sprigs of thyme
  • 2 shallots
  • 4 carrots, peeled and sliced thinly (about 2 cups)
  • 4 celery stalks, chopped (about 1 cup)
  • 1/4 c flour
  • splash of dry white wine (optional)
  • 2 c whole milk
  • 1 1/2 cups of chicken broth
  • 4 cups shredded chicken (I use a rotisserie chicken)
  • 2 cups of frozen peas
  • 1 tsp. a salt squeeze of lemon juice, black pepper, etc.

Instructions

Ready the oven. Preheat to 425 degrees.

Biscuits

In a medium-sized bowl, add baking powder, flour, salt, and sugar together and whisk until well-mixed. Grate the butter and add it into the bowl of dry mix. (Use your hands to mix) Add the milk. Use a fork to mix all the ingredients. Put the dough in a clean counter. Fold the dough over 3-5 times to get a 1-2 inch thick layer. You can cut 6-10 biscuits off this dough. Use a biscuit cutter or a knife as long as you can cut it evenly.

Filling

Melt the butter in a pan or any oven-safe pan. Add the shallots and thyme then saute for 5 minutes. Now, add the celery and carrots and saute for 5 minutes as well. Add flour and saute for a minute or two. Add a little amount of wine and let sizzle to burn the alcohol content. Gradually add the chicken broth and milk. (Stir every time you add the two ingredients.) You should get a thick and creamy soup. Add the peas and chicken then season with pepper, salt, and lemon juice to taste.

Bake

Arrange the biscuits and the filling. Brush with butter or milk to have a nice brown colour. Bake for 15-20 minutes until cooked through.
May 1, 2020 0 comment
0 FacebookTwitterPinterestEmail
Main Dish Recipes

Loaded Broccoli Cauliflower Salad (Low Carb)

by Rebecca May 1, 2020
written by Rebecca

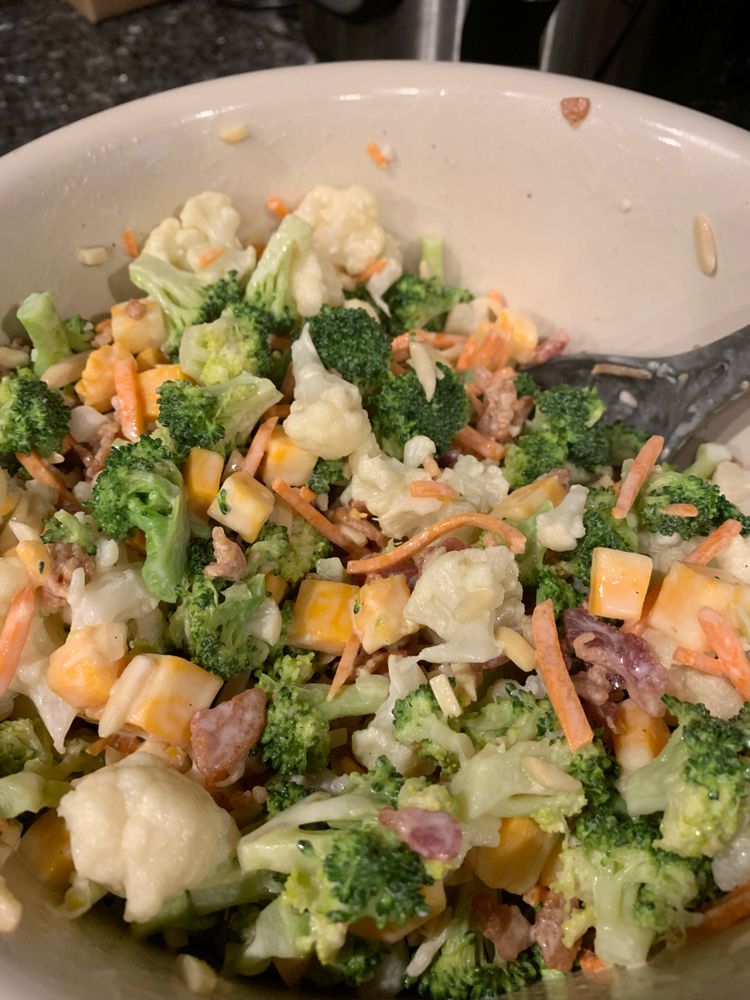
Recently, I discovered this recipe and I couldn’t be more satisfied with the results. See, this salad is the best for someone like me that needs to lose weight. Yeah, I enjoy the occasional dessert. Maybe, a little too much. It’s so easy and simple to make. It’s delicious to tell you honestly. This is my best alternative for rice. It’s low carb so I don’t feel guilty eating a little bacon. My friend introduced me to this recipe. I told her that I needed to stay healthy for my kids and she was more than willing to help me achieve my goal to lose some weight and eat healthy foods. I promise you, try this recipe for 2 months with everyday exercise, You’ll see a big difference in your body. Now, I feel light. I can move again without sweating all the water in my body. I don’t know if it is the best diet out there, but I have seen the results so I am 100% sure that you’ll see it too. Well,  we all have different views and procedures on how to stay healthy. I just want to share this with you because it works for me. I’ll keep having this recipe until I find a better diet that suits me. but for now, try this one today. Stay healthy!

Ingredients

Dressing

3/4 cup plain Greek yoghurt

1/2 cup mayonnaise

1/4 cup clover honey

2 Tablespoons red wine vinegar

1 Tablespoon granulated sugar

1/4 teaspoon salt

1/2 teaspoon black pepper

Salad

4 cups small broccoli florets, diced4 cups small cauliflower florets, diced

12 slices thick-cut bacon, cooked and diced

8 ounces Colby Jack cheese, small cubed

1/2 medium red onion, chopped and rinsed

Instructions

In a medium-sized bowl, add all the ingredients and whisk until well-mixed.

Cover and let it chill.

Toss in all the salad ingredients into a large-sized bowl.

Add the dressing into the salad and toss to coat evenly.

Top with bacon and serve. Enjoy!

Loaded Broccoli Cauliflower Salad (Low Carb)

Rebecca Recently, I discovered this recipe and I couldn’t be more satisfied with the results. See, this salad is the best for someone like me that needs to lose weight. Yeah,… Main Dish Recipes Loaded Broccoli Cauliflower Salad (Low Carb) European Print This
Nutrition facts: 200 calories 20 grams fat
Rating: 5.0/5
( 1 voted )

Ingredients

  • Dressing
  • 3/4 cup plain Greek yoghurt
  • 1/2 cup mayonnaise
  • 1/4 cup clover honey
  • 2 Tablespoons red wine vinegar
  • 1 Tablespoon granulated sugar
  • 1/4 teaspoon salt
  • 1/2 teaspoon black pepper
  • Salad
  • 4 cups small broccoli florets, diced4 cups small cauliflower florets, diced
  • 12 slices thick-cut bacon, cooked and diced
  • 8 ounces Colby Jack cheese, small cubed
  • 1/2 medium red onion, chopped and rinsed

Instructions

In a medium-sized bowl, add all the ingredients and whisk until well-mixed.

Cover and let it chill.

Toss in all the salad ingredients into a large-sized bowl.

Add the dressing into the salad and toss to coat evenly.

Top with bacon and serve. Enjoy!

May 1, 2020 0 comment
0 FacebookTwitterPinterestEmail
Main Dish Recipes

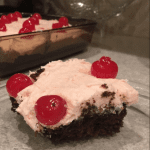
Outrageous Cherry Dr Pepper Cake

by Rebecca May 1, 2020
written by Rebecca

Hey there! I’m going to share another recipe for you today! I’ve been a fan of this recipe. It became of the most requested dessert by my kids. Do you like cherries? Yeah? Awesome! then, You are gonna love this! Take a break from all of the desserts you eat from pastry shops. I know you can do better than those treats. Follow these simple steps and I promise you that it is worth your precious time. Have fun baking! Mine is still in the oven!

INGREDIENTS

1 (15.25 ounce) box of super moist chocolate fudge cake mix (dry)

12 ounces Dr Pepper Cherry (room temperature)

1 (18 ounces) jar maraschino cherries, divided

2 (1 cup) sticks salted butter (room temperature)

7 cups of powdered sugar

INSTRUCTIONS

1. Ready the oven. Preheat to 350°F. Apply cooking spray to a 9 x 13 x 2-inch baking pan. Set aside.

2. Add soda and cake mix in a large bowl then whisk until well-mixed.

3. Remove the stems from the jarred cherries then, slice into four. Add to the cake batter and whisk until all ingredients are well incorporated.

4. Gently pour in the batter into the baking pan and use a spatula to flatten the cake evenly.

5. Bake in the oven for 30 minutes positioned in the middle part. Use a toothpick to know the doneness of the cake. If it comes out clean, your cake is ready.

6. Grease the bowl of the stand mixer with butter.

7. Beat for 3 minutes until the butter becomes fluffy.

8. Add and beat 1 cup of sugar into the mixture. (1 cup at a time.)

9. Get the juice from the cherry jar and add 6 tablespoons into the mixture. Continue beating until all ingredients are well-mixed. (Add more cherry juice if the icing is too thick and 1 tablespoon of sugar if it’s too thin.)

10. Using all of the icings, frost the cake generously. Garnish the cake with the remaining cherries. Slice, serve, and enjoy!

Outrageous Cherry Dr Pepper Cake

Rebecca Hey there! I’m going to share another recipe for you today! I’ve been a fan of this recipe. It became of the most requested dessert by my kids. Do you… Main Dish Recipes Outrageous Cherry Dr Pepper Cake European Print This
Nutrition facts: 200 calories 20 grams fat
Rating: 5.0/5
( 1 voted )

Ingredients

  • 1 (15.25 ounce) box of super moist chocolate fudge cake mix (dry)
  • 12 ounces Dr Pepper Cherry (room temperature)
  • 1 (18 ounces) jar maraschino cherries, divided
  • 2 (1 cup) sticks salted butter (room temperature)
  • 7 cups of powdered sugar

Instructions

1. Ready the oven. Preheat to 350°F. Apply cooking spray to a 9 x 13 x 2-inch baking pan. Set aside.

2. Add soda and cake mix in a large bowl then whisk until well-mixed.

3. Remove the stems from the jarred cherries then, slice into four. Add to the cake batter and whisk until all ingredients are well incorporated.

4. Gently pour in the batter into the baking pan and use a spatula to flatten the cake evenly.

5. Bake in the oven for 30 minutes positioned in the middle part. Use a toothpick to know the doneness of the cake. If it comes out clean, your cake is ready.

6. Grease the bowl of the stand mixer with butter.

7. Beat for 3 minutes until the butter becomes fluffy.

8. Add and beat 1 cup of sugar into the mixture. (1 cup at a time.)

9. Get the juice from the cherry jar and add 6 tablespoons into the mixture. Continue beating until all ingredients are well-mixed. (Add more cherry juice if the icing is too thick and 1 tablespoon of sugar if it's too thin.)

10. Using all of the icings, frost the cake generously. Garnish the cake with the remaining cherries. Slice, serve, and enjoy!

May 1, 2020 0 comment
0 FacebookTwitterPinterestEmail
Main Dish Recipes

No Bake Coconut Cream Eggs for Easter!

by Rebecca May 1, 2020
written by Rebecca

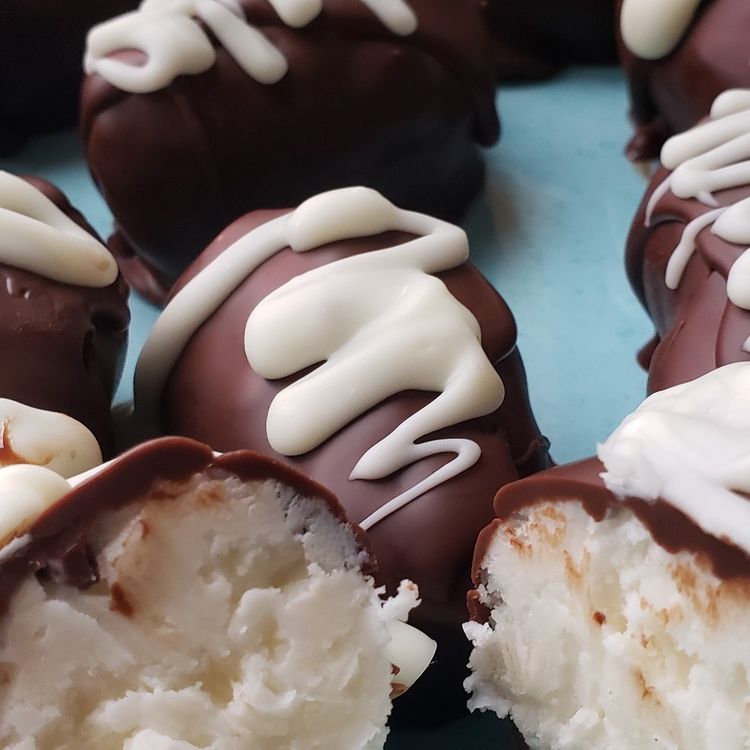
Coconut cream eggs are a star during Easter or even on a regular day! My kids love this yummy treat and are always insisting to help whenever I’m making this. It takes only a few ingredients to make and no baking required. Feel free to experiment, you can put almonds, or replace the coconut with peanut butter, there are no rules! I personally love coconut and my kids too so coconut it is!

Today, my youngest has some friends coming over. He never stops bragging about this coconut cream eggs to his friends, so he asked me to make it for them. How can I say no? I’m sure his friends will enjoy it as much as we do. And I made extra just in case.

Ingredients

8 oz softened cream cheese

1 tablespoon butter, softened

4 cups of powdered sugar

1 cup of coconut, shredded

1 (12 oz.) bag melting chocolate chips

How to make No-Bake Coconut Cream Eggs

Step 1: Use a parchment paper to line a baking sheet. Set aside.

Step 2: In a medium bowl, place cream cheese and butter. Use a hand mixer to beat until blended. Gradually add the powdered sugar. Add the coconut. Use a mixing spoon to ensure it is well incorporated. Put in the fridge for an hour.

Step 3: Mold the coconut mixture into egg shapes. Dust your hands first with powdered sugar before doing so.

Step 4: Place the coconut eggs on the parchment paper. Freeze for an hour.

Step 5: Melt the chocolates following the instructions written on the package.

Step 6: Use a fork to dip the eggs into the melted chocolate, coat the eggs completely. Using two forks, carefully transfer the chocolate covered eggs back onto the parchment paper.

Step 7: Serve and enjoy! By the way, you can store the cream eggs in the fridge too. Just make sure to place them in an airtight container.

No Bake Coconut Cream Eggs for Easter!

Rebecca Coconut cream eggs are a star during Easter or even on a regular day! My kids love this yummy treat and are always insisting to help whenever I’m making this.… Main Dish Recipes No Bake Coconut Cream Eggs for Easter! European Print This
Nutrition facts: 200 calories 20 grams fat
Rating: 5.0/5
( 1 voted )

Ingredients

  • 8 oz softened cream cheese
  • 1 tablespoon butter, softened
  • 4 cups of powdered sugar
  • 1 cup of coconut, shredded
  • 1 (12 oz.) bag melting chocolate chips

Instructions

Step 1: Use a parchment paper to line a baking sheet. Set aside.

Step 2: In a medium bowl, place cream cheese and butter. Use a hand mixer to beat until blended. Gradually add the powdered sugar. Add the coconut. Use a mixing spoon to ensure it is well incorporated. Put in the fridge for an hour.

Step 3: Mold the coconut mixture into egg shapes. Dust your hands first with powdered sugar before doing so.

Step 4: Place the coconut eggs on the parchment paper. Freeze for an hour.

Step 5: Melt the chocolates following the instructions written on the package.

Step 6: Use a fork to dip the eggs into the melted chocolate, coat the eggs completely. Using two forks, carefully transfer the chocolate covered eggs back onto the parchment paper.

Step 7: Serve and enjoy! By the way, you can store the cream eggs in the fridge too. Just make sure to place them in an airtight container.

May 1, 2020 0 comment
0 FacebookTwitterPinterestEmail
Main Dish Recipes

Lemon Blueberry Cake

by Rebecca May 1, 2020
written by Rebecca

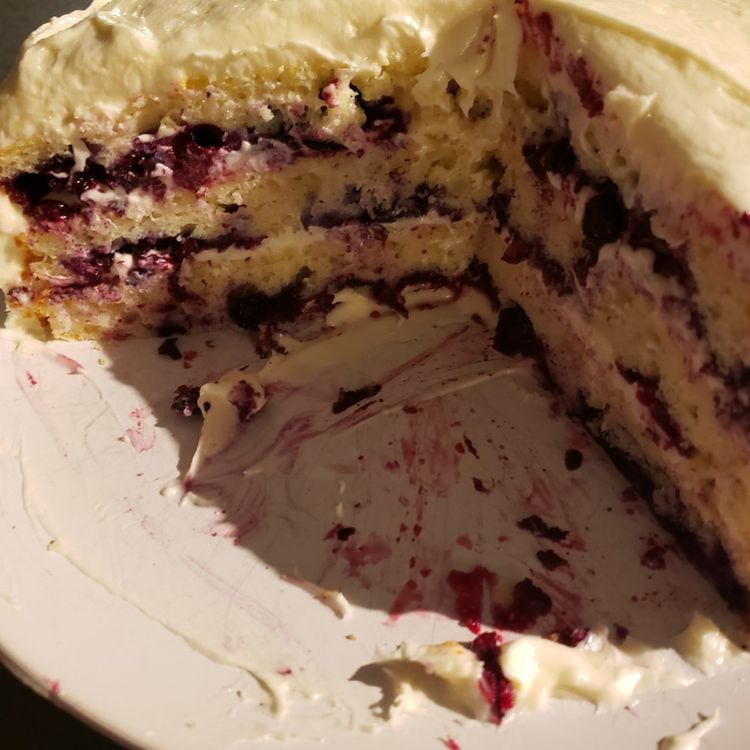
I love blueberries and this cake is one awesome way to enjoy them. I always keep some in my fridge whenever I’m craving for it (which is all the time).  So, to make sure my cake is fresh even if I already cut it, I either cover all the cut areas with plastic wrap or if I have some leftover frosting, I normally frost the sides of the cake (to prevent the cake from drying). Although, I prefer the frosting option if you know what I mean.

INGREDIENTS

1 (15.25oz). box vanilla cake, plus ingredients called for on the box

Juice and zest of 1 1/2 lemons, divided, plus more zest for garnish

1 3/4 cup fresh blueberries, divided

3 tbsp.  all-purpose flour

1 cup (2 sticks) butter, softened

3 cups powdered sugar

1/4 cup heavy cream

1 tsp. pure vanilla extract

Pinch of kosher salt

2 Thin lemon slices, for topping

How to make Lemon Blueberry Cake

Step 1: Ready the oven. Preheat to 350 degrees. Use a cooking spray to grease three 9-inch cake pans and line with parchment.

Step 2: Prepare the cake mix following the directions written on the package. Stir in the juice and zest of one lemon.

Step 3: Place 1 cup of blueberries and flour in a small bowl. Coat the blueberries to keep them from sinking, then gently fold into the batter.

Step 4: Divide the batter evenly among the three prepared cake pans. Place in the oven and bake for 18-20 minutes or until a toothpick inserted in the middle comes out clean.

Step 5: Do not remove from the pans. Let the cake cool for 10 minutes. Then remove and place onto a wire rack to cool completely.

Step 6: To make the frosting. Use a hand mixer or a stand mixer, beat the butter and 2 1/2 cups of powdered sugar. Add the remaining juice and zest, and the heavy cream. Beat until combined. Then, add vanilla and salt. You can also add the remaining 1/2 cup of powdered sugar for texture and flavour (optional).

Step 7: Dab centre of the cake plate with frosting (this way you can keep the cake in place). Place parchment strips on every side of the cake plate. Place the first cake layer, top it with frosting. Place the other layer on top of the first layer and frost. Repeat step for the last layer. Then, frost the sides of the layered cake.

Step 8: Garnish cake as desired using the remaining blueberries, lemon slices, and zest. Slice a piece. Enjoy!

Lemon Blueberry Cake

Rebecca I love blueberries and this cake is one awesome way to enjoy them. I always keep some in my fridge whenever I’m craving for it (which is all the time). … Main Dish Recipes Lemon Blueberry Cake European Print This
Nutrition facts: 200 calories 20 grams fat
Rating: 5.0/5
( 1 voted )

Ingredients

  • 1 (15.25oz). box vanilla cake, plus ingredients called for on the box
  • Juice and zest of 1 1/2 lemons, divided, plus more zest for garnish
  • 1 3/4 cup fresh blueberries, divided
  • 3 tbsp.  all-purpose flour
  • 1 cup (2 sticks) butter, softened
  • 3 cups powdered sugar
  • 1/4 cup heavy cream
  • 1 tsp. pure vanilla extract
  • Pinch of kosher salt
  • 2 Thin lemon slices, for topping

Instructions

Step 1: Ready the oven. Preheat to 350 degrees. Use a cooking spray to grease three 9-inch cake pans and line with parchment.

Step 2: Prepare the cake mix following the directions written on the package. Stir in the juice and zest of one lemon.

Step 3: Place 1 cup of blueberries and flour in a small bowl. Coat the blueberries to keep them from sinking, then gently fold into the batter.

Step 4: Divide the batter evenly among the three prepared cake pans. Place in the oven and bake for 18-20 minutes or until a toothpick inserted in the middle comes out clean.

Step 5: Do not remove from the pans. Let the cake cool for 10 minutes. Then remove and place onto a wire rack to cool completely.

Step 6: To make the frosting. Use a hand mixer or a stand mixer, beat the butter and 2 1/2 cups of powdered sugar. Add the remaining juice and zest, and the heavy cream. Beat until combined. Then, add vanilla and salt. You can also add the remaining 1/2 cup of powdered sugar for texture and flavour (optional).

Step 7: Dab centre of the cake plate with frosting (this way you can keep the cake in place). Place parchment strips on every side of the cake plate. Place the first cake layer, top it with frosting. Place the other layer on top of the first layer and frost. Repeat step for the last layer. Then, frost the sides of the layered cake.

Step 8: Garnish cake as desired using the remaining blueberries, lemon slices, and zest. Slice a piece. Enjoy!

May 1, 2020 0 comment
0 FacebookTwitterPinterestEmail
Main Dish Recipes

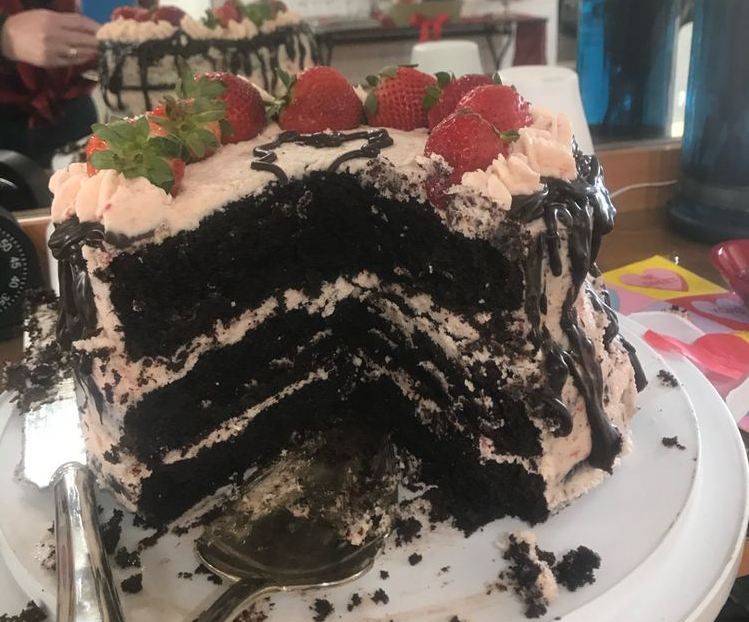
Chocolate Kahlua Cake with Strawberry Buttercream Frosting

by Rebecca May 1, 2020
written by Rebecca

With or without a special occasion, you will not get over this gorgeous, super-rich, and delicious cake! Serve it as is or with vanilla topping (I always like mine with vanilla on top), either way, it is still undeniably the best cake you’ll ever taste! It has a perfectly moist texture, an impressive strawberry buttercream frosting, a cake that’s soaked in Kahlua, and drizzled with ganache. I’m sure you’ll never run out of excuses just to have a slice of this beauty.

Ingredients

Cake Ingredients

3 cup flour

3 cup Sugar

1 1/2 cup special dark chocolate cocoa powder

1 tbsp baking powder

1 1/2 tsp baking soda

1 1/2 tsp kosher salt

4 large eggs

1/2 cup sour cream

1 cup buttermilk

1 cup of warm water

1/2 cup Kahlua

1/2 tsp espresso powder

1/2 cup canola oil

1 tbsp pure vanilla extract

Strawberry Buttercream Frosting ingredients

2 cup unsalted sweet cream butter, softened

6 cup powdered sugar

4 tsp vanilla extract

1/2 cup finely diced strawberries

5-7 Tbsp. heavy whipping cream

Strawberries for topping

1 large piping bag fitted with a star tip

Large ice cream scooper

Chocolate Ganache Ingredients

1 cup semi-sweet chocolate chips

1/2 cup heavy whipping cream

1 large squeeze bottle

How to make Chocolate Kahlua Cake with Strawberry Buttercream Frosting

Ready the oven. Preheat to 350 degrees. Spray three 9-inch cake pans with pam baking spray.

Place the espresso, Kahlua, and warm water in a small bowl. Whisk until combine.

With your stand mixer, combine the flour, sugar, and cocoa powder, baking soda, baking powder, and salt.

Gradually add the eggs, sour cream, buttermilk, espresso, oil, and vanilla extract. Combine and divide the batter between 3 pans.

Put in the oven and bake for 25-35 minutes. Check the doneness by inserting a toothpick in the middle. If it comes out clean, it’s done.

Cool the cake for 20 minutes.

Frosting Directions

Use a stand mixer to cream the butter, vanilla, powdered sugar, diced strawberries, and heavy whipping cream. Combine until creamy and stiff.

Place 1 cup of frosting into the piping bag.

To build the cake

Put 1 layer of cake onto the cake board.

Scoop 4-6 scoops of frosting using an ice cream scooper. Smooth evenly on the cake.

Place another cake layer on top and frost with the remaining frosting.

Chocolate Ganache Directions

In a small pot, heat the heavy whipping cream until it is steaming.

Put the chocolate chips in a heat-proof bowl.

Pour the chocolate chips over the heated heavy whipping cream. Sit for one minute, then whisk until smooth.

Now, pour the ganache into the squeeze bottle. Pipe dollop over the edge of the cake.

Place strawberries on top of the frosting.

Slice a piece. Enjoy!

Chocolate Kahlua Cake with Strawberry Buttercream Frosting

Rebecca With or without a special occasion, you will not get over this gorgeous, super-rich, and delicious cake! Serve it as is or with vanilla topping (I always like mine with… Main Dish Recipes Chocolate Kahlua Cake with Strawberry Buttercream Frosting European Print This
Nutrition facts: 200 calories 20 grams fat
Rating: 3.0/5
( 5 voted )

Ingredients

  • Cake Ingredients
  • 3 cup flour
  • 3 cup Sugar
  • 1 1/2 cup special dark chocolate cocoa powder
  • 1 tbsp baking powder
  • 1 1/2 tsp baking soda
  • 1 1/2 tsp kosher salt
  • 4 large eggs
  • 1/2 cup sour cream
  • 1 cup buttermilk
  • 1 cup of warm water
  • 1/2 cup Kahlua
  • 1/2 tsp espresso powder
  • 1/2 cup canola oil
  • 1 tbsp pure vanilla extract
  • Strawberry Buttercream Frosting ingredients
  • 2 cup unsalted sweet cream butter, softened
  • 6 cup powdered sugar
  • 4 tsp vanilla extract
  • 1/2 cup finely diced strawberries
  • 5-7 Tbsp. heavy whipping cream
  • Strawberries for topping
  • 1 large piping bag fitted with a star tip
  • Large ice cream scooper
  • Chocolate Ganache Ingredients
  • 1 cup semi-sweet chocolate chips
  • 1/2 cup heavy whipping cream
  • 1 large squeeze bottle

Instructions

Ready the oven. Preheat to 350 degrees. Spray three 9-inch cake pans with pam baking spray.

Place the espresso, Kahlua, and warm water in a small bowl. Whisk until combine.

With your stand mixer, combine the flour, sugar, and cocoa powder, baking soda, baking powder, and salt.

Gradually add the eggs, sour cream, buttermilk, espresso, oil, and vanilla extract. Combine and divide the batter between 3 pans.

Put in the oven and bake for 25-35 minutes. Check the doneness by inserting a toothpick in the middle. If it comes out clean, it's done.

Cool the cake for 20 minutes.

Frosting Directions

Use a stand mixer to cream the butter, vanilla, powdered sugar, diced strawberries, and heavy whipping cream. Combine until creamy and stiff.

Place 1 cup of frosting into the piping bag.

To build the cake

Put 1 layer of cake onto the cake board.

Scoop 4-6 scoops of frosting using an ice cream scooper. Smooth evenly on the cake.

Place another cake layer on top and frost with the remaining frosting.

Chocolate Ganache Directions

In a small pot, heat the heavy whipping cream until it is steaming.

Put the chocolate chips in a heat-proof bowl.

Pour the chocolate chips over the heated heavy whipping cream. Sit for one minute, then whisk until smooth.

Now, pour the ganache into the squeeze bottle. Pipe dollop over the edge of the cake.

Place strawberries on top of the frosting.

Slice a piece. Enjoy!

May 1, 2020 0 comment
0 FacebookTwitterPinterestEmail
Main Dish Recipes

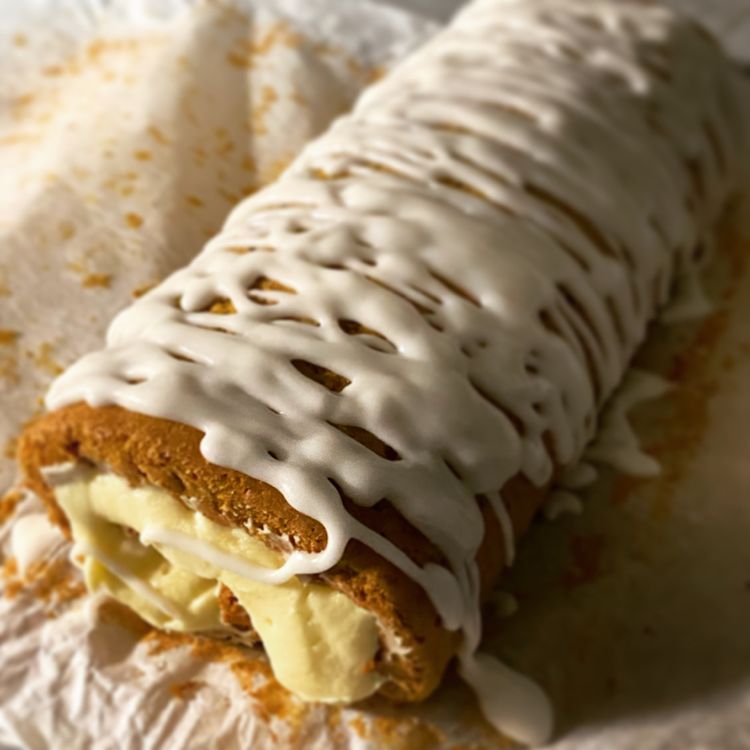
Carrot Cake Roll with Cream Cheese Frosting Filling

by Rebecca May 1, 2020
written by Rebecca

Hi there! Last week was awesome. I ate this amazing cake at my cousin’s wedding. It was so good that I contacted the pastry chef which happened to be my cousin’s best friend and she gave me this incredible recipe. I’m telling you guys, try this one out. You are in for a treat. I’m waiting for it to finish baking actually, while I’m writing this. Lol! Have fun baking everyone! Have a good day!

Ingredients

For the Cake

3/4 c flour

2 tsp. ground cinnamon

1 tsp. baking powder

1/2 tsp. kosher salt

1/2 tsp. ground ginger

1/4 tsp. ground nutmeg

1/8 tsp. ground cloves

3 large eggs

1/2 c granulated sugar

2 tbsp. vegetable oil

1 tsp. pure vanilla extract

3 medium carrots, shredded

For the Filling

1 c confectioners sugar

1 (8 oz.) package cream cheese, softened

6 tbsp. salted butter softened

1 tsp. pure vanilla extract

For the Glaze Drizzle:

3 c confectioners sugar

1/2 teaspoon vanilla extract

10-11 tbsp. milk

Instructions

Ready the oven then, preheat to 375 degrees F. Align parchment paper with the 15 x 10-inch jelly roll pan. The sides should stick out a little.

Mix flour, baking powder, salt, nutmeg, cloves, and cinnamon in a medium-sized bowl then whisk well.

Combine eggs and sugar in a large-sized bowl. Whisk until well-mixed.

In the same bowl as the egg mixture, add vanilla extract, carrots, and vegetable oil. Mix until all ingredients are incorporated.

Add the dry ingredients into the egg mixture then fold to merge.

Stir the batter until well-mixed. Prepare the jelly roll pan then pour in the batter. Bake for 12 minutes. (Remember to spread the batter evenly.) Once finished baking, use the overhang on the sides to remove the cake from the oven.

Place the cake on a large-sized wood chopping board then slowly roll the cake lengthwise.

Transfer the cake to a cooling rack and let it cool.

In a medium-sized bowl, add together cream cheese, confectioners sugar, butter, and vanilla extract for the filling. Whisk thoroughly until all ingredients are well incorporated or until creamy.

Slowly unroll the cake then spread on the filling. (Remember to leave a small gap on the edges.

Roll up the cake back. Use a plastic cling to wrap it tightly.

Refrigerate for 1 hour.

In a medium-sized mixing bowl, add together the glaze ingredients and whisk until well-mixed. Before slicing, sprinkle the glaze over the cake.

Carrot Cake Roll with Cream Cheese Frosting Filling

Rebecca Hi there! Last week was awesome. I ate this amazing cake at my cousin’s wedding. It was so good that I contacted the pastry chef which happened to be my… Main Dish Recipes Carrot Cake Roll with Cream Cheese Frosting Filling European Print This
Nutrition facts: 200 calories 20 grams fat
Rating: 5.0/5
( 1 voted )

Ingredients

  • For the Cake
  • 3/4 c flour
  • 2 tsp. ground cinnamon
  • 1 tsp. baking powder
  • 1/2 tsp. kosher salt
  • 1/2 tsp. ground ginger
  • 1/4 tsp. ground nutmeg
  • 1/8 tsp. ground cloves
  • 3 large eggs
  • 1/2 c granulated sugar
  • 2 tbsp. vegetable oil
  • 1 tsp. pure vanilla extract
  • 3 medium carrots, shredded
  • For the Filling
  • 1 c confectioners sugar
  • 1 (8 oz.) package cream cheese, softened
  • 6 tbsp. salted butter softened
  • 1 tsp. pure vanilla extract
  • For the Glaze Drizzle:
  • 3 c confectioners sugar
  • 1/2 teaspoon vanilla extract
  • 10-11 tbsp. milk

Instructions

Ready the oven then, preheat to 375 degrees F. Align parchment paper with the 15 x 10-inch jelly roll pan. The sides should stick out a little.

Mix flour, baking powder, salt, nutmeg, cloves, and cinnamon in a medium-sized bowl then whisk well.

Combine eggs and sugar in a large-sized bowl. Whisk until well-mixed.

In the same bowl as the egg mixture, add vanilla extract, carrots, and vegetable oil. Mix until all ingredients are incorporated.

Add the dry ingredients into the egg mixture then fold to merge.

Stir the batter until well-mixed. Prepare the jelly roll pan then pour in the batter. Bake for 12 minutes. (Remember to spread the batter evenly.) Once finished baking, use the overhang on the sides to remove the cake from the oven.

Place the cake on a large-sized wood chopping board then slowly roll the cake lengthwise.

Transfer the cake to a cooling rack and let it cool.

In a medium-sized bowl, add together cream cheese, confectioners sugar, butter, and vanilla extract for the filling. Whisk thoroughly until all ingredients are well incorporated or until creamy.

Slowly unroll the cake then spread on the filling. (Remember to leave a small gap on the edges.

Roll up the cake back. Use a plastic cling to wrap it tightly.

Refrigerate for 1 hour.

In a medium-sized mixing bowl, add together the glaze ingredients and whisk until well-mixed. Before slicing, sprinkle the glaze over the cake.

May 1, 2020 0 comment
0 FacebookTwitterPinterestEmail
Main Dish Recipes

EASY THUMBPRINT COOKIES

by Rebecca May 1, 2020
written by Rebecca

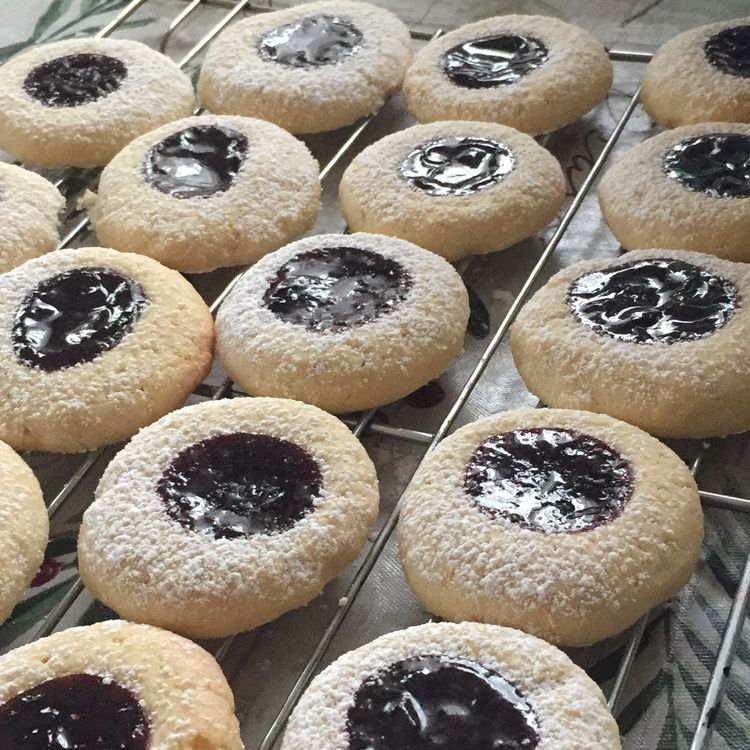
These thumbnail cookies are so pretty! They’re soft, buttery and we get to fill them with our favourite fillings! A bite-size shortbread cookie that is so delicious it melts in your mouth, and they are very easy to make. The dough is made with just 5 simple ingredients and rolled into individual balls. To achieve the perfect thumbnail cookies, use only high-quality unsalted butter. Make sure to soften it before mixing, in that way we can ensure the dough is smooth and less likely to crack. For an extra soft dough, use three tablespoons of cornstarch (this gives the cookies extra lift). Then, use your thumb to make an imprint exactly after making each ball. If using the jam as a filling, add it before baking. But when using a chocolate filling, add it afterwards.

Your filling options are entirely up to you! You can use the classic Jam Filling; raspberry, apricot, strawberry, blueberry (my favourite), or cherry jam. If your jam is too thick, take a few tablespoons and microwave before use. You can also, use chocolate filling (different kinds, again sky’s the limit) and decorate your thumbnail cookies, sprinkle with candies. Oh, I love how we can great creative with it!

To prevent your cookies from cracking, remember to roll the cookie dough until the surface is smooth. Imprint as soon as possible, don’t wait for it to stiffen. If in case you still see small cracks, you can just press the dough to seal. We don’t want unpretty crack cookies anyway.

When baking you want your cookies to not spread. Not enough flour to hold them will cause your cookies to spread too much. So you have to use the correct measurement. If the kitchen scale is available, use it, if not, fill your measuring cup and level it off using a knife. Remember not to over mix your ingredients, too. You should stop mixing once everything is combined. Chill the dough before baking (the colder the dough, the less your cookies will spread). And one last thing, when you are baking in batches, never (again never) add the cookie dough directly in a hot baking sheet.

Place your homemade thumbnail cookies in an airtight container at room temperature and consume it in 5 days. When stored in the fridge, so long as they are in a sealed freezer-safe bag, they will last up to 3 months.

Ingredients

Thumbprint Cookie Dough

1 c unsalted butter, softened to room temperature

1/2 c sugar

2 cups all-purpose flour

3 Tbsp. cornstarch

1 tsp. vanilla extract

Jam Filling

1/4 cup of raspberry jam, or other flavours such as apricot, strawberry and cherry jam

Chocolate Filling with Holiday Sprinkles

3 oz white chocolate, melted

holiday sprinkles

Dark Chocolate Filling with Bear Paw Decor

3 oz semisweet chocolate, melted

White Chocolate Filling with Snowman Decor

3 oz white chocolate, melted

1 tsp. coloured sprinkles

Dark Chocolate Filling with Reindeer Decor

1/4 c candy eyeballs

1/4 c red decorating balls

1 c pretzels

Instructions

To make the Thumbnail Cookie Dough

Prepare a stand mixer with a paddle attachment, or a large mixing bowl and electric hand mixer. Line a baking sheet using a parchment paper. Set aside.

Using the stand mixer, beat softened butter, sugar, and vanilla on medium-high speed for about 2 minutes or until fluffy and well combined.

Stop the mixer. Using a spatula, scrape down the sides of the bowl. Add the flour and cornstarch while mixing on low speed for another 2 minutes or until well combined. If using a hand mixer, you can use a wooden spoon to mix.

The dough will look dry and crumbly. It is pretty normal so don’t panic. First, scrape down the sides again. Now use your hands to form the dough into one piece.

Scoop out about 1 tbsp of dough. Roll it between your palms to shape it into a 1 1/4 inch or 3cm ball. Make sure it is smooth without any cracks.

To make an imprint, use the tip of your thumb about half-inch into the middle of the ball. Or you can also use the back of a 1/4 tsp. to make an imprint. Repeat for all the dough.

Place the indented balls an inch apart on the prepared baking sheet.

Put in the fridge for 30 minutes to chill.

Jam Thumbnail Cookies

Preheat the oven to 350 degrees F or 180 degrees C ten minutes before the end of the chilling time.

Take the jam out and stir. Microwave for 10 seconds if the jam is too thick.

Remove cookie dough from the fridge. Fill the indent with jam, full but not over-flowing.

Put inside the oven and bake for 10-12 minutes. make sure to remove them before your cookies start to brown.

Remove cookies from the baking sheet with a rigid spatula and place it on wire cooling racks. Cool completely.

Chocolate Jam Thumbnail Cookies

Preheat the oven to 350 degrees F or 180 degrees C about ten minutes before the end of chilling.

Place unfilled cookies in the oven and bake for 10-12 minutes.

Microwave your chocolate for 2-3 minutes at 50% power in 30 seconds intervals, stirring each time until smooth. (This depends on the amount of chocolate and your microwave power.)

Make sure to remove the cookies from the oven before they start to brown. Transfer them to cooling racks to cool completely.

Fill each indent with melted chocolate, decorate with sprinkles, candies, or pretzel pieces (whatever you desire).

EASY THUMBPRINT COOKIES

Rebecca These thumbnail cookies are so pretty! They’re soft, buttery and we get to fill them with our favourite fillings! A bite-size shortbread cookie that is so delicious it melts in… Main Dish Recipes EASY THUMBPRINT COOKIES European Print This
Nutrition facts: 200 calories 20 grams fat
Rating: 5.0/5
( 1 voted )

Ingredients

  • Thumbprint Cookie Dough
  • 1 c unsalted butter, softened to room temperature
  • 1/2 c sugar
  • 2 cups all-purpose flour
  • 3 Tbsp. cornstarch
  • 1 tsp. vanilla extract
  • Jam Filling
  • 1/4 cup of raspberry jam, or other flavours such as apricot, strawberry and cherry jam
  • Chocolate Filling with Holiday Sprinkles
  • 3 oz white chocolate, melted
  • holiday sprinkles
  • Dark Chocolate Filling with Bear Paw Decor
  • 3 oz semisweet chocolate, melted
  • White Chocolate Filling with Snowman Decor
  • 3 oz white chocolate, melted
  • 1 tsp. coloured sprinkles
  • Dark Chocolate Filling with Reindeer Decor
  • 1/4 c candy eyeballs
  • 1/4 c red decorating balls
  • 1 c pretzels

Instructions

To make the Thumbnail Cookie Dough

Prepare a stand mixer with a paddle attachment, or a large mixing bowl and electric hand mixer. Line a baking sheet using a parchment paper. Set aside.

Using the stand mixer, beat softened butter, sugar, and vanilla on medium-high speed for about 2 minutes or until fluffy and well combined.

Stop the mixer. Using a spatula, scrape down the sides of the bowl. Add the flour and cornstarch while mixing on low speed for another 2 minutes or until well combined. If using a hand mixer, you can use a wooden spoon to mix.

The dough will look dry and crumbly. It is pretty normal so don't panic. First, scrape down the sides again. Now use your hands to form the dough into one piece.

Scoop out about 1 tbsp of dough. Roll it between your palms to shape it into a 1 1/4 inch or 3cm ball. Make sure it is smooth without any cracks.

To make an imprint, use the tip of your thumb about half-inch into the middle of the ball. Or you can also use the back of a 1/4 tsp. to make an imprint. Repeat for all the dough.

Place the indented balls an inch apart on the prepared baking sheet.

Put in the fridge for 30 minutes to chill.

Jam Thumbnail Cookies

Preheat the oven to 350 degrees F or 180 degrees C ten minutes before the end of the chilling time.

Take the jam out and stir. Microwave for 10 seconds if the jam is too thick.

Remove cookie dough from the fridge. Fill the indent with jam, full but not over-flowing.

Put inside the oven and bake for 10-12 minutes. make sure to remove them before your cookies start to brown.

Remove cookies from the baking sheet with a rigid spatula and place it on wire cooling racks. Cool completely.

Chocolate Jam Thumbnail Cookies

Preheat the oven to 350 degrees F or 180 degrees C about ten minutes before the end of chilling.

Place unfilled cookies in the oven and bake for 10-12 minutes.

Microwave your chocolate for 2-3 minutes at 50% power in 30 seconds intervals, stirring each time until smooth. (This depends on the amount of chocolate and your microwave power.)

Make sure to remove the cookies from the oven before they start to brown. Transfer them to cooling racks to cool completely.

Fill each indent with melted chocolate, decorate with sprinkles, candies, or pretzel pieces (whatever you desire).

May 1, 2020 0 comment
0 FacebookTwitterPinterestEmail
Main Dish Recipes

PEPPERMINT BARK

by Rebecca May 1, 2020
written by Rebecca

Peppermint Bark is a DIY homemade holiday dessert; it’s a classic, super delish and very easy to make. I love how the crushed candy canes give this treat a satisfying crunch, with the cool and refreshing taste of peppermint in every bite. This is popular among kids and kids at heart, and a perfect treat to give in the holiday.

INGREDIENTS

1 Cup Mini Candy Canes (Crushed)

½ Tsp Pure Peppermint Extract

2 10-oz bags Semi-Sweet Chocolate Chips

2 10-oz bags White Chocolate Chips

½ Tbsp Coconut Oil

HOW TO MAKE PEPPERMINT BARK

Step 1: Place mini candy canes in a ziplock plastic bag and seal properly. Crush the candies to uneven sizes. Set aside.

Step 2: Line parchment paper on a 9 x 13-inch baking sheet.

Step 3: Put the semi-sweet chocolate chips in a microwave-safe glass bowl. Stir the chocolate and microwave in 15 minutes interval until melted completely.

Step 4: Once melted, pour the chocolate over the parchment paper. Refrigerate.

Step 5: In a separate microwave-safe bowl, place the white chocolate chips, coconut oil, and peppermint extract and heat for 30 seconds. Stir and microwave in 15-seconds intervals (stirring in between each session) until completely melted.

Step 6: Pour the white chocolate mixture over the semi-sweet chocolate mixture. Immediately sprinkle with the mini crushed candy canes. Gently press the candy canes into the white chocolate mixture, and refrigerate to set for about 20 minutes.

Step 7: Once done, remove from the fridge and break into pieces. Enjoy!

Quick Tip:
To keep the peppermint bark from separating, make sure that before breaking it into pieces, allow it first to come to room temperature. And when freezing, make sure to wrap it well. Start with waxed paper, then, some plastic wrap, or foil, and place it into an airtight container to keep out as much moisture as possible. In that way, you can keep your peppermint bark for several months in the freezer.

PEPPERMINT BARK

Rebecca Peppermint Bark is a DIY homemade holiday dessert; it’s a classic, super delish and very easy to make. I love how the crushed candy canes give this treat a satisfying… Main Dish Recipes PEPPERMINT BARK European Print This
Nutrition facts: 200 calories 20 grams fat
Rating: 5.0/5
( 1 voted )

Ingredients

  • 1 Cup Mini Candy Canes (Crushed)
  • ½ Tsp Pure Peppermint Extract
  • 2 10-oz bags Semi-Sweet Chocolate Chips
  • 2 10-oz bags White Chocolate Chips
  • ½ Tbsp Coconut Oil

Instructions

Step 1: Place mini candy canes in a ziplock plastic bag and seal properly. Crush the candies to uneven sizes. Set aside.

Step 2: Line parchment paper on a 9 x 13-inch baking sheet.

Step 3: Put the semi-sweet chocolate chips in a microwave-safe glass bowl. Stir the chocolate and microwave in 15 minutes interval until melted completely.

Step 4: Once melted, pour the chocolate over the parchment paper. Refrigerate.

Step 5: In a separate microwave-safe bowl, place the white chocolate chips, coconut oil, and peppermint extract and heat for 30 seconds. Stir and microwave in 15-seconds intervals (stirring in between each session) until completely melted.

Step 6: Pour the white chocolate mixture over the semi-sweet chocolate mixture. Immediately sprinkle with the mini crushed candy canes. Gently press the candy canes into the white chocolate mixture, and refrigerate to set for about 20 minutes.

Step 7: Once done, remove from the fridge and break into pieces. Enjoy!

Quick Tip:
To keep the peppermint bark from separating, make sure that before breaking it into pieces, allow it first to come to room temperature. And when freezing, make sure to wrap it well. Start with waxed paper, then, some plastic wrap, or foil, and place it into an airtight container to keep out as much moisture as possible. In that way, you can keep your peppermint bark for several months in the freezer.

May 1, 2020 0 comment
0 FacebookTwitterPinterestEmail
Newer Posts
Older Posts

Popular Posts

  • 1

    Crispy Crunchy Parmesan Potatoes

    March 21, 2020
  • 2

    CROCK POT SMOTHERED PORK CHOPS

    March 21, 2020
  • Facebook
  • Twitter

@2019 - All Right Reserved.


Back To Top