Cook it once
  • Home
  • Privacy Policy
  • Recipes
    • KETO
    • LC
    • WW
  • Tips
  • Contact
Cook it once
  • Home
  • Privacy Policy
  • Recipes
    • KETO
    • LC
    • WW
  • Tips
  • Contact
Monthly Archives

May 2020

Main Dish Recipes

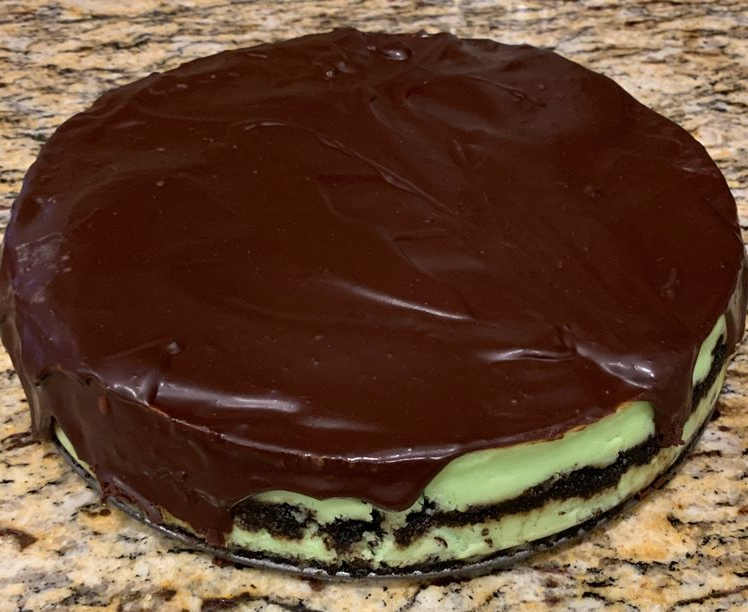
Mint Chocolate Cheesecake

by Rebecca May 2, 2020
written by Rebecca

I sure love the smell of mint chocolate cheesecake! Imagine waking up with a slice of this incredibly delicious cake with coffee on the side. I’m sure your day will be amazing! Well, anyway give this one a try. I’m sure you’re gonna love it.

Ingredients

1 cup of Oreo cookie crumbs

3 Tbsp. sugar

2 Tbsp. butter, melted

For the filling:

4 packages (8 ounces each) cream cheese, softened

1 c sugar

1 c white baking chips, melted and cooled

6 Tbsp. creme de menthe

1/4 c all-purpose flour

2 Tbsp. creme de cacao

1/2 tsp. peppermint extract

4 large eggs, room temperature, lightly beaten

1 cup of coarsely crushed Oreo cookies (about 10 cookies)

GANACHE:

3/4 c semisweet chocolate chips

6 Tbsp. heavy whipping cream

How to make Mint Chocolate Cheesecake

Ready the oven. Preheat to 325 degrees. Grease a 9-inch springform pan. Use a heavy-duty double-thick foil about 18 inches square. Wrap around the pan securely with the foil. Place sugar and cookie crumbs in a small bowl then mix. Add the butter and stir. Press in the bottom of the pan.

Add sugar and beat cream cheese in a large bowl until well-mixed and smooth. Add the flour, creme de menthe cooled chips and creme de cacao and extract. Beat in the eggs at low speed until incorporated with the mix. Pour in half of the batter above the crust and sprinkle the crushed Oreos. Gently top with the remaining batter. In a bigger baking pan, place the springform pan and add 1 cup of hot water. (In the bigger pan.)

Bake for 75-80 minutes until the centre is set and the top part looks a bit dry. Move the springform pan away from the hot water. Place the cheesecake on a wire rack and let it cool for 10 minutes. Use a knife to detach the sides from the pan. Remove the foil and let cool for another 1 hour. Cover and put in the fridge overnight.

Remove the rim from the pan. In a small bowl, put the chocolate chips. Bring cream to a boil in a small saucepan. Pour it over the chocolate and whisk until creamy and smooth. Top over the cheesecake.
Mint Chocolate Cheesecake

Rebecca I sure love the smell of mint chocolate cheesecake! Imagine waking up with a slice of this incredibly delicious cake with coffee on the side. I’m sure your day will… Main Dish Recipes Mint Chocolate Cheesecake European Print This
Nutrition facts: 200 calories 20 grams fat
Rating: 5.0/5
( 1 voted )

Ingredients

  • 1 cup of Oreo cookie crumbs
  • 3 Tbsp. sugar
  • 2 Tbsp. butter, melted
  • For the filling:
  • 4 packages (8 ounces each) cream cheese, softened
  • 1 c sugar
  • 1 c white baking chips, melted and cooled
  • 6 Tbsp. creme de menthe
  • 1/4 c all-purpose flour
  • 2 Tbsp. creme de cacao
  • 1/2 tsp. peppermint extract
  • 4 large eggs, room temperature, lightly beaten
  • 1 cup of coarsely crushed Oreo cookies (about 10 cookies)
  • GANACHE:
  • 3/4 c semisweet chocolate chips
  • 6 Tbsp. heavy whipping cream

Instructions

Ready the oven. Preheat to 325 degrees. Grease a 9-inch springform pan. Use a heavy-duty double-thick foil about 18 inches square. Wrap around the pan securely with the foil. Place sugar and cookie crumbs in a small bowl then mix. Add the butter and stir. Press in the bottom of the pan.

Add sugar and beat cream cheese in a large bowl until well-mixed and smooth. Add the flour, creme de menthe cooled chips and creme de cacao and extract. Beat in the eggs at low speed until incorporated with the mix. Pour in half of the batter above the crust and sprinkle the crushed Oreos. Gently top with the remaining batter. In a bigger baking pan, place the springform pan and add 1 cup of hot water. (In the bigger pan.)

Bake for 75-80 minutes until the centre is set and the top part looks a bit dry. Move the springform pan away from the hot water. Place the cheesecake on a wire rack and let it cool for 10 minutes. Use a knife to detach the sides from the pan. Remove the foil and let cool for another 1 hour. Cover and put in the fridge overnight.

Remove the rim from the pan. In a small bowl, put the chocolate chips. Bring cream to a boil in a small saucepan. Pour it over the chocolate and whisk until creamy and smooth. Top over the cheesecake.
May 2, 2020 0 comment
0 FacebookTwitterPinterestEmail
Main Dish Recipes

Old Fashioned Sugar Cream Pie

by Rebecca May 2, 2020
written by Rebecca

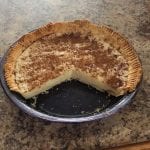
Pies are the best! Do you agree? It is a treat I love on special occasions. It’s a good gift too! This amazing recipe I am sharing with you today is not only simple to make but you will only be needing a very few ingredients as well. By the way, you won’t be needing eggs for this creamy delicious Pie to enjoy a smooth texture! Your house will smell incredibly aromatic, too. So it is the perfect pie for Thanksgiving! Imagine your family coming home to the smell of their childhood. Ah, it’s amazing! So, try this one and advance happy thanksgiving!

Ingredients

Pastry for single-crust pie (9 inches)

1 c sugar

1/4 c cornstarch

2 cups of 2% milk

1/2 c butter, cubed

1 tsp. vanilla extract

1/4 tsp. ground cinnamon

How to make Sugar Cream Pie

Ready the oven and preheat to 450 degrees. Roll the dough and fit in a 9-inch pie plate. Move the crust to the pie plate. Cut the crust to 1/2 inch past the rim of the plate then ridge the edge. Use a heavy-duty double-thick foil to line the uncooked crust. You can use uncooked rice, pie weights or dried beans to fill the pie.

Bake in the preheated oven for 8 minutes. Remove the foil and weights and bake for another 5-7 minutes or more until you achieve a light brown color. Move to the wire rack to cool. Turn down the heat of the oven to 375 degrees.

Mix cornstarch and sugar in a large saucepan. Add in the milk until creamy and smooth then bring it to a boil. Now, turn down the heat; cook and stir for 2 minutes until the sauce is thick and bubbly. Move the pan away from the heat then add vanilla and butter; keep stirring. Add to the crust and drizzle with cinnamon. Put it back into the oven and bake for 15-20 minutes or until the color turns golden brown. Place on the wire rack and let it cool. Put in the fridge to chill.

Old Fashioned Sugar Cream Pie

Rebecca Pies are the best! Do you agree? It is a treat I love on special occasions. It’s a good gift too! This amazing recipe I am sharing with you today… Main Dish Recipes Old Fashioned Sugar Cream Pie European Print This
Nutrition facts: 200 calories 20 grams fat
Rating: 5.0/5
( 1 voted )

Ingredients

  • Pastry for single-crust pie (9 inches)
  • 1 c sugar
  • 1/4 c cornstarch
  • 2 cups of 2% milk
  • 1/2 c butter, cubed
  • 1 tsp. vanilla extract
  • 1/4 tsp. ground cinnamon

Instructions

Ready the oven and preheat to 450 degrees. Roll the dough and fit in a 9-inch pie plate. Move the crust to the pie plate. Cut the crust to 1/2 inch past the rim of the plate then ridge the edge. Use a heavy-duty double-thick foil to line the uncooked crust. You can use uncooked rice, pie weights or dried beans to fill the pie.

Bake in the preheated oven for 8 minutes. Remove the foil and weights and bake for another 5-7 minutes or more until you achieve a light brown color. Move to the wire rack to cool. Turn down the heat of the oven to 375 degrees.

Mix cornstarch and sugar in a large saucepan. Add in the milk until creamy and smooth then bring it to a boil. Now, turn down the heat; cook and stir for 2 minutes until the sauce is thick and bubbly. Move the pan away from the heat then add vanilla and butter; keep stirring. Add to the crust and drizzle with cinnamon. Put it back into the oven and bake for 15-20 minutes or until the color turns golden brown. Place on the wire rack and let it cool. Put in the fridge to chill.

May 2, 2020 0 comment
0 FacebookTwitterPinterestEmail
Main Dish Recipes

Snickerdoodle Cheesecake Bars

by Rebecca May 2, 2020
written by Rebecca

I L.O.V.E Cheesecake! It’s my comfort food. Luckily I know how to make one.

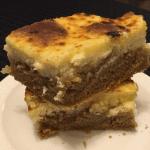
Hi there! I’m back to share another awesome recipe for you today! It has a pretty cool name as well. Snickerdoodle Cheesecake Bars! It’s so simple and easy to make. Follow these instructions and you are in for a treat. The soft and nice texture of this cheesecake will satisfy your cravings! I should know. Anyway, Have fun! Until next time!

Ingredients

For the Cheesecake Layer

2 (8-oz.) blocks of cream cheese, softened

1/2 cup granulated sugar

2 large eggs

1/2 tsp. pure vanilla extract

pinch of kosher salt

For the Snickerdoodle Layer

2 1/4 c. all-purpose flour

1/2 tsp. baking soda

1 1/2 tsp. ground cinnamon

1 tsp. kosher salt

3/4 c. (1 1/2 sticks) unsalted butter, melted

1 cup granulated sugar

1/2 cup packed brown sugar

2 large eggs

1 tsp. pure vanilla extract

1/4 cup cinnamon sugar, for sprinkling

How to make Snickerdoodle Cheesecake Bars

Ready the oven and preheat to 350 degrees. Grease with cooking spray a 9×13 baking pan. For the cheesecake layer: Add sugar and beat cream cheese in a large bowl until well-mixed. Now, add-in vanilla, eggs, and salt. Stir continuously until all ingredients are well incorporated.

Snickerdoodle layer: Mix baking soda, flour, cinnamon, and salt in a medium-sized bowl. Beat sugar and butter in a large bowl. (Use a hand mixer.) Add-in eggs and vanilla then beat until well-mixed. Slowly add the flour mixture and beat at low speed.

Press evenly half of the snickerdoodle dough in the bottom part of the pan and dredge with about half of the cinnamon sugar. Top with the cheesecake batter. (Use a spatula to flatten out the batter.) Split up the remainder of the snickerdoodle dough into small pieces, use your hands to flatten slightly then top the cheesecake layer. Sprinkle the cinnamon sugar on top.

Bake for 40 minutes until the center of the cheesecake is fluffy and the edges are done. Remove from the oven and let it cool. Slice it into squares.

Note: You can make your cinnamon sugar. Just mix 1/4 cup of sugar and 1 tsp. of ground cinnamon in a small bowl. Whisk until well-mixed.

Snickerdoodle Cheesecake Bars

Rebecca I L.O.V.E Cheesecake! It’s my comfort food. Luckily I know how to make one. Hi there! I’m back to share another awesome recipe for you today! It has a pretty… Main Dish Recipes Snickerdoodle Cheesecake Bars European Print This
Nutrition facts: 200 calories 20 grams fat
Rating: 5.0/5
( 1 voted )

Ingredients

  • For the Cheesecake Layer
  • 2 (8-oz.) blocks of cream cheese, softened
  • 1/2 cup granulated sugar
  • 2 large eggs
  • 1/2 tsp. pure vanilla extract
  • pinch of kosher salt
  • For the Snickerdoodle Layer
  • 2 1/4 c. all-purpose flour
  • 1/2 tsp. baking soda
  • 1 1/2 tsp. ground cinnamon
  • 1 tsp. kosher salt
  • 3/4 c. (1 1/2 sticks) unsalted butter, melted
  • 1 cup granulated sugar
  • 1/2 cup packed brown sugar
  • 2 large eggs
  • 1 tsp. pure vanilla extract
  • 1/4 cup cinnamon sugar, for sprinkling

Instructions

Ready the oven and preheat to 350 degrees. Grease with cooking spray a 9x13 baking pan. For the cheesecake layer: Add sugar and beat cream cheese in a large bowl until well-mixed. Now, add-in vanilla, eggs, and salt. Stir continuously until all ingredients are well incorporated.

Snickerdoodle layer: Mix baking soda, flour, cinnamon, and salt in a medium-sized bowl. Beat sugar and butter in a large bowl. (Use a hand mixer.) Add-in eggs and vanilla then beat until well-mixed. Slowly add the flour mixture and beat at low speed.

Press evenly half of the snickerdoodle dough in the bottom part of the pan and dredge with about half of the cinnamon sugar. Top with the cheesecake batter. (Use a spatula to flatten out the batter.) Split up the remainder of the snickerdoodle dough into small pieces, use your hands to flatten slightly then top the cheesecake layer. Sprinkle the cinnamon sugar on top.

Bake for 40 minutes until the center of the cheesecake is fluffy and the edges are done. Remove from the oven and let it cool. Slice it into squares.

Note: You can make your cinnamon sugar. Just mix 1/4 cup of sugar and 1 tsp. of ground cinnamon in a small bowl. Whisk until well-mixed.

May 2, 2020 0 comment
0 FacebookTwitterPinterestEmail
Main Dish Recipes

Doritos Locos Taco Pasta Salad

by Rebecca May 2, 2020
written by Rebecca

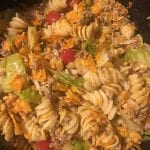
Who’s up for Tacos and Pasta? You? I knew it! Here’s another recipe that I know you are going to enjoy. I have recently stumbled upon this recipe while I was browsing the internet. What got me was the combination of taco and pasta. I mean, what’s that gonna taste like? So, I followed these simple steps and it got me to the perfect dish! I started bragging about it to my friends and they wouldn’t believe me so I told them to come over to my house and taste it themselves. Their reactions were really funny. I will never forget their faces! Okay enough with the stories. Let’s go back to business. I have made a few modifications to the recipe. Still it is perfect! Try it and ask your friends to come over. Maybe buy a bucket of ice-cold beer and put on a good movie. It’s gonna be a fun night! It would be an awesome night to catch up with your friends after this quarantine. With, of course, a nice Doritos locos taco pasta salad! Stay safe and enjoy this recipe.

Ingredients

1/2 pound lean ground beef

1/2 pound rotini pasta

2 tablespoon of taco seasoning

1/2 yellow sweet pepper, chopped

1/4 small white onion, diced

1/2 pint grape tomatoes

1 cup of shredded cheddar cheese

1/2 head iceberg lettuce, shredded

1/2 cup French dressing

1/4 cup sour cream

1 1/2 cup of nacho cheese Doritos, crushed

How to make Doritos Locos Taco Pasta Salad

Set the heat to over medium-high. Cook the beef in a pan until you get a brown color out of it. Leave out about 3 tbsp. of grease and drain the rest.

Pour in the taco seasoning and stir. Set aside.

Follow the instructions written on the package of the rotini. Set aside after draining.

In a large bowl, add all the ingredients and toss until well-mixed.

Add sour cream to garnish. Serve and enjoy!

Doritos Locos Taco Pasta Salad

Rebecca Who’s up for Tacos and Pasta? You? I knew it! Here’s another recipe that I know you are going to enjoy. I have recently stumbled upon this recipe while I… Main Dish Recipes Doritos Locos Taco Pasta Salad European Print This
Nutrition facts: 200 calories 20 grams fat
Rating: 5.0/5
( 1 voted )

Ingredients

  • 1/2 pound lean ground beef
  • 1/2 pound rotini pasta
  • 2 tablespoon of taco seasoning
  • 1/2 yellow sweet pepper, chopped
  • 1/4 small white onion, diced
  • 1/2 pint grape tomatoes
  • 1 cup of shredded cheddar cheese
  • 1/2 head iceberg lettuce, shredded
  • 1/2 cup French dressing
  • 1/4 cup sour cream
  • 1 1/2 cup of nacho cheese Doritos, crushed

Instructions

Set the heat to over medium-high. Cook the beef in a pan until you get a brown color out of it. Leave out about 3 tbsp. of grease and drain the rest.

Pour in the taco seasoning and stir. Set aside.

Follow the instructions written on the package of the rotini. Set aside after draining.

In a large bowl, add all the ingredients and toss until well-mixed.

Add sour cream to garnish. Serve and enjoy!

May 2, 2020 0 comment
0 FacebookTwitterPinterestEmail
Main Dish Recipes

Old Fashioned Creamy Rice Pudding

by Rebecca May 2, 2020
written by Rebecca

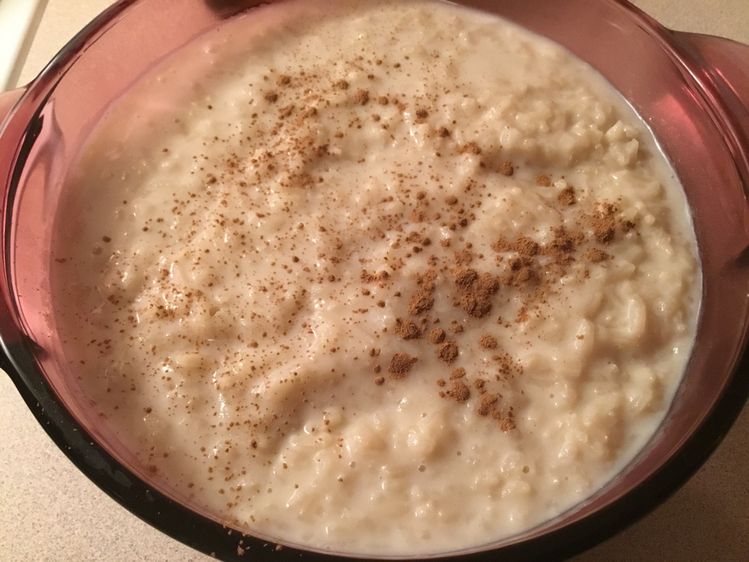
Rice puddings are served during cold weather. I remember always asking my mom to make this for me. It brings me comfort and warmth. And now that I have kids of my own, I make sure that they get to experience the same feeling I had whenever my mom served it for us. This recipe of Creamy Rice Pudding is nothing like my moms. It’s differently delicious (sorry mom, I still love your rice pudding though). I’ve never tasted anything like this. And it is very easy to make, you only need simple ingredients. I’m sure to share this with her, she will love this! She can put raisins to it just the way she always likes her pudding.

The first time I cooked this, it turned out amazing, even my kids can’t get enough of it! It’s so creamy and not-so-sweet. I even taught my eldest daughter this recipe, She’s 12. This is something I want my kids to pass on to their children as well. It’s like a family tradition. I know this is quite simple for a family recipe but this has a huge place in our hearts. Now, I want you to have this recipe. Just follow these simple instructions and you’ll have the perfect rice pudding, I promise you. This is our way of saying, God bless us all!

By the way, Before serving, sprinkle it with cinnamon or some nuts on top. It’s the best!

Ingredients

2 cups of white rice, cooked

2 cups of whole milk

3 Tbsp. unsalted butter

1/3 cup granulated white sugar

1/4 cup brown sugar

1/2 tsp. vanilla extract

1/4 tsp. cinnamon

How to make Creamy Rice Pudding

Put all the ingredients in a saucepan and mix thoroughly. Set to medium-low heat.

Keep stirring while bringing it to boil. Cook for 15-20 minutes.

Remove from heat and let it cool for 5-7 minutes then serve. Enjoy!

Old Fashioned Creamy Rice Pudding

Rebecca Rice puddings are served during cold weather. I remember always asking my mom to make this for me. It brings me comfort and warmth. And now that I have kids… Main Dish Recipes Old Fashioned Creamy Rice Pudding European Print This
Nutrition facts: 200 calories 20 grams fat
Rating: 5.0/5
( 1 voted )

Ingredients

  • 2 cups of white rice, cooked
  • 2 cups of whole milk
  • 3 Tbsp. unsalted butter
  • 1/3 cup granulated white sugar
  • 1/4 cup brown sugar
  • 1/2 tsp. vanilla extract
  • 1/4 tsp. cinnamon

Instructions

Put all the ingredients in a saucepan and mix thoroughly. Set to medium-low heat.

Keep stirring while bringing it to boil. Cook for 15-20 minutes.

Remove from heat and let it cool for 5-7 minutes then serve. Enjoy!

May 2, 2020 0 comment
0 FacebookTwitterPinterestEmail
Main Dish Recipes

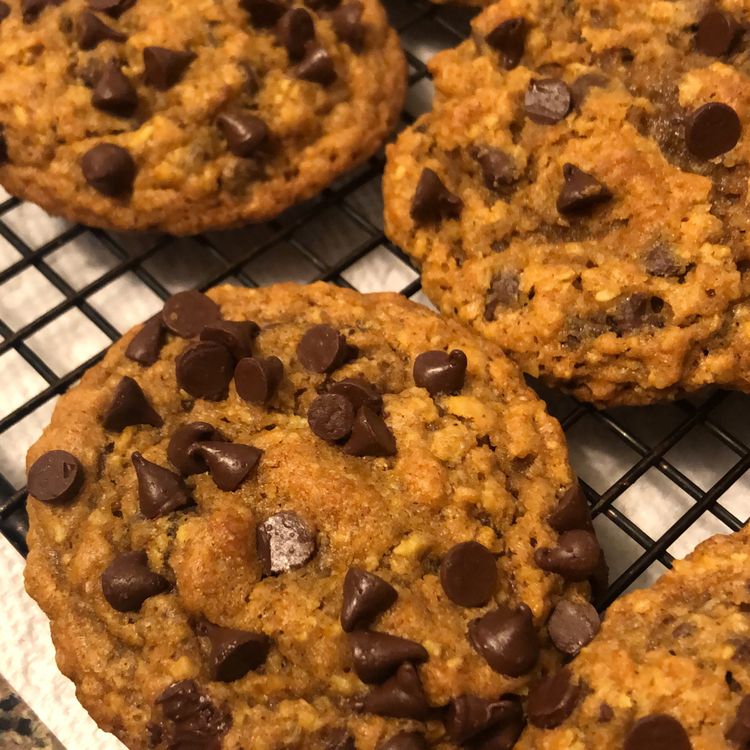
PUMPKIN OATMEAL CHOCOLATE CHIP COOKIES

by Rebecca May 2, 2020
written by Rebecca

I love cookies that crisp on the outside and chewy in the middle. I know, it is nothing like your traditional cookie, but nothing beats a deliciously different cookie. With this recipe, you’ll get to know the difference. I’m confident that you’ll love this pumpkin oatmeal cookies with chocolate chips.

Ingredients

3/4 cup unsalted butter softened

1 cup (181g) light brown sugar lightly packed

1/2 cup (107g) white sugar

1/2 cup + 2 Tbsp. (139g) canned pumpkin (not pumpkin pie filling and not the entire can)

1 large egg yolk discard or save the whites for another recipe

1 tsp. vanilla extract

1 and 1/2 cups (195g) white all-purpose flour

1 and 1/2 cups (151g) quick oats

1 tsp. cinnamon

2 tsp. pumpkin pie spice

1 tsp. baking soda

1/2 tsp. baking powder

1/2 tsp. salt

1/2 cup + 2 Tbsp. (116g) miniature semi-sweet chocolate chips

1/2 cup (95g) regular milk or dark chocolate chips

Instructions

Place softened butter, with the brown and white sugar in a mixing bowl. Use a hand mixer to beat.

Add the pumpkin, egg yolk, and vanilla. Beat more. (Make sure the pumpkin is not watery, use only high quality canned pumpkin. Adding watery pumpkin will make your cookies cakey. If need you can drab the pumpkin with a paper towel)

In a separate bowl, stir the flour, quick oats, cinnamon, pumpkin pie spice, baking soda, baking powder, and salt. If you prefer to add more seasonings you can; nutmeg, allspice, cloves, more cinnamon, pumpkin pie spice, etc.

Please use exact flour measurement; too much flour will lead to cakey cookies, and too little will cause your cookie to spread. Use your finger to level the flour at the top of the measuring cup, and do not press it down.

Add the dry ingredients to the wet mixture until just combined.

Once all the flour is added, the mixture should pull away from the edges. At this point, you can stir in the chocolate chips. (you can use whatever you like! I use just regular-sized milk chocolate chips and miniature semi-sweet chocolates)

We want to first refrigerate the dough, so cover them up and let them sit in the fridge for 30 minutes or (I prefer) one hour. This is an important step, make sure not to skip or your cookies will likely to spread.

Ready the oven. Preheat to 350 degrees F.

Now, line a baking mat with a nonstick liner, you can use parchment paper, too. This helps to cook the cookies evenly and not burn the edges.

Remove the chilled dough from the fridge. Roll two small balls of dough and press one ball on top of the other. Mesh into one tall piece without flattening. You have to get a tallish, almost vertical rectangle shape. So when baking, the bottom of the tall rectangle will cook first, then the top section next, all this in slightly less time. The shape is important to have that crisp on the outside and chewy in the inside cookies.

Only put 6-8 cookies on a cookie sheet because they spread quite large (depending on how much dough you rolled). I usually use 3-4 tablespoons per cookie.

Put the first batch in the fridge to chill and work on rolling the other batches.

When baking, after taking the tray out of the fridge, place it directly in the oven.

Bake in the preheated oven for 12-14 minutes or until the bottom and sides are very lightly browned. The secret is to slightly under-bake the cookies to keep them soft and chewy.

Remove the tray from the oven and allow the cookies to cook for another 1-2 minutes on the baking sheet. Transfer them to a wire cooling rack. (this is all up to you but you can press in 5-6 pieces of chocolate chips into the top of each cookie as soon as you remove them from the oven, for presentation)

I would suggest keeping the cookies for another day before serving. This way the cinnamon and pumpkin flavours already intensified. Make sure to store them in an airtight container.

PUMPKIN OATMEAL CHOCOLATE CHIP COOKIES

Rebecca I love cookies that crisp on the outside and chewy in the middle. I know, it is nothing like your traditional cookie, but nothing beats a deliciously different cookie. With… Main Dish Recipes PUMPKIN OATMEAL CHOCOLATE CHIP COOKIES European Print This
Nutrition facts: 200 calories 20 grams fat
Rating: 5.0/5
( 1 voted )

Ingredients

  • 3/4 cup unsalted butter softened
  • 1 cup (181g) light brown sugar lightly packed
  • 1/2 cup (107g) white sugar
  • 1/2 cup + 2 Tbsp. (139g) canned pumpkin (not pumpkin pie filling and not the entire can)
  • 1 large egg yolk discard or save the whites for another recipe
  • 1 tsp. vanilla extract
  • 1 and 1/2 cups (195g) white all-purpose flour
  • 1 and 1/2 cups (151g) quick oats
  • 1 tsp. cinnamon
  • 2 tsp. pumpkin pie spice
  • 1 tsp. baking soda
  • 1/2 tsp. baking powder
  • 1/2 tsp. salt
  • 1/2 cup + 2 Tbsp. (116g) miniature semi-sweet chocolate chips
  • 1/2 cup (95g) regular milk or dark chocolate chips

Instructions

Place softened butter, with the brown and white sugar in a mixing bowl. Use a hand mixer to beat.

Add the pumpkin, egg yolk, and vanilla. Beat more. (Make sure the pumpkin is not watery, use only high quality canned pumpkin. Adding watery pumpkin will make your cookies cakey. If need you can drab the pumpkin with a paper towel)

In a separate bowl, stir the flour, quick oats, cinnamon, pumpkin pie spice, baking soda, baking powder, and salt. If you prefer to add more seasonings you can; nutmeg, allspice, cloves, more cinnamon, pumpkin pie spice, etc.

Please use exact flour measurement; too much flour will lead to cakey cookies, and too little will cause your cookie to spread. Use your finger to level the flour at the top of the measuring cup, and do not press it down.

Add the dry ingredients to the wet mixture until just combined.

Once all the flour is added, the mixture should pull away from the edges. At this point, you can stir in the chocolate chips. (you can use whatever you like! I use just regular-sized milk chocolate chips and miniature semi-sweet chocolates)

We want to first refrigerate the dough, so cover them up and let them sit in the fridge for 30 minutes or (I prefer) one hour. This is an important step, make sure not to skip or your cookies will likely to spread.

Ready the oven. Preheat to 350 degrees F.

Now, line a baking mat with a nonstick liner, you can use parchment paper, too. This helps to cook the cookies evenly and not burn the edges.

Remove the chilled dough from the fridge. Roll two small balls of dough and press one ball on top of the other. Mesh into one tall piece without flattening. You have to get a tallish, almost vertical rectangle shape. So when baking, the bottom of the tall rectangle will cook first, then the top section next, all this in slightly less time. The shape is important to have that crisp on the outside and chewy in the inside cookies.

Only put 6-8 cookies on a cookie sheet because they spread quite large (depending on how much dough you rolled). I usually use 3-4 tablespoons per cookie.

Put the first batch in the fridge to chill and work on rolling the other batches.

When baking, after taking the tray out of the fridge, place it directly in the oven.

Bake in the preheated oven for 12-14 minutes or until the bottom and sides are very lightly browned. The secret is to slightly under-bake the cookies to keep them soft and chewy.

Remove the tray from the oven and allow the cookies to cook for another 1-2 minutes on the baking sheet. Transfer them to a wire cooling rack. (this is all up to you but you can press in 5-6 pieces of chocolate chips into the top of each cookie as soon as you remove them from the oven, for presentation)

I would suggest keeping the cookies for another day before serving. This way the cinnamon and pumpkin flavours already intensified. Make sure to store them in an airtight container.

May 2, 2020 0 comment
0 FacebookTwitterPinterestEmail
Main Dish Recipes

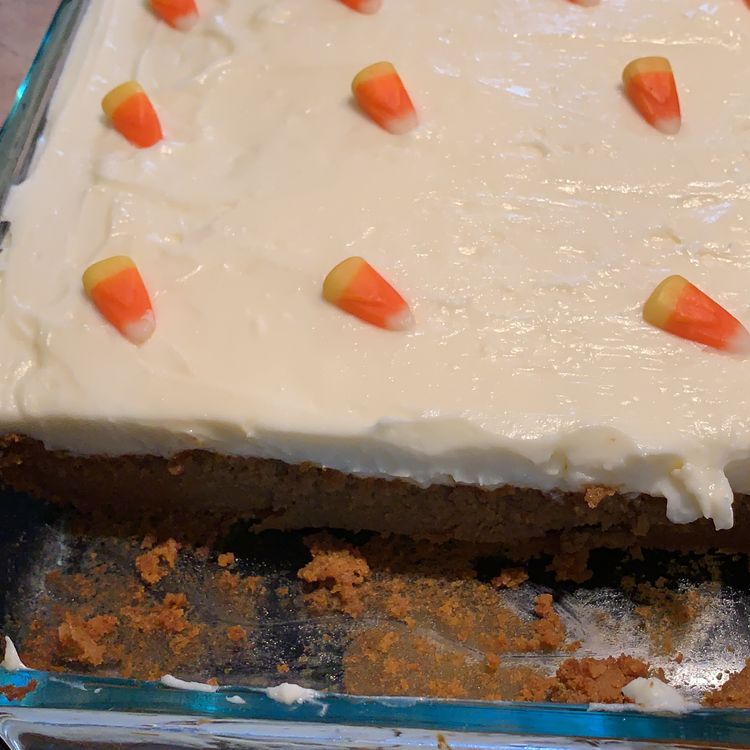
Pumpkin Cake Cheesecake

by Rebecca May 2, 2020
written by Rebecca

Pumpkins remind me of Fall. It is the season where I never stop baking! And speaking of pumpkins, the first in my list is this Pumpkin Cake Cheesecake. Oh, I am a fan of cheesecakes and pumpkin pie is one of my favourites! So this is going to be a real treat; these two in one incredibly and insanely delicious cake!

I like mine drizzled in caramel sauce. Just melt one bag of caramel and a can of evaporated milk, drizzle the caramel sauce over each slice and serve. I promise it makes a whole lot of difference!

Ingredients

Cake Ingredients

1 cup pumpkin puree

1 cup brown sugar (packed)

1/2 cup vegetable oil

2 large eggs

1 tsp vanilla

1 tsp baking soda

1 tsp pumpkin pie spice

1 tsp cinnamon

Pinch of salt

1 1/4 cup flour

Cheesecake Ingredients

16 oz cream cheese (room temperature)

1/2 cup sugar

1 tsp vanilla

3 large eggs

2 Tbsp. flour

Frosting Ingredients

4 oz cream cheese (soft)

2 Tbsp. unsalted butter (soft)

2 cups powdered sugar

1 tsp vanilla

1 Tbsp. whole milk

1 bag walnuts (chopped)

9-inch springform pan

Baking spray

Large bowl

Whisk

Medium bowl

Electric mixer/ bowl

offset spatula

Foil

Instructions

Ready the oven. Preheat to 350 degrees F.

Greased the springform pan with a cooking spray.

Set Aside.

To make the cake

In a large bowl, add the baking soda, pumpkin pie spice, cinnamon, and salt.

Whisk the dry ingredients until well-blended.

In a separate bowl, whisk to combine the oil, brown sugar, eggs, and vanilla.

Pour the wet ingredients slowly into the dry ingredients, whisking carefully to combine. Remember not to over whisk. Add the pumpkin puree while still mixing both dry and wet ingredients.

To make the cheesecake mixture

Use an electric mixer to beat the cream cheese, sugar, eggs, and flour. Beat on high until combined and smooth. Add and mix the vanilla.

Now, let’s make the cheesecake!

Spread half of the pumpkin cake batter at the bottom of the prepared pan.

Using a large spoon, dollop the first half of the cheesecake batter on top of the pumpkin cake batter (don’t spread or swirl, just dollop).

Add half of the pumpkin cake batter around the cheesecake batter. Again don’t spread, only use spoonfuls of dollops.

Now, add half of the cheesecake batter on top of the other layers. This time spread the cheesecake batter and use an offset spatula to even the layer.

Bake in the preheated oven for 50-60 minutes at 350 degrees.

The cheesecake will puff up while baking (it’s normal).

The cake may crack as well but it will settle once it’s cooled.

Once the cake is done. Remove from the oven and transfer to a wire rack to cool completely.

Then, refrigerate the cheesecake for at least 4 hours or overnight.

It’s time to frost

Place the cream cheese and butter in a mixing bowl and beat using an electric mixer. Beat until creamy and smooth.

Slowly add small amounts of powdered sugar while the mixer is still on. Continue mixing until all ingredients are well-mixed.

Add and mix the vanilla.

Pour the whole milk and mix again.

Remove the cake from the springform pan. Carefully run a thin knife around the cake, then release the ring of the pan.

Spread first the frosting around the sides of the cheesecake, moving to the top. Frost evenly.

Place the chopped walnuts on the sides of the cake until completely covered.

Cover the cheesecake. Place in the refrigerator until it is ready to serve.

Pumpkin Cake Cheesecake

Rebecca Pumpkins remind me of Fall. It is the season where I never stop baking! And speaking of pumpkins, the first in my list is this Pumpkin Cake Cheesecake. Oh, I… Main Dish Recipes Pumpkin Cake Cheesecake European Print This
Nutrition facts: 200 calories 20 grams fat
Rating: 5.0/5
( 1 voted )

Ingredients

  • Cake Ingredients
  • 1 cup pumpkin puree
  • 1 cup brown sugar (packed)
  • 1/2 cup vegetable oil
  • 2 large eggs
  • 1 tsp vanilla
  • 1 tsp baking soda
  • 1 tsp pumpkin pie spice
  • 1 tsp cinnamon
  • Pinch of salt
  • 1 1/4 cup flour
  • Cheesecake Ingredients
  • 16 oz cream cheese (room temperature)
  • 1/2 cup sugar
  • 1 tsp vanilla
  • 3 large eggs
  • 2 Tbsp. flour
  • Frosting Ingredients
  • 4 oz cream cheese (soft)
  • 2 Tbsp. unsalted butter (soft)
  • 2 cups powdered sugar
  • 1 tsp vanilla
  • 1 Tbsp. whole milk
  • 1 bag walnuts (chopped)
  • 9-inch springform pan
  • Baking spray
  • Large bowl
  • Whisk
  • Medium bowl
  • Electric mixer/ bowl
  • offset spatula
  • Foil

Instructions

Ready the oven. Preheat to 350 degrees F.

Greased the springform pan with a cooking spray.

Set Aside.

To make the cake

In a large bowl, add the baking soda, pumpkin pie spice, cinnamon, and salt.

Whisk the dry ingredients until well-blended.

In a separate bowl, whisk to combine the oil, brown sugar, eggs, and vanilla.

Pour the wet ingredients slowly into the dry ingredients, whisking carefully to combine. Remember not to over whisk. Add the pumpkin puree while still mixing both dry and wet ingredients.

To make the cheesecake mixture

Use an electric mixer to beat the cream cheese, sugar, eggs, and flour. Beat on high until combined and smooth. Add and mix the vanilla.

Now, let's make the cheesecake!

Spread half of the pumpkin cake batter at the bottom of the prepared pan.

Using a large spoon, dollop the first half of the cheesecake batter on top of the pumpkin cake batter (don't spread or swirl, just dollop).

Add half of the pumpkin cake batter around the cheesecake batter. Again don't spread, only use spoonfuls of dollops.

Now, add half of the cheesecake batter on top of the other layers. This time spread the cheesecake batter and use an offset spatula to even the layer.

Bake in the preheated oven for 50-60 minutes at 350 degrees.

The cheesecake will puff up while baking (it's normal).

The cake may crack as well but it will settle once it's cooled.

Once the cake is done. Remove from the oven and transfer to a wire rack to cool completely.

Then, refrigerate the cheesecake for at least 4 hours or overnight.

It's time to frost

Place the cream cheese and butter in a mixing bowl and beat using an electric mixer. Beat until creamy and smooth.

Slowly add small amounts of powdered sugar while the mixer is still on. Continue mixing until all ingredients are well-mixed.

Add and mix the vanilla.

Pour the whole milk and mix again.

Remove the cake from the springform pan. Carefully run a thin knife around the cake, then release the ring of the pan.

Spread first the frosting around the sides of the cheesecake, moving to the top. Frost evenly.

Place the chopped walnuts on the sides of the cake until completely covered.

Cover the cheesecake. Place in the refrigerator until it is ready to serve.

May 2, 2020 0 comment
0 FacebookTwitterPinterestEmail
Main Dish Recipes

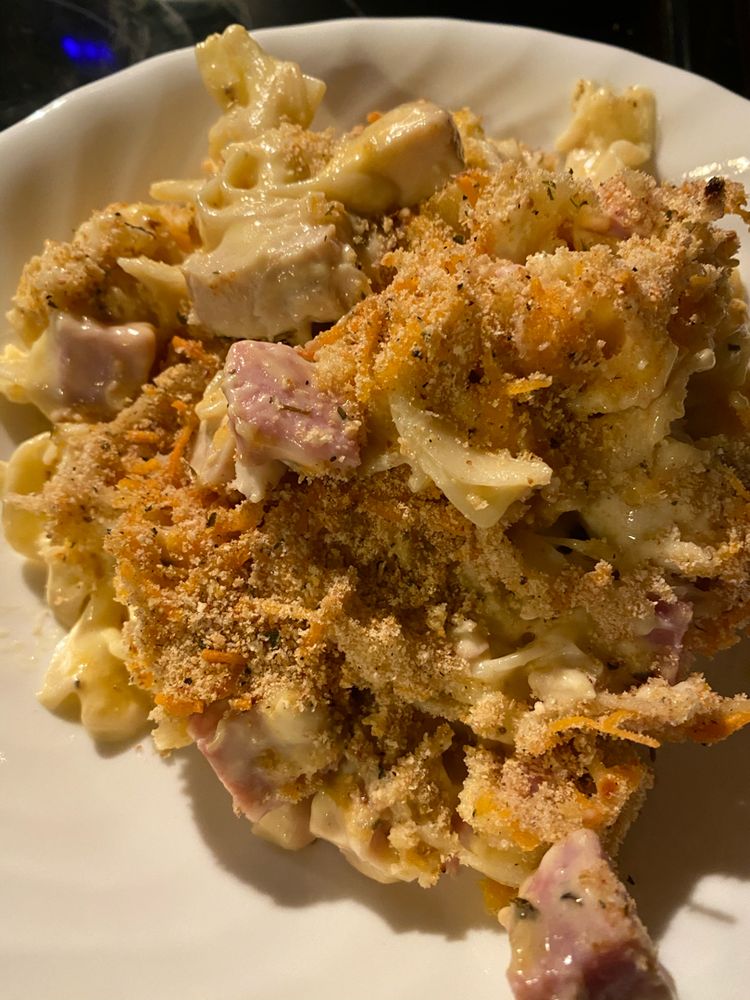
Chicken Cordon Bleu Casserole

by Rebecca May 2, 2020
written by Rebecca

This casserole is so flavorful and simple. It is a quick meal to serve during dinner and it is so deliciously satisfying to serve on any occasion. It is the most requested dish whenever everybody is coming over for dinner. And I always make extra for taking out!

Ingredients

2 box of Stove Top chicken stuffing, 6 oz each

1 can of Campbell’s cream of mushroom roasted garlic soup, 10.5 oz

1/2 can Campbell’s golden mushroom soup, 10.5 oz

1 pkg diced ham, 8 oz

2 1/2 lb chicken tenderloins

1 pkg of Swiss cheese, 8 oz

1 pkg Muenster cheese, 8 oz

1 pkg of French’s French Fried Onions (optional but highly recommended!), 6 oz

How to make Chicken Cordon Bleu Casserole

Step 1: Ready the oven. Preheat to 425 degrees.

Step 2: Cut the tenderloins into cubes. Place them in a large rimmed pan, add a little bit of water. Adding just enough water will keep the chicken from burning the bottom of the pan.

Step 3: Cover the chicken, and stir occasionally for about 15 minutes on medium-high heat until it is cooked. Although, the cooking time may vary so make sure to regularly check the chicken.

Step 4: Prepare the stuffing following the direction written on the package.

Step 5: Grease a 9 x 13-inch pan.

Step 6: Pour the stuffing on a prepared greased pan, creating a layer across the bottom. Wet your hands with cold water and pat down the stuffing nice and flat.

Step 7: Layer the Swiss cheese over the stuffing.

Step 8: Check the chicken if it is cooked. Then, remove the pan from the heat. Strain the excess liquid.

Step 9: Place and mix all the ingredients in a large bowl; the diced chicken, cubed ham, one can of cream of mushroom roasted garlic soup, and 1/2 can of golden mushroom soup. When adding French Fried Onions to the casserole (this step is optional, but is highly recommended), add only the half package into the creamy mixture and reserve the other half for topping.

Step 10: Using a spatula, evenly spread the cream of mushroom mixture over the first cheese layer.

Step 11: Top with Muenster cheese to create a new cheese layer.

Step 12: Sprinkle with salt and pepper.

Step 13: Place in the oven. Bake for 20-25 minutes or until the cheese is melted and the casserole is bubbling.

Step 14: If you are adding French Friend Onions, cook the casserole for 20 minutes, then top with onions and cook for another 5 minutes (again this is optional).

Chicken Cordon Bleu Casserole

Rebecca This casserole is so flavorful and simple. It is a quick meal to serve during dinner and it is so deliciously satisfying to serve on any occasion. It is the… Main Dish Recipes Chicken Cordon Bleu Casserole European Print This
Nutrition facts: 200 calories 20 grams fat
Rating: 5.0/5
( 1 voted )

Ingredients

  • 2 box of Stove Top chicken stuffing, 6 oz each
  • 1 can of Campbell's cream of mushroom roasted garlic soup, 10.5 oz
  • 1/2 can Campbell's golden mushroom soup, 10.5 oz
  • 1 pkg diced ham, 8 oz
  • 2 1/2 lb chicken tenderloins
  • 1 pkg of Swiss cheese, 8 oz
  • 1 pkg Muenster cheese, 8 oz
  • 1 pkg of French's French Fried Onions (optional but highly recommended!), 6 oz

Instructions

Step 1: Ready the oven. Preheat to 425 degrees.

Step 2: Cut the tenderloins into cubes. Place them in a large rimmed pan, add a little bit of water. Adding just enough water will keep the chicken from burning the bottom of the pan.

Step 3: Cover the chicken, and stir occasionally for about 15 minutes on medium-high heat until it is cooked. Although, the cooking time may vary so make sure to regularly check the chicken.

Step 4: Prepare the stuffing following the direction written on the package.

Step 5: Grease a 9 x 13-inch pan.

Step 6: Pour the stuffing on a prepared greased pan, creating a layer across the bottom. Wet your hands with cold water and pat down the stuffing nice and flat.

Step 7: Layer the Swiss cheese over the stuffing.

Step 8: Check the chicken if it is cooked. Then, remove the pan from the heat. Strain the excess liquid.

Step 9: Place and mix all the ingredients in a large bowl; the diced chicken, cubed ham, one can of cream of mushroom roasted garlic soup, and 1/2 can of golden mushroom soup. When adding French Fried Onions to the casserole (this step is optional, but is highly recommended), add only the half package into the creamy mixture and reserve the other half for topping.

Step 10: Using a spatula, evenly spread the cream of mushroom mixture over the first cheese layer.

Step 11: Top with Muenster cheese to create a new cheese layer.

Step 12: Sprinkle with salt and pepper.

Step 13: Place in the oven. Bake for 20-25 minutes or until the cheese is melted and the casserole is bubbling.

Step 14: If you are adding French Friend Onions, cook the casserole for 20 minutes, then top with onions and cook for another 5 minutes (again this is optional).

May 2, 2020 0 comment
0 FacebookTwitterPinterestEmail
Main Dish Recipes

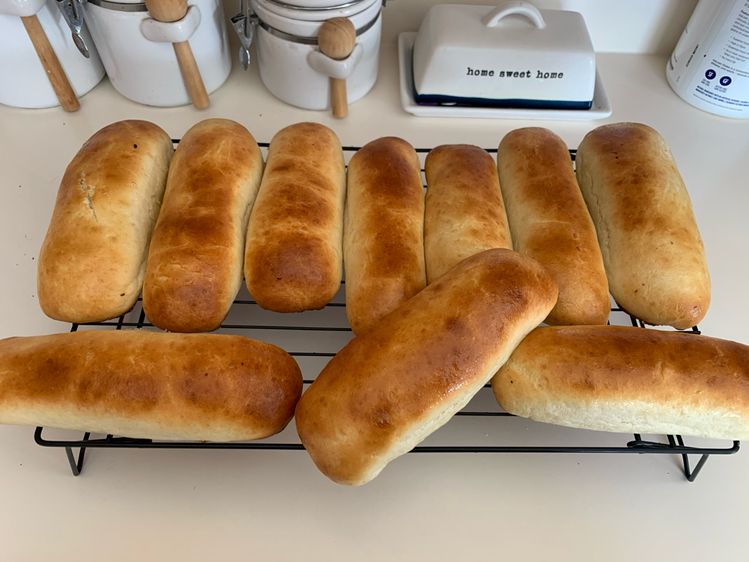
30-MINUTE HOT DOG OR HAMBURGER BUNS

by Rebecca May 2, 2020
written by Rebecca

I always buy 2 or 3 packs of buns because my kids love to make their homemade hamburger and hotdog sandwiches. This gives me an idea to just make our buns. Thankfully, I stumbled upon this fast and easy recipe on how to make delicious buns. And it took me only 30 minutes to make them and boy that was fast!

Ingredients

1 cup plus 3 tablespoons warm water 110 degrees

1/3 cup of canola oil

1/4 cup of sugar

2 full tablespoons active dry yeast

1 teaspoon salt

1 egg beaten

3 1/3 cups bread flour

1 pat of real butter

How to make Hotdog or Hamburger Buns

Step 1: Line parchment paper in a cookie sheet. Prepare all the ingredients. Make sure to use the exact measurements. You have to use the original ingredients, don’t substitute because we must follow exactly what the recipe says.

Step 2: Warm a large mixing bowl by rinsing it with hot water. In the same mixing bowl, add warm water, oil, sugar, and yeast. Sit for 15 minutes (use a timer).

Step 3: Measure the flour. Add one teaspoon of salt and mix well.

Step 4: When the timer alarms when the 15 minutes is up. You can now add the beaten egg into the yeast mixture, then the bread flour a little at a time. Whisking it until it starts to get thick. This time, using a wooden spoon, add the rest of the flour (as much as you need) to have a nice, tender dough that you can roll.

Step 5: Knead the dough onto a light flour board. Roll the dough to about 3/4 inch thick. Cut it using a 4-inch clean can or glass. Place cut doughs on the prepared parchment paper. To make hotdog buns, you have to turn sides down and under the dough to overlap. For hamburger buns, you’ll have to use the entire circle. Place both in the parchment paper.

Step 6: To have that store-bought buns look, don’t forget to brush the top of the buns with melted butter.

Step 7: Let the buns rise for 10 minutes. Bake in the preheated oven for 10 minutes at 425 degrees.

Step 8: Freeze the buns for later use.

30-MINUTE HOT DOG OR HAMBURGER BUNS

Rebecca I always buy 2 or 3 packs of buns because my kids love to make their homemade hamburger and hotdog sandwiches. This gives me an idea to just make our… Main Dish Recipes 30-MINUTE HOT DOG OR HAMBURGER BUNS European Print This
Nutrition facts: 200 calories 20 grams fat
Rating: 5.0/5
( 1 voted )

Ingredients

  • 1 cup plus 3 tablespoons warm water 110 degrees
  • 1/3 cup of canola oil
  • 1/4 cup of sugar
  • 2 full tablespoons active dry yeast
  • 1 teaspoon salt
  • 1 egg beaten
  • 3 1/3 cups bread flour
  • 1 pat of real butter

Instructions

Step 1: Line parchment paper in a cookie sheet. Prepare all the ingredients. Make sure to use the exact measurements. You have to use the original ingredients, don't substitute because we must follow exactly what the recipe says.

Step 2: Warm a large mixing bowl by rinsing it with hot water. In the same mixing bowl, add warm water, oil, sugar, and yeast. Sit for 15 minutes (use a timer).

Step 3: Measure the flour. Add one teaspoon of salt and mix well.

Step 4: When the timer alarms when the 15 minutes is up. You can now add the beaten egg into the yeast mixture, then the bread flour a little at a time. Whisking it until it starts to get thick. This time, using a wooden spoon, add the rest of the flour (as much as you need) to have a nice, tender dough that you can roll.

Step 5: Knead the dough onto a light flour board. Roll the dough to about 3/4 inch thick. Cut it using a 4-inch clean can or glass. Place cut doughs on the prepared parchment paper. To make hotdog buns, you have to turn sides down and under the dough to overlap. For hamburger buns, you'll have to use the entire circle. Place both in the parchment paper.

Step 6: To have that store-bought buns look, don't forget to brush the top of the buns with melted butter.

Step 7: Let the buns rise for 10 minutes. Bake in the preheated oven for 10 minutes at 425 degrees.

Step 8: Freeze the buns for later use.

May 2, 2020 0 comment
0 FacebookTwitterPinterestEmail
Main Dish Recipes

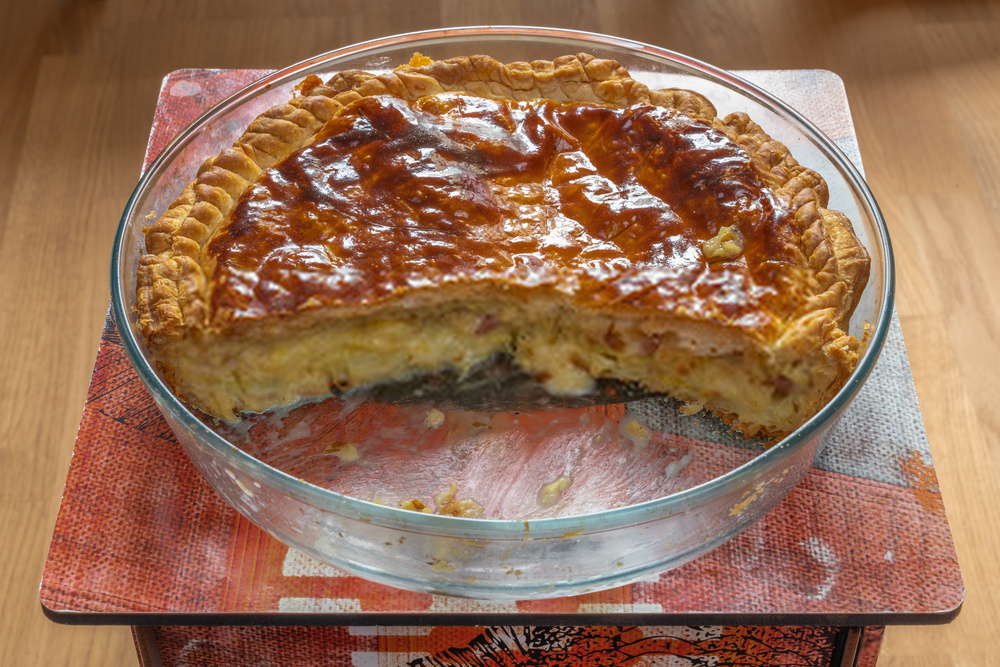
Impossible Coconut Custard Pie

by Rebecca May 1, 2020
written by Rebecca

I always considered it an odd name for a pie to be the name Impossible Pie or Impossible Coconut Pie. It seems nobody knows where the name came from, but it might be because “impossible” to make this pastry. Or maybe it’s because the ingredients that are only mixed seem “impossible” to end up being like a 3 layer cake. I love my cakes and pies, so I’m always ready to make other cakes or pies. Such a chance I would never turn down. I have thus set my thinking cap and started researching as an adventurer that I am. Well, it was not long before I found out that this impossible pie is identical to the magic cake. The only difference is how you manufacture the ingredients. You simply put all of the components into a blender, mix them, but the batter on a baking dish, and voila for this impossible pie. You’ve got a magical cake or an impossible cake.

Make sure that the impossible custard pie is refrigerated after serving. If prepared to dish it up, make sure that you remove the chill for a while, as it will taste good when it is in the room. Before placing the coconut tarts in the fridge, cover them loosely with aluminium foil.

Preparation time: 10 minutes
Cooking time: 25 minutes
Serves: 6-8
Method: Bake

Ingredients:

1/2 c Bisquick or gluten-free Bisquick (a cup of Bisquick can be substituted by a mix of one c of flour, 1½ tsp of baking powder,

½ tsp of salt, and 1 tbsp of oil or melted butter).

3/4 c sugar

4 eggs

2 c milk

1 c coconut, flaked

1 tsp vanilla

1 Tbsp butter softened

Directions:

Mix all the ingredients in a 9-inch buttered pan. It lays in the coconut topping, crust, and custard.

Bake at 400 degrees for about 25-30 min or until the custard is set.

Impossible Coconut Custard Pie

Rebecca I always considered it an odd name for a pie to be the name Impossible Pie or Impossible Coconut Pie. It seems nobody knows where the name came from, but… Main Dish Recipes Impossible Coconut Custard Pie European Print This
Nutrition facts: 200 calories 20 grams fat
Rating: 5.0/5
( 1 voted )

Ingredients

  • 1/2 c Bisquick or gluten-free Bisquick (a cup of Bisquick can be substituted by a mix of one c of flour, 1½ tsp of baking powder,
  • ½ tsp of salt, and 1 tbsp of oil or melted butter).
  • 3/4 c sugar
  • 4 eggs
  • 2 c milk
  • 1 c coconut, flaked
  • 1 tsp vanilla
  • 1 Tbsp butter softened

Instructions

Mix all the ingredients in a 9-inch buttered pan. It lays in the coconut topping, crust, and custard.

Bake at 400 degrees for about 25-30 min or until the custard is set.

May 1, 2020 0 comment
0 FacebookTwitterPinterestEmail
Newer Posts
Older Posts

Popular Posts

  • 1

    Crispy Crunchy Parmesan Potatoes

    March 21, 2020
  • 2

    CROCK POT SMOTHERED PORK CHOPS

    March 21, 2020
  • Facebook
  • Twitter

@2019 - All Right Reserved.


Back To Top