Cook it once
  • Home
  • Privacy Policy
  • Recipes
    • KETO
    • LC
    • WW
  • Tips
  • Contact
Cook it once
  • Home
  • Privacy Policy
  • Recipes
    • KETO
    • LC
    • WW
  • Tips
  • Contact
Monthly Archives

April 2020

Main Dish Recipes

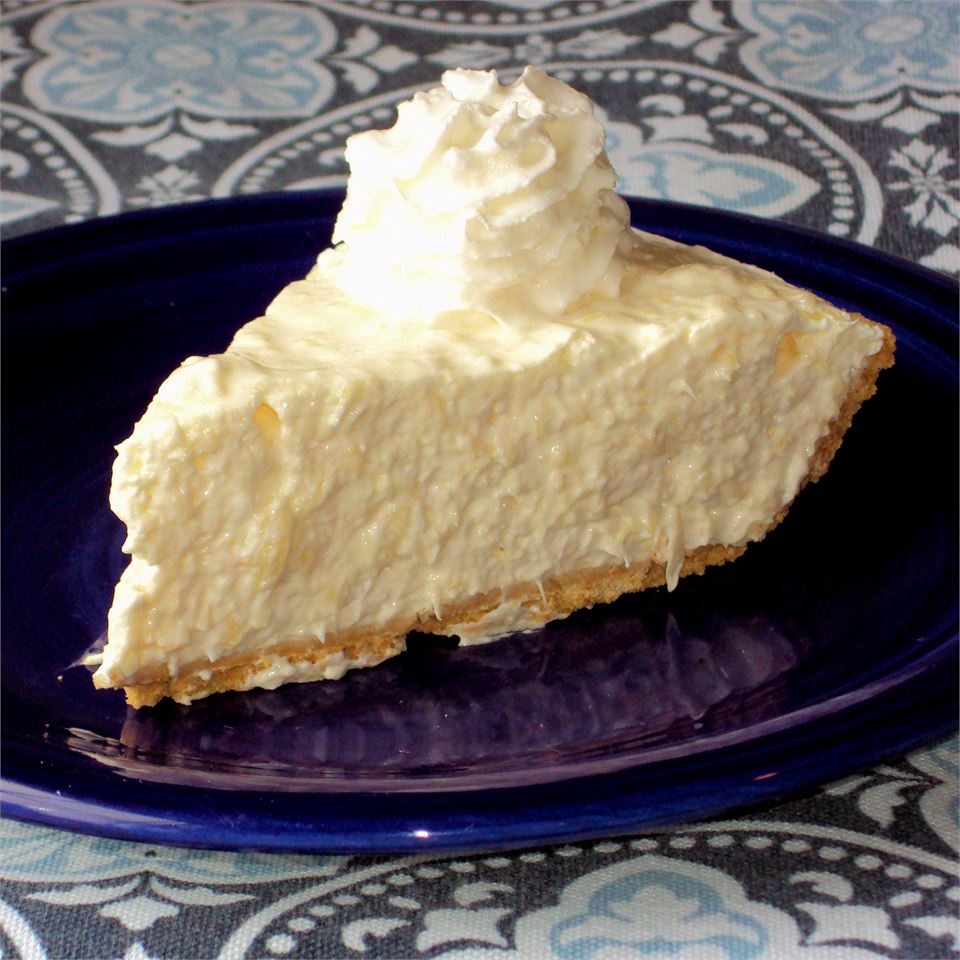
Jim’s Luscious & Easy Pineapple Cheese Pie

by Rebecca April 25, 2020
written by Rebecca

I am so amazed by no-bake cakes or pies. I am used to the traditional way of making pie, but hey anything is possible, right? And speaking of no-bake pie, I so love this Pineapple Cheese Pie and my little girl loves it as well. If I think about it she can even make it herself! It is simple and super easy. Just mix all ingredients, pour into a pie crust and voila! This can be my 7-year old’s first ever no-bake Pineapple Cheese Pie. Sounds super exciting!

This recipe is not only great for holidays but you can make this pie even on a regular day. For me, since this is a personal favourite, I always make sure that I have enough that I can store in my fridge. And because this is a great pick me up dessert.

Want to try it? I am sure that you already have everything that you need in your kitchen!

Ingredients

1 (9 inches) pie crust, baked

1 (20 ounces) can crush pineapple with juice

1 (8 ounces) container frozen whipped topping, thawed

1 (6 ounces) package pineapple Jell-O®

1 (12 ounces) container whipped cream cheese

How to make Jim’s Luscious & Easy Pineapple Cheese Pie

Step 1: Open pineapple can. Drain pineapple juice from the can and set fruit aside.

Step 2: In the same bowl with the pineapple juice, dissolve the gelatin. Microwave for 1 minute.

Step 3: Mix whipped topping and cream cheese until smooth.

Step 5: Add in pineapple into the cream cheese mixture.

Step 6: Stir in gelatin and make sure to mix it thoroughly.

Step 7: Pour mixture into the pie shell. Then, refrigerate for maybe 4 to 5 hours before serving.
Jim's Luscious & Easy Pineapple Cheese Pie

Rebecca I am so amazed by no-bake cakes or pies. I am used to the traditional way of making pie, but hey anything is possible, right? And speaking of no-bake pie,… Main Dish Recipes Jim’s Luscious & Easy Pineapple Cheese Pie European Print This
Nutrition facts: 200 calories 20 grams fat
Rating: 5.0/5
( 1 voted )

Ingredients

  • 1 (9 inches) pie crust, baked
  • 1 (20 ounces) can crush pineapple with juice
  • 1 (8 ounces) container frozen whipped topping, thawed
  • 1 (6 ounces) package pineapple Jell-O®
  • 1 (12 ounces) container whipped cream cheese

Instructions

Step 1: Open pineapple can. Drain pineapple juice from the can and set fruit aside.

Step 2: In the same bowl with the pineapple juice, dissolve the gelatin. Microwave for 1 minute.

Step 3: Mix whipped topping and cream cheese until smooth.

Step 5: Add in pineapple into the cream cheese mixture.

Step 6: Stir in gelatin and make sure to mix it thoroughly.

Step 7: Pour mixture into the pie shell. Then, refrigerate for maybe 4 to 5 hours before serving.
April 25, 2020 0 comment
0 FacebookTwitterPinterestEmail
Main Dish Recipes

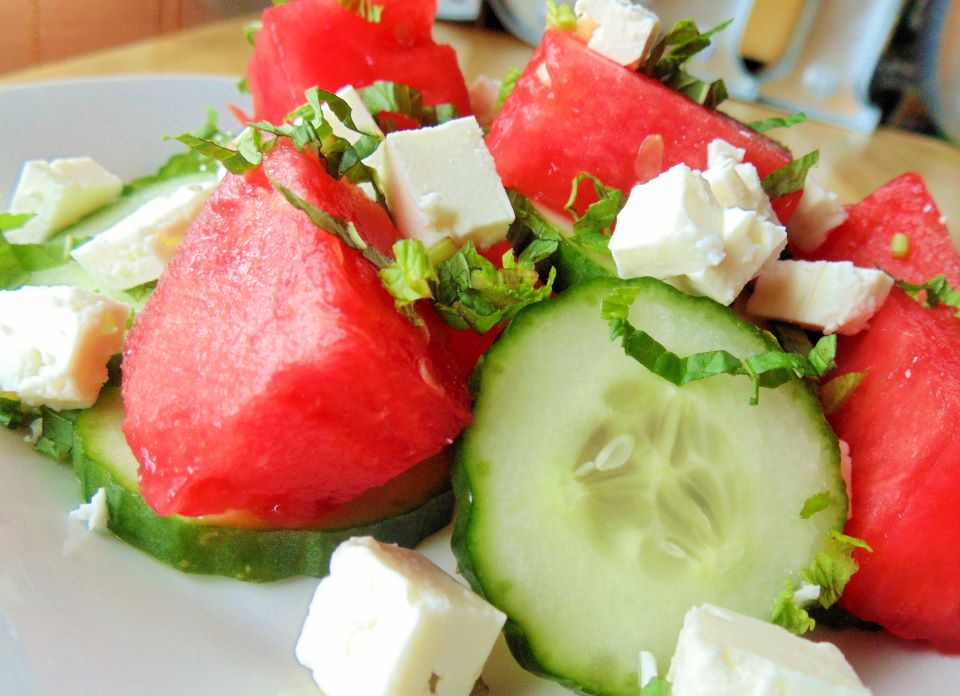
Watermelon Cucumber Salad With Feta

by Rebecca April 25, 2020
written by Rebecca

With just a few ingredients, you will get to enjoy a refreshing, tasty summer salad. Very easy to prepare, you can make this even when your eyes are close (just make sure to slice everything first!). The saltiness of the feta cheese, coolness of watermelon, and the crunchiness of cucumbers are a great combination paired with a simple and light dressing. And the mint gives us a taste of summer in paradise. This Watermelon Cucumber Salad With Feta is indeed a relaxing dish.

Munch it when you are beside a pool, or when you are watching your favourite shows, and this could even be an amazing side dish to pair with maybe a salmon or pork chops. Oh, why did I not think of that before? That gives me an idea!

With this unexpectedly delicious salad dish, anything is possible! So, are you ready to try and taste it for yourself? Wait no more because it will only take you 20 minutes to prepare this salad. Ready your knife, bowls, and wooden spoon, and let’s get mixing!

Ingredients

1 large seedless watermelon, cut it into 1-inch cubes

2 cucumbers, thinly sliced

12 leaves fresh mint, thinly sliced

¼ cup of olive oil

2 tablespoons of apple cider vinegar

coarse salt and ground black pepper to taste

1 cup of crumbled feta cheese

How to make Watermelon Cucumber Salad With Feta

Step 1: Slice watermelon into 1-inch cubes. As for the cucumbers and mint, make sure to slice them thinly.

Step 2: In a large bowl, mix watermelon, cucumbers, and mint.

Step 3: And in a separate small bowl, whisk olive oil, vinegar, salt, and pepper together.

Step 4: After nicely mixing the dressing, drizzle over salad, and gently toss to coat. Be careful not to spill it.

Step 5: Add crumbled feta cheese and give it another good mix. Serve and enjoy!

Watermelon Cucumber Salad With Feta

Rebecca With just a few ingredients, you will get to enjoy a refreshing, tasty summer salad. Very easy to prepare, you can make this even when your eyes are close (just… Main Dish Recipes Watermelon Cucumber Salad With Feta European Print This
Nutrition facts: 200 calories 20 grams fat
Rating: 5.0/5
( 1 voted )

Ingredients

  • 1 large seedless watermelon, cut it into 1-inch cubes
  • 2 cucumbers, thinly sliced
  • 12 leaves fresh mint, thinly sliced
  • ¼ cup of olive oil
  • 2 tablespoons of apple cider vinegar
  • coarse salt and ground black pepper to taste
  • 1 cup of crumbled feta cheese

Instructions

Step 1: Slice watermelon into 1-inch cubes. As for the cucumbers and mint, make sure to slice them thinly.

Step 2: In a large bowl, mix watermelon, cucumbers, and mint.

Step 3: And in a separate small bowl, whisk olive oil, vinegar, salt, and pepper together.

Step 4: After nicely mixing the dressing, drizzle over salad, and gently toss to coat. Be careful not to spill it.

Step 5: Add crumbled feta cheese and give it another good mix. Serve and enjoy!

April 25, 2020 0 comment
0 FacebookTwitterPinterestEmail
Main Dish Recipes

Cheddar Cheese Muffins

by Rebecca April 25, 2020
written by Rebecca

When I was a kid I remember asking my mom almost every day to bake cheese muffins. This is my family’s favourite! I like mine with extra cheese of course. My mom shares her recipe with me and now I am sharing it with you too! I hope your family will love these cheddar cheese muffins as much as we do.

It is pretty simple to make. It will only take you 15 minutes to prepare and another 20 minutes to cook.

Muffins are a simple joy to every meal. It is perfect for serving with soup, stew, BBQ, or any meal! They are super moist, tender, cheesy and oh so delicious. Try it today and I am sure that your loved ones will go crazy about it. These cheddar cheese muffins will be the star of your meal tonight. So if you are ready, let’s get baking!

Ingredients

2 cups all-purpose flour

½ cup of white sugar

1 tablespoon of baking powder

1 teaspoon salt

½ teaspoon baking soda

1 ½ cups of shredded Cheddar cheese

1 cup of plain yoghurt

2 eggs, beaten

¼ cup butter, melted

How to make Cheddar Cheese Muffins

Step 1: Prepare the oven. Preheat to 400 degrees F or 200 degrees C.

Step 2: Grease 12 pieces of large muffin cups.

Step 3: In a large mixing bowl, mix flour, sugar, baking powder, salt, and baking soda.

Step 4: Add in the cheddar cheese into the mixture. Stir carefully.

Step 5: Pour yoghurt, eggs, and butter over the prepared flour mixture. Stir until the dry ingredients are just moistened.

Step 6: Then, once the mixture is ready, spoon the batter into the greased muffin cups.

Step 7: Bake all 12 in the preheated oven for about 18 to 20 minutes or until the top just starts to lightly brown.

Step 8: Remove from the oven once one.

Step 9: Best served warm. If there is any leftover, put in the refrigerator and microwave when needed.

Cheddar Cheese Muffins

Rebecca When I was a kid I remember asking my mom almost every day to bake cheese muffins. This is my family’s favourite! I like mine with extra cheese of course.… Main Dish Recipes Cheddar Cheese Muffins European Print This
Nutrition facts: 200 calories 20 grams fat
Rating: 5.0/5
( 1 voted )

Ingredients

  • 2 cups all-purpose flour
  • ½ cup of white sugar
  • 1 tablespoon of baking powder
  • 1 teaspoon salt
  • ½ teaspoon baking soda
  • 1 ½ cups of shredded Cheddar cheese
  • 1 cup of plain yoghurt
  • 2 eggs, beaten
  • ¼ cup butter, melted

Instructions

Step 1: Prepare the oven. Preheat to 400 degrees F or 200 degrees C.

Step 2: Grease 12 pieces of large muffin cups.

Step 3: In a large mixing bowl, mix flour, sugar, baking powder, salt, and baking soda.

Step 4: Add in the cheddar cheese into the mixture. Stir carefully.

Step 5: Pour yoghurt, eggs, and butter over the prepared flour mixture. Stir until the dry ingredients are just moistened.

Step 6: Then, once the mixture is ready, spoon the batter into the greased muffin cups.

Step 7: Bake all 12 in the preheated oven for about 18 to 20 minutes or until the top just starts to lightly brown.

Step 8: Remove from the oven once one.

Step 9: Best served warm. If there is any leftover, put in the refrigerator and microwave when needed.

April 25, 2020 0 comment
0 FacebookTwitterPinterestEmail
Main Dish Recipes

These Vanilla Brownies Are the Treat You Didn’t Know You Needed

by Rebecca April 25, 2020
written by Rebecca

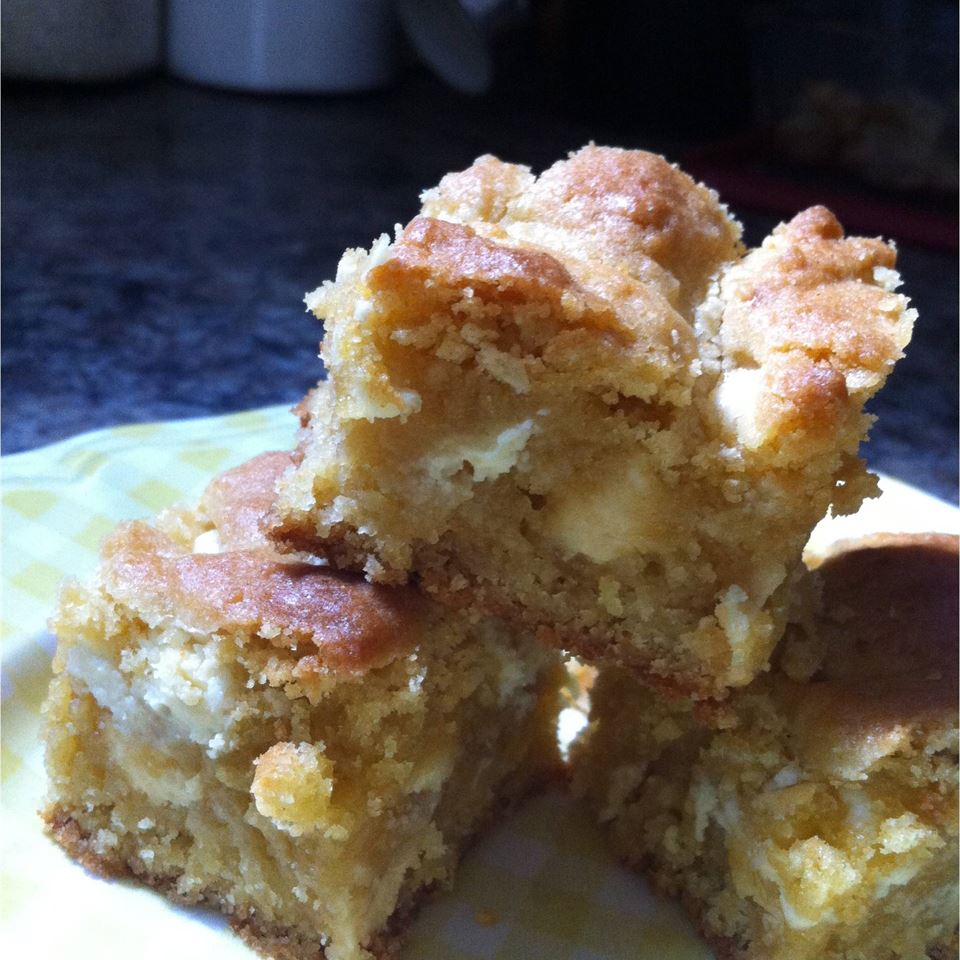
Brownies are just wonderful. They are very simple, rich dessert. One bite and you will end up eating more. Which kind do you like best? Chocolate brownies, caramel, or vanilla maybe? I like vanilla with chocolate chips. Oh, even the sound of it makes my mouth watery! Every bite is soft and chewy, melts in my mouth.

I remember when I first tasted a vanilla brownie, I looked at it and I was like, oh, so there is really a vanilla brownie. And yes! It was love at first bite. It changed my perspective entirely about brownies before all I know is the classic chocolate brownie and now I am enjoying every bite of this luscious vanilla brownie.

Are you ready to taste this amazingly good one of a kind white bar? Oh, I am so ready! Let us begin? 1, 2, 3 bake!

Ingredients

2 ¼ cups of all-purpose flour

2 ½ teaspoons baking powder

½ teaspoon salt

¾ cup unsalted butter softened

1 ¼ cups of white sugar

1 ¼ cups of packed brown sugar

1 teaspoon vanilla extract

3 eggs

2 cups of semisweet chocolate chips (optional)

How to make Vanilla Brownies

Step 1: Prepare the oven. Preheat to 350 degrees F or 175 degrees C.

Step 2: Grease a 10 x 5-inch jellyroll pan.

Step 3: Combine flour, baking powder, and salt in a small bowl. Set aside.

Step 4: In a large bowl, cream together the butter, white sugar, brown sugar, and vanilla until smooth.

Step 5: Beat eggs one at a time, then stir in the flour mixture.

Step 6: You can mix in chocolate chips if desired. This step is all up to you.

Step 7: Spread the batter evenly into the prepared 10 x 5-inch jellyroll pan.

Step 8: Bake batter in the preheated oven for a good 35 to 45 minutes.

Step 9: Once done. Remove pan from the oven and cool on a wire rack.

Step 10: When completely cooled, you can cut brownies into squares.

These Vanilla Brownies Are the Treat You Didn't Know You Needed

Rebecca Brownies are just wonderful. They are very simple, rich dessert. One bite and you will end up eating more. Which kind do you like best? Chocolate brownies, caramel, or vanilla… Main Dish Recipes These Vanilla Brownies Are the Treat You Didn’t Know You Needed European Print This
Nutrition facts: 200 calories 20 grams fat
Rating: 5.0/5
( 1 voted )

Ingredients

  • 2 ¼ cups of all-purpose flour
  • 2 ½ teaspoons baking powder
  • ½ teaspoon salt
  • ¾ cup unsalted butter softened
  • 1 ¼ cups of white sugar
  • 1 ¼ cups of packed brown sugar
  • 1 teaspoon vanilla extract
  • 3 eggs
  • 2 cups of semisweet chocolate chips (optional)

Instructions

Step 1: Prepare the oven. Preheat to 350 degrees F or 175 degrees C.

Step 2: Grease a 10 x 5-inch jellyroll pan.

Step 3: Combine flour, baking powder, and salt in a small bowl. Set aside.

Step 4: In a large bowl, cream together the butter, white sugar, brown sugar, and vanilla until smooth.

Step 5: Beat eggs one at a time, then stir in the flour mixture.

Step 6: You can mix in chocolate chips if desired. This step is all up to you.

Step 7: Spread the batter evenly into the prepared 10 x 5-inch jellyroll pan.

Step 8: Bake batter in the preheated oven for a good 35 to 45 minutes.

Step 9: Once done. Remove pan from the oven and cool on a wire rack.

Step 10: When completely cooled, you can cut brownies into squares.

April 25, 2020 0 comment
0 FacebookTwitterPinterestEmail
Main Dish Recipes

Quick and Easy Peach Cobbler

by Rebecca April 25, 2020
written by Rebecca

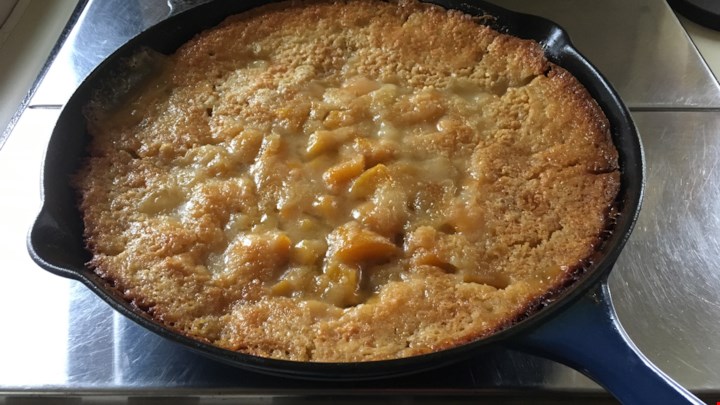
Do you have a favourite food that makes you hungry and nostalgic at the same time? Yeah, I am talking about something personal here. Because this recipe that I will be sharing has a special place in my heart. Whenever I eat this, it is like I am 8 years old again.

As a kid, my mom would make the exact peach cobbler for us on Christmas morning. It has been a part of our tradition as a family.

I cannot count the times I wished every day was Christmas because of this simple yet delicious treat! I’m sure you can relate to me once you taste it yourself. It is a type of food you will surely have cravings for. And did I mention that it would only take you less than an hour to prepare this amazing cobbler? How awesome is that? You only need 5 simple ingredients and 5 easy steps to make this. have your kids invite their friends because I am sure they will love it and be prepared for them to show up on your doorsteps from time to time craving for this sweet and delicious treat! Okay, enough talking. It is time to do the cooking. Are you ready? Yes? Yeah, me too!

Ingredients

1 cup of self-rising flour

1 cup of white sugar

1 cup of milk

2 (16 ounces) cans of sliced peaches in heavy syrup

1/2 cup butter

How to make Quick and Easy Peach Cobbler

Ready the oven. Preheat to 350 degrees F or 175 degrees C.

Melt 1/2 cup of butter in a 9 x 13-inch pan.

In the same pan, pour in the flour, milk, and sugar. Then around the pan, spread the peaches, including the syrup.

Bake for 30 to 40 minutes in the preheated oven, until its crust turns golden brown.

Finally, let it cool for about 10 minutes before serving.

Quick and Easy Peach Cobbler

Rebecca Do you have a favourite food that makes you hungry and nostalgic at the same time? Yeah, I am talking about something personal here. Because this recipe that I will… Main Dish Recipes Quick and Easy Peach Cobbler European Print This
Nutrition facts: 200 calories 20 grams fat
Rating: 5.0/5
( 1 voted )

Ingredients

  • 1 cup of self-rising flour
  • 1 cup of white sugar
  • 1 cup of milk
  • 2 (16 ounces) cans of sliced peaches in heavy syrup
  • 1/2 cup butter

Instructions

Ready the oven. Preheat to 350 degrees F or 175 degrees C.

Melt 1/2 cup of butter in a 9 x 13-inch pan.

In the same pan, pour in the flour, milk, and sugar. Then around the pan, spread the peaches, including the syrup.

Bake for 30 to 40 minutes in the preheated oven, until its crust turns golden brown.

Finally, let it cool for about 10 minutes before serving.

April 25, 2020 0 comment
0 FacebookTwitterPinterestEmail
Main Dish Recipes

4-Ingredient Lemon Pie

by Rebecca April 25, 2020
written by Rebecca

We all love to eat, and that is a proven fact. Well, who would want to pass humbling cooking especially desserts!

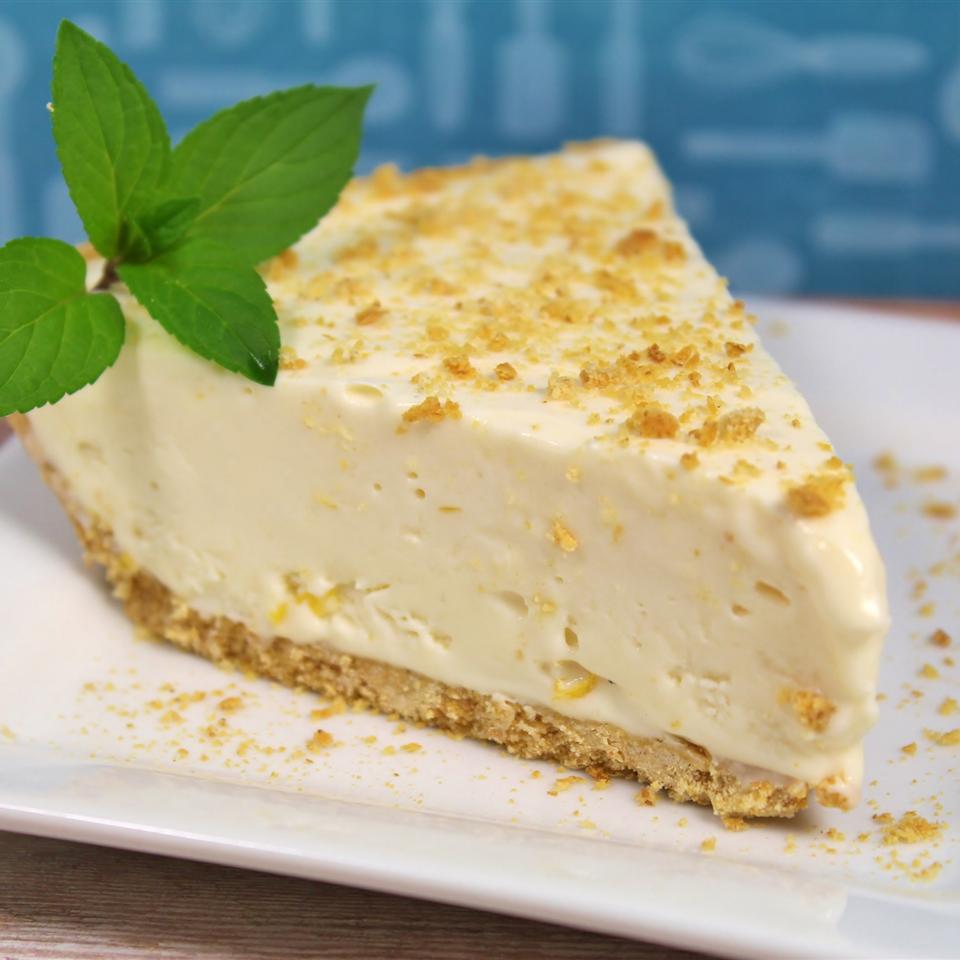
When we search for recipes online, we tend to just give up because of how complicated they are. Look no more! As there is no simpler dessert than this 4-ingredients Lemon Pie. Yes, you heard it right you only need 4 ingredients and no baking required!

This humble dessert can be served as is in a graham crust or you may want to glaze it with maybe strawberry or peach. It depends on how you like your pie. There are no rules! You can even top it with whipped cream or cool whip, either way, this dessert is amazingly delicious and super easy to make. Add more lemon if necessary, anyway, this is a lemon pie.

Ingredients

1 (8 ounces) package of cream cheese, room temperature

1 (14 ounces) can of sweetened condensed milk

⅓ cup of lemon juice

1 (9 inches) prepared graham cracker crust

Whipped cream for serving (optional)

How to make 4-Ingredient Lemon Pie

Step 1: Before mixing all ingredients, remember to fully soften the cream cheese first. This step is very important to get the exact and perfect consistency.

Step 2: Then, after the cream cheese is softened, pour in 14 ounces sweetened condensed milk, and ⅓ cup lemon juice. Use enough large bowl for mixing. You can adjust how much lemon you would want to use. It depends on how you like it of course.

Step 3. Make sure to mix all 4 ingredients well.

Step 4: Finally, spread mixture evenly in a graham crust.

Step 5: Refrigerate first lemon pie for at least 2 hours or until set.

Step 6: Once ready, you can top it with whipped cream or cool whip if desired. Maybe, a dash of strawberry or peach, but this is all optional.

Step 7: Best to serve chilled. Enjoy!

4-Ingredient Lemon Pie

Rebecca We all love to eat, and that is a proven fact. Well, who would want to pass humbling cooking especially desserts! When we search for recipes online, we tend to… Main Dish Recipes 4-Ingredient Lemon Pie European Print This
Nutrition facts: 200 calories 20 grams fat
Rating: 5.0/5
( 1 voted )

Ingredients

  • (8 ounces) package of cream cheese, room temperature
  • 1 (14 ounces) can of sweetened condensed milk
  • ⅓ cup of lemon juice
  • 1 (9 inches) prepared graham cracker crust
  • Whipped cream for serving (optional)

Instructions

Step 1: Before mixing all ingredients, remember to fully soften the cream cheese first. This step is very important to get the exact and perfect consistency.

Step 2: Then, after the cream cheese is softened, pour in 14 ounces sweetened condensed milk, and ⅓ cup lemon juice. Use enough large bowl for mixing. You can adjust how much lemon you would want to use. It depends on how you like it of course.

Step 3. Make sure to mix all 4 ingredients well.

Step 4: Finally, spread mixture evenly in a graham crust.

Step 5: Refrigerate first lemon pie for at least 2 hours or until set.

Step 6: Once ready, you can top it with whipped cream or cool whip if desired. Maybe, a dash of strawberry or peach, but this is all optional.

Step 7: Best to serve chilled. Enjoy!

April 25, 2020 0 comment
0 FacebookTwitterPinterestEmail
Main Dish Recipes

Alabama Fire Crackers Are a Quick and Easy DIY Snack

by Rebecca April 25, 2020
written by Rebecca

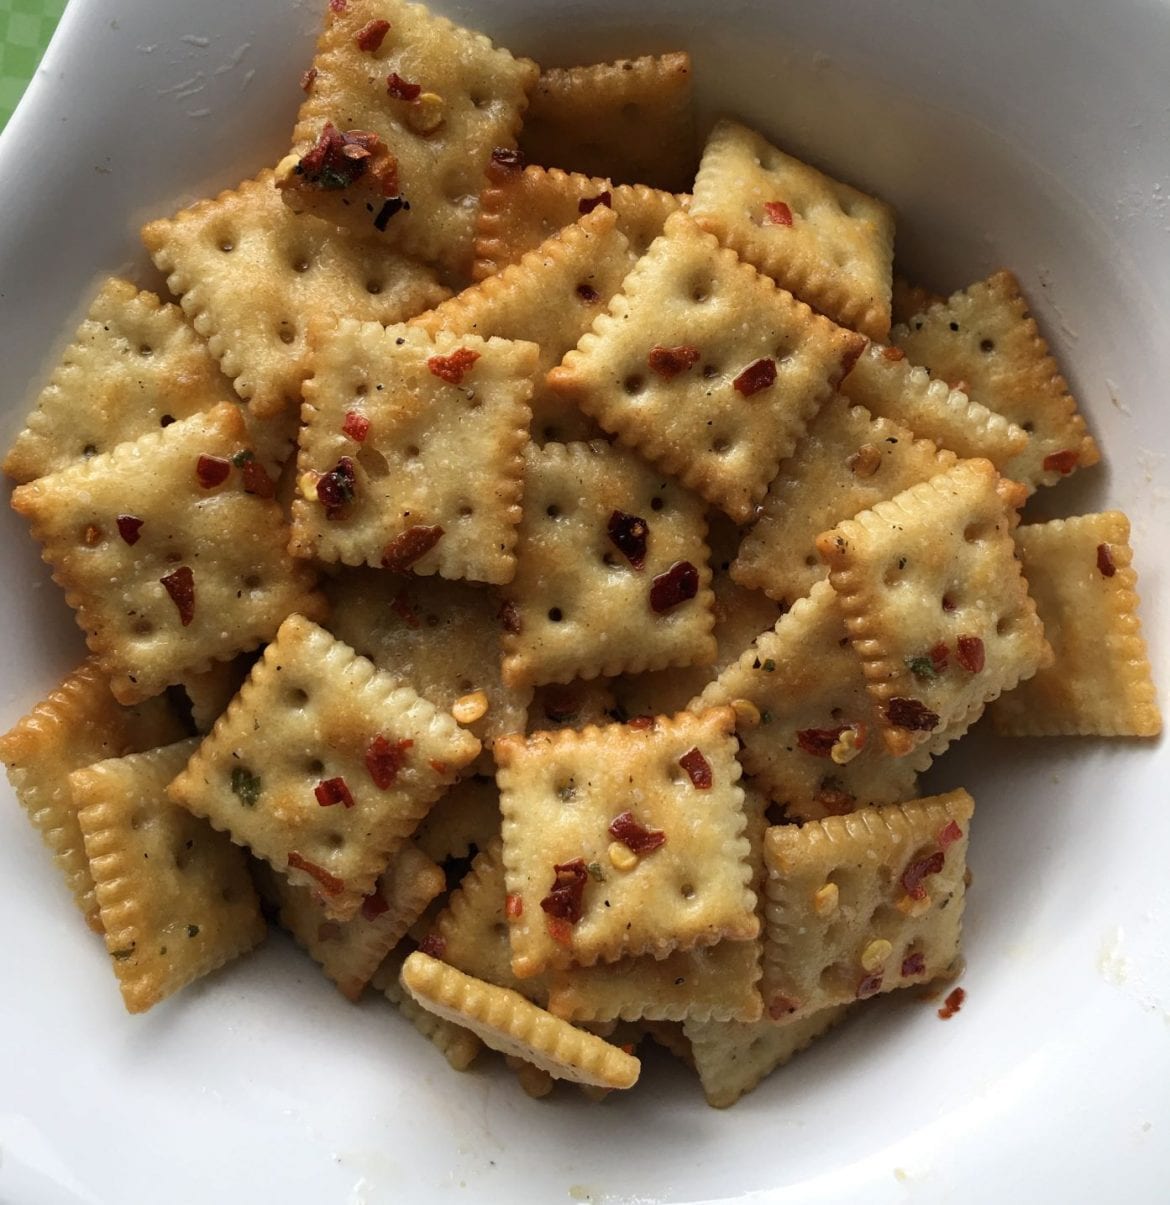
Snacks are just so perfect and fun to make. Most of them you can make your version. This recipe is a perfect example. It is a quick and easy DIY snack. No cooking required! And it would only take you up to 15 minutes to prepare and just leave it overnight to taste to perfection. Already excited to try?

Let me just give you one more reason for you to love this recipe. How awesome it is to turn regular crackers into something unforgettable and possibly may become one of the dishes you prepare on special occasions for your family and friends. I cannot oversell this enough. This is my favorite appetizer to serve, too! By the way, did I mention already that this is best when served with some chili sauce and cold beer? Yeah, it is! Enough talking. Let’s get you started. Shall we?

Ingredients

1 ⅔ cups of vegetable oil

1 teaspoon garlic powder

1 teaspoon onion powder

½ teaspoon of black pepper

2 (1 ounce) envelopes of ranch dressing mix

3 tablespoons crushed red pepper flakes

1 (16.5 ounces) package of multigrain saltine crackers

How to make Alabama Fire Crackers

Step 1: In a 2-gallon plastic zipper bag, pour in the vegetable oil, onion powder, garlic powder, ranch dressing mix, black pepper, and crushed red pepper flakes.

Step 2: Thoroughly combine the oil and spices in the sealed bag by smooshing it with your hands.

Step 3: Prepare the crackers and place them inside the bag.

Step 4: Make sure to seal the bag then turn it over to cover the crackers with the spice mix.

Step 5: Let the bag rest for about 1 hour, then turn it again.

Step 6: Repeat this procedure several times until the crackers are well-coated with the spice mix.

Step 7: Allow the bag to sit overnight to absorb all flavors.

Step 8: Then remove the crackers and serve.

Alabama Fire Crackers Are a Quick and Easy DIY Snack

Rebecca Snacks are just so perfect and fun to make. Most of them you can make your version. This recipe is a perfect example. It is a quick and easy DIY… Main Dish Recipes Alabama Fire Crackers Are a Quick and Easy DIY Snack European Print This
Nutrition facts: 200 calories 20 grams fat
Rating: 5.0/5
( 2 voted )

Ingredients

  • 1 ⅔ cups of vegetable oil
  • 1 teaspoon garlic powder
  • 1 teaspoon onion powder
  • ½ teaspoon of black pepper
  • 2 (1 ounce) envelopes of ranch dressing mix
  • 3 tablespoons crushed red pepper flakes
  • 1 (16.5 ounces) package of multigrain saltine crackers

Instructions

Step 1: In a 2-gallon plastic zipper bag, pour in the vegetable oil, onion powder, garlic powder, ranch dressing mix, black pepper, and crushed red pepper flakes.

Step 2: Thoroughly combine the oil and spices in the sealed bag by smooshing it with your hands.

Step 3: Prepare the crackers and place them inside the bag.

Step 4: Make sure to seal the bag then turn it over to cover the crackers with the spice mix.

Step 5: Let the bag rest for about 1 hour, then turn it again.

Step 6: Repeat this procedure several times until the crackers are well-coated with the spice mix.

Step 7: Allow the bag to sit overnight to absorb all flavors.

Step 8: Then remove the crackers and serve.

April 25, 2020 0 comment
0 FacebookTwitterPinterestEmail
Main Dish Recipes

Orange Meringue Pie Is Even Better Than Lemon

by Rebecca April 25, 2020
written by Rebecca

Have you heard of Orange Meringue? This is the best Meringue Pie that you will surely love! Try these easy steps to have something new in your list of amazing recipes.

Ingredients

1 (9 inches) unbaked pie crust

¾ cup of sugar

⅓ cup cornstarch

1 pinch salt

1 cup of orange juice

½ cup lemon juice

¼ cup of water

4 eggs, separated

4 tablespoons butter or margarine, cut into pieces

2 teaspoons grated orange zest

½ cup diced orange segments

½ cup white sugar

¼ teaspoon cream of tartar

How to make Orange Meringue Pie

Ready the oven. Preheat to 400 degrees F or 205 degrees C.

Line pastry with aluminium foil and a layer of pie weights or dried beans.

Bake in the preheated oven for about 10 minutes or until you achieve a golden crust edge.

Now, carefully remove the aluminium foil and pie weights then bake for about 5 minutes more.

Add together the 1/3 cup cornstarch, 3/4 cup sugar, and salt in a small saucepan then stir it thoroughly until it is well-mixed.

Pour in 1/4 cup of water, orange juice, and lemon juice in the same saucepan.

Whisk in the egg yolks.

Cook over medium heat for about 5 minutes. Make sure to keep stirring frequently until it is thick and bubbly.

Remove from the heat and stir in the butter and orange zest.

Stir in portions of diced oranges (Optional).

Pour the filling into the prepared pie crust then cover with plastic before setting it aside to cool.

Preheat the oven to 350 degrees F or 175 degrees C.

When the pie filling has cooled down to room temperature, you can preheat the oven to 350 degrees F or 175 degrees C.

Prepare the meringue.

Separate the egg whites from the yolks.

In a large metal or glass bowl, beat the egg whites until it is foamy.

Gradually add cream of tartar and 1/2 cup sugar while continuously beating until stiff peaks form.

Lift your beater or whisk straight up. The egg whites should form a sharp peak that holds its shape.

Spread mixture over the pie and make sure that filling is completely covered with meringue and meets the edges of the pie crust.

Bake for about 15 minutes in the preheated oven until the meringue topping is golden brown.

Orange Meringue Pie Is Even Better Than Lemon

Rebecca Have you heard of Orange Meringue? This is the best Meringue Pie that you will surely love! Try these easy steps to have something new in your list of amazing… Main Dish Recipes Orange Meringue Pie Is Even Better Than Lemon European Print This
Nutrition facts: 200 calories 20 grams fat
Rating: 5.0/5
( 1 voted )

Ingredients

  • 1 (9 inches) unbaked pie crust
  • ¾ cup of sugar
  • ⅓ cup cornstarch
  • 1 pinch salt
  • 1 cup of orange juice
  • ½ cup lemon juice
  • ¼ cup of water
  • 4 eggs, separated
  • 4 tablespoons butter or margarine, cut into pieces
  • 2 teaspoons grated orange zest
  • ½ cup diced orange segments
  • ½ cup white sugar
  • ¼ teaspoon cream of tartar

Instructions

Ready the oven. Preheat to 400 degrees F or 205 degrees C.

Line pastry with aluminium foil and a layer of pie weights or dried beans.

Bake in the preheated oven for about 10 minutes or until you achieve a golden crust edge.

Now, carefully remove the aluminium foil and pie weights then bake for about 5 minutes more.

Add together the 1/3 cup cornstarch, 3/4 cup sugar, and salt in a small saucepan then stir it thoroughly until it is well-mixed.

Pour in 1/4 cup of water, orange juice, and lemon juice in the same saucepan.

Whisk in the egg yolks.

Cook over medium heat for about 5 minutes. Make sure to keep stirring frequently until it is thick and bubbly.

Remove from the heat and stir in the butter and orange zest.

Stir in portions of diced oranges (Optional).

Pour the filling into the prepared pie crust then cover with plastic before setting it aside to cool.

Preheat the oven to 350 degrees F or 175 degrees C.

When the pie filling has cooled down to room temperature, you can preheat the oven to 350 degrees F or 175 degrees C.

Prepare the meringue.

Separate the egg whites from the yolks.

In a large metal or glass bowl, beat the egg whites until it is foamy.

Gradually add cream of tartar and 1/2 cup sugar while continuously beating until stiff peaks form.

Lift your beater or whisk straight up. The egg whites should form a sharp peak that holds its shape.

Spread mixture over the pie and make sure that filling is completely covered with meringue and meets the edges of the pie crust.

Bake for about 15 minutes in the preheated oven until the meringue topping is golden brown.

April 25, 2020 0 comment
0 FacebookTwitterPinterestEmail
Main Dish Recipes

Best Big, Fat, Chewy Chocolate Chip Cookie

by Rebecca April 25, 2020
written by Rebecca

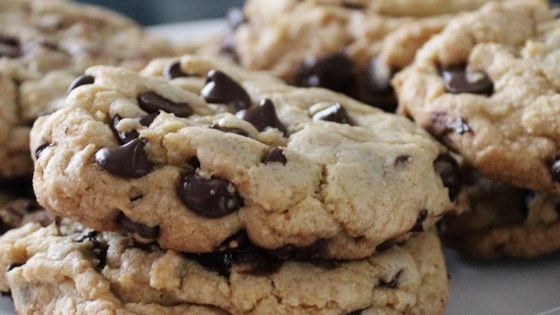
Have you ever been to a pastry shop and wonder how they make such great cookies? Good news! You are in for a treat if you try this simple recipe. Another good thing about this is that you will have the freshest and hottest cookies in the convenience of your own home.

Want to bake like a pastry wizard? Here is your chance to impress your friends and family members with your pastry skills! An easy and hassle-free way to satisfy your cravings. Shall we start? Okay, Let’s go!

Ingredients

2 cups all-purpose flour

½ teaspoon baking soda

½ teaspoon salt

¾ cup unsalted butter, melted

1 cup of packed brown sugar

½ cup of white sugar

1 tablespoon vanilla extract

1 egg

1 egg yolk

2 cups of semisweet chocolate chips

How to make Best Big, Fat, Chewy Chocolate Chip Cookie

Ready the oven. Preheat to 325 degrees F or 165 degrees C.

Now, grease the cookie sheets or line with parchment paper to eliminate sticking.

In a large bowl, sift thoroughly the baking soda, flour, and salt then put it aside.

Blend the melted butter with brown sugar and white sugar in a medium-sized bowl until it becomes creamy looking.

In the same bowl, beat in vanilla, egg yolk and egg altogether until it becomes creamy and light.

Using a wooden spoon, stir in the chocolate chips in the same bowl.

Use a cup to scoop the cookie dough. About 1/4 cup at a time onto the cookie sheets with parchment paper.

Make sure to distance the cookies 3 inches apart from each other.

Now, we are almost done! In the preheated oven, bake the dough for 15 to 17 minutes or until the edges are lightly toasted to perfection.

After 15 to 17 minutes, let the cookies cool down on baking sheets for a few minutes before completely transferring them to wire racks to cool.

Best Big, Fat, Chewy Chocolate Chip Cookie

Rebecca Have you ever been to a pastry shop and wonder how they make such great cookies? Good news! You are in for a treat if you try this simple recipe.… Main Dish Recipes Best Big, Fat, Chewy Chocolate Chip Cookie European Print This
Nutrition facts: 200 calories 20 grams fat
Rating: 5.0/5
( 1 voted )

Ingredients

  • 2 cups all-purpose flour
  • ½ teaspoon baking soda
  • ½ teaspoon salt
  • ¾ cup unsalted butter, melted
  • 1 cup of packed brown sugar
  • ½ cup of white sugar
  • 1 tablespoon vanilla extract
  • 1 egg
  • 1 egg yolk
  • 2 cups of semisweet chocolate chips

Instructions

Ready the oven. Preheat to 325 degrees F or 165 degrees C.

Now, grease the cookie sheets or line with parchment paper to eliminate sticking.

In a large bowl, sift thoroughly the baking soda, flour, and salt then put it aside.

Blend the melted butter with brown sugar and white sugar in a medium-sized bowl until it becomes creamy looking.

In the same bowl, beat in vanilla, egg yolk and egg altogether until it becomes creamy and light.

Using a wooden spoon, stir in the chocolate chips in the same bowl.

Use a cup to scoop the cookie dough. About 1/4 cup at a time onto the cookie sheets with parchment paper.

Make sure to distance the cookies 3 inches apart from each other.

Now, we are almost done! In the preheated oven, bake the dough for 15 to 17 minutes or until the edges are lightly toasted to perfection.

After 15 to 17 minutes, let the cookies cool down on baking sheets for a few minutes before completely transferring them to wire racks to cool.

April 25, 2020 0 comment
0 FacebookTwitterPinterestEmail
Main Dish Recipes

This Dreamy Pistachio Cake Starts With a Box of Cake Mix

by Rebecca April 25, 2020
written by Rebecca

My personal favourite! I can never have enough pistachios in a day. Who would not want pistachio, right? So this Dreamy Pistachio Cake is a real treat for me. I always keep some in my fridge.

This is very easy to make, just mix all the ingredients, bake, and voila! Your very own Dreamy Pistachio Cake that starts with a box of cake mix. The cake is very smooth and the frosting, please don’t forget the frosting! It is the crown of every cake.

Bake some of this Dreamy Pistachio Cake for your friends that are planning to come over this weekend. Teach them how to do it because I am pretty sure that they will love it!

A good laugh and meaningful conversation with your friends or loved ones over a slice of this Dreamy Pistachio Cake.

Ingredients

1 (18.25 ounce) package white cake mix

¾ cup of vegetable oil

1 cup lemon-lime flavoured carbonated beverage

3 eggs

2 (3 ounce) packages instant pistachio pudding mix

2 (1.3 ounces) envelopes whipped topping mix

1 ½ cups milk

How to make This Dreamy Pistachio Cake Starts With a Box of Cake Mix

Step 1: Mix white cake mix, oil, lemon-lime flavoured carbonated beverage, eggs, and add in the first package of pudding. Make sure to evenly and carefully beat all ingredients until smooth.

Step 2: Prepare the oven. Preheat to 325 degrees F or 165 degrees C.

Step 3: Bake pistachio cake for about 45 minutes.

Step 4: Test cake if it is done. Insert a knife with the thinnest blade into the centre of the cake. If the knife comes out clean, the cake is already done. You can use toothpick too as an alternative.

Step 5: Once the cake is done, get it out from the oven and let it cool.

Step 6: Finally, beat the Dream Whip, milk, and pudding until stiff. Then pour mixture evenly over cooled cake. Refrigerate.

This Dreamy Pistachio Cake Starts With a Box of Cake Mix

Rebecca My personal favourite! I can never have enough pistachios in a day. Who would not want pistachio, right? So this Dreamy Pistachio Cake is a real treat for me. I… Main Dish Recipes This Dreamy Pistachio Cake Starts With a Box of Cake Mix European Print This
Nutrition facts: 200 calories 20 grams fat
Rating: 3.8/5
( 38 voted )

Ingredients

  • 1 (18.25 ounce) package white cake mix
  • ¾ cup of vegetable oil
  • 1 cup lemon-lime flavoured carbonated beverage
  • 3 eggs
  • 2 (3 ounce) packages instant pistachio pudding mix
  • 2 (1.3 ounces) envelopes whipped topping mix
  • 1 ½ cups milk

Instructions

Step 1: Mix white cake mix, oil, lemon-lime flavoured carbonated beverage, eggs, and add in the first package of pudding. Make sure to evenly and carefully beat all ingredients until smooth.

Step 2: Prepare the oven. Preheat to 325 degrees F or 165 degrees C.

Step 3: Bake pistachio cake for about 45 minutes.

Step 4: Test cake if it is done. Insert a knife with the thinnest blade into the centre of the cake. If the knife comes out clean, the cake is already done. You can use toothpick too as an alternative.

Step 5: Once the cake is done, get it out from the oven and let it cool.

Step 6: Finally, beat the Dream Whip, milk, and pudding until stiff. Then pour mixture evenly over cooled cake. Refrigerate.

April 25, 2020 0 comment
0 FacebookTwitterPinterestEmail
Newer Posts
Older Posts

Popular Posts

  • 1

    Crispy Crunchy Parmesan Potatoes

    March 21, 2020
  • 2

    CROCK POT SMOTHERED PORK CHOPS

    March 21, 2020
  • Facebook
  • Twitter

@2019 - All Right Reserved.


Back To Top