Cook it once
  • Home
  • Privacy Policy
  • Recipes
    • KETO
    • LC
    • WW
  • Tips
  • Contact
Cook it once
  • Home
  • Privacy Policy
  • Recipes
    • KETO
    • LC
    • WW
  • Tips
  • Contact
Monthly Archives

April 2020

Main Dish Recipes

Cheesy Taco Casserole

by Rebecca April 29, 2020
written by Rebecca

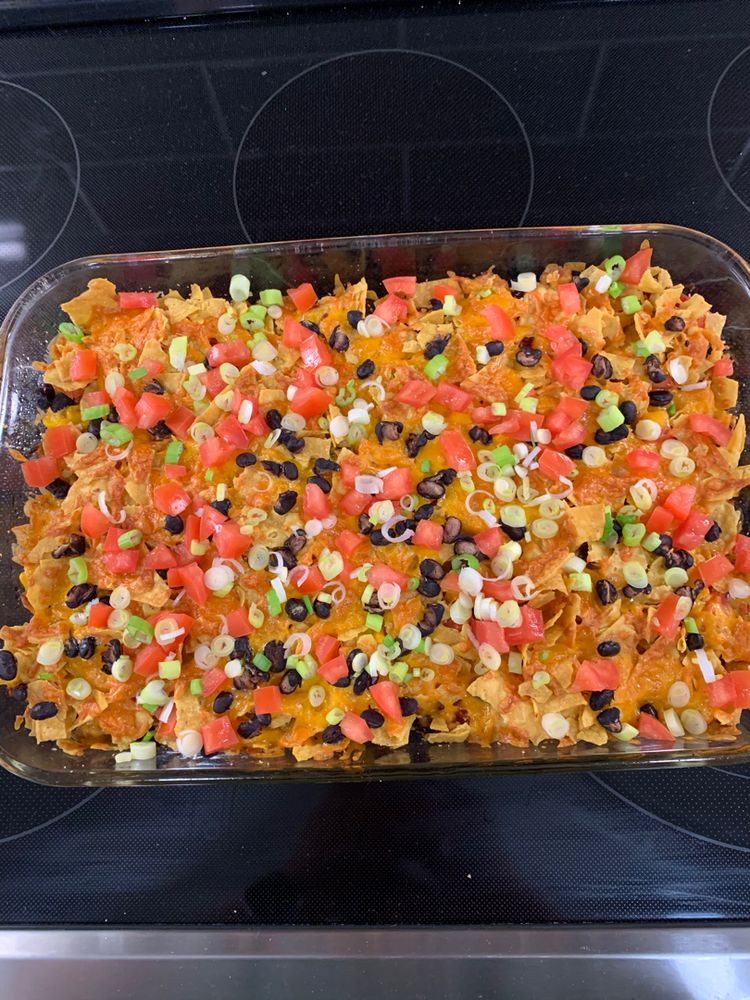
It’s Taco Tuesday! My favourite day of the week. It’ll be raining taco again or not. Today is different, it is not gonna be your regular Taco Tuesday. Because I will be serving a cheesy taco Casserole. Yummy!

Instead of using regular taco shells, I used a biscuit mix. It is sturdy, which means you can go crazy and pile any toppings that you like! Sour cream, tomatoes, lettuce, olives, and cheese on top, what else can you ask for? It is “the” taco casserole of dreams. I’m sure that after tonight you will never look taco nights the same way again.

INGREDIENTS

2 pounds ground beef

1 (1 oz.) packet taco seasoning

4 eggs

3/4 cup whole milk

1 3/4 cups of biscuit mix or Bisquick

1/2 cup sour cream

2 cups lettuce, chopped or shredded

1 cup tomato, finely chopped

2 cups sharp cheddar cheese, grated

black olives, sliced, optional

kosher salt and freshly ground pepper, to taste

How to make Cheesy Taco Casserole

Step 1: Prepare the oven. Preheat to 400 degrees F. With a non-stick spray, lightly grease a 9 x 13-ich baking dish.

Step 2: Beat eggs and milk together in large bowl until combined. Stir in biscuit mix, salt, and pepper. Then set aside.

Step 3: Season beef first with salt and pepper then cook until browned. Once done, drain fat, then stir in the taco seasoning.

Step 4: Place the beef evenly in the prepared greased baking pan. Spread evenly the biscuit mix on top of beef.

Step 5: Put the baking dish in the oven and bake for 22-25 minutes or until the biscuit layer is golden brown.

Step 6: When done, remove from the oven. Let it cool for 10 minutes. Then spread the sour cream on top.

Step 7: Top the dish with lettuce, cut tomatoes, and olives. Sprinkle top with cheddar cheese.

Step 8: Best serve hot. Enjoy!

Cheesy Taco Casserole

Rebecca It’s Taco Tuesday! My favourite day of the week. It’ll be raining taco again or not. Today is different, it is not gonna be your regular Taco Tuesday. Because I… Main Dish Recipes Cheesy Taco Casserole European Print This
Nutrition facts: 200 calories 20 grams fat
Rating: 5.0/5
( 1 voted )

Ingredients

  • 2 pounds ground beef
  • 1 (1 oz.) packet taco seasoning
  • 4 eggs
  • 3/4 cup whole milk
  • 1 3/4 cups of biscuit mix or Bisquick
  • 1/2 cup sour cream
  • 2 cups lettuce, chopped or shredded
  • 1 cup tomato, finely chopped
  • 2 cups sharp cheddar cheese, grated
  • black olives, sliced, optional
  • kosher salt and freshly ground pepper, to taste

Instructions

Step 1: Prepare the oven. Preheat to 400 degrees F. With a non-stick spray, lightly grease a 9 x 13-ich baking dish.

Step 2: Beat eggs and milk together in large bowl until combined. Stir in biscuit mix, salt, and pepper. Then set aside.

Step 3: Season beef first with salt and pepper then cook until browned. Once done, drain fat, then stir in the taco seasoning.

Step 4: Place the beef evenly in the prepared greased baking pan. Spread evenly the biscuit mix on top of beef.

Step 5: Put the baking dish in the oven and bake for 22-25 minutes or until the biscuit layer is golden brown.

Step 6: When done, remove from the oven. Let it cool for 10 minutes. Then spread the sour cream on top.

Step 7: Top the dish with lettuce, cut tomatoes, and olives. Sprinkle top with cheddar cheese.

Step 8: Best serve hot. Enjoy!
April 29, 2020 0 comment
0 FacebookTwitterPinterestEmail
Main Dish Recipes

Impossible Cheeseburger Pie

by Rebecca April 29, 2020
written by Rebecca

Who doesn’t love a cheeseburger? It’s one of the most comforting foods there is. And what if I tell you that there is such a thing as cheeseburger pie? I know, my family is crazy about it! It is very simple to make, just a few easy steps and you’ll have this meal on your table for dinner tonight. Not only that, but it is a complete meal itself. Once ingredients are cooked, pour it on a pie pan, pop in the oven wait 25 minutes and there you have it. Your dinner is served!

So whenever you are craving for a cheeseburger, and you want something out of ordinary, (amazingly delicious!) this dish is your go-to-meal.

INGREDIENTS

1 lb ground beef

1 small onion, diced

2 tsp mustard powder

1/2 cup cheddar cheese, shredded

1/2 cup pepper jack cheese, shredded

1/2 cup of milk

1/2 cup half and half

2 Tbsp. onion soup mix

1/2 cup Bisquick

2 eggs

Salt and pepper to taste

How to make Impossible Cheeseburger Pie

Step 1: Ready the oven. Preheat to 400 degrees.

Step 2: In a large skillet, cook beef and onion along with the mustard powder until the meat is brown (it’s okay if the meat still has a little red to it, anyway, it will continue to cook in the oven) and the onion is translucent. Drain the grease. Greased a 9-inch pie pan and pour the mixture. Spread until the layer is even.

Step 3: Sprinkle cheddar and jack cheese over the meat and onion mixture. You can use your favourite cheese or whatever cheese you like!

Step 4: In a medium-sized bowl, whisk milk, half and half, onion soup mix, Bisquick, salt, pepper, mustard powder, and eggs. Mix well and pour on top of the cheese.

Step 5: Put in the oven to bake for 25 minutes. Once done, cool before serving. Enjoy!

Impossible Cheeseburger Pie

Rebecca Who doesn’t love a cheeseburger? It’s one of the most comforting foods there is. And what if I tell you that there is such a thing as cheeseburger pie? I… Main Dish Recipes Impossible Cheeseburger Pie European Print This
Nutrition facts: 200 calories 20 grams fat
Rating: 5.0/5
( 1 voted )

Ingredients

  • 1 lb ground beef
  • 1 small onion, diced
  • 2 tsp mustard powder
  • 1/2 cup cheddar cheese, shredded
  • 1/2 cup pepper jack cheese, shredded
  • 1/2 cup of milk
  • 1/2 cup half and half
  • 2 Tbsp. onion soup mix
  • 1/2 cup Bisquick
  • 2 eggs
  • Salt and pepper to taste

Instructions

Step 1: Ready the oven. Preheat to 400 degrees.

Step 2: In a large skillet, cook beef and onion along with the mustard powder until the meat is brown (it's okay if the meat still has a little red to it, anyway, it will continue to cook in the oven) and the onion is translucent. Drain the grease. Greased a 9-inch pie pan and pour the mixture. Spread until the layer is even.

Step 3: Sprinkle cheddar and jack cheese over the meat and onion mixture. You can use your favourite cheese or whatever cheese you like!

Step 4: In a medium-sized bowl, whisk milk, half and half, onion soup mix, Bisquick, salt, pepper, mustard powder, and eggs. Mix well and pour on top of the cheese.

Step 5: Put in the oven to bake for 25 minutes. Once done, cool before serving. Enjoy!

April 29, 2020 0 comment
0 FacebookTwitterPinterestEmail
Main Dish RecipesRecipes

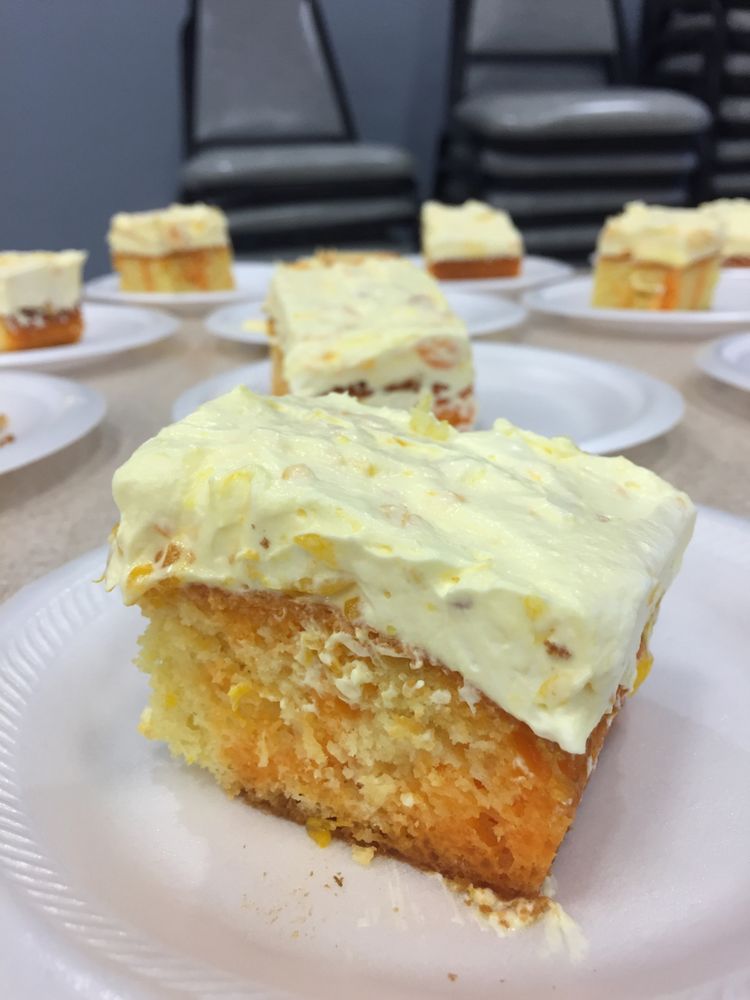
Orange Creamsicle Poke Cake

by Rebecca April 29, 2020
written by Rebecca

I am always amazed by poke cakes. Before, I didn’t even know what it means! When I first made a poke cake I laugh at myself, I thought, “Hey! poke is poking the cake with a fork to make holes”. Now I get it.

Poke cakes are not just pretty, they’re delicious, too! Like this Orange Creamsicle Poke Cake that reminds me of summer and popsicles. It is very easy to make. I am sure you’ll love it!

What you need:

1 (15.25 oz.) box white cake mix

3 eggs

1/2 cup oil

1 cup of water

1 tsp. vanilla extract, optional

Filling:

1 (3 oz.) package orange jello

1 cup of boiling water

1/2 cup cold water

Frosting:

1 (8 oz.) package frozen whipped topping, thawed

1 (3.4 oz.) instant vanilla pudding mix

1 cup milk

1 (11 oz.) can of mandarin oranges, drained, garnish

HOW TO ORANGE CREAMSICLE POKE CAKE

Step 1: Prepare the oven. Preheat to 350 degrees F or according to the cake packaging directions.  With a non-stick spray, grease a 9 x 13-inch baking pan.

Step 2: In a large bowl, pour the cake mix, eggs, oil, water, and vanilla extract. Mix until smooth.

Step 3: Pour mixture into the greased baking pan. Put in the oven and bake according to the package instruction.

Step 4: Remove the baking pan from the oven and let it cool for 15 minutes. Once cooled, poke the cake all over with a fork.

Step 5: In a large bowl, whisk jello mix in boiling water, stir until fully dissolved. Then, stir in cold water.

Step 6: Pour jello over the top of the cake, watch as the holes absorb the jello. Then, cover the cake and refrigerate for at least two hours.

Step 7: In a separate large bowl, whisk the milk. Keep stirring until thickened. Fold in frozen whipped topping until fully incorporated.

Step 8: Slowly pour the mixture over the chilled cake. Spread evenly.

Step 9: Top cake with drained mandarin oranges. Slice and serve.

Orange Creamsicle Poke Cake

Rebecca I am always amazed by poke cakes. Before, I didn’t even know what it means! When I first made a poke cake I laugh at myself, I thought, “Hey! poke… Recipes Orange Creamsicle Poke Cake European Print This
Nutrition facts: 200 calories 20 grams fat
Rating: 5.0/5
( 1 voted )

Ingredients

  • 1 (15.25 oz.) box white cake mix
  • 3 eggs
  • 1/2 cup oil
  • 1 cup of water
  • 1 tsp. vanilla extract, optional
  • Filling:
  • 1 (3 oz.) package orange jello
  • 1 cup of boiling water
  • 1/2 cup cold water
  • Frosting:
  • 1 (8 oz.) package frozen whipped topping, thawed
  • 1 (3.4 oz.) instant vanilla pudding mix
  • 1 cup milk
  • 1 (11 oz.) can of mandarin oranges, drained, garnish

Instructions

Step 1: Prepare the oven. Preheat to 350 degrees F or according to the cake packaging directions.  With a non-stick spray, grease a 9 x 13-inch baking pan.

Step 2: In a large bowl, pour the cake mix, eggs, oil, water, and vanilla extract. Mix until smooth.

Step 3: Pour mixture into the greased baking pan. Put in the oven and bake according to the package instruction.

Step 4: Remove the baking pan from the oven and let it cool for 15 minutes. Once cooled, poke the cake all over with a fork.

Step 5: In a large bowl, whisk jello mix in boiling water, stir until fully dissolved. Then, stir in cold water.

Step 6: Pour jello over the top of the cake, watch as the holes absorb the jello. Then, cover the cake and refrigerate for at least two hours.

Step 7: In a separate large bowl, whisk the milk. Keep stirring until thickened. Fold in frozen whipped topping until fully incorporated.

Step 8: Slowly pour the mixture over the chilled cake. Spread evenly.

Step 9: Top cake with drained mandarin oranges. Slice and serve.

April 29, 2020 0 comment
0 FacebookTwitterPinterestEmail
Main Dish Recipes

Stick of Butter Baked Rice

by Rebecca April 29, 2020
written by Rebecca

When cooking we need to be creative. Most of the time we just toss whatever we find in the pan and create a dish that’s never been cook by anyone before! And after a while, everybody is making it. Crazy, right?

Today, I came across a very interesting recipe. It is so simple that I decided to cook it now. We just need rice, some broth and onion soup, and an entire stick of butter. Put everything together and let the oven do the rest.

I love rice, we can do whatever we want with it. Cook it plain or with other ingredients, it doesn’t matter. Normally, what I do is just add butter on top of it. That is why I am intrigued by how this butter baked rice will taste like when cook. All I know is that it will be amazing! Imagine the sweet and savoury flavour of the French Onion Soup, the butteriness of the butter coming together, this is gonna be the most delicious rice you ever tasted! I can’t wait! (By the way, the rice once popped in the oven, we need to wait for an hour to cook)

I think my rice is done. I am excited! Let’s how a look shall we?

INGREDIENTS

1 cup of long-grain white rice, uncooked

1 (10 oz) can condense French Onion soup

1 (10 oz) can condensed beef broth

1/2 cup (1 stick) unsalted butter, sliced

HOW TO MAKE BUTTER BAKED RICE

Step 1: Ready the oven. Preheat to 425 degrees F.

Step 2: Stir the rice, soup, and broth in a 9 x 9-inch baking pan.

Step 3: Cut butter into big cubes. Arrange over the top and cover the dish tightly with foil.

Step 4: Put in the oven and bake for 30 minutes. This time remove the foil and bake for another 30 minutes.

Step 5: Remove from the oven. Serve and enjoy!

Stick of Butter Baked Rice

Rebecca When cooking we need to be creative. Most of the time we just toss whatever we find in the pan and create a dish that’s never been cook by anyone… Main Dish Recipes Stick of Butter Baked Rice European Print This
Nutrition facts: 200 calories 20 grams fat
Rating: 5.0/5
( 1 voted )

Ingredients

  • 1 cup of long-grain white rice, uncooked
  • 1 (10 oz) can condense French Onion soup
  • 1 (10 oz) can condensed beef broth
  • 1/2 cup (1 stick) unsalted butter, sliced

Instructions

Step 1: Ready the oven. Preheat to 425 degrees F.

Step 2: Stir the rice, soup, and broth in a 9 x 9-inch baking pan.

Step 3: Cut butter into big cubes. Arrange over the top and cover the dish tightly with foil.

Step 4: Put in the oven and bake for 30 minutes. This time remove the foil and bake for another 30 minutes.

Step 5: Remove from the oven. Serve and enjoy!

April 29, 2020 0 comment
0 FacebookTwitterPinterestEmail
Main Dish Recipes

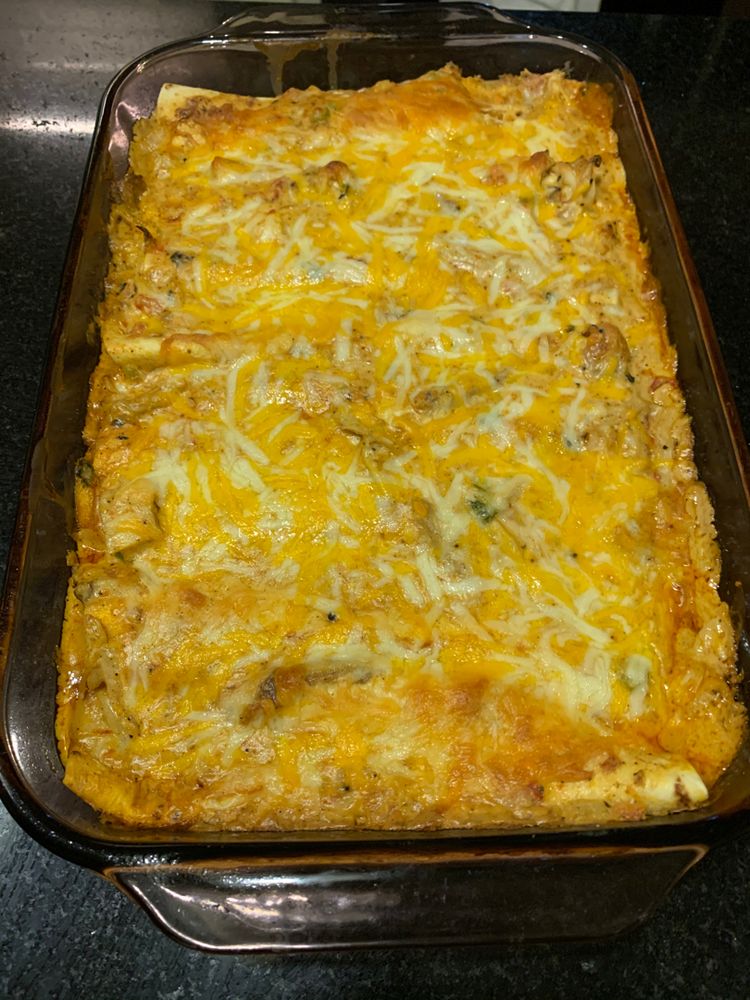
Cream Cheese Chicken Enchiladas

by Rebecca April 29, 2020
written by Rebecca

I am a fan of Mexican dishes. They are like my kryptonite. And this baby is one of my favourites! I just love how the flavours burst in my mouth. The gooeyness of the cheese, richness, and creaminess of the dish is just wow! The green chiles and chicken broth bring all this to the next level.

Ingredients

8-10 flour tortillas

1 (8 oz.) package cream cheese, room temperature, divided [1/2 and 1/2]

1-2 (4 oz.) cans green chiles

3 cups of cooked chicken, shredded

2 cups of Mexican blend cheese, grated, divided [1 cup; 1 cup]

2 cups of low-sodium chicken broth

3 Tbsp. unsalted butter

3 Tbsp. all-purpose flour

1 Tbsp. lime juice

1 tsp. cumin

1/2 tsp. chilli powder

kosher salt and freshly ground pepper, to taste

fresh cilantro, garnish, optional

Preparation

Ready the oven. Preheat to 350 degrees F. With non-stick spray, lightly grease a 9 X 13-inch baking pan.

In a medium-size mixing bowl, stir 1/2 cream cheese, chicken, 1 cup cheese, lime juice, cumin, and chilli powder. Season with salt and pepper.

Fill the tortillas with 2 to 3 tablespoon of chicken mixture. Place in the baking pan, seam side down.

Melt butter over medium-high heat. Whisk in flour and cook for about 5 to 7 minutes or until golden brown. Season with salt and pepper, pour in chicken broth while whisking gradually, and add the green chillies. Stir in the remaining 1/2 cream cheese and cook for another 5 to 7 minutes, or until thickened.

Remove pan from heat. Pour sauce over the enchiladas. Top with remaining cheese (I like mine more).

Place the baking dish in the oven and bake for 22 to 25 minutes or until the cheese and filling is melted and bubbly.

This step is optional but you can also broil for 3 to 5 minutes, or until slightly browned.

When done remove from the oven and let it rest for about 10 to 12 minutes. Once set, garnish with fresh cilantro. Serve and experience Mexico in every bite.

Rebecca I am a fan of Mexican dishes. They are like my kryptonite. And this baby is one of my favourites! I just love how the flavours burst in my mouth.… Main Dish Recipes Cream Cheese Chicken Enchiladas European Print This
Nutrition facts: 200 calories 20 grams fat
Rating: 4.5/5
( 2 voted )

Ingredients

  • 8-10 flour tortillas
  • 1 (8 oz.) package cream cheese, room temperature, divided [1/2 and 1/2]
  • 1-2 (4 oz.) cans green chiles
  • 3 cups of cooked chicken, shredded
  • 2 cups of Mexican blend cheese, grated, divided [1 cup; 1 cup]
  • 2 cups of low-sodium chicken broth
  • 3 Tbsp. unsalted butter
  • 3 Tbsp. all-purpose flour
  • 1 Tbsp. lime juice
  • 1 tsp. cumin
  • 1/2 tsp. chilli powder
  • kosher salt and freshly ground pepper, to taste
  • fresh cilantro, garnish, optional

Instructions

Ready the oven. Preheat to 350 degrees F. With non-stick spray, lightly grease a 9 X 13-inch baking pan.

In a medium-size mixing bowl, stir 1/2 cream cheese, chicken, 1 cup cheese, lime juice, cumin, and chilli powder. Season with salt and pepper.

Fill the tortillas with 2 to 3 tablespoon of chicken mixture. Place in the baking pan, seam side down.

Melt butter over medium-high heat. Whisk in flour and cook for about 5 to 7 minutes or until golden brown. Season with salt and pepper, pour in chicken broth while whisking gradually, and add the green chillies. Stir in the remaining 1/2 cream cheese and cook for another 5 to 7 minutes, or until thickened.

Remove pan from heat. Pour sauce over the enchiladas. Top with remaining cheese (I like mine more).

Place the baking dish in the oven and bake for 22 to 25 minutes or until the cheese and filling is melted and bubbly.

This step is optional but you can also broil for 3 to 5 minutes, or until slightly browned.

When done remove from the oven and let it rest for about 10 to 12 minutes. Once set, garnish with fresh cilantro. Serve and experience Mexico in every bite.

April 29, 2020 0 comment
0 FacebookTwitterPinterestEmail
Main Dish Recipes

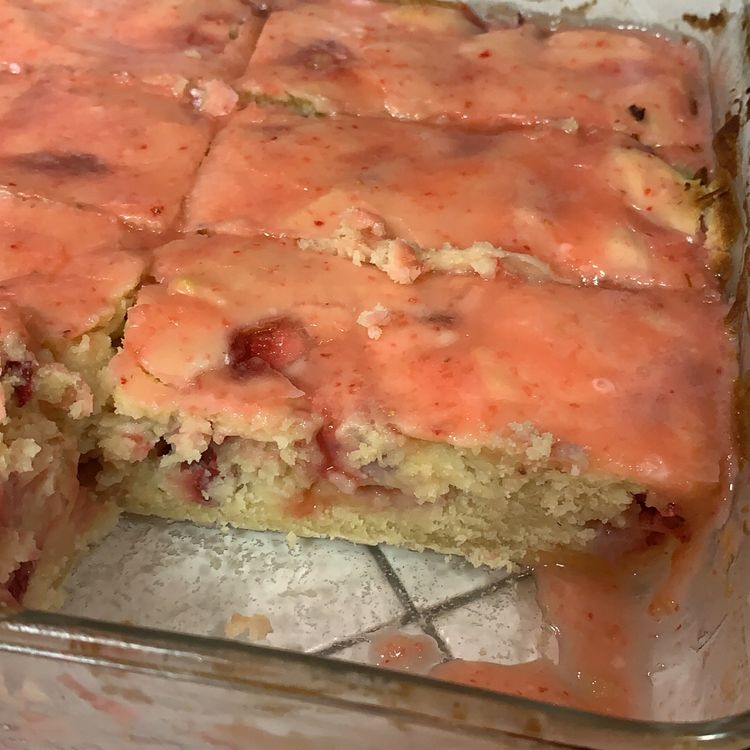
Strawberry lemonade blondies to die for!

by Rebecca April 29, 2020
written by Rebecca

So, I was browsing the internet last week looking for new recipes when I stumbled upon this amazing recipe. I tried it and I was so glad that I did because not only that it is simple to make, it has strawberries in it too! It’s my favourite! I’m sure it’s gonna be a treat to all strawberry lovers out there. Give it a try. I promise you, it’ll become your favourite too! Enjoy!

What you need:

For the Blondie Batter:

1 cup butter, room temp

3/4 cup sugar

1 egg

1/4 cup lemon juice

2 1/4 cups flour

1/2 tsp of baking powder

1/2 tsp salt

1 cup diced fresh strawberries

For the Glaze:

1 cup powdered sugar

1 Tbsp strawberry puree (2 large strawberries, see instructions below)

1/2 – 1 tablespoon lemon juice (enough to thin the glaze to spreadable consistency)

How to make Strawberry Lemonade Blondies

Ready the oven. Preheat to 350 degrees C. Put parchment paper in a 9-inch square baking pan.

Mix butter and sugar in a large bowl. Whisk until it becomes fluffy then, add the egg. You can use a hand mixer to get the best result.

Add the lemon juice in the same bowl. (At this point, the lemon juice will not mix with the other ingredients. Don’t worry.)

In a different bowl, whisk together baking powder, flour and, salt. then, add to the batter and whisk until well-mixed.

Add in the sliced strawberries. Layout the batter into the pan. Make sure to spread evenly.

Bake inside the oven for 30-35 minutes or until the edges are golden. Use a toothpick to know the doneness of the cake. Once done, let it cool.

Puree the strawberries in the food processor. (Remember to cut off the calyx.) Add pressure to get 1 tbsp of puree.

Whisk the puree, sugar, and lemon juice in a medium bowl until smooth. (If the glaze is thick, add lemon juice and add sugar if it is thin.)

Pour in the glaze over the blondies and spread gently. Let the flavours incorporate before slicing.

Strawberry lemonade blondies to die for!

Rebecca So, I was browsing the internet last week looking for new recipes when I stumbled upon this amazing recipe. I tried it and I was so glad that I did… Main Dish Recipes Strawberry lemonade blondies to die for! European Print This
Nutrition facts: 200 calories 20 grams fat
Rating: 5.0/5
( 1 voted )

Ingredients

  • For the Blondie Batter:
  • 1 cup butter, room temp
  • 3/4 cup sugar
  • 1 egg
  • 1/4 cup lemon juice
  • 2 1/4 cups flour
  • 1/2 tsp of baking powder
  • 1/2 tsp salt
  • 1 cup diced fresh strawberries
  • For the Glaze:
  • 1 cup powdered sugar
  • 1 Tbsp strawberry puree (2 large strawberries, see instructions below)
  • 1/2 - 1 tablespoon lemon juice (enough to thin the glaze to spreadable consistency)

Instructions

Ready the oven. Preheat to 350 degrees C. Put parchment paper in a 9-inch square baking pan.

Mix butter and sugar in a large bowl. Whisk until it becomes fluffy then, add the egg. You can use a hand mixer to get the best result.

Add the lemon juice in the same bowl. (At this point, the lemon juice will not mix with the other ingredients. Don't worry.)

In a different bowl, whisk together baking powder, flour and, salt. then, add to the batter and whisk until well-mixed.

Add in the sliced strawberries. Layout the batter into the pan. Make sure to spread evenly.

Bake inside the oven for 30-35 minutes or until the edges are golden. Use a toothpick to know the doneness of the cake. Once done, let it cool.

Puree the strawberries in the food processor. (Remember to cut off the calyx.) Add pressure to get 1 tbsp of puree.

Whisk the puree, sugar, and lemon juice in a medium bowl until smooth. (If the glaze is thick, add lemon juice and add sugar if it is thin.)

Pour in the glaze over the blondies and spread gently. Let the flavours incorporate before slicing.

April 29, 2020 0 comment
0 FacebookTwitterPinterestEmail
Main Dish Recipes

Strawberry Rhubarb Cream Pie

by Rebecca April 29, 2020
written by Rebecca

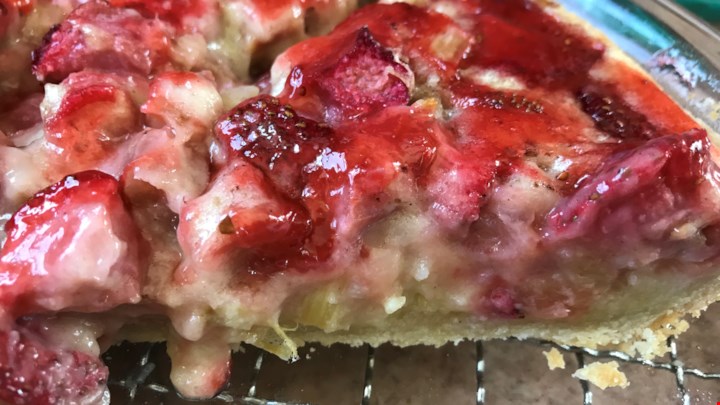
I love spring and this recipe reminds me of it every time. One bite and I’m in love! The fresh strawberries and rhubarb with the crunchy crumb topping is just amazing. Plus, it is so simple to make.

Ingredients

1 prepared pie crust (store-bought or make your own)

PIE FILLING:

16 oz strawberries, fresh with stems removed & sliced thin

1 cup of diced fresh rhubarb

1 cup sugar

1/3 cup flour

2 large eggs, room temp

1/2 cup reduced-fat sour cream or plain yogurt

1/2 tsp vanilla extract

CRUMB TOPPING:

2 1/2 Tbsp of brown sugar

2 Tbsp sugar

1/2 tsp ground cinnamon

a pinch of freshly grated nutmeg

1/4 cup butter, melted

1/2 cup + 2 1/2 teaspoon flour

How to make Strawberry Rhubarb Cream Pie

Step 1: Prepare the oven. Preheat to350 degrees F.

Step 2: Put the preferred pie crust into a pie pan. Crease the edges as desired.

Step 3: Place cut strawberries at the bottom of the crust. Sprinkle half of the rhubarb over strawberries. Repeat step until all the strawberries reach the top of the crust.

Step 4: Put sugar and flour in a bowl and mix well. Add eggs, sour cream, and vanilla. Blend in a mixer on medium speed for about 2 minutes. Pour over the mixture on top of the pie crust.

Step 5: In another bowl, combine brown sugar, sugar, cinnamon, and nutmeg. Pour in the melted butter and mix until combine. Add the flour and stir. Make sure that the mixture is clump together. Crumble evenly over the pie mixture.

Step 6: Brush the edges of the pie crust with an egg wash. Then bake at 350 degrees F for an hour and ten minutes.

Step 7: Once done. Cool completely on a wire rack for at least 4 hours. (I know four hours is a long time, and the kids can’t wait but to make sure that the cream is set, we have to wait.)

Strawberry Rhubarb Cream Pie

Rebecca I love spring and this recipe reminds me of it every time. One bite and I’m in love! The fresh strawberries and rhubarb with the crunchy crumb topping is just… Main Dish Recipes Strawberry Rhubarb Cream Pie European Print This
Nutrition facts: 200 calories 20 grams fat
Rating: 5.0/5
( 1 voted )

Ingredients

  • 1 prepared pie crust (store-bought or make your own)
  • PIE FILLING:
  • 16 oz strawberries, fresh with stems removed & sliced thin
  • 1 cup of diced fresh rhubarb
  • 1 cup sugar
  • 1/3 cup flour
  • 2 large eggs, room temp
  • 1/2 cup reduced-fat sour cream or plain yogurt
  • 1/2 tsp vanilla extract
  • CRUMB TOPPING:
  • 2 1/2 Tbsp of brown sugar
  • 2 Tbsp sugar
  • 1/2 tsp ground cinnamon
  • a pinch of freshly grated nutmeg
  • 1/4 cup butter, melted
  • 1/2 cup + 2 1/2 teaspoon flour

Instructions

Step 1: Prepare the oven. Preheat to350 degrees F.

Step 2: Put the preferred pie crust into a pie pan. Crease the edges as desired.

Step 3: Place cut strawberries at the bottom of the crust. Sprinkle half of the rhubarb over strawberries. Repeat step until all the strawberries reach the top of the crust.

Step 4: Put sugar and flour in a bowl and mix well. Add eggs, sour cream, and vanilla. Blend in a mixer on medium speed for about 2 minutes. Pour over the mixture on top of the pie crust.

Step 5: In another bowl, combine brown sugar, sugar, cinnamon, and nutmeg. Pour in the melted butter and mix until combine. Add the flour and stir. Make sure that the mixture is clump together. Crumble evenly over the pie mixture.

Step 6: Brush the edges of the pie crust with an egg wash. Then bake at 350 degrees F for an hour and ten minutes.

Step 7: Once done. Cool completely on a wire rack for at least 4 hours. (I know four hours is a long time, and the kids can't wait but to make sure that the cream is set, we have to wait.)

April 29, 2020 0 comment
0 FacebookTwitterPinterestEmail
Main Dish Recipes

Zucchini and Squash Au Gratin

by Rebecca April 29, 2020
written by Rebecca

Side dish balances the main dish. They may not be the star of the show but no meal is complete without them. I guess everybody will agree with me about that. And when we think of what meal to cook, we always make sure that the side and the main dishes complement.

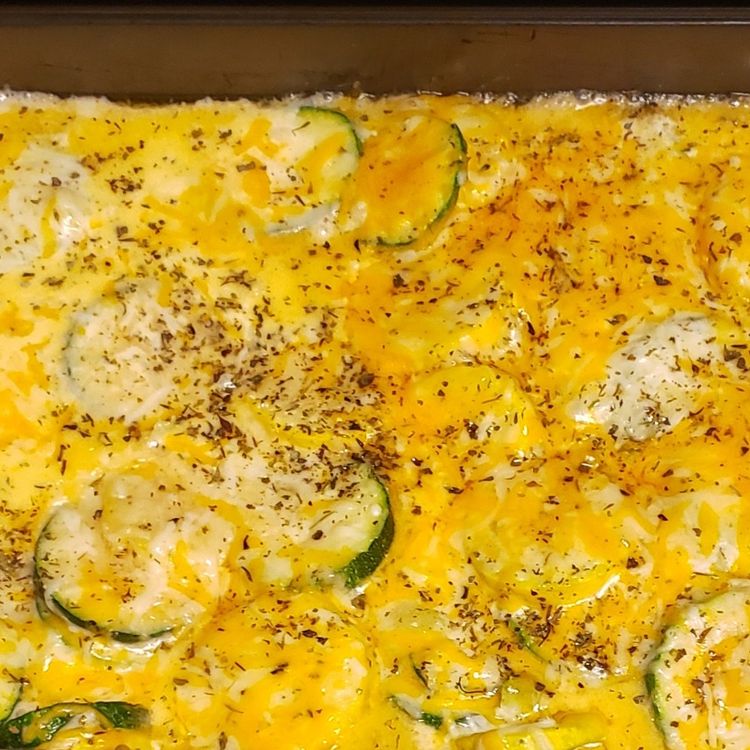
Zucchini and Squash Au Gratin is something I never thought before. I was used to traditional side dishes until I came across this recipe. What’s not to love? It is pretty easy to make, simple and could go along with just about anything!

My boy even if he dislikes zucchini, he can’t resist! He enjoys every bite and always want more. I know that when you try this, you will never look back! So when you are preparing your meal tonight and you run out of ideas what side dish to cook, try this and I’m sure your family would want more!

Ingredients

2 Tbsp butter

1 large zucchini, sliced

1 large yellow squash, sliced

2 medium shallots, minced

1 tsp garlic (fresh or jar)

1/2 cup heavy cream

shredded cheese, just a handful to sprinkle

salt and pepper, to taste

sprinkle of oregano

Parmesan cheese, to taste

How to make Zucchini and Squash Au Gratin

Step 1: Ready the oven. Preheat to 450 degrees.

Step 2: In a large pan, put butter and saute shallots and garlic. Cook until shallots are clear.

Step 3: Add the zucchinis, squash, and heavy cream. Sprinkle in salt, pepper, and cheese.

Step 4: Cook for about 8-10 minutes or until it’s bubbly.

Step 5: Pour into an oven-safe baking dish. Add a little or more parmesan and shredded cheese. (I like mine with more cheese!)

Step 6: Let’s get baking. Put the baking dish in the oven. Bake for about 10-14 minutes or until mixture is bubbly and the top is golden brown.

Serve alongside any meal. Enjoy!

Zucchini and Squash Au Gratin

Rebecca Side dish balances the main dish. They may not be the star of the show but no meal is complete without them. I guess everybody will agree with me about… Main Dish Recipes Zucchini and Squash Au Gratin European Print This
Nutrition facts: 200 calories 20 grams fat
Rating: 5.0/5
( 1 voted )

Ingredients

  • 2 Tbsp butter
  • 1 large zucchini, sliced
  • 1 large yellow squash, sliced
  • 2 medium shallots, minced
  • 1 tsp garlic (fresh or jar)
  • 1/2 cup heavy cream
  • shredded cheese, just a handful to sprinkle
  • salt and pepper, to taste
  • sprinkle of oregano
  • Parmesan cheese, to taste

Instructions

Step 1: Ready the oven. Preheat to 450 degrees.

Step 2: In a large pan, put butter and saute shallots and garlic. Cook until shallots are clear.

Step 3: Add the zucchinis, squash, and heavy cream. Sprinkle in salt, pepper, and cheese.

Step 4: Cook for about 8-10 minutes or until it's bubbly.

Step 5: Pour into an oven-safe baking dish. Add a little or more parmesan and shredded cheese. (I like mine with more cheese!)

Step 6: Let's get baking. Put the baking dish in the oven. Bake for about 10-14 minutes or until mixture is bubbly and the top is golden brown.

Serve alongside any meal. Enjoy!

April 29, 2020 0 comment
0 FacebookTwitterPinterestEmail
Main Dish Recipes

Pineapple Pecan Cake with Cream Cheese Frosting

by Rebecca April 29, 2020
written by Rebecca

It is my kids birthday today! I thought I would surprise her with her favourite Pineapple Pecan Cake with Cream Cheese Frosting. I want this day to be very special because it is her 7th birthday and we are having a small surprise party for her. Since this cake is pretty easy to make, I was able to bake it before she caught me! That was close!

My daughter loves it, she won’t stop kissing me! Her friends can’t get over it, too. Even their moms asked me how to make it! Crazy, right? So I shared them my recipe and they surprise on how simple it is to make.

Try it for yourself, I promise you your family will love it!

What you need…

For the cake

2 c flour

2 c sugar

2 tsp baking soda

2 eggs

1 (20-ounce) can of crushed pineapple with juice

1 cup chopped pecans, optional

For the Icing

1 stick butter, softened

1 (8-ounce) package cream cheese softened

2 cups confectioners sugar

1 Tbsp vanilla

What you need to do

Let’s start with the cake. In a large bowl, mix flour, sugar and baking soda. Add the eggs, pineapple along with its juice, and the pecans (it’s up to you if you want to use pecans, I like mine with lots of it). Stir until moistened. Pour mixture into a 9 x 13-inch buttered baking pan. Bake for about 35 minutes in a preheated 350°F oven. Insert a toothpick to check doneness, if it comes out clean then your cake is done. Remove from the oven and let it cool completely.

For the icing, combine cream cheese, butter, confectioner sugar, and vanilla. Gently beat until smooth.

It is time to frost the cake! Don’t be shy, pour everything on it. Serve and enjoy! Refrigerate if there’s any left. Great with coffee for a great afternoon snack.

Pineapple Pecan Cake with Cream Cheese Frosting

Rebecca It is my kids birthday today! I thought I would surprise her with her favourite Pineapple Pecan Cake with Cream Cheese Frosting. I want this day to be very special… Main Dish Recipes Pineapple Pecan Cake with Cream Cheese Frosting European Print This
Nutrition facts: 200 calories 20 grams fat
Rating: 5.0/5
( 1 voted )

Ingredients

  • For the cake
  • 2 c flour
  • 2 c sugar
  • 2 tsp baking soda
  • 2 eggs
  • 1 (20-ounce) can of crushed pineapple with juice
  • 1 cup chopped pecans, optional
  • For the Icing
  • 1 stick butter, softened
  • 1 (8-ounce) package cream cheese softened
  • 2 cups confectioners sugar
  • 1 Tbsp vanilla

Instructions

Let's start with the cake. In a large bowl, mix flour, sugar and baking soda. Add the eggs, pineapple along with its juice, and the pecans (it's up to you if you want to use pecans, I like mine with lots of it). Stir until moistened. Pour mixture into a 9 x 13-inch buttered baking pan. Bake for about 35 minutes in a preheated 350°F oven. Insert a toothpick to check doneness, if it comes out clean then your cake is done. Remove from the oven and let it cool completely.

For the icing, combine cream cheese, butter, confectioner sugar, and vanilla. Gently beat until smooth.

It is time to frost the cake! Don't be shy, pour everything on it. Serve and enjoy! Refrigerate if there's any left. Great with coffee for a great afternoon snack.

April 29, 2020 0 comment
0 FacebookTwitterPinterestEmail
Main Dish Recipes

Dark Coffee-Chocolate Cake with Mocha-Mascarpone Frosting

by Rebecca April 28, 2020
written by Rebecca

There’s nothing better in this world than life’s dessert, a chocolate cake. This recipe will surely give you the satisfaction you have been looking for in your lives. A strong chocolate cake with mocha-mascarpone is a treat that must not be ignored. Try and share this recipe with your loved ones.

INGREDIENTS:

Cake

2 cups cake flour

3/4 cup natural unsweetened cocoa powder

1 1/2 teaspoons baking soda

3/4 teaspoon salt

3/4 c unsalted butter, under room temperature

2 cups (packed) golden brown sugar

3 large eggs

1 1/2 teaspoons vanilla extract

1 cup buttermilk

4 tsp instant espresso powder must be dissolved with a 3/4 c hot water

Frosting

1/3 cup natural unsweetened cocoa powder

1 tablespoon instant espresso powder

1 1/2 c of chilled heavy whipping cream, divided

1 1/3 cups sugar

2 8-ounce containers chilled mascarpone cheese

Bittersweet chocolate curls (optional)

Directions:

Cake

In the centre of the oven, position rack; preheat up to 325 ° F. Generously butter two 9 inch cake pans with 2 inch-tall sides; dust it with flour, tap any excess. Line pans with parchment paper.

Sift 2 cups of cake into a medium bowl with flour, cocoa, and baking soda. Beat butter in large bowl to smooth with the help of the electric blender. Add brown sugar and beat for about 2 minutes until well mixed. Add eggs 1 at a time, which will be good after every addition, and add vanilla extract. Add 3 additional meal mixture and 2 additional buttermilk alternatively, then only blend until each addition has been blended. Stir in a smooth mixture of hot espresso water gradually.

Split batter among pans; smooth tops. Bake the cakes until clean, about 40 minutes after inserting the tester into the centre. Set aside to cool the cakes in pots on the rack for 15 mins. Insert a small knife to loosen cakes around the sides of the bowl. The cakes must be inverted onto the racks and vice versa to remove the parchment paper. Place a wire rack on top of every cake; reverse, to cool completely. Store every cake in plastic at room temperature.

Frosting

Sift cocoa powder into a big bowl; sprinkle powder with espresso. In a small saucepan, bring 1 cup of cream to boiling. Slowly for cocoa mixture cream, whisk about 1 minute until cocoa is fully dissolved. Stir until sugar dissolves, add 1/2 cup of cream and sugar. At least 2 hours of chill to cold.

Mix the cocoa mixture with mascarpone. Beat at low speed until mixed and smooth with the electric blender. Speed increase to medium-high; beat for about 2 minutes.

Brush off cakes with pastry brush and place on top of the plate. Top with 1 3/4 cup frost in dollops. Spread the frosting to the edges with an offset spatula. Top with a second layer of cake, press to stick. Spread thin frosting layer on top of the cake and topsides then chill 10 minutes. With the use of an offset spatula, swirl decoratively on top or side of the cake. If desired, add chocolate curls. Allow 20 minutes before serving to stand at room temperature.

Dark Coffee-Chocolate Cake with Mocha-Mascarpone Frosting

Rebecca There’s nothing better in this world than life’s dessert, a chocolate cake. This recipe will surely give you the satisfaction you have been looking for in your lives. A strong… Main Dish Recipes Dark Coffee-Chocolate Cake with Mocha-Mascarpone Frosting European Print This
Nutrition facts: 200 calories 20 grams fat
Rating: 5.0/5
( 2 voted )

Ingredients

  • Cake
  • 2 cups cake flour
  • 3/4 cup natural unsweetened cocoa powder
  • 1 1/2 teaspoons baking soda
  • 3/4 teaspoon salt
  • 3/4 c unsalted butter, under room temperature
  • 2 cups (packed) golden brown sugar
  • 3 large eggs
  • 1 1/2 teaspoons vanilla extract
  • 1 cup buttermilk
  • 4 tsp instant espresso powder must be dissolved with a 3/4 c hot water
  • Frosting
  • 1/3 cup natural unsweetened cocoa powder
  • 1 tablespoon instant espresso powder
  • 1 1/2 c of chilled heavy whipping cream, divided
  • 1 1/3 cups sugar
  • 2 8-ounce containers chilled mascarpone cheese
  • Bittersweet chocolate curls (optional)

Instructions

Cake

In the centre of the oven, position rack; preheat up to 325 ° F. Generously butter two 9 inch cake pans with 2 inch-tall sides; dust it with flour, tap any excess. Line pans with parchment paper.

Sift 2 cups of cake into a medium bowl with flour, cocoa, and baking soda. Beat butter in large bowl to smooth with the help of the electric blender. Add brown sugar and beat for about 2 minutes until well mixed. Add eggs 1 at a time, which will be good after every addition, and add vanilla extract. Add 3 additional meal mixture and 2 additional buttermilk alternatively, then only blend until each addition has been blended. Stir in a smooth mixture of hot espresso water gradually.

Split batter among pans; smooth tops. Bake the cakes until clean, about 40 minutes after inserting the tester into the centre. Set aside to cool the cakes in pots on the rack for 15 mins. Insert a small knife to loosen cakes around the sides of the bowl. The cakes must be inverted onto the racks and vice versa to remove the parchment paper. Place a wire rack on top of every cake; reverse, to cool completely. Store every cake in plastic at room temperature.

Frosting

Sift cocoa powder into a big bowl; sprinkle powder with espresso. In a small saucepan, bring 1 cup of cream to boiling. Slowly for cocoa mixture cream, whisk about 1 minute until cocoa is fully dissolved. Stir until sugar dissolves, add 1/2 cup of cream and sugar. At least 2 hours of chill to cold.

Mix the cocoa mixture with mascarpone. Beat at low speed until mixed and smooth with the electric blender. Speed increase to medium-high; beat for about 2 minutes.

Brush off cakes with pastry brush and place on top of the plate. Top with 1 3/4 cup frost in dollops. Spread the frosting to the edges with an offset spatula. Top with a second layer of cake, press to stick. Spread thin frosting layer on top of the cake and topsides then chill 10 minutes. With the use of an offset spatula, swirl decoratively on top or side of the cake. If desired, add chocolate curls. Allow 20 minutes before serving to stand at room temperature.

April 28, 2020 0 comment
0 FacebookTwitterPinterestEmail
Newer Posts
Older Posts

Popular Posts

  • 1

    Crispy Crunchy Parmesan Potatoes

    March 21, 2020
  • 2

    CROCK POT SMOTHERED PORK CHOPS

    March 21, 2020
  • Facebook
  • Twitter

@2019 - All Right Reserved.


Back To Top