Cook it once
  • Home
  • Privacy Policy
  • Recipes
    • KETO
    • LC
    • WW
  • Tips
  • Contact
Cook it once
  • Home
  • Privacy Policy
  • Recipes
    • KETO
    • LC
    • WW
  • Tips
  • Contact
Category:

Main Dish Recipes

Main Dish Recipes

Italian Lemon Drop Cookies

by Rebecca June 25, 2020
written by Rebecca

These little heaven-like treats are awesome! They are simply cute and delicious. Every bite is satisfying and every cookie is never to put to waste. They are perfect for children’s party because of how wonderful they look. Look at those colors, don’t you wanna just get a bite of that? If you do, then it’s time for you to preheat your oven and start baking! Best of luck. Enjoy!

INGREDIENTS

1⁄2 cup sugar

1 stick butter, softened

3 large eggs

1 1⁄2 teaspoons lemon extract

2 cups all-purpose flour

3 teaspoons baking powder

1⁄8 teaspoon salt

3 cups confectioners’ sugar

1⁄4 cup water

1 teaspoon lemon extract

How to make Italian Lemon Drop Cookies

Step 1: Ready the oven and preheat to 350 degrees F.

Step 2: In a large bowl, add salt, flour, and baking powder. Stir until well-mixed.

Step 3: In a separate large bowl, add butter and sugar. Whisk until cream then add lemon extract and eggs. Beat until blended.

Step 4: Add the flour mixture into the butter mixture. Whisk until well-mixed and the texture is smooth. Add a droplet of yellow food color if the dough is light-colored. Put the dough inside the fridge to chill.

Step 5: Scoop the dough and drop them into the prepared baking sheet. Leave at least 2 inches space between the doughs.

Step 6; Place inside the oven and bake for 12 to 15 minutes or until the color turns light brown.

Step 7: Remove the cookies from the oven and let it sit on a wire rack to cool.

Step 8: In a large mixing bowl, add all the icing ingredients and mix until smooth.

Step 9; Dip into the glaze the top part of the cookies and let sit on the sire rack to incorporate the glaze.

Step 10: Sprinkle lemon zest on top while the glaze is still moist.

Step 11: Insert the cookies inside an airtight container to preserve the freshness.

Italian Lemon Drop Cookies

Rebecca These little heaven-like treats are awesome! They are simply cute and delicious. Every bite is satisfying and every cookie is never to put to waste. They are perfect for children’s… Main Dish Recipes Italian Lemon Drop Cookies European Print This
Nutrition facts: 200 calories 20 grams fat
Rating: 5.0/5
( 1 voted )

Ingredients

  • 1⁄2 cup sugar
  • 1 stick butter, softened
  • 3 large eggs
  • 1 1⁄2 teaspoons lemon extract
  • 2 cups all-purpose flour
  • 3 teaspoons baking powder
  • 1⁄8 teaspoon salt
  • 3 cups confectioners’ sugar
  • 1⁄4 cup water
  • 1 teaspoon lemon extract

Instructions

Step 1: Ready the oven and preheat to 350 degrees F.

Step 2: In a large bowl, add salt, flour, and baking powder. Stir until well-mixed.

Step 3: In a separate large bowl, add butter and sugar. Whisk until cream then add lemon extract and eggs. Beat until blended.

Step 4: Add the flour mixture into the butter mixture. Whisk until well-mixed and the texture is smooth. Add a droplet of yellow food color if the dough is light-colored. Put the dough inside the fridge to chill.

Step 5: Scoop the dough and drop them into the prepared baking sheet. Leave at least 2 inches space between the doughs.

Step 6; Place inside the oven and bake for 12 to 15 minutes or until the color turns light brown.

Step 7: Remove the cookies from the oven and let it sit on a wire rack to cool.

Step 8: In a large mixing bowl, add all the icing ingredients and mix until smooth.

Step 9; Dip into the glaze the top part of the cookies and let sit on the sire rack to incorporate the glaze.

Step 10: Sprinkle lemon zest on top while the glaze is still moist.

Step 11: Insert the cookies inside an airtight container to preserve the freshness.

June 25, 2020 0 comment
0 FacebookTwitterPinterestEmail
Main Dish Recipes

Turkey And Stuffing Meatloaf

by Rebecca June 25, 2020
written by Rebecca

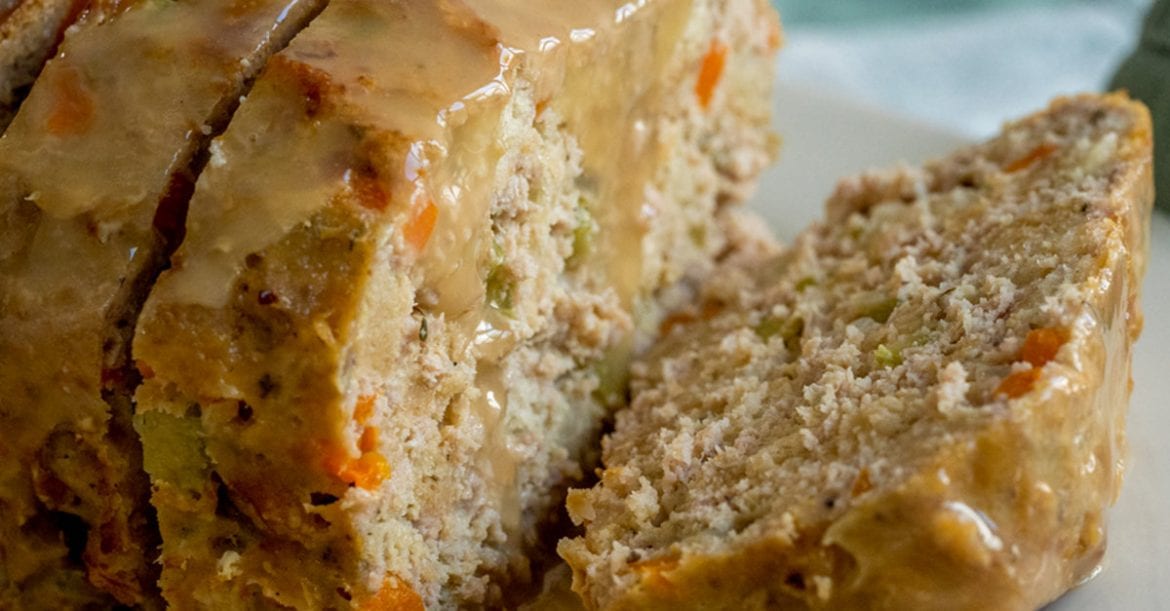
Lo and behold the best food for tonight’s dinner! This will be a part of your top 10 meals to cook for special occasions! I don’t know but it has a very fancy look and taste to it! The number of steps might give you a feeling that it’s a difficult dish but it’s not. Just make sure to follow it step by step for the best result. Good luck and have fun!

INGREDIENTS

2 pounds ground turkey

1 (6 oz.) box herb-seasoned stove-top stuffing

1 cup McCormick Simply Better Turkey Gravy, divided

1/2 cup carrots, diced

1/2 cup yellow onion, diced

1/2 cup celery, diced

3 cloves garlic, minced

1/2 teaspoon McCormick ground thyme or thyme leaves

1/2 teaspoon McCormick ground sage or sage leaves

2 large eggs

2 tablespoons unsalted butter

2 tablespoons milk

kosher salt and freshly ground pepper

How to make Turkey And Stuffing Meatloaf

Step 1: Ready the oven and preheat to 350 degrees F.

Step 2: Apply cooking spray in a 9×5-inch loaf pan.

Step 3: Place a skillet on the stove and turn the heat to medium-high. Melt butter and add onion, celery, and carrot. Saute for  6 to 8 minutes or until the ingredients are cooked and soft. Add in the minced garlic and cook for an extra 1 to 2 minutes or until aromatic.

Step 4: Add salt and pepper to taste. Add in 3 tablespoons of turkey gravy and cook for another 2 minutes. Remove the skillet from the stove and let it cool.

Step 5: In a large mixing bowl, add the stuffing mixture, ground turkey, milk, and eggs. Add in the cooked vegetables and sprinkle sage, thyme, salt, and pepper to taste.

Step 6: Mix using two forks or with clean hands until all the ingredients are incorporated.

Step 7: Pour the remaining 1/4 cup of gravy over mixture in the greased pan.

Step 8: Place inside the preheated oven and bake for 40 minutes.

Step 9: Remove the loan form the oven.

Step 10: Pour the turkey gravy on top. Serve hot and enjoy!

Turkey And Stuffing Meatloaf

Rebecca Lo and behold the best food for tonight’s dinner! This will be a part of your top 10 meals to cook for special occasions! I don’t know but it has… Main Dish Recipes Turkey And Stuffing Meatloaf European Print This
Nutrition facts: 200 calories 20 grams fat
Rating: 5.0/5
( 1 voted )

Ingredients

  • 2 pounds ground turkey
  • 1 (6 oz.) box herb-seasoned stove-top stuffing
  • 1 cup McCormick Simply Better Turkey Gravy, divided
  • 1/2 cup carrots, diced
  • 1/2 cup yellow onion, diced
  • 1/2 cup celery, diced
  • 3 cloves garlic, minced
  • 1/2 teaspoon McCormick ground thyme or thyme leaves
  • 1/2 teaspoon McCormick ground sage or sage leaves
  • 2 large eggs
  • 2 tablespoons unsalted butter
  • 2 tablespoons milk
  • kosher salt and freshly ground pepper

Instructions

Step 1: Ready the oven and preheat to 350 degrees F.

Step 2: Apply cooking spray in a 9x5-inch loaf pan.

Step 3: Place a skillet on the stove and turn the heat to medium-high. Melt butter and add onion, celery, and carrot. Saute for  6 to 8 minutes or until the ingredients are cooked and soft. Add in the minced garlic and cook for an extra 1 to 2 minutes or until aromatic.

Step 4: Add salt and pepper to taste. Add in 3 tablespoons of turkey gravy and cook for another 2 minutes. Remove the skillet from the stove and let it cool.

Step 5: In a large mixing bowl, add the stuffing mixture, ground turkey, milk, and eggs. Add in the cooked vegetables and sprinkle sage, thyme, salt, and pepper to taste.

Step 6: Mix using two forks or with clean hands until all the ingredients are incorporated.

Step 7: Pour the remaining 1/4 cup of gravy over mixture in the greased pan.

Step 8: Place inside the preheated oven and bake for 40 minutes.

Step 9: Remove the loan form the oven.

Step 10: Pour the turkey gravy on top. Serve hot and enjoy!

June 25, 2020 0 comment
0 FacebookTwitterPinterestEmail
Main Dish Recipes

Creamy Italian Sausage And Potato Soup

by Rebecca June 24, 2020
written by Rebecca

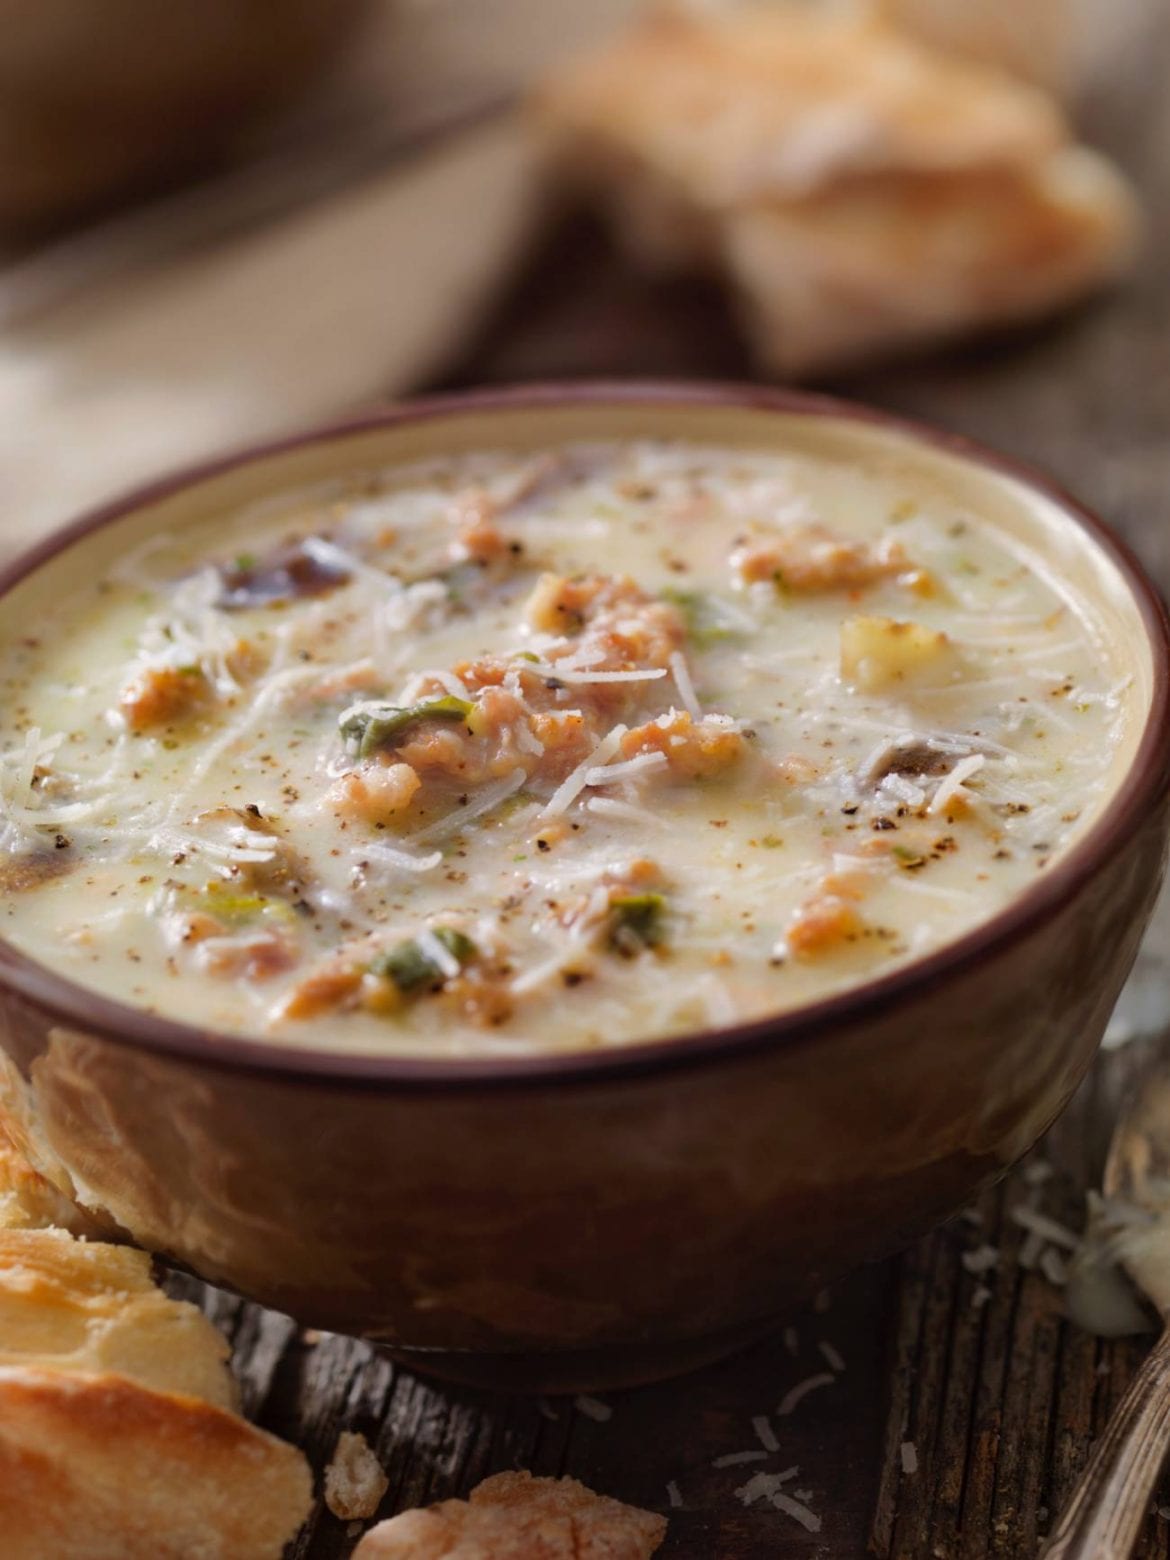
This Creamy Italian Sausage and Potato Soup is one of the best dishes I have ever cooked and tasted. The simplicity of this dish caught my attention. I’ve known this recipe for quite some time but now, I feel like I need to share it with other people that’s why I have decided to write down the recipe. Aside from the awesome flavor, the aroma is really good as well! Think about the smell of sausage and melted cheese. Oh boy, after this I probably will go to the kitchen to cook this. I think you probably will too! You all have a good day. Enjoy!

INGREDIENTS

1 pound mild Italian sausage

2 pounds Russet potatoes, diced

6 cups low-sodium chicken stock

3 cups chopped kale or spinach

1 cup heavy cream

½ cup parmesan cheese, shredded

Kosher salt and black pepper, to taste

Olive oil, for garnish

How to make Creamy Italian Sausage And Potato Soup

Step 1: Place a large stockpot on the stove and turn the heat to medium-high. Add in the Italian sausage crumble and cook until the color turns brown.

Step 2: Remove the cooked sausage and drain the excess grease in the stockpot.

Step 3: Put the sausage back to the pot and pour the chicken stock. Season with 1/4 teaspoon of black pepper and 1/2 teaspoon salt then add in the potatoes. Cook for 10 to 12 minutes until the potatoes are cooked and tender.

Step 4: Remove half of the potatoes then transfer them into a medium bowl.

Step 5: Mash the cooked potatoes and put them back to the pot.

Step 6: Add in spinach leaves, heavy cream, and kale. .Season with more salt and pepper.

Step 7: Cook for 2 to 3 minutes or until the kale is cooked and tender.

Step 8: Sprinkle parmesan cheese on top and freshly crushed black pepper then drizzle with olive oil.

Step 9: Serve and enjoy!

Creamy Italian Sausage And Potato Soup

Rebecca This Creamy Italian Sausage and Potato Soup is one of the best dishes I have ever cooked and tasted. The simplicity of this dish caught my attention. I’ve known this… Main Dish Recipes Creamy Italian Sausage And Potato Soup European Print This
Nutrition facts: 200 calories 20 grams fat
Rating: 5.0/5
( 1 voted )

Ingredients

  • 1 pound mild Italian sausage
  • 2 pounds Russet potatoes, diced
  • 6 cups low-sodium chicken stock
  • 3 cups chopped kale or spinach
  • 1 cup heavy cream
  • ½ cup parmesan cheese, shredded
  • Kosher salt and black pepper, to taste
  • Olive oil, for garnish

Instructions

Step 1: Place a large stockpot on the stove and turn the heat to medium-high. Add in the Italian sausage crumble and cook until the color turns brown.

Step 2: Remove the cooked sausage and drain the excess grease in the stockpot.

Step 3: Put the sausage back to the pot and pour the chicken stock. Season with 1/4 teaspoon of black pepper and 1/2 teaspoon salt then add in the potatoes. Cook for 10 to 12 minutes until the potatoes are cooked and tender.

Step 4: Remove half of the potatoes then transfer them into a medium bowl.

Step 5: Mash the cooked potatoes and put them back to the pot.

Step 6: Add in spinach leaves, heavy cream, and kale. .Season with more salt and pepper.

Step 7: Cook for 2 to 3 minutes or until the kale is cooked and tender.

Step 8: Sprinkle parmesan cheese on top and freshly crushed black pepper then drizzle with olive oil.

Step 9: Serve and enjoy!

June 24, 2020 0 comment
0 FacebookTwitterPinterestEmail
Main Dish Recipes

Parmesan-Crusted Pork Chops

by Rebecca June 24, 2020
written by Rebecca

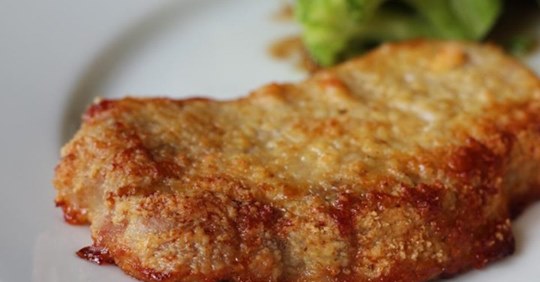
Eat pork chops the best way! Once you get a bite of this delicious meal, you will surely crave for it! My best friend introduced me to this recipe a few years ago. I remember it like it was yesterday. She was visiting me in New York. We had a great time that day and decided to cook dinner together. I remember, there were 4 pork chops in the freezer. She then defrosts it and told me that she was gonna make the best dinner. I watched her prepare and cook this amazing Parmesan-Crusted Pork Chops. At first, I was kind of pessimistic about the outcome of this dish because I never thought Parmesan Cheese would go well with pork chops but it does! The first bites are the best! You will always remember that moment you tasted perfection. The feeling of happiness where everything makes sense all of a sudden. Please excuse my way of building this recipe for you. It’s just that I want you to taste it yourself. I have provided all the steps. Just follow them and you are in for a treat!

INGREDIENTS

1 serving cooking spray

1 egg

1/4 cup grated Parmesan cheese

1 teaspoon Cajun seasoning

2 boneless pork chops, trimmed

How to make Parmesan-Crusted Pork Chops

Step 1: Ready the oven and preheat to 350 degrees F or 175 degrees C.

Step 2: Apply cooking spray in a baking dish.

Step 3: In a medium shallow bowl, add eggs. Whisk until creamy.

Step 4: On a clean plate, add Cajun seasoning and Parmesan cheese. Whisk until well-mixed.

Step 5: Coat each pork chop with the beaten eggs then coat with the cajun and parmesan mixture. Put them on the greased baking dish.

Step 6: Place the baking dish inside the preheated oven and bake for 40 minutes or until cooked through.

Step 7: Remove from the oven.

Step 8: Serve hot and enjoy!

Parmesan-Crusted Pork Chops

Rebecca Eat pork chops the best way! Once you get a bite of this delicious meal, you will surely crave for it! My best friend introduced me to this recipe a… Main Dish Recipes Parmesan-Crusted Pork Chops European Print This
Nutrition facts: 200 calories 20 grams fat
Rating: 5.0/5
( 2 voted )

Ingredients

  • 1 serving cooking spray
  • 1 egg
  • 1/4 cup grated Parmesan cheese
  • 1 teaspoon Cajun seasoning
  • 2 boneless pork chops, trimmed

Instructions

Step 1: Ready the oven and preheat to 350 degrees F or 175 degrees C.

Step 2: Apply cooking spray in a baking dish.

Step 3: In a medium shallow bowl, add eggs. Whisk until creamy.

Step 4: On a clean plate, add Cajun seasoning and Parmesan cheese. Whisk until well-mixed.

Step 5: Coat each pork chop with the beaten eggs then coat with the cajun and parmesan mixture. Put them on the greased baking dish.

Step 6: Place the baking dish inside the preheated oven and bake for 40 minutes or until cooked through.

Step 7: Remove from the oven.

Step 8: Serve hot and enjoy!

June 24, 2020 0 comment
0 FacebookTwitterPinterestEmail
Main Dish Recipes

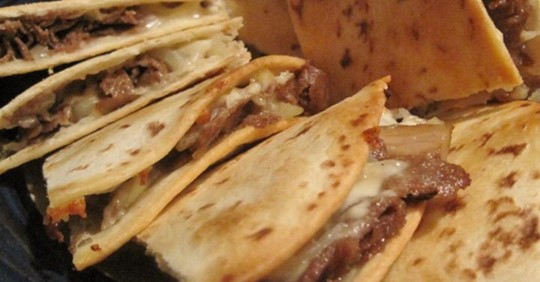
Philly Cheesesteak Quesadillas

by Rebecca June 24, 2020
written by Rebecca

I am so excited to share this recipe with you today! It is my new favorite food to eat pretty much every day in the past month. I just love the balance of all the flavors of this incredible dish. I never doubted that this was gone well because just by looking at the picture gave me an idea that it’s awesome! Enough with the talking, you just have to try it yourself. I am sure that it will not be a disappointment! I have provided all the steps you need to follow and the ingredients you will be needing. You are welcome! Enjoy!

INGREDIENTS

1 (1 pound) beef top sirloin, thinly sliced

2 small onions, sliced

2 green bell peppers, sliced

1 cup barbeque sauce (such as Bull’s-Eye(R) Texas-Style Bold Barbeque Sauce)

8 (10 inches) flour tortillas

2 cups shredded Cheddar cheese

How to make Philly Cheesesteak Quesadillas

Step 1: Ready the oven and preheat to 425 degrees F or 220 degrees C.

Step 2: Grease lightly a baking sheet. Set aside.

Step 3: Place a skillet on the stove and turn the heat to medium.

Step 4: Add in the beef and cook for 5 to 7 minutes or until the color turns brown.

Step 5: In the same skillet, toss in the sliced green bell peppers and sliced onions. Stir and cook for 5 to 10 minutes or until the onions are translucent and the bell peppers are soft.

Step 6: Pour in the barbecue sauce over the beef and simmer on medium heat for 10 minutes or until the sauce is thick.

Step 7: Place 4 tortilla chips on the prepared baking sheet and fill each tortilla with the beef mixture.

Step 8: Sprinkle generously each filled tortilla chips with cheddar cheese.

Step 9: Place the baking sheet in the oven and bake for 10 minutes. After 10 minutes, flip it over and let the cheese melt for 5 to 8 minutes.

Step 10: Remove from the oven. Serve hot ad enjoy!

Philly Cheesesteak Quesadillas

Rebecca I am so excited to share this recipe with you today! It is my new favorite food to eat pretty much every day in the past month. I just love… Main Dish Recipes Philly Cheesesteak Quesadillas European Print This
Nutrition facts: 200 calories 20 grams fat
Rating: 5.0/5
( 1 voted )

Ingredients

  • 1 (1 pound) beef top sirloin, thinly sliced
  • 2 small onions, sliced
  • 2 green bell peppers, sliced
  • 1 cup barbeque sauce (such as Bull’s-Eye(R) Texas-Style Bold Barbeque Sauce)
  • 8 (10 inches) flour tortillas
  • 2 cups shredded Cheddar cheese

Instructions

Step 1: Ready the oven and preheat to 425 degrees F or 220 degrees C.

Step 2: Grease lightly a baking sheet. Set aside.

Step 3: Place a skillet on the stove and turn the heat to medium.

Step 4: Add in the beef and cook for 5 to 7 minutes or until the color turns brown.

Step 5: In the same skillet, toss in the sliced green bell peppers and sliced onions. Stir and cook for 5 to 10 minutes or until the onions are translucent and the bell peppers are soft.

Step 6: Pour in the barbecue sauce over the beef and simmer on medium heat for 10 minutes or until the sauce is thick.

Step 7: Place 4 tortilla chips on the prepared baking sheet and fill each tortilla with the beef mixture.

Step 8: Sprinkle generously each filled tortilla chips with cheddar cheese.

Step 9: Place the baking sheet in the oven and bake for 10 minutes. After 10 minutes, flip it over and let the cheese melt for 5 to 8 minutes.

Step 10: Remove from the oven. Serve hot ad enjoy!

June 24, 2020 0 comment
0 FacebookTwitterPinterestEmail
Main Dish Recipes

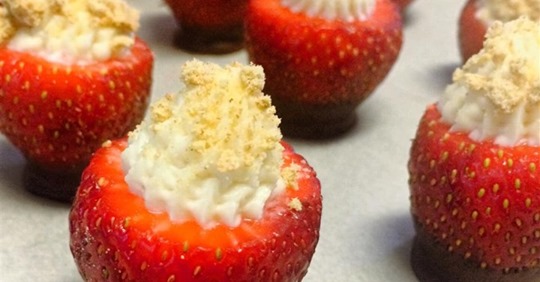
Strawberry CheeStrawberry Cheesecake Bitessecake Bites

by Rebecca June 24, 2020
written by Rebecca

These little treats will surely make you happy! I recently discovered this amazing recipe online. I was looking for desserts that I can make and prepare for my husband’s birthday. Since his favorite food is strawberry, I looked for strawberry dessert. This was the first thing I saw and I immediately fell in love with it. Aside from the amazing flavor, it is also very easy to make that even a newbie like me can pull off! I listed all the ingredients and the steps you need to follow to achieve the perfect outcome. This is perfect on a hot day. Make sure to refrigerate it long enough to make it cold. Enjoy!

INGREDIENTS

1 (8 ounces) package cream cheese

1/2 cup confectioners’ sugar

2 teaspoons vanilla extract

12 large fresh strawberries, hulled

2 tablespoons graham cracker crumbs

2 (1 ounce) squares semisweet chocolate chips (optional)

1 teaspoon canola oil (optional)

How to make Strawberry Cheesecake Bites

Step 1: Cover with waxed paper a baking sheet.

Step 2: In a medium mixing bowl, add confectioners’ sugar, vanilla extract, and cream cheese. Beat until well-mixed and creamy.

Step 3: Scoop the mixture and put it inside a piping bag that has a big round tip.

Step 4: Form a cone shape on top of each strawberry using a paring knife. Leave a tiny hollow on the strawberry.

Step 5: Fill each strawberry with 1 tablespoon of the cream cheese mixture. Fill each strawberry generously.

Step 6: In a shallow mixing bowl, add the graham cracker then coat each strawberry filled side with the crumbs.

Step 7: In a ceramic glass or any microwave-safe glass, add the canola oil and chocolate. Melt inside the microwave for 1 to 3 minutes while stirring every 30 seconds until the texture is smooth.

Step 8: Dip the edges of the strawberries into the melted chocolate.

Step 9: Put the dipped strawberries in the baking sheet. Place inside the fridge to cool and set.

Step 10: Serve and enjoy!

Strawberry Cheesecake Bites

Rebecca These little treats will surely make you happy! I recently discovered this amazing recipe online. I was looking for desserts that I can make and prepare for my husband’s birthday.… Main Dish Recipes Strawberry CheeStrawberry Cheesecake Bitessecake Bites European Print This
Nutrition facts: 200 calories 20 grams fat
Rating: 5.0/5
( 1 voted )

Ingredients

  • 1 (8 ounces) package cream cheese
  • 1/2 cup confectioners’ sugar
  • 2 teaspoons vanilla extract
  • 12 large fresh strawberries, hulled
  • 2 tablespoons graham cracker crumbs
  • 2 (1 ounce) squares semisweet chocolate chips (optional)
  • 1 teaspoon canola oil (optional)

Instructions

Step 1: Cover with waxed paper a baking sheet.

Step 2: In a medium mixing bowl, add confectioners' sugar, vanilla extract, and cream cheese. Beat until well-mixed and creamy.

Step 3: Scoop the mixture and put it inside a piping bag that has a big round tip.

Step 4: Form a cone shape on top of each strawberry using a paring knife. Leave a tiny hollow on the strawberry.

Step 5: Fill each strawberry with 1 tablespoon of the cream cheese mixture. Fill each strawberry generously.

Step 6: In a shallow mixing bowl, add the graham cracker then coat each strawberry filled side with the crumbs.

Step 7: In a ceramic glass or any microwave-safe glass, add the canola oil and chocolate. Melt inside the microwave for 1 to 3 minutes while stirring every 30 seconds until the texture is smooth.

Step 8: Dip the edges of the strawberries into the melted chocolate.

Step 9: Put the dipped strawberries in the baking sheet. Place inside the fridge to cool and set.

Step 10: Serve and enjoy!


June 24, 2020 0 comment
0 FacebookTwitterPinterestEmail
Main Dish Recipes

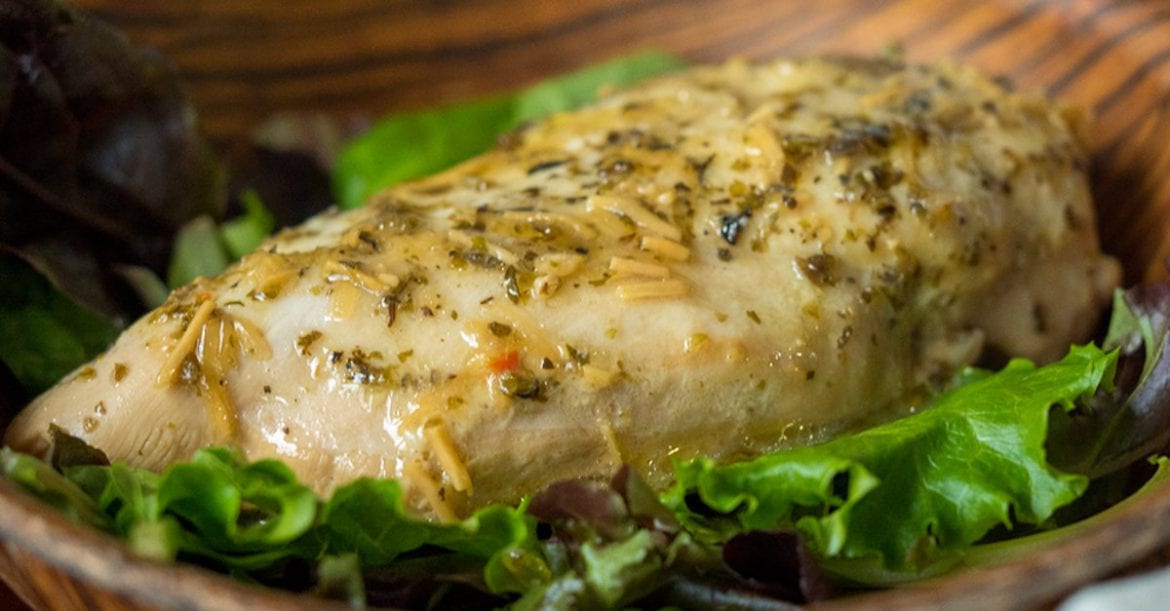
Slow Cooker Olive Garden Chicken

by Rebecca June 24, 2020
written by Rebecca

Slow cooker recipes are great. Cooking in a slow cooker is like opening a gift. A birthday or a Christmas present that you have been waiting for all year. Slow cooker recipes are just like that, you patiently wait for the dish to cook and when you open the pot you have an easy and well-cooked dinner. Surprise! Surprise! It is a one-pot dish that is cook for hours. Just like this Olive Garden Chicken. Another slow cooker recipe that I got from browsing the internet. I love chicken and slow cooker recipes. So this is perfect! I’ve been crazy about this dish for a while now. It’s super delicious! I love the flavor and the combination of the Italian dressing, seasoning, parmesan, and lemon juice is amazing. The flavor is like dancing inside my mouth. It’s mouthwatering, satisfying, and overly scrumptious. Serve this Olive Garden Chicken with rice for a heartwarming dinner. Or you can also pair it with pasta or salad. Either way, it’s great! A nice addition to your dinner menu and a guaranteed 5-star!

INGREDIENTS

4 boneless, skinless chicken breasts

1 (16 oz.) container Olive Garden Italian dressing

½ cup grated parmesan cheese

2 teaspoons lemon juice

2 tablespoons Italian seasoning

Salt and pepper, to taste

How to make Slow Cooker Olive Garden Chicken

Step 1: Grease the slow cooker with cooking spray.

Step 2: Put the chicken in the bottom of the slow cooker.

Step 3: Pour the bottle of dressing in a bowl and add in the parmesan cheese, lemon juice, Italian seasoning, and a pinch of salt and pepper. Whisk the ingredients until incorporated.

Step 4: Now, pour the mixture over the chicken and coat both sides.

Step 5: Cook the chicken on high for 3 1/2 hours, covered. Then, adjust the heat to low and continue cooking for 7 hours.

Step 6: Serve immediately with salad, pasta, or rice. Enjoy!

Slow Cooker Olive Garden Chicken

Rebecca Slow cooker recipes are great. Cooking in a slow cooker is like opening a gift. A birthday or a Christmas present that you have been waiting for all year. Slow… Main Dish Recipes Slow Cooker Olive Garden Chicken European Print This
Nutrition facts: 200 calories 20 grams fat
Rating: 4.0/5
( 32 voted )

Ingredients

  • 4 boneless, skinless chicken breasts
  • 1 (16 oz.) container Olive Garden Italian dressing
  • ½ cup grated parmesan cheese
  • 2 teaspoons lemon juice
  • 2 tablespoons Italian seasoning
  • Salt and pepper, to taste

Instructions

Step 1: Grease the slow cooker with cooking spray.

Step 2: Put the chicken in the bottom of the slow cooker.

Step 3: Pour the bottle of dressing in a bowl and add in the parmesan cheese, lemon juice, Italian seasoning, and a pinch of salt and pepper. Whisk the ingredients until incorporated.

Step 4: Now, pour the mixture over the chicken and coat both sides.

Step 5: Cook the chicken on high for 3 1/2 hours, covered. Then, adjust the heat to low and continue cooking for 7 hours.

Step 6: Serve immediately with salad, pasta, or rice. Enjoy!

June 24, 2020 0 comment
1 FacebookTwitterPinterestEmail
Main Dish Recipes

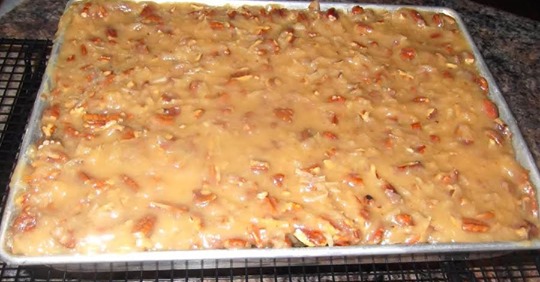
German Chocolate Sheet Cake (from the 1950’s)

by Rebecca June 24, 2020
written by Rebecca

Straight from the 1950s. This German Chocolate Sheet Cake is super moist with rich coconut pecan frosting that is mind-blowing delicious!

INGREDIENTS

1 pkg baker’s german sweet chocolate (4 ounces)

1/2 cup water

2 cup all-purpose flour, sifted, then measured

1 teaspoon baking soda

1/4 teaspoon salt

1 cup butter, softened

2 cups of sugar

4 large egg yolks, room temperature (reserve whites)

1 teaspoon vanilla extract

1 cup buttermilk

4 large egg whites, beaten to form stiff peaks

COCONUT PECAN FILLING AND FROSTING

1 can(s) evaporated milk 12-ounce size (not sweetened condensed)

1 1/2 cups sugar

3/4 cup melted butter (1 1/2 sticks)

4 large egg yolks, slightly beaten

1 1/2 teaspoon vanilla extract

7 oz baker’s angel flake coconut

1 1/2 cups broken pecans

DIRECTIONS

Step 1: Ready the oven and preheat it to 350 degrees. Then, grease and flour a 9 x 13-inch or 10 x 16-inch baking pan. If you want a thinner cake you can use a larger pan. You can even use three 9-inch pans, just frost the layers in between.

Step 2: Sift 2 cups of flour. After you sift the flour, measure it again for accuracy. And add in the baking soda and salt. Stir to combine and set aside.

Step 3: Melt the chocolates in the microwave for a minute and 30 seconds depending on the microwave you are using. Once melted, remove from the microwave and stir thoroughly.

Step 4: Separate the egg whites and beat until stiff peaks form.

Step 5: Beat the butter with a hand mixer until just combined. Add in the yolks one at a time, make sure to beat after each addition.

Step 6: Gradually add in the melted chocolates into the butter mixture. Mix and scrape with a spatula on the sides of the bowl. Stir in the vanilla and again mix until incorporated.

Step 7: At this point, you don’t have to use a hand mixer. So, add in the flour mixture alternating with the buttermilk, making sure to begin and end with the flour mixture. Once the mixtures are mixed, use the hand mixer for 10 to 20 seconds just to make sure the batter is well incorporated.

Step 8: Then, fold in the egg whites.

Step 9: pour the mixture into the greased pan and place it inside the preheated oven. Bake for 30 to 40 minutes or once the toothpick inserted in the middle comes out clean.

Step 10: To make the frosting, first melt the butter in a heavy pan. Stir in the milk, sugar, vanilla, and egg yolks. Cook over medium heat while stirring constantly for about 12 minutes or until thickened. Then, remove the saucepan from the heat and add in the coconut and pecans.

Step 11: Pour the frosting over the cooled cake.

Note: In case you decided to make three 9-inch layers, make sure to cool the frosting for a bit to thicken.

German Chocolate Sheet Cake (from the 1950’s)

Rebecca Straight from the 1950s. This German Chocolate Sheet Cake is super moist with rich coconut pecan frosting that is mind-blowing delicious! INGREDIENTS 1 pkg baker’s german sweet chocolate (4 ounces)… Main Dish Recipes German Chocolate Sheet Cake (from the 1950’s) European Print This
Nutrition facts: 200 calories 20 grams fat
Rating: 5.0/5
( 1 voted )

Ingredients

  • 1 pkg baker’s german sweet chocolate (4 ounces)
  • 1/2 cup water
  • 2 cup all-purpose flour, sifted, then measured
  • 1 teaspoon baking soda
  • 1/4 teaspoon salt
  • 1 cup butter, softened
  • 2 cups of sugar
  • 4 large egg yolks, room temperature (reserve whites)
  • 1 teaspoon vanilla extract
  • 1 cup buttermilk
  • 4 large egg whites, beaten to form stiff peaks
  • COCONUT PECAN FILLING AND FROSTING
  • 1 can(s) evaporated milk 12-ounce size (not sweetened condensed)
  • 1 1/2 cups sugar
  • 3/4 cup melted butter (1 1/2 sticks)
  • 4 large egg yolks, slightly beaten
  • 1 1/2 teaspoon vanilla extract
  • 7 oz baker’s angel flake coconut
  • 1 1/2 cups broken pecans

Instructions

Step 1: Ready the oven and preheat it to 350 degrees. Then, grease and flour a 9 x 13-inch or 10 x 16-inch baking pan. If you want a thinner cake you can use a larger pan. You can even use three 9-inch pans, just frost the layers in between.

Step 2: Sift 2 cups of flour. After you sift the flour, measure it again for accuracy. And add in the baking soda and salt. Stir to combine and set aside.

Step 3: Melt the chocolates in the microwave for a minute and 30 seconds depending on the microwave you are using. Once melted, remove from the microwave and stir thoroughly.

Step 4: Separate the egg whites and beat until stiff peaks form.

Step 5: Beat the butter with a hand mixer until just combined. Add in the yolks one at a time, make sure to beat after each addition.

Step 6: Gradually add in the melted chocolates into the butter mixture. Mix and scrape with a spatula on the sides of the bowl. Stir in the vanilla and again mix until incorporated.

Step 7: At this point, you don't have to use a hand mixer. So, add in the flour mixture alternating with the buttermilk, making sure to begin and end with the flour mixture. Once the mixtures are mixed, use the hand mixer for 10 to 20 seconds just to make sure the batter is well incorporated.

Step 8: Then, fold in the egg whites.

Step 9: pour the mixture into the greased pan and place it inside the preheated oven. Bake for 30 to 40 minutes or once the toothpick inserted in the middle comes out clean.

Step 10: To make the frosting, first melt the butter in a heavy pan. Stir in the milk, sugar, vanilla, and egg yolks. Cook over medium heat while stirring constantly for about 12 minutes or until thickened. Then, remove the saucepan from the heat and add in the coconut and pecans.

Step 11: Pour the frosting over the cooled cake.

Note: In case you decided to make three 9-inch layers, make sure to cool the frosting for a bit to thicken.


June 24, 2020 0 comment
0 FacebookTwitterPinterestEmail
Main Dish Recipes

Buttermilk Blueberry Breakfast Bake

by Rebecca June 24, 2020
written by Rebecca

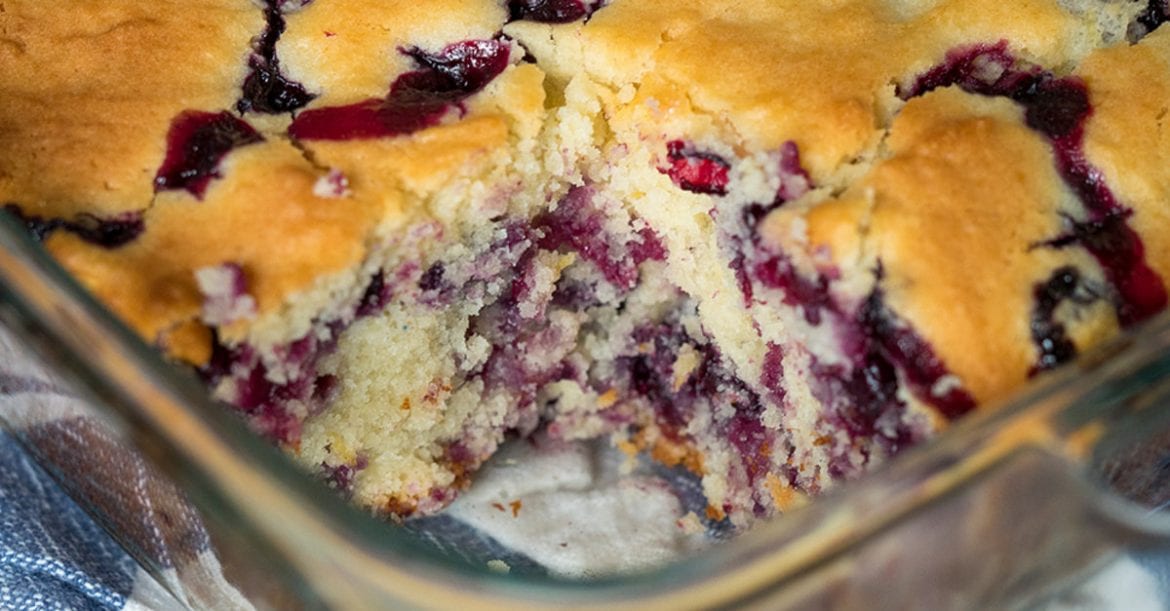
Have an amazing morning with Buttermilk Blueberry Breakfast Bake. This is a must-have in your breakfast menu. A super easy to make bake that will complete your day. It is moist, buttery, and bursting with fresh blueberries that will surely put a smile on your face. Begin your day with a slice of this delicious bake and I’m pretty sure you’ll never get enough of this. Pair it with a freshly brewed coffee to start your day right. I cannot wait for you to try it. Enjoy!

INGREDIENTS

2 cups all-purpose flour, divided

2 cups fresh blueberries

1 cup sugar, plus extra for sprinkling on the cake

1/2 cup buttermilk

1/2 cup (1 stick) unsalted butter, softened

1 lemon, zest

1 large egg, room temperature

2 teaspoons baking powder

1 teaspoon vanilla extract

1 teaspoon kosher salt

How to make Buttermilk Blueberry Breakfast Bake

Step 1: Ready the oven and preheat it to 350 degrees F. Lighty grease with butter or spray with a non-stick spray a  square baking dish.

Step 2: Whisk the 1 3/4 cups of flour, baking powder, and salt in a medium bowl.

Step 3: Place the butter, sugar, and lemon zest in a large bowl. Cream for about 3 to 5 minutes or until fluffy and light.

Step 4: Mix in the egg and vanilla extract. Continue beating until well combined.

Step 5: Pour in the buttermilk alternately with the flour mixture and mix until just combined.

Step 6: Put the blueberries in the remaining 1/4 cup of flour and toss until coated.

Step 7: Then, gently fold in the blueberries into the batter.

Step 8: Pour the batter into the prepared baking dish. Sprinkle 1 to 2 tablespoons of sugar over the batter.

Step 9: Place inside the preheated oven and bake for about 40 minutes. Insert a toothpick in the middle, once it comes out clean the cake is done.

Step 10: Once done, remove from the oven. Let it cool first before serving. Enjoy!

Buttermilk Blueberry Breakfast Bake

Rebecca Have an amazing morning with Buttermilk Blueberry Breakfast Bake. This is a must-have in your breakfast menu. A super easy to make bake that will complete your day. It is… Main Dish Recipes Buttermilk Blueberry Breakfast Bake European Print This
Nutrition facts: 200 calories 20 grams fat
Rating: 5.0/5
( 2 voted )

Ingredients

  • 2 cups all-purpose flour, divided
  • 2 cups fresh blueberries
  • 1 cup sugar, plus extra for sprinkling on the cake
  • 1/2 cup buttermilk
  • 1/2 cup (1 stick) unsalted butter, softened
  • 1 lemon, zest
  • 1 large egg, room temperature
  • 2 teaspoons baking powder
  • 1 teaspoon vanilla extract
  • 1 teaspoon kosher salt

Instructions

Step 1: Ready the oven and preheat it to 350 degrees F. Lighty grease with butter or spray with a non-stick spray a  square baking dish.

Step 2: Whisk the 1 3/4 cups of flour, baking powder, and salt in a medium bowl.

Step 3: Place the butter, sugar, and lemon zest in a large bowl. Cream for about 3 to 5 minutes or until fluffy and light.

Step 4: Mix in the egg and vanilla extract. Continue beating until well combined.

Step 5: Pour in the buttermilk alternately with the flour mixture and mix until just combined.

Step 6: Put the blueberries in the remaining 1/4 cup of flour and toss until coated.

Step 7: Then, gently fold in the blueberries into the batter.

Step 8: Pour the batter into the prepared baking dish. Sprinkle 1 to 2 tablespoons of sugar over the batter.

Step 9: Place inside the preheated oven and bake for about 40 minutes. Insert a toothpick in the middle, once it comes out clean the cake is done.

Step 10: Once done, remove from the oven. Let it cool first before serving. Enjoy!

June 24, 2020 0 comment
0 FacebookTwitterPinterestEmail
Main Dish Recipes

No-Bake Cherry Cheesecake Lush

by Rebecca June 24, 2020
written by Rebecca

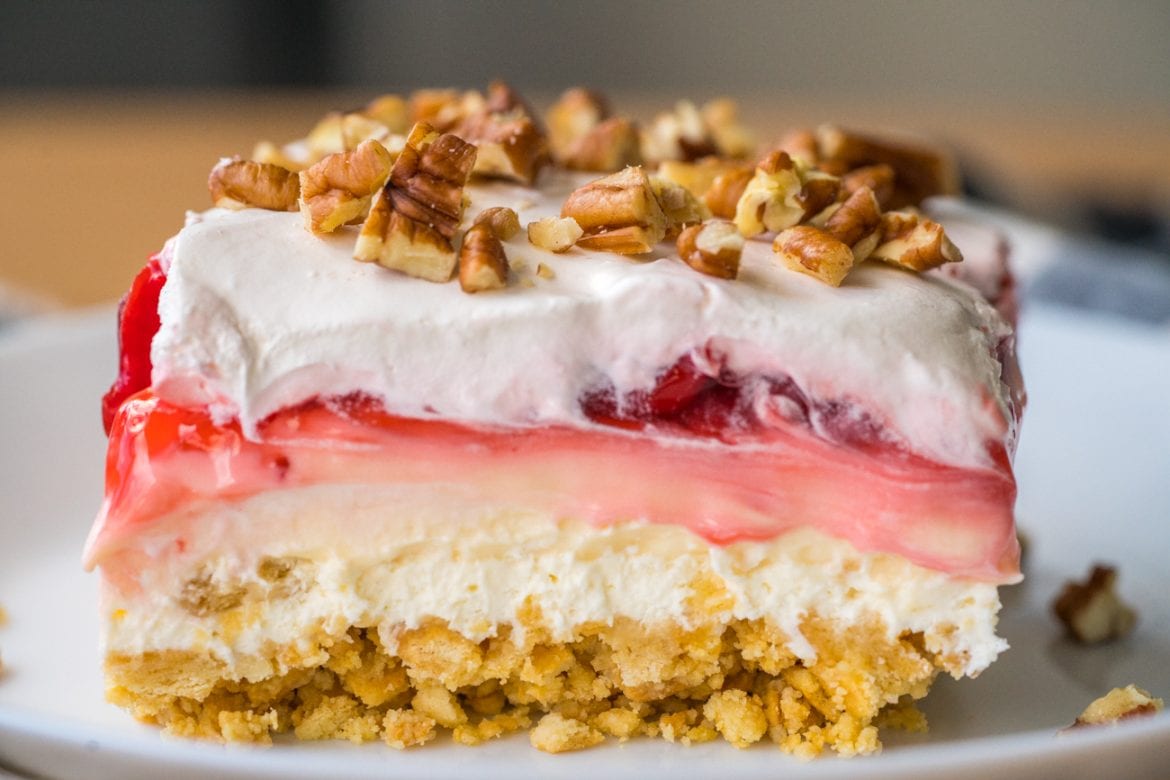
This is another no-bake recipe that I love. Easy and quick to make, and I repeat baking not required. This pretty lush is the greatest thing ever! The layers of color are so refreshing, light, and tastes super delicious! This Cherry Cheesecake Lush is all you’ve been looking for, you can never go wrong with cherries and cheesecake. They are made to brighten up the day. Put them together for a perfect, mouthwatering dessert.

INGREDIENTS

1 package vanilla sandwich cookies (approx. 36 cookies), crushed

1/2 cup (1 stick) unsalted butter, melted

1/4 teaspoon salt

1 (8 oz.) package cream cheese, softened

1 cup powdered sugar

2 (16 oz.) containers frozen whipped topping, divided

2 (3.4 oz.) boxes cheesecake instant pudding mix

3 cups whole milk

1 (21 oz.) can cherry pie filling

1/2 cup walnuts, roughly chopped

How to make No-Bake Cherry Cheesecake Lush

Step 1: In a large bowl, place melted butter and 1/4 teaspoon of salt. Toss to thoroughly coat the cookie crumbs.

Step 2: Pour and press in an even layer the curb mixture into a 9 x 13-inch baking dish.

Step 3: Put in the fridge to chill until the mixture is ready to use.

Step 4: Place the cream cheese in a large bowl and beat for 1 to 2 minutes or until creamy and smooth. Whisk in the powdered sugar and 1 1/2 cups frozen whipped topping until just combined. Pour and spread the mixture over the chilled crust.

Step 5: Place the milk, cheesecake pudding mixture, and remaining 1 cup frozen whipped topping in another bowl. Whisk until thicken.

Step 6: Evenly spread the pudding mixture on top of the cream cheese layer, and top the cream cheese filling with cherry pie filling.

Step 7: For the last layer, carefully spread the frozen whipped topping, making sure not to drag the cherry filling as much.

Step 8: Place inside the fridge to chill for around 1 to 2 hours or until set.

Step 9: Remove from the fridge and top with some chopped walnuts. Slice and serve. Enjoy!

No-Bake Cherry Cheesecake Lush

Rebecca This is another no-bake recipe that I love. Easy and quick to make, and I repeat baking not required. This pretty lush is the greatest thing ever! The layers of… Main Dish Recipes No-Bake Cherry Cheesecake Lush European Print This
Nutrition facts: 200 calories 20 grams fat
Rating: 5.0/5
( 1 voted )

Ingredients

  • 1 package vanilla sandwich cookies (approx. 36 cookies), crushed
  • 1/2 cup (1 stick) unsalted butter, melted
  • 1/4 teaspoon salt
  • 1 (8 oz.) package cream cheese, softened
  • 1 cup powdered sugar
  • 2 (16 oz.) containers frozen whipped topping, divided
  • 2 (3.4 oz.) boxes cheesecake instant pudding mix
  • 3 cups whole milk
  • 1 (21 oz.) can cherry pie filling
  • 1/2 cup walnuts, roughly chopped

Instructions

Step 1: In a large bowl, place melted butter and 1/4 teaspoon of salt. Toss to thoroughly coat the cookie crumbs.

Step 2: Pour and press in an even layer the curb mixture into a 9 x 13-inch baking dish.

Step 3: Put in the fridge to chill until the mixture is ready to use.

Step 4: Place the cream cheese in a large bowl and beat for 1 to 2 minutes or until creamy and smooth. Whisk in the powdered sugar and 1 1/2 cups frozen whipped topping until just combined. Pour and spread the mixture over the chilled crust.

Step 5: Place the milk, cheesecake pudding mixture, and remaining 1 cup frozen whipped topping in another bowl. Whisk until thicken.

Step 6: Evenly spread the pudding mixture on top of the cream cheese layer, and top the cream cheese filling with cherry pie filling.

Step 7: For the last layer, carefully spread the frozen whipped topping, making sure not to drag the cherry filling as much.

Step 8: Place inside the fridge to chill for around 1 to 2 hours or until set.

Step 9: Remove from the fridge and top with some chopped walnuts. Slice and serve. Enjoy!

June 24, 2020 0 comment
0 FacebookTwitterPinterestEmail
Newer Posts
Older Posts

Popular Posts

  • 1

    Crispy Crunchy Parmesan Potatoes

    March 21, 2020
  • 2

    CROCK POT SMOTHERED PORK CHOPS

    March 21, 2020
  • Facebook
  • Twitter

@2019 - All Right Reserved.


Back To Top