Cook it once
  • Home
  • Privacy Policy
  • Recipes
    • KETO
    • LC
    • WW
  • Tips
  • Contact
Cook it once
  • Home
  • Privacy Policy
  • Recipes
    • KETO
    • LC
    • WW
  • Tips
  • Contact
Category:

Main Dish Recipes

Main Dish Recipes

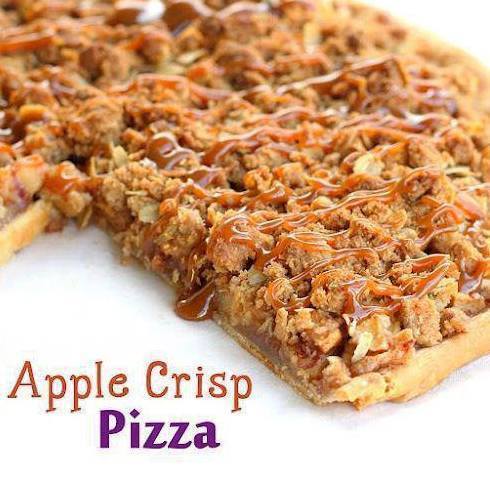
Apple Crisp Pizza

by Rebecca June 26, 2020
written by Rebecca

This Apple Crisp Pizza made my day today. I was feeling a little low and this is the first thing that popped in my head. It smells great, irresistible, and it tastes amazing! The cinnamon sugared apples that are stacked over a flaky pie crust drizzled with caramel sauce is heaven! One bite and it’s as if all my problems floated in the air. I felt light, happy, and better. This Apple Crisp Pizza is my pick me up dessert. Delicious, sweet, and it has an enticing aroma that fills the kitchen every time I make it. Don’t miss out and try it the soonest.

INGREDIENTS

Pastry for single-crust pie (9 inches)

2/3 cup sugar

3 tablespoons all-purpose flour

1 teaspoon ground Cinnamon

4 medium apples (like Gala, Fiji, Braeburn, Empire) peeled and diced into 1/4 inch pieces

FOR THE TOPPING

1/2 cup all-purpose flour

1/3 cup packed brown sugar

1/2 cup old-fashioned rolled oats

1 teaspoon ground cinnamon

1/4 cup salted butter, softened

FOR THE DRIZZLE

1/2 cup caramel topping

How to make Apple Crisp Pizza

Step 1: Ready the oven. Preheat it to 350 degrees.

Step 2: In a 12-inch pizza pan, roll out the pastry to fit into the pan and fold under the edges so the pizza will have a bit of a raised crust.

Step 3: Place the sugar, flour, and cinnamon in a medium bowl. Mix until well combined. Then, add in the peeled and diced apples. Toss to coat.

Step 4: In a single layer, arrange the apple on top completely covering the crust.

Step 5: To prepare the topping, put the flour, brown sugar, oats, cinnamon, and butter in a bowl. Mix until incorporated. Then, evenly sprinkle the topping over the apples.

Step 6: Place inside the preheated oven and bake for 35 to 40 minutes or until the apples are soft.

Step 7: Once done, remove from the oven and drizzle with caramel topping, slice, and serve with a scoop of ice cream. Enjoy!

Apple Crisp Pizza

Rebecca This Apple Crisp Pizza made my day today. I was feeling a little low and this is the first thing that popped in my head. It smells great, irresistible, and… Main Dish Recipes Apple Crisp Pizza European Print This
Nutrition facts: 200 calories 20 grams fat
Rating: 5.0/5
( 1 voted )

Ingredients

  • Pastry for single-crust pie (9 inches)
  • 2/3 cup sugar
  • 3 tablespoons all-purpose flour
  • 1 teaspoon ground Cinnamon
  • 4 medium apples (like Gala, Fiji, Braeburn, Empire) peeled and diced into 1/4 inch pieces
  • FOR THE TOPPING
  • 1/2 cup all-purpose flour
  • 1/3 cup packed brown sugar
  • 1/2 cup old-fashioned rolled oats
  • 1 teaspoon ground cinnamon
  • 1/4 cup salted butter, softened
  • FOR THE DRIZZLE
  • 1/2 cup caramel topping

Instructions

Step 1: Ready the oven. Preheat it to 350 degrees.

Step 2: In a 12-inch pizza pan, roll out the pastry to fit into the pan and fold under the edges so the pizza will have a bit of a raised crust.

Step 3: Place the sugar, flour, and cinnamon in a medium bowl. Mix until well combined. Then, add in the peeled and diced apples. Toss to coat.

Step 4: In a single layer, arrange the apple on top completely covering the crust.

Step 5: To prepare the topping, put the flour, brown sugar, oats, cinnamon, and butter in a bowl. Mix until incorporated. Then, evenly sprinkle the topping over the apples.

Step 6: Place inside the preheated oven and bake for 35 to 40 minutes or until the apples are soft.

Step 7: Once done, remove from the oven and drizzle with caramel topping, slice, and serve with a scoop of ice cream. Enjoy!
June 26, 2020 0 comment
0 FacebookTwitterPinterestEmail
Main Dish Recipes

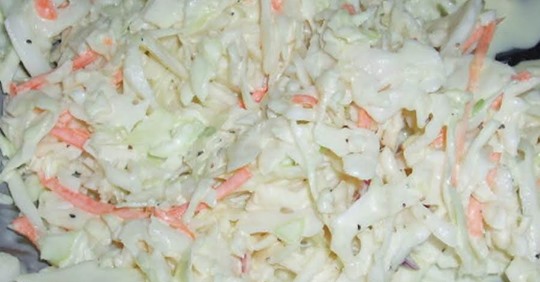
Better than K.F.C Coleslaw

by Rebecca June 26, 2020
written by Rebecca

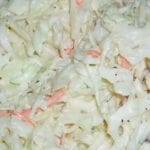
This is the best tasting coleslaw you will ever have and I tell you, this is better than KFC’s coleslaw! And this is not hard to put together, all you need are a few simple ingredients. Mix them nicely before adding your shredded coleslaw mix and dressing, and you’re all set. Easy peasy, right? It is great as is or served along with your favorite chicken, pork chops, or anything that you can think of really. I love serving this during our weekend barbeque. The kids are crazy about it, and it just hits the spot!

Before I used to buy coleslaw from KFC whenever I am craving or my kids are asking for it. Now that I mastered the art of making my own, I seldom buy ready to eat coleslaw. I mean, it is super easy to make, a no-fuss, and everyone can do it. I don’t even have to go out, all I need to do is head to the kitchen and make it. I super love coleslaw because it is so refreshing, creamy, and it goes well with just about anything! I make just enough because I want it always fresh. Sometimes if there is any leftover which happens hardly, I just put it in the fridge and eat it the next day. I believe that coleslaw is a staple in every household, especially in mine. That is why I am keeping this recipe always and I would suggest that you do, too.

INGREDIENTS

1 pkg 16 oz, shredded coleslaw mix

1/2 cup mayonnaise

2 tablespoons milk

2 tablespoons sugar

1 tablespoons mustard

2 teaspoons vinegar

1/2 teaspoon salt

1/2 teaspoon pepper

How to make Better than K.F.C Coleslaw

Step 1: Mix the mayonnaise, milk, sugar, mustard, vinegar, salt, and pepper using your hand egg beater. Beat until incorporated.

Step 2: Add in the coleslaw mix and dressing. Mix until combined and serve. Enjoy!

Better than K.F.C Coleslaw

Rebecca This is the best tasting coleslaw you will ever have and I tell you, this is better than KFC’s coleslaw! And this is not hard to put together, all you… Main Dish Recipes Better than K.F.C Coleslaw European Print This
Nutrition facts: 200 calories 20 grams fat
Rating: 5.0/5
( 2 voted )

Ingredients

  • 1 pkg 16 oz, shredded coleslaw mix
  • 1/2 cup mayonnaise
  • 2 tablespoons milk
  • 2 tablespoons sugar
  • 1 tablespoons mustard
  • 2 teaspoons vinegar
  • 1/2 teaspoon salt
  • 1/2 teaspoon pepper

Instructions

Step 1: Mix the mayonnaise, milk, sugar, mustard, vinegar, salt, and pepper using your hand egg beater. Beat until incorporated.

Step 2: Add in the coleslaw mix and dressing. Mix until combined and serve. Enjoy!

June 26, 2020 0 comment
0 FacebookTwitterPinterestEmail
Main Dish Recipes

Chocolate Cupcakes with Cream Cheese-Oreo®-Buttercream Frosting

by Rebecca June 26, 2020
written by Rebecca

I recently made this incredible cake and I’m really glad that I decided to do so! It’s probably one of the best cupcakes I have ever tasted in my life. It’s the perfect combination of sweetness and creaminess! Try it and you’ll be the judge. I know that you’re gonna love it too! Enjoy!

INGREDIENTS

For the Cupcakes

1 1/3 cups all-purpose flour

2/3 cup cocoa powder

1 1/2 teaspoons baking soda

1 teaspoon baking powder

1 teaspoon instant espresso powder

1/2 teaspoon ground cinnamon

1/2 teaspoon salt

1 1/3 cups white sugar

2/3 cup brown sugar

4 eggs

1/3 cup water

2 teaspoons vanilla extract

1 cup sour cream

1/4 cup vegetable oil

For the Frosting

1 (8 ounces) package cream cheese, at room temperature

7 tablespoons butter, at room temperature

1 teaspoon vanilla extract

3 cups confectioners’ sugar

18 chocolate sandwich cookies (such as Oreo(R))

2 tablespoons milk, or more as needed

How to make Chocolate Cupcakes with Cream Cheese-Oreo®-Buttercream Frosting

Step 1: Ready the oven and preheat to 325 degrees F or 165 degrees C.

Step 2: Apply cooking spray or line with paper liners a two 12-cup muffin tins.

Step 3: In a large bowl, add cocoa powder, flour, baking powder, cinnamon, espresso powder, and salt. Whisk until well-mixed then add in brown sugar and white sugar. Continue whisking until all ingredients are blended.

Step 4: In another mixing bowl, add water, eggs, and vanilla extract. Whisk until creamy then add oil and sour cream. Continue whisking.

Step 5: Transfer the egg mixture into the flour mixture and stir until well-mixed.

Step 6: Scoop the batter and fill muffin cups about 3/4 each.

Step 7: Place inside the oven and bake for 18 to 20 minutes or until the top bounces back when poked.

Step 8: Remove from the oven and let it sit on a wire rack to cool for at least 20 minutes.

Step 9: In a large bowl, add butter and cream cheese. Stir until well-mixed and the texture is smooth. Add in the vanilla extract and continue to stir.

Step 10: Mix the confectioners’ sugar at medium-low speed for 2 to 5 minutes until firm. If the frosting is too thick, add 1 tablespoon of milk to make it thin.

Step 11: Add the cookies in the food processor and crush. Add the crushed cookies into the frosting and mix using a spatula.

Step 12: Put the frosting inside the fridge for at least 15 minutes to cool.

Step 13: Spread the frosting on top of the cake.

Step 14: Serve and enjoy!

Rebecca I recently made this incredible cake and I’m really glad that I decided to do so! It’s probably one of the best cupcakes I have ever tasted in my life.… Main Dish Recipes Chocolate Cupcakes with Cream Cheese-Oreo®-Buttercream Frosting European Print This
Nutrition facts: 200 calories 20 grams fat
Rating: 5.0/5
( 1 voted )

Ingredients

  • For the Cupcakes
  • 1 1/3 cups all-purpose flour
  • 2/3 cup cocoa powder
  • 1 1/2 teaspoons baking soda
  • 1 teaspoon baking powder
  • 1 teaspoon instant espresso powder
  • 1/2 teaspoon ground cinnamon
  • 1/2 teaspoon salt
  • 1 1/3 cups white sugar
  • 2/3 cup brown sugar
  • 4 eggs
  • 1/3 cup water
  • 2 teaspoons vanilla extract
  • 1 cup sour cream
  • 1/4 cup vegetable oil
  • For the Frosting
  • 1 (8 ounces) package cream cheese, at room temperature
  • 7 tablespoons butter, at room temperature
  • 1 teaspoon vanilla extract
  • 3 cups confectioners’ sugar
  • 18 chocolate sandwich cookies (such as Oreo(R))
  • 2 tablespoons milk, or more as needed

Instructions

Step 1: Ready the oven and preheat to 325 degrees F or 165 degrees C.

Step 2: Apply cooking spray or line with paper liners a two 12-cup muffin tins.

Step 3: In a large bowl, add cocoa powder, flour, baking powder, cinnamon, espresso powder, and salt. Whisk until well-mixed then add in brown sugar and white sugar. Continue whisking until all ingredients are blended.

Step 4: In another mixing bowl, add water, eggs, and vanilla extract. Whisk until creamy then add oil and sour cream. Continue whisking.

Step 5: Transfer the egg mixture into the flour mixture and stir until well-mixed.

Step 6: Scoop the batter and fill muffin cups about 3/4 each.

Step 7: Place inside the oven and bake for 18 to 20 minutes or until the top bounces back when poked.

Step 8: Remove from the oven and let it sit on a wire rack to cool for at least 20 minutes.

Step 9: In a large bowl, add butter and cream cheese. Stir until well-mixed and the texture is smooth. Add in the vanilla extract and continue to stir.

Step 10: Mix the confectioners' sugar at medium-low speed for 2 to 5 minutes until firm. If the frosting is too thick, add 1 tablespoon of milk to make it thin.

Step 11: Add the cookies in the food processor and crush. Add the crushed cookies into the frosting and mix using a spatula.

Step 12: Put the frosting inside the fridge for at least 15 minutes to cool.

Step 13: Spread the frosting on top of the cake.

Step 14: Serve and enjoy!

June 26, 2020 0 comment
0 FacebookTwitterPinterestEmail
Main Dish Recipes

Sheet Pan Smoked Sausage, Apple, and Root Veggie Dinner

by Rebecca June 26, 2020
written by Rebecca

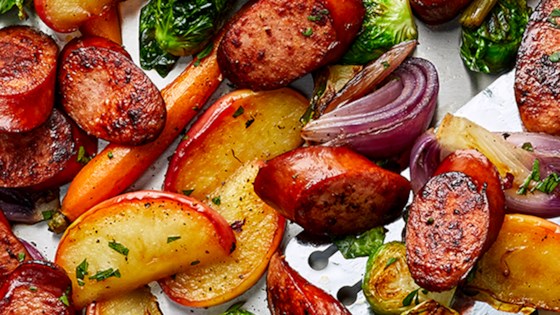
This is the best! I recently learned how to make this amazing dish and I can’t get enough of it! The aroma and flavor are just too perfect for me not to cook this 3 times already this week. At first, I thought, Apples and sausage? Really? But the moment I tasted it, every flavor made sense. They complimented each other well even though they may be odd to begin at first. Try it yourself and I am one hundred percent sure that you will think the same thing! Enough with the chitchat and head to your kitchen and prepare all the ingredients. Have a blast!

INGREDIENTS

8 ounces baby carrots

8 ounces Brussels sprouts, halved lengthwise

1 small red onion, peeled and cut into 8 wedges

3 tablespoons olive oil

2 teaspoons chopped fresh rosemary

1 teaspoon kosher salt

1/2 teaspoon black pepper

1 (12 ounces) package Hillshire Farm(R) Rope Smoked Sausage, cut in 1/2″ bias-cut slices

1 medium Honeycrisp apple, cut into 12 wedges

1 lemon, halved

2 tablespoons chopped parsley

How to make Sheet Pan Smoked Sausage, Apple, and Root Veggie Dinner

Step 1: Ready the oven and preheat to 450 degrees F.

Step 2: Apply cooking spray in a baking pan.

Step 3: In a large mixing bowl, add in the carrots, onion with oil, rosemary, Brussels sprouts, salt, and pepper. Stir until well-mixed.

Step 4: Transfer the vegetable mixture into the prepared baking pan followed by the sausage.

Step 5: Place the baking pan inside the oven and bake for about 20 minutes or until the vegetables and sausage are tender and juicy.

Step 6: Ready the broiler and preheat to a high setting.

Step 7: Toss in the sliced apples into the baking pan and cook for 5 to 6 minutes until tender and the vegetables are a bit caramelized.

Step 8: Remove the baking pan from the oven and let it sit on a wire rack.

Step 9: Drizzle with lemon juice and sprinkle with chopped parsley.

Step 10: Serve hot and enjoy!

Sheet Pan Smoked Sausage, Apple, and Root Veggie Dinner

Rebecca This is the best! I recently learned how to make this amazing dish and I can’t get enough of it! The aroma and flavor are just too perfect for me… Main Dish Recipes Sheet Pan Smoked Sausage, Apple, and Root Veggie Dinner European Print This
Nutrition facts: 200 calories 20 grams fat
Rating: 4.5/5
( 2 voted )

Ingredients

  • 8 ounces baby carrots
  • 8 ounces Brussels sprouts, halved lengthwise
  • 1 small red onion, peeled and cut into 8 wedges
  • 3 tablespoons olive oil
  • 2 teaspoons chopped fresh rosemary
  • 1 teaspoon kosher salt
  • 1/2 teaspoon black pepper
  • 1 (12 ounces) package Hillshire Farm(R) Rope Smoked Sausage, cut in 1/2″ bias-cut slices
  • 1 medium Honeycrisp apple, cut into 12 wedges
  • 1 lemon, halved
  • 2 tablespoons chopped parsley

Instructions

Step 1: Ready the oven and preheat to 450 degrees F.

Step 2: Apply cooking spray in a baking pan.

Step 3: In a large mixing bowl, add in the carrots, onion with oil, rosemary, Brussels sprouts, salt, and pepper. Stir until well-mixed.

Step 4: Transfer the vegetable mixture into the prepared baking pan followed by the sausage.

Step 5: Place the baking pan inside the oven and bake for about 20 minutes or until the vegetables and sausage are tender and juicy.

Step 6: Ready the broiler and preheat to a high setting.

Step 7: Toss in the sliced apples into the baking pan and cook for 5 to 6 minutes until tender and the vegetables are a bit caramelized.

Step 8: Remove the baking pan from the oven and let it sit on a wire rack.

Step 9: Drizzle with lemon juice and sprinkle with chopped parsley.

Step 10: Serve hot and enjoy!

June 26, 2020 0 comment
0 FacebookTwitterPinterestEmail
Main Dish Recipes

Creamy Cornbread Casserole

by Rebecca June 26, 2020
written by Rebecca

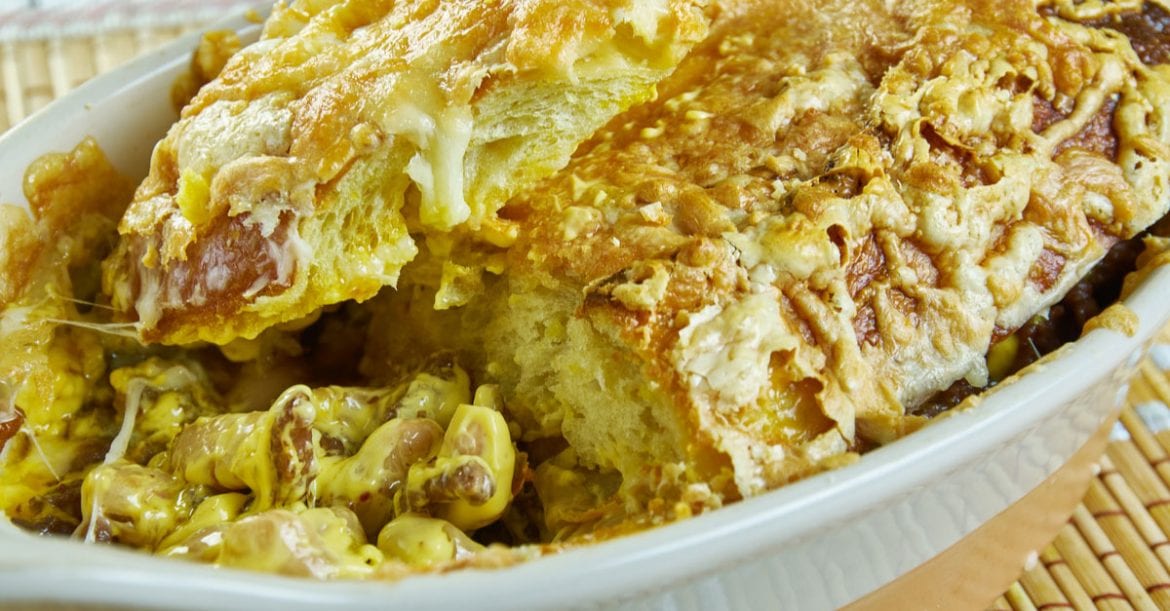
I remember this treat growing up. This was my grandma’s favorite dessert to make every time we visit her which was pretty much every day. This is a part of our family that every member knows how to make it. I know, this is a pretty common recipe that you probably know too, but I think the only difference is the way it sits in our family table. I mean, in our dinner table, this has a special place where we put it at an elevated angle. I don’t know, maybe that’s an exaggeration to some of you but it’s just the way we prepare it. We consider it as the main food in the table. I have provided all the steps and ingredients so you can taste perfection! Another thing I love about this recipe is how easy it is to make. I mean, you only need 7 steps to achieve perfection. It’s also hassle-free. In less than an hour, you will taste how good and additive this Creamy Cornbread Casserole is! Okay, enough with the long introduction, it’s time for you to find out if what I’m saying is true! Enjoy!

INGREDIENTS

1 (15 ounces) can whole kernel corn, drained and 1/2 liquid reserved

1 (14.75 ounce) can cream-style corn

2 eggs

1 (8 ounces) package dry cornbread mix

1 cup sour cream

8 ounces Cheddar cheese, shredded

How to make Creamy Cornbread Casserole

Step 1: Ready the oven and preheat to 400 degrees F or 200 degrees C.

Step 2: Apply cooking spray in a 9×13-inch baking pan.

Step 3: Mix reserved liquid, corn, cornbread mix, sour cream, and eggs in a large mixing bowl. Stir until all the ingredients are well-blended.

Step 4: Transfer the batter into the greased baking pan then sprinkle with cheddar cheese.

Step 5: Place inside the oven and bake for 30 minutes or until the color turns golden brown.

Step 6: Remove the pan from the oven and let it sit on a wire rack to cool.

Step 7: Serve and enjoy!

Creamy Cornbread Casserole

Rebecca I remember this treat growing up. This was my grandma’s favorite dessert to make every time we visit her which was pretty much every day. This is a part of… Main Dish Recipes Creamy Cornbread Casserole European Print This
Nutrition facts: 200 calories 20 grams fat
Rating: 5.0/5
( 1 voted )

Ingredients

  • 1 (15 ounces) can whole kernel corn, drained and 1/2 liquid reserved
  • 1 (14.75 ounce) can cream-style corn
  • 2 eggs
  • 1 (8 ounces) package dry cornbread mix
  • 1 cup sour cream
  • 8 ounces Cheddar cheese, shredded

Instructions

Step 1: Ready the oven and preheat to 400 degrees F or 200 degrees C.

Step 2: Apply cooking spray in a 9x13-inch baking pan.

Step 3: Mix reserved liquid, corn, cornbread mix, sour cream, and eggs in a large mixing bowl. Stir until all the ingredients are well-blended.

Step 4: Transfer the batter into the greased baking pan then sprinkle with cheddar cheese.

Step 5: Place inside the oven and bake for 30 minutes or until the color turns golden brown.

Step 6: Remove the pan from the oven and let it sit on a wire rack to cool.

Step 7: Serve and enjoy!

June 26, 2020 0 comment
0 FacebookTwitterPinterestEmail
Main Dish Recipes

Grandma’s Cinnamon Rolls

by Rebecca June 26, 2020
written by Rebecca

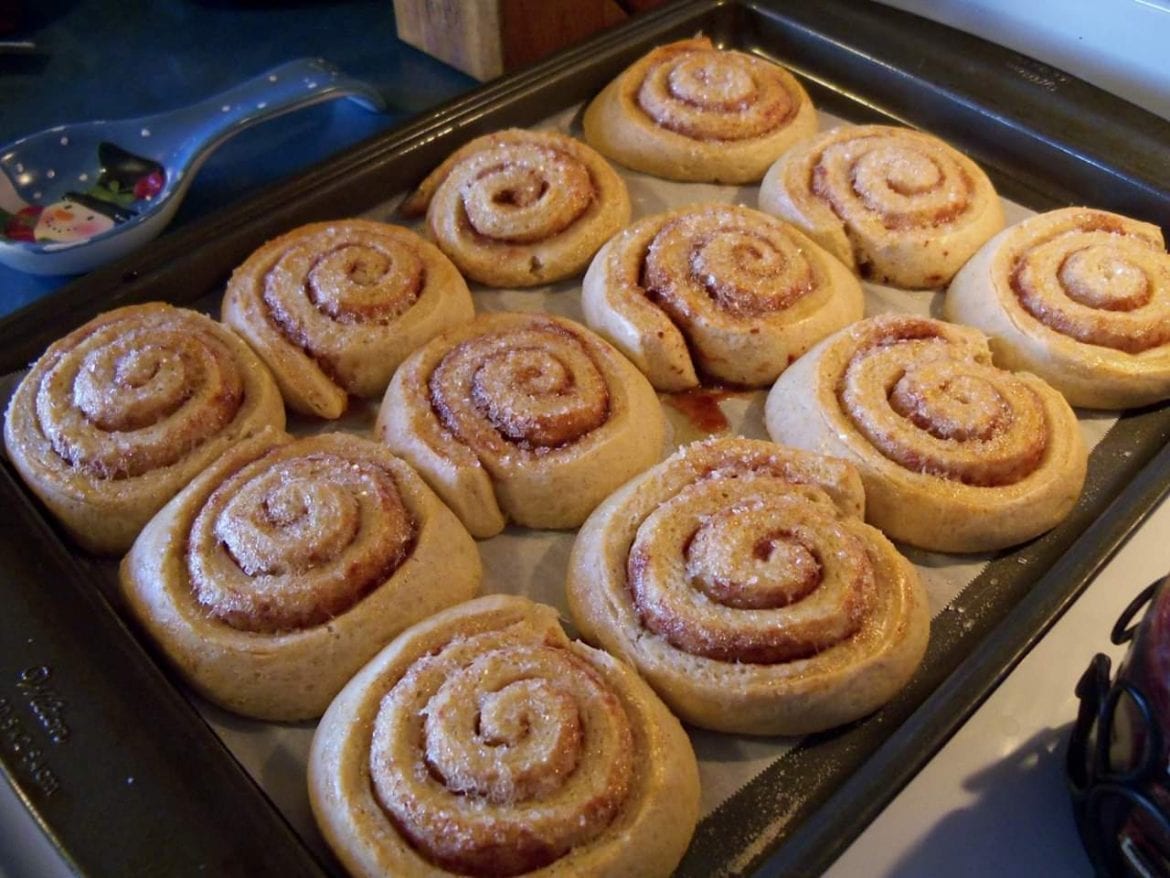
These amazing little treats will surely make your day perfect! I made these 3 days ago for my kid’s birthday. She was very happy with the taste that she forgot that there was a cake! Its simple to make and the ingredients are not that hard to find. I bet you have them in your pantry. Just follow these simple steps and you will surely taste perfection! By the way, be very generous with the cinnamon for that amazing aroma and flavor! I hope this brings a smile to your face. Don’t forget to share because for sure you won’t resist eating more of these. Have a good day!

INGREDIENTS

3 cups flour

1/4 cup sugar

2 tablespoons baking powder

1 tablespoon salt

1/3 cup shortening

1 egg

1 1/2 cup milk

4-5 tablespoons cinnamon

2 cups brown sugar

3/4 cup butter softened

How to make Grandma’s Cinnamon Rolls

Step 1: Grease a cookie sheet or parchment paper. Set aside.

Step 2: In a large mixing bowl, add baking powder, sugar, flour, shortening, and salt. Mix using your hands.

Step 3: Beat eggs and pour milk in another mixing bowl. Mix until well-mixed.

Step 4: Create a hole in the middle of the flour mixture.

Step 5: Transfer the egg mixture into the flour mixture. Mix using a spoon until creamy.

Step 6: Place a floured countertop.

Step 7: Roll the dough into 1/4-inch thick.

Step 8: Add the soft butter on top and spread.

Step 9: Add in brown sugar on top and cover the soft butter layer then sprinkle cinnamon. Add more cinnamon if you prefer.

Step 10: Roll the dough tightly.

Step 11: Cut the sought onto 1/2-inch thick.

Step 12: Place the sliced dough into the greased cookie sheet or parchment paper.

Step 13: Place inside the oven and bake for 12 to 15 minutes at 400 degrees.

Step14: Remove for the oven and let sit on a wire rack to cool for at least 10 minutes.

Step 15: Serve and enjoy!

Grandma’s Cinnamon Rolls

Rebecca These amazing little treats will surely make your day perfect! I made these 3 days ago for my kid’s birthday. She was very happy with the taste that she forgot… Main Dish Recipes Grandma’s Cinnamon Rolls European Print This
Nutrition facts: 200 calories 20 grams fat
Rating: 5.0/5
( 1 voted )

Ingredients

  • 3 cups flour
  • 1/4 cup sugar
  • 2 tablespoons baking powder
  • 1 tablespoon salt
  • 1/3 cup shortening
  • 1 egg
  • 1 1/2 cup milk
  • 4-5 tablespoons cinnamon
  • 2 cups brown sugar
  • 3/4 cup butter softened

Instructions

Step 1: Grease a cookie sheet or parchment paper. Set aside.

Step 2: In a large mixing bowl, add baking powder, sugar, flour, shortening, and salt. Mix using your hands.

Step 3: Beat eggs and pour milk in another mixing bowl. Mix until well-mixed.

Step 4: Create a hole in the middle of the flour mixture.

Step 5: Transfer the egg mixture into the flour mixture. Mix using a spoon until creamy.

Step 6: Place a floured countertop.

Step 7: Roll the dough into 1/4-inch thick.

Step 8: Add the soft butter on top and spread.

Step 9: Add in brown sugar on top and cover the soft butter layer then sprinkle cinnamon. Add more cinnamon if you prefer.

Step 10: Roll the dough tightly.

Step 11: Cut the sought onto 1/2-inch thick.

Step 12: Place the sliced dough into the greased cookie sheet or parchment paper.

Step 13: Place inside the oven and bake for 12 to 15 minutes at 400 degrees.

Step14: Remove for the oven and let sit on a wire rack to cool for at least 10 minutes.

Step 15: Serve and enjoy!

June 26, 2020 0 comment
0 FacebookTwitterPinterestEmail
Main Dish Recipes

Mom’s Macaroni Salad

by Rebecca June 25, 2020
written by Rebecca


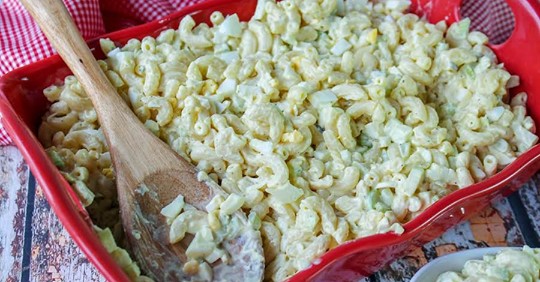
Whenever I want something light yet still flavorful and delicious, I make my Mom’s Macaroni Salad. It is the best thing ever! Growing up, I witnessed how my mom works in the kitchen. She’s a great cook, not a professional but I think most moms know how to prepare a decent and amazing dishes and she’s not an exemption. She likes to experiment, most of the time she prepared dishes, treats that we’ve never seen or heard before. Ahh, I miss my mom so much! She taught me almost every recipe I know. Like this macaroni salad. It is such a simple salad, very easy and quick to make. The ingredients are readily available, uncomplicated, and easy to find. This is a straightforward salad that will give you what you expected and more. It is refreshing and creamy. It might look like your usual macaroni salad, still it will not disappoint you. Every bite reminds me of my childhood, my mom, and how amazing mother’s are. I am never gonna be contented with just a scoop, I always find myself coming back for more! It is perfect when paired with grilled steak, hamburger, even hotdog. Our weekend backyard barbeque will never be complete without my Mom’s Macaroni Salad.

INGREDIENTS

1 pkg macaroni, elbow (about 12 oz)

4 eggs, hardboiled

5 stalks celery

1/4 cup sweet relish

3/4 cup good mayonnaise

2 tablespoons yellow mustard

dash(es) salt and pepper

How to make Mom’s Macaroni Salad

Step 1: Follow the package instruction to cook the macaroni. Once cooked, drain the macaroni and let it cool.

Step 2: Meanwhile, chop the celery and eggs.

Step 3: In a large bowl, put the chopped celery, eggs, and cooked macaroni.

Step 4: Add in the mayonnaise, mustard, and relish. Mix until incorporated.

Step 5: Add in some salt and pepper to taste and mix well.

Step 6: Transfer to serving bowls and serve. Enjoy!

Mom’s Macaroni Salad

Rebecca   Whenever I want something light yet still flavorful and delicious, I make my Mom’s Macaroni Salad. It is the best thing ever! Growing up, I witnessed how my mom… Main Dish Recipes Mom’s Macaroni Salad European Print This
Nutrition facts: 200 calories 20 grams fat
Rating: 5.0/5
( 1 voted )

Ingredients

  • 1 pkg macaroni, elbow (about 12 oz)
  • 4 eggs, hardboiled
  • 5 stalks celery
  • 1/4 cup sweet relish
  • 3/4 cup good mayonnaise
  • 2 tablespoons yellow mustard
  • dash(es) salt and pepper

Instructions

Step 1: Follow the package instruction to cook the macaroni. Once cooked, drain the macaroni and let it cool.

Step 2: Meanwhile, chop the celery and eggs.

Step 3: In a large bowl, put the chopped celery, eggs, and cooked macaroni.

Step 4: Add in the mayonnaise, mustard, and relish. Mix until incorporated.

Step 5: Add in some salt and pepper to taste and mix well.

Step 6: Transfer to serving bowls and serve. Enjoy!

June 25, 2020 0 comment
0 FacebookTwitterPinterestEmail
Main Dish Recipes

CHILI RELLENOS CASSEROLE

by Rebecca June 25, 2020
written by Rebecca

Let’s go Mexico! I am a fan of this amazing casserole. It is well seasoned, satisfying, and heartwarming. The flavors bursting inside your mouth in every bite is an experience you will never forget. Delicious!

INGREDIENTS

1 pound ground sirloin

1/2 cup chopped onion

3/4 cup red bell pepper

1 teaspoon olive oil

1/2 teaspoon salt

1/4 teaspoon pepper

1/2 teaspoon garlic powder

1 teaspoon cumin

1/4 teaspoon allspice

2 4 ounce cans chopped green chilis

1 1/2 cups shredded sharp cheddar cheese, and a little more for the top of the casserole

1 cup milk

1/2 cup sour cream

1/4 cup flour

4 eggs beaten

dash of Tobasco

toppings of sour cream, black sliced olives, and chopped green onions

HOW TO MAKE CHILI RELLENOS CASSEROLE

Step 1: Heat the olive oil in a medium-sized skillet. Saute the onion, garlic, and bell pepper. Add in a dash of salt and cook until the onion is translucent.

Step 2: Add in the ground beef and season with salt and pepper. Sprinkle the cumin, allspice, then continue cooking until the beef is browned and cooked through. But do not overcook the beef as it is still going into the oven.

Step 3: Drain away all the fat from the beef mixture by setting your skillet at an angle and use a paper towel to soak up all the grease.

Step 4: Add a can of Achilles in a 9 x 13 x 1 1/2-inch baking dish. Spread the chilis evenly at the bottom of the pan.

Step 5: Spatter over the sharp cheese and pour the drained ground beef mixture on top. Spread evenly.

Step 6: Add in the second can of chilis on top of the meat.

Step 7: Stir the milk, sour cream, flour, salt, pepper, beaten eggs, and a dash of Tobasco in a small mixing bowl. Mix until smooth. Then, pour evenly over the dish.

Step 8: Place inside the oven and bake at 350 degrees for 45 to 50 minutes. Ten minutes before the dish is done, remove from the oven and sprinkle some cheese on top. Return to the oven and continue baking. You can turn the oven on broil if the dish is not brown enough when it hits 50 minutes. It will only take about 5 minutes or so, watch the casserole carefully so it will not burn.

Step 9: Once cooked, remove from the oven and cut into squares before serving. Top with sour cream, black olives, and chopped green onions. Enjoy!

CHILI RELLENOS CASSEROLE

Rebecca Let’s go Mexico! I am a fan of this amazing casserole. It is well seasoned, satisfying, and heartwarming. The flavors bursting inside your mouth in every bite is an experience… Main Dish Recipes CHILI RELLENOS CASSEROLE European Print This
Nutrition facts: 200 calories 20 grams fat
Rating: 4.5/5
( 2 voted )

Ingredients

  • 1 pound ground sirloin
  • 1/2 cup chopped onion
  • 3/4 cup red bell pepper
  • 1 teaspoon olive oil
  • 1/2 teaspoon salt
  • 1/4 teaspoon pepper
  • 1/2 teaspoon garlic powder
  • 1 teaspoon cumin
  • 1/4 teaspoon allspice
  • 2 4 ounce cans chopped green chilis
  • 1 1/2 cups shredded sharp cheddar cheese, and a little more for the top of the casserole
  • 1 cup milk
  • 1/2 cup sour cream
  • 1/4 cup flour
  • 4 eggs beaten
  • dash of Tobasco
  • toppings of sour cream, black sliced olives, and chopped green onions

Instructions

Step 1: Heat the olive oil in a medium-sized skillet. Saute the onion, garlic, and bell pepper. Add in a dash of salt and cook until the onion is translucent.

Step 2: Add in the ground beef and season with salt and pepper. Sprinkle the cumin, allspice, then continue cooking until the beef is browned and cooked through. But do not overcook the beef as it is still going into the oven.

Step 3: Drain away all the fat from the beef mixture by setting your skillet at an angle and use a paper towel to soak up all the grease.

Step 4: Add a can of Achilles in a 9 x 13 x 1 1/2-inch baking dish. Spread the chilis evenly at the bottom of the pan.

Step 5: Spatter over the sharp cheese and pour the drained ground beef mixture on top. Spread evenly.

Step 6: Add in the second can of chilis on top of the meat.

Step 7: Stir the milk, sour cream, flour, salt, pepper, beaten eggs, and a dash of Tobasco in a small mixing bowl. Mix until smooth. Then, pour evenly over the dish.

Step 8: Place inside the oven and bake at 350 degrees for 45 to 50 minutes. Ten minutes before the dish is done, remove from the oven and sprinkle some cheese on top. Return to the oven and continue baking. You can turn the oven on broil if the dish is not brown enough when it hits 50 minutes. It will only take about 5 minutes or so, watch the casserole carefully so it will not burn.

Step 9: Once cooked, remove from the oven and cut into squares before serving. Top with sour cream, black olives, and chopped green onions. Enjoy!

June 25, 2020 0 comment
0 FacebookTwitterPinterestEmail
Main Dish Recipes

Victory’s Taco Tater Tot Casserole

by Rebecca June 25, 2020
written by Rebecca

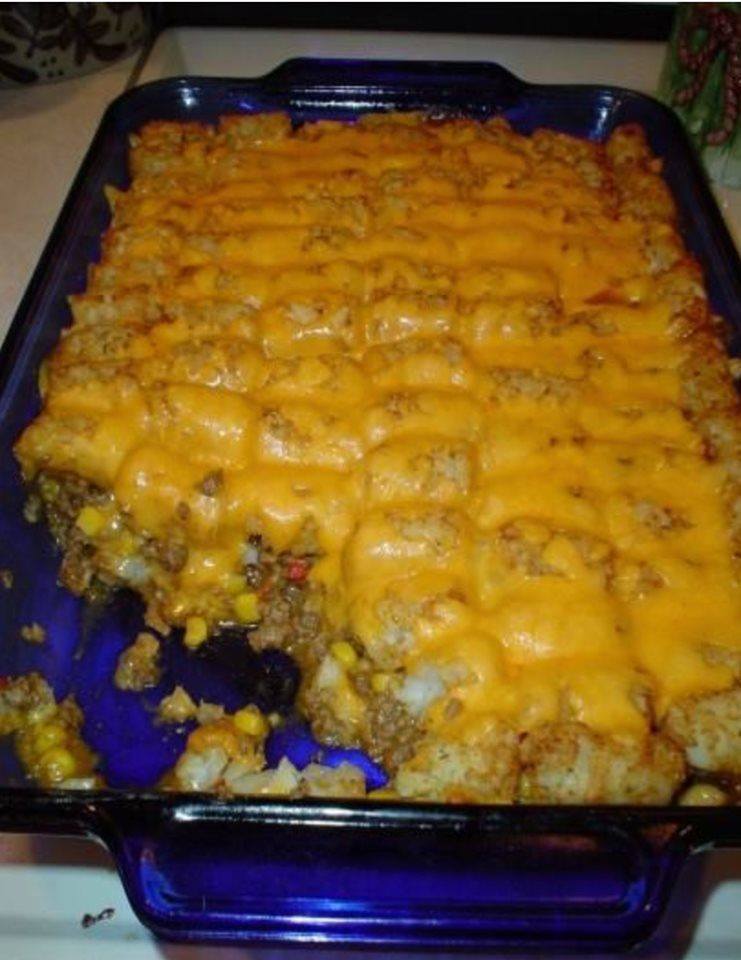
This casserole is by far the best tater tot casserole I’ve had for years! It’s very easy to make, the ingredients are simple, but the result is superb! My family loves it, they want it either with ketchup or with their favorite taco sauce. This casserole is a real victory, a winner. It is so satisfying, bursting with flavors, and super delicious! Our week will never be complete if I have not served this. This casserole is what my kids are looking forward to every week. This 5-star casserole is to die for! Cheesy, hearty, and mouthwatering. Great for game nights, family dinner, to serve whenever you have guests, and a lot more. This is an impressive Taco Tater Tot Casserole that screams Victory! This casserole never fails to impress the crowd, unquestionably a great dish that everyone loves and thrilled about. Don’t be left behind, try this Tater Tot Casserole and you will be surprised. This is an awesome change from your usual chili.

INGREDIENTS

2 lbs lean ground beef

1 (1 1/4 ounce) package taco seasoning

1 (15 ounce) can corn, drained

1 (10 3/4 ounce) can Fiesta nacho cheese soup

1 (32 ounce) package tater tots

1 (8 ounce) package cheddar cheese

How to make Victory’s Taco Tater Tot Casserole

Step 1: Place the beef in a skillet and cook until browned. Drain any excess fat.

Step 2: Mix in the taco seasoning and water. Let it simmer for about 5 minutes.

Step 3: Add in the corn soup.

Step 4: Pour the mixture into a 9 x 13-inch pan and top it with the tater tots.

Step 5: Place inside the oven and bake at 350 degrees for about 35 minutes.

Step 6: Remove from the oven and sprinkle the cheese over. Then, put the pan back into the oven and bake for 5 minutes more or until the cheese is melted.

Step 7: Once done, remove from the oven and add in some ketchup or taco sauce before serving. Enjoy!

Victory’s Taco Tater Tot Casserole

Rebecca This casserole is by far the best tater tot casserole I’ve had for years! It’s very easy to make, the ingredients are simple, but the result is superb! My family… Main Dish Recipes Victory’s Taco Tater Tot Casserole European Print This
Nutrition facts: 200 calories 20 grams fat
Rating: 4.5/5
( 2 voted )

Ingredients

  • 2 lbs lean ground beef
  • 1 (1 1/4 ounce) package taco seasoning
  • 1 (15 ounce) can corn, drained
  • 1 (10 3/4 ounce) can Fiesta nacho cheese soup
  • 1 (32 ounce) package tater tots
  • 1 (8 ounce) package cheddar cheese

Instructions

Step 1: Place the beef in a skillet and cook until browned. Drain any excess fat.

Step 2: Mix in the taco seasoning and water. Let it simmer for about 5 minutes.

Step 3: Add in the corn soup.

Step 4: Pour the mixture into a 9 x 13-inch pan and top it with the tater tots.

Step 5: Place inside the oven and bake at 350 degrees for about 35 minutes.

Step 6: Remove from the oven and sprinkle the cheese over. Then, put the pan back into the oven and bake for 5 minutes more or until the cheese is melted.

Step 7: Once done, remove from the oven and add in some ketchup or taco sauce before serving. Enjoy!

June 25, 2020 0 comment
0 FacebookTwitterPinterestEmail
Main Dish Recipes

Homemade Peanut Butter Cups

by Rebecca June 25, 2020
written by Rebecca

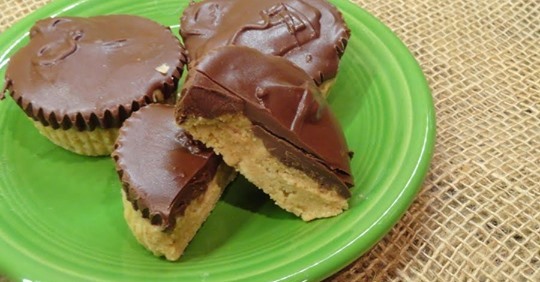
Two of my favorites in a cup – peanut butter and chocolate! Nothing beats a homemade peanut butter cups made with so much love. Refrigerate them or leave them at room temperature for a creamier and softer bite. Either way, these sweet little cups satisfy my sweet tooth and my nutty cravings. There are many things I love about these cups, first because it is so easy to make even my kids can do it! The ingredients are pretty straightforward, all of them I am sure you already have. They are amazing to give as a do-it-your-own gift. And because I love peanut butter! I can finish a tub of peanut butter in a heartbeat without me even realizing it. Crazy, right? So this Homemade Peanut Butter Cups are perfect for me. They remind me of Reese’s. Before I was so obsessed with Reese’s but figured why not do something similar myself? I mean I still love Reese’s but these cute little homemade cups are so much more amazing! It’s cost-efficient, and I usually make them in batches, I just stash them in the freezer.

INGREDIENTS

1 cup butter, melted

2 cups graham crackers, crushed

2 cups confectioner’s sugar

1 cup peanut butter

1 1/2 cups semi-sweet chocolate chips

4 tablespoons peanut butter

How to make Homemade Peanut Butter Cups

Step 1: Use paper liners to line your muffin tins and grease them with cooking spray.

Step 2: In a bowl, place the butter, graham crackers, confectioner’s sugar, and a cup of peanut butter. Mix well until incorporated.

Step 3: Spoon about 1 – 1 1/2 tablespoons of the mixture into the muffin liners. Pressing the mixture into the bottom of the greased liners.

Step 4: Melt the chocolate chips with 4 tablespoons of peanut butter.

Step 5: Once melted, spoon the filling over the liners. Use a spoon to smooth the tops of the cups.

Step 6: Then, put the muffin tins inside the fridge to set.

Homemade Peanut Butter Cups

Rebecca Two of my favorites in a cup – peanut butter and chocolate! Nothing beats a homemade peanut butter cups made with so much love. Refrigerate them or leave them at… Main Dish Recipes Homemade Peanut Butter Cups European Print This
Nutrition facts: 200 calories 20 grams fat
Rating: 5.0/5
( 1 voted )

Ingredients

  • 1 cup butter, melted
  • 2 cups graham crackers, crushed
  • 2 cups confectioner’s sugar
  • 1 cup peanut butter
  • 1 1/2 cups semi-sweet chocolate chips
  • 4 tablespoons peanut butter

Instructions

Step 1: Use paper liners to line your muffin tins and grease them with cooking spray.

Step 2: In a bowl, place the butter, graham crackers, confectioner's sugar, and a cup of peanut butter. Mix well until incorporated.

Step 3: Spoon about 1 - 1 1/2 tablespoons of the mixture into the muffin liners. Pressing the mixture into the bottom of the greased liners.

Step 4: Melt the chocolate chips with 4 tablespoons of peanut butter.

Step 5: Once melted, spoon the filling over the liners. Use a spoon to smooth the tops of the cups.

Step 6: Then, put the muffin tins inside the fridge to set.


June 25, 2020 0 comment
0 FacebookTwitterPinterestEmail
Newer Posts
Older Posts

Popular Posts

  • 1

    Crispy Crunchy Parmesan Potatoes

    March 21, 2020
  • 2

    CROCK POT SMOTHERED PORK CHOPS

    March 21, 2020
  • Facebook
  • Twitter

@2019 - All Right Reserved.


Back To Top