Cook it once
  • Home
  • Privacy Policy
  • Recipes
    • KETO
    • LC
    • WW
  • Tips
  • Contact
Cook it once
  • Home
  • Privacy Policy
  • Recipes
    • KETO
    • LC
    • WW
  • Tips
  • Contact
Category:

Main Dish Recipes

Main Dish Recipes

Martha’s Company Casserole

by Rebecca June 29, 2020
written by Rebecca

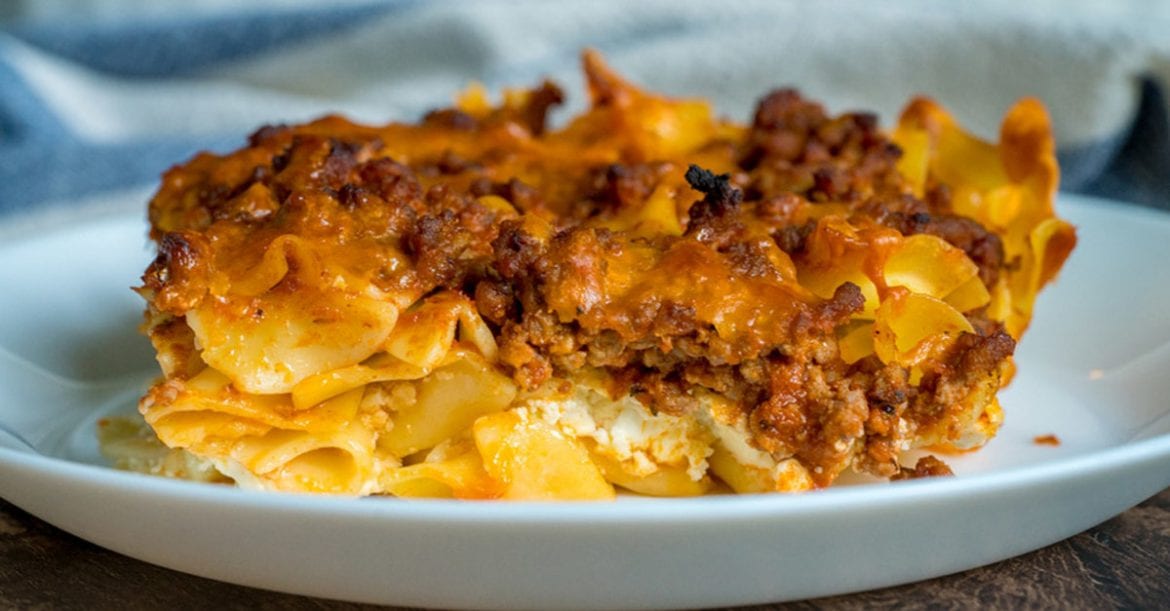
This dish is just pure awesome! Layers of delicious wonders of meat and noodles. You really need to try this because I am sure that you need this in your life. I made this two days ago and I’m thinking of making this again today! All the layers will surely give you a satisfying feeling. The taste of melted cheese, slightly toasted ground beef, and al dente pasta noodles will make you want to eat more. Are you already craving for this? I know! I think it’s time to find all these ingredients and prepare to be mind blown! Enjoy!

INGREDIENTS

8 oz. egg noodles, cooked and drained

1 pound lean ground beef

2 (8 oz.) cans tomato sauce

1 cup cottage cheese

1 (8 oz.) package cream cheese, room temperature

1/3 cup sour cream

1/4 cup green onions, finely chopped

2 tablespoons unsalted butter, melted

2/3 cup cheddar cheese, grated

Kosher salt and freshly ground pepper, to taste

How to make Martha’s Company Casserole

Step 1: Ready the oven and preheat to 350 degrees.

Step 2: Apply cooking spray in a 9×13-inch baking dish.

Step 3: Place a large skillet on the stove and turn the heat to medium-high. Add the beef and cook until the color turns brown. Set aside the excess oil.

Step 4: Pour the tomato sauce and cook for 2 to 3 minutes. Remove from the heat.

Step 5: Combine cream cheese, sour cream, cottage cheese, and green onions in a medium bowl. Stir until well-mixed.

Step 6: Arrange the 1/2 cooked noodles into the greased baking dish then add the cream cheese mixture on top.

Step 7: Spread the rest of the noodles on top of the cream cheese mixture then pour the melted butter on top of the noodles.

Step 8: Add in the beef mixture on top of the noodles and garnish with cheddar cheese.

Step 9: Place inside the preheated oven and bake for 45 minutes or until the cheese is melted.

Step 10: Remove the baking dish from the oven and place on a wire rack. Let it cool for 10 to 15 minutes.

Step 11: Serve and enjoy!

Martha’s Company Casserole

Rebecca This dish is just pure awesome! Layers of delicious wonders of meat and noodles. You really need to try this because I am sure that you need this in your… Main Dish Recipes Martha’s Company Casserole European Print This
Nutrition facts: 200 calories 20 grams fat
Rating: 5.0/5
( 1 voted )

Ingredients

  • 8 oz. egg noodles, cooked and drained
  • 1 pound lean ground beef
  • 2 (8 oz.) cans tomato sauce
  • 1 cup cottage cheese
  • 1 (8 oz.) package cream cheese, room temperature
  • 1/3 cup sour cream
  • 1/4 cup green onions, finely chopped
  • 2 tablespoons unsalted butter, melted
  • 2/3 cup cheddar cheese, grated
  • Kosher salt and freshly ground pepper, to taste

Instructions

Step 1: Ready the oven and preheat to 350 degrees.

Step 2: Apply cooking spray in a 9x13-inch baking dish.

Step 3: Place a large skillet on the stove and turn the heat to medium-high. Add the beef and cook until the color turns brown. Set aside the excess oil.

Step 4: Pour the tomato sauce and cook for 2 to 3 minutes. Remove from the heat.

Step 5: Combine cream cheese, sour cream, cottage cheese, and green onions in a medium bowl. Stir until well-mixed.

Step 6: Arrange the 1/2 cooked noodles into the greased baking dish then add the cream cheese mixture on top.

Step 7: Spread the rest of the noodles on top of the cream cheese mixture then pour the melted butter on top of the noodles.

Step 8: Add in the beef mixture on top of the noodles and garnish with cheddar cheese.

Step 9: Place inside the preheated oven and bake for 45 minutes or until the cheese is melted.

Step 10: Remove the baking dish from the oven and place on a wire rack. Let it cool for 10 to 15 minutes.

Step 11: Serve and enjoy!
June 29, 2020 0 comment
0 FacebookTwitterPinterestEmail
Main Dish Recipes

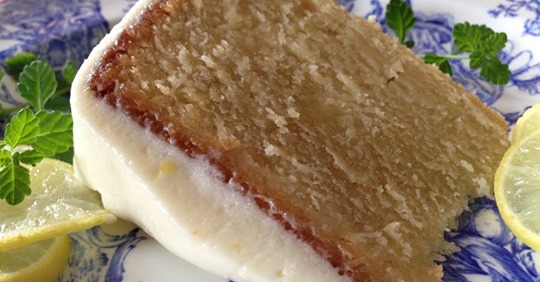
Key Lime Poundcake with Key Lime Cream Cheese Icing

by Rebecca June 29, 2020
written by Rebecca

This is such a simple cake but agreeably delicious! It is a moist, dense, sweet cake with cream cheese frosting. An insanely good key lime pound cake that will satisfy your sweet tooth.

INGREDIENTS

4 sticks butter, that’s 1 pound, room temperature

3 cups of sugar

6 large eggs, room temperature

4 cups all-purpose flour

1/2 cup fresh key lime juice

1/4 cup evaporated milk, (I always keep a good number of those small, 5 ounce cans in my pantry.)

4 teaspoons key lime zest, minced

1 teaspoon vanilla

FOR THE KEY LIME CREAM CHEESE ICING

8 ounces cream cheese, room temperature

3-4 tablespoons butter, room temperature

4 cups confectioner’s sugar

1/4 cup freshly squeezed key lime juice

2-3 teaspoons key lime zest

1 teaspoon vanilla extract

How to make Key Lime Poundcake with Key Lime Cream Cheese Icing

Step 1: Prepare the oven. Preheat it to 300 degrees. Grease a 10-inch tube pan with a non-stick spray. It is okay to use a 10 1/2-inch pan, too.

Step 2: Beat the butter with a stand-up or electric mixer until light and fluffy. Mix in the sugar and beat for 5 minutes more.

Step 3: Add the eggs one at a time while beating every after each addition.

Step 4: Stir in the juice, milk, zest, and vanilla until well combined.

Step 5: Mix the butter-egg mixture alternatively with the key lime juice and milk mixture using your hand. ake sure to start and end with flour. Mix just until combined.

Step 6: Evenly pour the batter in the tube pan. Lightly tap to lose any air bubbles.

Step 7: Place inside the preheated oven and bake for 45 minutes. It is done once the toothpick inserted in the middle comes out clean.

Step 8: Remove from the oven and cool in the pan for 20 to 25 minutes. Then, transfer the cake to a cooling rack to cool completely.

TO MAKE KEY LIME CREAM CHEESE ICING

Step 1: Beat the cream cheese and butter with a hand mixer until well combined.

Step 2: Add in the confectioner’s sugar. Beat thoroughly until smooth and fluffy.

Step 3: Drizzle the lime juice and add in the zest followed by the vanilla. Mix until incorporated.

Step 4: Ice the cake and fill the middle hole with the excess key lime cream cheese icing.

Key Lime Poundcake with Key Lime Cream Cheese Icing

Rebecca This is such a simple cake but agreeably delicious! It is a moist, dense, sweet cake with cream cheese frosting. An insanely good key lime pound cake that will satisfy… Main Dish Recipes Key Lime Poundcake with Key Lime Cream Cheese Icing European Print This
Nutrition facts: 200 calories 20 grams fat
Rating: 5.0/5
( 1 voted )

Ingredients

  • 4 sticks butter, that’s 1 pound, room temperature
  • 3 cups of sugar
  • 6 large eggs, room temperature
  • 4 cups all-purpose flour
  • 1/2 cup fresh key lime juice
  • 1/4 cup evaporated milk, (I always keep a good number of those small, 5 ounce cans in my pantry.)
  • 4 teaspoons key lime zest, minced
  • 1 teaspoon vanilla
  • FOR THE KEY LIME CREAM CHEESE ICING
  • 8 ounces cream cheese, room temperature
  • 3-4 tablespoons butter, room temperature
  • 4 cups confectioner’s sugar
  • 1/4 cup freshly squeezed key lime juice
  • 2-3 teaspoons key lime zest
  • 1 teaspoon vanilla extract

Instructions

Step 1: Prepare the oven. Preheat it to 300 degrees. Grease a 10-inch tube pan with a non-stick spray. It is okay to use a 10 1/2-inch pan, too.

Step 2: Beat the butter with a stand-up or electric mixer until light and fluffy. Mix in the sugar and beat for 5 minutes more.

Step 3: Add the eggs one at a time while beating every after each addition.

Step 4: Stir in the juice, milk, zest, and vanilla until well combined.

Step 5: Mix the butter-egg mixture alternatively with the key lime juice and milk mixture using your hand. ake sure to start and end with flour. Mix just until combined.

Step 6: Evenly pour the batter in the tube pan. Lightly tap to lose any air bubbles.

Step 7: Place inside the preheated oven and bake for 45 minutes. It is done once the toothpick inserted in the middle comes out clean.

Step 8: Remove from the oven and cool in the pan for 20 to 25 minutes. Then, transfer the cake to a cooling rack to cool completely.

TO MAKE KEY LIME CREAM CHEESE ICING

Step 1: Beat the cream cheese and butter with a hand mixer until well combined.

Step 2: Add in the confectioner's sugar. Beat thoroughly until smooth and fluffy.

Step 3: Drizzle the lime juice and add in the zest followed by the vanilla. Mix until incorporated.

Step 4: Ice the cake and fill the middle hole with the excess key lime cream cheese icing.

June 29, 2020 0 comment
0 FacebookTwitterPinterestEmail
Main Dish Recipes

Fried Cabbage And Kielbasa Skillet

by Rebecca June 29, 2020
written by Rebecca

This Fried Cabbage and Kielbasa Skillet is by far one of the best dishes I have ever cooked and eaten! The simplicity of this dish is just mind-blowing. For anyone looking for a delicious and healthy dish, this is the one you are looking for! For me, it has all the quality of a perfect meal. A very satisfying food to eat when you are trying to cut out any type of meat in your life. I don’t know but maybe this is my way of trying out to be vegan. Though this has Kielbasa in it, it’s just one piece. Lately, I’ve been thinking of giving it a try. I am sure that is the start! One step at a time!

INGREDIENTS

1 (14 oz.) package kielbasa, thinly sliced

1 large head green cabbage, cored and sliced

4 cloves garlic, minced

1/2 yellow onion, finely chopped

3 tablespoons olive oil

3 tablespoons unsalted butter

2 tablespoons white wine vinegar

1 tablespoon Dijon mustard

1 teaspoon paprika

1/4-1/2 teaspoon red pepper flakes

Kosher salt and freshly ground pepper, to taste

Fresh parsley, optional, garnish

How to make Fried Cabbage And Kielbasa Skillet

Step 1: Place a skillet on the stove and turn the heat to medium-high. Add oil and saute the chopped onion until translucent.

Step 2: Add the garlic and saute for another 1-2 minutes until lightly brown.

Step 3: Pour the vinegar and stir and scrape the bottom part of the pan.

Step 4: Set aside the onions and garlic then toss in the sliced kielbasa. Cook for 2 to 3 minutes each side until the color turns brown.

Step 5: Add in Dijon mustard and butter into the pan and toss in the cabbage. Stir until well combined then season with red pepper flakes, paprika, salt, and pepper.

Step 6: Cook the added ingredients for 5 to 10 minutes or until the cabbage is cooked and the edges are brown.

Step 7: Remove the pan from the stove.

Step 8: Garnish with parsley. Serve and enjoy!

Note: This dish is best served, hot!

Fried Cabbage And Kielbasa Skillet

Rebecca This Fried Cabbage and Kielbasa Skillet is by far one of the best dishes I have ever cooked and eaten! The simplicity of this dish is just mind-blowing. For anyone… Main Dish Recipes Fried Cabbage And Kielbasa Skillet European Print This
Nutrition facts: 200 calories 20 grams fat
Rating: 4.5/5
( 2 voted )

Ingredients

  • 1 (14 oz.) package kielbasa, thinly sliced
  • 1 large head green cabbage, cored and sliced
  • 4 cloves garlic, minced
  • 1/2 yellow onion, finely chopped
  • 3 tablespoons olive oil
  • 3 tablespoons unsalted butter
  • 2 tablespoons white wine vinegar
  • 1 tablespoon Dijon mustard
  • 1 teaspoon paprika
  • 1/4-1/2 teaspoon red pepper flakes
  • Kosher salt and freshly ground pepper, to taste
  • Fresh parsley, optional, garnish

Instructions

Step 1: Place a skillet on the stove and turn the heat to medium-high. Add oil and saute the chopped onion until translucent.

Step 2: Add the garlic and saute for another 1-2 minutes until lightly brown.

Step 3: Pour the vinegar and stir and scrape the bottom part of the pan.

Step 4: Set aside the onions and garlic then toss in the sliced kielbasa. Cook for 2 to 3 minutes each side until the color turns brown.

Step 5: Add in Dijon mustard and butter into the pan and toss in the cabbage. Stir until well combined then season with red pepper flakes, paprika, salt, and pepper.

Step 6: Cook the added ingredients for 5 to 10 minutes or until the cabbage is cooked and the edges are brown.

Step 7: Remove the pan from the stove.

Step 8: Garnish with parsley. Serve and enjoy!

Note: This dish is best served, hot!

June 29, 2020 0 comment
0 FacebookTwitterPinterestEmail
Main Dish Recipes

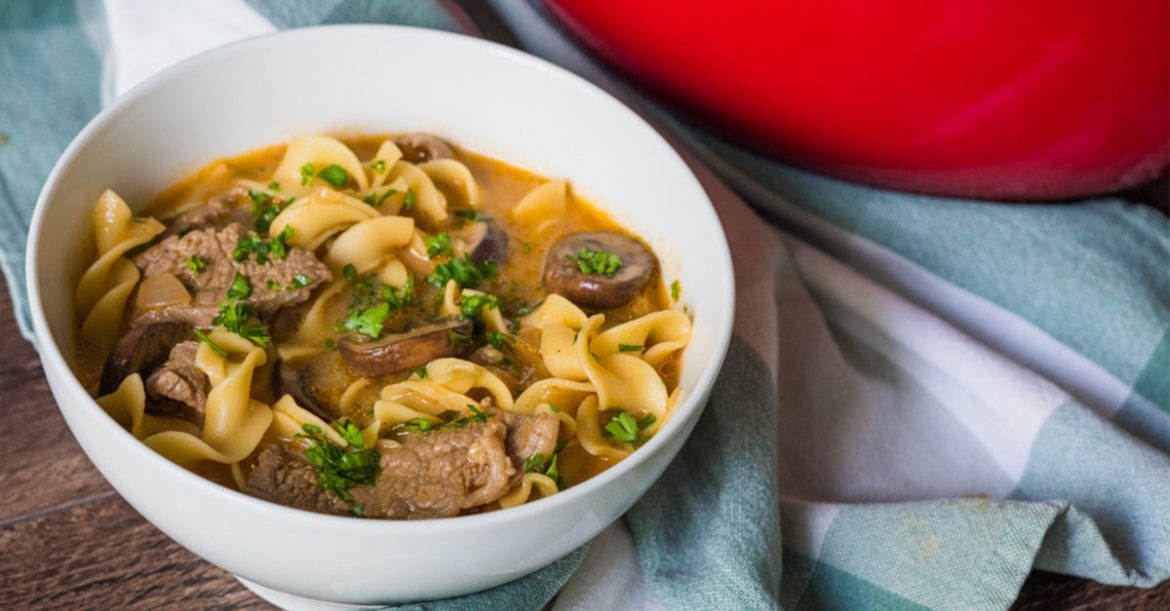
One-Pot Beef Stroganoff Soup

by Rebecca June 29, 2020
written by Rebecca

A hearty, warm, yet light One-Pot Beef Stroganoff Soup that is made and serves with love is all you need for a gloomy afternoon. It is one of the best comfort food ever made – creamy and savory that will lighten up your day.

INGREDIENTS

2 tablespoons unsalted butter

1 pound flank or sirloin steak, thinly sliced into bite-sized strips

8 ounces cremini mushrooms, sliced

1 small sweet onion, diced

4 cloves garlic, minced

2 tablespoons tomato paste

1/2 cup white wine

1 tablespoon Worcestershire sauce

5 cups beef stock

1 1/2 cups dried egg noodles

1/2 cup sour cream

2 tablespoons all-purpose flour

Fresh parsley, chopped

Kosher salt and freshly ground black pepper, to taste

How to make One-Pot Beef Stroganoff Soup

Step 1: Place the butter in a large pot or Dutch oven to melt over medium-high heat.

Step 2: Season the meat with salt and pepper. Place in the pot with melted butter and cook until browned. Transfer the meat once browned to a plate or bowl. Set aside.

Step 3: Add in the onions and mushrooms and continue to cook for 5 minutes or until softened.

Step 4: Add in the garlic. Cook for another minute.

Step 5: Add in the tomato paste and white wine into the pot and stir. Cook for about 3 minutes or until the liquid is reduced in half. Scrape the bits with a wooden spoon from the bottom of the pan.

Step 6: Add in the Worcestershire sauce and beef stock. Bring to a boil.

Step 7: Stir int the egg noodles and reduce the heat to a simmer. Cook the noodles for about 5 to 7 minutes to al dente.

Step 8: Place the flour and sour cream in a bowl. Add in half a cup of the hot sauce. Whisk until incorporated.

Step 9: Pour the mixture into the pot while stirring constantly and continue to simmer for 5 minutes.

Step 10: Transfer the meat back to the pot and continue to cook until thoroughly heated. Adjust the seasoning to your preferred taste. Garnish with some fresh parsley before serving. Enjoy!

One-Pot Beef Stroganoff Soup

Rebecca A hearty, warm, yet light One-Pot Beef Stroganoff Soup that is made and serves with love is all you need for a gloomy afternoon. It is one of the best… Main Dish Recipes One-Pot Beef Stroganoff Soup European Print This
Nutrition facts: 200 calories 20 grams fat
Rating: 5.0/5
( 1 voted )

Ingredients

  • 2 tablespoons unsalted butter
  • 1 pound flank or sirloin steak, thinly sliced into bite-sized strips
  • 8 ounces cremini mushrooms, sliced
  • 1 small sweet onion, diced
  • 4 cloves garlic, minced
  • 2 tablespoons tomato paste
  • 1/2 cup white wine
  • 1 tablespoon Worcestershire sauce
  • 5 cups beef stock
  • 1 1/2 cups dried egg noodles
  • 1/2 cup sour cream
  • 2 tablespoons all-purpose flour
  • Fresh parsley, chopped
  • Kosher salt and freshly ground black pepper, to taste

Instructions

Step 1: Place the butter in a large pot or Dutch oven to melt over medium-high heat.

Step 2: Season the meat with salt and pepper. Place in the pot with melted butter and cook until browned. Transfer the meat once browned to a plate or bowl. Set aside.

Step 3: Add in the onions and mushrooms and continue to cook for 5 minutes or until softened.

Step 4: Add in the garlic. Cook for another minute.

Step 5: Add in the tomato paste and white wine into the pot and stir. Cook for about 3 minutes or until the liquid is reduced in half. Scrape the bits with a wooden spoon from the bottom of the pan.

Step 6: Add in the Worcestershire sauce and beef stock. Bring to a boil.

Step 7: Stir int the egg noodles and reduce the heat to a simmer. Cook the noodles for about 5 to 7 minutes to al dente.

Step 8: Place the flour and sour cream in a bowl. Add in half a cup of the hot sauce. Whisk until incorporated.

Step 9: Pour the mixture into the pot while stirring constantly and continue to simmer for 5 minutes.

Step 10: Transfer the meat back to the pot and continue to cook until thoroughly heated. Adjust the seasoning to your preferred taste. Garnish with some fresh parsley before serving. Enjoy!

June 29, 2020 0 comment
0 FacebookTwitterPinterestEmail
Main Dish Recipes

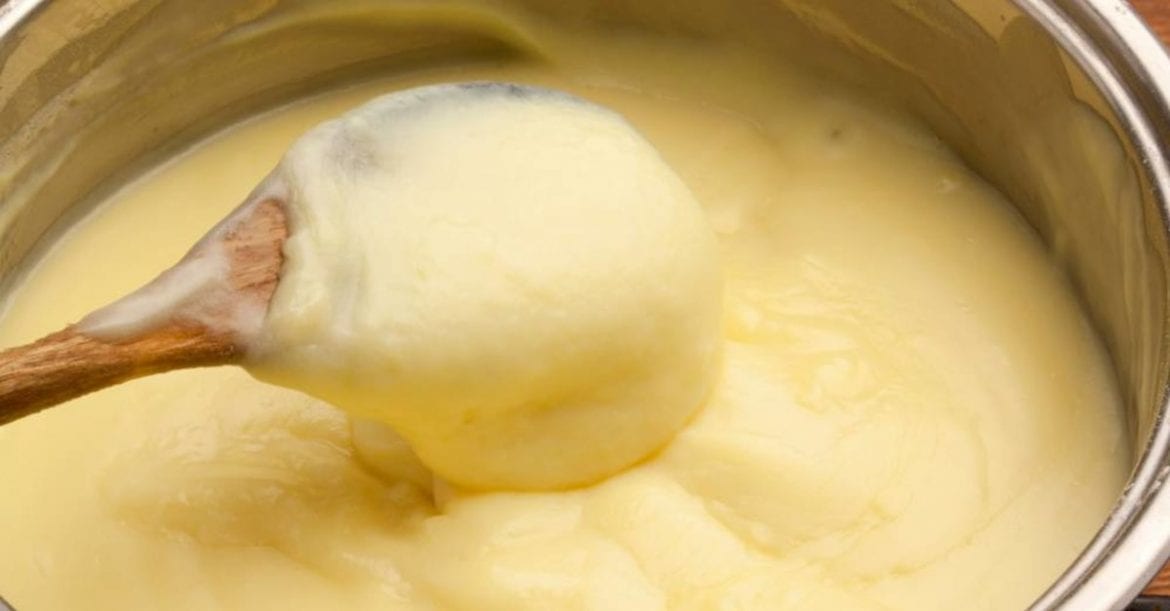
Old-Fashioned Vanilla Custard

by Rebecca June 29, 2020
written by Rebecca

A velvety, smooth homemade Vanilla Custard is a staple, great to serve with fresh berries or cinnamon. Place a scoop in a bowl and top with fresh berries for a light, healthy, and refreshing breakfast. It is amazing served warm for a snack, too. At first, it is intimidating and looks like a little hard work to make but it’s actually pretty simple. Whip up a batch, and you’ll end up making it again and again because it’s so good and anything top with sweet cream a is a happy booster. Old-Fashioned Vanilla Custard is on my favorite list, and why not? It is a must, can be eaten plain, is used in creme brulee, and other baked desserts. And vanilla goes along with just about anything! Top it with crumbled cookies, crushed candy, fresh fruit, fresh mint, or chocolate chips which are few of my favorite vanilla toppings. I love adding some flavor to it after I finish making the custard, like espresso, coffee, or almond extract, even freshly ground nutmeg or cinnamon. Amazing right?

INGREDIENTS

1 cup heavy whipping cream

1 cup whole milk

4 egg yolks

2 teaspoons vanilla extract

1 ½ tablespoons cornstarch

¼ cup granulated sugar

How to make Old-Fashioned Vanilla Custard

Step 1: Combine the milk, heavy cream, and vanilla extract in a saucepan over medium heat and make sure to continuously stir the mixture for 5 minutes. Once the mixture is hot but not boiling, remove the saucepan from the heat.

Step 2: Place the egg yolks, cornstarch, and sugar in a large resistant bowl. Whisk until well blended.

Step 3: Carefully and gradually pour the hot cream mixture over the egg yolk mixture. Make sure to whisk the mixture constantly so the eggs will not scramble.

Step 4: Transfer the custard mixture back to the first saucepan. Cook over low heat and stir for 8 to 10 minutes until the mixture thickened. Do not bring the mixture to a boil or the custard will curdle.

Step 5: Serve immediately. Enjoy!

Old-Fashioned Vanilla Custard

Rebecca A velvety, smooth homemade Vanilla Custard is a staple, great to serve with fresh berries or cinnamon. Place a scoop in a bowl and top with fresh berries for a… Main Dish Recipes Old-Fashioned Vanilla Custard European Print This
Nutrition facts: 200 calories 20 grams fat
Rating: 5.0/5
( 1 voted )

Ingredients

  • 1 cup heavy whipping cream
  • 1 cup whole milk
  • 4 egg yolks
  • 2 teaspoons vanilla extract
  • 1 ½ tablespoons cornstarch
  • ¼ cup granulated sugar

Instructions

Step 1: Combine the milk, heavy cream, and vanilla extract in a saucepan over medium heat and make sure to continuously stir the mixture for 5 minutes. Once the mixture is hot but not boiling, remove the saucepan from the heat.

Step 2: Place the egg yolks, cornstarch, and sugar in a large resistant bowl. Whisk until well blended.

Step 3: Carefully and gradually pour the hot cream mixture over the egg yolk mixture. Make sure to whisk the mixture constantly so the eggs will not scramble.

Step 4: Transfer the custard mixture back to the first saucepan. Cook over low heat and stir for 8 to 10 minutes until the mixture thickened. Do not bring the mixture to a boil or the custard will curdle.

Step 5: Serve immediately. Enjoy!

June 29, 2020 0 comment
0 FacebookTwitterPinterestEmail
Main Dish Recipes

Crunchy Frito Corn Salad

by Rebecca June 29, 2020
written by Rebecca

I love this! The zesty, crunchy corn salad top with Fritos chips is a summer side dish that is great to serve all year round!

We love corn, I like to stock especially when it is in season. When I am not using them yet, I cut off the cobs and freeze. A foolproof way to throw fresh veggies into a cozy meal at any time of the day. I like it most when grilled or cooked in a milk and butter texture like how we used to. Not until I read about this Crunchy Frito Corn Salad recipe that everyone is crazy about. I tell you this recipe is the greatest! I am obsessed and the kids had so much fun devouring this delicious corn salad. It instantly became my family’s favorite, a matter of fact, the most requested. This is a must-try, you guys. It’s refreshing, it’s simple, easy to make, and a quick fix if you want something light for dinner. You can even use canned corn kernels if fresh cobs are not available and it still is gonna be great! No need for anything fancy, just a few simple ingredients to make this crunchy Frito Corn Salad.

INGREDIENTS

2 (15 oz.) cans whole corn kernels, rinsed and drained

2 cups sharp cheddar cheese, grated

1 (10.25 oz.) bag Fritos or your choice of corn chips, plus more for garnish

1 green pepper, seeds removed, diced

1/2 cup red onion, diced

1 cup mayonnaise

1 tablespoon lime juice

1 tablespoon taco seasoning

How to make Crunchy Frito Corn Salad

Step 1: Place the mayonnaise, lime juice, and taco seasoning in a medium bowl. Whisk until combined.

Step 2: In another bowl, toss the corn kernels, cheddar cheese, green pepper, and red onion. Mix until incorporated.

Step 3: Mix the mayonnaise dressing with corn mixture. Toss until thoroughly coated.

Step 4: Top with Fritos before serving and adjust the seasoning according to taste. Enjoy!

Crunchy Frito Corn Salad

Rebecca I love this! The zesty, crunchy corn salad top with Fritos chips is a summer side dish that is great to serve all year round! We love corn, I like… Main Dish Recipes Crunchy Frito Corn Salad European Print This
Nutrition facts: 200 calories 20 grams fat
Rating: 5.0/5
( 1 voted )

Ingredients

  • 2 (15 oz.) cans whole corn kernels, rinsed and drained
  • 2 cups sharp cheddar cheese, grated
  • 1 (10.25 oz.) bag Fritos or your choice of corn chips, plus more for garnish
  • 1 green pepper, seeds removed, diced
  • 1/2 cup red onion, diced
  • 1 cup mayonnaise
  • 1 tablespoon lime juice
  • 1 tablespoon taco seasoning

Instructions

Step 1: Place the mayonnaise, lime juice, and taco seasoning in a medium bowl. Whisk until combined.

Step 2: In another bowl, toss the corn kernels, cheddar cheese, green pepper, and red onion. Mix until incorporated.

Step 3: Mix the mayonnaise dressing with corn mixture. Toss until thoroughly coated.

Step 4: Top with Fritos before serving and adjust the seasoning according to taste. Enjoy!

June 29, 2020 0 comment
0 FacebookTwitterPinterestEmail
Main Dish Recipes

How To Cook Bacon In The Oven

by Rebecca June 27, 2020
written by Rebecca

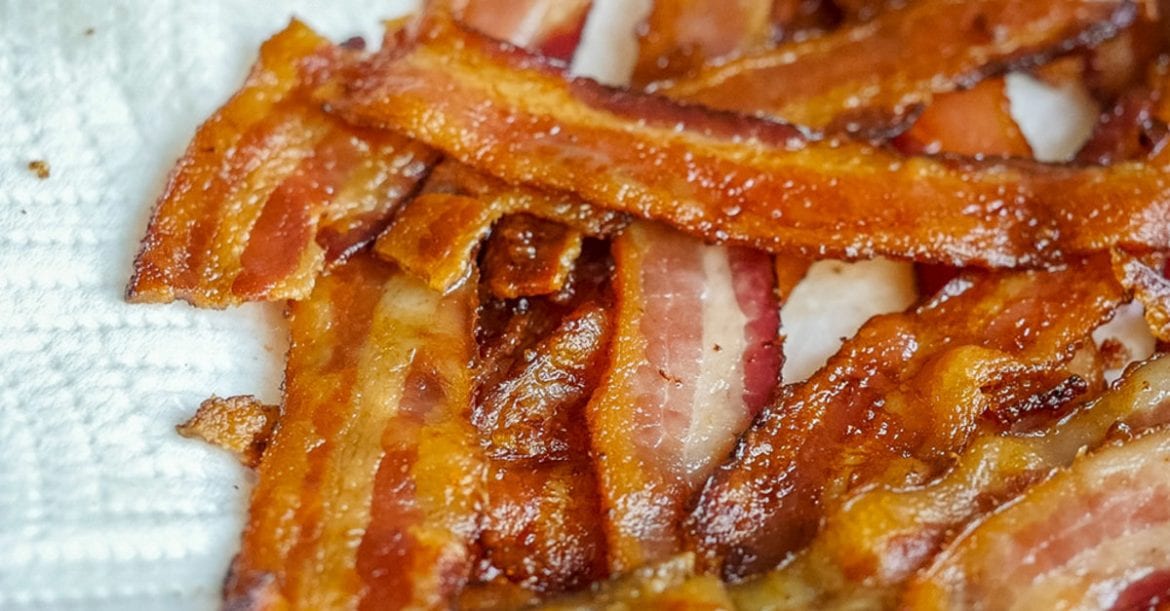
So how do you cook bacon in the oven? Simple! All you need is packed of your favorite bacon, a baking sheet, foil, and 25 minutes. Don’t get me wrong, I love the traditional cooking in a skillet version of bacon with the oil splattering all over and the whole kitchen smelling like bacon all day. But I think this oven-baked bacon is hassle-free and the easier version to enjoy your favorite bacon.

If you are at my house the first thing you’ll notice when you open my fridge is the packs of bacon. Not two or three but more than 5 packs of bacon! We love bacon, we always have it for breakfast, we include it to dishes that require bacon, I put it in my sandwich or burger, or just eat it as is like chips. Crazy, huh? We are a bacon family. Bacon is great to put in your Breakfast Nachos, Ohh I love nachos and bacon sets it on a different level. Baked-ones I mean. I put it on my Southwestern Bacon Quiche, Apple Bacon Toast, and a lot more! Try the oven-baked bacon and I am pretty sure your life will be a little less messy.

INGREDIENTS

12 slices bacon

How To Cook Bacon In The Oven

Step 1: Lay the bacon on an aluminum foil-lined large baking sheet. Line them in a single layer across the baking sheet. Make sure though that the pieces don’t overlap.

Step 2: Place the baking sheet inside a cold oven, then, turn the heat to 400 degrees F.

Step 3: Bake the bacon for about 15 to 25 minutes or until the bacon is on your desired level of crispiness. Check the bacon after 15 minutes as thin slices of bacon cook quickly.

Step 4: Once baked, remove from the oven and transfer the cooked bacon to a paper towel-lined plate to drain any excess oil. Great for breakfast with some eggs and mashed potatoes. Enjoy!

How To Cook Bacon In The Oven

Rebecca So how do you cook bacon in the oven? Simple! All you need is packed of your favorite bacon, a baking sheet, foil, and 25 minutes. Don’t get me wrong,… Main Dish Recipes How To Cook Bacon In The Oven European Print This
Nutrition facts: 200 calories 20 grams fat
Rating: 3.3/5
( 4 voted )

Ingredients

  • 12 slices bacon

Instructions

Step 1: Lay the bacon on an aluminum foil-lined large baking sheet. Line them in a single layer across the baking sheet. Make sure though that the pieces don't overlap.

Step 2: Place the baking sheet inside a cold oven, then, turn the heat to 400 degrees F.

Step 3: Bake the bacon for about 15 to 25 minutes or until the bacon is on your desired level of crispiness. Check the bacon after 15 minutes as thin slices of bacon cook quickly.

Step 4: Once baked, remove from the oven and transfer the cooked bacon to a paper towel-lined plate to drain any excess oil. Great for breakfast with some eggs and mashed potatoes. Enjoy!

June 27, 2020 0 comment
0 FacebookTwitterPinterestEmail
Main Dish Recipes

CHEESY SMOKED SAUSAGE AND POTATO CASSEROLE

by Rebecca June 27, 2020
written by Rebecca

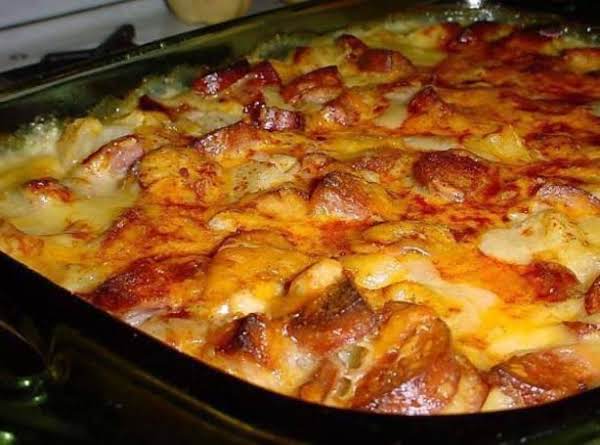
A super cheesy and creamy side dish with sliced smoked sausage is the super comfort food! It can be a side or a main dish, and you will never go wrong with a cheesy smoked sausage and potato casserole. This is what I described as comforting and satisfying; the cheesiness, meltiness, creaminess of this casserole is to die for! And the flavors just burst inside your mouth in every bite. A mouthwatering dish that is always a winner! A keeper! Plus, it is very easy to make, the ingredients are quite long but simple and easy to find. This casserole is fabulously cheesy, and with this recipe, you get both in every bite – potatoes, and meat. The wedges of smoked sausage add so much salty, meaty flavor to this side dish. And its creamy and smooth sauce is just wow!

INGREDIENTS

3 cups potatoes, peeled, boiled and cubed

1 lb skinless smoked sausage

4 tablespoons butter

4 tablespoons flour

2 cups of milk

1/2 teaspoon salt

1/4 teaspoon pepper

1/8 teaspoon paprika

1/2 lb Velveeta cheese cubed

1/2 cup shredded cheddar cheese

HOW TO MAKE CHEESY SMOKED SAUSAGE AND POTATO CASSEROLE

Step 1: Slice the skinless smoked sausage in half and lengthwise, then chop it into half-inch pieces. Cook the chopped potatoes in a frying pan, turning frequently for about 15 minutes or until slightly browned.

Step 2: Ready the oven. Preheat it to 3250 degrees F.

Step 3: Place the potatoes in a 2-quart casserole dish. Add in the meat and gently toss.

Step 4: In a saucepan, mix the butter, flour, milk, salt, pepper, and Velveeta over medium heat, Stir constantly until warm, melted, and smooth.

Step 5: Carefully pour the cheese sauce over the potatoes and meat.

Step 6: Sprinkle the shredded cheddar cheese on top of the casserole, and evenly dust the top with paprika.

Step 7: Place inside the preheated oven and bake for 35 to 45 minutes or until the top is golden brown and the cheese is melted.

CHEESY SMOKED SAUSAGE AND POTATO CASSEROLE

Rebecca A super cheesy and creamy side dish with sliced smoked sausage is the super comfort food! It can be a side or a main dish, and you will never go… Main Dish Recipes CHEESY SMOKED SAUSAGE AND POTATO CASSEROLE European Print This
Nutrition facts: 200 calories 20 grams fat
Rating: 5.0/5
( 3 voted )

Ingredients

  • 3 cups potatoes, peeled, boiled and cubed
  • 1 lb skinless smoked sausage
  • 4 tablespoons butter
  • 4 tablespoons flour
  • 2 cups of milk
  • 1/2 teaspoon salt
  • 1/4 teaspoon pepper
  • 1/8 teaspoon paprika
  • 1/2 lb Velveeta cheese cubed
  • 1/2 cup shredded cheddar cheese

Instructions

Step 1: Slice the skinless smoked sausage in half and lengthwise, then chop it into half-inch pieces. Cook the chopped potatoes in a frying pan, turning frequently for about 15 minutes or until slightly browned.

Step 2: Ready the oven. Preheat it to 3250 degrees F.

Step 3: Place the potatoes in a 2-quart casserole dish. Add in the meat and gently toss.

Step 4: In a saucepan, mix the butter, flour, milk, salt, pepper, and Velveeta over medium heat, Stir constantly until warm, melted, and smooth.

Step 5: Carefully pour the cheese sauce over the potatoes and meat.

Step 6: Sprinkle the shredded cheddar cheese on top of the casserole, and evenly dust the top with paprika.

Step 7: Place inside the preheated oven and bake for 35 to 45 minutes or until the top is golden brown and the cheese is melted.

June 27, 2020 0 comment
0 FacebookTwitterPinterestEmail
Main Dish Recipes

Homemade Cinnamon Roll Casserole

by Rebecca June 27, 2020
written by Rebecca

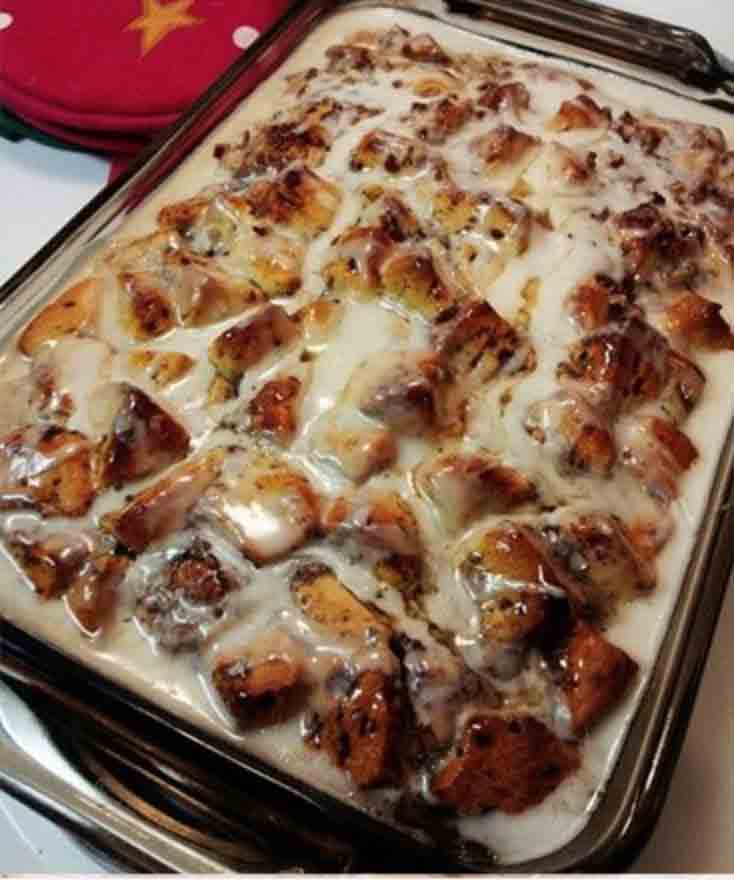
My favorite breakfast! It does not only taste amazing but it smells heavenly, too! This homemade cinnamon roll casserole bakes up pretty quickly for an easy breakfast or brunch with your loved ones. I loved it for so many reasons! Because it’s very easy to make as it uses refrigerated cinnamon roll dough that takes less than 15 minutes to prepare. This you can make even the night before and bake it in the morning so it stays fresh and delicious. And you can use the canned frosting for a quick powdered sugar drizzle. Amazing, right? Your breakfast or brunch will never be the same again when you have this cinnamon roll casserole on your table. It is comforting and delicious, and everyone loves it!

INGREDIENTS

2 tablespoons of melted butter or baking spray

2 cans (12.4 oz each) Pillsbury® refrigerated cinnamon rolls with icing

4 eggs

1/2 cup heavy whipping cream

2 teaspoons ground cinnamon

2 teaspoons vanilla

1 cup chopped Pecans

1/4 cup maple syrup

For the Garnish

Icing from cinnamon rolls

Maple syrup (if desired) –I found it was sweet enough without it

How to make Homemade Cinnamon Roll Casserole

Step 1: Prepare the oven. Preheat it to 375 degrees F.

Step 2: Melt the butter and pour it into a 13 x 9-inch or 3-quart ungreased glass baking dish.

Step 3: Divide the cans of dough into 16 rolls and set the icing aside. Slice the rolls into 8 pieces. Place them over the butter.

Step 4: Beat the eggs in a medium bowl. Add in the cream, cinnamon, and vanilla. Mix until well blended.

Step 5: Pour the mixture over the rolled dough pieces then, sprinkle over the pecans, and drizzle the top with 1/4 cup syrup.

Step 6: Place inside the preheated oven and bake for 20 to 28 minutes or until golden brown.

Step 7: Microwave the icing on medium heat for 10 to 15 seconds or until the icing is thin enough to drizzle.

Homemade Cinnamon Roll Casserole

Rebecca My favorite breakfast! It does not only taste amazing but it smells heavenly, too! This homemade cinnamon roll casserole bakes up pretty quickly for an easy breakfast or brunch with… Main Dish Recipes Homemade Cinnamon Roll Casserole European Print This
Nutrition facts: 200 calories 20 grams fat
Rating: 4.5/5
( 2 voted )

Ingredients

  • 2 tablespoons of melted butter or baking spray
  • 2 cans (12.4 oz each) Pillsbury® refrigerated cinnamon rolls with icing
  • 4 eggs
  • 1/2 cup heavy whipping cream
  • 2 teaspoons ground cinnamon
  • 2 teaspoons vanilla
  • 1 cup chopped Pecans
  • 1/4 cup maple syrup
  • For the Garnish
  • Icing from cinnamon rolls
  • Maple syrup (if desired) –I found it was sweet enough without it

Instructions

Step 1: Prepare the oven. Preheat it to 375 degrees F.

Step 2: Melt the butter and pour it into a 13 x 9-inch or 3-quart ungreased glass baking dish.

Step 3: Divide the cans of dough into 16 rolls and set the icing aside. Slice the rolls into 8 pieces. Place them over the butter.

Step 4: Beat the eggs in a medium bowl. Add in the cream, cinnamon, and vanilla. Mix until well blended.

Step 5: Pour the mixture over the rolled dough pieces then, sprinkle over the pecans, and drizzle the top with 1/4 cup syrup.

Step 6: Place inside the preheated oven and bake for 20 to 28 minutes or until golden brown.

Step 7: Microwave the icing on medium heat for 10 to 15 seconds or until the icing is thin enough to drizzle.

June 27, 2020 0 comment
0 FacebookTwitterPinterestEmail
Main Dish Recipes

Super & Easy Blueberry Coffee Cake

by Rebecca June 27, 2020
written by Rebecca

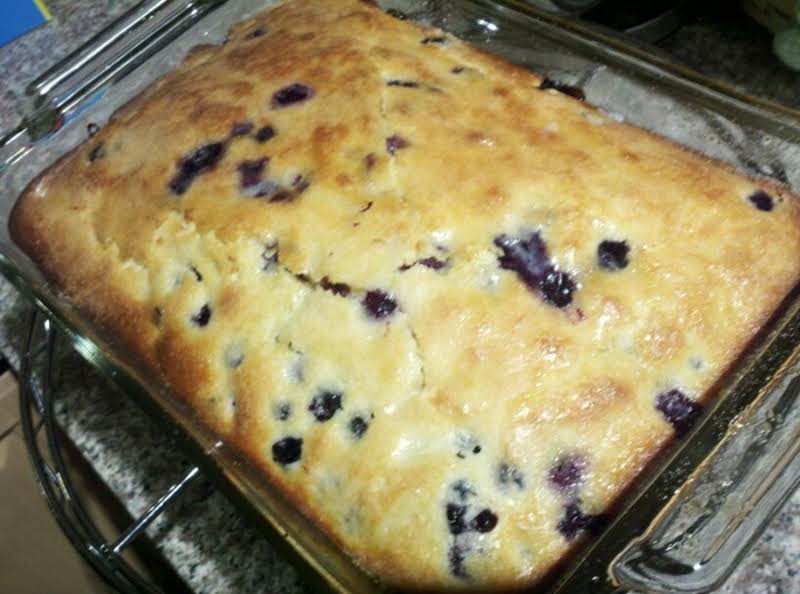
This is a super and easy cake recipe that everyone loved! This is a soft, deliciously moist coffee cake that is filled with blueberries and has a crunchy, sweet crumb topping. This recipe is a based recipe to make this amazing cake or even muffins! And no one will ever say no to blueberries, or cake, or muffins! Try it and I am sure you are gonna love it. This brings blueberries into a new level! A 2.0 version of blueberry cakes out there. Experience the flavors bursting inside your mouth in every bite and this smells wonderful, too!

INGREDIENTS

1 egg, beaten

1/2 cup sugar

1 1/4 cups flour

2 teaspoons baking powder

3/4 teaspoon salt

1/2 cup milk

3 tablespoons butter, melted

1 cup blueberries, fresh

For the Topping

1 tablespoon butter, melted

2 tablespoons sugar

How to make Super & Easy Blueberry Coffee Cake

Step 1: Place the egg and sugar in a mixing bowl and beat until thick.

Step 2: Combine the flour, baking powder, and salt in a separate bowl.

Step 3: Add the flour and milk alternately into the egg mixture and make sure to beat after each addition.

Step 4: Stir in the melted butter until incorporated.

Step 5: And fold in the blueberries.

Step 6: Pour the batter into an 8-inch floured and greased square baking pan. And sprinkle the top with 2 tablespoons of sugar.

Step 7: Place inside the fridge and chill overnight, covered.

Step 8: When ready to prepare. Preheat the oven to 350 degrees.

Step 9: Take the pan out from the fridge and place it inside the preheated oven. Bake for about 35 minutes or until the top springs back when touched. Then, brush the top with the remaining melted butter. Let it cool before cutting. Serve and enjoy!

A note: To make muffins using this exact recipe, bake them for 18 to 20 minutes and before removing from the oven check to make sure that the tops spring back when lightly touched.

Super & Easy Blueberry Coffee Cake

Rebecca This is a super and easy cake recipe that everyone loved! This is a soft, deliciously moist coffee cake that is filled with blueberries and has a crunchy, sweet crumb… Main Dish Recipes Super & Easy Blueberry Coffee Cake European Print This
Nutrition facts: 200 calories 20 grams fat
Rating: 5.0/5
( 1 voted )

Ingredients

  • 1 egg, beaten
  • 1/2 cup sugar
  • 1 1/4 cups flour
  • 2 teaspoons baking powder
  • 3/4 teaspoon salt
  • 1/2 cup milk
  • 3 tablespoons butter, melted
  • 1 cup blueberries, fresh
  • For the Topping
  • 1 tablespoon butter, melted
  • 2 tablespoons sugar

Instructions

Step 1: Place the egg and sugar in a mixing bowl and beat until thick.

Step 2: Combine the flour, baking powder, and salt in a separate bowl.

Step 3: Add the flour and milk alternately into the egg mixture and make sure to beat after each addition.

Step 4: Stir in the melted butter until incorporated.

Step 5: And fold in the blueberries.

Step 6: Pour the batter into an 8-inch floured and greased square baking pan. And sprinkle the top with 2 tablespoons of sugar.

Step 7: Place inside the fridge and chill overnight, covered.

Step 8: When ready to prepare. Preheat the oven to 350 degrees.

Step 9: Take the pan out from the fridge and place it inside the preheated oven. Bake for about 35 minutes or until the top springs back when touched. Then, brush the top with the remaining melted butter. Let it cool before cutting. Serve and enjoy!

A note: To make muffins using this exact recipe, bake them for 18 to 20 minutes and before removing from the oven check to make sure that the tops spring back when lightly touched.

June 27, 2020 0 comment
0 FacebookTwitterPinterestEmail
Newer Posts
Older Posts

Popular Posts

  • 1

    Crispy Crunchy Parmesan Potatoes

    March 21, 2020
  • 2

    CROCK POT SMOTHERED PORK CHOPS

    March 21, 2020
  • Facebook
  • Twitter

@2019 - All Right Reserved.


Back To Top