Cook it once
  • Home
  • Privacy Policy
  • Recipes
    • KETO
    • LC
    • WW
  • Tips
  • Contact
Cook it once
  • Home
  • Privacy Policy
  • Recipes
    • KETO
    • LC
    • WW
  • Tips
  • Contact
Category:

Main Dish Recipes

Main Dish Recipes

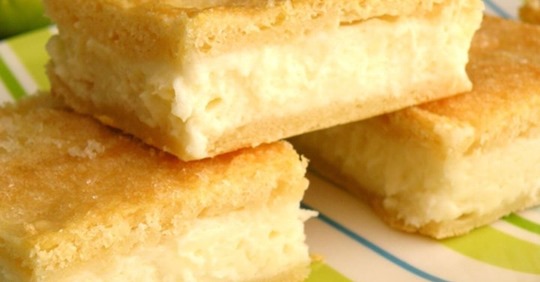
Cream Cheese Squares

by Rebecca June 30, 2020
written by Rebecca

You need this in your life guys! I think I am in love with this Cream Cheese Squares! My best friend taught me this incredible recipe. She said that this will become my favorite and it did! It was love at first bite. We baked it together las week. It was the best day because we haven’t seen each other for a while because of the lockdown even though we are only 2 miles away from each other. She brought her kids with her so my kids were so happy to see them. We spent the entire day catching up, cooking, and eating, a lot! This was the highlight of that day. I can’t say more about this recipe except, you need to try it. Enjoy!

INGREDIENTS

2 (8 ounce) cans refrigerated crescent roll dough

2 (8 ounce) packages cream cheese

1 cup white sugar

1 teaspoon vanilla extract

1/2 cup margarine, melted

1/4 cup white sugar

1 teaspoon ground cinnamon

How to make Cream Cheese Squares

Step 1: Ready the oven and preheat to 350 degrees F or 175 degrees.

Step 2: Apply cooking spray in a 9×13-inch pan.

Step 3: Compress 1 can of the crescent rolls into the bottom part of the greased pan.

Step 4: Combine 1 cup of sugar, vanilla, and cream cheese in a medium bowl. Whisk until creamy.

Step 5: Transfer the mixture into the pressed crescent rolls and spread evenly.

Step 6: Add in the 2nd can of the crescent rolls and place it over the cream cheese layer. (Do not press)

Step 7: Add in the melted margarine all over the pan.

Step 8: In a small bowl, add the rest of the sugar about 1/4 cup and cinnamon. Stir until well-mixed then transfer the mixture on top of the 2nd layer of the crescent rolls.

Step 9: Place inside the preheated oven and bake for 25 to 30 minutes or until the color of the top turns golden and crisp.
Cream Cheese Squares

Rebecca You need this in your life guys! I think I am in love with this Cream Cheese Squares! My best friend taught me this incredible recipe. She said that this… Main Dish Recipes Cream Cheese Squares European Print This
Nutrition facts: 200 calories 20 grams fat
Rating: 5.0/5
( 1 voted )

Ingredients

  • 2 (8 ounce) cans refrigerated crescent roll dough
  • 2 (8 ounce) packages cream cheese
  • 1 cup white sugar
  • 1 teaspoon vanilla extract
  • 1/2 cup margarine, melted
  • 1/4 cup white sugar
  • 1 teaspoon ground cinnamon

Instructions

Step 1: Ready the oven and preheat to 350 degrees F or 175 degrees.

Step 2: Apply cooking spray in a 9x13-inch pan.

Step 3: Compress 1 can of the crescent rolls into the bottom part of the greased pan.

Step 4: Combine 1 cup of sugar, vanilla, and cream cheese in a medium bowl. Whisk until creamy.

Step 5: Transfer the mixture into the pressed crescent rolls and spread evenly.

Step 6: Add in the 2nd can of the crescent rolls and place it over the cream cheese layer. (Do not press)

Step 7: Add in the melted margarine all over the pan.

Step 8: In a small bowl, add the rest of the sugar about 1/4 cup and cinnamon. Stir until well-mixed then transfer the mixture on top of the 2nd layer of the crescent rolls.

Step 9: Place inside the preheated oven and bake for 25 to 30 minutes or until the color of the top turns golden and crisp.
June 30, 2020 0 comment
0 FacebookTwitterPinterestEmail
Main Dish Recipes

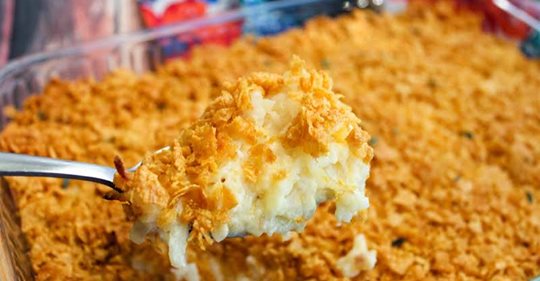
Southern Hash Brown Casserole – Sticky, Filling, And DELICIOUS!

by Rebecca June 30, 2020
written by Rebecca

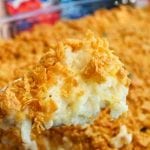
Anyone looking for the best side dish to go with your breakfast, lunch, or dinner? This is your lucky day! For those potato lovers that are reading this, this is a dream come true! A creamy and tart treat with a little sweetness to it! I made this 2 days ago as a gift for my younger sister. I cooked an amazing lunch but the one they loved was this Southern Hash Brown Casserole! I can’t blame them because it is amazing! Come on, Friends, I can’t sell this more than what I am doing. You just have to give it a try to know if what I am saying is true. I am 100 percent certain that you and your folks will love it. By the way, try to control yourself. I had to drag my sister away from this to prevent her from devouring the entire pan! Just kidding but that can happen! Enjoy!

INGREDIENTS

1 bag(s)frozen hash brown potatoes (2 lbs)

2 cups shredded cheddar cheese

1/2 cup melted butter

1 1/2 teaspoon salt

1 small onion (chopped)

1 can(s)cream of chicken or cream of mushroom soup, 10.75 oz.

1 cup sour cream

2 cups crushed Corn Flakes

1/4 cup melted butter

How to make Southern Hash Brown Casserole

Step 1: Combine 1/2 cup of butter, hash browns, cheddar cheese, sour cream, soup, onion, and salt in a large mixing bowl. Whisk until well-mixed.

Step 2: Apply cooking spray in a 9×11 or 9×13-inch casserole dish or pan.

Step 3: Transfer the hash browns mixture into the greased baking pan. Lightly spread the mixture using a spoon or spatula.

Step 4: Combine 1/4 cup of melted butter and Cron Flakes in a small mixing bowl. Whisk until well-mixed then spread the mixture on top of the hash browns mixture layer.

Step 5: Place inside the preheated oven and bake for 45 minutes at 350 degrees or until the top part turns light brown.

Step 6: Remove from the oven and let it sit on a wire rack to cool a little. Serve and enjoy!

Southern Hash Brown Casserole – Sticky, Filling, And DELICIOUS!

Rebecca Anyone looking for the best side dish to go with your breakfast, lunch, or dinner? This is your lucky day! For those potato lovers that are reading this, this is… Main Dish Recipes Southern Hash Brown Casserole – Sticky, Filling, And DELICIOUS! European Print This
Nutrition facts: 200 calories 20 grams fat
Rating: 5.0/5
( 1 voted )

Ingredients

  • 1 bag(s)frozen hash brown potatoes (2 lbs)
  • 2 cups shredded cheddar cheese
  • 1/2 cup melted butter
  • 1 1/2 teaspoon salt
  • 1 small onion (chopped)
  • 1 can(s)cream of chicken or cream of mushroom soup, 10.75 oz.
  • 1 cup sour cream
  • 2 cups crushed Corn Flakes
  • 1/4 cup melted butter

Instructions

Step 1: Combine 1/2 cup of butter, hash browns, cheddar cheese, sour cream, soup, onion, and salt in a large mixing bowl. Whisk until well-mixed.

Step 2: Apply cooking spray in a 9x11 or 9x13-inch casserole dish or pan.

Step 3: Transfer the hash browns mixture into the greased baking pan. Lightly spread the mixture using a spoon or spatula.

Step 4: Combine 1/4 cup of melted butter and Cron Flakes in a small mixing bowl. Whisk until well-mixed then spread the mixture on top of the hash browns mixture layer.

Step 5: Place inside the preheated oven and bake for 45 minutes at 350 degrees or until the top part turns light brown.

Step 6: Remove from the oven and let it sit on a wire rack to cool a little. Serve and enjoy!

June 30, 2020 0 comment
0 FacebookTwitterPinterestEmail
Main Dish Recipes

Chewy Peanut Butter Brownies

by Rebecca June 30, 2020
written by Rebecca

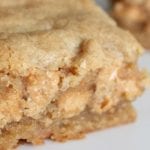
This just might be one of the best brownies I have ever tasted! The flavor, as well as the aroma of this amazing recipe, will make you want to eat a lot! I am not kidding. I am proud to admit that I eat a lot of these amazing treats that’s why I gain “a little” weight these past few weeks. It’s worth it though! I just can’t get enough of these little pieces of heaven-baked brownies. The best part of the baking process is when you open the oven after 30 minutes or so and that perfect smell of the brownies comes out to fill your home with that delicious aroma! It’s the best! Remember to close your windows to contain that awesome smell! Don’t forget about the first bite. My first reaction was both amazing and proud! I could not believe that I pulled it off! I know you will too!

INGREDIENTS

1/2 cup peanut butter

1/3 cup margarine, softened

2/3 cup white sugar

1/2 cup packed brown sugar

2 eggs

1/2 teaspoon vanilla extract

1 cup all-purpose flour

1 teaspoon baking powder

1/4 teaspoon salt

How to make Chewy Peanut Butter Brownies

Step 1: Ready the oven and preheat to 350 degrees F or 175 degrees C.

Step 2: Apply cooking spray in a 9×9-inch baking pan.

Step 3: Add margarine and peanut butter in a medium bowl. Whisk until creamy.

Step 4: Add in the brown sugar, eggs, vanilla, and white sugar a little at a time into the margarine and peanut butter mixture. Whisk until well-blended.

Step 5: In the same bowl, add in baking powder, flour, and salt. Mix until all the ingredients are well combined.

Step 6: Place inside the oven and cook for 30 to 35 minutes or until the top of the brownies bounce back when poked suing a finger.

Step 7: Remove from the oven and let it sit on a wire rack.

Step 8: Slice into 16 squares. Serve and enjoy!

Chewy Peanut Butter Brownies

Rebecca This just might be one of the best brownies I have ever tasted! The flavor, as well as the aroma of this amazing recipe, will make you want to eat… Main Dish Recipes Chewy Peanut Butter Brownies European Print This
Nutrition facts: 200 calories 20 grams fat
Rating: 5.0/5
( 1 voted )

Ingredients

  • 1/2 cup peanut butter
  • 1/3 cup margarine, softened
  • 2/3 cup white sugar
  • 1/2 cup packed brown sugar
  • 2 eggs
  • 1/2 teaspoon vanilla extract
  • 1 cup all-purpose flour
  • 1 teaspoon baking powder
  • 1/4 teaspoon salt

Instructions

Step 1: Ready the oven and preheat to 350 degrees F or 175 degrees C.

Step 2: Apply cooking spray in a 9x9-inch baking pan.

Step 3: Add margarine and peanut butter in a medium bowl. Whisk until creamy.

Step 4: Add in the brown sugar, eggs, vanilla, and white sugar a little at a time into the margarine and peanut butter mixture. Whisk until well-blended.

Step 5: In the same bowl, add in baking powder, flour, and salt. Mix until all the ingredients are well combined.

Step 6: Place inside the oven and cook for 30 to 35 minutes or until the top of the brownies bounce back when poked suing a finger.

Step 7: Remove from the oven and let it sit on a wire rack.

Step 8: Slice into 16 squares. Serve and enjoy!

June 30, 2020 0 comment
0 FacebookTwitterPinterestEmail
Main Dish Recipes

Enchanted Sour Cream Chicken Enchiladas

by Rebecca June 30, 2020
written by Rebecca

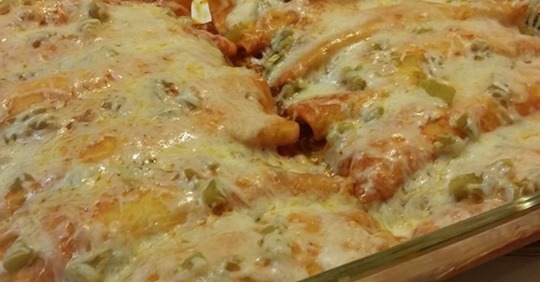
These little treats will become one of your favorite foods to eat on movie nights or pretty much every time you want to sit, eat, and chill! Aside from the easy steps to make these awesome wonders, it also has a very minimal set of ingredients. My friends and I always make these Chicken Enchiladas whenever they come to visit the house. Have a nice cold beer and company, that’s what we always want right? I think it’s time to call your friends and have one of those awesome girl nights! Enjoy!

INGREDIENTS

2 cups cubed cooked chicken

1 cup sour cream

⅛ teaspoon salt

1 pinch ground black pepper

½ cup vegetable oil for frying

12 (5 inch)s corn tortillas

1 (4 ounces) can chop green chilies, drained

2 cups shredded Monterey Jack cheese

How to make Enchanted Sour Cream Chicken Enchiladas

Step 1: Ready the oven and preheat to 400 degrees F or 200 degrees C.

Step 2: APply cooking spray in a 9×13-inch baking dish.

Step 3: In a large mixing bowl, add chicken, salt, pepper, and sour cream. Mix until well-blended then set it aside.

Step 4: Place a skillet on the stove and turn the heat to medium-high. Add oil and wait for it to become hot.

Step 5: Add in the corn tortillas one at a time into the hot oil. Cook for 10 seconds each or until it becomes soft.

Step 6: Scoop the chicken mixture and put it inside each of the tortillas. Spread the mixture into the middle and roll it into a cylinder-like shape.

Step 7: Put the tortillas in the greased baking dish. Arrange them side down.

Step 8: Sprinkle green chilis on top of the tortillas followed by the shredded Monterey Jack Cheese.

Step 9: Place the baking dish inside the preheated oven and bake for 12 to 15 minutes or until the cheese is completely melted and the enchiladas are cooked through.

Step 10: Remove from the oven. Serve hot and enjoy!

Enchanted Sour Cream Chicken Enchiladas

Rebecca These little treats will become one of your favorite foods to eat on movie nights or pretty much every time you want to sit, eat, and chill! Aside from the… Main Dish Recipes Enchanted Sour Cream Chicken Enchiladas European Print This
Nutrition facts: 200 calories 20 grams fat
Rating: 5.0/5
( 1 voted )

Ingredients

  • 2 cups cubed cooked chicken
  • 1 cup sour cream
  • ⅛ teaspoon salt
  • 1 pinch ground black pepper
  • ½ cup vegetable oil for frying
  • 12 (5 inch)s corn tortillas
  • 1 (4 ounces) can chop green chilies, drained
  • 2 cups shredded Monterey Jack cheese

Instructions

Step 1: Ready the oven and preheat to 400 degrees F or 200 degrees C.

Step 2: APply cooking spray in a 9x13-inch baking dish.

Step 3: In a large mixing bowl, add chicken, salt, pepper, and sour cream. Mix until well-blended then set it aside.

Step 4: Place a skillet on the stove and turn the heat to medium-high. Add oil and wait for it to become hot.

Step 5: Add in the corn tortillas one at a time into the hot oil. Cook for 10 seconds each or until it becomes soft.

Step 6: Scoop the chicken mixture and put it inside each of the tortillas. Spread the mixture into the middle and roll it into a cylinder-like shape.

Step 7: Put the tortillas in the greased baking dish. Arrange them side down.

Step 8: Sprinkle green chilis on top of the tortillas followed by the shredded Monterey Jack Cheese.

Step 9: Place the baking dish inside the preheated oven and bake for 12 to 15 minutes or until the cheese is completely melted and the enchiladas are cooked through.

Step 10: Remove from the oven. Serve hot and enjoy!

June 30, 2020 0 comment
0 FacebookTwitterPinterestEmail
Main Dish Recipes

One-Pot Black Pepper Chicken

by Rebecca June 30, 2020
written by Rebecca

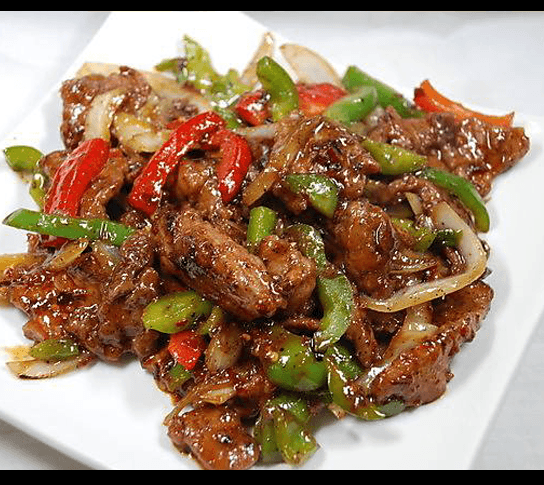
A genius Chinese dish that’s great to serve alongside some brown rice or quinoa. Experience all the flavors bursting inside your mouth, the tender, soft Black Pepper Chicken that is packed with Asian flavoring. This is an easy and quick one-pot dinner idea that your family will surely enjoy. Satisfy your taste buds with this amazing, simple dish that is ready in less than an hour. This One-Pot Black Pepper Chicken is super flavorful, with a bit of a kick, and a crowd favorite wherever I go. A must-try!

INGREDIENTS

1-½ pounds boneless, skinless chicken breasts, cut into cubes

1 red bell pepper, seeded and cut into strips

1-½ teaspoons freshly ground black pepper

1-inch fresh ginger root, peeled and finely chopped

2 cloves garlic, peeled and finely minced

3 tablespoons lite soy sauce, divided (optional, coconut Aminos, Tamari or Bragg Liquid Aminos)

3 tablespoons white vinegar, divided

1 tablespoon coconut palm sugar or honey

2 tablespoons olive oil

How to make One-Pot Black Pepper Chicken

Step 1: In a medium-sized bowl, whisk half of the soy sauce, half of the vinegar, and the sweetener.

Step 2: Add in the chicken and toss to thoroughly coat. Chill the marinate for 30 minutes in the fridge.

Step 3: Heat oil to a skillet over medium-low heat. Sautee the garlic and ginger for 30 seconds or until the garlic is golden and fragrant. Make sure not to burn the garlic.

Step 4: Add in the marinated chicken including the sauce and cook for about 3 minutes.

Step 5: Place the bell pepper strips along with the remaining soy sauce and vinegar into the pan. Add in some pepper, stir, and continue cooking for about 10 minutes or until the peppers have softened and the chicken is thoroughly cooked.

Step 6: Once done, remove from heat and serve immediately. Spoon your cooked chicken over or alongside some brown rice or quinoa.

One-Pot Black Pepper Chicken

Rebecca A genius Chinese dish that’s great to serve alongside some brown rice or quinoa. Experience all the flavors bursting inside your mouth, the tender, soft Black Pepper Chicken that is… Main Dish Recipes One-Pot Black Pepper Chicken European Print This
Nutrition facts: 200 calories 20 grams fat
Rating: 4.7/5
( 3 voted )

Ingredients

  • 1-½ pounds boneless, skinless chicken breasts, cut into cubes
  • 1 red bell pepper, seeded and cut into strips
  • 1-½ teaspoons freshly ground black pepper
  • 1-inch fresh ginger root, peeled and finely chopped
  • 2 cloves garlic, peeled and finely minced
  • 3 tablespoons lite soy sauce, divided (optional, coconut Aminos, Tamari or Bragg Liquid Aminos)
  • 3 tablespoons white vinegar, divided
  • 1 tablespoon coconut palm sugar or honey
  • 2 tablespoons olive oil

Instructions

Step 1: In a medium-sized bowl, whisk half of the soy sauce, half of the vinegar, and the sweetener.

Step 2: Add in the chicken and toss to thoroughly coat. Chill the marinate for 30 minutes in the fridge.

Step 3: Heat oil to a skillet over medium-low heat. Sautee the garlic and ginger for 30 seconds or until the garlic is golden and fragrant. Make sure not to burn the garlic.

Step 4: Add in the marinated chicken including the sauce and cook for about 3 minutes.

Step 5: Place the bell pepper strips along with the remaining soy sauce and vinegar into the pan. Add in some pepper, stir, and continue cooking for about 10 minutes or until the peppers have softened and the chicken is thoroughly cooked.

Step 6: Once done, remove from heat and serve immediately. Spoon your cooked chicken over or alongside some brown rice or quinoa.

June 30, 2020 0 comment
0 FacebookTwitterPinterestEmail
Main Dish Recipes

Lazy Cake Cookies

by Rebecca June 30, 2020
written by Rebecca

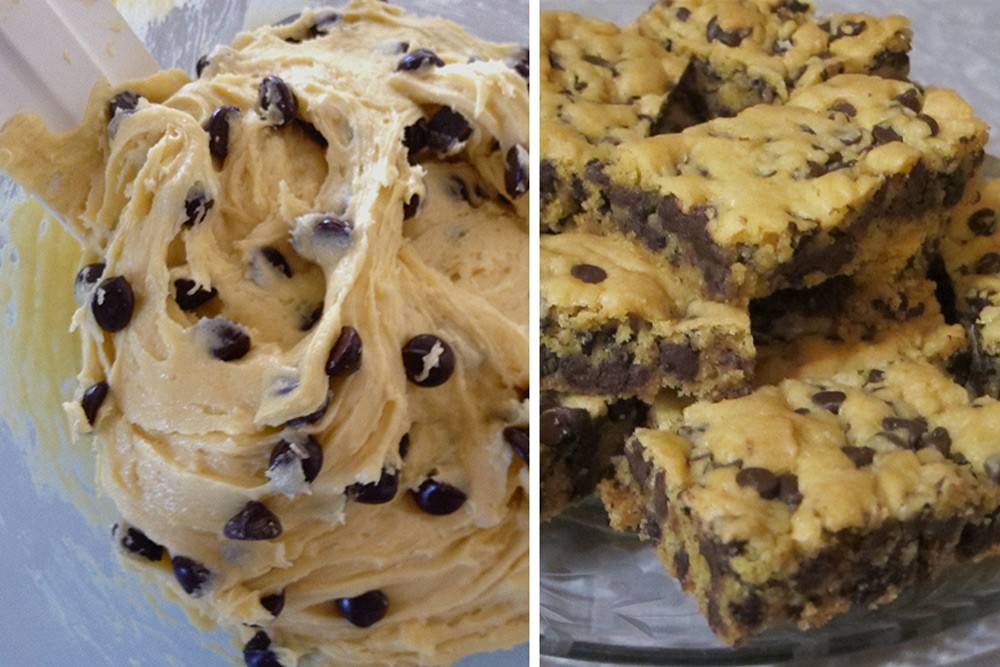
I love to bake, especially during special occasions. I am so much into cookies and one of my favorites is this super thick and soft Lazy Cake Cookies. First, because it is the easiest to make, the ingredients are readily available, and it is darn delicious. Like those melt-in-your-mouth cookies, we often buy from the store. To tell you honestly, I’ve never bought a single cookie when I learned how to make them myself. Whenever I am craving, I bake and for me, it does change how I looked at those store-bought cookies I spent too much money on before. I am hats off to the pâtissier who spend their time making the incredible and delicious baked goods we enjoy so much. For me, baking is another form of art and it is not for everyone. So going back to these amazing Lazy Cake Cookies. The recipe is so simple, a no-fuss, and I think this is a base recipe for a cookie. You can use any flavor of cake mix, even maybe crushed candies to mix in, and it is still gonna be a hit. I haven’t tried it though but you are very much welcome to be as creative. I like it simple so I stick to this recipe but maybe one day I’ll be able to get out of my comfort zone.

INGREDIENTS

1 box yellow or white cake mix

2 eggs, beaten

1 stick melted butter

2 chocolate chips

How to make Lazy Cake Cookies

Step 1: Prepare the oven. Preheat it to 350 degrees.

Step 2: Grease a 9 x 13-inch pan with cooking spray so it will be easier to cut and clean up.

Step 3: In a bowl, mix the cake mix, beaten eggs, and melted butter until thoroughly combined. Then, fold in the chocolate chips.

Step 4: Place inside the preheated oven and bake for about 20 minutes.

Lazy Cake Cookies

Rebecca I love to bake, especially during special occasions. I am so much into cookies and one of my favorites is this super thick and soft Lazy Cake Cookies. First, because… Main Dish Recipes Lazy Cake Cookies European Print This
Nutrition facts: 200 calories 20 grams fat
Rating: 3.1/5
( 11 voted )

Ingredients

  • 1 box yellow or white cake mix
  • 2 eggs, beaten
  • 1 stick melted butter
  • 2 chocolate chips

Instructions

Step 1: Prepare the oven. Preheat it to 350 degrees.

Step 2: Grease a 9 x 13-inch pan with cooking spray so it will be easier to cut and clean up.

Step 3: In a bowl, mix the cake mix, beaten eggs, and melted butter until thoroughly combined. Then, fold in the chocolate chips.

Step 4: Place inside the preheated oven and bake for about 20 minutes.

June 30, 2020 0 comment
0 FacebookTwitterPinterestEmail
Main Dish Recipes

Incredibly Delicious Italian Cream Cake

by Rebecca June 29, 2020
written by Rebecca

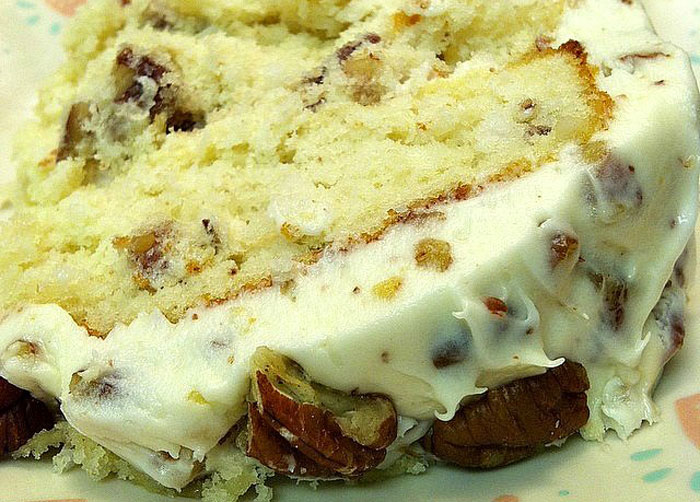
My new favorite! This incredibly delicious Italian Cream Cake is made with buttermilk, coconut, pecans, and a hint of rum. It is something that I have never tried before, but gosh this cake is awesome, soft with cream cheese coconut frosting and chopped nuts on top. The loveliest cake I’ve made so far.

INGREDIENTS

1 (16.25-ounce) package white cake mix (I used Duncan Hines Moist Deluxe)

3 large eggs

1 1/4 cups buttermilk

1/4 cup vegetable oil

1 (3 1/2-ounce) can flaked coconut

2/3 cup chopped pecans, toasted

3 tablespoons Rum (optional)

For the Cream Cheese Frosting

1 (8-ounce) package cream cheese, softened

1/2 cup butter or margarine, softened

1 (16-ounce) package powdered sugar

2 teaspoons vanilla extract

1 cup chopped pecans, toasted

How to make Italian Cream Cake

Step 1: Beat the cake mix, eggs, buttermilk, and oil with an electric mixer at medium speed for 2 minutes.

Step 2: Then, stir in the coconut and pecans.

Step 3: Pour the batter into 3 greased and floured 9-inch round cake pans.

Step 4: Place inside the oven and bake for 15 to 17 minutes at 350 degrees. Insert a toothpick in the middle, once it comes out clean the cake is done.

Step 5: Remove the pans from the oven and cool the cakes in the pan for 10 minutes. Then, transfer on wire racks to cool completely.

Step 6: If desired, sprinkle the cake layers evenly with rum and it rest for 10 minutes.

Step 7: Evenly spread the cream cheese frosting between the layers of each cake, on top and sides as well. Place inside the fridge to chill for 2 hours before serving. Slice and enjoy it!

To make the Cream Cheese Frosting

Step 1: Use an electric mixer to beat the cream cheese and butter at media speed until smooth.

Step 2: Slowly add in the powdered sugar while beating continuously until light and fluffy.

Step 3: Mix in the vanilla and pecans.

Step 4: Frost the cooled cake with the cream cheese frosting.

Rebecca My new favorite! This incredibly delicious Italian Cream Cake is made with buttermilk, coconut, pecans, and a hint of rum. It is something that I have never tried before, but… Main Dish Recipes Incredibly Delicious Italian Cream Cake European Print This
Nutrition facts: 200 calories 20 grams fat
Rating: 5.0/5
( 1 voted )

Ingredients

  • 1 (16.25-ounce) package white cake mix (I used Duncan Hines Moist Deluxe)
  • 3 large eggs
  • 1 1/4 cups buttermilk
  • 1/4 cup vegetable oil
  • 1 (3 1/2-ounce) can flaked coconut
  • 2/3 cup chopped pecans, toasted
  • 3 tablespoons Rum (optional)
  • For the Cream Cheese Frosting
  • 1 (8-ounce) package cream cheese, softened
  • 1/2 cup butter or margarine, softened
  • 1 (16-ounce) package powdered sugar
  • 2 teaspoons vanilla extract
  • 1 cup chopped pecans, toasted

Instructions

Step 1: Beat the cake mix, eggs, buttermilk, and oil with an electric mixer at medium speed for 2 minutes.

Step 2: Then, stir in the coconut and pecans.

Step 3: Pour the batter into 3 greased and floured 9-inch round cake pans.

Step 4: Place inside the oven and bake for 15 to 17 minutes at 350 degrees. Insert a toothpick in the middle, once it comes out clean the cake is done.

Step 5: Remove the pans from the oven and cool the cakes in the pan for 10 minutes. Then, transfer on wire racks to cool completely.

Step 6: If desired, sprinkle the cake layers evenly with rum and it rest for 10 minutes.

Step 7: Evenly spread the cream cheese frosting between the layers of each cake, on top and sides as well. Place inside the fridge to chill for 2 hours before serving. Slice and enjoy it!

To make the Cream Cheese Frosting

Step 1: Use an electric mixer to beat the cream cheese and butter at media speed until smooth.

Step 2: Slowly add in the powdered sugar while beating continuously until light and fluffy.

Step 3: Mix in the vanilla and pecans.

Step 4: Frost the cooled cake with the cream cheese frosting.

June 29, 2020 0 comment
0 FacebookTwitterPinterestEmail
Main Dish Recipes

Sausage Cheese Balls

by Rebecca June 29, 2020
written by Rebecca

These sausage cheese balls are the perfect appetizer. Always a hit every time I make them. They are not only great to serve on special occasions but during dinner with family or friends. I will not wait until there is an occasion to serve something delicious. These little balls are pretty easy to put together and are quick to make so I can serve them whenever. The ingredients are readily available, simple, you might even have them in your pantry. The kids can help, too. Ask them to form the mixture into balls, I bet they will dive into doing it fast! This can be a fun cooking activity for kids. I’m sure they will be glad to help.

Sausage Cheese Balls are not your regular meatballs, they are a little bready in a good way, unique in texture but are deliciously addictive! I get overwhelming compliments whenever I make these beauties. Most of them asked for the recipe, that is why I thought why not share it with everybody? This recipe is a no-fuss, I’m sure you’ll be able to follow through and make these amazing Sausage Cheese Balls. It’s worth sharing!

INGREDIENTS

2 pounds pork sausage

1 1/2 cups buttermilk baking mix

16 ounces shredded Cheddar cheese

1/2 cup diced onion

1/2 cup chopped celery

1/2 teaspoon garlic powder

How to make Sausage Cheese Balls

Step 1: Prepare the oven. Preheat it to 375 degrees F or 190 degrees C.

Step 2: In a bowl, combine the sausage, baking mix, cheddar cheese, onion, celery, and garlic powder. Mix until incorporated.

Step 3: Scoop and form an inch ball. Do this for the rest of the mixture.

Step 4: Place the balls half-inch apart on an ungreased cookie sheet.

Step 5: Put in the preheated oven and bake for 15 minutes or until golden brown. Once done, remove from the oven and transfer to a serving plate. Serve immediately. Enjoy!

Sausage Cheese Balls

Rebecca These sausage cheese balls are the perfect appetizer. Always a hit every time I make them. They are not only great to serve on special occasions but during dinner with… Main Dish Recipes Sausage Cheese Balls European Print This
Nutrition facts: 200 calories 20 grams fat
Rating: 5.0/5
( 1 voted )

Ingredients

  • 2 pounds pork sausage
  • 1 1/2 cups buttermilk baking mix
  • 16 ounces shredded Cheddar cheese
  • 1/2 cup diced onion
  • 1/2 cup chopped celery
  • 1/2 teaspoon garlic powder

Instructions

Step 1: Prepare the oven. Preheat it to 375 degrees F or 190 degrees C.

Step 2: In a bowl, combine the sausage, baking mix, cheddar cheese, onion, celery, and garlic powder. Mix until incorporated.

Step 3: Scoop and form an inch ball. Do this for the rest of the mixture.

Step 4: Place the balls half-inch apart on an ungreased cookie sheet.

Step 5: Put in the preheated oven and bake for 15 minutes or until golden brown. Once done, remove from the oven and transfer to a serving plate. Serve immediately. Enjoy!

June 29, 2020 0 comment
0 FacebookTwitterPinterestEmail
Main Dish Recipes

BEEF STROGANOFF CASSEROLE

by Rebecca June 29, 2020
written by Rebecca

Like many other casseroles that I’ve already shared, this Beef Stroganoff is on top of my list. It is the ultimate comfort food, the next level stroganoff recipe that I love so much! The ingredients are the perfect combination and are cooked excellently. It has a rich flavorful sauce that no one can resist. This is a modest dish, turned out inexpensive. You can use some leftover roast beef, chopped leftover steak, or even store-bought pre-cooked roast. The noodles are soaked into the creamy and gravy sauce for more flavor. Just make sure that the noodles are only slightly undercooked so it’ll not get mushy once baked. This casserole is to die for! Every bite is crazy delicious, the flavors bursting to leave your mouth watery and you asking for more. And this stroganoff casserole is very easy to make, you just need to mix the ingredients, pour in a casserole dish, and bake until hot and bubbly. Top with some parmesan cheese and serve.

INGREDIENTS

1 can cream of mushroom soup

1 can cream of chicken soup

8 oz of sour cream

12 oz of uncooked egg noodles

1 pound of ground beef

⅓ cup of grated parmesan cheese

HOW TO MAKE BEEF STROGANOFF CASSEROLE

Step 1: Prepare the oven. Preheat it to 350 degrees.

Step 2: Brown the ground beef in a skillet and drain off any excess fat.

Step 3: Follow the package instruction to cook the noodles. Once cooked, drain the water.

Step 4: Put the mushroom soup, chicken soup, and sour cream in a bowl. Mix until well combined.

Step 5: Add in the beef and noodles.

Step 6: Pour the mixture into a 10 x 13-inch casserole dish. Use a foil to cover the casserole.

Step 7: Place inside the preheated oven and bake for 30 to 40 minutes.

Step 8: Remove from the oven and sprinkle with parmesan cheese. Serve immediately. Enjoy!

BEEF STROGANOFF CASSEROLE

Rebecca Like many other casseroles that I’ve already shared, this Beef Stroganoff is on top of my list. It is the ultimate comfort food, the next level stroganoff recipe that I… Main Dish Recipes BEEF STROGANOFF CASSEROLE European Print This
Nutrition facts: 200 calories 20 grams fat
Rating: 4.8/5
( 4 voted )

Ingredients

  • 1 can cream of mushroom soup
  • 1 can cream of chicken soup
  • 8 oz of sour cream
  • 12 oz of uncooked egg noodles
  • 1 pound of ground beef
  • ⅓ cup of grated parmesan cheese

Instructions

Step 1: Prepare the oven. Preheat it to 350 degrees.

Step 2: Brown the ground beef in a skillet and drain off any excess fat.

Step 3: Follow the package instruction to cook the noodles. Once cooked, drain the water.

Step 4: Put the mushroom soup, chicken soup, and sour cream in a bowl. Mix until well combined.

Step 5: Add in the beef and noodles.

Step 6: Pour the mixture into a 10 x 13-inch casserole dish. Use a foil to cover the casserole.

Step 7: Place inside the preheated oven and bake for 30 to 40 minutes.

Step 8: Remove from the oven and sprinkle with parmesan cheese. Serve immediately. Enjoy!

June 29, 2020 0 comment
0 FacebookTwitterPinterestEmail
Main Dish Recipes

Moist pineapple cake topped with cream cheese frosting

by Rebecca June 29, 2020
written by Rebecca

Are you looking for a delicious dessert for tonight? You came to the right page! I highly recommend you try this amazing cake. I was amazed the first time I tried this. I never thought it would be so good. I love a cake that is moist inside hence, this Moist Pineapple Cake! My best friend introduced me to this recipe. I am so glad that she taught me how to this. I was hesitant at first to even try it because I didn’t think it has potential but I was wrong to even think that! By the way, make sure to refrigerate the cake for at least 1 hour to cool it. It is best to eat cold and drink a hot nice coffee. I can imagine how you would react while eating this cake and sipping your hot coffee. Give this a try, I promise it won’t disappoint you.

INGREDIENTS

FOR THE CAKE

1 can(s) crushed pineapple in 100% juice (large can – 20oz) – do not drain

2 cups all-purpose flour

1 1/2 cups sugar

2 large eggs

2 teaspoons baking soda

FOR THE FROSTING

8 oz cream cheese, room temp

1 stick unsalted butter, room temp

2 cups powdered sugar

1 teaspoon vanilla

2 tablespoons milk

How to make Moist Pineapple Cake Topped With Cream Cheese Frosting

Step 1: Ready the oven and preheat to 350 degrees.

Step 2: Combine all the cake ingredients in a large mixing bowl. Mix using your clean hand. You can also use a beater.

Step 3: Transfer the mixture into the prepared 9×13 glass pan.

Step 4: Place inside the oven and bake for 30 to 40 minutes or until the color turns golden brown.

Step 5: Meanwhile, in a mixing bowl, combine all the ingredients for the frosting. Whisk until well-mixed.

Step 6: Remove the baking dish from the oven and let it sit on a wire rack to cool.

Step 7: Spread the frosting all over the cake

Step 8: Place the cake inside the fridge to cool.

Step 9: Serve cold. Enjoy!

Moist pineapple cake topped with cream cheese frosting

Rebecca Are you looking for a delicious dessert for tonight? You came to the right page! I highly recommend you try this amazing cake. I was amazed the first time I… Main Dish Recipes Moist pineapple cake topped with cream cheese frosting European Print This
Nutrition facts: 200 calories 20 grams fat
Rating: 3.6/5
( 11 voted )

Ingredients

  • FOR THE CAKE
  • 1 can(s) crushed pineapple in 100% juice (large can – 20oz) – do not drain
  • 2 cups all-purpose flour
  • 1 1/2 cups sugar
  • 2 large eggs
  • 2 teaspoons baking soda
  • FOR THE FROSTING
  • 8 oz cream cheese, room temp
  • 1 stick unsalted butter, room temp
  • 2 cups powdered sugar
  • 1 teaspoon vanilla
  • 2 tablespoons milk

Instructions

Step 1: Ready the oven and preheat to 350 degrees.

Step 2: Combine all the cake ingredients in a large mixing bowl. Mix using your clean hand. You can also use a beater.

Step 3: Transfer the mixture into the prepared 9x13 glass pan.

Step 4: Place inside the oven and bake for 30 to 40 minutes or until the color turns golden brown.

Step 5: Meanwhile, in a mixing bowl, combine all the ingredients for the frosting. Whisk until well-mixed.

Step 6: Remove the baking dish from the oven and let it sit on a wire rack to cool.

Step 7: Spread the frosting all over the cake

Step 8: Place the cake inside the fridge to cool.

Step 9: Serve cold. Enjoy!

June 29, 2020 0 comment
0 FacebookTwitterPinterestEmail
Newer Posts
Older Posts

Popular Posts

  • 1

    Crispy Crunchy Parmesan Potatoes

    March 21, 2020
  • 2

    CROCK POT SMOTHERED PORK CHOPS

    March 21, 2020
  • Facebook
  • Twitter

@2019 - All Right Reserved.


Back To Top