Cook it once
  • Home
  • Privacy Policy
  • Recipes
    • KETO
    • LC
    • WW
  • Tips
  • Contact
Cook it once
  • Home
  • Privacy Policy
  • Recipes
    • KETO
    • LC
    • WW
  • Tips
  • Contact
Category:

Main Dish Recipes

Main Dish Recipes

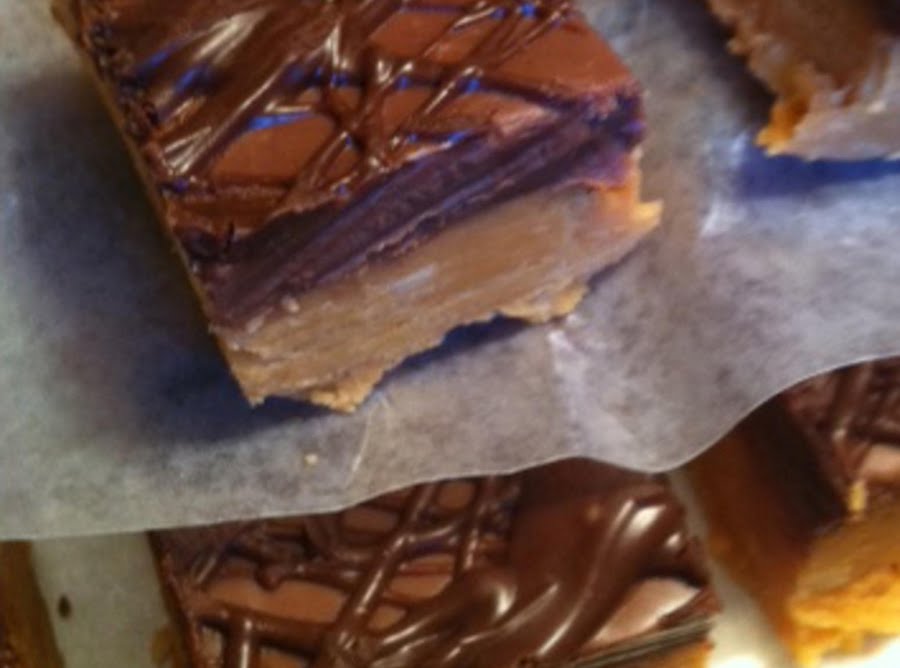
Easy Butterfinger Candy

by Rebecca July 1, 2020
written by Rebecca

I will never get tired of saying this; This is the best treat ever! I always brag this recipe to my friends because it’s the only dessert I know how to bake. Just kidding, it is just simply amazing. It is not a complicated dessert to make. You just need 4 basic ingredients to make these sweet little treats. On top of that, there are only 8 easy steps that you need to follow and you are bound to perfection! My kids love these. Every time I go to the kitchen to get dessert, they always say that they wish that when I open the fridge, they will see these Butterfinger Candies! Being the great mom that I am, I always make them happy and excited by making these. I hope you get to try this. I promise you that it won’t disappoint you. Once you decide to prepare this amazing recipe, you are in for a treat! What are you waiting for? It’s time to prove if what I’m saying is true! Enjoy!

INGREDIENTS

1 lb candy corn (16 oz)

1 jar(s) peanut butter, crunchy (18 oz)

1/2 pkg semi-sweet chocolate chips (about 6 oz)

1 tablespoon vegetable shortening

How to make Easy Butterfinger Candy

Step 1: Place the candy corn in a microwavable bowl. Place it inside the microwave and turn the setting to high to melt the candy corn. Stir every 30 seconds until it is completely melted.

Step 2: Add in the 1 jar of crunchy peanut butter into the melted candy corn and stir until combined.

Step 3: Line a 9×13-inch pan.

Step 4: Transfer the mixture into the lined pan and press it to flatten the mixture. Let it cool for 5 minutes or more.

Step 5: In another microwavable bowl, put 1 tablespoon of shortening and chocolate chips. Place inside the microwave and allow it to melt.

Step 6: Spread the melted chocolate chip mixture on top of the candy mixture. Let it sit for 5 minutes or more until it is set or put it inside the fridge.

Step 7: Slice it into square cuts.

Step 8: Drizzle melted milk over the cake. Serve and enjoy!

Easy Butterfinger Candy

Rebecca I will never get tired of saying this; This is the best treat ever! I always brag this recipe to my friends because it’s the only dessert I know how… Main Dish Recipes Easy Butterfinger Candy European Print This
Nutrition facts: 200 calories 20 grams fat
Rating: 5.0/5
( 1 voted )

Ingredients

  • 1 lb candy corn (16 oz)
  • 1 jar(s) peanut butter, crunchy (18 oz)
  • 1/2 pkg semi-sweet chocolate chips (about 6 oz)
  • 1 tablespoon vegetable shortening

Instructions

Step 1: Place the candy corn in a microwavable bowl. Place it inside the microwave and turn the setting to high to melt the candy corn. Stir every 30 seconds until it is completely melted.

Step 2: Add in the 1 jar of crunchy peanut butter into the melted candy corn and stir until combined.

Step 3: Line a 9x13-inch pan.

Step 4: Transfer the mixture into the lined pan and press it to flatten the mixture. Let it cool for 5 minutes or more.

Step 5: In another microwavable bowl, put 1 tablespoon of shortening and chocolate chips. Place inside the microwave and allow it to melt.

Step 6: Spread the melted chocolate chip mixture on top of the candy mixture. Let it sit for 5 minutes or more until it is set or put it inside the fridge.

Step 7: Slice it into square cuts.

Step 8: Drizzle melted milk over the cake. Serve and enjoy!
July 1, 2020 0 comment
0 FacebookTwitterPinterestEmail
Main Dish Recipes

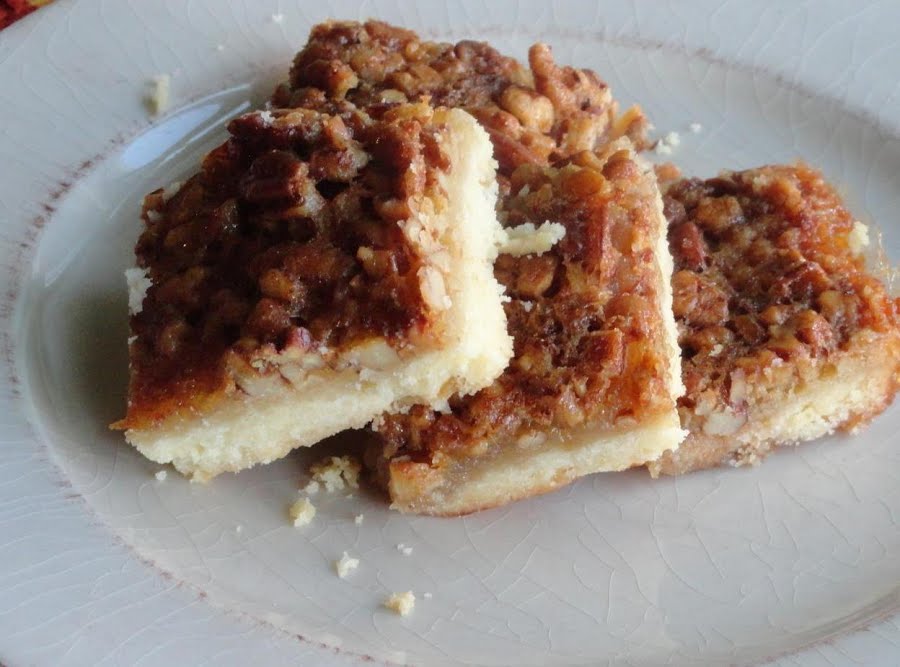
Pecan Pie Bars

by Rebecca July 1, 2020
written by Rebecca

These Pecan Pie Bars are the most requested during the fall. The smell of the pecans when baking lift my soul and every bite is simply heaven! A perfect little gift to give to family and friends. Super delicious with a thick buttery shortbread crust topped with perfectly sweet filling and crunchy pecans. Literally, all the pecans you can eat with your hands! A no-fuss, and the easiest way to enjoy your favorite pecan pie.

INGREDIENTS

3 cups all-purpose flour

1/2 cup white sugar

1/2 teaspoon salt

1 cup butter

4 eggs

1 1/2 cups light corn syrup

1 1/2 cups white sugar

3 tablespoons butter

1 1/2 teaspoons vanilla extract

2 1/2 cups chopped pecans ( i leave some of them whole)

How to make Pecan Pie Bars

Step 1: Prepare the oven. Preheat it to 350 degrees.

Step 2: With parchment paper, line a 10 x 15-inch jelly roll pan but leave a little overhang so it will be easier to lift the bars out. Then, lightly grease the pan with Pam.

Step 2: Stir the flour, half a cup of sugar, and salt in a large bowl. Add in a cup of butter and mix until the mixture resembles coarse crumbs. Transfer the mixture into the prepared pan and press it firmly on the bottom of the pan.

Step 3: Place inside the preheated oven and bake for 20 minutes.

Step 4: Meanwhile, prepare the filling by mixing the eggs, corn syrup, 1 1/2 cups sugar, 3 tablespoons of butter, and vanilla in a large bowl. Stir until smooth. Then, add in the chopped pecans and mix well.

Step 5: Once the crust comes out of the oven, evenly spread the filling over the crust.

Step 6: Place it bake in the oven and bake for 25 minutes more or until set. Once done, remove from the oven and loosen the edges using a knife. Transfer on a wire rack to completely cool before slicing into bars.

Pecan Pie Bars

Rebecca These Pecan Pie Bars are the most requested during the fall. The smell of the pecans when baking lift my soul and every bite is simply heaven! A perfect little… Main Dish Recipes Pecan Pie Bars European Print This
Nutrition facts: 200 calories 20 grams fat
Rating: 5.0/5
( 1 voted )

Ingredients

  • 3 cups all-purpose flour
  • 1/2 cup white sugar
  • 1/2 teaspoon salt
  • 1 cup butter
  • 4 eggs
  • 1 1/2 cups light corn syrup
  • 1 1/2 cups white sugar
  • 3 tablespoons butter
  • 1 1/2 teaspoons vanilla extract
  • 2 1/2 cups chopped pecans ( i leave some of them whole)

Instructions

Step 1: Prepare the oven. Preheat it to 350 degrees.

Step 2: With parchment paper, line a 10 x 15-inch jelly roll pan but leave a little overhang so it will be easier to lift the bars out. Then, lightly grease the pan with Pam.

Step 2: Stir the flour, half a cup of sugar, and salt in a large bowl. Add in a cup of butter and mix until the mixture resembles coarse crumbs. Transfer the mixture into the prepared pan and press it firmly on the bottom of the pan.

Step 3: Place inside the preheated oven and bake for 20 minutes.

Step 4: Meanwhile, prepare the filling by mixing the eggs, corn syrup, 1 1/2 cups sugar, 3 tablespoons of butter, and vanilla in a large bowl. Stir until smooth. Then, add in the chopped pecans and mix well.

Step 5: Once the crust comes out of the oven, evenly spread the filling over the crust.

Step 6: Place it bake in the oven and bake for 25 minutes more or until set. Once done, remove from the oven and loosen the edges using a knife. Transfer on a wire rack to completely cool before slicing into bars.

July 1, 2020 0 comment
0 FacebookTwitterPinterestEmail
Main Dish Recipes

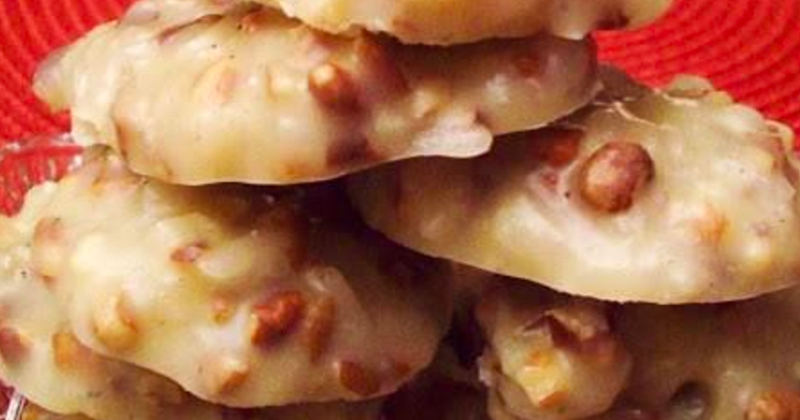
No-Bake Pecan Coconut Praline Cookies

by Rebecca July 1, 2020
written by Rebecca

Hello Tuesday! Another day, another amazing no-bake recipe. I know, I am obsessed with no-bake! This Pecan Coconut Praline cookie is the easiest and quickest to make. If you want something sweet but don’t want to spend so much time and effort, well, this is the perfect recipe. My go-to whenever I want something quick, easy, and sweet. I have been hoarding no-bake recipes for quite some time now and I can tell you that they are amazing! Super easy to put together even my kids can do it! Just like this recipe for a no-bake coconut praline cookies. With just a few simple ingredients and a little to no effort, you can be able to make these nutty sweets. All you need is sugar, evaporated milk, butter, chopped pecans, and grated coconut. Mix them well and just let it sit until hardened. And wallah! You have yourself some sweet, nutty, perfectly textured, and delicious pralines that you and your family, especially your kids will enjoy! So simple, so easy, and wonderfully textured with a praline-ey, pecan-ey, and coconut-ey taste. What else can you ask for?

INGREDIENTS

2½ cups sugar

½ cup evaporated milk

½ cup of corn syrup

½ cup butter

1 teaspoon vanilla

2-2½ cups chopped pecans

2½ cups grated coconut

How to make No-Bake Pecan Coconut Praline Cookies

Step 1: Set aside the pecans, coconut, and vanilla.

Step 2: In a large saucepan, mix the sugar, evaporated milk, corn syrup, and butter. Then, bring to a roiling boil, for about 3 minutes.

Step 3: Once boiling, remove from the heat and stir in the pecans, coconut, and vanilla.

Step 4: Mix for about 4 minutes until incorporated.

Step 5: Place a spoonful of batter on wax paper. Do this for the rest. And let them sit until hardened.

Step 6: Once hardened, remove the praline cookies from the wax paper. Serve and enjoy!

No-Bake Pecan Coconut Praline Cookies

Rebecca Hello Tuesday! Another day, another amazing no-bake recipe. I know, I am obsessed with no-bake! This Pecan Coconut Praline cookie is the easiest and quickest to make. If you want… Main Dish Recipes No-Bake Pecan Coconut Praline Cookies European Print This
Nutrition facts: 200 calories 20 grams fat
Rating: 5.0/5
( 2 voted )

Ingredients

  • 2½ cups sugar
  • ½ cup evaporated milk
  • ½ cup of corn syrup
  • ½ cup butter
  • 1 teaspoon vanilla
  • 2-2½ cups chopped pecans
  • 2½ cups grated coconut

Instructions

Step 1: Set aside the pecans, coconut, and vanilla.

Step 2: In a large saucepan, mix the sugar, evaporated milk, corn syrup, and butter. Then, bring to a roiling boil, for about 3 minutes.

Step 3: Once boiling, remove from the heat and stir in the pecans, coconut, and vanilla.

Step 4: Mix for about 4 minutes until incorporated.

Step 5: Place a spoonful of batter on wax paper. Do this for the rest. And let them sit until hardened.

Step 6: Once hardened, remove the praline cookies from the wax paper. Serve and enjoy!

July 1, 2020 0 comment
0 FacebookTwitterPinterestEmail
Main Dish Recipes

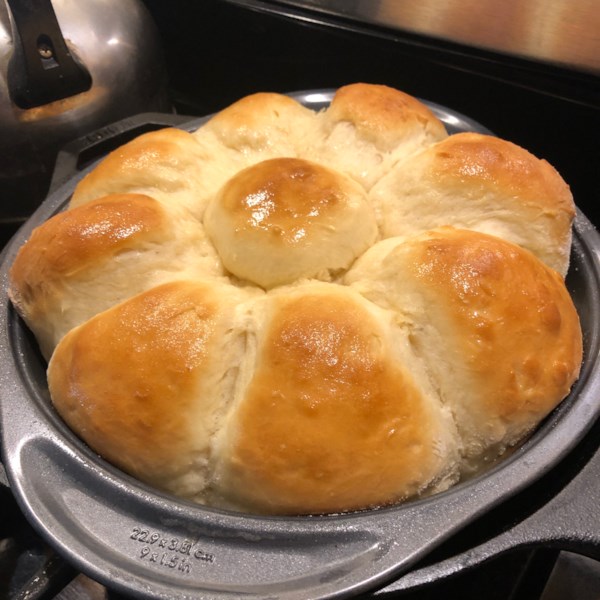
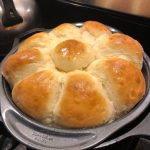
Old-Fashioned Soft and Buttery Yeast Rolls

by Rebecca July 1, 2020
written by Rebecca

These lovely rolls are to die for! Soft, buttery, and oh so darn delicious!

INGREDIENTS

1 pkg active dry yeast (equals 2 1/4 tsp)

1/4 cup warm water

1/3 cup white, granulated sugar

1/4 cup butter, softened

1 teaspoon salt

1 cup hot milk

1 egg, lightly beaten

4 1/2 cups sifted all-purpose flour

2 tablespoons butter, melted (for brushing rolls)

How to make Old-Fashioned Soft and Buttery Yeast Rolls

Step 1: In a large bowl with very warm water, sprinkle the yeast over. Stir it until the yeast is dissolved. Leave it for about 10 minutes to foam.

Step 2: In a separate bowl with hot milk in it, combine the sugar, 1/4 cup of butter, and salt. Stir until the sugar is dissolved and the butter is melted. Let the mixture cool to 105 to 115 degrees.

Step 3: Pour the milk mixture over to the yeast. Mix the egg and beat in 4 cups of flour, a cup of time. This will form a soft dough. And dust a pastry cloth using the rest of the remaining half a cup of flour.

Step 4: With the remaining flour, dust your hands and flour your pastry cloth. And lightly knead the dough for about 5 minutes.

Step 5: Transfer the dough into a warm, buttered bowl and turn greased side up. Cover the dough and place in a warm area to rise for about 1 1/4 to 1 1/2 hours until doubled in size.

Step 6: Remove the cover and punch the dough down and knead on a lightly floured pastry cloth for about 4 to 5 minutes. Use a little flour as possible to dust your hands as the dough will be sticky, or else the rolls will be as feathery light.

Step 7: Cut the dough with a large knife into four pieces. Then, cut them more into four pieces or maybe just pinch off a small piece of dough and roll them into about 1 3/4-inch diameter round balls. When rolling the dough, pull sides down and under so to shape a roll. Place them in neat rows on a well-buttered 13 x 9 x 2-inch pan bottom side down.

Step 8: Let them rise until doubled in a warm place, covered, for about 30 to 40 minutes. Then, brush the tops with some melted butter.

Step 9: Place inside the oven and bake in 375 degrees F for 18 to 20 minutes or until the top is nicely browned. Cooking time still depends on ion your oven, if yours runs hot, then adjust the temperature accordingly.

Step 10: This is optional but highly recommended. If you want a buttery soft crust, you can brush or bathe more melted butter on top once the rolls are out from the oven. The butter will sizzle down both sides and bottom of the rolls.

Old-Fashioned Soft and Buttery Yeast Rolls

Rebecca These lovely rolls are to die for! Soft, buttery, and oh so darn delicious! INGREDIENTS 1 pkg active dry yeast (equals 2 1/4 tsp) 1/4 cup warm water 1/3 cup… Main Dish Recipes Old-Fashioned Soft and Buttery Yeast Rolls European Print This
Nutrition facts: 200 calories 20 grams fat
Rating: 5.0/5
( 1 voted )

Ingredients

  • 1 pkg active dry yeast (equals 2 1/4 tsp)
  • 1/4 cup warm water
  • 1/3 cup white, granulated sugar
  • 1/4 cup butter, softened
  • 1 teaspoon salt
  • 1 cup hot milk
  • 1 egg, lightly beaten
  • 4 1/2 cups sifted all-purpose flour
  • 2 tablespoons butter, melted (for brushing rolls)

Instructions

Step 1: In a large bowl with very warm water, sprinkle the yeast over. Stir it until the yeast is dissolved. Leave it for about 10 minutes to foam.

Step 2: In a separate bowl with hot milk in it, combine the sugar, 1/4 cup of butter, and salt. Stir until the sugar is dissolved and the butter is melted. Let the mixture cool to 105 to 115 degrees.

Step 3: Pour the milk mixture over to the yeast. Mix the egg and beat in 4 cups of flour, a cup of time. This will form a soft dough. And dust a pastry cloth using the rest of the remaining half a cup of flour.

Step 4: With the remaining flour, dust your hands and flour your pastry cloth. And lightly knead the dough for about 5 minutes.

Step 5: Transfer the dough into a warm, buttered bowl and turn greased side up. Cover the dough and place in a warm area to rise for about 1 1/4 to 1 1/2 hours until doubled in size.

Step 6: Remove the cover and punch the dough down and knead on a lightly floured pastry cloth for about 4 to 5 minutes. Use a little flour as possible to dust your hands as the dough will be sticky, or else the rolls will be as feathery light.

Step 7: Cut the dough with a large knife into four pieces. Then, cut them more into four pieces or maybe just pinch off a small piece of dough and roll them into about 1 3/4-inch diameter round balls. When rolling the dough, pull sides down and under so to shape a roll. Place them in neat rows on a well-buttered 13 x 9 x 2-inch pan bottom side down.

Step 8: Let them rise until doubled in a warm place, covered, for about 30 to 40 minutes. Then, brush the tops with some melted butter.

Step 9: Place inside the oven and bake in 375 degrees F for 18 to 20 minutes or until the top is nicely browned. Cooking time still depends on ion your oven, if yours runs hot, then adjust the temperature accordingly.

Step 10: This is optional but highly recommended. If you want a buttery soft crust, you can brush or bathe more melted butter on top once the rolls are out from the oven. The butter will sizzle down both sides and bottom of the rolls.

July 1, 2020 0 comment
0 FacebookTwitterPinterestEmail
Main Dish Recipes

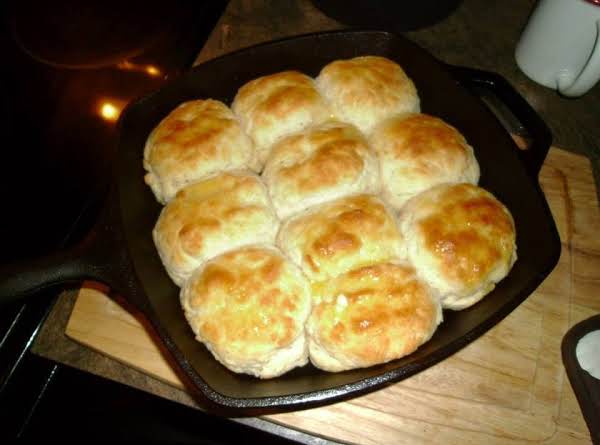
Southern Buttermilk Biscuits

by Rebecca July 1, 2020
written by Rebecca

Another Southern pride! This Buttermilk Biscuit is love! When I stayed with my Grandma she made me this almost every day. Well, because I am obsessed with it! I stayed with her for just a couple of days and I found my new favorite! So before I traveled back, my granny, sweet as she always will be, taught me how to make this super delicious Southern Buttermilk Biscuits. I made it first as a welcome me back party with friends and they loved it! And this has become the most requested. It is a huge hit every time! This is a winner recipe, a keeper. And I can testify that this recipe is the best! Thank you to my lovely granny for sharing her recipe with me. If not because of her I will not be able to taste such amazing biscuits. Try it, I know you’ll love them too!

INGREDIENTS

3 cups self-rising flour

1/2 cup lard

pinch sugar

3/4 cup buttermilk, possibly more

2 tablespoons melted butter

How to make Southern Buttermilk Biscuits

Step 1: Prepare the oven. Preheat it to 425 degrees.

Step 2: Use a pastry blender or two forks to cut the lard into the flour.

Step 3: Add in a pinch of sugar and just enough buttermilk to make the dough soft.

Step 4: Knead the dough but do not over-knead as it will end up like a tough biscuit. Knead it just enough until smooth.

Step 5: Dust your hands with flour, then, pinch off a little of the dough and roll into a ball.

Step 6: In a greased iron skillet or pan, press the dough to lightly flatten each ball.

Step 7: Place the skillet or pan inside the preheated oven and bake for about 18 to 18 minutes. Once done, remove from the oven and brush the top with melted butter. Serve immediately. Enjoy!

Rebecca Another Southern pride! This Buttermilk Biscuit is love! When I stayed with my Grandma she made me this almost every day. Well, because I am obsessed with it! I stayed… Main Dish Recipes Southern Buttermilk Biscuits European Print This
Nutrition facts: 200 calories 20 grams fat
Rating: 5.0/5
( 1 voted )

Ingredients

  • 3 cups self-rising flour
  • 1/2 cup lard
  • pinch sugar
  • 3/4 cup buttermilk, possibly more
  • 2 tablespoons melted butter

Instructions

Step 1: Prepare the oven. Preheat it to 425 degrees.

Step 2: Use a pastry blender or two forks to cut the lard into the flour.

Step 3: Add in a pinch of sugar and just enough buttermilk to make the dough soft.

Step 4: Knead the dough but do not over-knead as it will end up like a tough biscuit. Knead it just enough until smooth.

Step 5: Dust your hands with flour, then, pinch off a little of the dough and roll into a ball.

Step 6: In a greased iron skillet or pan, press the dough to lightly flatten each ball.

Step 7: Place the skillet or pan inside the preheated oven and bake for about 18 to 18 minutes. Once done, remove from the oven and brush the top with melted butter. Serve immediately. Enjoy!

July 1, 2020 0 comment
0 FacebookTwitterPinterestEmail
Main Dish Recipes

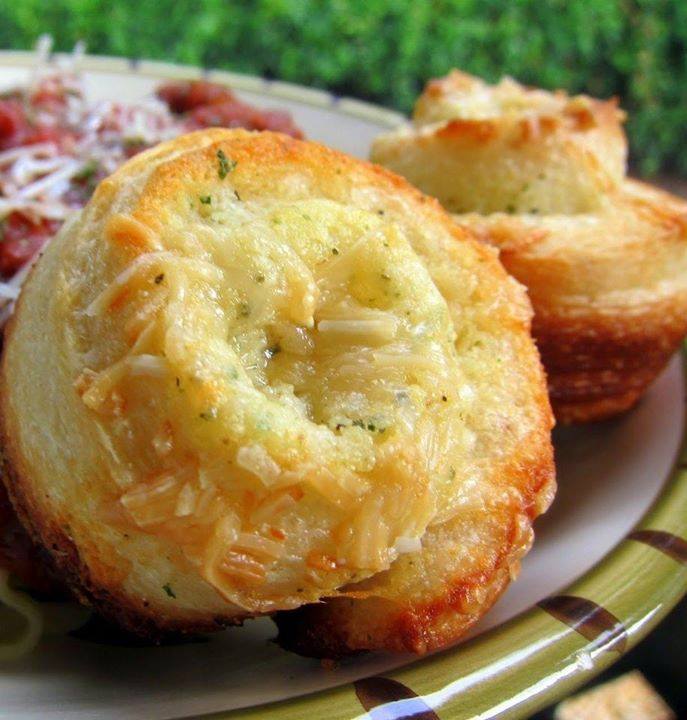
Garlic Roll Cupcakes

by Rebecca July 1, 2020
written by Rebecca

These tasty rolls are the greatest thing ever! Super easy to make and require only a few simple ingredients; refrigerated breadsticks, softened butter, garlic bread seasoning, grated and shredded parmesan. The garlic seasoning, butter, and cheeses combine so well! These yummies bring me back to my childhood days, where the kitchen smells like garlic from when my mom baked these delicious garlic roll cupcakes. The aroma, the taste, it’s simply irresistible! I can eat the whole thing all by myself but it’s always good to share so you might wanna bake mo if you are having guests this week or today! These steps will guide you to perfection. Just make sure to follow them correctly and do not skip a step for great results! I just remembered, last week, my cousin and her kids visited our home. It so happened that I had baked plenty of these amazing cupcakes so everyone got a bite or two. It was so fun. We had not seen each other in a long time and these cupcakes reminded us of the good old days. It’s even more perfect now because we have kids to pass on the recipe to!

INGREDIENTS

1 can (12 counts) refrigerated breadsticks

1/4 cup butter, softened

1 teaspoon garlic bread seasoning (Johnny’s)

1 tablespoon grated parmesan cheese

shredded parmesan cheese

HOW TO MAKE GARLIC ROLL CUPCAKES

Step 1: Prepare the oven. Preheat it to 400 degrees.

Step 2: Grease a 12-cup muffin pan by lightly spraying them with cooking spray.

Step 3: In a bowl, combine the softened butter, garlic bread seasoning, and a tablespoon of grated parmesan.

Step 4: Meanwhile, unroll the breadsticks and separate them into individual breadsticks.

Step 5: Generously spread the garlic butter over the breadsticks.

Step 6: Roll each breadstick up and transfer them into the prepared muffin pan.

Step 7: Sprinkle the rolled breadsticks with shredded or grated parmesan.

Step 8: Place inside the preheated oven and bake for about 12 to 15 minutes or until golden brown.

Garlic Roll Cupcakes

Rebecca These tasty rolls are the greatest thing ever! Super easy to make and require only a few simple ingredients; refrigerated breadsticks, softened butter, garlic bread seasoning, grated and shredded parmesan.… Main Dish Recipes Garlic Roll Cupcakes European Print This
Nutrition facts: 200 calories 20 grams fat
Rating: 5.0/5
( 1 voted )

Ingredients

  • 1 can (12 counts) refrigerated breadsticks
  • 1/4 cup butter, softened
  • 1 teaspoon garlic bread seasoning (Johnny’s)
  • 1 tablespoon grated parmesan cheese
  • shredded parmesan cheese

Instructions

Step 1: Prepare the oven. Preheat it to 400 degrees.

Step 2: Grease a 12-cup muffin pan by lightly spraying them with cooking spray.

Step 3: In a bowl, combine the softened butter, garlic bread seasoning, and a tablespoon of grated parmesan.

Step 4: Meanwhile, unroll the breadsticks and separate them into individual breadsticks.

Step 5: Generously spread the garlic butter over the breadsticks.

Step 6: Roll each breadstick up and transfer them into the prepared muffin pan.

Step 7: Sprinkle the rolled breadsticks with shredded or grated parmesan.

Step 8: Place inside the preheated oven and bake for about 12 to 15 minutes or until golden brown.

July 1, 2020 0 comment
0 FacebookTwitterPinterestEmail
Main Dish Recipes

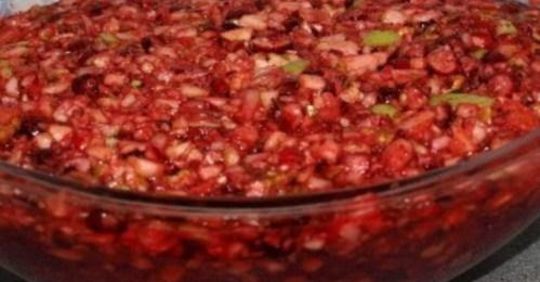
Cranberry Salad

by Rebecca July 1, 2020
written by Rebecca

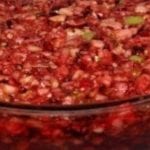
Summer all year long! This Cranberry salad is so refreshing, with all the summer fruit you can put into; cranberries, oranges, apples, and pineapples. It is especially great when chilled for a day or maybe two so the flavors will mix well. One heck of a fruit-infused salad for dessert, ah I want more and more of this! It is a guilt-free dessert yet still satisfy my sweet cravings. It is not an occasional salad for me, I make it whenever I want to. Because why not? It is super easy to put together, the ingredients are readily available, and it is simply fabulous! This creamy salad is a real treat and is always present on any occasion or holiday. This is a heavenly sweet salad that is full of different flavors and textures, perfect for an easy and festive side dish.

INGREDIENTS

1 pkg cranberries (found in the produce section)

2 large oranges, peeled and cut into chunks

2 large apples, unpeeled, chopped (i use granny smith)

2 cups pecans, chopped

1 pkg strawberry jello

1/2 cup celery, chopped fine

peel from one orange, grated

1/2 cup crushed pineapple

2 cups of sugar

HOW TO MAKE CRANBERRY SALAD

Step 1: First, you need to wash the cranberries and drain them well after washing.

Step 2: Then, peel the oranges and cut them into chunks. Slice the apples, leave the peel on, and chop. Do the same with the pecans and celery.

Step 3: Combine the cranberries, oranges, apples, pecans, celery, orange peel, crushed pineapple, and sugar in a large serving bowl. For the pineapple, you don’t have to drain them anymore, just include the juice. Mix well until incorporated.

Step 4: Mix the Jell-O with a cup of boiling water. Dissolve and then pour it over the fruit mixture.

Step 5: Place inside the fridge, covered, for at least a day or two so the flavors will mix well.

Cranberry Salad

Rebecca Summer all year long! This Cranberry salad is so refreshing, with all the summer fruit you can put into; cranberries, oranges, apples, and pineapples. It is especially great when chilled… Main Dish Recipes Cranberry Salad European Print This
Nutrition facts: 200 calories 20 grams fat
Rating: 5.0/5
( 1 voted )

Ingredients

  • 1 pkg cranberries (found in the produce section)
  • 2 large oranges, peeled and cut into chunks
  • 2 large apples, unpeeled, chopped (i use granny smith)
  • 2 cups pecans, chopped
  • 1 pkg strawberry jello
  • 1/2 cup celery, chopped fine
  • peel from one orange, grated
  • 1/2 cup crushed pineapple
  • 2 cups of sugar

Instructions

Step 1: First, you need to wash the cranberries and drain them well after washing.

Step 2: Then, peel the oranges and cut them into chunks. Slice the apples, leave the peel on, and chop. Do the same with the pecans and celery.

Step 3: Combine the cranberries, oranges, apples, pecans, celery, orange peel, crushed pineapple, and sugar in a large serving bowl. For the pineapple, you don’t have to drain them anymore, just include the juice. Mix well until incorporated.

Step 4: Mix the Jell-O with a cup of boiling water. Dissolve and then pour it over the fruit mixture.

Step 5: Place inside the fridge, covered, for at least a day or two so the flavors will mix well.

July 1, 2020 0 comment
0 FacebookTwitterPinterestEmail
Main Dish Recipes

Country Apple Fritter Bread – Now You Can Have Your Fritters And Sweet Bread At The Same Time!

by Rebecca June 30, 2020
written by Rebecca

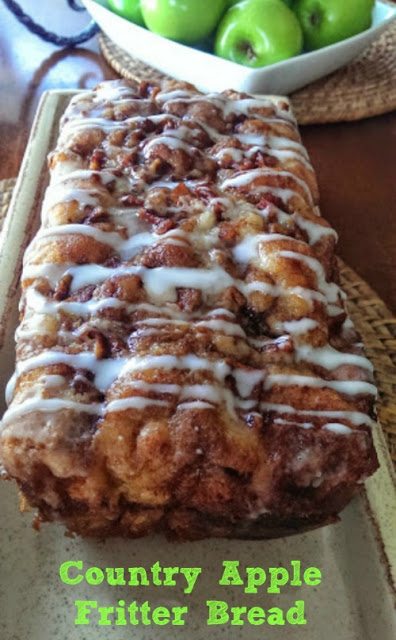
I love this fluffy, buttery, white cake bread loaded with chunks of juicy apples. It smells great, tastes super amazing, and oh so irresistible. It has layers of brown sugar and swirled cinnamon inside and out. Now you can have fritters and sweet bread at the same time. It’s to die for!

INGREDIENTS

1/3 cup Light brown sugar

1 teaspoon ground cinnamon

2/3 cup White sugar

1/2 cup butter, softened

2 Eggs

1 1/2 teaspoons Vanilla extract

1 1/2 cups all-purpose flour

1 3/4 teaspoons Baking powder

1/2 cup Milk

2 Apples, peeled and chopped (any kind)

To make the Old-Fashioned Creme Glaze

1/2 cup Powdered sugar

2 tablespoons of milk or cream

How to make Country Apple Fritter Bread

Step 1: Prepare the oven. Preheat it to 350 degrees F. Grease a 9 x 5-inch loaf pan with non-stick spray, or you can line the pan with a foil and spray with non-stick spray for easy slicing.

Step 2: In a bowl, mix the brown sugar and cinnamon. Set aside.

Step 3: Put the sugar and butter in a medium-sized bowl. Beat with an electric mixer until creamy and smooth.

Step 4: Beat in the eggs one at a time until incorporated, then, add in the vanilla extract.

Step 5: In another bowl, whisk the flour and baking powder until combined. Add into the creamed butter and mix until well blended.

Step 6: Then, stir the milk into the batter until smooth.

Step 7: Carefully pour the half of the batter into the prepared loaf pan. Add in half of the apple mixture, followed by half of the brown sugar and cinnamon mixture.

Step 8: And gently pat the apple mixture into the batter.

Step 9: Pour the leftover batter over the apple layer, then top it with the remaining apple mixture, brown sugar, and cinnamon mixture.

Step 10: Again gently pat the apples into the batter, and using a knife or spoon, swirl the brown sugar mixture through the apples.

Step 11: Place inside the preheated oven and bake for about 50 to 60 minutes. Once the toothpick inserted in the middle comes out clean, it is done.

Step 12: For the glaze, combine the powdered sugar, milk, or cream until incorporated.

Step 13: One the cake is cooled for about 15 minutes, drizzle the cake with the glaze.

Country Apple Fritter Bread – Now You Can Have Your Fritters And Sweet Bread At The Same Time!

Rebecca I love this fluffy, buttery, white cake bread loaded with chunks of juicy apples. It smells great, tastes super amazing, and oh so irresistible. It has layers of brown sugar… Main Dish Recipes Country Apple Fritter Bread – Now You Can Have Your Fritters And Sweet Bread At The Same Time! European Print This
Nutrition facts: 200 calories 20 grams fat
Rating: 5.0/5
( 1 voted )

Ingredients

  • 1/3 cup Light brown sugar
  • 1 teaspoon ground cinnamon
  • 2/3 cup White sugar
  • 1/2 cup butter, softened
  • 2 Eggs
  • 1 1/2 teaspoons Vanilla extract
  • 1 1/2 cups all-purpose flour
  • 1 3/4 teaspoons Baking powder
  • 1/2 cup Milk
  • 2 Apples, peeled and chopped (any kind)
  • To make the Old-Fashioned Creme Glaze
  • 1/2 cup Powdered sugar
  • 2 tablespoons of milk or cream

Instructions

Step 1: Prepare the oven. Preheat it to 350 degrees F. Grease a 9 x 5-inch loaf pan with non-stick spray, or you can line the pan with a foil and spray with non-stick spray for easy slicing.

Step 2: In a bowl, mix the brown sugar and cinnamon. Set aside.

Step 3: Put the sugar and butter in a medium-sized bowl. Beat with an electric mixer until creamy and smooth.

Step 4: Beat in the eggs one at a time until incorporated, then, add in the vanilla extract.

Step 5: In another bowl, whisk the flour and baking powder until combined. Add into the creamed butter and mix until well blended.

Step 6: Then, stir the milk into the batter until smooth.

Step 7: Carefully pour the half of the batter into the prepared loaf pan. Add in half of the apple mixture, followed by half of the brown sugar and cinnamon mixture.

Step 8: And gently pat the apple mixture into the batter.

Step 9: Pour the leftover batter over the apple layer, then top it with the remaining apple mixture, brown sugar, and cinnamon mixture.

Step 10: Again gently pat the apples into the batter, and using a knife or spoon, swirl the brown sugar mixture through the apples.

Step 11: Place inside the preheated oven and bake for about 50 to 60 minutes. Once the toothpick inserted in the middle comes out clean, it is done.

Step 12: For the glaze, combine the powdered sugar, milk, or cream until incorporated.

Step 13: One the cake is cooled for about 15 minutes, drizzle the cake with the glaze.

June 30, 2020 0 comment
0 FacebookTwitterPinterestEmail
Main Dish Recipes

Arizona Sunshine Lemon Pie

by Rebecca June 30, 2020
written by Rebecca

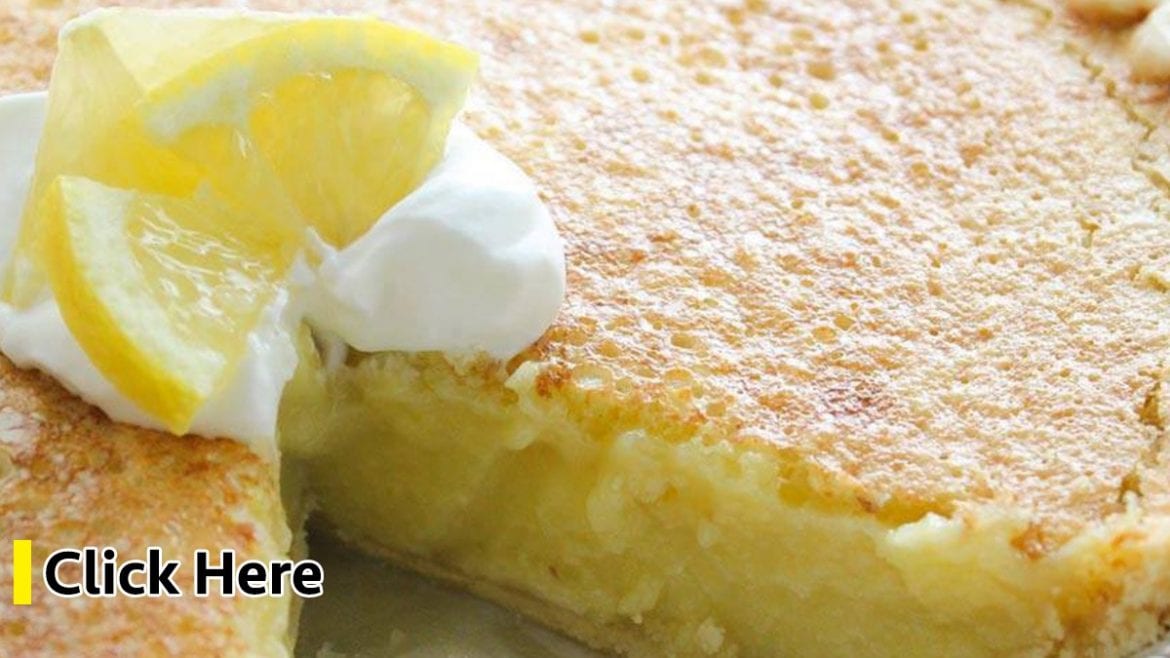
You re my sunshine, my only sunshine. Today is a good day! We are traveling to Arizona for the weekend. I am gonna get myself all the lemon I can get! Every time we are visiting Arizona, my heart leaps a beat. I love picking lemons, and the freshly picked lemons are the greatest! The smell, it’s so fresh, citrusy, kind of a summer vibe. And another amazing thing I love about lemons? None other than making them into a Lemon Pie. This Arizona Sunshine Lemon Pie is what I am crazy about. It’s pretty simple to make, plus the ingredients you need are readily available. And it’s cost-efficient too because you only gonna need simple ingredients; eggs, butter, vanilla, sugar, pie crust, and of course lemon. I am sure you already have these in your pantry. This lemon pie is to die for! The fresh, citrusy, tangy, zingy, and super delicious lemon pie you will ever taste! If you haven’t tried this before, you are missing out. This is a pretty straightforward recipe you can easily follow, so go get those lemons and make this today. I know you’ll love it!

INGREDIENTS

1 large lemon

4 eggs

1 stick melted butter

1 teaspoon vanilla

1½ cups sugar

1 unbaked pie crust

Whipped cream, optional

How to make Arizona Sunshine Lemon Pie

Step 1: Prepare the oven. Preheat it to 350 degrees.

Step 2: Cut the lemon into small pieces but leave the rind on.

Step 3: Puree the lemon pieces using a blender, along with the eggs, butter, vanilla, and sugar until creamy and smooth. The right consistent should be fairly runny.

Step 4: Pour the mixture into the pie crust.

Step 5: Place inside the preheated oven and bake for 40 minutes.

Step 6: If the pit crust becomes overly browned, use a foil to gently cover it.

Step: Once done, remove from the oven and slice. Serve with a dollop of fresh whipped cream. Enjoy!

Arizona Sunshine Lemon Pie

Rebecca You re my sunshine, my only sunshine. Today is a good day! We are traveling to Arizona for the weekend. I am gonna get myself all the lemon I can… Main Dish Recipes Arizona Sunshine Lemon Pie European Print This
Nutrition facts: 200 calories 20 grams fat
Rating: 4.3/5
( 3 voted )

Ingredients

  • 1 large lemon
  • 4 eggs
  • 1 stick melted butter
  • 1 teaspoon vanilla
  • 1½ cups sugar
  • 1 unbaked pie crust
  • Whipped cream, optional

Instructions

Step 1: Prepare the oven. Preheat it to 350 degrees.

Step 2: Cut the lemon into small pieces but leave the rind on.

Step 3: Puree the lemon pieces using a blender, along with the eggs, butter, vanilla, and sugar until creamy and smooth. The right consistent should be fairly runny.

Step 4: Pour the mixture into the pie crust.

Step 5: Place inside the preheated oven and bake for 40 minutes.

Step 6: If the pit crust becomes overly browned, use a foil to gently cover it.

Step: Once done, remove from the oven and slice. Serve with a dollop of fresh whipped cream. Enjoy!

June 30, 2020 0 comment
0 FacebookTwitterPinterestEmail
Main Dish Recipes

Old-Fashioned Potato Candy

by Rebecca June 30, 2020
written by Rebecca

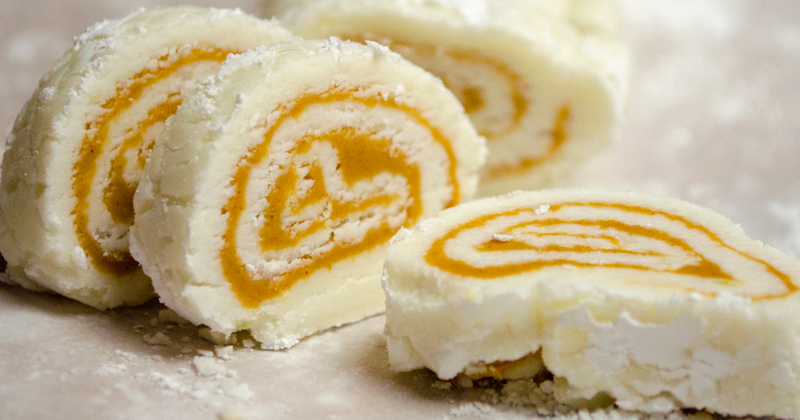
I’ve never heard about this Potato Candy until the weekend before. It’s a no-bake, no-fuss, 4 ingredient candy that has been around for ages! And yet I had no idea what it was. Rolling my eyes in dismay. It’s made of powdered sugar, mashed potato, peanut butter, and milk. It’s irresistibly good, sweet, and fascinating! It instantly melted my heart. I’m in love!

INGREDIENTS

6 cups powdered sugar, plus more if needed

1/2 cup russet potato, mashed and cooled (about 1 large potato)

1/3 cup creamy peanut butter

1 tablespoon milk

1 teaspoon vanilla extract

1/8 teaspoon salt

How to make Old-Fashioned Potato Candy

Step 1: Put the mashed potato, milk, vanilla, and salt in a large bowl and beat using an election mixer on medium speed for about 2 minutes.

Step 2: Add in the powdered sugar, a cup at a time, and mix until a dough is formed. Once you already added in 6 cups of sugar but still need more, add in tablespoon increments. Consistency should be slightly thick than a cookie dough.

Step 3: Make a ball out of the dough and dust it with some powdered sugar. Roll out the dough on a sheet of wax paper or parchment paper about a 1/8-inch thick rectangle. Then, cut the dough to 10 x 12-inches.

Step 4: Sprinkle some more powdered sugar over the dough and put another parchment paper on top. Carefully invert the rectangular dough and remove the paper you used to roll it out.

Step 5: Evenly spread the peanut butter over the dough. Then, roll it tightly jelly-roll style, long-side to long-side with the parchment paper as your guide. Wrap with parchment paper and place inside the freezer for an hour.

Step 6: Remove from the freezer and cut the dough into 1/4-inch thick slices. Serve and enjoy! For the leftover candies, you can store them in an airtight container inside the fridge.

Old-Fashioned Potato Candy

Rebecca I’ve never heard about this Potato Candy until the weekend before. It’s a no-bake, no-fuss, 4 ingredient candy that has been around for ages! And yet I had no idea… Main Dish Recipes Old-Fashioned Potato Candy European Print This
Nutrition facts: 200 calories 20 grams fat
Rating: 5.0/5
( 1 voted )

Ingredients

  • 6 cups powdered sugar, plus more if needed
  • 1/2 cup russet potato, mashed and cooled (about 1 large potato)
  • 1/3 cup creamy peanut butter
  • 1 tablespoon milk
  • 1 teaspoon vanilla extract
  • 1/8 teaspoon salt

Instructions

Step 1: Put the mashed potato, milk, vanilla, and salt in a large bowl and beat using an election mixer on medium speed for about 2 minutes.

Step 2: Add in the powdered sugar, a cup at a time, and mix until a dough is formed. Once you already added in 6 cups of sugar but still need more, add in tablespoon increments. Consistency should be slightly thick than a cookie dough.

Step 3: Make a ball out of the dough and dust it with some powdered sugar. Roll out the dough on a sheet of wax paper or parchment paper about a 1/8-inch thick rectangle. Then, cut the dough to 10 x 12-inches.

Step 4: Sprinkle some more powdered sugar over the dough and put another parchment paper on top. Carefully invert the rectangular dough and remove the paper you used to roll it out.

Step 5: Evenly spread the peanut butter over the dough. Then, roll it tightly jelly-roll style, long-side to long-side with the parchment paper as your guide. Wrap with parchment paper and place inside the freezer for an hour.

Step 6: Remove from the freezer and cut the dough into 1/4-inch thick slices. Serve and enjoy! For the leftover candies, you can store them in an airtight container inside the fridge.

June 30, 2020 0 comment
0 FacebookTwitterPinterestEmail
Newer Posts
Older Posts

Popular Posts

  • 1

    Crispy Crunchy Parmesan Potatoes

    March 21, 2020
  • 2

    CROCK POT SMOTHERED PORK CHOPS

    March 21, 2020
  • Facebook
  • Twitter

@2019 - All Right Reserved.


Back To Top