Cook it once
  • Home
  • Privacy Policy
  • Recipes
    • KETO
    • LC
    • WW
  • Tips
  • Contact
Cook it once
  • Home
  • Privacy Policy
  • Recipes
    • KETO
    • LC
    • WW
  • Tips
  • Contact
Category:

Main Dish Recipes

Main Dish Recipes

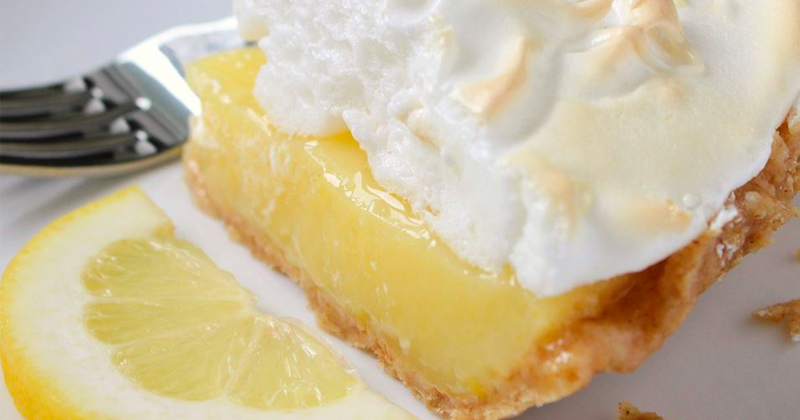
Grandma’s Lemon Meringue Pie

by Rebecca July 4, 2020
written by Rebecca

Grandma got it good with this creamy, lemony, and delicious Lemon Meringue Pie. Thickened without milk, just cornstarch, flour, and egg yolks. A simple and sweet pie that has been around for ages, yet, is still loved by many. This is an old recipe that has been passed around from generation to generation. A real keeper! Delightful and refreshing. I like it the most because of the fresh lemon juice and lemon zest that has been used. Tangy, sweet, and bursting with lemon flavor.

INGREDIENTS

1 cup white sugar

2 tablespoons all-purpose flour

3 tablespoons cornstarch

1/4 teaspoon salt

1 1/2 cups water

2 lemons, juiced and zest

2 tablespoons butter

4 egg yolks, beaten

1 (9 inches) pie crust, baked

4 egg whites

6 tablespoons white sugar

How to make Grandma’s Lemon Meringue Pie

Step 1: Prepare the oven. Preheat it to 350 degrees F or 175 degrees C.

Step 2: First, make the lemon filling. Whisk a cup of sugar, flour, cornstarch, and salt in a medium saucepan. Mix in the water, lemon juice, and lemon zest.

Step 2: Cook while stirring frequently over medium-high heat until the mixture comes to a boil. Then, stir in the butter.

Step 3: In a small bowl, place the egg yolks and slowly whisk in half a cup of the hot sugar mixture.

Step 4: Mix the egg yolk mixture into the remaining sugar mixture and continue to cook while stirring constantly until the mixture is thick.

Step 5: Once the mixture is thickened, remove the pan from the heat and carefully pour the filling into the baked pastry shell.

Step 6: Next, make the meringue. Put the egg whites in a large glass or metal bowl and whip until foamy. Slowly add in the sugar, whipping continuously until stiff peaks form.

Step 7: Evenly spread the meringue on top of the pie and crust sealing the edges.

Step 8: Place inside the preheated oven and bake for about 10 minutes or until the meringue is golden brown.

Grandma’s Lemon Meringue Pie

Rebecca Grandma got it good with this creamy, lemony, and delicious Lemon Meringue Pie. Thickened without milk, just cornstarch, flour, and egg yolks. A simple and sweet pie that has been… Main Dish Recipes Grandma’s Lemon Meringue Pie European Print This
Nutrition facts: 200 calories 20 grams fat
Rating: 5.0/5
( 1 voted )

Ingredients

  • 1 cup white sugar
  • 2 tablespoons all-purpose flour
  • 3 tablespoons cornstarch
  • 1/4 teaspoon salt
  • 1 1/2 cups water
  • 2 lemons, juiced and zest
  • 2 tablespoons butter
  • 4 egg yolks, beaten
  • 1 (9 inches) pie crust, baked
  • 4 egg whites
  • 6 tablespoons white sugar

Instructions

Step 1: Prepare the oven. Preheat it to 350 degrees F or 175 degrees C.

Step 2: First, make the lemon filling. Whisk a cup of sugar, flour, cornstarch, and salt in a medium saucepan. Mix in the water, lemon juice, and lemon zest.

Step 2: Cook while stirring frequently over medium-high heat until the mixture comes to a boil. Then, stir in the butter.

Step 3: In a small bowl, place the egg yolks and slowly whisk in half a cup of the hot sugar mixture.

Step 4: Mix the egg yolk mixture into the remaining sugar mixture and continue to cook while stirring constantly until the mixture is thick.

Step 5: Once the mixture is thickened, remove the pan from the heat and carefully pour the filling into the baked pastry shell.

Step 6: Next, make the meringue. Put the egg whites in a large glass or metal bowl and whip until foamy. Slowly add in the sugar, whipping continuously until stiff peaks form.

Step 7: Evenly spread the meringue on top of the pie and crust sealing the edges.

Step 8: Place inside the preheated oven and bake for about 10 minutes or until the meringue is golden brown.
July 4, 2020 0 comment
0 FacebookTwitterPinterestEmail
Main Dish Recipes

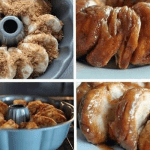
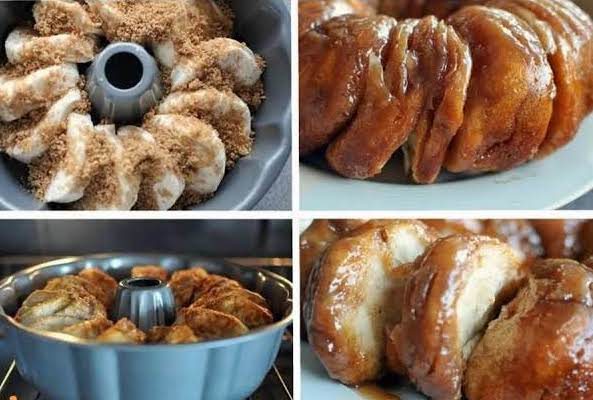
BISCUIT CINNAMON ROLLS

by Rebecca July 4, 2020
written by Rebecca

I love the smell of cinnamon. It wakes my senses up in the morning. When I am making this biscuit cinnamon rolls, the house ended up smelling amazing and the kids making their way to the kitchen, excited to have a piece of this delicious, flaky biscuit cinnamon rolls. My heart melts at first bite like I’m in love! This homemade wonder rolls flipped my world upside down, I’m head over heels, crazy addicted to the taste and smell of this biscuit cinnamon rolls. It is to die for!

INGREDIENTS

2 small tubes refrigerator buttermilk biscuits OR 1 tube Pillsbury Grands buttermilk biscuits

3 tablespoons butter, melted

1/2 cup pancake syrup (any brand you like, I used Mrs. Buttersworth)

1/3 cup packed light brown sugar

1/2 teaspoon cinnamon

1/4 cup chopped pecans, optional

1/4 cup chopped almonds, optional

HOW TO MAKE BISCUIT CINNAMON ROLLS

Step 1: Prepare the oven. Preheat it to 375 degrees. And grease a fluted pan by spraying it with a non-stick spray.

Step 2: In a small bowl, combine the melted butter and syrup. Set aside.

Step 3: Put the brown sugar, cinnamon, and nuts if using in a separate bowl. Mix well until combined.

Step 4: Place in the bottom of the pan just about half of the syrup mixture.

Step 5: Spray the top of the mixture with the brown sugar mixture.

Step 6: Layer the biscuits closely to each other with edges overlapping on the bottom of the pan to form a ring.

Step 7: Drizzle the remaining syrup and sprinkle the sugar mixture over the top.

Step 8: Place inside the oven and bake for about 20 to 25 minutes or until golden brown. Once done, let the rolls cool in the pan for a minute before inverting it onto a serving platter.

A note: If 1 Pillsbury Grands Buttermilk Biscuits is not enough, you can use 1 1/2 and bake it for 30 minutes.

BISCUIT CINNAMON ROLLS

Rebecca I love the smell of cinnamon. It wakes my senses up in the morning. When I am making this biscuit cinnamon rolls, the house ended up smelling amazing and the… Main Dish Recipes BISCUIT CINNAMON ROLLS European Print This
Nutrition facts: 200 calories 20 grams fat
Rating: 5.0/5
( 1 voted )

Ingredients

  • 2 small tubes refrigerator buttermilk biscuits OR 1 tube Pillsbury Grands buttermilk biscuits
  • 3 tablespoons butter, melted
  • 1/2 cup pancake syrup (any brand you like, I used Mrs. Buttersworth)
  • 1/3 cup packed light brown sugar
  • 1/2 teaspoon cinnamon
  • 1/4 cup chopped pecans, optional
  • 1/4 cup chopped almonds, optional

Instructions

Step 1: Prepare the oven. Preheat it to 375 degrees. And grease a fluted pan by spraying it with a non-stick spray.

Step 2: In a small bowl, combine the melted butter and syrup. Set aside.

Step 3: Put the brown sugar, cinnamon, and nuts if using in a separate bowl. Mix well until combined.

Step 4: Place in the bottom of the pan just about half of the syrup mixture.

Step 5: Spray the top of the mixture with the brown sugar mixture.

Step 6: Layer the biscuits closely to each other with edges overlapping on the bottom of the pan to form a ring.

Step 7: Drizzle the remaining syrup and sprinkle the sugar mixture over the top.

Step 8: Place inside the oven and bake for about 20 to 25 minutes or until golden brown. Once done, let the rolls cool in the pan for a minute before inverting it onto a serving platter.

A note: If 1 Pillsbury Grands Buttermilk Biscuits is not enough, you can use 1 1/2 and bake it for 30 minutes.

July 4, 2020 0 comment
0 FacebookTwitterPinterestEmail
Main Dish Recipes

Pecan Pie Cookies

by Rebecca July 4, 2020
written by Rebecca

These pecan pie cookies are great for any occasion! With a thin flaky crust and an amazing layer of the nutty caramel pecan pie filling, these cookies passed any age! The perfect combination of sweet, nutty, salty makes these cookies addictive. And the chocolate drizzle makes this pretty and irresistible. Eat it as is or serve it with fresh whipped cream on top. Either way, these cookies are delicious! And the secret to having an amazing pecan pie cookies is consistency. Make sure that the consistency is right, not too runny, not too thick.

INGREDIENTS

1 prepared single pie crust (homemade or purchased, I used Pillsbury)

2 tablespoons butter, melted

½ cup pecans, chopped

⅓ cup packed brown sugar

¼ cup of corn syrup

2 eggs

⅛ teaspoon salt

optional – ¼ cup semi-sweet or milk chocolate chip for decorating

How to make Pecan Pie Cookies

Step 1: Ready the oven. Preheat it to 400 degrees.

Step 2: Combine the butter, pecans, brown sugar, corn syrup, salt, and eggs in a large non-stick pan. Cook over medium-low heat on a stovetop just until thickened, Make sure to not dry it out, just slightly thickened and about the consistency of a pudding. Once thickened, remove from the heat. Set aside.

Step 3: Undo the dough and cut into circles using a 3-inch cookie cutter. Then, gently fold the circles about 1/8 to 1/4-inch up on the edges.

Step 4: Then, put a tablespoon of the pecan mixture into the circles.

Step 5: Transfer the filled circles onto a parchment-lined pan.

Step 6: Place inside the preheated oven and bake for about 8 minutes or until the filling is just set. Once set, remove from the oven and cool on a wire rack.

Step 7: In a small Ziploc bag, put the chocolate chips and microwave for 15 seconds or until almost melted. Cut a little the corner of the bag and drizzle the almost melted chocolate over the cooled cookies. Let them cool.

Pecan Pie Cookies

Rebecca These pecan pie cookies are great for any occasion! With a thin flaky crust and an amazing layer of the nutty caramel pecan pie filling, these cookies passed any age!… Main Dish Recipes Pecan Pie Cookies European Print This
Nutrition facts: 200 calories 20 grams fat
Rating: 5.0/5
( 1 voted )

Ingredients

  • 1 prepared single pie crust (homemade or purchased, I used Pillsbury)
  • 2 tablespoons butter, melted
  • ½ cup pecans, chopped
  • ⅓ cup packed brown sugar
  • ¼ cup of corn syrup
  • 2 eggs
  • ⅛ teaspoon salt
  • optional - ¼ cup semi-sweet or milk chocolate chip for decorating

Instructions

Step 1: Ready the oven. Preheat it to 400 degrees.

Step 2: Combine the butter, pecans, brown sugar, corn syrup, salt, and eggs in a large non-stick pan. Cook over medium-low heat on a stovetop just until thickened, Make sure to not dry it out, just slightly thickened and about the consistency of a pudding. Once thickened, remove from the heat. Set aside.

Step 3: Undo the dough and cut into circles using a 3-inch cookie cutter. Then, gently fold the circles about 1/8 to 1/4-inch up on the edges.

Step 4: Then, put a tablespoon of the pecan mixture into the circles.

Step 5: Transfer the filled circles onto a parchment-lined pan.

Step 6: Place inside the preheated oven and bake for about 8 minutes or until the filling is just set. Once set, remove from the oven and cool on a wire rack.

Step 7: In a small Ziploc bag, put the chocolate chips and microwave for 15 seconds or until almost melted. Cut a little the corner of the bag and drizzle the almost melted chocolate over the cooled cookies. Let them cool.

July 4, 2020 0 comment
0 FacebookTwitterPinterestEmail
Main Dish Recipes

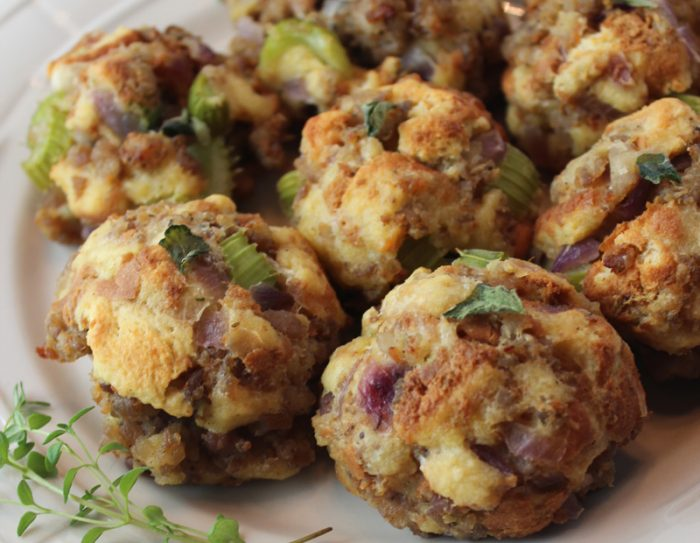
BEST STUFFING BALLS

by Rebecca July 4, 2020
written by Rebecca

Do not underestimate these little ball-shaped pieces of heave. They can make your day and make you smile with every bite! For health-conscious people like me, this is the perfect meal to eat without having the guilt like when I am eating meat. The dried herbs are the highlight of this dish. They give the most flavor and without them, this will never be as perfect as it is. If you feel like you want to take a break from greasy meals, this is the best alternative for that. It almost tastes like a regular meatball but instead of ground meat, it’s dried herbs. How awesome is that? I think you are curious right now, huh? The only solution to this dilemma is to go to the kitchen and start preparing the ingredients! Enjoy!

INGREDIENTS

1 large red or white onion (or two smaller ones) finely diced

1 tablespoon olive oil

200 g white breadcrumbs

2 teaspoons dried sage

2 teaspoons dried mixed herbs

Salt and pepper

1 egg beaten together with a fork

HOW TO MAKE BEST STUFFING BALLS

Step 1: Ready the oven and preheat to 200 C.

Step 2: Apply cooking spray in a small roasting tin.

Step 3: Add a little olive oil in a saucepan. Add in the sliced onion and cover. Turn the heat to low and cook for 5 minutes. Stir the onion is halfway translucent.

Step 4: In a large bowl, grate the bread into the breadcrumbs.

Step 5: Transfer the onion into the bread crumbs. Toss in the herbs. Season with salt and pepper to taste and stir.

Step 6: Let the mixture cool then add the eggs and beat until well-blended.

Step 7: Shape the mixture into 12 balls then place them in the greased tin.

Step 8: Place the tin inside the oven and bake for 30 minutes or until the color turns golden brown.

Step 9: Remove the tin from the oven and let it sit on a wire rack to cool.

BEST STUFFING BALLS

Rebecca Do not underestimate these little ball-shaped pieces of heave. They can make your day and make you smile with every bite! For health-conscious people like me, this is the perfect… Main Dish Recipes BEST STUFFING BALLS European Print This
Nutrition facts: 200 calories 20 grams fat
Rating: 5.0/5
( 1 voted )

Ingredients

  • 1 large red or white onion (or two smaller ones) finely diced
  • 1 tablespoon olive oil
  • 200 g white breadcrumbs
  • 2 teaspoons dried sage
  • 2 teaspoons dried mixed herbs
  • Salt and pepper
  • 1 egg beaten together with a fork

Instructions

Step 1: Ready the oven and preheat to 200 C.

Step 2: Apply cooking spray in a small roasting tin.

Step 3: Add a little olive oil in a saucepan. Add in the sliced onion and cover. Turn the heat to low and cook for 5 minutes. Stir the onion is halfway translucent.

Step 4: In a large bowl, grate the bread into the breadcrumbs.

Step 5: Transfer the onion into the bread crumbs. Toss in the herbs. Season with salt and pepper to taste and stir.

Step 6: Let the mixture cool then add the eggs and beat until well-blended.

Step 7: Shape the mixture into 12 balls then place them in the greased tin.

Step 8: Place the tin inside the oven and bake for 30 minutes or until the color turns golden brown.

Step 9: Remove the tin from the oven and let it sit on a wire rack to cool.

July 4, 2020 0 comment
0 FacebookTwitterPinterestEmail
Main Dish Recipes

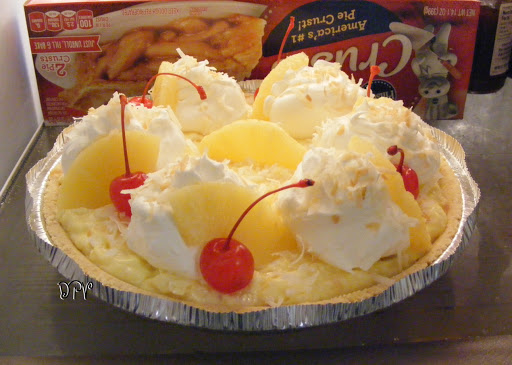
5 Minute No Bake Hawaiian Pie

by Rebecca July 4, 2020
written by Rebecca

I know why you went to this page. It’s because of the title, right? Well, in that case, you read it correctly! This is a no-bake pie and 5 minutes to prepare and make this is true as well! It’s very convenient for busy people like us. This like instant treats that you will only need to place inside the fridge to cool and it’s ready to eat. I love the taste of pineapples, cherries, and coconut in this recipe. They compliment each other. The diversity of the flavors will blow your mind. I mean, I never thought pineapples and coconuts would taste together in one recipe. You just need to try it yourself to see if what I am saying is true. I am certain that you are gonna love it too! So, do you have all the ingredients? Yes? great! Now, it’s time to go to the kitchen and start prepping! Enjoy!

INGREDIENTS

1 (20-ounce) can chilled crushed pineapple in a heavy syrup, undrained

1 to 2 tablespoons lemon juice, optional but recommended

1 (6-serving size) package instant vanilla pudding mix

1 (8-ounce) container sour cream

1 (9-inch) store-bought shortbread pie crust

1 to 2 cups prepared whipped cream or Cool Whip

1 (8-ounce) can pineapple slices, drained well on paper towels and each slice cut into thirds

6 to 8 stemmed maraschino cherries, drained well on paper towels

2 to 3 tablespoons sweetened flaked coconut, toasted if desired

How to make 5 Minute No Bake Hawaiian Pie

Step 1: Mix lemon juice, crushed pineapple including the juice, dry pudding mix in a large mixing bowl.  Stir until well-blended then add the sour cream and continue stirring.

Step 2: Scoop the mixture and fill the pie crust.

Step 3: Spread the whipped cream on top.

Step 4: Place the sliced cherries, coconut, and pineapples. Arrange them nicely.

Step 5: Put inside the fridge and let it cool for at least 5 hours.

Step 6: Serve and enjoy!

5 Minute No Bake Hawaiian Pie

Rebecca I know why you went to this page. It’s because of the title, right? Well, in that case, you read it correctly! This is a no-bake pie and 5 minutes… Main Dish Recipes 5 Minute No Bake Hawaiian Pie European Print This
Nutrition facts: 200 calories 20 grams fat
Rating: 5.0/5
( 1 voted )

Ingredients

  • 1 (20-ounce) can chilled crushed pineapple in a heavy syrup, undrained
  • 1 to 2 tablespoons lemon juice, optional but recommended
  • 1 (6-serving size) package instant vanilla pudding mix
  • 1 (8-ounce) container sour cream
  • 1 (9-inch) store-bought shortbread pie crust
  • 1 to 2 cups prepared whipped cream or Cool Whip
  • 1 (8-ounce) can pineapple slices, drained well on paper towels and each slice cut into thirds
  • 6 to 8 stemmed maraschino cherries, drained well on paper towels
  • 2 to 3 tablespoons sweetened flaked coconut, toasted if desired

Instructions

Step 1: Mix lemon juice, crushed pineapple including the juice, dry pudding mix in a large mixing bowl.  Stir until well-blended then add the sour cream and continue stirring.

Step 2: Scoop the mixture and fill the pie crust.

Step 3: Spread the whipped cream on top.

Step 4: Place the sliced cherries, coconut, and pineapples. Arrange them nicely.

Step 5: Put inside the fridge and let it cool for at least 5 hours.

Step 6: Serve and enjoy!

July 4, 2020 0 comment
0 FacebookTwitterPinterestEmail
Main Dish Recipes

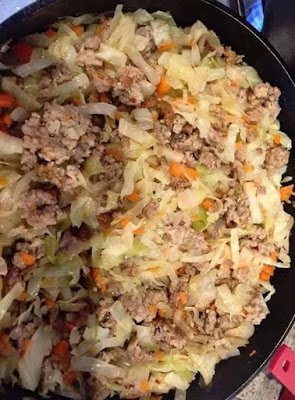
If you like egg rolls, this is amazing

by Rebecca July 4, 2020
written by Rebecca

This recipe is super legit! I made this a couple of weeks ago and I just remembered how awesome it is that’s why I am making one again today. As I am writing this, I am waiting for it to cook. I can smell the perfection coming out of the skillet! Have you ever been so amazed by food? Well, this surely amazed me. I love how easy and simple the ingredients are. I mean, 6 ingredients that you have right now. It’s very convenient. Did I already mention the taste? Yeah, after your first bite, I am 100 percent certain that you would want more. Just make sure to cook a lot so you can share it with your folks! This was a product of the lockdown. 2 days into the lockdown, I was so bored and hungry that I started to try a lot of recipes with the limited ingredients that I had. I was lucky enough to come up with recipes that not only are convenient but delicious too! One of these days, I will write the rest of the ingredients that I came up with but for now, you would give this one a try. Enjoy!

INGREDIENTS

1 bag coleslaw mix

1 lb pork sausage

2 cloves garlic minced (or garlic powder)

1 teaspoon ground ginger

Salt to taste

1/4 cup onion diced

PREPARATION

Step 1: Place a large skillet on the stove and turn the heat to medium.

Step 2: Add a little oil and cook the sausage until the color turns brown.

Step 3: Remove the sausage from the pan and leave the grease. Set aside.

Step 4: Saute the minced garlic and ground ginger until aromatic. Add in the onion and saute until translucent. Lastly, add the 1 bag of coleslaw mix. Add salt to taste.

Step 5: Cover and simmer for about 5 minutes or until set.

Step 6: Remove the cover. Stir and taste to your preference.

Step 7: Turn off the heat and let it sit for at least 5 minutes.

Step 8: Serve and enjoy!

If you like egg rolls, this is amazing

Rebecca This recipe is super legit! I made this a couple of weeks ago and I just remembered how awesome it is that’s why I am making one again today. As… Main Dish Recipes If you like egg rolls, this is amazing European Print This
Nutrition facts: 200 calories 20 grams fat
Rating: 5.0/5
( 1 voted )

Ingredients

  • 1 bag coleslaw mix
  • 1 lb pork sausage
  • 2 cloves garlic minced (or garlic powder)
  • 1 teaspoon ground ginger
  • Salt to taste
  • 1/4 cup onion diced

Instructions

Step 1: Place a large skillet on the stove and turn the heat to medium.

Step 2: Add a little oil and cook the sausage until the color turns brown.

Step 3: Remove the sausage from the pan and leave the grease. Set aside.

Step 4: Saute the minced garlic and ground ginger until aromatic. Add in the onion and saute until translucent. Lastly, add the 1 bag of coleslaw mix. Add salt to taste.

Step 5: Cover and simmer for about 5 minutes or until set.

Step 6: Remove the cover. Stir and taste to your preference.

Step 7: Turn off the heat and let it sit for at least 5 minutes.

Step 8: Serve and enjoy!

July 4, 2020 0 comment
0 FacebookTwitterPinterestEmail
Main Dish Recipes

Cinnamon Rock Candy

by Rebecca July 4, 2020
written by Rebecca

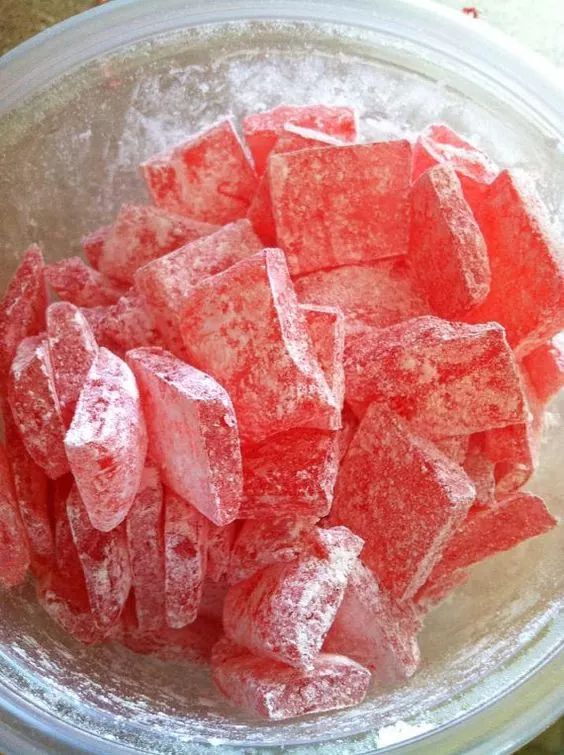
I love candies, if only I can stock them forever and just collect them, I would! My candy obsession allowed me to try different varieties of candies and one of my favorite candy recipes is this Cinnamon Rock Candy. The recipe itself is adjustable that you can substitute the ingredients with lemon, orange, anise, or other oils that you can easily find at candy making supply stores and drugstores. These pretty pink bite-sized candies are excellent for stocking stuffers!

INGREDIENTS

1 cup of water

3 3/4 cups sugar

1 1/4 cups light corn syrup

1 teaspoon red food coloring

1 teaspoon cinnamon oil (2 teaspoons if you like it spicy)

1 1/2 cups powdered sugar

1 butter, for greasing the surface

How to make Cinnamon Rock Candy

Step 1: Grease a 15 x 10 x 1-inch sheet pan with butter. Line it with parchment paper and grease with some butter. Make sure the edges of the parchment paper are thoroughly buttered so the candy will not seep underneath.

Step 2: Combine the water, corn syrup, and food coloring in a large deep saucepan. Stir over medium-high heat until the sugar dissolved. Make sure that the attached candy thermometer is not touching the bottom of the pan for the exact temperature. Proceed to boil the sugar mixture for about 20 minutes or until it reached 300 degrees F or the hard crack stage. When you noticed that the mixture boil too closely to the edge of the pan, remove the pan from the heat and stir the bubbles to subside before returning the pan to medium-high heat.

Step 3: Remove the pan from the heat once the mixture reached 300 degrees F and quickly stir in the cinnamon oil. You might want to keep your face away from the mixture because it is strong like onions. Work in a well-ventilated area.

Step 4: Immediately pour the mixture into the prepared pan and cool for 4 hours.

Step 5: Dust the top of the candy with powdered sugar after 4 hours. Then, flip the candy over onto a large cutting board or cookie sheet and remove the parchment paper.

Step 6: Place the candy back into the pan and break it into bite-size pieces using the tip of a sharp knife. Sprinkle the candies with more powdered sugar before storing it in an airtight container.

Cinnamon Rock Candy

Rebecca I love candies, if only I can stock them forever and just collect them, I would! My candy obsession allowed me to try different varieties of candies and one of… Main Dish Recipes Cinnamon Rock Candy European Print This
Nutrition facts: 200 calories 20 grams fat
Rating: 5.0/5
( 1 voted )

Ingredients

  • 1 cup of water
  • 3 3/4 cups sugar
  • 1 1/4 cups light corn syrup
  • 1 teaspoon red food coloring
  • 1 teaspoon cinnamon oil (2 teaspoons if you like it spicy)
  • 1 1/2 cups powdered sugar
  • 1 butter, for greasing the surface

Instructions

Step 1: Grease a 15 x 10 x 1-inch sheet pan with butter. Line it with parchment paper and grease with some butter. Make sure the edges of the parchment paper are thoroughly buttered so the candy will not seep underneath.

Step 2: Combine the water, corn syrup, and food coloring in a large deep saucepan. Stir over medium-high heat until the sugar dissolved. Make sure that the attached candy thermometer is not touching the bottom of the pan for the exact temperature. Proceed to boil the sugar mixture for about 20 minutes or until it reached 300 degrees F or the hard crack stage. When you noticed that the mixture boil too closely to the edge of the pan, remove the pan from the heat and stir the bubbles to subside before returning the pan to medium-high heat.

Step 3: Remove the pan from the heat once the mixture reached 300 degrees F and quickly stir in the cinnamon oil. You might want to keep your face away from the mixture because it is strong like onions. Work in a well-ventilated area.

Step 4: Immediately pour the mixture into the prepared pan and cool for 4 hours.

Step 5: Dust the top of the candy with powdered sugar after 4 hours. Then, flip the candy over onto a large cutting board or cookie sheet and remove the parchment paper.

Step 6: Place the candy back into the pan and break it into bite-size pieces using the tip of a sharp knife. Sprinkle the candies with more powdered sugar before storing it in an airtight container.

July 4, 2020 0 comment
0 FacebookTwitterPinterestEmail
Main Dish Recipes

BIG SOFT GINGER COOKIES

by Rebecca July 4, 2020
written by Rebecca

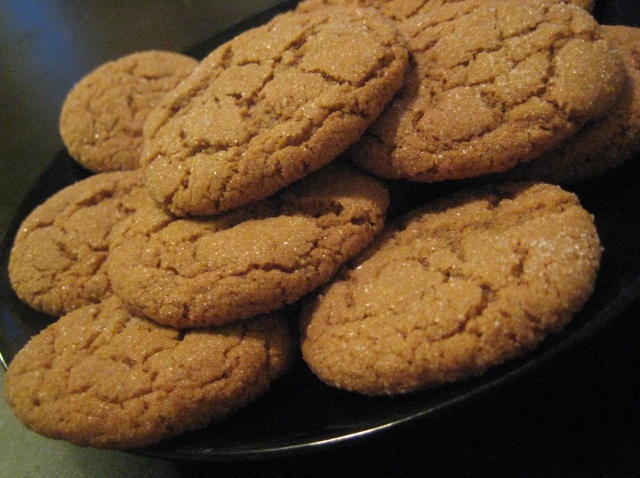
I love soft and chewy cookies that is why I am crazy about this Big Soft Ginger Cookies. Don’t get me wrong but I prefer this compared to crunchy gingersnaps. Cookies are amazing, they are like the hidden gem of the kitchen. And cookies are I think the easiest to make. It all started last summer, my obsession with baking especially cookies. Putting unrelated ingredients together that results in something deliciously amazing. I am no pro baker but I nailed every cookie I baked! And my favorite among the many cookies I made is this ginger cookie. They are big, soft, and chewy. Pretty, too. With the crystalized sugar dusted over the cookies just before baking provides beautiful shimmer on top of the crackled surface.

INGREDIENTS

2 1/4 cups all-purpose flour

2 teaspoons ground ginger

1 teaspoon baking soda

3/4 teaspoon ground cinnamon

1/2 teaspoon ground cloves

1/4 teaspoon salt

3/4 cup margarine, softened

1 cup white sugar

1 egg

1 tablespoon water

1/4 cup molasses

2 tablespoons white sugar

HOW TO MAKE BIG SOFT GINGER COOKIES

Step 1: Prepare the oven. Preheat it to 350 degrees F or 175 degrees C.

Step 2: In a bowl, sift the flour along with the ginger, baking soda, cinnamon, ground cloves, and salt.

Step 3: Put the margarine and a cup of sugar in a large bowl. Cream until light and fluffy. Then, beat in the egg and mix in the water and molasses.

Step 4: Slowly stir in the dry ingredients into the molasses mixture.

Step 5: Form the dough into walnut-sized balls and roll them onto the remaining sugar.

Step 6: Transfer the cookies  2 inches apart onto an ungreased cookie sheet. Slightly flatten the cookies.

Step 7: Place inside the preheated oven and bake for about 8 to 10 minutes. Don’t remove the cookies as of yet from the cookie sheet, let them rest and cool a little for 5 minutes before transferring them to a wire rack to cool completely. Once cooled, store the cookies in an airtight container or serve immediately. Enjoy!

BIG SOFT GINGER COOKIES

Rebecca I love soft and chewy cookies that is why I am crazy about this Big Soft Ginger Cookies. Don’t get me wrong but I prefer this compared to crunchy gingersnaps.… Main Dish Recipes BIG SOFT GINGER COOKIES European Print This
Nutrition facts: 200 calories 20 grams fat
Rating: 5.0/5
( 1 voted )

Ingredients

  • 2 1/4 cups all-purpose flour
  • 2 teaspoons ground ginger
  • 1 teaspoon baking soda
  • 3/4 teaspoon ground cinnamon
  • 1/2 teaspoon ground cloves
  • 1/4 teaspoon salt
  • 3/4 cup margarine, softened
  • 1 cup white sugar
  • 1 egg
  • 1 tablespoon water
  • 1/4 cup molasses
  • 2 tablespoons white sugar

Instructions

Step 1: Prepare the oven. Preheat it to 350 degrees F or 175 degrees C.

Step 2: In a bowl, sift the flour along with the ginger, baking soda, cinnamon, ground cloves, and salt.

Step 3: Put the margarine and a cup of sugar in a large bowl. Cream until light and fluffy. Then, beat in the egg and mix in the water and molasses.

Step 4: Slowly stir in the dry ingredients into the molasses mixture.

Step 5: Form the dough into walnut-sized balls and roll them onto the remaining sugar.

Step 6: Transfer the cookies  2 inches apart onto an ungreased cookie sheet. Slightly flatten the cookies.

Step 7: Place inside the preheated oven and bake for about 8 to 10 minutes. Don't remove the cookies as of yet from the cookie sheet, let them rest and cool a little for 5 minutes before transferring them to a wire rack to cool completely. Once cooled, store the cookies in an airtight container or serve immediately. Enjoy!

July 4, 2020 0 comment
0 FacebookTwitterPinterestEmail
Main Dish Recipes

Homemade Chicken & Biscuits

by Rebecca July 3, 2020
written by Rebecca

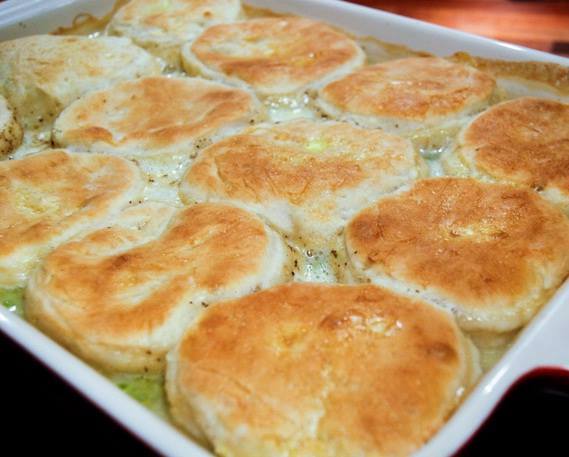
If you want a hearty and flavorful dinner then here is a recipe that will take your dinner to the next level! Simply whip up the ingredients and bake. This homemade Chicken and Biscuits is way to easy to prepare. A comforting and scrumptious casserole dish that has a colorful variety of vegetables, chunky chicken topped with either a store-bought or homemade biscuits.

INGREDIENTS

3 tablespoons butter

1 medium onion – chopped

1 rib celery – finely chopped

salt and pepper – to taste

2 tablespoons all-purpose flour

1 3/4 cup chicken broth

1 teaspoon thyme – chopped, fresh

1/2 cup whole milk

3 cups chicken – cooked, chopped

1 carrot – roughly chopped

1 cup frozen peas

1 teaspoon lemon juice

12 biscuits – storebought or homemade

1 egg

1 tablespoon water

How to make Homemade Chicken & Biscuits

Step 1: Prepare the oven. Preheat it to 375 degrees F or 190 degrees C.

Step 2: Then, grease a 9 x 13-inch casserole dish.

Step 3: Melt the butter in a heavy skillet over medium heat. Add in the onion and celery. Cook for about 5 minutes or until softened. Sprinkle with some salt and pepper.

Step 4: Stir in the flour and cook for a minute. Pour the broth and add in the thyme. Stir occasionally and bring to a boil over medium heat.

Step 5: Add in the milk, chicken, carrots, peas, and lemon juice. Mix until well combined. Then, slowly pour the mixture into the casserole dish.

Step 6: Place inside the preheated and bake for an hour and 20 minutes. After, take the dish out the oven and increase the oven temperature to 425 degrees F or 205 degrees C.

Step 7: Slice the biscuits into 12 rounds. Layer them over the chicken gravy.

Step 8: In a small bowl, whisk the egg and water. Then, brush over the biscuits.

Step 9: Return the dish into the oven and continue baking for another 10 to 12 minutes or until the biscuits are done.

Step 10: Once done, remove from the oven and serve immediately. Enjoy!

Homemade Chicken & Biscuits

Rebecca If you want a hearty and flavorful dinner then here is a recipe that will take your dinner to the next level! Simply whip up the ingredients and bake. This… Main Dish Recipes Homemade Chicken & Biscuits European Print This
Nutrition facts: 200 calories 20 grams fat
Rating: 4.0/5
( 2 voted )

Ingredients

  • 3 tablespoons butter
  • 1 medium onion - chopped
  • 1 rib celery - finely chopped
  • salt and pepper - to taste
  • 2 tablespoons all-purpose flour
  • 1 3/4 cup chicken broth
  • 1 teaspoon thyme - chopped, fresh
  • 1/2 cup whole milk
  • 3 cups chicken - cooked, chopped
  • 1 carrot - roughly chopped
  • 1 cup frozen peas
  • 1 teaspoon lemon juice
  • 12 biscuits - storebought or homemade
  • 1 egg
  • 1 tablespoon water

Instructions

Step 1: Prepare the oven. Preheat it to 375 degrees F or 190 degrees C.

Step 2: Then, grease a 9 x 13-inch casserole dish.

Step 3: Melt the butter in a heavy skillet over medium heat. Add in the onion and celery. Cook for about 5 minutes or until softened. Sprinkle with some salt and pepper.

Step 4: Stir in the flour and cook for a minute. Pour the broth and add in the thyme. Stir occasionally and bring to a boil over medium heat.

Step 5: Add in the milk, chicken, carrots, peas, and lemon juice. Mix until well combined. Then, slowly pour the mixture into the casserole dish.

Step 6: Place inside the preheated and bake for an hour and 20 minutes. After, take the dish out the oven and increase the oven temperature to 425 degrees F or 205 degrees C.

Step 7: Slice the biscuits into 12 rounds. Layer them over the chicken gravy.

Step 8: In a small bowl, whisk the egg and water. Then, brush over the biscuits.

Step 9: Return the dish into the oven and continue baking for another 10 to 12 minutes or until the biscuits are done.

Step 10: Once done, remove from the oven and serve immediately. Enjoy!

July 3, 2020 0 comment
0 FacebookTwitterPinterestEmail
Main Dish Recipes

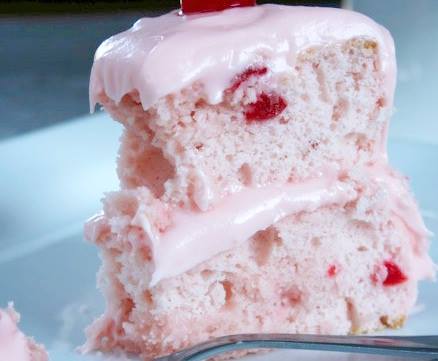
Cherry Layer Cake with Cherry Cream Cheese Frosting

by Rebecca July 3, 2020
written by Rebecca

A pretty pink cake that tastes amazing with a heavenly cherry cream cheese frosting. It is soft, fluffy, and OMG, a head turner!

INGREDIENTS

For the Cake

3 cups sifted cake flour

2½ teaspoons baking powder

1 teaspoon salt

⅓ cup unsalted butter, room temperature

⅓ cup vegetable shortening

1½ cups sugar

¼ cup maraschino cherry juice

¾ cup whole milk

¼ teaspoon almond extract

16 maraschino cherries, cut into eighths

5 egg whites, room temperature, stiffly beaten

For the Frosting

8 oz (1 block) cream cheese, room temperature

¾ cup (1½ sticks) unsalted butter, room temperature

¼ cup maraschino cherry juice

6 cups confectionary sugar

How to make Cherry Layer Cake with Cherry Cream Cheese Frosting

To make the cake

Step 1: Prepare the oven. Preheat it to 350 degrees F.

Step 2: Grease and flour a two 9-inch round layer cake pans and if desired you can line the bottom of the pan with parchment.

Step 3: In a medium bowl, sift the flour, baking powder, and salt.

Step 4: In a large bowl, cream the butter, shortening, and sugar for about 5 minutes or until fluffy.

Step 5: Use a measuring cup to measure the milk, almond extract, and cherry juice.

Step 6: Alternately add the wet and dry ingredients, beginning and ending with the dry ingredients, to the creamed mixture. Make sure to beat well every after addition. And fold in the cherries.

Step 7: In a different bowl, stiffly beat the egg whites. To lighten the batter, fold in 1/3 of beat whites to the batter. Then, fold in the rest of the egg white mixture until fully combined.

Step 8: Share the batter between the pans. Place inside the preheated oven and bake for 30 to 35 minutes or until the cake is springy when touched.

Step 9: Once done, remove the pans from the oven. Don’t remove the cakes yet, let them cool in the pan for about 10 minutes. Then, carefully loosen the edges with a think knife. Transfer the cakes onto the racks and cool them into room temperature.

To make the Frosting

Step 1: In a bowl, cream the butter and cream cheese with 1/2 confectionary sugar. Stir in the cherry juice and mix in enough confectionary sugar to get your desired consistency and taste.

Cherry Layer Cake with Cherry Cream Cheese Frosting

Rebecca A pretty pink cake that tastes amazing with a heavenly cherry cream cheese frosting. It is soft, fluffy, and OMG, a head turner! INGREDIENTS For the Cake 3 cups sifted… Main Dish Recipes Cherry Layer Cake with Cherry Cream Cheese Frosting European Print This
Nutrition facts: 200 calories 20 grams fat
Rating: 4.3/5
( 4 voted )

Ingredients

  • For the Cake
  • 3 cups sifted cake flour
  • 2½ teaspoons baking powder
  • 1 teaspoon salt
  • ⅓ cup unsalted butter, room temperature
  • ⅓ cup vegetable shortening
  • 1½ cups sugar
  • ¼ cup maraschino cherry juice
  • ¾ cup whole milk
  • ¼ teaspoon almond extract
  • 16 maraschino cherries, cut into eighths
  • 5 egg whites, room temperature, stiffly beaten
  • For the Frosting
  • 8 oz (1 block) cream cheese, room temperature
  • ¾ cup (1½ sticks) unsalted butter, room temperature
  • ¼ cup maraschino cherry juice
  • 6 cups confectionary sugar

Instructions

To make the cake

Step 1: Prepare the oven. Preheat it to 350 degrees F.

Step 2: Grease and flour a two 9-inch round layer cake pans and if desired you can line the bottom of the pan with parchment.

Step 3: In a medium bowl, sift the flour, baking powder, and salt.

Step 4: In a large bowl, cream the butter, shortening, and sugar for about 5 minutes or until fluffy.

Step 5: Use a measuring cup to measure the milk, almond extract, and cherry juice.

Step 6: Alternately add the wet and dry ingredients, beginning and ending with the dry ingredients, to the creamed mixture. Make sure to beat well every after addition. And fold in the cherries.

Step 7: In a different bowl, stiffly beat the egg whites. To lighten the batter, fold in 1/3 of beat whites to the batter. Then, fold in the rest of the egg white mixture until fully combined.

Step 8: Share the batter between the pans. Place inside the preheated oven and bake for 30 to 35 minutes or until the cake is springy when touched.

Step 9: Once done, remove the pans from the oven. Don't remove the cakes yet, let them cool in the pan for about 10 minutes. Then, carefully loosen the edges with a think knife. Transfer the cakes onto the racks and cool them into room temperature.

To make the Frosting

Step 1: In a bowl, cream the butter and cream cheese with 1/2 confectionary sugar. Stir in the cherry juice and mix in enough confectionary sugar to get your desired consistency and taste.

July 3, 2020 0 comment
0 FacebookTwitterPinterestEmail
Newer Posts
Older Posts

Popular Posts

  • 1

    Crispy Crunchy Parmesan Potatoes

    March 21, 2020
  • 2

    CROCK POT SMOTHERED PORK CHOPS

    March 21, 2020
  • Facebook
  • Twitter

@2019 - All Right Reserved.


Back To Top