Cook it once
  • Home
  • Privacy Policy
  • Recipes
    • KETO
    • LC
    • WW
  • Tips
  • Contact
Cook it once
  • Home
  • Privacy Policy
  • Recipes
    • KETO
    • LC
    • WW
  • Tips
  • Contact
Category:

Main Dish Recipes

Main Dish Recipes

Irresistible Banana Oatmeal Chocolate Chip Cookies

by Rebecca August 3, 2020
written by Rebecca

Serves: Makes 3-4 dozen | Prep: 30 Min | Cook: 15 Min

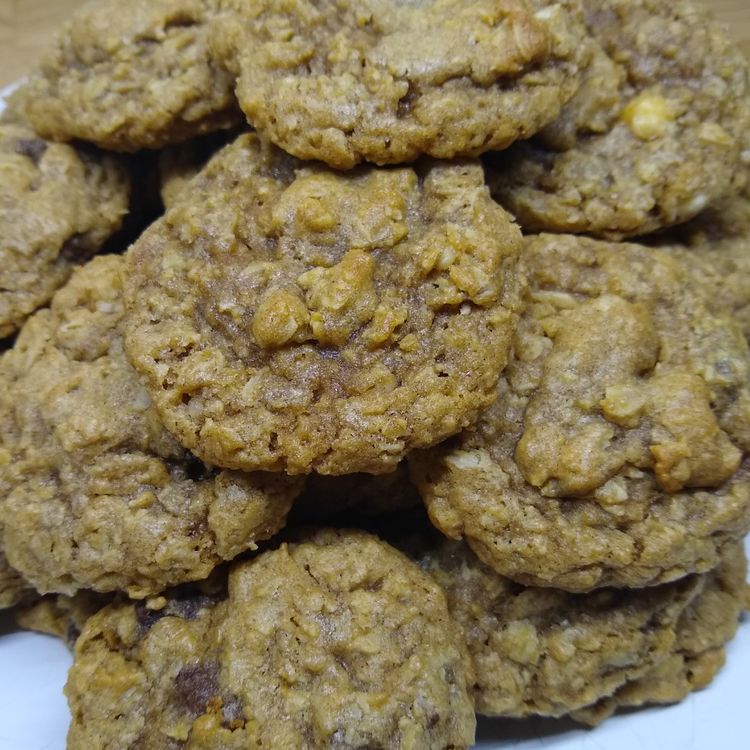
These easy, healthy, and irresistible cookies are made with mashed bananas, oatmeal, and chocolate chips. The three that I love most and my go-to whenever I am craving for a wholesome dessert. Is there anything better than bananas, oatmeal, and chocolate chips? I think not! The combination is perfect and heavenly. These Irresistible Banana Oatmeal Chocolate Chip Cookies are freaking delicious and to die for!

I used to blend bananas with oatmeal and chocolate. It’s my easy takeaway breakfast smoothie for busy days and if I want something lighter. But I have never thought that it’ll work wonders as well when made into cookies. I first made these healthy cookies summer last year and I have been obsessed with it ever since! It’s sweet enough as a dessert and nutritious to qualify as an afternoon snack. With this recipe, you can make 3 to 4 dozens of these healthy cookies that is why these are great for sharing and to bring to camping. And in case you are looking for homemade gifts, these are perfect, too! You just have to put these cookies in a cute box or jar.

Ingredients

1 cup shortening

1/2 cup white sugar

3/4 cup brown sugar, firmly packed

2 eggs

1 teaspoon vanilla

3/4 cup mashed banana (about two medium)

1 teaspoon salt

1 teaspoon baking soda

1 1/2 teaspoon cinnamon

2 cups flour

2 cups oatmeal (i use quick oatmeal)

6 oz or 1/2 bag of semi-sweet chocolate chips

How to Make Irresistible Banana Oatmeal Chocolate Chip Cookies

Step 1: Prepare the oven. Preheat it to 350 degrees.

Step 2: In a bowl, cream the shortening, sugars, eggs, vanilla, and banana.

Step 3: Stir in the salt, baking soda, cinnamon, flour, oatmeal, and chocolate chips.

Step 4: Once the ingredients are combined, drop the batter by heaping spoonfuls onto the greased cookie sheets.

Step 5: Place inside the preheated oven and bake for about 10 to 14 minutes. This recipe makes 3 to 4 dozens of cookies depending on size.

Irresistible Banana Oatmeal Chocolate Chip Cookies

Rebecca Serves: Makes 3-4 dozen | Prep: 30 Min | Cook: 15 Min These easy, healthy, and irresistible cookies are made with mashed bananas, oatmeal, and chocolate chips. The three that… Main Dish Recipes Irresistible Banana Oatmeal Chocolate Chip Cookies European Print This
Serves: 3-4 dozen Prep Time: 30 mins Cooking Time: 15 mins 15 mins
Nutrition facts: 200 calories 20 grams fat
Rating: 4.1/5
( 7 voted )

Ingredients

  • 1 cup shortening
  • 1/2 cup white sugar
  • 3/4 cup brown sugar, firmly packed
  • 2 eggs
  • 1 teaspoon vanilla
  • 3/4 cup mashed banana (about two medium)
  • 1 teaspoon salt
  • 1 teaspoon baking soda
  • 1 1/2 teaspoon cinnamon
  • 2 cups flour
  • 2 cups oatmeal (i use quick oatmeal)
  • 6 oz or 1/2 bag of semi-sweet chocolate chips

Instructions

Step 1: Prepare the oven. Preheat it to 350 degrees.

Step 2: In a bowl, cream the shortening, sugars, eggs, vanilla, and banana.

Step 3: Stir in the salt, baking soda, cinnamon, flour, oatmeal, and chocolate chips.

Step 4: Once the ingredients are combined, drop the batter by heaping spoonfuls onto the greased cookie sheets.

Step 5: Place inside the preheated oven and bake for about 10 to 14 minutes. This recipe makes 3 to 4 dozens of cookies depending on size.
August 3, 2020 0 comment
0 FacebookTwitterPinterestEmail
Main Dish Recipes

Lemon Zucchini Cake With Lemon Cream Cheese Frost

by Rebecca August 3, 2020
written by Rebecca

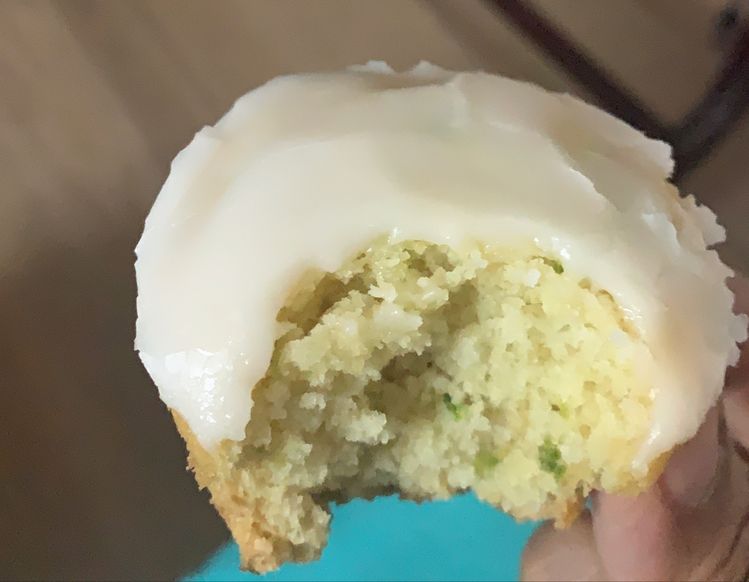
This is a no-fuss, maybe not the prettiest cake you’ll see but don’t judge because this is one of the best you’ll ever have. It is moist, with a tender crumb and insanely delicious! A great way to use up your garden zucchini. This is my go-to cake if I want something healthy but still tastes amazing! And the frosting is so simple with the perfect balance of sweet and bright citrus flavor. I love it because it is not overwhelmingly sweet like the usual cake frosting.

I have been experimenting with desserts and I am amazed by this Lemon Zucchini Cake With Lemon Cream Cheese Frost. It’s not every day that we see zucchini cakes. It has the perfect balance of everything and I love it most because it’s simple, easy to make, healthy, and surprisingly delicious!

Ingredients

1 box lemon cake mix

4 large eggs; slightly beaten

2 cups zucchini; peeled & grated

4 oz pkg. instant lemon pudding

1 teaspoon grated lemon zest

FOR THE FROSTING

3 tablespoons butter; room temp.

3 oz cream cheese; softened

1 1/2 cups powdered sugar

1 teaspoon grated lemon zest

1 teaspoon fresh lemon juice

How to Make Lemon Zucchini Cake With Lemon Cream Cheese Frost

Step 1: Using an electric mixer, mix the lemon cake mix, eggs, zucchini, instant lemon pudding, and lemon zest on low speed for 3 minutes.

Step 2: Once the mix ingredients are combined, pour the batter into a 9 x 13-inch baking pan.

Step 3: Place the batter inside the oven and bake at 325 degrees F for about 40 minutes.

Step 4: Once done, remove the cake from the oven and allow the cake cool completely.

Step 5: While waiting for the cake to cool, you can prepare the posting by creaming the butter and cream cheese.

Step 6: Add in the powdered sugar and continue mixing.

Step 7: Stir in the lemon juice and zest. Mix until incorporated.

Step 8: Once the cake is completely cooled, frost the cake. You can garnish with lemon if desired. Enjoy!

Lemon Zucchini Cake With Lemon Cream Cheese Frost

Rebecca This is a no-fuss, maybe not the prettiest cake you’ll see but don’t judge because this is one of the best you’ll ever have. It is moist, with a tender… Main Dish Recipes Lemon Zucchini Cake With Lemon Cream Cheese Frost European Print This
Nutrition facts: 200 calories 20 grams fat
Rating: 5.0/5
( 1 voted )

Ingredients

  • 1 box lemon cake mix
  • 4 large eggs; slightly beaten
  • 2 cups zucchini; peeled & grated
  • 4 oz pkg. instant lemon pudding
  • 1 teaspoon grated lemon zest
  • FOR THE FROSTING
  • 3 tablespoons butter; room temp.
  • 3 oz cream cheese; softened
  • 1 1/2 cups powdered sugar
  • 1 teaspoon grated lemon zest
  • 1 teaspoon fresh lemon juice

Instructions

Step 1: Using an electric mixer, mix the lemon cake mix, eggs, zucchini, instant lemon pudding, and lemon zest on low speed for 3 minutes.

Step 2: Once the mix ingredients are combined, pour the batter into a 9 x 13-inch baking pan.

Step 3: Place the batter inside the oven and bake at 325 degrees F for about 40 minutes.

Step 4: Once done, remove the cake from the oven and allow the cake cool completely.

Step 5: While waiting for the cake to cool, you can prepare the posting by creaming the butter and cream cheese.

Step 6: Add in the powdered sugar and continue mixing.

Step 7: Stir in the lemon juice and zest. Mix until incorporated.

Step 8: Once the cake is completely cooled, frost the cake. You can garnish with lemon if desired. Enjoy!

August 3, 2020 0 comment
0 FacebookTwitterPinterestEmail
Main Dish Recipes

Old Timey Caramel Icing

by Rebecca August 3, 2020
written by Rebecca

Serves: 12 or more | Prep: 15 Min | Cook: 30 Min

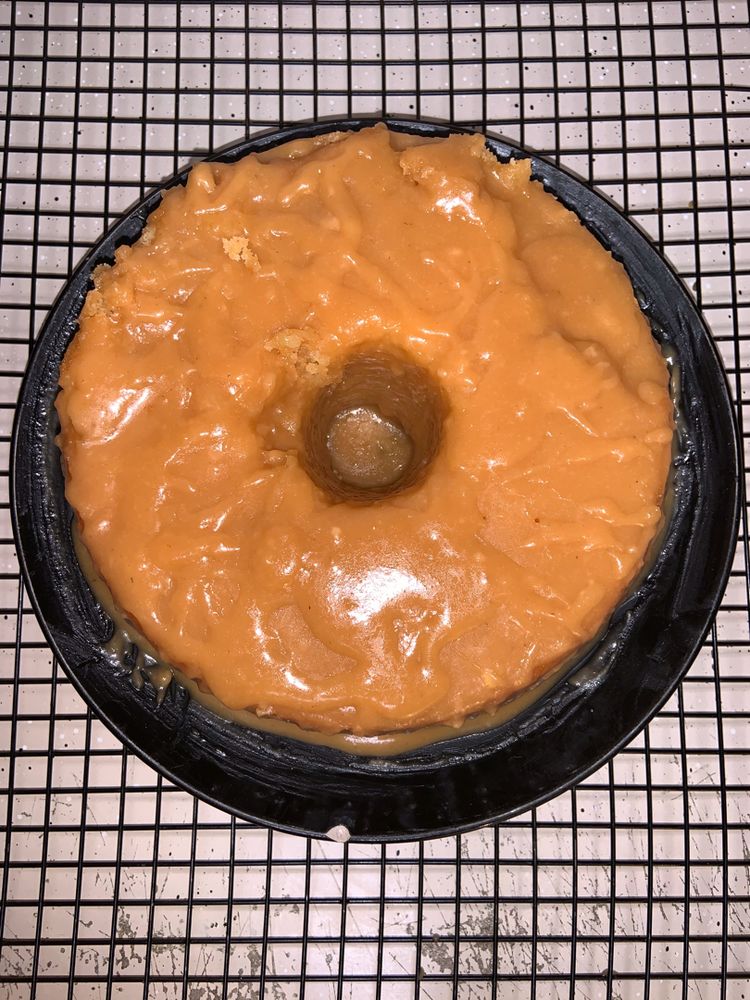
This is not your typical caramel that is smooth and sticky like those you find in candy bars. This caramel is meant for icing. A heavy icing for cakes and cupcakes. It is a little crunchy on the outside but smooth and soft when you bite into it.

This caramel frosting is completely different from frosting. Many of us don’t know what is the difference between icing and frosting. This caramel falls in the icing category, it is hard and flat. While frosting is light and fluffy.

Ingredients

3 cups white granulated sugar

1 1/3 cups white whole milk

1 1/2 stick cold butter

5 tablespoons white granulated sugar

How to make Old-Timey Caramel Icing

Step 1: In a heavy saucepan, heat the 3 cups of sugar and milk on medium heat. Stir for a couple of minutes and continue to heat.

Step 2: Meanwhile, place 5 tablespoons of sugar in a small black iron skillet on medium to medium-high heat, stirring until the sugar turns into a liquid, then, golden brown. Be careful as it will be bubbling and hot.

Step 3: Check the milk and sugar. At this point, the mixture should be very hot so carefully pour in the browned sugar and whisk. Continue to cook for another 5 minutes or until the mixture reaches the softball stage. You can test it by dropping a bit off a spoon into s small glass of water. It is ready when a small softball forms.

Step 4: When the mixture reached the softball stage, remove the skillet from the heat. And with an electric mixer, mix in 1 1/2 sticks of cold butter. Make sure to use only cold butter, not margarine.

Step 5: Beat until cooled and the consistency is spreadable.

Step 6: If the consistency is too thick, you can beat in a tablespoon of milk at a time to make the consistency thin.

Step 7: Completely cool the cake before icing or else the heavy icing can cause the top of the cake to split. But it’ll still taste amazing!

Old Timey Caramel Icing

Rebecca Serves: 12 or more | Prep: 15 Min | Cook: 30 Min This is not your typical caramel that is smooth and sticky like those you find in candy bars.… Main Dish Recipes Old Timey Caramel Icing European Print This
Serves: 12 or more Prep Time: 15 mins Cooking Time: 30 mins 30 mins
Nutrition facts: 200 calories 20 grams fat
Rating: 5.0/5
( 1 voted )

Ingredients

  • 3 cups white granulated sugar
  • 1 1/3 cups white whole milk
  • 1 1/2 stick cold butter
  • 5 tablespoons white granulated sugar

Instructions

Step 1: In a heavy saucepan, heat the 3 cups of sugar and milk on medium heat. Stir for a couple of minutes and continue to heat.

Step 2: Meanwhile, place 5 tablespoons of sugar in a small black iron skillet on medium to medium-high heat, stirring until the sugar turns into a liquid, then, golden brown. Be careful as it will be bubbling and hot.

Step 3: Check the milk and sugar. At this point, the mixture should be very hot so carefully pour in the browned sugar and whisk. Continue to cook for another 5 minutes or until the mixture reaches the softball stage. You can test it by dropping a bit off a spoon into s small glass of water. It is ready when a small softball forms.

Step 4: When the mixture reached the softball stage, remove the skillet from the heat. And with an electric mixer, mix in 1 1/2 sticks of cold butter. Make sure to use only cold butter, not margarine.

Step 5: Beat until cooled and the consistency is spreadable.

Step 6: If the consistency is too thick, you can beat in a tablespoon of milk at a time to make the consistency thin.

Step 7: Completely cool the cake before icing or else the heavy icing can cause the top of the cake to split. But it'll still taste amazing!

August 3, 2020 0 comment
0 FacebookTwitterPinterestEmail
Main Dish Recipes

Zucchini Tomato Pie

by Rebecca August 3, 2020
written by Rebecca

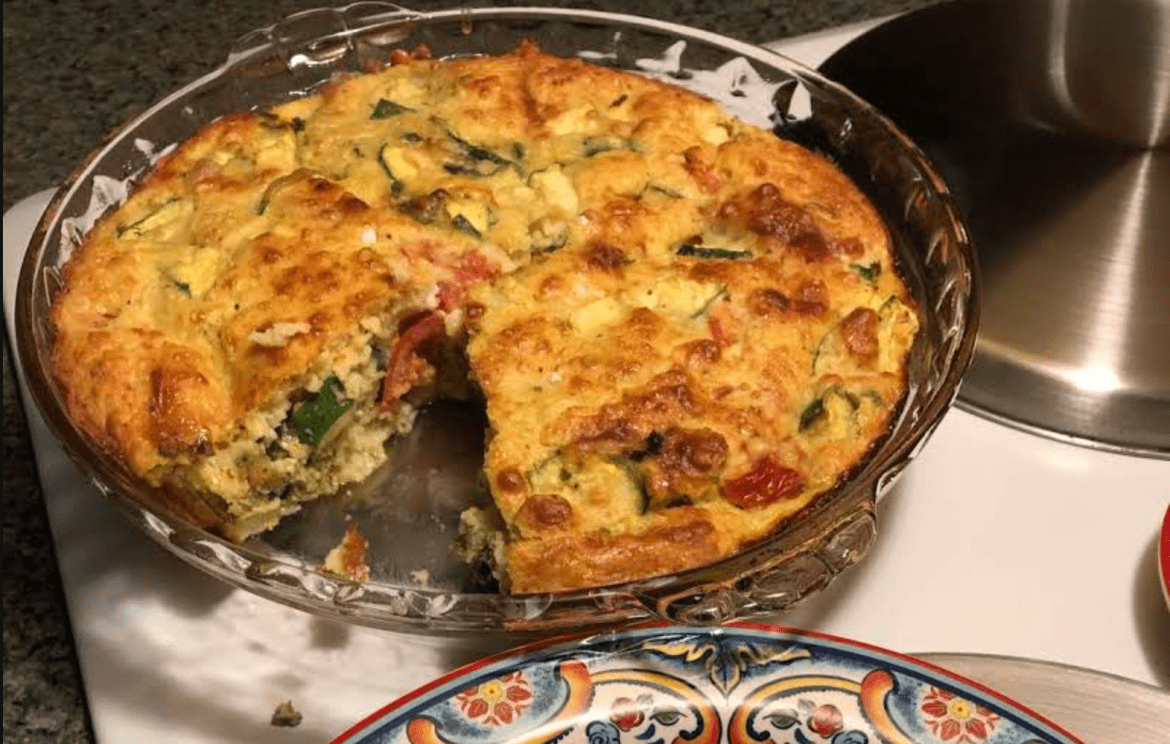
I never thought that pie can be healthy, too. LOL. But kidding aside, this pie is not your ordinary pie. It is not blueberry pie, neither a peach pie. It is Zucchini Pie! A vegetable pie that everyone is raving about lately. A no crust pie that is a breeze to make. Don’t worry about your picky eaters because they will love this pie. It’s not only healthy but it’s so good! It is only right to expect so much because this pie will disappoint. This can be a full meal with some salad or a side dish. This pie is my new obsession. I don’t have to worry about the weight like I always do. I can just eat the whole thing, worry-free. This pie is the perfect summer breakfast, lunch, and dinner!

Ingredients

1 cup chopped zucchini

1 cup chopped tomato, drained and blotted dry

1/2 cup chopped green onions

3/4 cup grated parmesan cheese

1 cup Bisquick

3/4 cup milk

3 eggs

1 teaspoon no-salt lemon pepper

1 teaspoon garlic powder

1 teaspoon oregano

1-2 teaspoons sugar

1/2 teaspoon salt

How to Make Zucchini Tomato Pie

Step 1: Prepare the oven. Preheat it to 400 degrees F.

Step 2: Grease lightly the sides and bottom of a 9-inch pie plate.

Step 3: In a bowl, combine the chopped zucchini, tomato, and onion. Add in the cheese and mix well.

Step 4: Once the ingredients are incorporated, transfer it to the prepared pie plate and spread it.

Step 5: Using a fork, stir the Bisquick, milk, eggs, no-salt lemon pepper, garlic powder, oregano, sugar, and salt. Mix well until blended. Then, pour the veggies on top of the cheese mixture.

Step 6: Place inside the preheated oven and bake for about 35 minutes or until a knife inserted in the middle of the pie comes out clean.

Step 7: Once done, remove from the oven and let the pie cool for at least 10 minutes before serving. Enjoy!

Zucchini Tomato Pie

Rebecca I never thought that pie can be healthy, too. LOL. But kidding aside, this pie is not your ordinary pie. It is not blueberry pie, neither a peach pie. It… Main Dish Recipes Zucchini Tomato Pie European Print This
Nutrition facts: 200 calories 20 grams fat
Rating: 5.0/5
( 2 voted )

Ingredients

  • 1 cup chopped zucchini
  • 1 cup chopped tomato, drained and blotted dry
  • 1/2 cup chopped green onions
  • 3/4 cup grated parmesan cheese
  • 1 cup Bisquick
  • 3/4 cup milk
  • 3 eggs
  • 1 teaspoon no-salt lemon pepper
  • 1 teaspoon garlic powder
  • 1 teaspoon oregano
  • 1-2 teaspoons sugar
  • 1/2 teaspoon salt

Instructions

Step 1: Prepare the oven. Preheat it to 400 degrees F.

Step 2: Grease lightly the sides and bottom of a 9-inch pie plate.

Step 3: In a bowl, combine the chopped zucchini, tomato, and onion. Add in the cheese and mix well.

Step 4: Once the ingredients are incorporated, transfer it to the prepared pie plate and spread it.

Step 5: Using a fork, stir the Bisquick, milk, eggs, no-salt lemon pepper, garlic powder, oregano, sugar, and salt. Mix well until blended. Then, pour the veggies on top of the cheese mixture.

Step 6: Place inside the preheated oven and bake for about 35 minutes or until a knife inserted in the middle of the pie comes out clean.

Step 7: Once done, remove from the oven and let the pie cool for at least 10 minutes before serving. Enjoy!

August 3, 2020 0 comment
0 FacebookTwitterPinterestEmail
Main Dish Recipes

Lemony Lemon Brownies

by Rebecca August 3, 2020
written by Rebecca

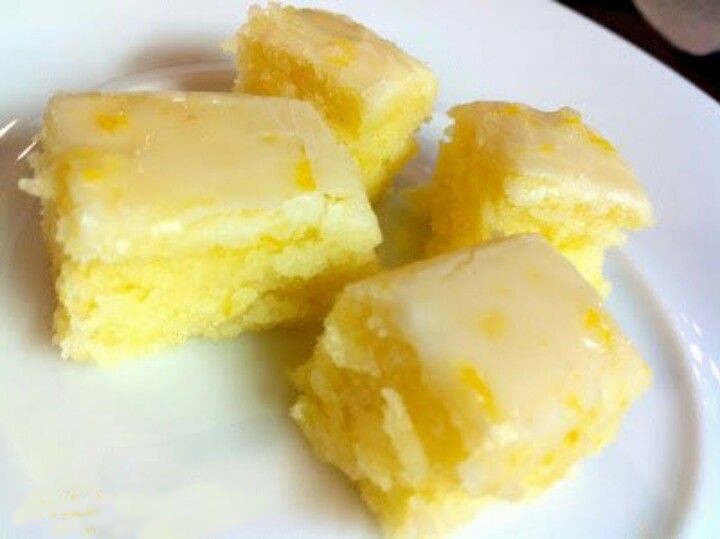
I love these lemon brownies. They are really soft, chewy, and the lemon flavor just bursts into the mouth! They are the perfect summer treat that you can have all year round. This Lemony Lemon brownie is a real treat for all the lemon lovers out there!

INGREDIENTS

For the The “Brownie” Batter:

3/4 cup all-purpose flour {King Arthur All-Purpose Flour}

3/4 cup granulated sugar

1/4 teaspoon salt {Sea Salt}

1/2 cup (1 stick) unsalted butter, softened

2 large eggs

2 tablespoons lemon zest

2 tablespoons lemon juice

For the Tart Lemon Glaze:

1 rounded cup powdered sugar

4 tablespoon lemon juice

8 teaspoons lemon zest

How to make Lemony Lemon Brownies

Step 1: Prepare the oven. Preheat it to 350 degrees F.

Step 2: Using butter or cooking spray, grease an 8 x 8-inch baking dish and set aside.

Step 3: Grab two small or one large lemon and zest and juice them. Set aside.

Step 4: Beat the flour, sugar, salt, and softened butter with an electric mixer until incorporated.

Step 5: Whisk the eggs, lemon zest, and lemon juice in a separate bowl. Mix well until combined. Then, pour the mixture into the flour mixture and beat for about 2 minutes at medium speed until smooth and creamy.

Step 6: Carefully pour the mixture into the prepared baking dish and place inside the preheated oven to bake for about 23 to 25 minutes or until the brownies just beginning to turn golden around the edges. To check the doneness, insert a toothpick in the middle and when it comes out clean the brownie is done.

Step 7: Once done, remove the brownie from the oven and cool. Make sure to not overbake the brownie or else it’ll be dry.

Step 8: While waiting for the brownies to cool, make the glaze by sifting the powdered sugar and adding the lemon zest and juice. Whisk the ingredients until combined.

Step 9: Glaze the cooled brownies by spreading the glaze using a rubber spatula. Allow the glaze to set before spreading the rest of the glaze over the bars. Let the glaze set before cutting the brownie into bars. This tart lemon glaze does not harden like most of the glaze.

Lemony Lemon Brownies

Rebecca I love these lemon brownies. They are really soft, chewy, and the lemon flavor just bursts into the mouth! They are the perfect summer treat that you can have all… Main Dish Recipes Lemony Lemon Brownies European Print This
Nutrition facts: 200 calories 20 grams fat
Rating: 3.8/5
( 5 voted )

Ingredients

  • For the The "Brownie" Batter:
  • 3/4 cup all-purpose flour {King Arthur All-Purpose Flour}
  • 3/4 cup granulated sugar
  • 1/4 teaspoon salt {Sea Salt}
  • 1/2 cup (1 stick) unsalted butter, softened
  • 2 large eggs
  • 2 tablespoons lemon zest
  • 2 tablespoons lemon juice
  • For the Tart Lemon Glaze:
  • 1 rounded cup powdered sugar
  • 4 tablespoon lemon juice
  • 8 teaspoons lemon zest

Instructions

Step 1: Prepare the oven. Preheat it to 350 degrees F.

Step 2: Using butter or cooking spray, grease an 8 x 8-inch baking dish and set aside.

Step 3: Grab two small or one large lemon and zest and juice them. Set aside.

Step 4: Beat the flour, sugar, salt, and softened butter with an electric mixer until incorporated.

Step 5: Whisk the eggs, lemon zest, and lemon juice in a separate bowl. Mix well until combined. Then, pour the mixture into the flour mixture and beat for about 2 minutes at medium speed until smooth and creamy.

Step 6: Carefully pour the mixture into the prepared baking dish and place inside the preheated oven to bake for about 23 to 25 minutes or until the brownies just beginning to turn golden around the edges. To check the doneness, insert a toothpick in the middle and when it comes out clean the brownie is done.

Step 7: Once done, remove the brownie from the oven and cool. Make sure to not overbake the brownie or else it'll be dry.

Step 8: While waiting for the brownies to cool, make the glaze by sifting the powdered sugar and adding the lemon zest and juice. Whisk the ingredients until combined.

Step 9: Glaze the cooled brownies by spreading the glaze using a rubber spatula. Allow the glaze to set before spreading the rest of the glaze over the bars. Let the glaze set before cutting the brownie into bars. This tart lemon glaze does not harden like most of the glaze.

August 3, 2020 0 comment
0 FacebookTwitterPinterestEmail
Main Dish Recipes

Cream Cheese Chicken Tacos

by Rebecca August 3, 2020
written by Rebecca

Serves: 5 (2 tacos each) |  Prep: 20 Min | Cook: 10 Min

I always love a good old taco. The flavors are amazing and tacos are pretty easy to make. But this Cream Cheese Chicken Tacos are not your ordinary tacos. They are way better and are great to serve with lettuce, tomato, and homemade guacamole. These amazing tacos are loaded with chicken, cream cheese, and cheddar cheese filling. They are so great, I keep coming back for more! Cream Cheese Chicken Tacos is an easy dinner recipe, a no-fuss, just plain delicious!

If you are looking for an easy and quick dinner menu, look no more! These tacos are a breeze to make. In just 30 minutes you’ll have these on your dinner table. And they are freaking delicious! A must-try!

Ingredients

1 pkg (8 oz.) cream cheese

2 clove garlic, minced

2 cups deli rotisserie chicken or leftover roast/baked chicken shredded

1 bunch green onion, thinly sliced

1/2 teaspoon salt

1/4 teaspoon pepper

1 cup shredded cheddar cheese

10 medium corn tortillas

canola oil for frying

How to Make Cream Cheese Chicken Tacos

Step 1: Prepare the oven. Preheat it to 425 degrees.

Step 2: Meanwhile, in a skillet, heat about a tablespoon of oil. Once heated, fry the tortillas, one at a time over medium heat until they are lightly browned. You can use more oil if needed. Transfer the tortillas on paper towels or on a wire rack to drain.

Step 3: In a saucepan, heat the cream cheese over low heat, stirring until completely melted.

Step 4: Add in the shredded chicken, garlic, green onion, and cheddar cheese in the saucepan. Remove the saucepan from the heat and stir until incorporated.

Step 5: Evenly arrange the chicken mixture between each shell. Then, place the taco shells in a 9 x 13-inch baking dish.

Step 6: Place inside the preheated oven and bake for about 8 to 10 minutes or until the shells are beginning to brown well.

Cream Cheese Chicken Tacos

Rebecca Serves: 5 (2 tacos each) |  Prep: 20 Min | Cook: 10 Min I always love a good old taco. The flavors are amazing and tacos are pretty easy to… Main Dish Recipes Cream Cheese Chicken Tacos European Print This
Serves: 5 Prep Time: 20 mins Cooking Time: 10 mins 10 mins
Nutrition facts: 200 calories 20 grams fat
Rating: 3.3/5
( 3 voted )

Ingredients

  • 1 pkg (8 oz.) cream cheese
  • 2 clove garlic, minced
  • 2 cups deli rotisserie chicken or leftover roast/baked chicken shredded
  • 1 bunch green onion, thinly sliced
  • 1/2 teaspoon salt
  • 1/4 teaspoon pepper
  • 1 cup shredded cheddar cheese
  • 10 medium corn tortillas
  • canola oil for frying

Instructions

Step 1: Prepare the oven. Preheat it to 425 degrees.

Step 2: Meanwhile, in a skillet, heat about a tablespoon of oil. Once heated, fry the tortillas, one at a time over medium heat until they are lightly browned. You can use more oil if needed. Transfer the tortillas on paper towels or on a wire rack to drain.

Step 3: In a saucepan, heat the cream cheese over low heat, stirring until completely melted.

Step 4: Add in the shredded chicken, garlic, green onion, and cheddar cheese in the saucepan. Remove the saucepan from the heat and stir until incorporated.

Step 5: Evenly arrange the chicken mixture between each shell. Then, place the taco shells in a 9 x 13-inch baking dish.

Step 6: Place inside the preheated oven and bake for about 8 to 10 minutes or until the shells are beginning to brown well.

August 3, 2020 0 comment
1 FacebookTwitterPinterestEmail
Main Dish Recipes

Nanny’s Famous Coconut-Pineapple Cake

by Rebecca August 3, 2020
written by Rebecca

Yield: Makes 1 (3-layer) cake

This coconut cake is what everyone is raving about! It’s gorgeous, it’s delicious, and the flavors blend perfectly. It beats all the cakes I’ve made before. It’s heavenly, it’s like a cotton fluff on a plate, and the secret to all of it is the lemon-lime soft drink.

Ingredients

1 (15 1/4-ounce) can crushed pineapple in juice, undrained

1 1/2 cups butter or margarine, softened

3 cups of sugar

5 large eggs

1/2 cup lemon-lime soft drink*

3 cups cake flour, sifted

1 teaspoon lemon extract

1 teaspoon vanilla extract

Pineapple Filling

Cream Cheese Frosting

1 (6-ounce) package frozen flaked coconut, thawed

Garnish: fresh mint sprig

How to Make Nanny’s Famous Coconut-Pineapple Cake

Step 1: Grease the sides and bottom of 3 9-inch round cake pans and use a wax paper to line the bottom of the pans. Then, grease and flour the wax paper.

Step 2: Drain the pineapple and make sure to reserve 3/4 cup of juice. Then, separate 1/4 cup reserved juice for the Cream Cheese Frosting and reserving the crushed pineapple for the Pineapple filling.

Step 3: Using an electric mixer, beat the butter at medium speed until creamy. Slowly add the sugar and beating thoroughly. Add in the eggs, one at a time, beating every after each addition.

Step 4: Combine the half cup reserved pineapple juice with a soft drink. Stir the flour to the butter mixture alternately with the juice mixture. Begin and end with flour, while beating at low speed every after each addition until incorporated. Once blended, pour the mixture into the prepared cake pans.

Step 5: Place inside the oven and bake at 350 degrees for about 25 to 30 minutes or until a wooden toothpick inserted in the middle comes out clean. Immediately remove the pans from the oven and let the cakes cool on wire racks.

Step 6: Once cooled, spread 3/4 cup of the Pineapple filling between each cake layer and the rest of the filling on top of the cake. On the sides of the cakes, spread the cream cheese frosting and pipe the border around the top if you choose to. Now, sprinkle over the coconut and garnish the cake if desired.

NOTE: *You can use 7-Up for the lemon-lime soft drink because the level of carbonation of 7-Up is specific and will make the layers rise gorgeously.

Nanny's Famous Coconut-Pineapple Cake

Rebecca Yield: Makes 1 (3-layer) cake This coconut cake is what everyone is raving about! It’s gorgeous, it’s delicious, and the flavors blend perfectly. It beats all the cakes I’ve made… Main Dish Recipes Nanny’s Famous Coconut-Pineapple Cake European Print This
Nutrition facts: 200 calories 20 grams fat
Rating: 5.0/5
( 1 voted )

Ingredients

  • 1 (15 1/4-ounce) can crushed pineapple in juice, undrained
  • 1 1/2 cups butter or margarine, softened
  • 3 cups of sugar
  • 5 large eggs
  • 1/2 cup lemon-lime soft drink*
  • 3 cups cake flour, sifted
  • 1 teaspoon lemon extract
  • 1 teaspoon vanilla extract
  • Pineapple Filling
  • Cream Cheese Frosting
  • 1 (6-ounce) package frozen flaked coconut, thawed
  • Garnish: fresh mint sprig

Instructions

Step 1: Grease the sides and bottom of 3 9-inch round cake pans and use a wax paper to line the bottom of the pans. Then, grease and flour the wax paper.

Step 2: Drain the pineapple and make sure to reserve 3/4 cup of juice. Then, separate 1/4 cup reserved juice for the Cream Cheese Frosting and reserving the crushed pineapple for the Pineapple filling.

Step 3: Using an electric mixer, beat the butter at medium speed until creamy. Slowly add the sugar and beating thoroughly. Add in the eggs, one at a time, beating every after each addition.

Step 4: Combine the half cup reserved pineapple juice with a soft drink. Stir the flour to the butter mixture alternately with the juice mixture. Begin and end with flour, while beating at low speed every after each addition until incorporated. Once blended, pour the mixture into the prepared cake pans.

Step 5: Place inside the oven and bake at 350 degrees for about 25 to 30 minutes or until a wooden toothpick inserted in the middle comes out clean. Immediately remove the pans from the oven and let the cakes cool on wire racks.

Step 6: Once cooled, spread 3/4 cup of the Pineapple filling between each cake layer and the rest of the filling on top of the cake. On the sides of the cakes, spread the cream cheese frosting and pipe the border around the top if you choose to. Now, sprinkle over the coconut and garnish the cake if desired.

NOTE: *You can use 7-Up for the lemon-lime soft drink because the level of carbonation of 7-Up is specific and will make the layers rise gorgeously.

August 3, 2020 0 comment
0 FacebookTwitterPinterestEmail
Main Dish Recipes

Strawberry Brownies

by Rebecca August 3, 2020
written by Rebecca

Yield: 10-12 | Prep time: 10 minutes| Cook time: 15 minutes| Additional time: 5 minutes| Total time: 30 minutes

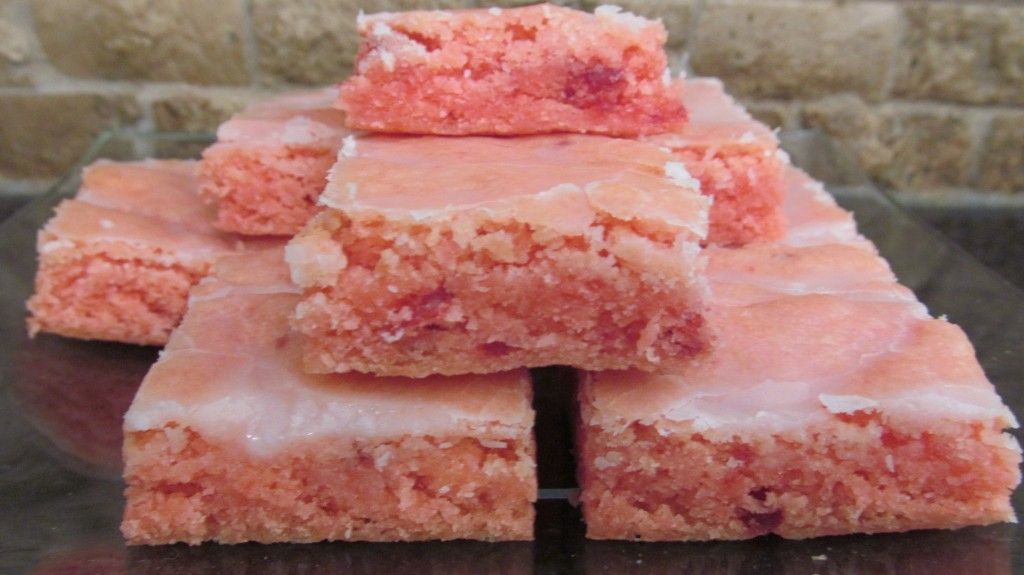
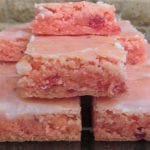
These strawberry brownies are the prettiest thing. They are super easy and fun to make. Always the star on potlucks and one of the best homemade gifts to give to friends, colleagues, and family. Girls are raving about these delicious brownies. It’s pink, it’s pretty on a plate, can be a decorative edible on parties, and they are heavenly delicious the guys dig it, too!

INGREDIENTS

TO MAKE THE BROWNIES:

1 box strawberry cake mix (see notes)

2 eggs

1/3 cup oil

TO MAKE THE GLAZE:

1 cup powdered sugar

1 -2 tablespoons water or lemon juice

1/2 teaspoon vanilla extract (optional)

HOW TO MAKE STRAWBERRY BROWNIES

Step 1: Prepare the oven. Preheat it to 350 degrees.

Step 2: Line with parchment paper an 8 x 9-inch square baking pan and spray it with flour spray.

Step 3: Using a hand mixer, combine the strawberry cake mix, eggs, and oil. Mix well.

Step 4: Once the batter is thoroughly mixed, spread it evenly into the prepared pan.

Step 5: Place the pan inside the preheated oven and bake the batter for 15 minutes or until just set. Make sure to not overbake.

Step 6: Once done, remove from the oven and let the brownies cool for 10 minutes before carefully lifting it from the pan. Use the ends of the parchment paper to slowly lift the brownies.

Step 7: In a small bowl, mix the powdered sugar, water or lemon juice, and extract (if using). The consistency should be smooth, not watery.

Step 8: Pour the glaze over the brownie, then, spread to edges. This will make the glaze drip down-sides.

Step 9: Let the brownies cool and the glaze to set first before cutting the brownie into squares.

NOTES:
If you are using 8-inch pans, it’ll yield thicker brownies and with 9-inch pans, thinner brownies.

You should use a good mixer to mix and a spatula to spread as the batter will be very thick.

To cut the brownies easier, you should refrigerate the glazed brownies first for an hour or so.

NUTRITION INFORMATION:

Amount Per Serving: CALORIES: 128 TOTAL FAT: 7g SATURATED FAT: 1g TRANS FAT: 0g UNSATURATED FAT: 5g CHOLESTEROL: 31mg SODIUM: 47mg CARBOHYDRATES: 14g FIBER: 0g SUGAR: 12g PROTEIN: 2g

Strawberry Brownies

Rebecca Yield: 10-12 | Prep time: 10 minutes| Cook time: 15 minutes| Additional time: 5 minutes| Total time: 30 minutes These strawberry brownies are the prettiest thing. They are super easy… Main Dish Recipes Strawberry Brownies European Print This
Serves: 10-12 Prep Time: 10 mins Cooking Time: 20 mins 20 mins
Nutrition facts: 128 calories 7 fat
Rating: 3.8/5
( 17 voted )

Ingredients

  • TO MAKE THE BROWNIES:
  • 1 box strawberry cake mix (see notes)
  • 2 eggs
  • 1/3 cup oil
  • TO MAKE THE GLAZE:
  • 1 cup powdered sugar
  • 1 -2 tablespoons water or lemon juice
  • 1/2 teaspoon vanilla extract (optional)

Instructions

Step 1: Prepare the oven. Preheat it to 350 degrees.

Step 2: Line with parchment paper an 8 x 9-inch square baking pan and spray it with flour spray.

Step 3: Using a hand mixer, combine the strawberry cake mix, eggs, and oil. Mix well.

Step 4: Once the batter is thoroughly mixed, spread it evenly into the prepared pan.

Step 5: Place the pan inside the preheated oven and bake the batter for 15 minutes or until just set. Make sure to not overbake.

Step 6: Once done, remove from the oven and let the brownies cool for 10 minutes before carefully lifting it from the pan. Use the ends of the parchment paper to slowly lift the brownies.

Step 7: In a small bowl, mix the powdered sugar, water or lemon juice, and extract (if using). The consistency should be smooth, not watery.

Step 8: Pour the glaze over the brownie, then, spread to edges. This will make the glaze drip down-sides.

Step 9: Let the brownies cool and the glaze to set first before cutting the brownie into squares.

NOTES:
If you are using 8-inch pans, it'll yield thicker brownies and with 9-inch pans, thinner brownies.

You should use a good mixer to mix and a spatula to spread as the batter will be very thick.

To cut the brownies easier, you should refrigerate the glazed brownies first for an hour or so.

August 3, 2020 0 comment
0 FacebookTwitterPinterestEmail
Main Dish Recipes

My Grandma Old-Fashioned Biscuits

by Rebecca August 3, 2020
written by Rebecca

Serves: Makes 10 to 12 biscuits | Prep: 10 Min | Cook: 15 Min

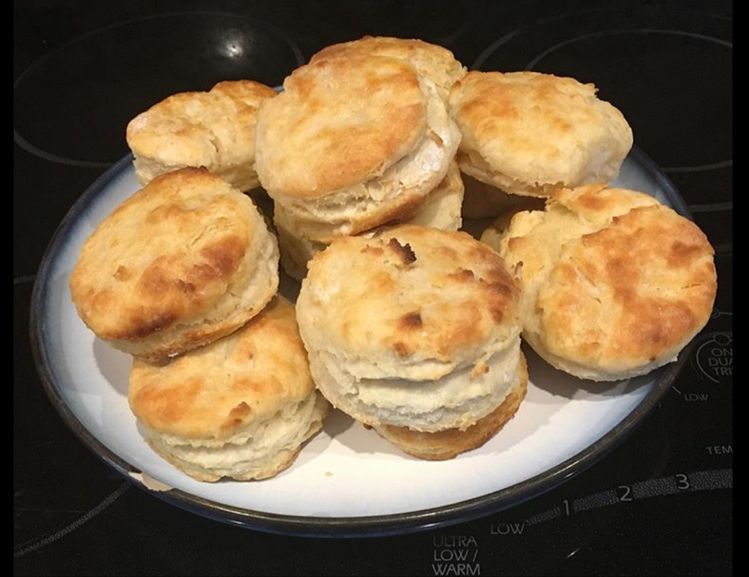
I have been struggling with making biscuits. I thought it’s easy to make, but a few years later I’m still in the dark. I would love to make biscuits like my grandmother. I always wondered how she made those delicious biscuits effortlessly. Until I found the perfect recipe. I wish I knew then these secrets; never use too much shortening, don’t over knead the dough, and make sure that the shortening and buttermilk you’ll use are very cold.

Ingredients

2 cups self-rising flour (Martha white or white lily for best results)

1/4 cup lard or shortening (about egg-sized and very cold)

1 cup very cold buttermilk (may need to adjust amount)

3 tablespoons melted shortening or butter

How to Make My Granny’s Old-Fashioned Biscuits

Step 1: Prepare the oven. Preheat it to 450 degrees.

Step 2: Thoroughly grease a large cast-iron skillet or biscuit pan. Set aside.

Step 3: In a large bowl, combine the flour with lard/shortening.

Step 4: Using the usual pastry method, cut into the flour.

Step 5: Pour in the milk and combine using a fork or your hands to form a light dough. Then, knead the dough couple of times on a floured board. Pat to flatten the dough to about half-inch thick.

Step 6: Cut the dough into biscuits with a biscuit cutter and transfer the dough into the prepared pan.

Step 7: Then, pour the melted butter or shortening over the biscuits.

Step 8: Place inside the preheated oven and bake for approximately 13 to 15 minutes or until golden.

Step 9: Once browned, transfer the biscuits into a covered container. Let the biscuits steam for 5 minutes. Before steaming, you can brush the biscuits with melted butter if desired.

Step 10: Once steamed, serve the biscuits hot with butter, apple butter, jelly, jam, honey, or anything you prefer. Enjoy!

NOTE: If a biscuit cutter is not available, you can use a 4-ounce mushroom can. Open both ends of the can, wash, and remove the label.

My Granny's Old-Fashioned Biscuits

Rebecca Serves: Makes 10 to 12 biscuits | Prep: 10 Min | Cook: 15 Min I have been struggling with making biscuits. I thought it’s easy to make, but a few… Main Dish Recipes My Grandma Old-Fashioned Biscuits European Print This
Serves: 12 Prep Time: 10 mins Cooking Time: 15 mins 15 mins
Nutrition facts: 200 calories 20 grams fat
Rating: 4.5/5
( 2 voted )

Ingredients

  • 2 cups self-rising flour (Martha white or white lily for best results)
  • 1/4 cup lard or shortening (about egg-sized and very cold)
  • 1 cup very cold buttermilk (may need to adjust amount)
  • 3 tablespoons melted shortening or butter

Instructions

Step 1: Prepare the oven. Preheat it to 450 degrees.

Step 2: Thoroughly grease a large cast-iron skillet or biscuit pan. Set aside.

Step 3: In a large bowl, combine the flour with lard/shortening.

Step 4: Using the usual pastry method, cut into the flour.

Step 5: Pour in the milk and combine using a fork or your hands to form a light dough. Then, knead the dough couple of times on a floured board. Pat to flatten the dough to about half-inch thick.

Step 6: Cut the dough into biscuits with a biscuit cutter and transfer the dough into the prepared pan.

Step 7: Then, pour the melted butter or shortening over the biscuits.

Step 8: Place inside the preheated oven and bake for approximately 13 to 15 minutes or until golden.

Step 9: Once browned, transfer the biscuits into a covered container. Let the biscuits steam for 5 minutes. Before steaming, you can brush the biscuits with melted butter if desired.

Step 10: Once steamed, serve the biscuits hot with butter, apple butter, jelly, jam, honey, or anything you prefer. Enjoy!

NOTE: If a biscuit cutter is not available, you can use a 4-ounce mushroom can. Open both ends of the can, wash, and remove the label.

August 3, 2020 0 comment
0 FacebookTwitterPinterestEmail
Main Dish Recipes

Cream Cheese Snowball Cookies Are Your New Cookie Obsession

by Rebecca July 8, 2020
written by Rebecca

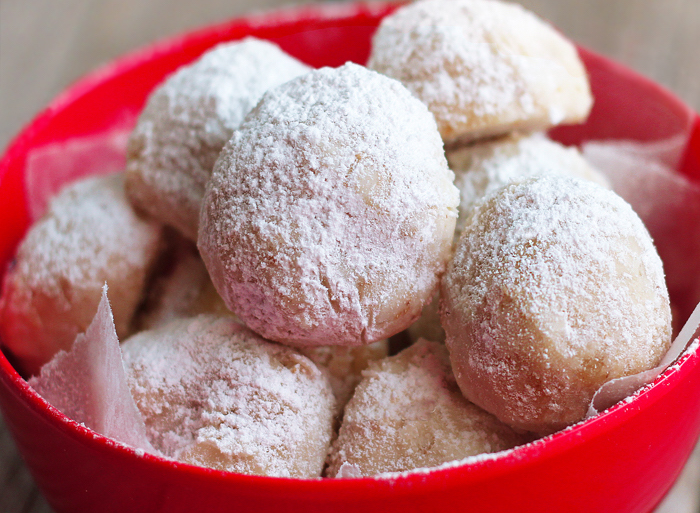
These snowball cookies are a holiday classic. A whip and bake cookies that melt in your mouth with sweet pecan goodness and cream cheese! These pecan filled cookies that are covered in powdered sugar are my new favorite cookies obsession.  Tender, filled, sweet, nutty, and no doubt the best cream cheese snowball cookies that you will ever taste! Whoever I make these it’s like Christmas! The kids are running around the house, me and my husband in the kitchen drinking wine while preparing for dinner. A nostalgic feeling whenever I have a bite of these super delicious cookies. And these are pretty and yummy to give as a homemade gift. My friends and colleagues were so happy last year because I gave them each a box of these rounded wonders. Try it for yourself, I promise you will go gaga over these cookies!

INGREDIENTS

1 cup confectioners’ sugar

1/2 cup finely chopped walnuts (optional)

1/2 cup vegetable shortening (such as Crisco(R))

1/2 cup butter, softened

1/2 cup cream cheese, softened

1/2 cup white sugar

1/2 teaspoon almond extract

1/2 teaspoon vanilla extract

1 1/2 cups all-purpose flour

How to make Cream Cheese Snowball Cookies

Step 1: Prepare the oven. Preheat it to 350 degrees F or 175 degrees C.

Step 2: In a shallow bowl, sift the confectioner’s sugar. Then, stir in the walnuts and set aside.

Step 3: In another bowl, beat the shortening, butter, cream cheese, and sugar until well combined. Stir in the almond extract, vanilla extract, and flour. Mix until incorporated.

Step 4: Form the dough into 1-inch diameter balls. Place on an ungreased baking sheet about 1 1/2 inches apart.

Step 5: Place inside the preheated oven and bake for approximately 6 minutes or until the edges of the cookies turn a bit golden.

Step 6: Once done, remove from the oven and let the cookies cool on the baking sheet for a minute.

Step 7: While the cookies are still warm, roll them in the confectioner’s sugar-walnut mixture.

Cream Cheese Snowball Cookies Are Your New Cookie Obsession

Rebecca These snowball cookies are a holiday classic. A whip and bake cookies that melt in your mouth with sweet pecan goodness and cream cheese! These pecan filled cookies that are… Main Dish Recipes Cream Cheese Snowball Cookies Are Your New Cookie Obsession European Print This
Nutrition facts: 200 calories 20 grams fat
Rating: 5.0/5
( 1 voted )

Ingredients

  • 1 cup confectioners’ sugar
  • 1/2 cup finely chopped walnuts (optional)
  • 1/2 cup vegetable shortening (such as Crisco(R))
  • 1/2 cup butter, softened
  • 1/2 cup cream cheese, softened
  • 1/2 cup white sugar
  • 1/2 teaspoon almond extract
  • 1/2 teaspoon vanilla extract
  • 1 1/2 cups all-purpose flour

Instructions

Step 1: Prepare the oven. Preheat it to 350 degrees F or 175 degrees C.

Step 2: In a shallow bowl, sift the confectioner's sugar. Then, stir in the walnuts and set aside.

Step 3: In another bowl, beat the shortening, butter, cream cheese, and sugar until well combined. Stir in the almond extract, vanilla extract, and flour. Mix until incorporated.

Step 4: Form the dough into 1-inch diameter balls. Place on an ungreased baking sheet about 1 1/2 inches apart.

Step 5: Place inside the preheated oven and bake for approximately 6 minutes or until the edges of the cookies turn a bit golden.

Step 6: Once done, remove from the oven and let the cookies cool on the baking sheet for a minute.

Step 7: While the cookies are still warm, roll them in the confectioner's sugar-walnut mixture.

July 8, 2020 0 comment
0 FacebookTwitterPinterestEmail
Newer Posts
Older Posts

Popular Posts

  • 1

    Crispy Crunchy Parmesan Potatoes

    March 21, 2020
  • 2

    CROCK POT SMOTHERED PORK CHOPS

    March 21, 2020
  • Facebook
  • Twitter

@2019 - All Right Reserved.


Back To Top