Cook it once
  • Home
  • Privacy Policy
  • Recipes
    • KETO
    • LC
    • WW
  • Tips
  • Contact
Cook it once
  • Home
  • Privacy Policy
  • Recipes
    • KETO
    • LC
    • WW
  • Tips
  • Contact
Category:

Main Dish Recipes

Main Dish Recipes

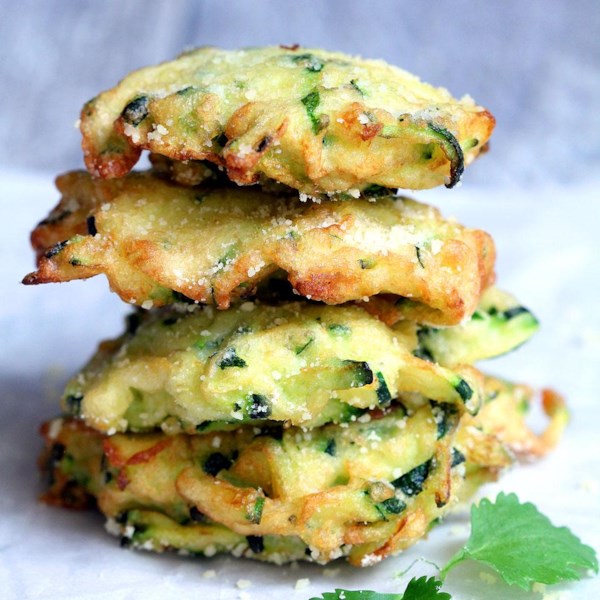
ZUCCHINI-PARMESAN CHEESE FRITTERS

by Rebecca August 12, 2020
written by Rebecca

Prep time: 15 min | Cook time: 10 min | Ready In: 35 min | Servings: 8

Zucchini is one of the most versatile. You can put this on anything and the result will always be superb! That is not the best part yet because zucchini as we all know has lots of health benefits. I am obsessed with anything zucchini and one of my go-to is this Zucchini-Parmesan Cheese Fritters. You can make these in a heartbeat and the ingredients are so simple, you might already have them on hand. And if you are looking for a clever way to hide veggies from your picky eaters, these fritters are perfect! Munch on these healthy and delicious snacks all day, every day worry-free.

INGREDIENTS

3 large zucchini, finely grated

1/2 teaspoon salt

For the Batter:

1 egg

5 tablespoons all-purpose flour

4 tablespoons Parmesan cheese

1/4 teaspoon salt

ground black pepper to taste

oil for frying

For the Toppings:

1 tablespoon grated Parmesan cheese, or to taste

1 pinch salt

1/4 cup sour cream, for topping

HOW TO MAKE ZUCCHINI-PARMESAN CHEESE FRITTERS

Step 1: Place the zucchini and salt in a bowl. Stir to combine. Then, set it aside for at least 10 minutes before pouring the mixture into a clean dish towel or cheesecloth. Give it a good squeeze to completely drain.

Step 2: In a bowl, whisk the egg, then, add in the flour, parmesan cheese, salt, and pepper. Add in the drained zucchini and mix thoroughly.

Step 3: In a medium-sized pan, heat the oil over medium-high heat.

Step 4: Once the oil is hot, place tablespoons of batter and cook the fritters for approximately 5 minutes per batch or until golden brown on both sides.

Step 5: Transfer the cooked fritters onto a serving plate and sprinkle over some parmesan cheese and salt. Serve hot with sour cream. Enjoy!

Nutrition Facts:

Per Serving: 138 calories; 11.4 g fat; 6.7 g carbohydrates; 3.4 g protein; 23 mg cholesterol; 248 mg sodium

ZUCCHINI-PARMESAN CHEESE FRITTERS

Rebecca Prep time: 15 min | Cook time: 10 min | Ready In: 35 min | Servings: 8 Zucchini is one of the most versatile. You can put this on anything… Main Dish Recipes ZUCCHINI-PARMESAN CHEESE FRITTERS European Print This
Serves: 8 Prep Time: 15 mins Cooking Time: 10 mins 10 mins
Nutrition facts: 138 calories 20 grams fat
Rating: 4.0/5
( 2 voted )

Ingredients

  • 3 large zucchini, finely grated
  • 1/2 teaspoon salt
  • For the Batter:
  • 1 egg
  • 5 tablespoons all-purpose flour
  • 4 tablespoons Parmesan cheese
  • 1/4 teaspoon salt
  • ground black pepper to taste
  • oil for frying
  • For the Toppings:
  • 1 tablespoon grated Parmesan cheese, or to taste
  • 1 pinch salt
  • 1/4 cup sour cream, for topping

Instructions

Step 1: Place the zucchini and salt in a bowl. Stir to combine. Then, set it aside for at least 10 minutes before pouring the mixture into a clean dish towel or cheesecloth. Give it a good squeeze to completely drain.

Step 2: In a bowl, whisk the egg, then, add in the flour, parmesan cheese, salt, and pepper. Add in the drained zucchini and mix thoroughly.

Step 3: In a medium-sized pan, heat the oil over medium-high heat.

Step 4: Once the oil is hot, place tablespoons of batter and cook the fritters for approximately 5 minutes per batch or until golden brown on both sides.

Step 5: Transfer the cooked fritters onto a serving plate and sprinkle over some parmesan cheese and salt. Serve hot with sour cream. Enjoy!
August 12, 2020 0 comment
0 FacebookTwitterPinterestEmail
Main Dish Recipes

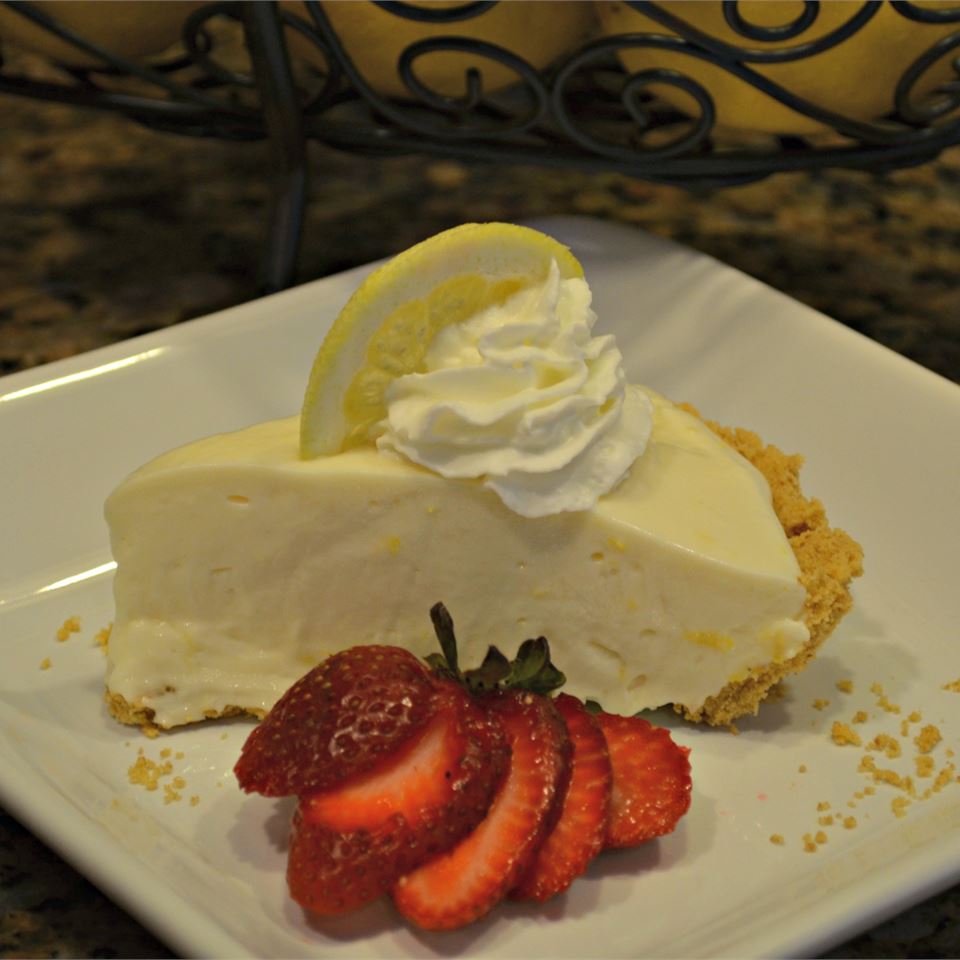
YOU’LL BE MAKING THIS LEMONADE PIE ALL SUMMER

by Rebecca August 12, 2020
written by Rebecca

Servings: 8 | Yield: 1 pie

A perfectly sweet pie to complete your meal. This Lemonade Pie is an awesome dessert that screams summer in every bite. It is super refreshing and has the perfect balance of sweet and tangy. The perfect dessert if you are looking for a light treat. Plus, this is a breeze to make. And no baking required!

This heavenly pie is fluffy, soft, and only requires a few simple ingredients to make. A freaking delicious lemonade pie that hits the right spot. I am a big fan of lemonade so this pie is my perfect match. My zing and my go-to all year round! The secret to making a perfect lemonade pie is to chill it enough to set. So as much as I want to dig right into it, patience is needed before you can even take a tiny bite. And this pie is worth the wait!

INGREDIENTS

1 9 inches prepared graham cracker crust

¾ cup frozen lemonade concentrate, thawed

1 8 oz package cream cheese, softened

1 14 oz can sweeten condensed milk

1 8 oz container frozen whipped topping, thawed

HOW TO MAKE LEMONADE PIE

Step 1: Place the lemonade concentrate, cream cheese, and condensed milk in a blender.

Step 2: Blend the mixture until smooth over medium speed.

Step 3: Pour the mixture in a bowl, then, fold in the whipped topping.

Step 4: Then, transfer into a graham cracker crust.

Tips:

If you are watching your weight, you can use Fat-Free Sugar-Free Pudding Mix, 1% milk, and Lite Cool Whip instead without compromising the taste.

Chill the pie before serving or eat it straight from the freezer! This pie freezes great, so if you are planning to bring this to a BBQ, just freeze it and just grab it on your way to the event.

Make sure to chill the pie first before serving or else you’ll get a pudding-like texture that won’t hold its shape. That would be a disaster when you slice the cake.

Nutrition Facts:

Per Serving: 544.3 calories; 47.5 mg cholesterol; 323.9 mg sodium; 7.7 g protein; 67 g carbohydrates

YOU’LL BE MAKING THIS LEMONADE PIE ALL SUMMER

Rebecca Servings: 8 | Yield: 1 pie A perfectly sweet pie to complete your meal. This Lemonade Pie is an awesome dessert that screams summer in every bite. It is super… Main Dish Recipes YOU’LL BE MAKING THIS LEMONADE PIE ALL SUMMER European Print This
Serves: 8
Nutrition facts: 544.3 calories 20 grams fat
Rating: 5.0/5
( 1 voted )

Ingredients

  • 1 9 inches prepared graham cracker crust
  • ¾ cup frozen lemonade concentrate, thawed
  • 1 8 oz package cream cheese, softened
  • 1 14 oz can sweeten condensed milk
  • 1 8 oz container frozen whipped topping, thawed

Instructions

Step 1: Place the lemonade concentrate, cream cheese, and condensed milk in a blender.

Step 2: Blend the mixture until smooth over medium speed.

Step 3: Pour the mixture in a bowl, then, fold in the whipped topping.

Step 4: Then, transfer into a graham cracker crust.

Tips:

If you are watching your weight, you can use Fat-Free Sugar-Free Pudding Mix, 1% milk, and Lite Cool Whip instead without compromising the taste.

Chill the pie before serving or eat it straight from the freezer! This pie freezes great, so if you are planning to bring this to a BBQ, just freeze it and just grab it on your way to the event.

Make sure to chill the pie first before serving or else you'll get a pudding-like texture that won't hold its shape. That would be a disaster when you slice the cake.

August 12, 2020 0 comment
0 FacebookTwitterPinterestEmail
Main Dish Recipes

RASPBERRY ICEBOX CAKE FOR HOT SUMMER DAYS

by Rebecca August 12, 2020
written by Rebecca

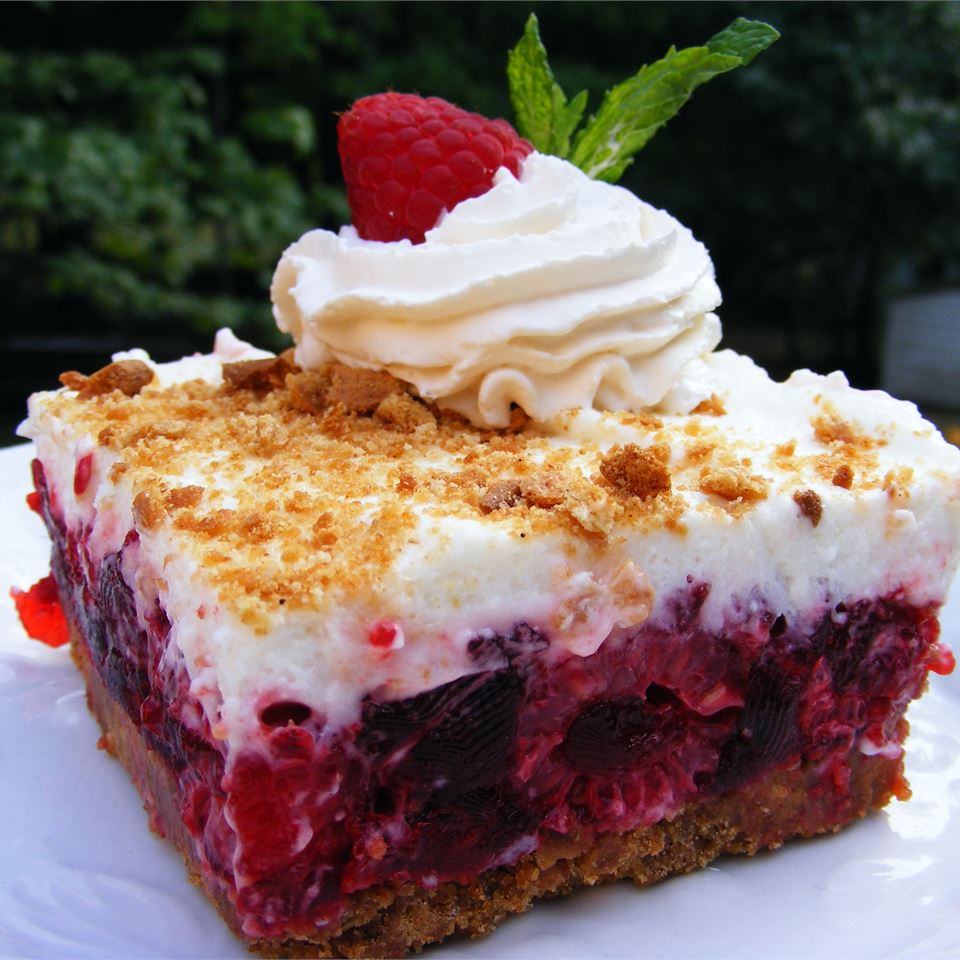
This is the perfect cake for the hot summer days. If you haven’t tried icebox cake, I think it is time you should. This cake has amazing layers from graham crackers layered with whipped cream, lemon curd, and a heap of fresh raspberries.

This Raspberry Icebox Cake is so light, super fun to make, undoubtedly gorgeous, and tastes superb. Super perfect for ladies’ brunch!

Ingredients

24 graham crackers, crushed

⅓ cup butter

¼ cup packed brown sugar

1 6 oz package raspberry flavored Jell-O® mix

1 cup boiling water

15 ounces frozen raspberries

20 large marshmallows

⅓ cup milk

1 cup heavy whipping cream, whipped

HOW TO MAKE RASPBERRY ICEBOX CAKE

Step 1: Prepare the oven. Preheat it to 175 degrees C or 350 degrees F.

Step 2: In a bowl, whisk in the graham cracker crumbs, butter, and brown sugar until incorporated. Then, set aside 1/4 cup of the mixture for topping and press the remaining mixture into a 9 x 13-inch pan.

Step 3: Place inside the oven and bake for about 10 minutes. When done, remove from the oven and allow the cake to cool.

Step 4: Meanwhile, dissolve the raspberry gelatin in boiling water, then, add in the frozen raspberries. Stir until melted. Once done, chill so the wafer base is somewhat set.

Step 5: Melt the milk and the marshmallows. Then, allow it to cool before folding and spreading on top of the raspberry mixture in whipped cream. Then, sprinkle the leftover crumbs over.

Step 6: Place inside the fridge to chill for at least 3 to 4 hours before serving.

Notes:

This recipe is customizable. You can use different pudding flavors from cheesecake or lemon and a chocolate graham crackers instead of a regular graham. Raspberries can be substituted with strawberries or blueberries, too. Although, I personally love the tang from the raspberries that gives this cake a sweet and creamy blend.

And it’ll be easier to lift the cake out from the pan if you first line the dish with parchment paper, plastic wrap or tinfoil.

Nutrition Facts:

Per Serving: 294.8 calories; 23.8 mg cholesterol; 235.2 mg sodium; 3.6 g protein; 49.4 g carbohydrates

RASPBERRY ICEBOX CAKE FOR HOT SUMMER DAYS

Rebecca This is the perfect cake for the hot summer days. If you haven’t tried icebox cake, I think it is time you should. This cake has amazing layers from graham… Main Dish Recipes RASPBERRY ICEBOX CAKE FOR HOT SUMMER DAYS European Print This
Nutrition facts: 294.8 calories 20 grams fat
Rating: 5.0/5
( 1 voted )

Ingredients

  • 24 graham crackers, crushed
  • ⅓ cup butter
  • ¼ cup packed brown sugar
  • 1 6 oz package raspberry flavored Jell-O® mix
  • 1 cup boiling water
  • 15 ounces frozen raspberries
  • 20 large marshmallows
  • ⅓ cup milk
  • 1 cup heavy whipping cream, whipped

Instructions

Step 1: Prepare the oven. Preheat it to 175 degrees C or 350 degrees F.

Step 2: In a bowl, whisk in the graham cracker crumbs, butter, and brown sugar until incorporated. Then, set aside 1/4 cup of the mixture for topping and press the remaining mixture into a 9 x 13-inch pan.

Step 3: Place inside the oven and bake for about 10 minutes. When done, remove from the oven and allow the cake to cool.

Step 4: Meanwhile, dissolve the raspberry gelatin in boiling water, then, add in the frozen raspberries. Stir until melted. Once done, chill so the wafer base is somewhat set.

Step 5: Melt the milk and the marshmallows. Then, allow it to cool before folding and spreading on top of the raspberry mixture in whipped cream. Then, sprinkle the leftover crumbs over.

Step 6: Place inside the fridge to chill for at least 3 to 4 hours before serving.

Notes:

This recipe is customizable. You can use different pudding flavors from cheesecake or lemon and a chocolate graham crackers instead of a regular graham. Raspberries can be substituted with strawberries or blueberries, too. Although, I personally love the tang from the raspberries that gives this cake a sweet and creamy blend.

And it'll be easier to lift the cake out from the pan if you first line the dish with parchment paper, plastic wrap or tinfoil.

August 12, 2020 0 comment
0 FacebookTwitterPinterestEmail
Main Dish Recipes

CINNAMON HONEYBUN CAKE IS BASICALLY JUST A GIANT HONEYBUN

by Rebecca August 12, 2020
written by Rebecca

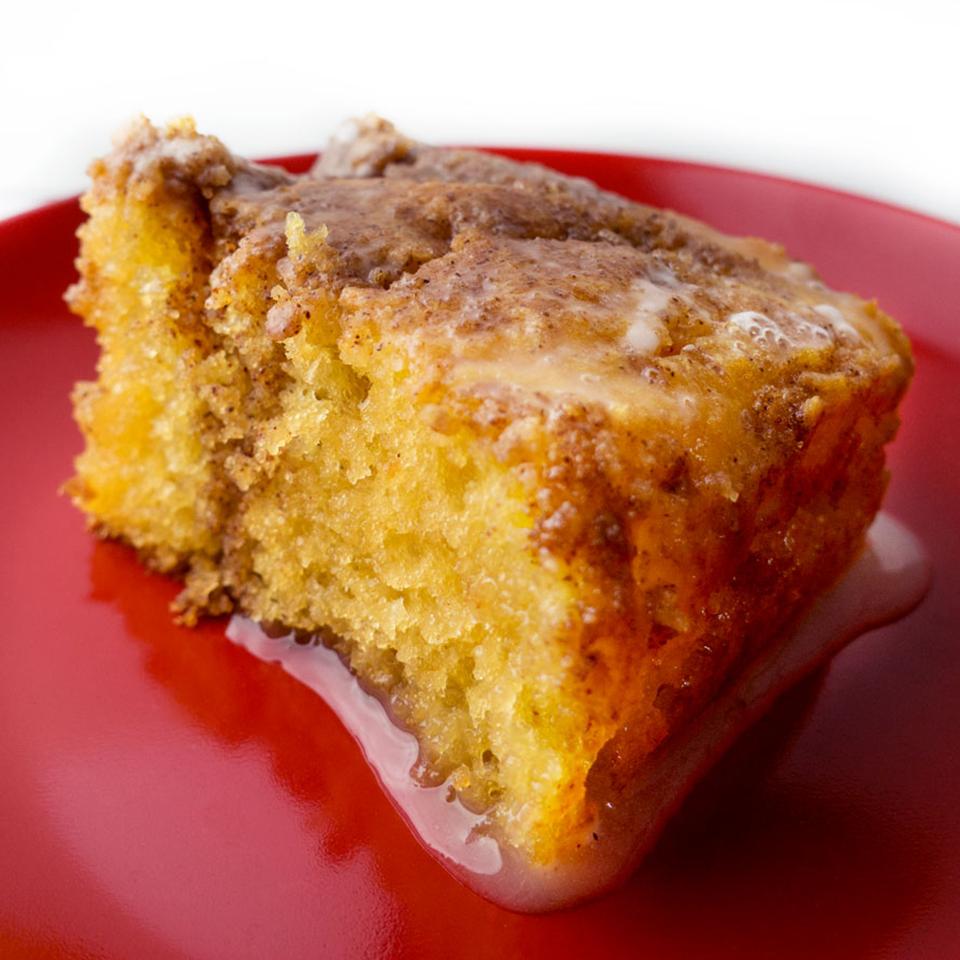
I love cinnamon! It wakes my senses up and its aroma is simply heaven. This cake is specially made for cinnamon lovers like me. A straight out from the cake mix recipe that is surprisingly amazing! It is perfectly sweet, super moist, and topped with a simple glaze. This Cinnamon Honeybun Cake is perfect for breakfast, snacks, even as a dessert. This certainly will be your family’s new addiction!

Ingredients

1 18.25 oz package yellow cake mix

1 cup buttermilk

4 eggs

½ teaspoon baking soda

¾ cup of vegetable oil

1 cup brown sugar

2 teaspoons ground cinnamon

¾ cup milk

1 teaspoon vanilla extract

3 cups confectioners’ sugar

HOW TO MAKE CINNAMON HONEYBUN CAKE

Step 1: Prepare the oven. Preheat it to 325 degrees F or 165 degrees C.

Step 2: Then, grease a 9 x 13-inch cake dish.

Step 3: In a bowl, whisk the cake mixture, buttermilk, sugar, baking soda, and vegetable oil until incorporated.

Step 4: Place the brown sugar and cinnamon in another bowl. Mix well.

Step 5: Transfer the batter into the prepared cake pan. Then, scatter spoonfuls of the cinnamon sugar on top of the batter. Using the same spoon, carefully stir the cinnamon sugar into the cake batter to leave streaks and ribbons. But make sure to not overmix.

Step 6: Place inside the preheated oven and bake for about 30 to 35 minutes. Check the doneness by inserting a toothpick in the middle of the cake. Once it comes out clean, the cake is done.

Step 7: Remove the cake from the oven and with a knife, poke holes all over the cake.

Step 8: In a bowl, whisk in the milk, vanilla extract, and candy sugar until smooth and runny. Spread the frosting around the cake so the icing will soak into the holes. Let the cake cool before serving. Enjoy!

Notes:

This moist cake can last up to four to five days. Make sure to cover it well so it won’t dry out.

If you don’t have a mixer, that is okay. All you need is just a large bowl and a brush.

Place the leftovers in the microwave for several seconds before serving.

Nutrition Facts:

Per Serving: 534.5 calories; 64.9 mg cholesterol; 392 mg sodium; 5.2 g protein; 83.7 g carbohydrates

CINNAMON HONEYBUN CAKE IS BASICALLY JUST A GIANT HONEYBUN

Rebecca I love cinnamon! It wakes my senses up and its aroma is simply heaven. This cake is specially made for cinnamon lovers like me. A straight out from the cake… Main Dish Recipes CINNAMON HONEYBUN CAKE IS BASICALLY JUST A GIANT HONEYBUN European Print This
Nutrition facts: 200 calories 20 grams fat
Rating: 5.0/5
( 1 voted )

Ingredients

  • 1 18.25 oz package yellow cake mix
  • 1 cup buttermilk
  • 4 eggs
  • ½ teaspoon baking soda
  • ¾ cup of vegetable oil
  • 1 cup brown sugar
  • 2 teaspoons ground cinnamon
  • ¾ cup milk
  • 1 teaspoon vanilla extract
  • 3 cups confectioners’ sugar

Instructions

Step 1: Prepare the oven. Preheat it to 325 degrees F or 165 degrees C.

Step 2: Then, grease a 9 x 13-inch cake dish.

Step 3: In a bowl, whisk the cake mixture, buttermilk, sugar, baking soda, and vegetable oil until incorporated.

Step 4: Place the brown sugar and cinnamon in another bowl. Mix well.

Step 5: Transfer the batter into the prepared cake pan. Then, scatter spoonfuls of the cinnamon sugar on top of the batter. Using the same spoon, carefully stir the cinnamon sugar into the cake batter to leave streaks and ribbons. But make sure to not overmix.

Step 6: Place inside the preheated oven and bake for about 30 to 35 minutes. Check the doneness by inserting a toothpick in the middle of the cake. Once it comes out clean, the cake is done.

Step 7: Remove the cake from the oven and with a knife, poke holes all over the cake.

Step 8: In a bowl, whisk in the milk, vanilla extract, and candy sugar until smooth and runny. Spread the frosting around the cake so the icing will soak into the holes. Let the cake cool before serving. Enjoy!

Notes:

This moist cake can last up to four to five days. Make sure to cover it well so it won't dry out.

If you don't have a mixer, that is okay. All you need is just a large bowl and a brush.

Place the leftovers in the microwave for several seconds before serving.

August 12, 2020 0 comment
0 FacebookTwitterPinterestEmail
Main Dish Recipes

THIS LEMON PUDDING CAKE TASTES LIKE SUNSHINE

by Rebecca August 12, 2020
written by Rebecca

Servings: 12 | Yield: 8-inch square cake

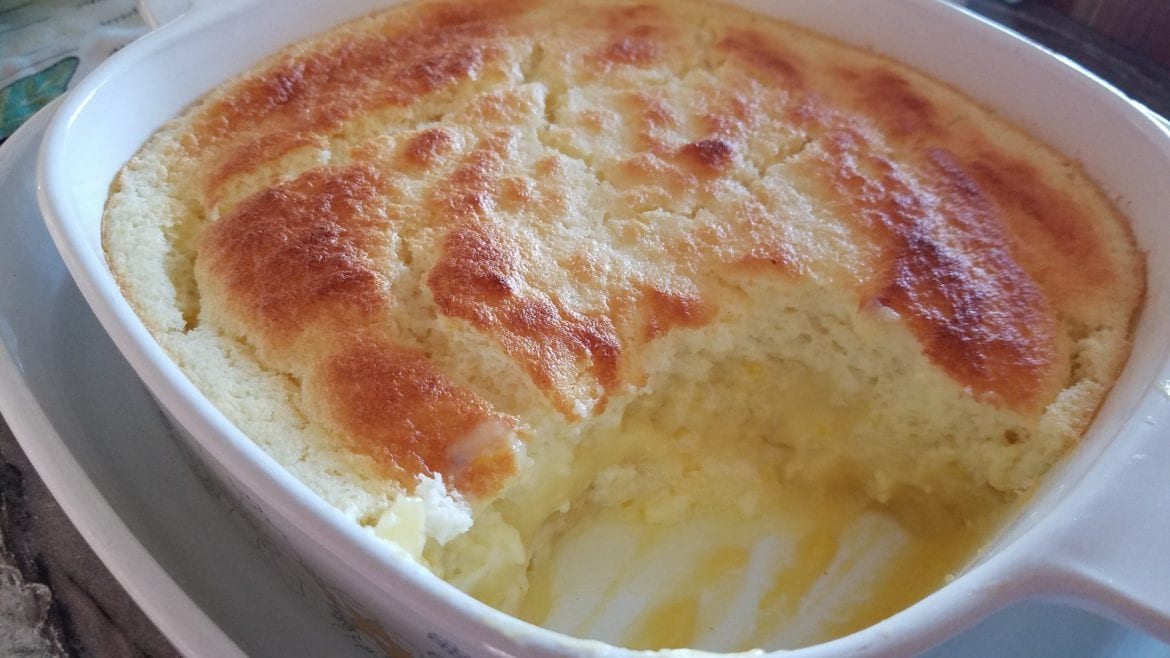
A dream cake that has a fluffy lemon block with a rich lemon pudding on the bottom. It is a real crowd-pleaser and a no-fuss that requires only eight simple ingredients. This Lemon Pudding Cake is a pretty straightforward dessert and the sauce on the bottom makes it even more irresistible.

Ingredients

4 eggs, separated

⅓ cup lemon juice

1 teaspoon lemon zest

1 tablespoon butter

1 ½ cups white sugar

½ cup sifted all-purpose flour

½ teaspoon salt

1 ½ cups milk

How to make Lemon Pudding Cake

Step 1: Place the egg yolks, lemon juice, lemon rind, and butter or margarine in a mixing bowl. Beat until thick and the color is lemon.

Step 2: In a separate bowl, stir in the sugar, flour, and salt.

Step 3: Add in the milk to the egg yolk mixture alternately with the milk, beating thoroughly every after each addition.

Step 4: In another bowl, beat the egg whites until stiff peaks form. Then, add to the batter and beat with an electric mixer on low speed.

Step 5: Transfer the batter into an 8 inches in line baking dish.

Step 6: Put a pan of hot water into the oven, then, place the baking dish in the tub.

Step 7: Bake the cake at 350 degrees F or 175 degrees C for approximately 45 minutes.

Notes:

Before cutting the lemon in half, roll it first on the counter, then apply a light pressure to loosen the membranes. This way you’ll surely get the best of the lemon. And if a citrus squeezer is not available, just place a small strainer over a bowl and with a fork, twisting back and forth, extrude as much juice as you can get from the lemon.

Make sure to sift the sugar before using it as unsifted sugar creates small clumps and will not evenly blend in the lemon juice. Make sure to stir the mixture constantly as it boils to guarantee smooth glazing.

Nutrition Facts:

Per Serving: 165 calories; 67 mg cholesterol; 139.7 mg sodium; 3.7 g protein; 31.1 g carbohydrates

THIS LEMON PUDDING CAKE TASTES LIKE SUNSHINE

Rebecca Servings: 12 | Yield: 8-inch square cake A dream cake that has a fluffy lemon block with a rich lemon pudding on the bottom. It is a real crowd-pleaser and a… Main Dish Recipes THIS LEMON PUDDING CAKE TASTES LIKE SUNSHINE European Print This
Serves: 12
Nutrition facts: 165 calories 20 grams fat
Rating: 4.3/5
( 3 voted )

Ingredients

  • 4 eggs, separated
  • ⅓ cup lemon juice
  • 1 teaspoon lemon zest
  • 1 tablespoon butter
  • 1 ½ cups white sugar
  • ½ cup sifted all-purpose flour
  • ½ teaspoon salt
  • 1 ½ cups milk

Instructions

Step 1: Place the egg yolks, lemon juice, lemon rind, and butter or margarine in a mixing bowl. Beat until thick and the color is lemon.

Step 2: In a separate bowl, stir in the sugar, flour, and salt.

Step 3: Add in the milk to the egg yolk mixture alternately with the milk, beating thoroughly every after each addition.

Step 4: In another bowl, beat the egg whites until stiff peaks form. Then, add to the batter and beat with an electric mixer on low speed.

Step 5: Transfer the batter into an 8 inches in line baking dish.

Step 6: Put a pan of hot water into the oven, then, place the baking dish in the tub.

Step 7: Bake the cake at 350 degrees F or 175 degrees C for approximately 45 minutes.

Notes:

Before cutting the lemon in half, roll it first on the counter, then apply a light pressure to loosen the membranes. This way you'll surely get the best of the lemon. And if a citrus squeezer is not available, just place a small strainer over a bowl and with a fork, twisting back and forth, extrude as much juice as you can get from the lemon.

Make sure to sift the sugar before using it as unsifted sugar creates small clumps and will not evenly blend in the lemon juice. Make sure to stir the mixture constantly as it boils to guarantee smooth glazing.

August 12, 2020 0 comment
0 FacebookTwitterPinterestEmail
Main Dish Recipes

COCONUT CUSTARD PIE

by Rebecca August 11, 2020
written by Rebecca

Servings: 8 | Yield: 1 pie

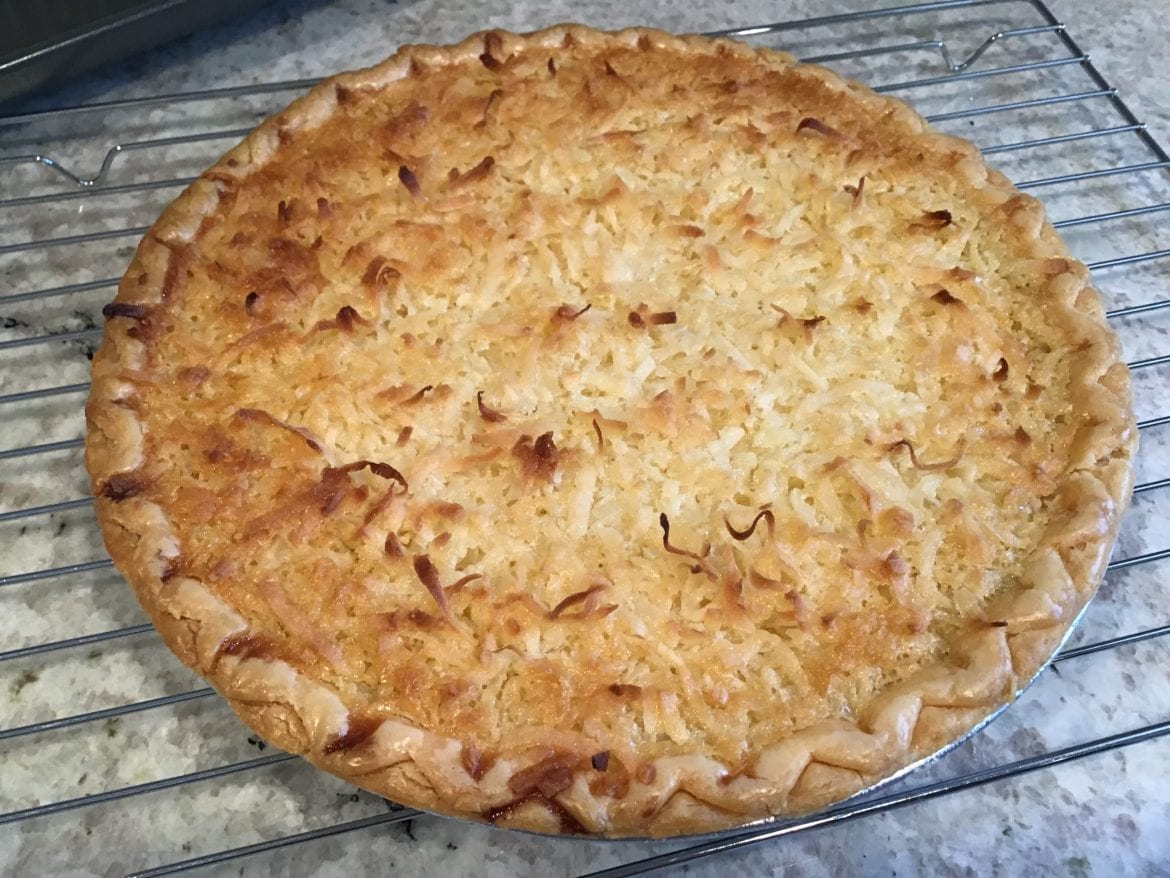
Everybody couldn’t get away with this heavenly pie! I made this just yesterday and everyone fell instantly in love. It is a real treat for everyone who loves coconut, custard, and pie. This rich, satisfying decadent holiday dessert has a creamy egg custard filling that no one can say no to. This has been my family’s favorite for decades!

Growing up, I watched my mom made this. I will always have a vivid picture of me and my brother constantly fighting for the last piece! This pie is so good we can’t take our hands off it. My favorite is the flaky, buttery crust and my brother is obsessed with the lightly-sweetened custard filling. But we both love the toasted coconut flakes. Every bite is nostalgic. A reminder of my crazy but amazing childhood.

This Coconut Custard Pie hits the sweet spot and one slice will never be enough. This pie is certainly a crowd pleaser and will leave you salivating.

INGREDIENTS

½ cup butter

1 ½ cups white sugar

2 tablespoons all-purpose flour

2 eggs

1 cup milk

1 cup flaked coconut

1 teaspoon vanilla extract

1 recipe pastry for a 9-inch single-crust pie

1 tablespoon flaked coconut

HOW TO MAKE COCONUT CUSTARD PIE

Step 1: Prepare the oven. Preheat it to 350 degrees F or 175 degrees C.

Step 2: Place the butter or margarine, sugar, and eggs in a large bowl. Beat with an electric mixer over low speed. Add in the flour and half a cup of milk at a time. Then, mix in a cup of coconut and vanilla. Beat thoroughly.

Step 3: Once the filling is well incorporated, transfer it into the unbaked pie shell. Sprinkle enough coconut to lightly cover the top.

Step 4: Place inside the preheated oven and bake for about 40 to 50 minutes or until set.

Nutrition Facts:

Per Serving: 447.2 calories; 79.4 mg cholesterol; 256.7 mg sodium; 4.6 g protein; 55.9 g carbohydrates

COCONUT CUSTARD PIE

Rebecca Servings: 8 | Yield: 1 pie Everybody couldn’t get away with this heavenly pie! I made this just yesterday and everyone fell instantly in love. It is a real treat for everyone who… Main Dish Recipes COCONUT CUSTARD PIE European Print This
Serves: 8
Nutrition facts: 447.2 calories 20 grams fat
Rating: 5.0/5
( 1 voted )

Ingredients

  • ½ cup butter
  • 1 ½ cups white sugar
  • 2 tablespoons all-purpose flour
  • 2 eggs
  • 1 cup milk
  • 1 cup flaked coconut
  • 1 teaspoon vanilla extract
  • 1 recipe pastry for a 9-inch single-crust pie
  • 1 tablespoon flaked coconut

Instructions

Step 1: Prepare the oven. Preheat it to 350 degrees F or 175 degrees C.

Step 2: Place the butter or margarine, sugar, and eggs in a large bowl. Beat with an electric mixer over low speed. Add in the flour and half a cup of milk at a time. Then, mix in a cup of coconut and vanilla. Beat thoroughly.

Step 3: Once the filling is well incorporated, transfer it into the unbaked pie shell. Sprinkle enough coconut to lightly cover the top.

Step 4: Place inside the preheated oven and bake for about 40 to 50 minutes or until set.

August 11, 2020 0 comment
0 FacebookTwitterPinterestEmail
Main Dish Recipes

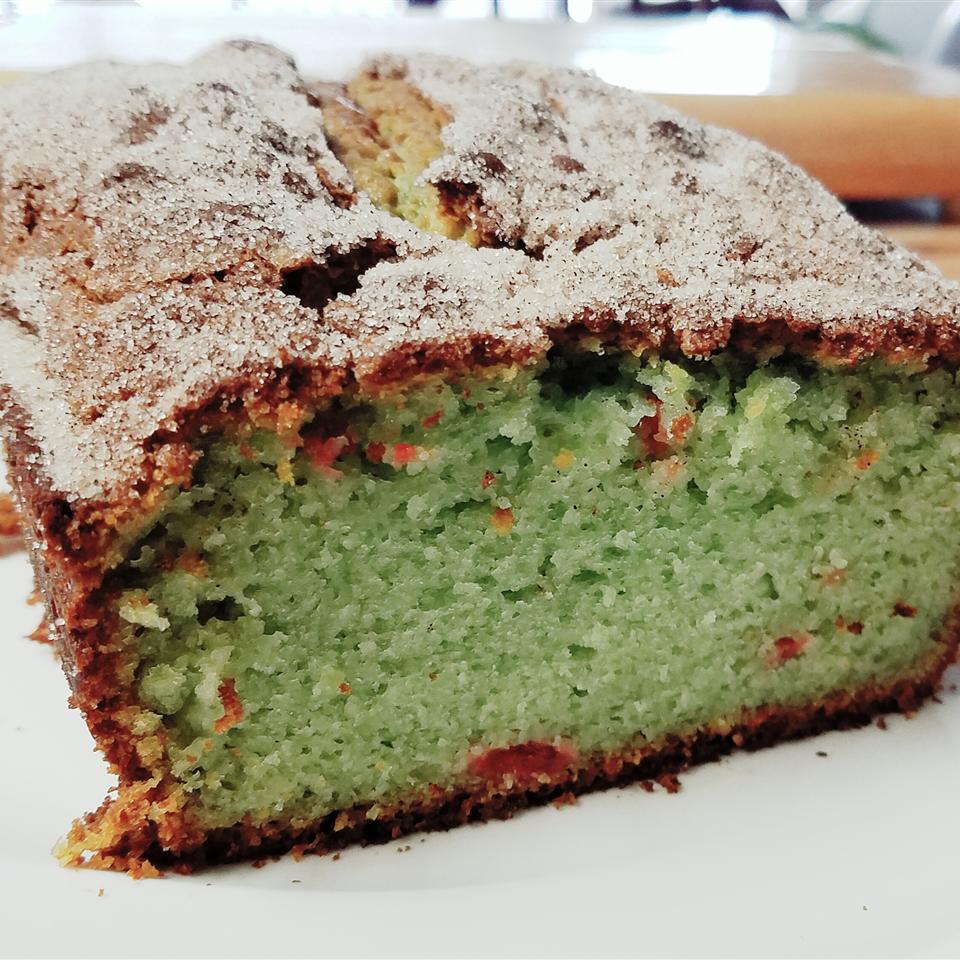
PISTACHIO BREAD IS AN EASY DELIGHT

by Rebecca August 11, 2020
written by Rebecca

Servings: 24 | Yield: 2 – 9×5 inch loaves

The easiest bread to make that is made from cake mix and pistachio pudding mix. Don’t underestimate because this bread is crazy delicious! And pistachio is one of the healthiest. It is the primary source of healthy fats, carbohydrates, calcium, antioxidants, and different nutrients from vitamin B6 and thiamine among others. And it has a wide range of health benefits that is perfect if you are watching your diet closely. This bread is undoubtedly guilt-free and you have an option to use yogurt if you are cutting down on butter or oil, too.

This has been my go-to. If all else fails I always run to this recipe. Not only that this is pretty easy to whip up but it has amazing health benefits aside from it tastes superb! This Pistachio Bread is perfect for any occasion and it looks and tastes pretty amazing! It is an easy holiday homemade gift, too that everyone will appreciate.

INGREDIENTS

1 18.25 oz package yellow cake mix

4 eggs

¼ cup of vegetable oil

2 tablespoons water

1 3 oz package instant pistachio pudding mix

1 cup sour cream

½ cup maraschino cherries

½ teaspoon green food coloring

½ teaspoon ground cinnamon

2 tablespoons white sugar

HOW TO MAKE PISTACHIO BREAD

Step 1: Prepare the oven. Preheat it to 350 degrees F or 175 degrees C.

Step 2: Then, grease and flour two 9 x 5-inch loaf pans.

Step 3: Place the cake mix, eggs, oil, water, pudding mix, sour cream, cherries, and food coloring in a mixing bowl. Mix well before transferring into the prepared pan.

Step 4: In a separate bowl, combine the cinnamon and sugar. Then, sprinkle it over the tops of the loaves.

Step 5: Place inside the preheated oven and bake for approximately 45 minutes.

Step 6: Once done, remove from the oven and allow the bread to cool before serving. Enjoy!

Nutrition Facts:

Per Serving: 172.3 calories; 35.6 mg cholesterol; 217.2 mg sodium; 2.3 g protein; 23.7 g carbohydrates

PISTACHIO BREAD IS AN EASY DELIGHT

Rebecca Servings: 24 | Yield: 2 – 9×5 inch loaves The easiest bread to make that is made from cake mix and pistachio pudding mix. Don’t underestimate because this bread is crazy delicious! And… Main Dish Recipes PISTACHIO BREAD IS AN EASY DELIGHT European Print This
Serves: 24
Nutrition facts: 172.3 calories 20 grams fat
Rating: 5.0/5
( 1 voted )

Ingredients

  • 1 18.25 oz package yellow cake mix
  • 4 eggs
  • ¼ cup of vegetable oil
  • 2 tablespoons water
  • 1 3 oz package instant pistachio pudding mix
  • 1 cup sour cream
  • ½ cup maraschino cherries
  • ½ teaspoon green food coloring
  • ½ teaspoon ground cinnamon
  • 2 tablespoons white sugar

Instructions

Step 1: Prepare the oven. Preheat it to 350 degrees F or 175 degrees C.

Step 2: Then, grease and flour two 9 x 5-inch loaf pans.

Step 3: Place the cake mix, eggs, oil, water, pudding mix, sour cream, cherries, and food coloring in a mixing bowl. Mix well before transferring into the prepared pan.

Step 4: In a separate bowl, combine the cinnamon and sugar. Then, sprinkle it over the tops of the loaves.

Step 5: Place inside the preheated oven and bake for approximately 45 minutes.

Step 6: Once done, remove from the oven and allow the bread to cool before serving. Enjoy!

August 11, 2020 0 comment
0 FacebookTwitterPinterestEmail
Main Dish Recipes

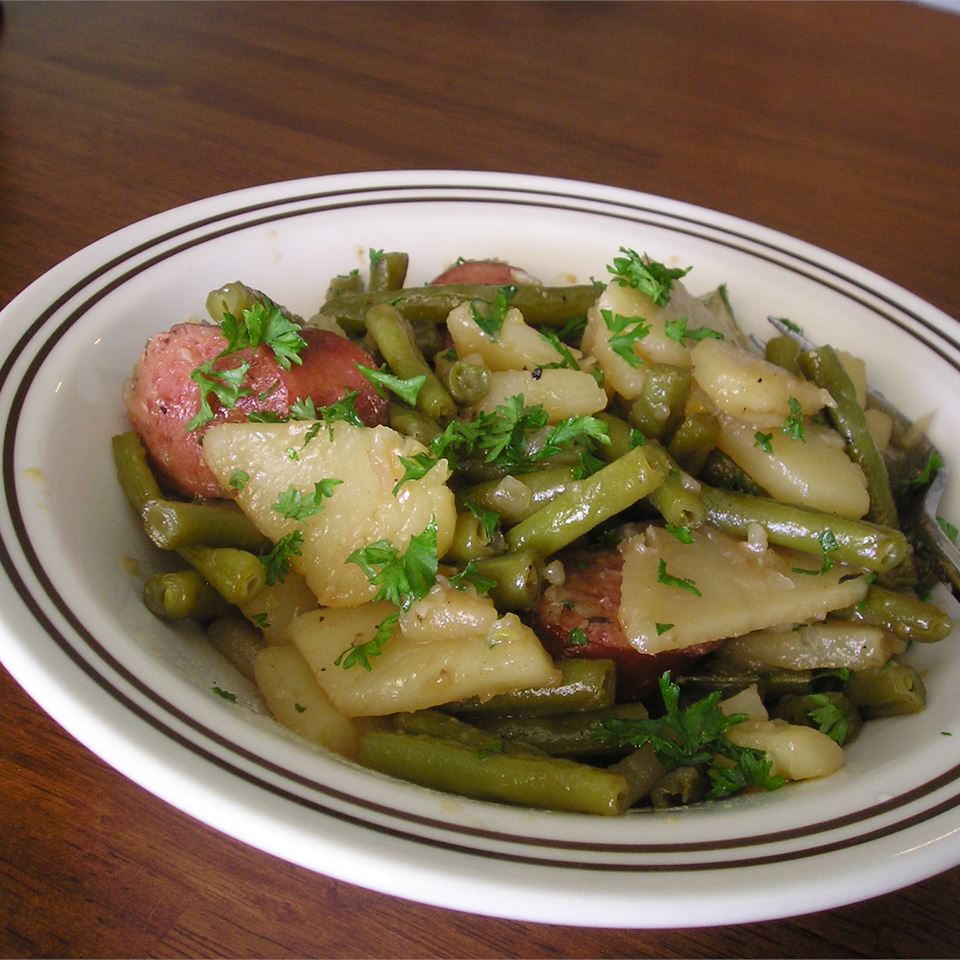
OLD-FASHIONED GREEN BEANS AND POTATOES

by Rebecca August 11, 2020
written by Rebecca

Prep time: 10 min | Cook: 25 | Total: 35 | Servings: 6 | Yield: 6 servings

This Green Beans and Potatoes are my favorite! It is a very good alternative for greasy meat. I am kind of making a pass from a meaty and greasy meal that is why I am looking for new and easy recipes and this one just gets me! I am so satisfied with the taste of all the veggies in this dish. The simplicity of the flavors is the best thing about this. For those of you who love potatoes and beans, this will surely satisfy you to your very core! I may be exaggerating but it’s just that, I want you to taste it yourself and find out if what I am saying is true! For those of you who want meat, you can also add ground pork or beef. I know that it will be awesome with meat but I just prefer this recipe instead. If you do add meat, make sure to toast it a little. It will give extra flavor to the dish. Enjoy!

INGREDIENTS

3 cups thinly sliced potatoes

2 cups frozen green beans

½ teaspoon dried thyme

¼ teaspoon ground black pepper

1 teaspoon vegetarian Worcestershire sauce

1 cup vegetable broth, divided

1 teaspoon cornstarch

¼ cup chopped fresh parsley

HOW TO MAKE OLD-FASHIONED GREEN BEANS AND POTATOES

Step 1: Place the potatoes, green beans, thyme, pepper, Worcestershire sauce, and 3/4 cup of broth in a large skillet. Bring to a boil over medium-high heat, then, adjust the heat to medium-low and simmer for about 15 to 20 minutes, covered, until the vegetables are tender.

Step 2: Combine the rest of the broth and the cornstarch in a small bowl. Then, add in the parsley.

Step 3: Stir it in the potato mixture and continue to cook while stirring until bubbly and thickened.

Nutrition Facts:

Per Serving: 82.7 calories; 0 mg cholesterol; 99.3 mg sodium; 2.1 g protein; 18.3 g carbohydrates

OLD-FASHIONED GREEN BEANS AND POTATOES

Rebecca Prep time: 10 min | Cook: 25 | Total: 35 | Servings: 6 | Yield: 6 servings This Green Beans and Potatoes are my favorite! It is a very good alternative for greasy meat. I am kind of making… Main Dish Recipes OLD-FASHIONED GREEN BEANS AND POTATOES European Print This
Serves: 6 Prep Time: 10 mins Cooking Time: 25 mins 25 mins
Nutrition facts: 82.7 calories 20 grams fat
Rating: 5.0/5
( 1 voted )

Ingredients

  • 3 cups thinly sliced potatoes
  • 2 cups frozen green beans
  • ½ teaspoon dried thyme
  • ¼ teaspoon ground black pepper
  • 1 teaspoon vegetarian Worcestershire sauce
  • 1 cup vegetable broth, divided
  • 1 teaspoon cornstarch
  • ¼ cup chopped fresh parsley

Instructions

Step 1: Place the potatoes, green beans, thyme, pepper, Worcestershire sauce, and 3/4 cup of broth in a large skillet. Bring to a boil over medium-high heat, then, adjust the heat to medium-low and simmer for about 15 to 20 minutes, covered, until the vegetables are tender.

Step 2: Combine the rest of the broth and the cornstarch in a small bowl. Then, add in the parsley.

Step 3: Stir it in the potato mixture and continue to cook while stirring until bubbly and thickened.

August 11, 2020 0 comment
0 FacebookTwitterPinterestEmail
Main Dish Recipes

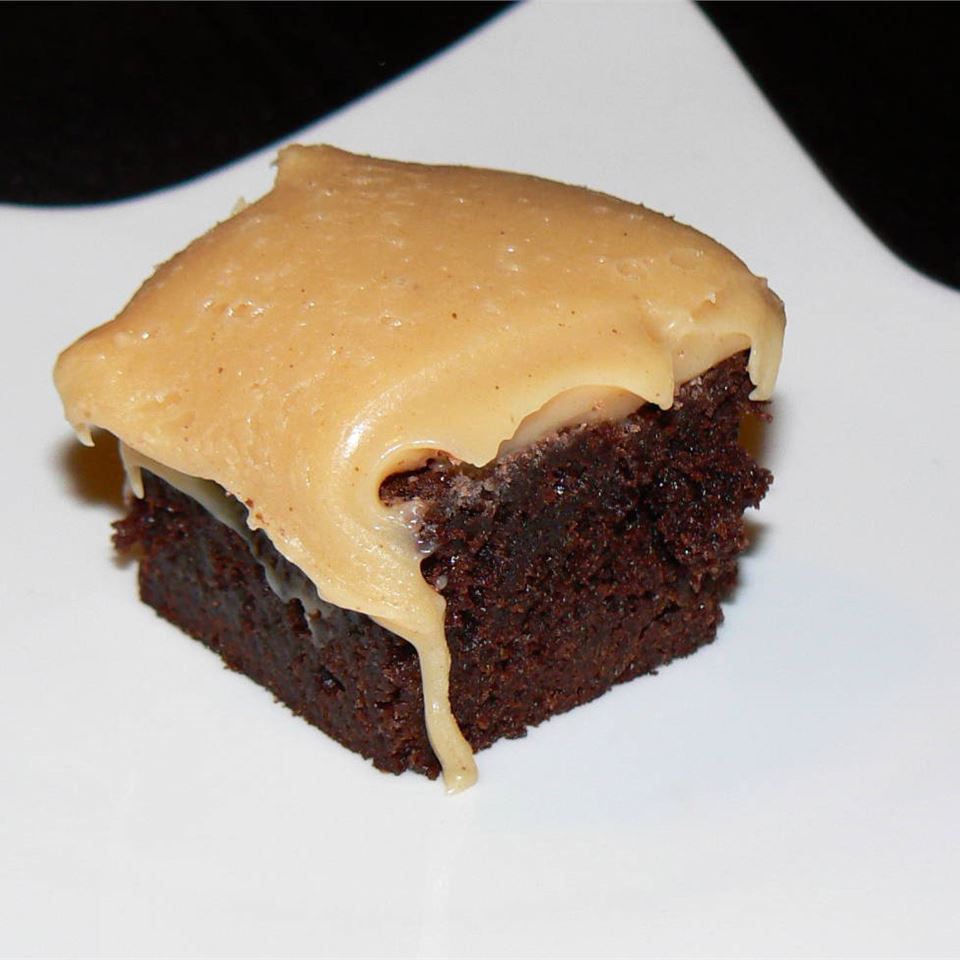
BROWNIES WITH PEANUT BUTTER FUDGE FROSTING

by Rebecca August 11, 2020
written by Rebecca

Prep time: 15 min | Cook: 45 min | Total: 1 hr | Servings: 18 | Yield: 9 brownies

The easiest Brownies recipe you will ever try. As simple as it may but the taste is extraordinary! The peanut butter makes it very delicious so be very generous with it. I have had a lot of brownies in my life but this surely makes it to my top 10. I am so glad that I decided to give this a try. This will surely make your afternoon super awesome! I hope you all love it. Enjoy!

INGREDIENTS

1 19.8 oz package brownie mix

1 cup peanut butter chips

½ cup butter

1 14 oz can sweeten condensed milk

HOW TO MAKE BROWNIES WITH PEANUT BUTTER FUDGE FROSTING

Step 1: Prepare the brownies following the package instruction. Then, allow it cool in the pan and don’t slice.

Step 2: In a medium saucepan over low heat melt the peanut butter chips and butter until smooth while stirring constantly.

Step 3: Once the mixture smooth, remove the pan from the heat and mix in the sweetened condensed milk.

Step 4: Generously spread the frosting over the cooled brownies.

Step 5: Place inside the fridge to chill until set before slicing into squares.

NOTE:

Store the brownies in an airtight jar at room temperature and they will stay fresh for at least a week.

If you want the peanut butter to be firmer and not so creamy, keep the brownies in the fridge. These brownies freeze well and can last up to 3 months.

For the brownies to thaw, place them first in the fridge to chill overnight before serving.

To have the perfect brownies, use the exact baking time for preference because home ovens can be fickle. Underbake brownies have a thick and gummy texture while overbaked brownies are dry and cakey.

Nutrition Facts:

Per Serving: 324.3 calories; 21 mg cholesterol; 190.4 mg sodium; 5.8 g protein; 42.1 g carbohydrates

BROWNIES WITH PEANUT BUTTER FUDGE FROSTING

Rebecca Prep time: 15 min | Cook: 45 min | Total: 1 hr | Servings: 18 | Yield: 9 brownies The easiest Brownies recipe you will ever try. As simple as it may but the taste is extraordinary! The peanut… Main Dish Recipes BROWNIES WITH PEANUT BUTTER FUDGE FROSTING European Print This
Serves: 18 Prep Time: 15 mins Cooking Time: 45 mins 45 mins
Nutrition facts: 324.3 calories 20 grams fat
Rating: 5.0/5
( 1 voted )

Ingredients

  • 1 19.8 oz package brownie mix
  • 1 cup peanut butter chips
  • ½ cup butter
  • 1 14 oz can sweeten condensed milk

Instructions

Step 1: Prepare the brownies following the package instruction. Then, allow it cool in the pan and don't slice.

Step 2: In a medium saucepan over low heat melt the peanut butter chips and butter until smooth while stirring constantly.

Step 3: Once the mixture smooth, remove the pan from the heat and mix in the sweetened condensed milk.

Step 4: Generously spread the frosting over the cooled brownies.

Step 5: Place inside the fridge to chill until set before slicing into squares.

NOTE:

Store the brownies in an airtight jar at room temperature and they will stay fresh for at least a week.

If you want the peanut butter to be firmer and not so creamy, keep the brownies in the fridge. These brownies freeze well and can last up to 3 months.

For the brownies to thaw, place them first in the fridge to chill overnight before serving.

To have the perfect brownies, use the exact baking time for preference because home ovens can be fickle. Underbake brownies have a thick and gummy texture while overbaked brownies are dry and cakey.


August 11, 2020 0 comment
0 FacebookTwitterPinterestEmail
Main Dish Recipes

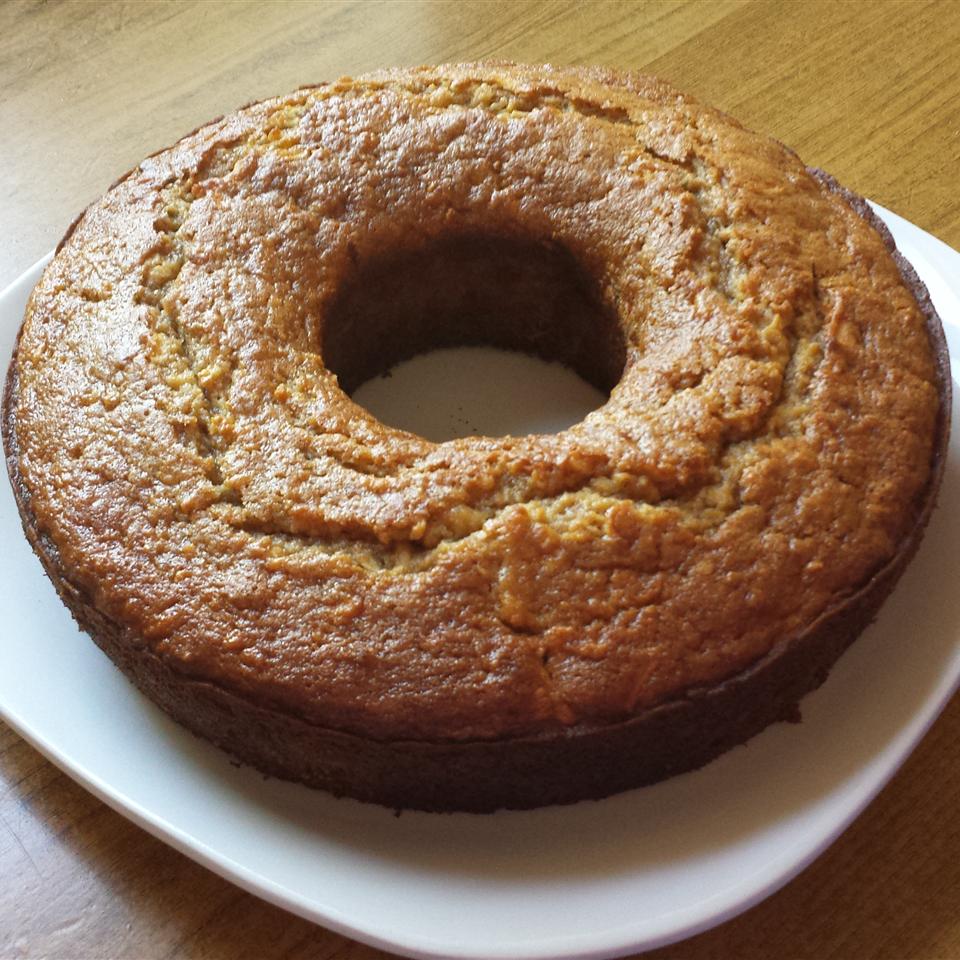
GRANDMA’S FRESH APPLE CAKE

by Rebecca August 11, 2020
written by Rebecca

Prep time: 25 min | Cooking: 1 hr | Total: 1 hr and 25 min | Servings: 12 | Yield: 1 cake

What a very refreshing taste! A combination of good-tasting apples is what makes this cake very delicious. Make sure to choose the best ones! I never would have known this amazing recipe if wasn’t for my best friend, Shannon, so a big thanks to you! I have listed all the steps that you need to follow and it will guide you to perfection. I hope you all love this recipe. Enjoy!

INGREDIENTS

1 cup all-purpose flour

1 teaspoon baking soda

1 teaspoon ground cinnamon

½ teaspoon salt

1 cup white sugar

1 egg

¼ cup of vegetable oil

2 cups peeled and chopped apple

½ cup chopped walnuts

½ cup raisins

HOW TO MAKE GRANDMA’S FRESH APPLE CAKE

Step 1: Prepare the oven. Preheat it to 350 degrees F or 175 degrees C.

Step 2: Then, grease and flour a fluted tube pan or bundt pan.

Step 3: Sift the flour, baking soda, cinnamon, and salt in a bowl and set aside.

Step 4: In a separate bowl, combine the sugar, egg, and oil.

Step 5: Add in the flour mixture the egg mixture and mix until just combined before folding in the apple, walnuts, and raisins.

Step 6: Place inside the preheated oven and bake for an hour or until the toothpick inserted in the middle comes out clean.

NOTE:

You can use dates or any kind of chopped nut you please in place of raisins.

The secret to an amazing apple cake is using varieties of apple. Combination of flavors and textures such as sweet, sour, crisp, and gentle. I would suggest trying combining Honeycrisp and Granny smith if you want a more tart cake or for a sweeter kind use Gala or Fuji.

Apple cakes can be thaw and serve at room temperature. They can stay fresh for 12 months!

Nutrition Facts:

Per Serving: 212.6 calories; 15.5 mg cholesterol; 208.9 mg sodium; 2.6 g protein; 33.8 g carbohydrates

GRANDMA’S FRESH APPLE CAKE

Rebecca Prep time: 25 min | Cooking: 1 hr | Total: 1 hr and 25 min | Servings: 12 | Yield: 1 cake What a very refreshing taste! A combination of good-tasting apples is what makes this cake very delicious.… Main Dish Recipes GRANDMA’S FRESH APPLE CAKE European Print This
Serves: 12 Prep Time: 25 mins Cooking Time: 1 hr 1 hr
Nutrition facts: 212.6 calories 20 grams fat
Rating: 5.0/5
( 1 voted )

Ingredients

  • 1 cup all-purpose flour
  • 1 teaspoon baking soda
  • 1 teaspoon ground cinnamon
  • ½ teaspoon salt
  • 1 cup white sugar
  • 1 egg
  • ¼ cup of vegetable oil
  • 2 cups peeled and chopped apple
  • ½ cup chopped walnuts
  • ½ cup raisins

Instructions

Step 1: Prepare the oven. Preheat it to 350 degrees F or 175 degrees C.

Step 2: Then, grease and flour a fluted tube pan or bundt pan.

Step 3: Sift the flour, baking soda, cinnamon, and salt in a bowl and set aside.

Step 4: In a separate bowl, combine the sugar, egg, and oil.

Step 5: Add in the flour mixture the egg mixture and mix until just combined before folding in the apple, walnuts, and raisins.

Step 6: Place inside the preheated oven and bake for an hour or until the toothpick inserted in the middle comes out clean.

NOTE:

You can use dates or any kind of chopped nut you please in place of raisins.

The secret to an amazing apple cake is using varieties of apple. Combination of flavors and textures such as sweet, sour, crisp, and gentle. I would suggest trying combining Honeycrisp and Granny smith if you want a more tart cake or for a sweeter kind use Gala or Fuji.

Apple cakes can be thaw and serve at room temperature. They can stay fresh for 12 months!

August 11, 2020 0 comment
0 FacebookTwitterPinterestEmail
Newer Posts
Older Posts

Popular Posts

  • 1

    Crispy Crunchy Parmesan Potatoes

    March 21, 2020
  • 2

    CROCK POT SMOTHERED PORK CHOPS

    March 21, 2020
  • Facebook
  • Twitter

@2019 - All Right Reserved.


Back To Top