Cook it once
  • Home
  • Privacy Policy
  • Recipes
    • KETO
    • LC
    • WW
  • Tips
  • Contact
Cook it once
  • Home
  • Privacy Policy
  • Recipes
    • KETO
    • LC
    • WW
  • Tips
  • Contact
Category:

Main Dish Recipes

Main Dish Recipes

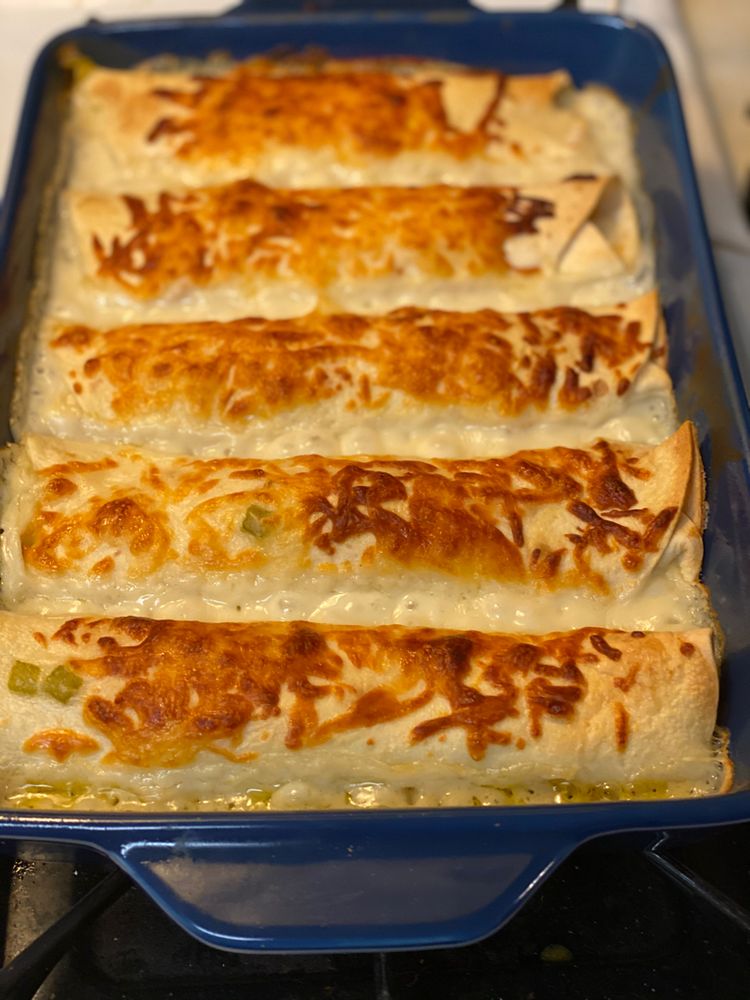
Chicken Enchiladas with Sour Cream White Sauce

by Rebecca August 14, 2020
written by Rebecca

Enchiladas are one of my weaknesses. They are so easy to make and the ingredients are pretty straightforward. Cheeses, butter, tortillas, chilies, and meat are all you need to whip this up. Enchiladas are a sure-fire, always a hit during game nights and gatherings.

Lately, I have been obsessing about these chicken enchiladas with sour cream white sauce. It is so freaking delicious, I just can’t help myself but to indulge. It’s creamy, savory with a little bit of spice.

Ingredients

10 small soft flour tortillas (you can use corn but I like flour with chicken)

3 tablespoons flour

2 cups chicken broth

1 cup sour cream

2 1/2 cups shredded and cooked chicken (we like to use rotisserie chicken)

3 cups Monterey Jack cheese – shredded

3 tablespoons butter

4oz can diced green chilies (I like medium – they are not spicy at all)

How to make Chicken Enchiladas with Sour Cream White Sauce

Step 1: Prepare the oven. Preheat it to 350 degrees.

Step 2: In a bowl, mix the shredded chicken with a cup of cheese.

Step 3: Then, fill the tortillas with the chicken-and-cheese mixture. Roll the filled tortillas and put them in a greased 9 x 13-inch pan.

Step 4: In a pan, melt the butter over medium heat.

Step 5: Add in the flour into the melted butter and whisk for a minute over medium heat.

Step 6: Pour in the broth, whisk, and continue cooking until thick and the mixture bubbles up.

Step 7: Now, remove the broth from the heat and stir in the sour cream and chilies. Make sure that before adding in the sour cream that the mixture is not too hot or the sour cream will curdle.

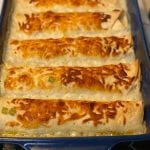
Step 8: Then, pour the mixture on top of the enchiladas and top with the rest of the cheese.

Step 9: Place inside the preheated oven and bake for about 20 to 23 minutes. Then, broil for at least 3 minutes to brown the cheese.
Chicken Enchiladas with Sour Cream White Sauce

Rebecca Enchiladas are one of my weaknesses. They are so easy to make and the ingredients are pretty straightforward. Cheeses, butter, tortillas, chilies, and meat are all you need to whip… Main Dish Recipes Chicken Enchiladas with Sour Cream White Sauce European Print This
Nutrition facts: 200 calories 20 grams fat
Rating: 5.0/5
( 1 voted )

Ingredients

  • 10 small soft flour tortillas (you can use corn but I like flour with chicken)
  • 3 tablespoons flour
  • 2 cups chicken broth
  • 1 cup sour cream
  • 2 1/2 cups shredded and cooked chicken (we like to use rotisserie chicken)
  • 3 cups Monterey Jack cheese - shredded
  • 3 tablespoons butter
  • 4oz can diced green chilies (I like medium - they are not spicy at all)

Instructions

Step 1: Prepare the oven. Preheat it to 350 degrees.

Step 2: In a bowl, mix the shredded chicken with a cup of cheese.

Step 3: Then, fill the tortillas with the chicken-and-cheese mixture. Roll the filled tortillas and put them in a greased 9 x 13-inch pan.

Step 4: In a pan, melt the butter over medium heat.

Step 5: Add in the flour into the melted butter and whisk for a minute over medium heat.

Step 6: Pour in the broth, whisk, and continue cooking until thick and the mixture bubbles up.

Step 7: Now, remove the broth from the heat and stir in the sour cream and chilies. Make sure that before adding in the sour cream that the mixture is not too hot or the sour cream will curdle.

Step 8: Then, pour the mixture on top of the enchiladas and top with the rest of the cheese.

Step 9: Place inside the preheated oven and bake for about 20 to 23 minutes. Then, broil for at least 3 minutes to brown the cheese.
August 14, 2020 0 comment
0 FacebookTwitterPinterestEmail
Main Dish Recipes

Crispy Southern Fried Pork Chops

by Rebecca August 14, 2020
written by Rebecca

Serves: 4-5 | Prep: 15 Min | Cook: 15 Min

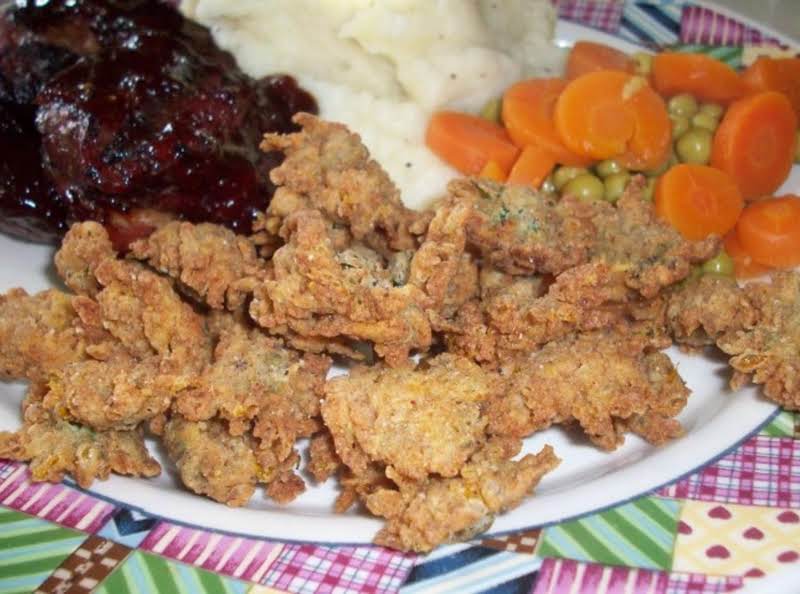
My ultimate comfort food! Crispy, seasoned chops that are fried to perfection! Pair it with mashed potatoes, veggies, and gravy for a complete meal.

This simple recipe is a winner. A timeless Southern fried pork chops that are undeniably crispy and delicious! My kids love these chops and they prefer to put spoonfuls of creamy gravy on top. Try it and I am sure you’ll love it too!

Ingredients

1 1/2 to 2 lb boneless pork chops, thin sliced

1 cup milk

1 large egg

1 cup self-rising flour

1 teaspoon onion powder

1/2 teaspoon garlic powder

1 1/2 teaspoons chicken-flavored base

3/4 teaspoon black pepper or to taste

oil for frying (I use canola)

How to Make Crispy Southern Fried Pork Chops

Step 1: To start, remove the chops from the package, then, wash and pat them dry.

Step 2: Put the washed pork chops on a cutting board and pound both sides using a meat mallet.

Step 3: Place the egg and milk in a bowl. Using a fork, mix them well.

Step 4: In a separate bowl, combine the flour, chicken-flavored base, and seasonings.

Step 5: Place the pork chops into the flour mixture to dredge, then, dip into the milk-and-egg mixture before rolling in flour mixture.

Step 6: In a heavy skillet or cast-iron chicken fryer, heat about an inch of oil. Once hot, add in the pork chops making sure to not overcrowd the pan. You can cook at least 2 or 3 pieces of chops at the same time.

Step 7: Fry the chops for at least 3 to 5 minutes on each side until the golden and the juices run clear.

Step 8: Repeat the same process with the remaining pork chops.

Step 9: Transfer the cooked pork chops onto a serving plate and serve hot with your side of choice.

NOTE:

If you are looking for a chicken-flavored base, you can get it from most grocery stores in the soup/bullion side. This base is like a moist powder.

Crispy Southern Fried Pork Chops

Rebecca Serves: 4-5 | Prep: 15 Min | Cook: 15 Min My ultimate comfort food! Crispy, seasoned chops that are fried to perfection! Pair it with mashed potatoes, veggies, and gravy… Main Dish Recipes Crispy Southern Fried Pork Chops European Print This
Serves: 4-5 Prep Time: 15 mins Cooking Time: 15 mins 15 mins
Nutrition facts: 200 calories 20 grams fat
Rating: 5.0/5
( 1 voted )

Ingredients

  • 1 1/2 to 2 lb boneless pork chops, thin sliced
  • 1 cup milk
  • 1 large egg
  • 1 cup self-rising flour
  • 1 teaspoon onion powder
  • 1/2 teaspoon garlic powder
  • 1 1/2 teaspoons chicken-flavored base
  • 3/4 teaspoon black pepper or to taste
  • oil for frying (I use canola)

Instructions

Step 1: To start, remove the chops from the package, then, wash and pat them dry.

Step 2: Put the washed pork chops on a cutting board and pound both sides using a meat mallet.

Step 3: Place the egg and milk in a bowl. Using a fork, mix them well.

Step 4: In a separate bowl, combine the flour, chicken-flavored base, and seasonings.

Step 5: Place the pork chops into the flour mixture to dredge, then, dip into the milk-and-egg mixture before rolling in flour mixture.

Step 6: In a heavy skillet or cast-iron chicken fryer, heat about an inch of oil. Once hot, add in the pork chops making sure to not overcrowd the pan. You can cook at least 2 or 3 pieces of chops at the same time.

Step 7: Fry the chops for at least 3 to 5 minutes on each side until the golden and the juices run clear.

Step 8: Repeat the same process with the remaining pork chops.

Step 9: Transfer the cooked pork chops onto a serving plate and serve hot with your side of choice.

NOTE:

If you are looking for a chicken-flavored base, you can get it from most grocery stores in the soup/bullion side. This base is like a moist powder.

August 14, 2020 0 comment
0 FacebookTwitterPinterestEmail
Main Dish Recipes

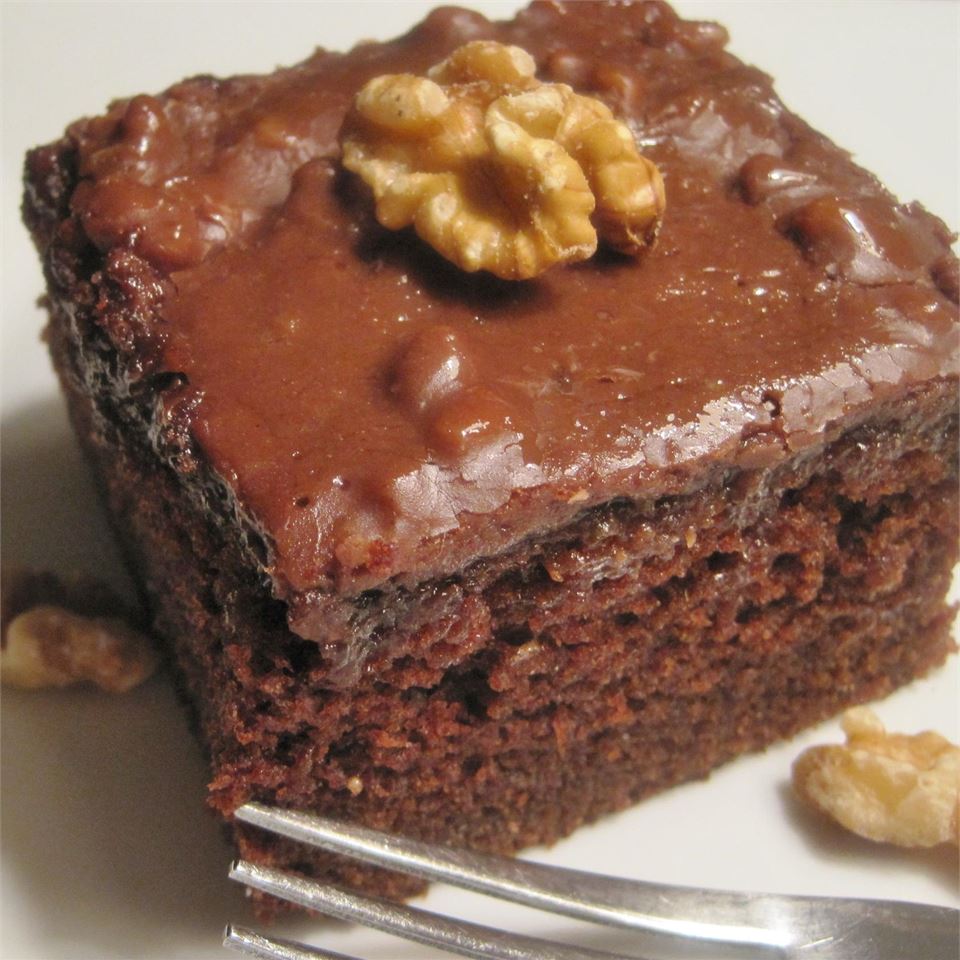
Double Chocolate Coca Cola Cake

by Rebecca August 14, 2020
written by Rebecca

Prep: 15 Min | Cook: 25 Min

This cake is timeless! And the best chocolate cake you’ll ever have! They say it’s even better than the original and I agree! A homemade version of the famous Cracker Barrel restaurant’s Double Chocolate Coca Cola Cake. A copycat that is way better than the real one! A no-fuss chocolate cake with cola that everyone is going crazy about. I have made this many times and I repeatedly get the same reactions from “insanely amazing” to “the best cake I have”! I am a certified chocoholics and this cake is my weakness – pure chocolatey, sort of dense, and kind of fluffy. Serve a slice with some ice cream or whipped cream on top and you are in heaven!

Ingredients

1 cup coca-cola (not diet)

1/2 cup cooking oil

1 stick butter

3 tablespoons cocoa

2 cups sugar

2 cups plain flour

1/2 teaspoon salt

2 eggs

1/2 cup buttermilk

1 teaspoon baking soda

1 teaspoon vanilla

frosting ingredients

1 stick butter

2 1/3 tablespoons cocoa

6 tablespoons cream or milk

1 teaspoon vanilla

3 3/4 cups confectioners sugar

How to Make Double Chocolate Coca Cola Cake

Step 1: Combine the cola, oil, butter, and cocoa in a saucepan. Bring to a boil.

Step 2: Meanwhile, mix the sugar, flour, and salt in a bowl.

Step 3: Then, pour the cola mixture into the flour mixture. Beat until combined.

Step 4: Add in the eggs, buttermilk, baking soda, and vanilla into the mixture. Mix well.

Step 5: Transfer the mixture into a greased and floured 13 x 9-inch baking dish.

Step 6: Place inside the oven and bake at 305 degrees for about 20 to 25 minutes.

Step 7: To make the frosting, combine the butter, cocoa, and milk in a saucepan. Heat until the butter has melted and mix the rest of the ingredients.

Step 8: Once the cake is done, remove from the oven and allow it to cool for a bit before frosting. Enjoy!

Double Chocolate Coca Cola Cake

Rebecca Prep: 15 Min | Cook: 25 Min This cake is timeless! And the best chocolate cake you’ll ever have! They say it’s even better than the original and I agree!… Main Dish Recipes Double Chocolate Coca Cola Cake European Print This
Prep Time: 15 mins Cooking Time: 25 mins 25 mins
Nutrition facts: 200 calories 20 grams fat
Rating: 5.0/5
( 1 voted )

Ingredients

  • 1 cup coca-cola (not diet)
  • 1/2 cup cooking oil
  • 1 stick butter
  • 3 tablespoons cocoa
  • 2 cups sugar
  • 2 cups plain flour
  • 1/2 teaspoon salt
  • 2 eggs
  • 1/2 cup buttermilk
  • 1 teaspoon baking soda
  • 1 teaspoon vanilla
  • frosting ingredients
  • 1 stick butter
  • 2 1/3 tablespoons cocoa
  • 6 tablespoons cream or milk
  • 1 teaspoon vanilla
  • 3 3/4 cups confectioners sugar

Instructions

Step 1: Combine the cola, oil, butter, and cocoa in a saucepan. Bring to a boil.

Step 2: Meanwhile, mix the sugar, flour, and salt in a bowl.

Step 3: Then, pour the cola mixture into the flour mixture. Beat until combined.

Step 4: Add in the eggs, buttermilk, baking soda, and vanilla into the mixture. Mix well.

Step 5: Transfer the mixture into a greased and floured 13 x 9-inch baking dish.

Step 6: Place inside the oven and bake at 305 degrees for about 20 to 25 minutes.

Step 7: To make the frosting, combine the butter, cocoa, and milk in a saucepan. Heat until the butter has melted and mix the rest of the ingredients.

Step 8: Once the cake is done, remove from the oven and allow it to cool for a bit before frosting. Enjoy!

August 14, 2020 0 comment
0 FacebookTwitterPinterestEmail
Main Dish Recipes

Buttermilk Pie

by Rebecca August 14, 2020
written by Rebecca

Serves: 6-8 | Prep: 10 Min | Cook: 1 Hr 10 Min

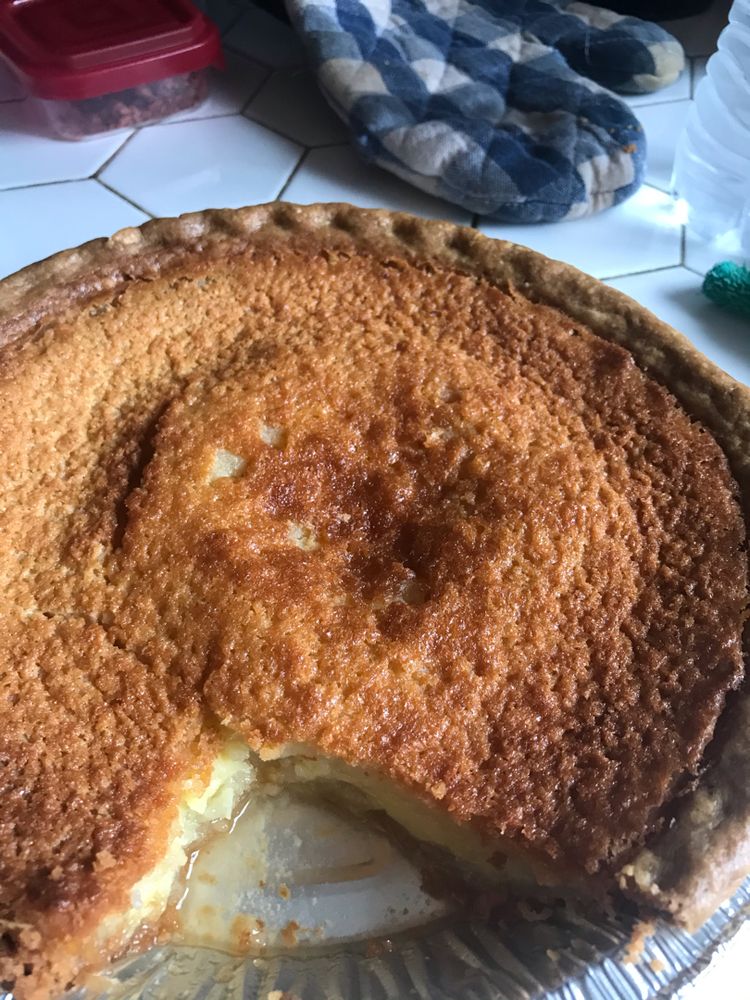
I will always have a nostalgic feeling whenever I make this pie. This goes way back. I remembered my grandmother, she’s fond of making pie and one of her favorites is this Buttermilk Pie. I loved watching her cook. She’s graceful, talented, and she glides in the kitchen like a pro! She taught me almost everything I know including how to make this delicious pie.

This precious pie will always have a special place in my heart. It’s my favorite! I love the silky texture and perfectly sweet taste it has. This is a breeze to make and is made of a few simple pantry ingredients from sugar, butter, eggs, and flour. And magically the filling transforms into a custard when baking without a fuss! This pie is sincerely amazing and heavenly.

Ingredients

1 3/4 cups sugar

1 stick unsalted butter, room temp

3 large eggs

1/4 teaspoon vanilla extract

3 tablespoons all-purpose flour

pinch of salt

1 cup buttermilk

1 9″ unbaked pie crust

How to Make Buttermilk Pie

Step 1: In a bowl, cream the sugar and butter until well combined. Add in the eggs one at a time, beating every after each addition until the mixture is nice and smooth. Then, stir in the vanilla, salt, and flour. Mix in the buttermilk into the mixture until incorporated.

Step 2: Line a baking sheet with foil. This way the foil will catch any overflow. Place the pie shell on the sheet, then, fill it with the buttermilk mixture until the top of the shell.

Step 3: For the rest of the mixture, pour them into an ungreased custard cup.

Step 4: Place inside the oven and bake at 300 degrees for an hour an 10 minutes.

Step 5: Once done, remove from the oven and allow the pie to set until nearly cooled.

Step 6: Serve or store in the fridge, covered. Enjoy!

Buttermilk Pie

Rebecca Serves: 6-8 | Prep: 10 Min | Cook: 1 Hr 10 Min I will always have a nostalgic feeling whenever I make this pie. This goes way back. I remembered… Main Dish Recipes Buttermilk Pie European Print This
Serves: 6-8 Prep Time: 10 mins Cooking Time: 1 hr 10 mins 1 hr 10 mins
Nutrition facts: 200 calories 20 grams fat
Rating: 5.0/5
( 1 voted )

Ingredients

  • 1 3/4 cups sugar
  • 1 stick unsalted butter, room temp
  • 3 large eggs
  • 1/4 teaspoon vanilla extract
  • 3 tablespoons all-purpose flour
  • pinch of salt
  • 1 cup buttermilk
  • 1 9" unbaked pie crust

Instructions

Step 1: In a bowl, cream the sugar and butter until well combined. Add in the eggs one at a time, beating every after each addition until the mixture is nice and smooth. Then, stir in the vanilla, salt, and flour. Mix in the buttermilk into the mixture until incorporated.

Step 2: Line a baking sheet with foil. This way the foil will catch any overflow. Place the pie shell on the sheet, then, fill it with the buttermilk mixture until the top of the shell.

Step 3: For the rest of the mixture, pour them into an ungreased custard cup.

Step 4: Place inside the oven and bake at 300 degrees for an hour an 10 minutes.

Step 5: Once done, remove from the oven and allow the pie to set until nearly cooled.

Step 6: Serve or store in the fridge, covered. Enjoy!

August 14, 2020 0 comment
0 FacebookTwitterPinterestEmail
Main Dish Recipes

Old-Fashioned Candied Sweet Potatoes

by Rebecca August 14, 2020
written by Rebecca

Serves: 4 to 6 | Prep: 1 Hr | Cook: 5 Min

I never thought that a simple potato recipe can be this good! These sliced sweet potatoes are smothered in buttery brown sugar mixture. Surely, this homemade goodness makes history!

This top-notch potato recipe is super simple, you only need a few simple ingredients to whip this up. Anyone can make this in a heartbeat! Sweet potatoes, sugar, butter, nutmeg, and cinnamon are the key ingredients. Some people call these candied yams or glazed sweet potatoes. A straightforward description of these potatoes that are covered in sweet buttery mixture. This delicious side is perfect for any occasion and an amazing addition to any meal. My personal favorite to serve during holiday and fall. A pretty comforting dish like no other!

These glazed potatoes are so addicting! My family adores this dish so much! This has been the most requested in every gathering. This simple potato side never fails to impress everyone. If we can only give it a ten star we would! This candied sweet potato recipe is a must-have and to die for! I made these last night and my kids are requesting it again tonight! Impressive, deliciously addicting, and will unquestionably make your mouth water!

Ingredients

4 to 6 sweet potatoes, peeled and sliced

2 cups sugar

1 stick butter (1/2 cup)

1/2 to 1 teaspoon nutmeg (nutmeg is strong and you don’t need a lot)

1 teaspoon cinnamon

pinch salt

How to Make Old-Fashioned Candied Sweet Potatoes

Step 1: Melt the butter in a large skillet or cast iron over medium heat.

Step 2: Then, stir in the sliced potatoes to the butter and toss to coat.

Step 3: In a bowl, mix the sugar, nutmeg, and salt.

Step 4: Add the sugar mixture into the potatoes, then, toss to coat.

Step 5: Lower the heat and simmer for at least an hour, covered, while stirring seldomly until the potatoes are soft.

Old-Fashioned Candied Sweet Potatoes

Rebecca Serves: 4 to 6 | Prep: 1 Hr | Cook: 5 Min I never thought that a simple potato recipe can be this good! These sliced sweet potatoes are smothered in… Main Dish Recipes Old-Fashioned Candied Sweet Potatoes European Print This
Serves: 4-6 Prep Time: 1 hr Cooking Time: 5 mins 5 mins
Nutrition facts: 200 calories 20 grams fat
Rating: 5.0/5
( 1 voted )

Ingredients

  • 4 to 6 sweet potatoes, peeled and sliced
  • 2 cups sugar
  • 1 stick butter (1/2 cup)
  • 1/2 to 1 teaspoon nutmeg (nutmeg is strong and you don't need a lot)
  • 1 teaspoon cinnamon
  • pinch salt

Instructions

Step 1: Melt the butter in a large skillet or cast iron over medium heat.

Step 2: Then, stir in the sliced potatoes to the butter and toss to coat.

Step 3: In a bowl, mix the sugar, nutmeg, and salt.

Step 4: Add the sugar mixture into the potatoes, then, toss to coat.

Step 5: Lower the heat and simmer for at least an hour, covered, while stirring seldomly until the potatoes are soft.

August 14, 2020 0 comment
0 FacebookTwitterPinterestEmail
Main Dish Recipes

German Chocolate Pie

by Rebecca August 13, 2020
written by Rebecca

Serves: 8 | Prep: 10 Min | Cook: 55 Min

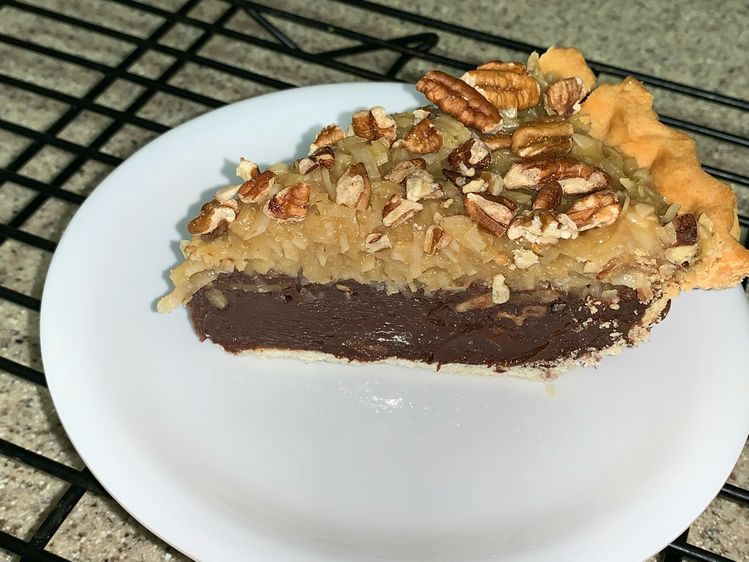
This classic pie is what everyone is raving about. It is silky, smooth, and heavenly delicious! One bite and you’ll never be able to put your fork down! It is ridiculously addictive and I bet you’ll be fighting for that last bite!

A wonderful and phenomenal dessert that is undeniably easy to make. The ingredients are simple and combine perfectly well together. This pie has everything I can ask for from pecans, coconut, and chocolate chips! A melt-in-your-mouth dessert that is excellent to serve to guests, and is perfectly sweet to bring to potlucks and picnics. With its fudgy, indulgent flourless chocolate filling and coconut-pecan topping this German Chocolate Pie certainly wins the heart of many! Unquestionably, an extraordinary pie for everyone and every occasion!

Ingredients

1 cup light corn syrup

3 large eggs

1 cup sugar

2 tablespoons butter, melted

1 teaspoon vanilla extract

2 cups chopped pecans

3/4 cup flaked coconut

3/4 cup semisweet chocolate chips

1 prepared pie crust (9-inch deep-dish)

cool whip, if desired, for topping before serving

How to Make German Chocolate Pie

Step 1: Prepare the oven. Preheat it to 350 degrees.

Step 2: In a bowl, place the corn syrup, eggs, sugar, butter, and vanilla. Beat using an electric mixer on medium speed until thoroughly combined and light-colored. Then, stir in the pecans and coconut. Mix using your hands.

Step 3: Scatter the chocolate chips in the bottom of the prepared pie crust before pouring in the corn syrup mixture.

Step 4: Place inside the preheated oven and bake for about 55 to 60 minutes or until the top is set.

Step 5: Once done, remove the pie from the oven and cool completely on a wire rack. Cooling takes about 2 hours.

Step 6: Once cooled, serve the pie with cool whip or whipped topping if preferred. If you have any leftovers, store them in the fridge. Enjoy!

German Chocolate Pie

Rebecca Serves: 8 | Prep: 10 Min | Cook: 55 Min This classic pie is what everyone is raving about. It is silky, smooth, and heavenly delicious! One bite and you’ll… Main Dish Recipes German Chocolate Pie European Print This
Serves: 8 Prep Time: 10 mins Cooking Time: 55 mins 55 mins
Nutrition facts: 200 calories 20 grams fat
Rating: 5.0/5
( 1 voted )

Ingredients

  • 1 cup light corn syrup
  • 3 large eggs
  • 1 cup sugar
  • 2 tablespoons butter, melted
  • 1 teaspoon vanilla extract
  • 2 cups chopped pecans
  • 3/4 cup flaked coconut
  • 3/4 cup semisweet chocolate chips
  • 1 prepared pie crust (9-inch deep-dish)
  • cool whip, if desired, for topping before serving

Instructions

Step 1: Prepare the oven. Preheat it to 350 degrees.

Step 2: In a bowl, place the corn syrup, eggs, sugar, butter, and vanilla. Beat using an electric mixer on medium speed until thoroughly combined and light-colored. Then, stir in the pecans and coconut. Mix using your hands.

Step 3: Scatter the chocolate chips in the bottom of the prepared pie crust before pouring in the corn syrup mixture.

Step 4: Place inside the preheated oven and bake for about 55 to 60 minutes or until the top is set.

Step 5: Once done, remove the pie from the oven and cool completely on a wire rack. Cooling takes about 2 hours.

Step 6: Once cooled, serve the pie with cool whip or whipped topping if preferred. If you have any leftovers, store them in the fridge. Enjoy!

August 13, 2020 0 comment
0 FacebookTwitterPinterestEmail
Main Dish Recipes

DEEP FRIED DANDELION BLOSSOMS

by Rebecca August 13, 2020
written by Rebecca

Serves: 25- 30 blossoms per person | Prep: 20 Min | Cook: 15 Min

These little wonders will bring a smile to your face for sure! I have never tried anything like this before and I am so in with the new flavor it brought to my tongue. It is crispy on the outside and juice on the inside. I really can’t describe the taste even more other than that it is pure awesome! All I can say is you really should give this one a try. I hope you all love it. Enjoy!

Ingredients

35-40 *prepared dandelion blossoms per person

1 egg

1 cup milk

FOR THE SPICIER BLOSSOMS- DRY MIXTURE:

1/2 cup flour

1/2 cup Italian bread crumbs

1/4 teaspoon cayenne pepper

1 teaspoon paprika

1/2 teaspoon black pepper

1/4 teaspoon dried oregano

1/8 teaspoon dried thyme

1/8 teaspoon cumin

FOR THE PLAINER DRY MIXTURE:

1/2 cup flour

1/2 cup Italian bread crumbs

1/2 teaspoon salt

1/2 teaspoon black pepper

HOW TO MAKE DEEP FRIED DANDELION BLOSSOMS

Important Notes:

Pick dandelions that have not been sprayed with any pesticides.

Gather and cook the blossoms right away.

Rinse with cold water. Drain and set aside.

Step 1: Cut the stem off.

Step 2: Add the egg wash, egg, and milk in a small mixing bowl.

Step 3: Place a cast-iron skillet on the stove and turn the heat to high. Add 1 1/2 of the canola oil and allow it to bubble.

Step 4: Transfer the blossom into the egg wash mixture.

Step 5: Remove the excess liquid add into the dry mix. Shake off to remove the excess.

Step 6: Drop blossoms into the oil one at a time. Do not overcrowd to prevent it from sticking.

Step 7: Toss and turn the blossoms using a slotted spoon. Make sure to cook both sides. Remove right away before it starts to turn dark brown.

Step 8: Place the blossoms into an oven-proof dish with paper towels and drain the excess oil.

Step 9: Serve crispy and hot. Enjoy!

DEEP FRIED DANDELION BLOSSOMS

Rebecca Serves: 25- 30 blossoms per person | Prep: 20 Min | Cook: 15 Min These little wonders will bring a smile to your face for sure! I have never tried… Main Dish Recipes DEEP FRIED DANDELION BLOSSOMS European Print This
Serves: 25-30 Prep Time: 20 mins Cooking Time: 15 mins 15 mins
Nutrition facts: 200 calories 20 grams fat
Rating: 5.0/5
( 1 voted )

Ingredients

  • 35-40 *prepared dandelion blossoms per person
  • 1 egg
  • 1 cup milk
  • FOR THE SPICIER BLOSSOMS- DRY MIXTURE:
  • 1/2 cup flour
  • 1/2 cup Italian bread crumbs
  • 1/4 teaspoon cayenne pepper
  • 1 teaspoon paprika
  • 1/2 teaspoon black pepper
  • 1/4 teaspoon dried oregano
  • 1/8 teaspoon dried thyme
  • 1/8 teaspoon cumin
  • FOR THE PLAINER DRY MIXTURE:
  • 1/2 cup flour
  • 1/2 cup Italian bread crumbs
  • 1/2 teaspoon salt
  • 1/2 teaspoon black pepper

Instructions

Important Notes:

Pick dandelions that have not been sprayed with any pesticides.

Gather and cook the blossoms right away.

Rinse with cold water. Drain and set aside.

Step 1: Cut the stem off.

Step 2: Add the egg wash, egg, and milk in a small mixing bowl.

Step 3: Place a cast-iron skillet on the stove and turn the heat to high. Add 1 1/2 of the canola oil and allow it to bubble.

Step 4: Transfer the blossom into the egg wash mixture.

Step 5: Remove the excess liquid add into the dry mix. Shake off to remove the excess.

Step 6: Drop blossoms into the oil one at a time. Do not overcrowd to prevent it from sticking.

Step 7: Toss and turn the blossoms using a slotted spoon. Make sure to cook both sides. Remove right away before it starts to turn dark brown.

Step 8: Place the blossoms into an oven-proof dish with paper towels and drain the excess oil.

Step 9: Serve crispy and hot. Enjoy!

August 13, 2020 0 comment
0 FacebookTwitterPinterestEmail
Main Dish Recipes

Homemade Amish Sweet Bread Recipe

by Rebecca August 13, 2020
written by Rebecca

Prep Time: 1 hour 45 minutes | Cook Time: 30 minutes | Total Time: 2 hours 15 minutes | Servings: 2 loaves

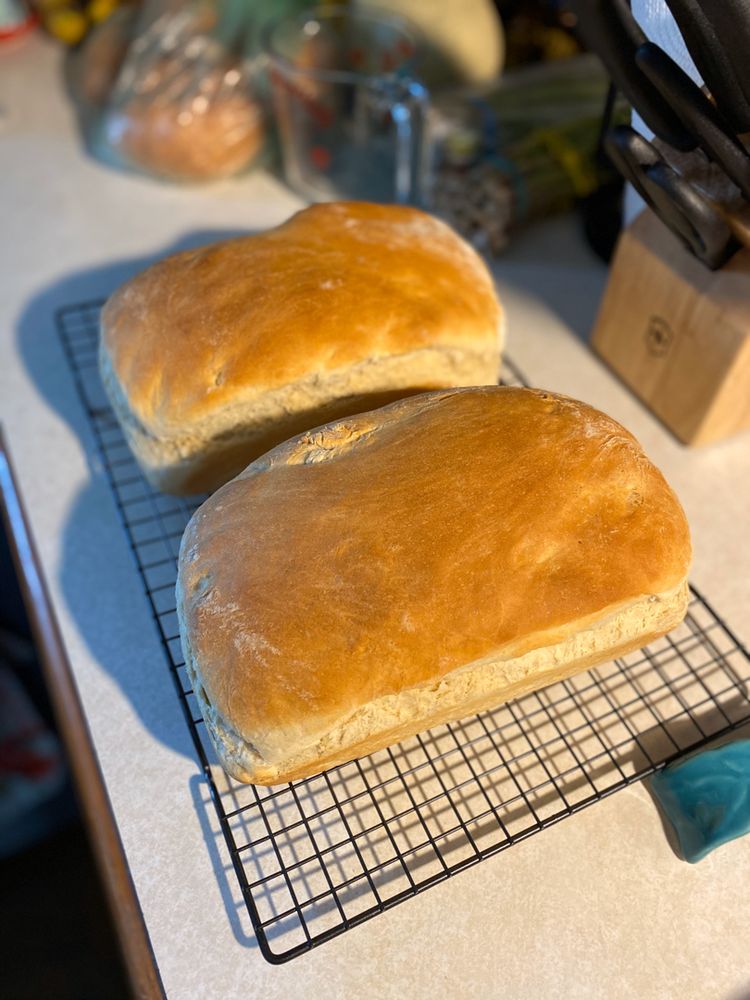
This recipe is awesome! The simplicity of the taste and the softness of the inside of these 2 loaves are amazing! I usually eat it as is and without any spread. It tastes really good but if you feel like adding more, try adding peanut butter on top. It’s really good too. Give this one a try and enjoy!

Ingredients

2 cups water

2/3 cups sugar

1 1/2 tablespoons yeast

1 1/2 teaspoons salt

1/4 cup vegetable oil

5 1/2 to 6 cups all-purpose flour

How to make Homemade Amish Sweet Bread

Step 1: Pour 2 cups of water in a microwavable bowl and heat at 110 degrees F. If you do not have a thermometer, heat about 1/2 cup of water and bring to a boil then add tap water until it fills to 2 cups.

Step 2: Add and stir sugar into the heated water.

Step 3: Add the yeast and allow it to sit for 10 minutes.

Step 4: Add in the oil and salt and stir.

Step 5: Gradually add flour until you get a consistent non-stick dough and form a ball.

Step 6: Sprinkle a little flour on the surface and knead the dough for 5 minutes or until a tiny piece of the dough does not tear.

Step 7: Apply cooking spray into a bowl. Add in the dough and cover it with a damp towel.

Step 8: Allow the dough to rise for at least 1 hour until the size becomes double.

Step 9: Punch the middle of the risen dough and pull the sides.

Step 10: Cut the dough into two and put them into the sprayed load pan.

Step 11: Allow the loaves to rise again for an extra 30 minutes uncovered.

Step 12: Place inside the preheated oven and bake for 30 minutes at 350 degrees F or until cooked through.

Step 13: Remove from the oven and let it sit on a wire rack to cool to room temperature.

Step 14: Serve and enjoy!

Homemade Amish Sweet Bread Recipe

Rebecca Prep Time: 1 hour 45 minutes | Cook Time: 30 minutes | Total Time: 2 hours 15 minutes | Servings: 2 loaves This recipe is awesome! The simplicity of the… Main Dish Recipes Homemade Amish Sweet Bread Recipe European Print This
Serves: 2 Prep Time: 1 hr 45 mins Cooking Time: 30 mins 30 mins
Nutrition facts: 200 calories 20 grams fat
Rating: 4.5/5
( 2 voted )

Ingredients

  • 2 cups water
  • 2/3 cups sugar
  • 1 1/2 tablespoons yeast
  • 1 1/2 teaspoons salt
  • 1/4 cup vegetable oil
  • 5 1/2 to 6 cups all-purpose flour

Instructions

Step 1: Pour 2 cups of water in a microwavable bowl and heat at 110 degrees F. If you do not have a thermometer, heat about 1/2 cup of water and bring to a boil then add tap water until it fills to 2 cups.

Step 2: Add and stir sugar into the heated water.

Step 3: Add the yeast and allow it to sit for 10 minutes.

Step 4: Add in the oil and salt and stir.

Step 5: Gradually add flour until you get a consistent non-stick dough and form a ball.

Step 6: Sprinkle a little flour on the surface and knead the dough for 5 minutes or until a tiny piece of the dough does not tear.

Step 7: Apply cooking spray into a bowl. Add in the dough and cover it with a damp towel.

Step 8: Allow the dough to rise for at least 1 hour until the size becomes double.

Step 9: Punch the middle of the risen dough and pull the sides.

Step 10: Cut the dough into two and put them into the sprayed load pan.

Step 11: Allow the loaves to rise again for an extra 30 minutes uncovered.

Step 12: Place inside the preheated oven and bake for 30 minutes at 350 degrees F or until cooked through.

Step 13: Remove from the oven and let it sit on a wire rack to cool to room temperature.

Step 14: Serve and enjoy!

August 13, 2020 0 comment
0 FacebookTwitterPinterestEmail
Main Dish Recipes

Coconut Topped / Cream Cheese Sheet Cake

by Rebecca August 13, 2020
written by Rebecca

Serves: 24 squares | Prep: 15 Min | Cook: 40 Min

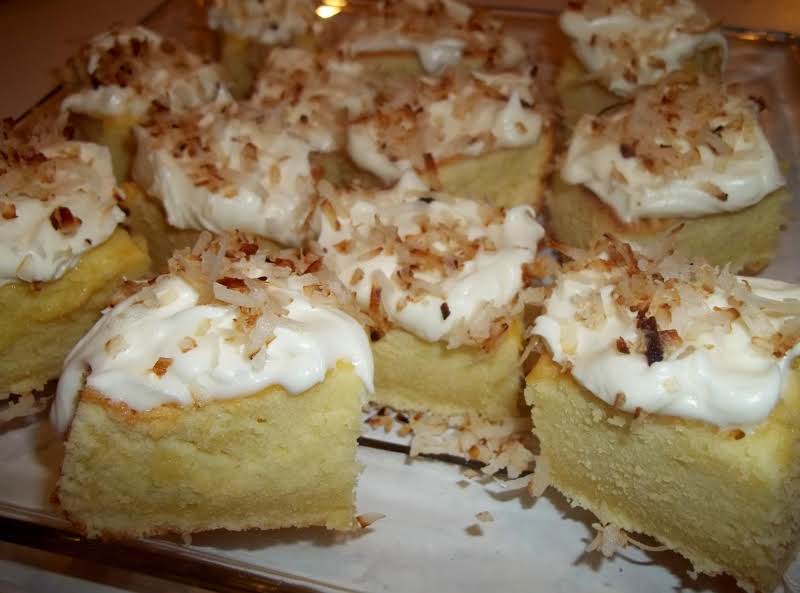
This is a lovely cake that you can make in a breeze. Super moist, incredibly light, and freaking delicious! The perfect summer dessert with cream cheese frosting and toasted coconut.

Ingredients

1 cup butter, softened (2 sticks)

6 oz cream cheese, softened

6 eggs

2 1/4 cups sugar

1 – 2 teaspoons vanilla extract or for more of a coconut flavor, add coconut extract

2 1/4 cups cake flour

1/8 cup coconut milk or coconut cream – optional

FOR THE FROSTING: (I DOUBLE THE RECIPE)

1/4 cup butter, softened

4 oz cream cheese, softened

1/2 teaspoon vanilla or coconut extract is good as well

1 1/2 cups confectioners’ sugar

1/2 cup coconut- for toasting and sprinkling on top of the frosting

How to Make Coconut Topped / Cream Cheese Sheet Cake

Step 1: Prepare the oven. Preheat it to 350 degrees F.

Step 2: Grease a 9 x 13-inch pan with nonstick cooking spray. You are welcome to use a sheet cake pan if you prefer a thicker cake.

Step 3: In a bowl, cream the butter, cream cheese, and sugar.

Step 4: One at a time, beat in the eggs, then, the vanilla and flour. At this point, you can add milk if using. Beat thoroughly.

Step 5: Pour the batter into the prepared pan and spread.

Step 6: Place inside the preheated oven and bake for about 35 to 40 minutes or until a toothpick inserted in the middle comes out clean.

Step 7: Once done, remove the cake from the oven and allow it to cool on a cooling rack. Don’t fret because the cake will fall when cooling, that’s is perfectly normal. The cake should be thick as a sheet cake and it’ll not be just like a regular cake.

Step 8: To make the frosting, beat the butter, cheese, and sugar. Mix until well combined.

Step 9: At this point, toast the coconut in a lightly sprayed skillet. Make sure to keep tossing until golden. Or place it on a baking sheet, toast in the oven while frequently turning to ensure the coconut will not burn.

Step 10: Now, gently remove the cake from the pan and slice it into 24 squares once cooled. Top the cake with frosting and coconut. Do this while the cake is still in the pan. Enjoy!

NOTE:

I like thick frosting but if you want a frosting that is not very thick, add several tablespoons of milk, cream, or coconut milk.

Try putting the cake in the freezer as it comes out of the oven. This will make it moister but I’ve read that it is most true with cakes in general.

Coconut Topped / Cream Cheese Sheet Cake

Rebecca Serves: 24 squares | Prep: 15 Min | Cook: 40 Min This is a lovely cake that you can make in a breeze. Super moist, incredibly light, and freaking delicious!… Main Dish Recipes Coconut Topped / Cream Cheese Sheet Cake European Print This
Serves: 24 Prep Time: 15 mins Cooking Time: 40 mins 40 mins
Nutrition facts: 200 calories 20 grams fat
Rating: 5.0/5
( 1 voted )

Ingredients

  • 1 cup butter, softened (2 sticks)
  • 6 oz cream cheese, softened
  • 6 eggs
  • 2 1/4 cups sugar
  • 1 - 2 teaspoons vanilla extract or for more of a coconut flavor, add coconut extract
  • 2 1/4 cups cake flour
  • 1/8 cup coconut milk or coconut cream - optional
  • FOR THE FROSTING: (I DOUBLE THE RECIPE)
  • 1/4 cup butter, softened
  • 4 oz cream cheese, softened
  • 1/2 teaspoon vanilla or coconut extract is good as well
  • 1 1/2 cups confectioners' sugar
  • 1/2 cup coconut- for toasting and sprinkling on top of the frosting

Instructions

Step 1: Prepare the oven. Preheat it to 350 degrees F.

Step 2: Grease a 9 x 13-inch pan with nonstick cooking spray. You are welcome to use a sheet cake pan if you prefer a thicker cake.

Step 3: In a bowl, cream the butter, cream cheese, and sugar.

Step 4: One at a time, beat in the eggs, then, the vanilla and flour. At this point, you can add milk if using. Beat thoroughly.

Step 5: Pour the batter into the prepared pan and spread.

Step 6: Place inside the preheated oven and bake for about 35 to 40 minutes or until a toothpick inserted in the middle comes out clean.

Step 7: Once done, remove the cake from the oven and allow it to cool on a cooling rack. Don't fret because the cake will fall when cooling, that's is perfectly normal. The cake should be thick as a sheet cake and it'll not be just like a regular cake.

Step 8: To make the frosting, beat the butter, cheese, and sugar. Mix until well combined.

Step 9: At this point, toast the coconut in a lightly sprayed skillet. Make sure to keep tossing until golden. Or place it on a baking sheet, toast in the oven while frequently turning to ensure the coconut will not burn.

Step 10: Now, gently remove the cake from the pan and slice it into 24 squares once cooled. Top the cake with frosting and coconut. Do this while the cake is still in the pan. Enjoy!

NOTE:

I like thick frosting but if you want a frosting that is not very thick, add several tablespoons of milk, cream, or coconut milk.

Try putting the cake in the freezer as it comes out of the oven. This will make it moister but I've read that it is most true with cakes in general.

August 13, 2020 0 comment
0 FacebookTwitterPinterestEmail
Main Dish Recipes

Flavorfully Fantastic Chicken Salad Sandwich

by Rebecca August 13, 2020
written by Rebecca

Serves: 2 to 3 people | Prep: 10 Min

Two days ago, I was looking for a new and easy recipe that I can try for my best friend’s birthday and this one just got my attention instantly! I am not a very good cook but I try now and then to at least learn. This recipe is really easy that even a newbie like me can pull off. I bet you can do it better than me so I hope you give it a try. The flavors in this Chicken Salad Sandwich will blow your minds out! Growing up, I always bring a sandwich in school. It is pretty much what I always eat as a kid. I know that this really simple but I just feel proud that I was able to make it from scratch!  The creaminess of the sauce and the chicken are the best thing about this recipe. Be very generous with the chicken if you want a full-packed sandwich! I only listed 1 can but feel free to add more. This serves 2ito 3 people so if you are making for at least 10, just add more of the ingredients. I can’t wait for you to try it. Just follow these steps and you are in for a treat. Enjoy!

Ingredients

1 10 oz can white meat chicken

12 pecans, finely chopped

1 shallot, finely chopped

1/2 green apple, finely chopped

1 stick of celery, finely chopped

6-12 dried cranberries or cherries, chopped

1-1 1/2 tablespoons mayonnaise

salt and pepper to taste

1 small tomato, diced

1-2 whole-wheat pitas, cut in half

How to Make Flavorfully Fantastic Chicken Salad Sandwich

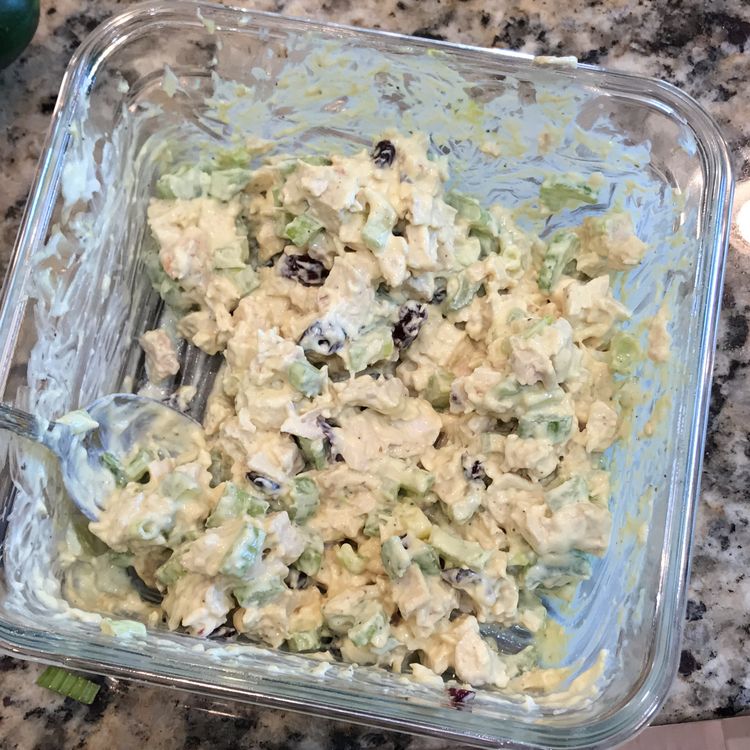
Step 1: In a small bowl, combine the white meat chicken, pecans, shallot, green apple, celery, cranberries or cherries, mayonnaise, and salt-and-pepper to taste. Mix thoroughly.

Step 2: Once the mixture is well mixed, gently stir in the tomatoes.

Step 3: Generously stuff the salad into the pitas. Enjoy!

Flavorfully Fantastic Chicken Salad Sandwich

Rebecca Serves: 2 to 3 people | Prep: 10 Min Two days ago, I was looking for a new and easy recipe that I can try for my best friend’s birthday… Main Dish Recipes Flavorfully Fantastic Chicken Salad Sandwich European Print This
Serves: 2-3 Prep Time: 10 mins
Nutrition facts: 200 calories 20 grams fat
Rating: 5.0/5
( 1 voted )

Ingredients

  • 1 10 oz can white meat chicken
  • 12 pecans, finely chopped
  • 1 shallot, finely chopped
  • 1/2 green apple, finely chopped
  • 1 stick of celery, finely chopped
  • 6-12 dried cranberries or cherries, chopped
  • 1-1 1/2 tablespoons mayonnaise
  • salt and pepper to taste
  • 1 small tomato, diced
  • 1-2 whole-wheat pitas, cut in half

Instructions

Step 1: In a small bowl, combine the white meat chicken, pecans, shallot, green apple, celery, cranberries or cherries, mayonnaise, and salt-and-pepper to taste. Mix thoroughly.

Step 2: Once the mixture is well mixed, gently stir in the tomatoes.

Step 3: Generously stuff the salad into the pitas. Enjoy!

August 13, 2020 0 comment
0 FacebookTwitterPinterestEmail
Newer Posts
Older Posts

Popular Posts

  • 1

    Crispy Crunchy Parmesan Potatoes

    March 21, 2020
  • 2

    CROCK POT SMOTHERED PORK CHOPS

    March 21, 2020
  • Facebook
  • Twitter

@2019 - All Right Reserved.


Back To Top