Cook it once
  • Home
  • Privacy Policy
  • Recipes
    • KETO
    • LC
    • WW
  • Tips
  • Contact
Cook it once
  • Home
  • Privacy Policy
  • Recipes
    • KETO
    • LC
    • WW
  • Tips
  • Contact
Category:

Main Dish Recipes

Main Dish Recipes

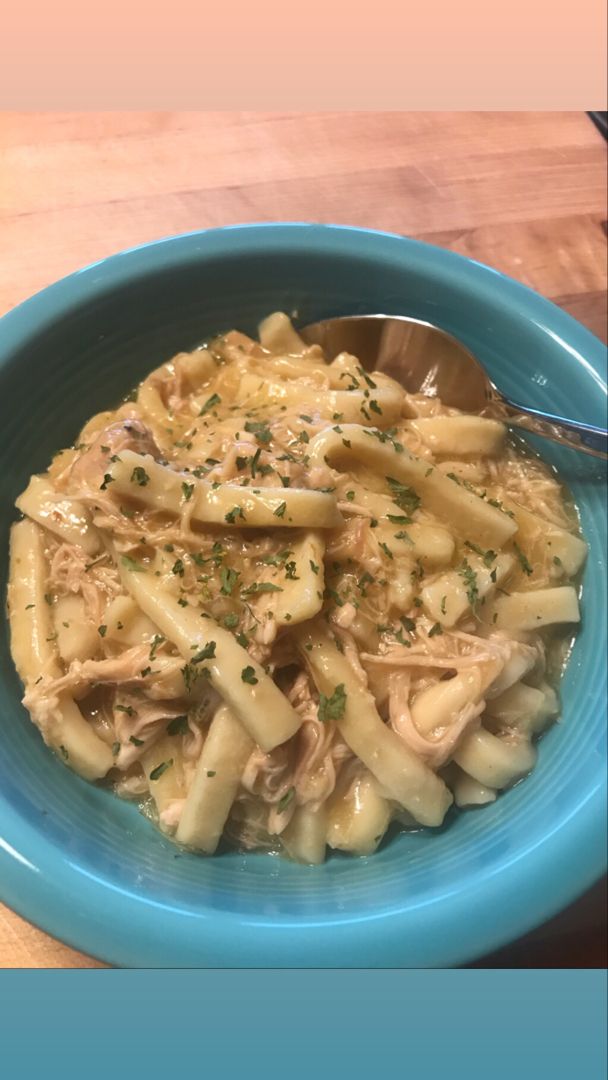
Comforting Chicken & Noodles Crock Pot

by Rebecca August 15, 2020
written by Rebecca

I love a warm, creamy, and filling soup in the winter. I think there is nothing more comforting than a bowl of chicken and noodle soup in the middle of a cold night.

This is a no-fuss recipe for a creamy soup. Another crockpot wonder that everyone should know about. The chicken breasts are put in the crockpot for a few hours until tender. Boil them with the chicken soup and shred into pieces. I use frozen egg noodles like I always do. This is a pretty simple recipe, easy to put together, and just leave it to cook. One of the best things about a crockpot is you don’t need to spend eternity in the chicken. Just put everything into the pot and leave. A perfect companion of a busy mom like me. Before I leave the house, I put all the ingredients in the pot and when I come back dinner is ready.

This chicken and noodles crockpot is perfect if you are feeling under the weather. You can add some ginger to the soup to pump you up. It is pretty effective. It will keep your tummy warm and fills you up.

INGREDIENTS

2 can cream of chicken soup

2 can chicken broth (15oz each)

1 stick butter or margarine

1 lb chicken breasts (fresh or frozen)

1 package frozen egg noodles (24 oz) I used Reames

How to make Chicken & Noodles Crock Pot

Step 1: Put the chicken at the bottom of a crockpot.

Step 2: Then, pour in the chicken broth and soup.

Step 3: Top with a stick of butter.

Step 4: Set the crockpot on low for about 6 to 7 hours.

Step 5: Once done, remove the chicken from the crockpot and shred to pieces.

Step 6: Place the shredded chicken back into the crockpot.

Step 7: Add in the frozen noodles and continue cooking for another 2 hours. Make sure to stir every 30 minutes until done.
Comforting Chicken & Noodles Crock Pot

Rebecca I love a warm, creamy, and filling soup in the winter. I think there is nothing more comforting than a bowl of chicken and noodle soup in the middle of… Main Dish Recipes Comforting Chicken & Noodles Crock Pot European Print This
Nutrition facts: 200 calories 20 grams fat
Rating: 3.6/5
( 32 voted )

Ingredients

  • 2 can cream of chicken soup
  • 2 can chicken broth (15oz each)
  • 1 stick butter or margarine
  • 1 lb chicken breasts (fresh or frozen)
  • 1 package frozen egg noodles (24 oz) I used Reames

Instructions

Step 1: Put the chicken at the bottom of a crockpot.

Step 2: Then, pour in the chicken broth and soup.

Step 3: Top with a stick of butter.

Step 4: Set the crockpot on low for about 6 to 7 hours.

Step 5: Once done, remove the chicken from the crockpot and shred to pieces.

Step 6: Place the shredded chicken back into the crockpot.

Step 7: Add in the frozen noodles and continue cooking for another 2 hours. Make sure to stir every 30 minutes until done.
August 15, 2020 0 comment
0 FacebookTwitterPinterestEmail
Main Dish Recipes

School Pizza Recipe

by Rebecca August 15, 2020
written by Rebecca

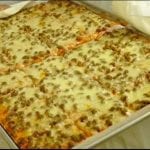
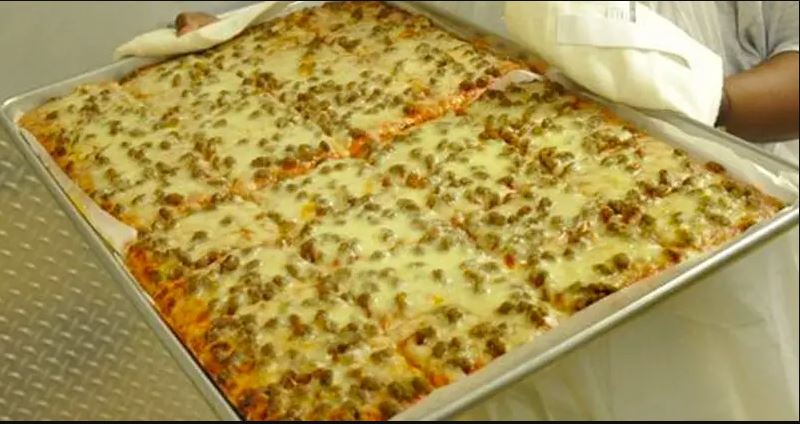
School pizza? This is nostalgic! Remember the pizza we looked forward to at school lunches? It’s the same thing! But if you don’t know what it is, don’t worry I have your back. And if you love pizza, then, this is going to be a real treat!

Equipment to use:

Half sheet pan

Parchment paper (which will be used to line the half sheet pan.)

An oven

A whisk and maybe

Oven mitts

Ingredients

FOR THE CRUST:

2 ⅔ flour

¾ cup powdered milk

2 tablespoons sugar

1 packet of quick rise yeast

1 teaspoon salt

1 ⅔ cup warm water (105-110 degrees)

2 tablespoons vegetable oil

FOR THE FILLING:

½ pound ground chuck

½ teaspoon salt

½ teaspoon pepper

1 8oz block mozzarella cheese – grated yourself (to be authentic school pizza, you will have to use imitation mozzarella

shreds)

FOR THE SAUCE (You can make the sauce the day before):

6oz can tomato paste

1 cup water

⅓ olive oil

2 cloves garlic minced

1 teaspoon salt

1 teaspoon pepper

½ tablespoon dried oregano

½ tablespoon dried basil

½ teaspoon dried rosemary crushed

To make School Pizza

Step 1: Prepare the oven. Preheat it to 475 degrees.

Step 2: Use a pam to spray the pan before laying it with parchment paper.

Step 3: Whisk the flour, powdered milk, sugar, yeast, and salt in a large bowl.

Step 4: Add in oil into a 110 to 115 degrees hot water and pour it into the flour mixture.

Step 5: Use a wooden spoon to stir the mixture until a batter forms. There will be lumps and that’s okay, what we don’t want is dry spots so mix the mixture well.

Step 6: Transfer the dough into the prepared pan and with your finger spread it until it is even. If the dough is hard to spread, let it rest for at least 5 minutes and try again.

Step 7: Place inside the preheated oven and bake for about 8 to 10 minutes. Once done, remove from the oven and set aside.

Step 8: Brown the meat in a skillet at medium heat until it resembles crumbles. Make sure to repeatedly stir the meat. Once the meat is no longer pink, drain the grease and set aside.

Step 9: To make the pizza sauce, place the 6oz can tomato paste, 1 cup water, ⅓ olive oil, 2 cloves minced garlic, 1 teaspoon salt, 1 teaspoon pepper, ½ tablespoon dried oregano, ½ tablespoon dried basil, and ½ teaspoon crushed dried rosemary in a saucepan. Cook over low to medium heat, stirring frequently. Sprinkle in some salt to taste. Let the sauce simmer for about 20 to 30 minutes until the tomato sauce thickened.

Step 10: Spread the sauce all over the crust, sprinkle the meat on top, then the cheese.

Step 11: Place inside the preheated oven and bake for about 8 to 10 minutes until the crust begins to brown and the cheese is melted.

Step 12: Remove the pizza from the oven and allow it to rest for at least 5 minutes.

Step 13: When ready, slice, and serve. Enjoy!

NOTE:

You can make the pizza sauce ahead. Just store it in the fridge and take it out when ready to use.

Nutrition facts:

282kcal per slice | 24g carbohydrates | 15g fat | 13g protein | 514mg sodium | 298IU vitamin A

School Pizza Recipe

Rebecca School pizza? This is nostalgic! Remember the pizza we looked forward to at school lunches? It’s the same thing! But if you don’t know what it is, don’t worry I… Main Dish Recipes School Pizza Recipe European Print This
Nutrition facts: 282 calories 15 fat
Rating: 3.6/5
( 7 voted )

Ingredients

  • FOR THE CRUST:
  • 2 ⅔ flour
  • ¾ cup powdered milk
  • 2 tablespoons sugar
  • 1 packet of quick rise yeast
  • 1 teaspoon salt
  • 1 ⅔ cup warm water (105-110 degrees)
  • 2 tablespoons vegetable oil
  • FOR THE FILLING:
  • ½ pound ground chuck
  • ½ teaspoon salt
  • ½ teaspoon pepper
  • 1 8oz block mozzarella cheese – grated yourself (to be authentic school pizza, you will have to use imitation mozzarella
  • shreds)
  • FOR THE SAUCE (You can make the sauce the day before):
  • 6oz can tomato paste
  • 1 cup water
  • ⅓ olive oil
  • 2 cloves garlic minced
  • 1 teaspoon salt
  • 1 teaspoon pepper
  • ½ tablespoon dried oregano
  • ½ tablespoon dried basil
  • ½ teaspoon dried rosemary crushed

Instructions

Step 1: Prepare the oven. Preheat it to 475 degrees.

Step 2: Use a pam to spray the pan before laying it with parchment paper.

Step 3: Whisk the flour, powdered milk, sugar, yeast, and salt in a large bowl.

Step 4: Add in oil into a 110 to 115 degrees hot water and pour it into the flour mixture.

Step 5: Use a wooden spoon to stir the mixture until a batter forms. There will be lumps and that's okay, what we don't want is dry spots so mix the mixture well.

Step 6: Transfer the dough into the prepared pan and with your finger spread it until it is even. If the dough is hard to spread, let it rest for at least 5 minutes and try again.

Step 7: Place inside the preheated oven and bake for about 8 to 10 minutes. Once done, remove from the oven and set aside.

Step 8: Brown the meat in a skillet at medium heat until it resembles crumbles. Make sure to repeatedly stir the meat. Once the meat is no longer pink, drain the grease and set aside.

Step 9: To make the pizza sauce, place the 6oz can tomato paste, 1 cup water, ⅓ olive oil, 2 cloves minced garlic, 1 teaspoon salt, 1 teaspoon pepper, ½ tablespoon dried oregano, ½ tablespoon dried basil, and ½ teaspoon crushed dried rosemary in a saucepan. Cook over low to medium heat, stirring frequently. Sprinkle in some salt to taste. Let the sauce simmer for about 20 to 30 minutes until the tomato sauce thickened.

Step 10: Spread the sauce all over the crust, sprinkle the meat on top, then the cheese.

Step 11: Place inside the preheated oven and bake for about 8 to 10 minutes until the crust begins to brown and the cheese is melted.

Step 12: Remove the pizza from the oven and allow it to rest for at least 5 minutes.

Step 13: When ready, slice, and serve. Enjoy!

NOTE:

You can make the pizza sauce ahead. Just store it in the fridge and take it out when ready to use.

August 15, 2020 0 comment
0 FacebookTwitterPinterestEmail
Main Dish Recipes

Best Chocolate Chip Cookies

by Rebecca August 15, 2020
written by Rebecca

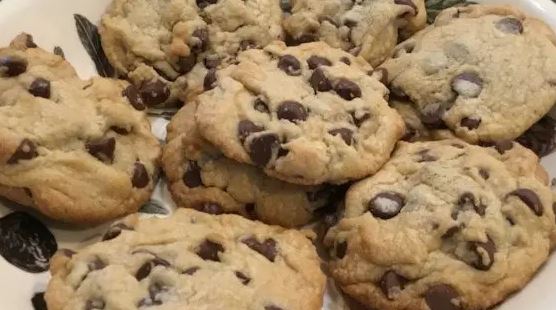
I am a fan of cookies. I love everything about a good old cookie. Aside from they are one of the easiest to whip up, they are generally delicious with the right amount of everything. And nothing beats a chocolate chip cookie that has a crisp edge and chewy middles.

When I was younger my mom always took me with her to this bakeshop around the corner. They make the best pastries and I am obsessed with their cookies. They have every cookie a child can dream of. The owner was very fond of me so she let me have a piece of every cookie they sell. That was the reason why I taught myself to make cookies. And my personal favorite is this traditional chocolate chip cookie. It’s super easy to make and the ingredients are pretty simple. This is a no-fuss, plain straightforward cookie recipe that turns out perfectly every single time! And these cookies are honest out-of-this-world delicious!

Ingredients

1 cup white sugar

1 cup packed brown sugar

2 eggs

2 teaspoons vanilla extract

1 teaspoon baking soda

2 teaspoons hot water

1/2 teaspoon salt

3 cups all-purpose flour

2 cups semisweet chocolate chips

1 cup chopped walnuts

How to make Best Chocolate Chip Cookies

Step 1: Prepare the oven. Preheat it to 350 degrees F or 175 degrees C.

Step 2: Place the butter, white sugar, and brown sugar in a bowl. Cream until smooth.

Step 3: Beat in the eggs, a piece at a time, beating well every after each addition.

Step 4: Stir in the vanilla.

Step 5: In hot water, dissolve the baking soda and stir it in the batter along with the salt.

Step 6: Then, stir in the flour, chocolate chips, and nuts.

Step 7: Put large spoonfuls of the batter onto ungreased pans.

Step 8: Place the pans inside the preheated oven and bake for approximately 10 minutes or until the edges of the cookies are nicely brown.

Best Chocolate Chip Cookies

Rebecca I am a fan of cookies. I love everything about a good old cookie. Aside from they are one of the easiest to whip up, they are generally delicious with… Main Dish Recipes Best Chocolate Chip Cookies European Print This
Nutrition facts: 200 calories 20 grams fat
Rating: 5.0/5
( 2 voted )

Ingredients

  • 1 cup white sugar
  • 1 cup packed brown sugar
  • 2 eggs
  • 2 teaspoons vanilla extract
  • 1 teaspoon baking soda
  • 2 teaspoons hot water
  • 1/2 teaspoon salt
  • 3 cups all-purpose flour
  • 2 cups semisweet chocolate chips
  • 1 cup chopped walnuts

Instructions

Step 1: Prepare the oven. Preheat it to 350 degrees F or 175 degrees C.

Step 2: Place the butter, white sugar, and brown sugar in a bowl. Cream until smooth.

Step 3: Beat in the eggs, a piece at a time, beating well every after each addition.

Step 4: Stir in the vanilla.

Step 5: In hot water, dissolve the baking soda and stir it in the batter along with the salt.

Step 6: Then, stir in the flour, chocolate chips, and nuts.

Step 7: Put large spoonfuls of the batter onto ungreased pans.

Step 8: Place the pans inside the preheated oven and bake for approximately 10 minutes or until the edges of the cookies are nicely brown.

August 15, 2020 0 comment
0 FacebookTwitterPinterestEmail
Main Dish Recipes

APPLE FRITTER CAKE

by Rebecca August 15, 2020
written by Rebecca

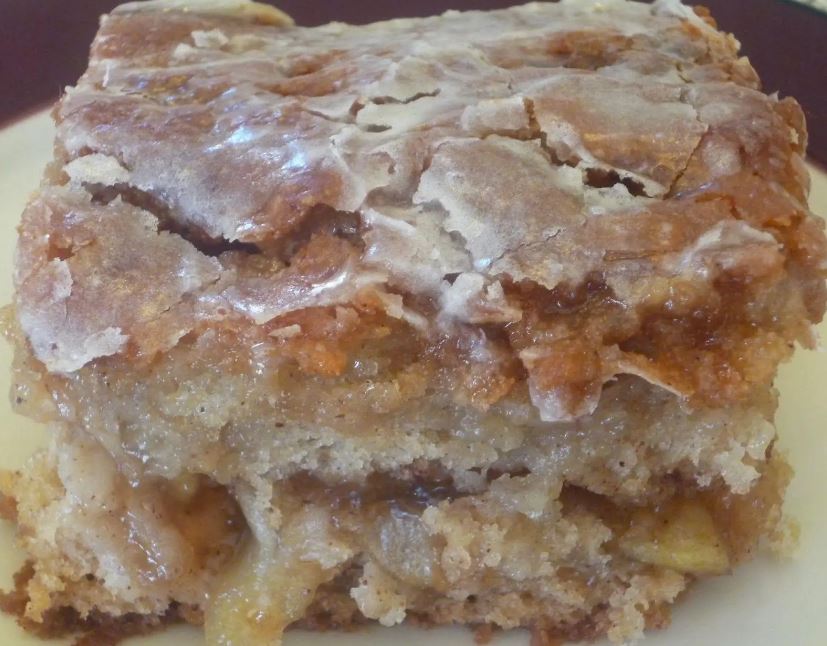
This guilt-free dessert is everything! It is not overwhelmingly sweet, it’s just perfect! The three awesome parts of this dessert are the filling, cake, and glaze. It might look a bit too much but trust me it’s easy peasy.

INGREDIENTS

FOR THE FILLING:

1 heaping cup of sliced apples (cored and quartered and then sliced)

1/3 cup sugar

1/4 teaspoon cinnamon

small pinch freshly grated nutmeg

2 tablespoons cornstarch

2 teaspoons water

1/2 cup brown sugar (I used a 1/4 cup each of dark and light)

1/2 teaspoon cinnamon

FOR THE CAKE:

1/3 cup butter

3/4 cup sugar

1/2 cup applesauce

1 teaspoon vanilla

2 eggs

2 1/4 cups flour

1 teaspoon baking powder

1 teaspoon baking soda

1 teaspoon salt

1 teaspoon cinnamon

1 cup Greek yogurt (you could use plain yogurt as well or sour cream)

FOR THE GLAZE:

2 cups powdered sugar

1 teaspoon vanilla

6 tablespoons milk

TO MAKE APPLE FRITTER CAKE

To start, we make the filling:

Step 1: In a small saucepan, combine the apples, sugar, water, cinnamon, and cornstarch.

Step 2: Cook the apple mix on low heat for about 5 to 7 minutes while constantly stirring until the sauce thickened and the apples are a little tender. Then, set the apple mix aside.

Step 3: Mix the brown sugar with cinnamon in a small bowl until well combined.

Now the for the cake:

Step 1: Prepare the oven. Preheat it to 350 degrees.

Step 2: Then, grease and flour a 9 x 13-inch baking dish and set aside.

Step 3: In a mixing bowl, cream the butter and sugar for about 3 minutes until light and fluffy.

Step 4: Mix the applesauce and vanilla.

Step 5: Then, add in the eggs one at a time, beating every after each addition. Or break the eggs in a separate bowl a piece at a time to avoid using a bad egg.

Step 6: Sift the flour, baking powder, baking soda, salt, and cinnamon.

Step 7: Add in the dry ingredients to the batter in three separate parts alternately with the yogurt in two parts. Begin and end with the flour mixture.

Step 8: Beat the batter until just combined. make sure to not overbeat.

Step 9: Place half of the batter into the prepared pan.

Step 10: Take spoonfuls of the cooled apple mixture over the batter, spreading as evenly as you can.

Step 11: Then, sprinkle over 2/3 of the brown sugar-cinnamon mixture.

Step 12: Top with the remaining batter, then, sprinkle on top the rest of the brown sugar-cinnamon mix.

Step 13: Place inside the preheated oven and bake for about 45 to 55 minutes or until the toothpick inserted in the middle comes out clean.

Finally for the glaze:

Step 1: Combine the powdered sugar, vanilla, and milk in a bowl until you get your desired consistency.

Step 2: Pour the glaze over the hot cake. You might need to pick the cake up and tilt it to evenly spread the glaze as evenly as you can.

Step 3: Allow the cake to sit for the glaze to set.

Nutrition facts:

355.6 calories per serving | total fat 6.2g | protein 5.8g | sodium 188.9mg| total carbs 73.5g.

APPLE FRITTER CAKE

Rebecca This guilt-free dessert is everything! It is not overwhelmingly sweet, it’s just perfect! The three awesome parts of this dessert are the filling, cake, and glaze. It might look a… Main Dish Recipes APPLE FRITTER CAKE European Print This
Nutrition facts: 355.6 calories 6.2 fat
Rating: 5.0/5
( 1 voted )

Ingredients

  • FOR THE FILLING:
  • 1 heaping cup of sliced apples (cored and quartered and then sliced)
  • 1/3 cup sugar
  • 1/4 teaspoon cinnamon
  • small pinch freshly grated nutmeg
  • 2 tablespoons cornstarch
  • 2 teaspoons water
  • 1/2 cup brown sugar (I used a 1/4 cup each of dark and light)
  • 1/2 teaspoon cinnamon
  • FOR THE CAKE:
  • 1/3 cup butter
  • 3/4 cup sugar
  • 1/2 cup applesauce
  • 1 teaspoon vanilla
  • 2 eggs
  • 2 1/4 cups flour
  • 1 teaspoon baking powder
  • 1 teaspoon baking soda
  • 1 teaspoon salt
  • 1 teaspoon cinnamon
  • 1 cup Greek yogurt (you could use plain yogurt as well or sour cream)
  • FOR THE GLAZE:
  • 2 cups powdered sugar
  • 1 teaspoon vanilla
  • 6 tablespoons milk

Instructions

To start, we make the filling:

Step 1: In a small saucepan, combine the apples, sugar, water, cinnamon, and cornstarch.

Step 2: Cook the apple mix on low heat for about 5 to 7 minutes while constantly stirring until the sauce thickened and the apples are a little tender. Then, set the apple mix aside.

Step 3: Mix the brown sugar with cinnamon in a small bowl until well combined.

Now the for the cake:

Step 1: Prepare the oven. Preheat it to 350 degrees.

Step 2: Then, grease and flour a 9 x 13-inch baking dish and set aside.

Step 3: In a mixing bowl, cream the butter and sugar for about 3 minutes until light and fluffy.

Step 4: Mix the applesauce and vanilla.

Step 5: Then, add in the eggs one at a time, beating every after each addition. Or break the eggs in a separate bowl a piece at a time to avoid using a bad egg.

Step 6: Sift the flour, baking powder, baking soda, salt, and cinnamon.

Step 7: Add in the dry ingredients to the batter in three separate parts alternately with the yogurt in two parts. Begin and end with the flour mixture.

Step 8: Beat the batter until just combined. make sure to not overbeat.

Step 9: Place half of the batter into the prepared pan.

Step 10: Take spoonfuls of the cooled apple mixture over the batter, spreading as evenly as you can.

Step 11: Then, sprinkle over 2/3 of the brown sugar-cinnamon mixture.

Step 12: Top with the remaining batter, then, sprinkle on top the rest of the brown sugar-cinnamon mix.

Step 13: Place inside the preheated oven and bake for about 45 to 55 minutes or until the toothpick inserted in the middle comes out clean.

Finally for the glaze:

Step 1: Combine the powdered sugar, vanilla, and milk in a bowl until you get your desired consistency.

Step 2: Pour the glaze over the hot cake. You might need to pick the cake up and tilt it to evenly spread the glaze as evenly as you can.

Step 3: Allow the cake to sit for the glaze to set.

August 15, 2020 0 comment
0 FacebookTwitterPinterestEmail
Main Dish Recipes

MINI STRAWBERRY CHEESECAKE TACOS

by Rebecca August 15, 2020
written by Rebecca

Strawberry cheesecake in tacos? I’m in heaven! This bite-sized cheesecake taco is the most clever sweet fix ever designed. It is easy to share, tastes like a real cheesecake, and it’s super fun to make!

Ingredients

5 8 inch Tortillas about 20 rounds

1 cup graham cracker crumbs

1/4 cup butter melted

1 cup strawberries chopped

1/4 cup sugar

2 teaspoons water

1 tablespoon corn starch

1 tablespoon cold water

1 cup heavy cream

1 cup cream cheese softened

1 teaspoon lemon zest

1 teaspoon vanilla

1/4 cup powdered sugar

HOW TO MAKE MINI STRAWBERRY CHEESECAKE TACOS

Step 1: Prepare the oven. Preheat it to 400 degrees F.

Step 2: Use a cookie cutter to slice 4 to 5 rounds out of the tortillas to make about 20 shells. Then, in melted butter dip each tortilla piece and coat in graham cracker crumbs.

Step 3: Flip first the muffin tin upside down before placing the pieces of tortilla in between the coffin cups. Place inside the preheated oven and bake for about 10 minutes until just golden brown. Then, remove from the oven and allow the tortillas to cool in the pan.

Step 4: Meanwhile, prepare the strawberry filling by filling a small pot with water, then, add in the sugar and strawberries. Allow the mixture to bring to a boil. When boiling, adjust the heat to a simmer to soften the strawberries.

Step 5: Dissolve the cornstarch in water, then, pour it over the strawberry mixture and bring it to a boil while constantly stirring. The mixture is going to be a little chunky. Remove the pan from the heat and thoroughly cool the mixture.

Step 6: In the meantime, whisk the cream cheese, heavy cream, powdered sugar, lemon zest, and vanilla on medium speed for 2 minutes until the mixture thickened. Then, place inside the fridge to chill for at least 30 minutes.

Step 7: Once chilled, transfer the cream cheese filling into a piping bag.

Step 8: Stuff the taco shells with the cream cheese filling. Place the strawberry filling on top and sprinkle with more graham cracker crumbs if desired. Enjoy!

MINI STRAWBERRY CHEESECAKE TACOS

Rebecca Strawberry cheesecake in tacos? I’m in heaven! This bite-sized cheesecake taco is the most clever sweet fix ever designed. It is easy to share, tastes like a real cheesecake, and… Main Dish Recipes MINI STRAWBERRY CHEESECAKE TACOS European Print This
Nutrition facts: 200 calories 20 grams fat
Rating: 5.0/5
( 1 voted )

Ingredients

  • 5 8 inch Tortillas about 20 rounds
  • 1 cup graham cracker crumbs
  • 1/4 cup butter melted
  • 1 cup strawberries chopped
  • 1/4 cup sugar
  • 2 teaspoons water
  • 1 tablespoon corn starch
  • 1 tablespoon cold water
  • 1 cup heavy cream
  • 1 cup cream cheese softened
  • 1 teaspoon lemon zest
  • 1 teaspoon vanilla
  • 1/4 cup powdered sugar

Instructions

Step 1: Prepare the oven. Preheat it to 400 degrees F.

Step 2: Use a cookie cutter to slice 4 to 5 rounds out of the tortillas to make about 20 shells. Then, in melted butter dip each tortilla piece and coat in graham cracker crumbs.

Step 3: Flip first the muffin tin upside down before placing the pieces of tortilla in between the coffin cups. Place inside the preheated oven and bake for about 10 minutes until just golden brown. Then, remove from the oven and allow the tortillas to cool in the pan.

Step 4: Meanwhile, prepare the strawberry filling by filling a small pot with water, then, add in the sugar and strawberries. Allow the mixture to bring to a boil. When boiling, adjust the heat to a simmer to soften the strawberries.

Step 5: Dissolve the cornstarch in water, then, pour it over the strawberry mixture and bring it to a boil while constantly stirring. The mixture is going to be a little chunky. Remove the pan from the heat and thoroughly cool the mixture.

Step 6: In the meantime, whisk the cream cheese, heavy cream, powdered sugar, lemon zest, and vanilla on medium speed for 2 minutes until the mixture thickened. Then, place inside the fridge to chill for at least 30 minutes.

Step 7: Once chilled, transfer the cream cheese filling into a piping bag.

Step 8: Stuff the taco shells with the cream cheese filling. Place the strawberry filling on top and sprinkle with more graham cracker crumbs if desired. Enjoy!

August 15, 2020 0 comment
0 FacebookTwitterPinterestEmail
Main Dish Recipes

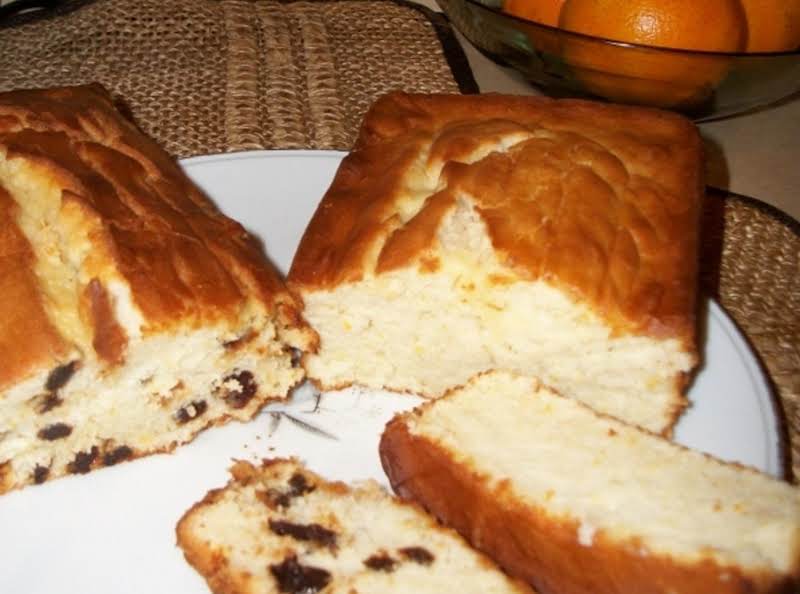
Orange Cream Cheese Bread

by Rebecca August 14, 2020
written by Rebecca

Serves: 2 loaves | Prep: 15 Min | Cook: 55 Min

This moist and creamy bread is everyone’s favorite. My mom’s most requested and my dad’s weakness. I love this because it is a breeze to make. A pretty straightforward bread but the result will surprise you.

If you are looking for a perfect Spring dessert then this Orange Cream Cheese Bread is all you need. It is a delightfully refreshing cake that hit all the sweet spots. The amazing flavor of orange joined with a heavenly cream cheese filling and creamy frosting is everything you need to lighten your mood today. Certainly, a must make brad recipe.

Ingredients

1 pkg cream cheese, softened (8 oz)

1/2 cup shortening

1 2/3 cups granulated sugar

2 eggs

2 1/4 cups all-purpose flour

1 teaspoon salt

1 tablespoon baking powder

1 cup milk

1/2 cup chopped walnuts

2 tablespoons grated orange peel

1/4 cup orange juice

How to Make Orange Cream Cheese Bread

Step 1: Cream the cream cheese and shortening.

Step 2: Slowly stir in the sugar while beating until fluffy and light.

Step 3: Add in the eggs one at a time, beating well every after each addition.

Step 4: In a bowl, combine the flour, baking powder, and salt.

Step 5: Stir in the flour into the creamed mixture alternately with the milk, ending in flour. Mix thoroughly every after addition.

Step 6: Then, stir in the walnuts and orange peel.

Step 7: Transfer the batter into 2 greased and floured 8-1/2 x 4-1/2 x 3-inch loaf pans.

Step 8: Place inside the oven and bake at 375 degrees F for approximately 55 minutes or until a toothpick inserted in the middle comes out clean.

Step 9: Once done, remove the bread from the oven and allow it to cool in the pan for at least 10 minutes.

Step 10: After 10 minutes, sprinkle the orange juice over the loaves.

Step 11: Then, remove the loaf from the pan and transfer into a wire rack to cool completely.

Orange Cream Cheese Bread

Rebecca Serves: 2 loaves | Prep: 15 Min | Cook: 55 Min This moist and creamy bread is everyone’s favorite. My mom’s most requested and my dad’s weakness. I love this… Main Dish Recipes Orange Cream Cheese Bread European Print This
Serves: 2 Prep Time: 15 mins Cooking Time: 55 mins 55 mins
Nutrition facts: 200 calories 20 grams fat
Rating: 5.0/5
( 1 voted )

Ingredients

  • 1 pkg cream cheese, softened (8 oz)
  • 1/2 cup shortening
  • 1 2/3 cups granulated sugar
  • 2 eggs
  • 2 1/4 cups all-purpose flour
  • 1 teaspoon salt
  • 1 tablespoon baking powder
  • 1 cup milk
  • 1/2 cup chopped walnuts
  • 2 tablespoons grated orange peel
  • 1/4 cup orange juice

Instructions

Step 1: Cream the cream cheese and shortening.

Step 2: Slowly stir in the sugar while beating until fluffy and light.

Step 3: Add in the eggs one at a time, beating well every after each addition.

Step 4: In a bowl, combine the flour, baking powder, and salt.

Step 5: Stir in the flour into the creamed mixture alternately with the milk, ending in flour. Mix thoroughly every after addition.

Step 6: Then, stir in the walnuts and orange peel.

Step 7: Transfer the batter into 2 greased and floured 8-1/2 x 4-1/2 x 3-inch loaf pans.

Step 8: Place inside the oven and bake at 375 degrees F for approximately 55 minutes or until a toothpick inserted in the middle comes out clean.

Step 9: Once done, remove the bread from the oven and allow it to cool in the pan for at least 10 minutes.

Step 10: After 10 minutes, sprinkle the orange juice over the loaves.

Step 11: Then, remove the loaf from the pan and transfer into a wire rack to cool completely.

August 14, 2020 0 comment
0 FacebookTwitterPinterestEmail
Main Dish Recipes

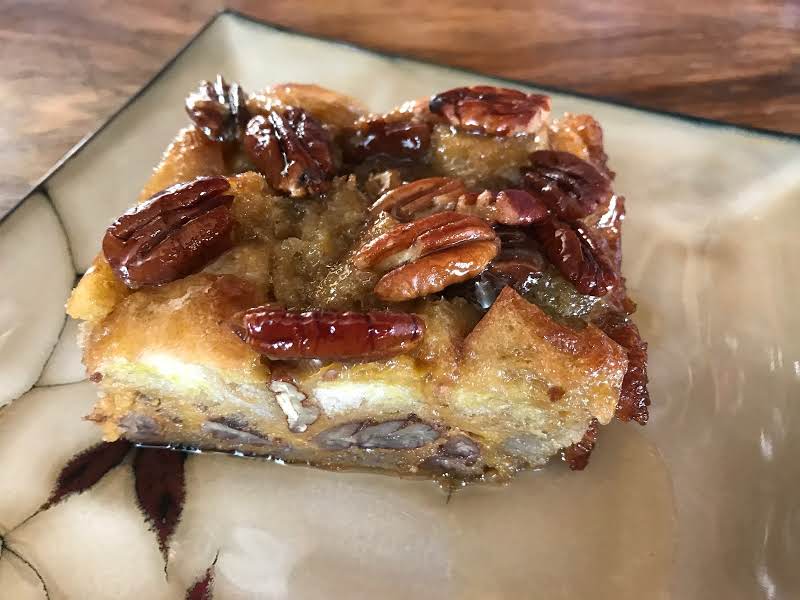
Pecan Pie Bread Pudding

by Rebecca August 14, 2020
written by Rebecca

Serves: 6-8 | Prep: 20 Min | Cook: 1 Hr

A decadent treat for everyone to enjoy! Indulge on this Pecan Pie Bread Pudding and your taste buds will thank you. This pie is a certified crowd-pleaser and to die for. There is nothing to hate about this pecan pie with rum sauce, it’s baked to perfection and seriously good!

Ingredients

6 large eggs beaten

1 cup light Karo syrup

1 cup heavy cream

1/2 cup butter, melted

2 teaspoons vanilla extract

1 cup sugar

1/4 cup dark rum or bourbon

8 cups cubed bread (use a hearty or heavy bread) does not have to be stale or toasted

1 cup chopped or halved pecans divided

FOR THE RUM SAUCE:

1 stick butter

1 cup sugar

1/4 cup dark rum or bourbon

1/4 cup water (if you want a heavy rum or bourbon flavor to omit the water and use liquor in its place

How to Make Pecan Pie Bread Pudding

NOTE: You can prepare this in the morning and let it sit. Then, come dinner, just pop this in the oven. This pudding is best when you sit it for a few hours or overnight so the bread will have enough time to soak up everything.

Step 1: Place the eggs in a large bowl and lightly beat.

Step 2: Stir in the syrup, heavy cream, melted butter, vanilla extract, sugar, and dark rum or bourbon. Mix thoroughly until well combined.

Step 3: Then, fold in the bread and half of the pecans.

Step 4: Allow the mixture to sit for an hour at room temperature mixing every so often so the bread will be well coated.

Step 5: Place inside the fridge, covered, until ready to bake.

Step 6: When ready to bake, prepare the oven. Preheat it to 350 degrees.

Step 7: Grease a 9 x 13-inch baking dish with butter or cooking spray. If you like a thicker bread pudding you can use a small-sized dish.

Step 8: Transfer the mixture into the prepared baking dish and top with the rest of the pecans.

Step 9: Place inside the preheated oven and bake for about 60 minutes.

Step 10: To make the RUM SAUCE, melt a stick of butter in a saucepan. Once melted, stir in the sugar, rum or bourbon, and water. Combine and let it simmer for at least 10 minutes while occasionally stirring. Keep the sauce warm until the bread is done.

Step 11: Once the bread is done, remove it from the oven. Then, pour the rum sauce over the cake while still hot. Let the sauce get down between the pudding and the sides of the baking dish.

Step 12: Then, allow the sauce to sit for at least 15 minutes before pouring in more sauce on top. You will be the judge of how much sauce you want.

Step 13: Serve it warm with a scoop of vanilla ice cream or fresh whipped topping. Enjoy!

Pecan Pie Bread Pudding

Rebecca Serves: 6-8 | Prep: 20 Min | Cook: 1 Hr A decadent treat for everyone to enjoy! Indulge on this Pecan Pie Bread Pudding and your taste buds will thank… Main Dish Recipes Pecan Pie Bread Pudding European Print This
Serves: 6-8 Prep Time: 20 mins Cooking Time: 1 hr 1 hr
Nutrition facts: 200 calories 20 grams fat
Rating: 5.0/5
( 1 voted )

Ingredients

  • 6 large eggs beaten
  • 1 cup light Karo syrup
  • 1 cup heavy cream
  • 1/2 cup butter, melted
  • 2 teaspoons vanilla extract
  • 1 cup sugar
  • 1/4 cup dark rum or bourbon
  • 8 cups cubed bread (use a hearty or heavy bread) does not have to be stale or toasted
  • 1 cup chopped or halved pecans divided
  • FOR THE RUM SAUCE:
  • 1 stick butter
  • 1 cup sugar
  • 1/4 cup dark rum or bourbon
  • 1/4 cup water (if you want a heavy rum or bourbon flavor to omit the water and use liquor in its place

Instructions

NOTE: You can prepare this in the morning and let it sit. Then, come dinner, just pop this in the oven. This pudding is best when you sit it for a few hours or overnight so the bread will have enough time to soak up everything.

Step 1: Place the eggs in a large bowl and lightly beat.

Step 2: Stir in the syrup, heavy cream, melted butter, vanilla extract, sugar, and dark rum or bourbon. Mix thoroughly until well combined.

Step 3: Then, fold in the bread and half of the pecans.

Step 4: Allow the mixture to sit for an hour at room temperature mixing every so often so the bread will be well coated.

Step 5: Place inside the fridge, covered, until ready to bake.

Step 6: When ready to bake, prepare the oven. Preheat it to 350 degrees.

Step 7: Grease a 9 x 13-inch baking dish with butter or cooking spray. If you like a thicker bread pudding you can use a small-sized dish.

Step 8: Transfer the mixture into the prepared baking dish and top with the rest of the pecans.

Step 9: Place inside the preheated oven and bake for about 60 minutes.

Step 10: To make the RUM SAUCE, melt a stick of butter in a saucepan. Once melted, stir in the sugar, rum or bourbon, and water. Combine and let it simmer for at least 10 minutes while occasionally stirring. Keep the sauce warm until the bread is done.

Step 11: Once the bread is done, remove it from the oven. Then, pour the rum sauce over the cake while still hot. Let the sauce get down between the pudding and the sides of the baking dish.

Step 12: Then, allow the sauce to sit for at least 15 minutes before pouring in more sauce on top. You will be the judge of how much sauce you want.

Step 13: Serve it warm with a scoop of vanilla ice cream or fresh whipped topping. Enjoy!

August 14, 2020 0 comment
0 FacebookTwitterPinterestEmail
Main Dish Recipes

Gooey Butter Cake

by Rebecca August 14, 2020
written by Rebecca

Serves: 16 | Prep: 10 Min | Cook: 45 Min

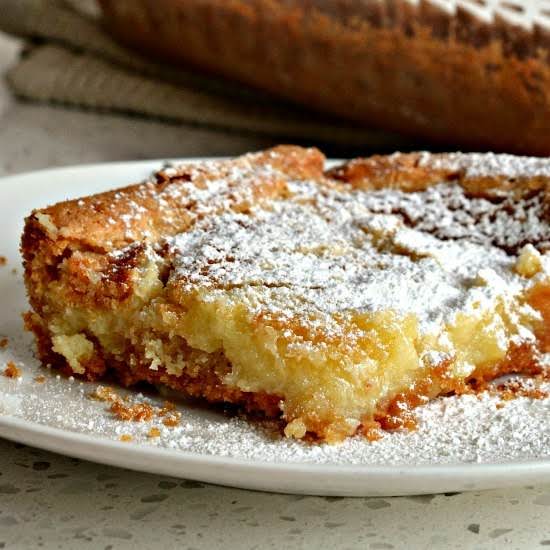
This sweet and gooey cake is too much to handle! Perfectly sweet and freaking delicious I can eat it in just one sitting. This is a pretty easy cake to make and requires only six simple ingredients that are already on hand. My daughter is obsessed with this dense, flat cake. She can eat the whole thing by herself! This cake is insanely good she always fights us for the last piece!

Whenever I have guests, they always request this gooey butter cake. And asked me every time if they can take home at least a piece each! They love this cake so much I have to make two or three of this.

Ingredients

1 yellow butter cake mix (just the cake mix)

1/2 cup butter melted

3 eggs

8 oz cream cheese softened

1 teaspoon vanilla extract

3 1/2 cups powdered sugar plus more for dusting if desired

How to Make Gooey Butter Cake

Step 1: Prepare the oven. Preheat it to 350 degrees.

Step 2: Then, grease a 9 x 13-inch baking dish.

Step 3: In a bowl, combine the cake mix, melted butter, and egg.

Step 4: Transfer and gently tap in the bottom of the prepared pan.

Step 5: Beat the cream cheese with a stand or hand mixer until smooth and lump-free. Adjust the mixer to low, then, add the eggs one at a time and continue to beat until well combined.

Step 6: Stir in the vanilla extract, then, the powdered sugar in various increments beating just until combined.

Step 7: Then, pour the mixture over the cake mix layer and make sure to not mix.

Step 8: Place inside the preheated oven and bake for about 40 to 45 minutes or until golden brown.

Step 9: Once done, remove from the oven and allow the cake to cool. Sprinkle the cooled cake with some powdered sugar if preferred. Enjoy!

Gooey Butter Cake

Rebecca Serves: 16 | Prep: 10 Min | Cook: 45 Min This sweet and gooey cake is too much to handle! Perfectly sweet and freaking delicious I can eat it in… Main Dish Recipes Gooey Butter Cake European Print This
Serves: 16 Prep Time: 10 mins Cooking Time: 45 mins 45 mins
Nutrition facts: 200 calories 20 grams fat
Rating: 5.0/5
( 1 voted )

Ingredients

  • 1 yellow butter cake mix (just the cake mix)
  • 1/2 cup butter melted
  • 3 eggs
  • 8 oz cream cheese softened
  • 1 teaspoon vanilla extract
  • 3 1/2 cups powdered sugar plus more for dusting if desired

Instructions

Step 1: Prepare the oven. Preheat it to 350 degrees.

Step 2: Then, grease a 9 x 13-inch baking dish.

Step 3: In a bowl, combine the cake mix, melted butter, and egg.

Step 4: Transfer and gently tap in the bottom of the prepared pan.

Step 5: Beat the cream cheese with a stand or hand mixer until smooth and lump-free. Adjust the mixer to low, then, add the eggs one at a time and continue to beat until well combined.

Step 6: Stir in the vanilla extract, then, the powdered sugar in various increments beating just until combined.

Step 7: Then, pour the mixture over the cake mix layer and make sure to not mix.

Step 8: Place inside the preheated oven and bake for about 40 to 45 minutes or until golden brown.

Step 9: Once done, remove from the oven and allow the cake to cool. Sprinkle the cooled cake with some powdered sugar if preferred. Enjoy!

August 14, 2020 0 comment
0 FacebookTwitterPinterestEmail
Main Dish Recipes

Old-Fashioned Soft and Buttery Yeast Rolls

by Rebecca August 14, 2020
written by Rebecca

Serves: 16 large pull-apart rolls | Prep: 2 Hr 45 Min | Cook: 20 Min

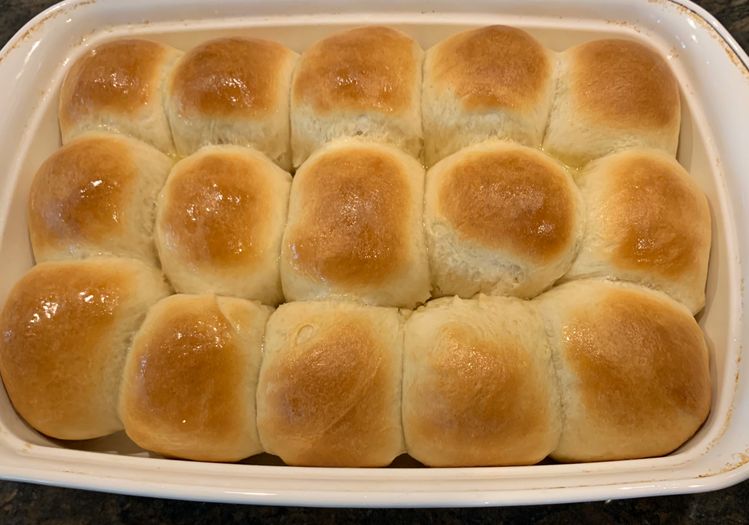
These amazingly soft and fluffy buttery rolls are the best in town! A snap to make and compliment every dinner dish. A simple yet delicious addition to your meal.

Ingredients

1 pkg active dry yeast (equals 2 1/4 tsp)

1/4 cup warm water

1/3 cup white, granulated sugar

1/4 cup butter, softened

1 teaspoon salt

1 cup hot milk

1 egg, lightly beaten

4 1/2 cups sifted all-purpose flour

2 tablespoons butter, melted (for brushing rolls)

How to Make Old-Fashioned Soft and Buttery Yeast Rolls

Step 1: In a large bowl with hot water, sprinkle the yeast and stir until it dissolves. Let it sit for at least minutes to foam.

Step 2: Add the sugar, 1/4 cup of butter, and salt into the hot milk. Mix well until the sugar is dissolved and the butter is melted. Then, allow the mixture to cool to 105 to 115 degrees.

Step 3: Stir in the milk mixture into the yeast mixture. Then, beat in the egg and 4 cups of flour a cup at a time to make a soft dough.

Step 4: Dust a pastry cloth with half a cup of flour.

Step 5: Lightly knead the dough for at least 5 minutes and use the rest of the flour to flour the pastry cloth and your hands.

Step 6: Put the dough in a warm and buttered bowl. Then, turn the greased side up. Cover the dough and allow it to rise for about 1 1/4 to 1 1/2 hours in a warm place.

Step 7: Once the dough rises, punch it down and knead it again on a lightly floured pastry cloth for at least 4 yo 5 minutes. The dough will be sticky so use a bit of flour as possible to flour your hands or else the rolls will not be as feathery light.

Step 8: Slice the dough with a large knife into four pieces. Then, cut the four slices into four pieces or you can just pinch off a small chunk of the dough into round balls (about 1 3/4 inches in diameter).

Step 9: When rolling the dough, pull the sides down and under to make a roll. Then, place the rolls in a well-buttered 13 x 9 x 2-inch pan, bottom side down in rows, making sure they are not touching each other.

Step 10: Allow the rolls to rise, covered, in a warm place for about 30 to 45 minutes until the size doubled.

Step 11: Then, brush the tops of the rolls with melted butter.

Step 12: Place inside the oven and bake at 375 degrees F for 18 to 20 minutes or until browned. This depends on your oven. Mine runs hot so I bake at 325 degrees so the top will not brown before the rolls are done inside. Set your oven temperature accordingly.

Step 13: Once done, remove from the oven and brush or bathe the hot rolls with more melted butter. The butter will sizzle down on the sides and bottom to give you a buttery soft crust.

Old-Fashioned Soft and Buttery Yeast Rolls

Rebecca Serves: 16 large pull-apart rolls | Prep: 2 Hr 45 Min | Cook: 20 Min These amazingly soft and fluffy buttery rolls are the best in town! A snap to… Main Dish Recipes Old-Fashioned Soft and Buttery Yeast Rolls European Print This
Serves: 16 Prep Time: 2 hrs 45 mins Cooking Time: 20 mins 20 mins
Nutrition facts: 200 calories 20 grams fat
Rating: 4.5/5
( 2 voted )

Ingredients

  • 1 pkg active dry yeast (equals 2 1/4 tsp)
  • 1/4 cup warm water
  • 1/3 cup white, granulated sugar
  • 1/4 cup butter, softened
  • 1 teaspoon salt
  • 1 cup hot milk
  • 1 egg, lightly beaten
  • 4 1/2 cups sifted all-purpose flour
  • 2 tablespoons butter, melted (for brushing rolls)

Instructions

Step 1: In a large bowl with hot water, sprinkle the yeast and stir until it dissolves. Let it sit for at least minutes to foam.

Step 2: Add the sugar, 1/4 cup of butter, and salt into the hot milk. Mix well until the sugar is dissolved and the butter is melted. Then, allow the mixture to cool to 105 to 115 degrees.

Step 3: Stir in the milk mixture into the yeast mixture. Then, beat in the egg and 4 cups of flour a cup at a time to make a soft dough.

Step 4: Dust a pastry cloth with half a cup of flour.

Step 5: Lightly knead the dough for at least 5 minutes and use the rest of the flour to flour the pastry cloth and your hands.

Step 6: Put the dough in a warm and buttered bowl. Then, turn the greased side up. Cover the dough and allow it to rise for about 1 1/4 to 1 1/2 hours in a warm place.

Step 7: Once the dough rises, punch it down and knead it again on a lightly floured pastry cloth for at least 4 yo 5 minutes. The dough will be sticky so use a bit of flour as possible to flour your hands or else the rolls will not be as feathery light.

Step 8: Slice the dough with a large knife into four pieces. Then, cut the four slices into four pieces or you can just pinch off a small chunk of the dough into round balls (about 1 3/4 inches in diameter).

Step 9: When rolling the dough, pull the sides down and under to make a roll. Then, place the rolls in a well-buttered 13 x 9 x 2-inch pan, bottom side down in rows, making sure they are not touching each other.

Step 10: Allow the rolls to rise, covered, in a warm place for about 30 to 45 minutes until the size doubled.

Step 11: Then, brush the tops of the rolls with melted butter.

Step 12: Place inside the oven and bake at 375 degrees F for 18 to 20 minutes or until browned. This depends on your oven. Mine runs hot so I bake at 325 degrees so the top will not brown before the rolls are done inside. Set your oven temperature accordingly.

Step 13: Once done, remove from the oven and brush or bathe the hot rolls with more melted butter. The butter will sizzle down on the sides and bottom to give you a buttery soft crust.

August 14, 2020 0 comment
0 FacebookTwitterPinterestEmail
Main Dish Recipes

CHEESY SMOKED SAUSAGE AND POTATO CASSEROLE

by Rebecca August 14, 2020
written by Rebecca

Serves: 4-6 | Prep: 30 Min | Cook: 35 Min

This is yet another casserole that I am sure you will love! It is smoky, it is cheesy, and hearty! This is the real deal – a no-fuss casserole that you can make in a heartbeat! It is loaded with flavors and is perfect all year round.

I always love casserole because they are super easy to make and already a complete meal. Casseroles are versatile, you can put just about anything. From a healthy, hearty casserole dish to a dessert. I have my favorites and one of them is this cheesy smoked sausage and potato casserole. The ingredients are simple but the result is superb! This sure pleases everyone and is always a hit on every occasion. I brought this on potlucks and picnics and it’s gone in a snap!

Ingredients

3 cups potatoes, peeled, boiled and cubed

1 lb skinless smoked sausage

4 tablespoons butter

4 tablespoons flour

2 cups milk

1/2 teaspoon salt

1/4 teaspoon pepper

1/8 teaspoon paprika

1/2 lb Velveeta cheese cubed

1/2 cup shredded cheddar cheese

HOW TO MAKE CHEESY SMOKED SAUSAGE AND POTATO CASSEROLE

Step 1: Slice the skinless smoked sausage in half, then lengthwise before chopping in into half pieces.

Step 2: Cook the chopped sausages in a frying pan for approximately 15 minutes while turning regularly until slightly brown.

Step 3: Meanwhile, prepare the oven. Preheat it to 350 degrees F.

Step 4: In a 2-quart casserole, place the potatoes and cooked sausages. Gently toss.

Step 5: In a saucepan, combine the butter, flour, milk, salt, pepper, and Velveeta cheese. Warm the mixture over medium heat until smooth and melted. Make sure to stir constantly.

Step 6: Then, pour the mixture over the potatoes and sausages.

Step 7: Evenly sprinkle over the shredded sharp cheese, then the paprika.

Step 8: Place inside the preheated oven and bake for about 35 to 45 minutes or until the top is golden brown.

CHEESY SMOKED SAUSAGE AND POTATO CASSEROLE

Rebecca Serves: 4-6 | Prep: 30 Min | Cook: 35 Min This is yet another casserole that I am sure you will love! It is smoky, it is cheesy, and hearty!… Main Dish Recipes CHEESY SMOKED SAUSAGE AND POTATO CASSEROLE European Print This
Serves: 4-6 Prep Time: 30 mins Cooking Time: 35 mins 35 mins
Nutrition facts: 200 calories 20 grams fat
Rating: 3.5/5
( 2 voted )

Ingredients

  • 3 cups potatoes, peeled, boiled and cubed
  • 1 lb skinless smoked sausage
  • 4 tablespoons butter
  • 4 tablespoons flour
  • 2 cups milk
  • 1/2 teaspoon salt
  • 1/4 teaspoon pepper
  • 1/8 teaspoon paprika
  • 1/2 lb Velveeta cheese cubed
  • 1/2 cup shredded cheddar cheese

Instructions

Step 1: Slice the skinless smoked sausage in half, then lengthwise before chopping in into half pieces.

Step 2: Cook the chopped sausages in a frying pan for approximately 15 minutes while turning regularly until slightly brown.

Step 3: Meanwhile, prepare the oven. Preheat it to 350 degrees F.

Step 4: In a 2-quart casserole, place the potatoes and cooked sausages. Gently toss.

Step 5: In a saucepan, combine the butter, flour, milk, salt, pepper, and Velveeta cheese. Warm the mixture over medium heat until smooth and melted. Make sure to stir constantly.

Step 6: Then, pour the mixture over the potatoes and sausages.

Step 7: Evenly sprinkle over the shredded sharp cheese, then the paprika.

Step 8: Place inside the preheated oven and bake for about 35 to 45 minutes or until the top is golden brown.

August 14, 2020 0 comment
0 FacebookTwitterPinterestEmail
Newer Posts
Older Posts

Popular Posts

  • 1

    Crispy Crunchy Parmesan Potatoes

    March 21, 2020
  • 2

    CROCK POT SMOTHERED PORK CHOPS

    March 21, 2020
  • Facebook
  • Twitter

@2019 - All Right Reserved.


Back To Top