Cook it once
  • Home
  • Privacy Policy
  • Recipes
    • KETO
    • LC
    • WW
  • Tips
  • Contact
Cook it once
  • Home
  • Privacy Policy
  • Recipes
    • KETO
    • LC
    • WW
  • Tips
  • Contact
Category:

Main Dish Recipes

Main Dish Recipes

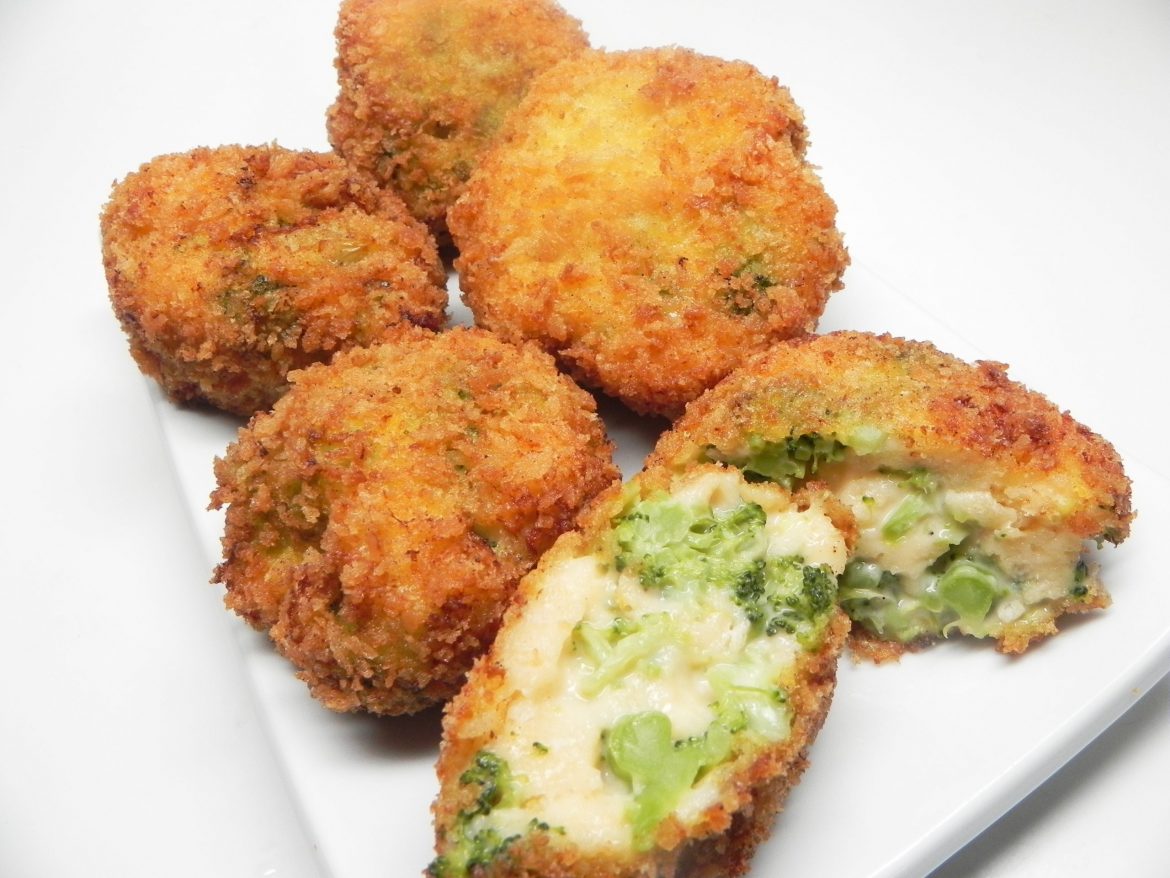
BROCCOLI CHEESE BITES

by Rebecca August 24, 2020
written by Rebecca

Prep time: 30 min | Cook: 10 min | Total: 40 min | Servings: 10 | Yield: 10 servings

These healthy bites are a smart way to include more vegetables into your diet especially if you have picky eaters like me. As a mom with kids that are not a fan of veggies, I always find a way for my young ones to eat healthy. And these Broccoli Cheese Bites are perfect! Crispy, cheesy, and loaded with broccoli. My go-to finger food, snack, and a great healthy addition to the kid’s school lunches.

INGREDIENTS

5 cups vegetable oil for frying

1 16 oz package chopped frozen broccoli, thawed and drained

4 cups shredded sharp Cheddar cheese

3 ½ cups dry bread crumbs

salt and pepper to taste

HOW TO MAKE BROCCOLI CHEESE BITES

Step 1:In a deep-fryer, heat the oil to about 375 degrees F or 190 degrees C.

Step 2: In a medium saucepan, add the broccoli with a cup of boiling water. Bring to a boil, covered, for 5 minutes until firm but not tender.

Step 3: Melt the cheddar cheese in a medium saucepan over low heat. Once melted, mix in the broccoli. And let the mixture cool and thicken for about 15 minutes.

Step 4: Combine the bread crumbs, salt, and pepper in a medium bowl. Place onto a large piece of wax paper and spread.

Step 5: Shape the broccoli cheese mixture into balls. Then, thoroughly roll into the bread crumb mixture until coated.

Step 6: Deep fry the balls for 5 minutes until golden brown.

Step 7: Once done, transfer the balls on paper towels to drain.

NOTES:

The oil’s nutritional value is calculated after cooking based on a retention value of 10 percent. Though, the exact quantity will vary depending on the cooking time and temperature, ingredient’s density, and the type of oil used.

You can cook the freeform bits if mini muffin pans are not available. With baking sheet, just grease the mixture onto the pan and drop big dollops. The baking time will still be the same.

Nutrition Facts:

Per Serving: 440.5 calories; 47.5 mg cholesterol; 568.3 mg sodium; 17.6 g protein; 30 g carbohydrates

BROCCOLI CHEESE BITES

Rebecca Prep time: 30 min | Cook: 10 min | Total: 40 min | Servings: 10 | Yield: 10 servings These healthy bites are a smart way to include more vegetables into your diet especially if you have picky eaters… Main Dish Recipes BROCCOLI CHEESE BITES European Print This
Serves: 10 Prep Time: 30 mins Cooking Time: 10 mins 10 mins
Nutrition facts: 440.5 calories 20 grams fat
Rating: 5.0/5
( 1 voted )

Ingredients

  • 5 cups vegetable oil for frying
  • 1 16 oz package chopped frozen broccoli, thawed and drained
  • 4 cups shredded sharp Cheddar cheese
  • 3 ½ cups dry bread crumbs
  • salt and pepper to taste

Instructions

Step 1:In a deep-fryer, heat the oil to about 375 degrees F or 190 degrees C.

Step 2: In a medium saucepan, add the broccoli with a cup of boiling water. Bring to a boil, covered, for 5 minutes until firm but not tender.

Step 3: Melt the cheddar cheese in a medium saucepan over low heat. Once melted, mix in the broccoli. And let the mixture cool and thicken for about 15 minutes.

Step 4: Combine the bread crumbs, salt, and pepper in a medium bowl. Place onto a large piece of wax paper and spread.

Step 5: Shape the broccoli cheese mixture into balls. Then, thoroughly roll into the bread crumb mixture until coated.

Step 6: Deep fry the balls for 5 minutes until golden brown.

Step 7: Once done, transfer the balls on paper towels to drain.

NOTES:

The oil's nutritional value is calculated after cooking based on a retention value of 10 percent. Though, the exact quantity will vary depending on the cooking time and temperature, ingredient's density, and the type of oil used.

You can cook the freeform bits if mini muffin pans are not available. With baking sheet, just grease the mixture onto the pan and drop big dollops. The baking time will still be the same.
August 24, 2020 0 comment
0 FacebookTwitterPinterestEmail
Main Dish Recipes

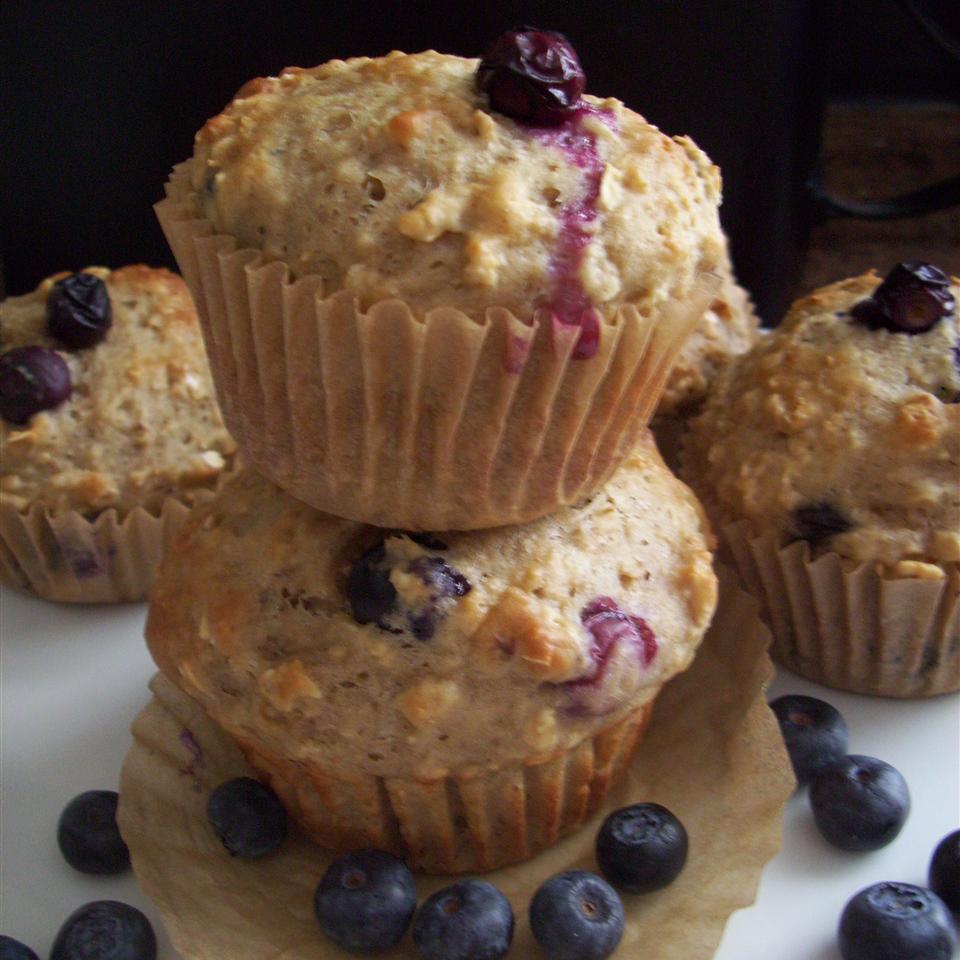
GET-UP-AND-GO MUFFINS WITH GREEK YOGURT, OATMEAL, AND BLUEBERRIES

by Rebecca August 24, 2020
written by Rebecca

Prep time: 15 min | Cook: 20 mins | Total: 35 mins | Servings: 12 | Yield: 1 dozen

They say eat what makes you happy. And these delightful muffins makes me very happy! It is my preferred walk around and eat treat. These Instagram worthy muffins do not have oil or butter, so you will not feel guilty if you finish the whole tray! Loaded with fresh blueberries with Greek yogurt and oats, these get-up-and-go muffins will keep you full until your next meal.

INGREDIENTS

1 serving cooking spray

2 cups all-purpose flour

1 cup quick-cooking oats

1 teaspoon baking soda

1 teaspoon baking powder

½ teaspoon salt

1 ¼ cups Greek yogurt

2 eggs

½ cup unsweetened applesauce

⅓ cup brown sugar

2 tablespoons water

1 ½ tablespoons vanilla extract

1 ¼ cups fresh blueberries

1 teaspoon all-purpose flour

HOW TO MAKE GET-UP-AND-GO MUFFINS WITH GREEK YOGURT, OATMEAL, AND BLUEBERRIES

Step 1: Prepare the oven. Preheat it to 350 degrees F or 175 degrees C.

Step 2: Grease a muffin tin with cooking spray or paper liners to line them with.

Step 3: In a medium bowl, whisk 2 cups flour, oats, baking soda, baking powder, and salt.

Step 4: In a large bowl, whisk the Greek yogurt, eggs, applesauce, brown sugar, water, and vanilla extract.

Step 5: In a teaspoon of flour, toss the blueberries to ensure that they will not sink to the bottom of the muffins.

Step 6: Then, fold the flour mixture into the Greek yogurt mixture. Followed by the blueberries.

Step 7: Scoop or spoon the batter into the prepared muffin tin. Fill each cup to about 3/4 full.

Step 8: Place inside the preheated oven and bake for about 20 minutes or until the toothpick inserted in the middle of the muffin comes out clean.

TIPS:

Don’t worry about the lumps, it is all good. Just make sure to not overbake the batter.

I prefer fresh blueberries, but you can use frozen ones or try using different varieties.

Use varieties of Greek yogurt as well. If you like you can substitute milk with water.

Nutrition Facts:

Per Serving: 182.5 calories; 35.7 mg cholesterol; 270.7 mg sodium; 5.5 g protein; 31.2 g carbohydrates

GET-UP-AND-GO MUFFINS WITH GREEK YOGURT, OATMEAL, AND BLUEBERRIES

Rebecca Prep time: 15 min | Cook: 20 mins | Total: 35 mins | Servings: 12 | Yield: 1 dozen They say eat what makes you happy. And these delightful muffins makes me very happy! It is my preferred walk… Main Dish Recipes GET-UP-AND-GO MUFFINS WITH GREEK YOGURT, OATMEAL, AND BLUEBERRIES European Print This
Serves: 12 Prep Time: 15 mins Cooking Time: 20 mins 20 mins
Nutrition facts: 182.5 calories 20 grams fat
Rating: 5.0/5
( 1 voted )

Ingredients

  • 1 serving cooking spray
  • 2 cups all-purpose flour
  • 1 cup quick-cooking oats
  • 1 teaspoon baking soda
  • 1 teaspoon baking powder
  • ½ teaspoon salt
  • 1 ¼ cups Greek yogurt
  • 2 eggs
  • ½ cup unsweetened applesauce
  • ⅓ cup brown sugar
  • 2 tablespoons water
  • 1 ½ tablespoons vanilla extract
  • 1 ¼ cups fresh blueberries
  • 1 teaspoon all-purpose flour

Instructions

Step 1: Prepare the oven. Preheat it to 350 degrees F or 175 degrees C.

Step 2: Grease a muffin tin with cooking spray or paper liners to line them with.

Step 3: In a medium bowl, whisk 2 cups flour, oats, baking soda, baking powder, and salt.

Step 4: In a large bowl, whisk the Greek yogurt, eggs, applesauce, brown sugar, water, and vanilla extract.

Step 5: In a teaspoon of flour, toss the blueberries to ensure that they will not sink to the bottom of the muffins.

Step 6: Then, fold the flour mixture into the Greek yogurt mixture. Followed by the blueberries.

Step 7: Scoop or spoon the batter into the prepared muffin tin. Fill each cup to about 3/4 full.

Step 8: Place inside the preheated oven and bake for about 20 minutes or until the toothpick inserted in the middle of the muffin comes out clean.

TIPS:

Don't worry about the lumps, it is all good. Just make sure to not overbake the batter.

I prefer fresh blueberries, but you can use frozen ones or try using different varieties.

Use varieties of Greek yogurt as well. If you like you can substitute milk with water.

August 24, 2020 0 comment
0 FacebookTwitterPinterestEmail
Main Dish Recipes

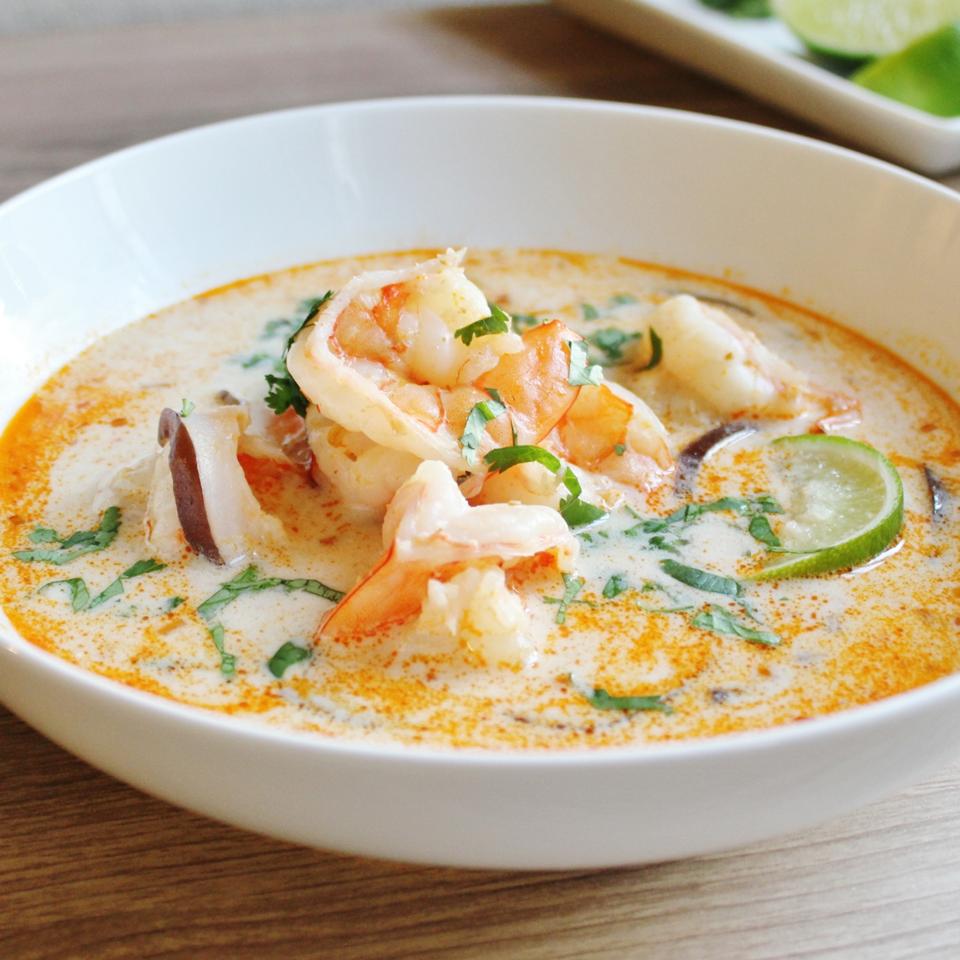
THE BEST THAI COCONUT SOUP

by Rebecca August 24, 2020
written by Rebecca

Prep: 35 min | Cook: 30 mins | Total: 1 hr 5 mins | Servings: 8 | Yield: 8 servings

This is one of the best Thai soup I’ve ever tasted! Bold, authentic, and all the vibrant flavors just burst inside your mouth. It has the right zing, the perfect blend of all ingredients, balance by the coconut milk. You can adjust the spice, make it mild or super spicy. It all depends on how you like it. But I always prefer mine with more kick that never fails to tingle my taste buds and make my nose run. And this Thai Coconut Soup is loaded with shrimp and mushrooms, another plus point for me because shrimps and shiitake? Why not? This delicious and spicy Thai soup is all you need to spice up your day.

INGREDIENTS

1 tablespoon vegetable oil

2 tablespoons grated fresh ginger

1 stalk lemongrass, minced

2 teaspoons red curry paste

4 cups chicken broth

3 tablespoons fish sauce

1 tablespoon light brown sugar

3 13.5 oz cans coconut milk

½ pound fresh shiitake mushrooms, sliced

1 pound medium shrimp – peeled and deveined

2 tablespoons fresh lime juice

1 pinch salt to taste

¼ cup chopped fresh cilantro

HOW TO MAKE THE BEST THAI COCONUT SOUP

Step 1: In a large pot, heat the oil over medium heat.

Step 2: Once the oil is hot, add in the ginger, lemongrass, and curry paste. Sautee for a minute before slowly pouring in the chicken broth, continuously stirring.

Step 3: Then, stir in the fish sauce and brown sugar and let the mixture simmer for about 15 minutes.

Step 4: Add in the coconut milk and mushrooms. Stir and cook for 5 minutes until the mushrooms are soft.

Step 5: Add in the shrimps and continue cooking for approximately 5 minutes until no longer pink.

Step 6: Add and stir the lime juice. Season with salt to taste.

Step 7: Garnish with cilantro and serve. Enjoy!

Nutrition Facts:

Per Serving: 367.6 calories; 86.3 mg cholesterol; 579.4 mg sodium; 13.2 g protein; 8.9 g carbohydrates

THE BEST THAI COCONUT SOUP

Rebecca Prep: 35 min | Cook: 30 mins | Total: 1 hr 5 mins | Servings: 8 | Yield: 8 servings This is one of the best Thai soup I’ve ever tasted! Bold, authentic, and all the vibrant flavors just… Main Dish Recipes THE BEST THAI COCONUT SOUP European Print This
Serves: 8 Prep Time: 35 mins Cooking Time: 30 mins 30 mins
Nutrition facts: 367.6 calories 20 grams fat
Rating: 5.0/5
( 1 voted )

Ingredients

  • 1 tablespoon vegetable oil
  • 2 tablespoons grated fresh ginger
  • 1 stalk lemongrass, minced
  • 2 teaspoons red curry paste
  • 4 cups chicken broth
  • 3 tablespoons fish sauce
  • 1 tablespoon light brown sugar
  • 3 13.5 oz cans coconut milk
  • ½ pound fresh shiitake mushrooms, sliced
  • 1 pound medium shrimp - peeled and deveined
  • 2 tablespoons fresh lime juice
  • 1 pinch salt to taste
  • ¼ cup chopped fresh cilantro

Instructions

Step 1: In a large pot, heat the oil over medium heat.

Step 2: Once the oil is hot, add in the ginger, lemongrass, and curry paste. Sautee for a minute before slowly pouring in the chicken broth, continuously stirring.

Step 3: Then, stir in the fish sauce and brown sugar and let the mixture simmer for about 15 minutes.

Step 4: Add in the coconut milk and mushrooms. Stir and cook for 5 minutes until the mushrooms are soft.

Step 5: Add in the shrimps and continue cooking for approximately 5 minutes until no longer pink.

Step 6: Add and stir the lime juice. Season with salt to taste.

Step 7: Garnish with cilantro and serve. Enjoy!

August 24, 2020 0 comment
0 FacebookTwitterPinterestEmail
Main Dish Recipes

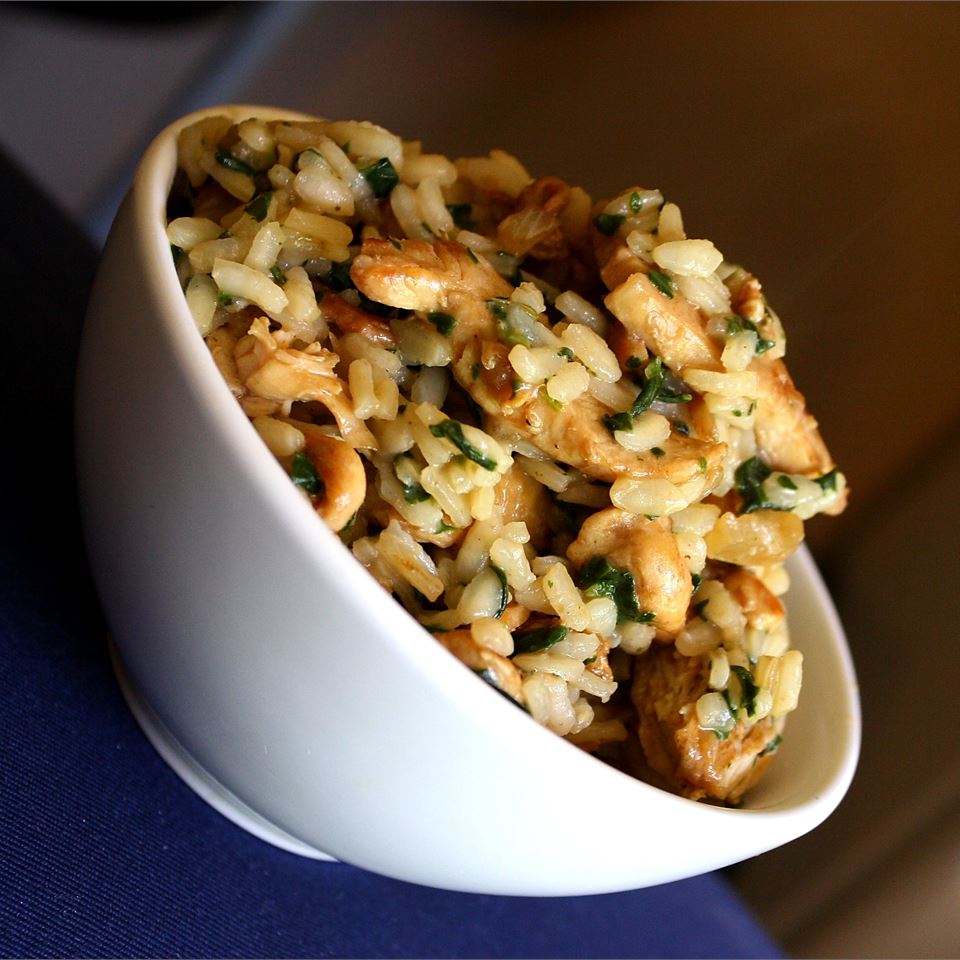
ROASTED CHICKEN WITH RISOTTO AND CARAMELIZED ONIONS

by Rebecca August 24, 2020
written by Rebecca

Prep: 15 min | Cook: 30 mins | Total: 45 mins | Serving: 4 | Yield: 4 servings

I got to tell you, this risotto is the bomb! A freaking delicious meal in a bowl. The caramelized onions, balsamic vinegar, and creamy risotto gives your leftover moist roasted chicken a royal treatment. Sprinkle with a bit of grated Parmesan or Pecorino Romano before serving and you got yourself the most filling meal.

INGREDIENTS

4 tablespoons olive oil, divided

1 onion, chopped

¼ cup balsamic vinegar

1 ½ cups uncooked Arborio rice

¼ cup dry white wine

7 cups hot chicken broth

2 tablespoons butter

2 cups chopped cooked chicken breast

salt and pepper to taste

2 tablespoons chopped fresh thyme

HOW TO MAKE ROASTED CHICKEN WITH RISOTTO AND CARAMELIZED ONIONS

Step 1: Heat 2 tablespoons of oil in a medium saucepan over medium heat. Sautee the onions for 15 to 20 minutes until they turn dark golden brown. Then, remove the saucepan from the heat and add in the balsamic vinegar. Stir and set aside.

Step 2: In another large skillet, heat the rest of the oil over medium heat. Add in the rice and stir. Boil for about 2 minutes before pouring in the wine. Adjust the heat to medium-low and begin adding in the broth about a cup at a time. Pour more broth as each cup of broth is absorbed. Do this for 20 minutes until the broth is absorbed and the rice is al dente.

Step 3: Add in the reserved onion mixture and stir well. Let the onion mixture heat through.

Step 4: Remove the skillet from the heat, then, stir in the butter and chicken.

Step 5: Season with salt and pepper to taste. Garnish with fresh thyme before serving. Enjoy!

NOTE:

For this recipe, you can use leftover roasted or poached chicken breasts. In a large saucepan, add 2 to 3 bone-in breasts halves to poach the chicken breasts. Pour in enough lightly salted water to cover the chicken. Bring to a boil over high heat. Then, adjust the heat to low and simmer for 30 minutes.

Nutrition Facts:

Per Serving: 774 calories; 72.2 mg cholesterol; 2840.1 mg sodium; 44.8 g protein; 77.3 g carbohydrates

ROASTED CHICKEN WITH RISOTTO AND CARAMELIZED ONIONS

Rebecca Prep: 15 min | Cook: 30 mins | Total: 45 mins | Serving: 4 | Yield: 4 servings I got to tell you, this risotto is the bomb! A freaking delicious meal in a bowl. The caramelized onions, balsamic… Main Dish Recipes ROASTED CHICKEN WITH RISOTTO AND CARAMELIZED ONIONS European Print This
Serves: 4 Prep Time: 15 mins Cooking Time: 30 mins 30 mins
Nutrition facts: 774 calories 20 grams fat
Rating: 5.0/5
( 1 voted )

Ingredients

  • 4 tablespoons olive oil, divided
  • 1 onion, chopped
  • ¼ cup balsamic vinegar
  • 1 ½ cups uncooked Arborio rice
  • ¼ cup dry white wine
  • 7 cups hot chicken broth
  • 2 tablespoons butter
  • 2 cups chopped cooked chicken breast
  • salt and pepper to taste
  • 2 tablespoons chopped fresh thyme

Instructions

Step 1: Heat 2 tablespoons of oil in a medium saucepan over medium heat. Sautee the onions for 15 to 20 minutes until they turn dark golden brown. Then, remove the saucepan from the heat and add in the balsamic vinegar. Stir and set aside.

Step 2: In another large skillet, heat the rest of the oil over medium heat. Add in the rice and stir. Boil for about 2 minutes before pouring in the wine. Adjust the heat to medium-low and begin adding in the broth about a cup at a time. Pour more broth as each cup of broth is absorbed. Do this for 20 minutes until the broth is absorbed and the rice is al dente.

Step 3: Add in the reserved onion mixture and stir well. Let the onion mixture heat through.

Step 4: Remove the skillet from the heat, then, stir in the butter and chicken.

Step 5: Season with salt and pepper to taste. Garnish with fresh thyme before serving. Enjoy!

NOTE:

For this recipe, you can use leftover roasted or poached chicken breasts. In a large saucepan, add 2 to 3 bone-in breasts halves to poach the chicken breasts. Pour in enough lightly salted water to cover the chicken. Bring to a boil over high heat. Then, adjust the heat to low and simmer for 30 minutes.

August 24, 2020 0 comment
0 FacebookTwitterPinterestEmail
Main Dish Recipes

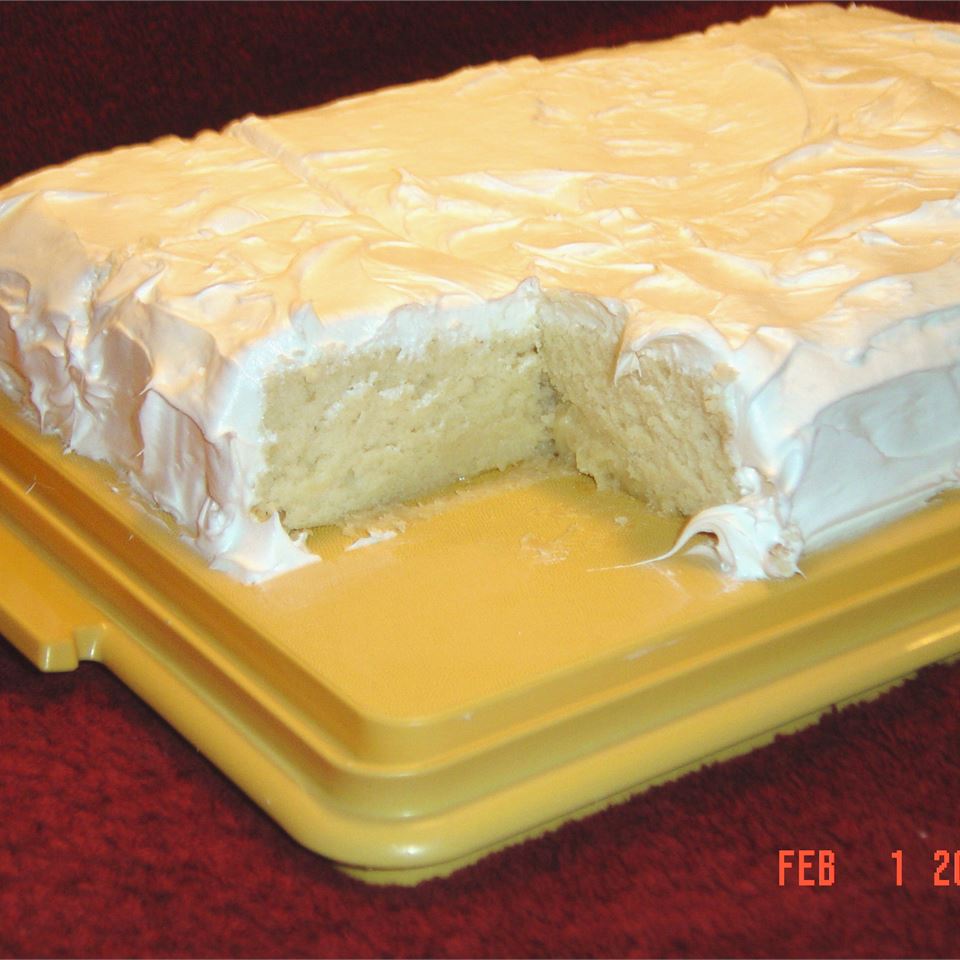
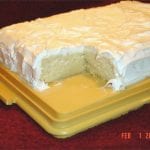
HEAVENLY WHITE CAKE

by Rebecca August 24, 2020
written by Rebecca

Prep time: 30 mins | Cook: 30 mins | Additional: 1 hr | Total: 2 hrs | Servings: 12 | Yield: 1 sheet cake or layer cake

A moist, buttery, sponge cake that is excellent for any occasion! This iconic cake never goes out of style. We all admire how fluffy, light, and heavenly delicious this white cake is. And the classic meringue icing is not overwhelmingly sweet, it is just perfect! This cake goes pretty well with a cup of freshly brewed coffee.

INGREDIENTS

2 ¾ cups sifted cake flour

4 teaspoons baking powder

¾ teaspoon salt

4 egg whites

1 ½ cups white sugar

¾ cup butter

1 cup milk

1 teaspoon vanilla extract

1 teaspoon almond extract

HOW TO MAKE HEAVENLY WHITE CAKE

Step 1: Make sure to measure the sifted cake flour, baking powder, and salt. Sift the three together three times.

Step 2: Add the eggs in a mixing bowl. Beat until foamy. Then, slowly add in half a cup of sugar and beat more until the meringue hold in soft peaks.

Step 3: In another bowl, beat the butter until smooth. Add in the rest of the sugar and cream until light and fluffy. Alternately add in the sifted ingredients with milk a tiny portion at a time. Make sure to beat every after each addition. Then, stir in the flavorings before adding in the meringue. Beat until thoroughly combined.

Step 4: Line the bottom of a 15 x 10 x 1-inch pan with parchment paper.

Step 5: Pour and spread the batter into the prepared pan.

Step 6: Place inside the oven and bake at 350 degrees F or 175 degrees C for about 30 to 35 minutes.

Step 7: Once done, remove from the oven and allow the cake to cool in the pan for at least 10 minutes before transferring the cake to a wire rack to cool completely.

NOTES:

This cake can also be baked in two 9-inch round pans for 30 to 35 minutes or in three 8-inch pans for 25 to 30 minutes.

To avoid the development of a thicker crust, I suggest lining the bottom of the pan with parchment paper. This will also help to ensure that the cake comes out in the pan in one piece.

Nutrition Facts:

Per Serving: 335.6 calories; 32.1 mg cholesterol; 417.1 mg sodium; 4.7 g protein; 52.1 g carbohydrates

HEAVENLY WHITE CAKE

Rebecca Prep time: 30 mins | Cook: 30 mins | Additional: 1 hr | Total: 2 hrs | Servings: 12 | Yield: 1 sheet cake or layer cake A moist, buttery, sponge cake that is excellent for any occasion! This iconic cake… Main Dish Recipes HEAVENLY WHITE CAKE European Print This
Serves: 12 Prep Time: 30 mins Cooking Time: 30 mins 30 mins
Nutrition facts: 335.6 calories 20 grams fat
Rating: 5.0/5
( 1 voted )

Ingredients

  • 2 ¾ cups sifted cake flour
  • 4 teaspoons baking powder
  • ¾ teaspoon salt
  • 4 egg whites
  • 1 ½ cups white sugar
  • ¾ cup butter
  • 1 cup milk
  • 1 teaspoon vanilla extract
  • 1 teaspoon almond extract

Instructions

Step 1: Make sure to measure the sifted cake flour, baking powder, and salt. Sift the three together three times.

Step 2: Add the eggs in a mixing bowl. Beat until foamy. Then, slowly add in half a cup of sugar and beat more until the meringue hold in soft peaks.

Step 3: In another bowl, beat the butter until smooth. Add in the rest of the sugar and cream until light and fluffy. Alternately add in the sifted ingredients with milk a tiny portion at a time. Make sure to beat every after each addition. Then, stir in the flavorings before adding in the meringue. Beat until thoroughly combined.

Step 4: Line the bottom of a 15 x 10 x 1-inch pan with parchment paper.

Step 5: Pour and spread the batter into the prepared pan.

Step 6: Place inside the oven and bake at 350 degrees F or 175 degrees C for about 30 to 35 minutes.

Step 7: Once done, remove from the oven and allow the cake to cool in the pan for at least 10 minutes before transferring the cake to a wire rack to cool completely.

NOTES:

This cake can also be baked in two 9-inch round pans for 30 to 35 minutes or in three 8-inch pans for 25 to 30 minutes.

To avoid the development of a thicker crust, I suggest lining the bottom of the pan with parchment paper. This will also help to ensure that the cake comes out in the pan in one piece.

August 24, 2020 0 comment
0 FacebookTwitterPinterestEmail
Main Dish Recipes

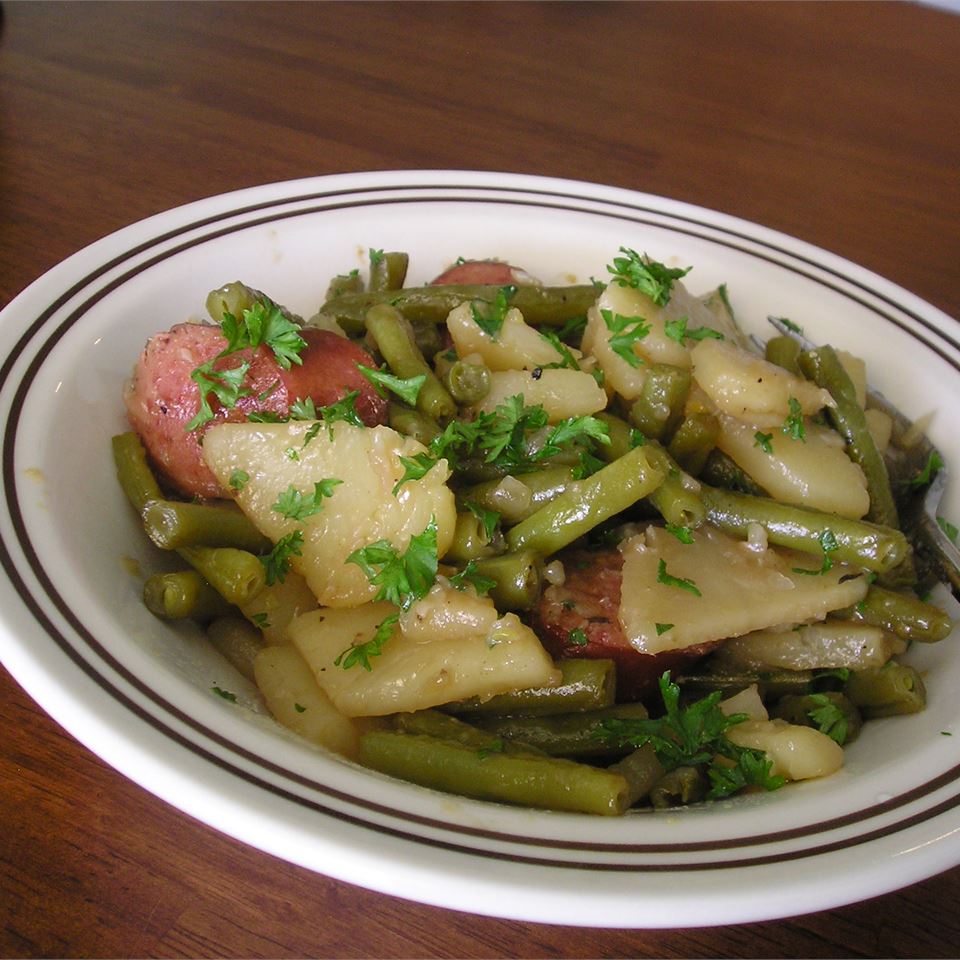
OLD-FASHIONED GREEN BEANS AND POTATOES

by Rebecca August 22, 2020
written by Rebecca

Prep time: 10 min | Cook: 25 | Total: 35 | Servings: 6 | Yield: 6 servings

This vegetarian dish is so good you’ll eat everything in one sitting! A healthy side that is perfect with just about anything. A no-fuss, simple, and deliciously hearty dish that you can enjoy all year round. Bonus, if you have your mini garden. Pick and cook for an all-natural meal that your whole family will thoroughly enjoy! My go-to whenever I want something light, healthy, easy, and quick. Even my picky eater loves this Old-fashioned green beans and potatoes.

You can make this with or without meat. I sometimes add leftover ham or chicken for a complete meal. This is perfect if you are watching your diet, or you just decided to take the path to a healthy lifestyle. I cook this at least twice a week and I eat this as is. This may be light but it is satisfying, savory, and super good! A mouth-watering dish that hits all the good spots. Fresh, enticing, simple side dish that no doubt delicious in every way, you’ll dig right in!

INGREDIENTS

3 cups thinly sliced potatoes

2 cups frozen green beans

½ teaspoon dried thyme

¼ teaspoon ground black pepper

1 teaspoon vegetarian Worcestershire sauce

1 cup vegetable broth, divided

1 teaspoon cornstarch

¼ cup chopped fresh parsley

HOW TO MAKE OLD-FASHIONED GREEN BEANS AND POTATOES

Step 1: Combine the potatoes, green beans, thyme, pepper, Worcestershire sauce, and 3/4 cup of broth in a large skillet. Bring to a boil over medium-high heat, then, adjust the heat to medium-low and simmer, covered, for about 15 to 20 minutes or until the vegetables are tender.

Step 2: Add the rest of the broth and cornstarch in a small bowl. Blend then stir in the parsley. Add this to the potato mixture and continue to cook, stirring, until bubbly and the mixture has thickened.

Nutrition Facts:

Per Serving: 82.7 calories; 0 mg cholesterol; 99.3 mg sodium; 2.1 g protein; 18.3 g carbohydrates

OLD-FASHIONED GREEN BEANS AND POTATOES

Rebecca Prep time: 10 min | Cook: 25 | Total: 35 | Servings: 6 | Yield: 6 servings This vegetarian dish is so good you’ll eat everything in one sitting! A healthy side that is perfect with just about anything.… Main Dish Recipes OLD-FASHIONED GREEN BEANS AND POTATOES European Print This
Serves: 6 Prep Time: 10 mins Cooking Time: 25 mins 25 mins
Nutrition facts: 82.7 calories 20 grams fat
Rating: 3.8/5
( 9 voted )

Ingredients

  • 3 cups thinly sliced potatoes
  • 2 cups frozen green beans
  • ½ teaspoon dried thyme
  • ¼ teaspoon ground black pepper
  • 1 teaspoon vegetarian Worcestershire sauce
  • 1 cup vegetable broth, divided
  • 1 teaspoon cornstarch
  • ¼ cup chopped fresh parsley

Instructions

Step 1: Combine the potatoes, green beans, thyme, pepper, Worcestershire sauce, and 3/4 cup of broth in a large skillet. Bring to a boil over medium-high heat, then, adjust the heat to medium-low and simmer, covered, for about 15 to 20 minutes or until the vegetables are tender.

Step 2: Add the rest of the broth and cornstarch in a small bowl. Blend then stir in the parsley. Add this to the potato mixture and continue to cook, stirring, until bubbly and the mixture has thickened.

August 22, 2020 0 comment
0 FacebookTwitterPinterestEmail
Main Dish Recipes

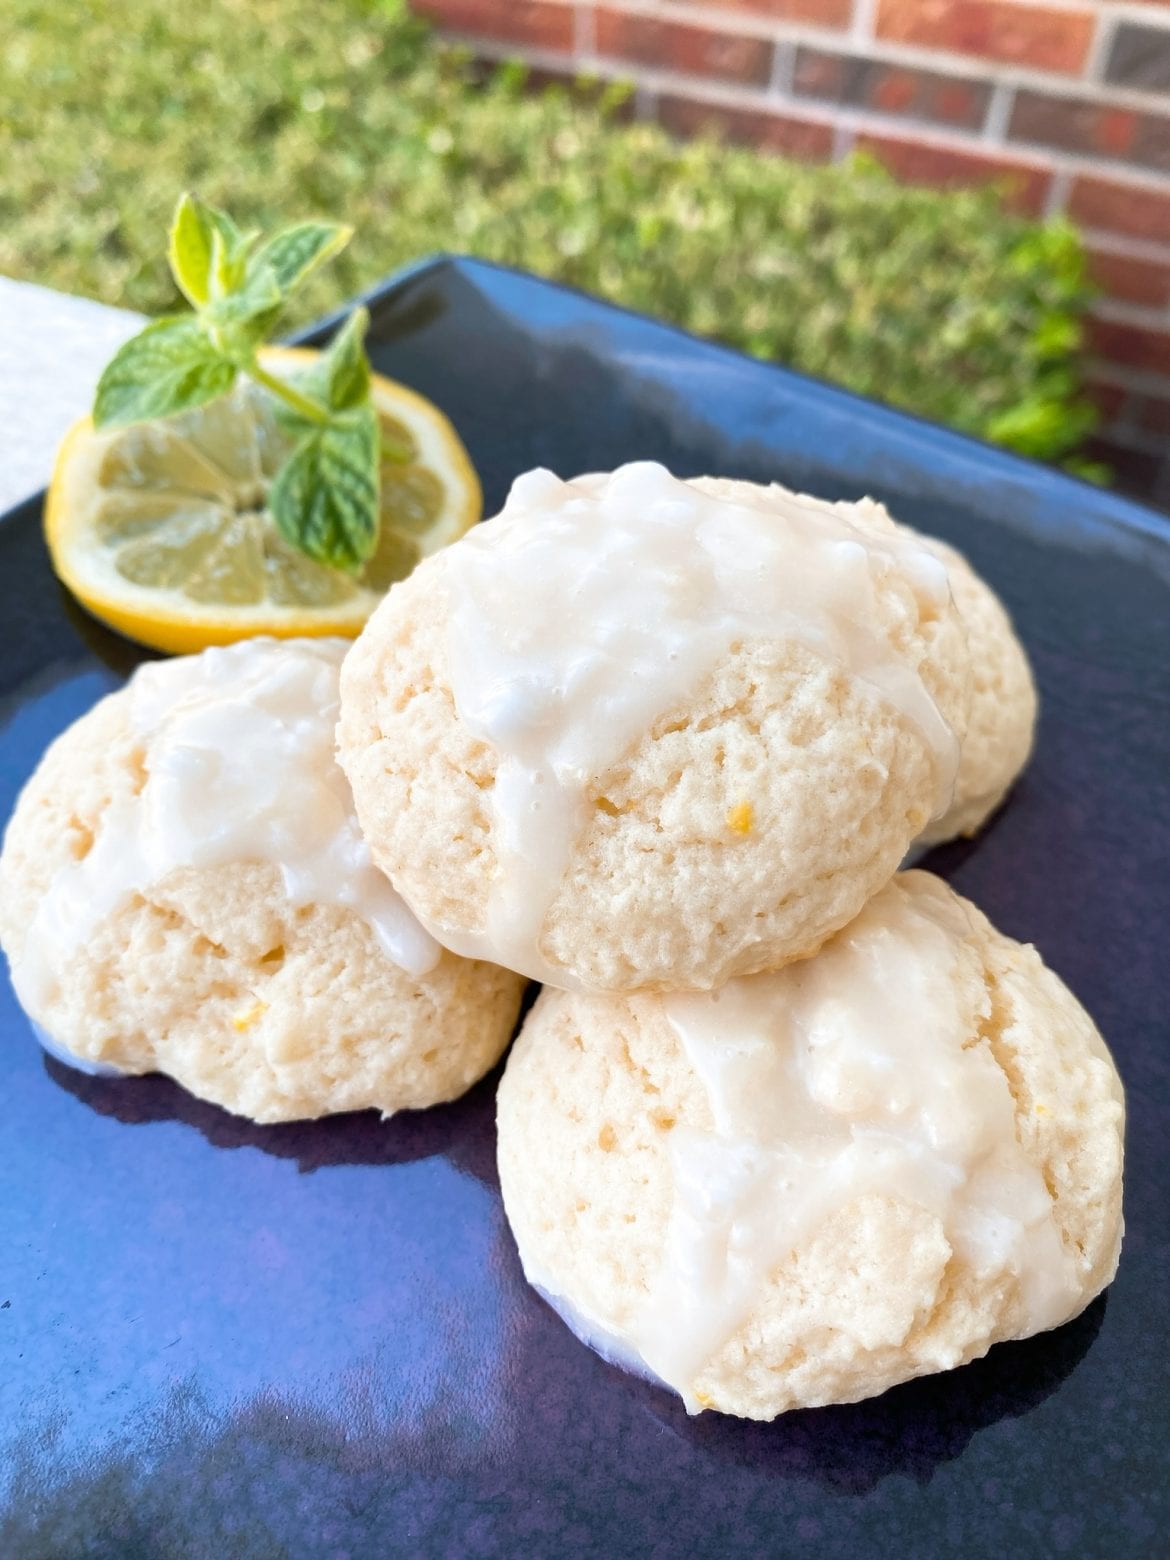
LEMONY ALMOND-RICOTTA COOKIES

by Rebecca August 22, 2020
written by Rebecca

Prep time: 20 min | Cook: 15 min | Additional: 30 min | Total: 1 hr 5 min | Servings: 36 | Yield: 36 cookies

Tangy and sweet – these pillowy cookies are the miniature of lemon cakes. Tender, moist, soft, and a euphoric cloud of deliciousness! These minis are the perfect homemade holiday gift. I am pretty sure that everyone will love these cookies and their melt-in-your-mouth lemony glaze.

INGREDIENTS

1 cup white sugar

½ cup unsalted butter softened

1 cup

2 tablespoons lemon juice

1 tablespoon almond extract

½ teaspoon lemon zest

1 large egg, room temperature

2 cups all-purpose flour

1 ½ teaspoon baking powder

½ teaspoon salt

For the Icing (optional):

½ cup powdered sugar

2 tablespoons lemon juice

HOW TO MAKE LEMONY ALMOND-RICOTTA COOKIES

Step 1: Prepare the oven. Preheat it to 350 degrees F or 175 degrees C.

Step 2: Then, with a parchment paper line a baking sheet.

Step 3: Add the sugar and butter in a large bowl. Beat using an electric mixer on low speed until blended. Adjust the speed to high and continue beating for another 5 minutes until light and fluffy. Add in the ricotta cheese, lemon juice, almond extract, lemon zest, and egg. Beat on medium speed until well combined. Then, before adding in the flour, baking powder, and salt, first reduce the speed to low. Slowly mix until a dough forms.

Step 4: Use a cookie scoop to scoop the dough and transfer 2-inches apart onto the prepared baking dish.

Step 5: Place inside the preheated oven and bake for about 12 to 15 minutes or until very lightly golden.

Step 6: Remove the cookies from the oven and move them to a wire rack to cool for at least 30 minutes.

Step 7: To make the icing, add the powdered sugar and lemon juice in a small bowl. Mix until you get a smooth icing. Then, drizzle over the cooled cookies.

Step 8: Set the cookies aside and allow the icing to dry completely.

Nutrition Facts:

Per Serving: 79.7 calories; 11.9 mg cholesterol; 55.1 mg sodium; 0.9 g protein; 12.8 g carbohydrates

LEMONY ALMOND-RICOTTA COOKIES

Rebecca Prep time: 20 min | Cook: 15 min | Additional: 30 min | Total: 1 hr 5 min | Servings: 36 | Yield: 36 cookies Tangy and sweet – these pillowy cookies are the miniature of lemon cakes. Tender, moist, soft,… Main Dish Recipes LEMONY ALMOND-RICOTTA COOKIES European Print This
Serves: 36 Prep Time: 20 mins Cooking Time: 45 mins 45 mins
Nutrition facts: 79.7 calories 20 grams fat
Rating: 5.0/5
( 1 voted )

Ingredients

  • 1 cup white sugar
  • ½ cup unsalted butter softened
  • 1 cup
  • 2 tablespoons lemon juice
  • 1 tablespoon almond extract
  • ½ teaspoon lemon zest
  • 1 large egg, room temperature
  • 2 cups all-purpose flour
  • 1 ½ teaspoon baking powder
  • ½ teaspoon salt
  • For the Icing (optional):
  • ½ cup powdered sugar
  • 2 tablespoons lemon juice

Instructions

Step 1: Prepare the oven. Preheat it to 350 degrees F or 175 degrees C.

Step 2: Then, with a parchment paper line a baking sheet.

Step 3: Add the sugar and butter in a large bowl. Beat using an electric mixer on low speed until blended. Adjust the speed to high and continue beating for another 5 minutes until light and fluffy. Add in the ricotta cheese, lemon juice, almond extract, lemon zest, and egg. Beat on medium speed until well combined. Then, before adding in the flour, baking powder, and salt, first reduce the speed to low. Slowly mix until a dough forms.

Step 4: Use a cookie scoop to scoop the dough and transfer 2-inches apart onto the prepared baking dish.

Step 5: Place inside the preheated oven and bake for about 12 to 15 minutes or until very lightly golden.

Step 6: Remove the cookies from the oven and move them to a wire rack to cool for at least 30 minutes.

Step 7: To make the icing, add the powdered sugar and lemon juice in a small bowl. Mix until you get a smooth icing. Then, drizzle over the cooled cookies.

Step 8: Set the cookies aside and allow the icing to dry completely.

August 22, 2020 0 comment
0 FacebookTwitterPinterestEmail
Main Dish Recipes

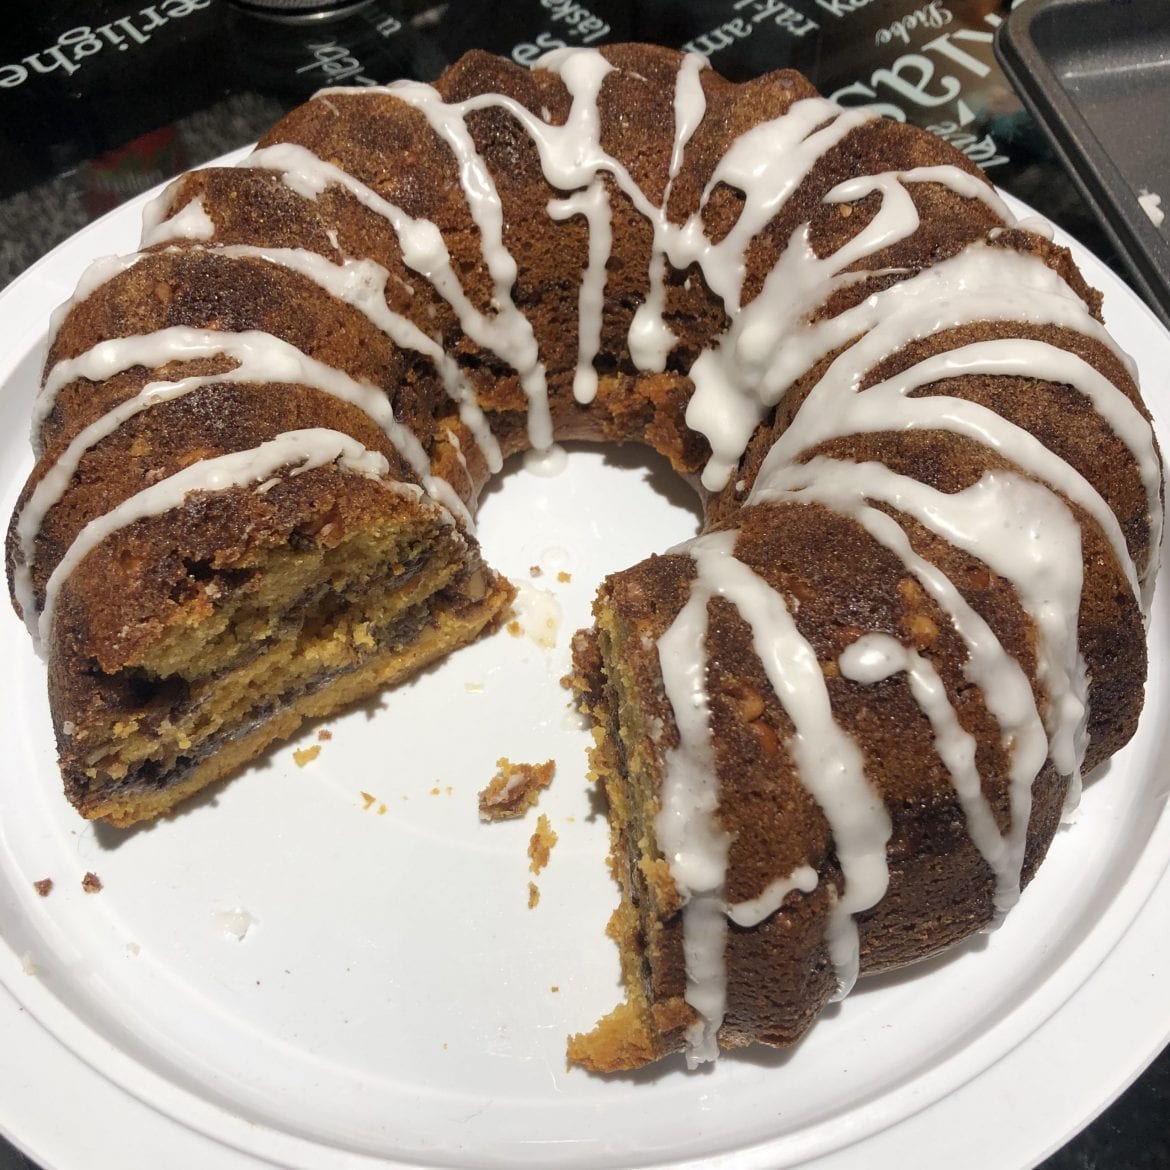
CINNAMON COFFEE CAKE

by Rebecca August 22, 2020
written by Rebecca

Servings: 24 | Yield: 1- 9×13 inch pan

I am a certified coffeeholic and this cake is my best pal! Quick, easy, and superb! It’s deliciously soft, buttery, and cinnamon-y. A great get-together cake that is perfect with a cup of coffee for breakfast or an afternoon snack.

I learned this recipe from my mom. This is one of her personal favorites and soon became mine. We both love how pretty simple this cake is. An unquestionably not fussy breakfast and a dessert in one. We just had this on brunch today and now I am craving again. This light, homemade coffee cake from scratch is the easiest and quickest you will ever make. With minimal ingredients that are always available and a few minutes of prepping, you don’t need to spend forever in the kitchen or wait for long to have a bite of this luscious cake.

INGREDIENTS

1 18.25-oz package yellow cake mix

1 3.4-oz package instant vanilla pudding mix

1 3.4-oz package instant butterscotch pudding mix

4 eggs

1 cup of water

1 cup of vegetable oil

1 cup packed brown sugar

1 tablespoon ground cinnamon

1 cup chopped walnuts

HOW TO MAKE CINNAMON COFFEE CAKE

Step 1: Prepare the oven. Preheat it to 350 degrees F or 175 degrees C.

Step 2: Then, grease a 9 x 13-inch baking pan or a 10-inch bundt cake pan.

Step 3: Stir the cake mix, vanilla pudding mix, and butterscotch pudding mix in a medium bowl. Add in the eggs, oil, and water. Mix thoroughly.

Step 4: Combine the brown sugar, cinnamon, and nuts in another bowl.

Step 5: Evenly spread half of the batter into the prepared pan. Sprinkle half of the nut mixture on top, spread the rest of the batter over, and lastly sprinkle the remaining nut mixture on top.

Step 6: Place inside the preheated oven and bake for approximately 20 minutes. Then, adjust the heat to about 325 degrees F or 165 degrees C and continue baking for another 35 to 40 minutes.

Nutrition Facts:

Per Serving: 282.3 calories; 31.4 mg cholesterol; 274.9 mg sodium; 2.8 g protein; 34.1 g carbohydrates

CINNAMON COFFEE CAKE

Rebecca Servings: 24 | Yield: 1- 9×13 inch pan I am a certified coffeeholic and this cake is my best pal! Quick, easy, and superb! It’s deliciously soft, buttery, and cinnamon-y. A great get-together… Main Dish Recipes CINNAMON COFFEE CAKE European Print This
Serves: 24
Nutrition facts: 282.3 calories 20 grams fat
Rating: 5.0/5
( 1 voted )

Ingredients

  • 1 18.25-oz package yellow cake mix
  • 1 3.4-oz package instant vanilla pudding mix
  • 1 3.4-oz package instant butterscotch pudding mix
  • 4 eggs
  • 1 cup of water
  • 1 cup of vegetable oil
  • 1 cup packed brown sugar
  • 1 tablespoon ground cinnamon
  • 1 cup chopped walnuts

Instructions

Step 1: Prepare the oven. Preheat it to 350 degrees F or 175 degrees C.

Step 2: Then, grease a 9 x 13-inch baking pan or a 10-inch bundt cake pan.

Step 3: Stir the cake mix, vanilla pudding mix, and butterscotch pudding mix in a medium bowl. Add in the eggs, oil, and water. Mix thoroughly.

Step 4: Combine the brown sugar, cinnamon, and nuts in another bowl.

Step 5: Evenly spread half of the batter into the prepared pan. Sprinkle half of the nut mixture on top, spread the rest of the batter over, and lastly sprinkle the remaining nut mixture on top.

Step 6: Place inside the preheated oven and bake for approximately 20 minutes. Then, adjust the heat to about 325 degrees F or 165 degrees C and continue baking for another 35 to 40 minutes.

August 22, 2020 0 comment
0 FacebookTwitterPinterestEmail
Main Dish Recipes

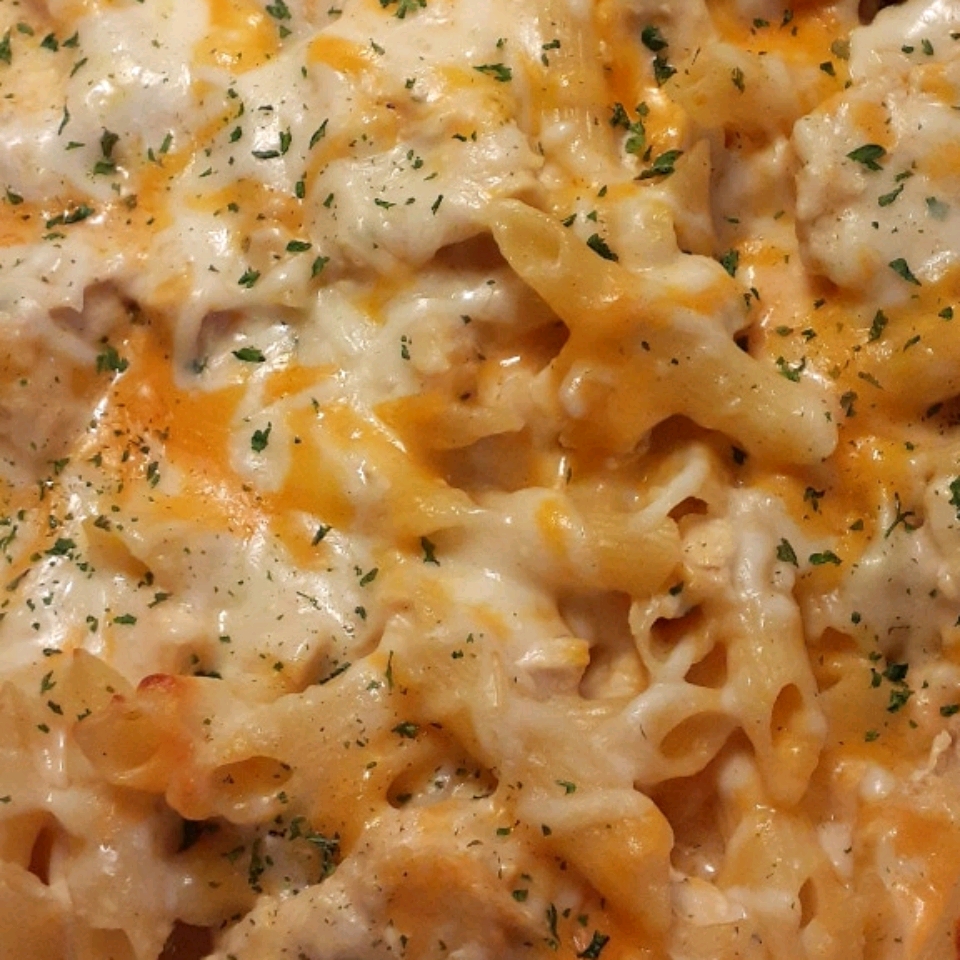
CHEESY CHICKEN ALFREDO CASSEROLE IS A COMFORTING ONE-PAN MEAL

by Rebecca August 22, 2020
written by Rebecca

Prep time: 15 min | Cook: 45 min | Total: 1 hr | Servings: 6 | Yield: 6 servings

This is pure comfort! Pretty easy, not fussy, and delicious! A hearty pasta dish with amazing alfredo sauce, juicy chicken, that are layered in creamy cheeses. Simple yet satisfying and your family’s next big thing!

INGREDIENTS

3 eaches skinless, boneless chicken breast halves

1 8-oz package penne pasta

½ 16-oz jar Alfredo sauce

1 ½ cups shredded mozzarella cheese, divided

¼ cup milk

1 tablespoon onion powder

1 tablespoon garlic powder

1 cup shredded Cheddar cheese

HOW TO MAKE CHEESY CHICKEN ALFREDO CASSEROLE

Step 1: Prepare the oven. Preheat it to 350 degrees F or 175 degrees C.

Step 2: In a pot, place the chicken. Pour enough water into the pot to cover the chicken. Boil the mixture over high heat, then, reduce the heat and simmer for about 15 minutes until the chicken is no longer pink in the middle and the juices run clear.

Step 3: At the same time, let a large pot of finely salted water to boil. Add in the penne and cook for about 11 minutes, occasionally stirring until bite-tender. Drain and set aside.

Step 4: Going back to the chicken. Remove from the heat, drain the cooked chicken, and cut into bite-size pieces.

Step 5: In a large bowl, mix the chicken, noodles, Alfredo sauce, 1/2 mozzarella cheese, milk, onion powder, and garlic powder. Then, transfer this into a 1 1/2-quart casserole dish. Sprinkle the rest of the mozzarella cheese and Cheddar cheese on top.

Step 6: Place inside the preheated oven and bake for about 25 minutes or until melted and bubbly.

NOTES:

The alfredo sauce can be made ahead. At least two days beforehand. Or if you are short of time, just use a high-quality refrigerated Alfredo pasta sauce from the grocery store.

As for the pasta, you can any medium-sized pasta like rigatoni, fusilli, or farfalle.

Nutrition Facts:

Per Serving: 467.5 calories; 86.2 mg cholesterol; 693.4 mg sodium; 30.8 g protein; 32.4 g carbohydrates

CHEESY CHICKEN ALFREDO CASSEROLE IS A COMFORTING ONE-PAN MEAL

Rebecca Prep time: 15 min | Cook: 45 min | Total: 1 hr | Servings: 6 | Yield: 6 servings This is pure comfort! Pretty easy, not fussy, and delicious! A hearty pasta dish with amazing alfredo sauce, juicy chicken,… Main Dish Recipes CHEESY CHICKEN ALFREDO CASSEROLE IS A COMFORTING ONE-PAN MEAL European Print This
Serves: 6 Prep Time: 15 mins Cooking Time: 45 mins 45 mins
Nutrition facts: 467.5 calories 20 grams fat
Rating: 4.5/5
( 2 voted )

Ingredients

  • 3 eaches skinless, boneless chicken breast halves
  • 1 8-oz package penne pasta
  • ½ 16-oz jar Alfredo sauce
  • 1 ½ cups shredded mozzarella cheese, divided
  • ¼ cup milk
  • 1 tablespoon onion powder
  • 1 tablespoon garlic powder
  • 1 cup shredded Cheddar cheese

Instructions

Step 1: Prepare the oven. Preheat it to 350 degrees F or 175 degrees C.

Step 2: In a pot, place the chicken. Pour enough water into the pot to cover the chicken. Boil the mixture over high heat, then, reduce the heat and simmer for about 15 minutes until the chicken is no longer pink in the middle and the juices run clear.

Step 3: At the same time, let a large pot of finely salted water to boil. Add in the penne and cook for about 11 minutes, occasionally stirring until bite-tender. Drain and set aside.

Step 4: Going back to the chicken. Remove from the heat, drain the cooked chicken, and cut into bite-size pieces.

Step 5: In a large bowl, mix the chicken, noodles, Alfredo sauce, 1/2 mozzarella cheese, milk, onion powder, and garlic powder. Then, transfer this into a 1 1/2-quart casserole dish. Sprinkle the rest of the mozzarella cheese and Cheddar cheese on top.

Step 6: Place inside the preheated oven and bake for about 25 minutes or until melted and bubbly.

NOTES:

The alfredo sauce can be made ahead. At least two days beforehand. Or if you are short of time, just use a high-quality refrigerated Alfredo pasta sauce from the grocery store.

As for the pasta, you can any medium-sized pasta like rigatoni, fusilli, or farfalle.

August 22, 2020 0 comment
0 FacebookTwitterPinterestEmail
Main Dish Recipes

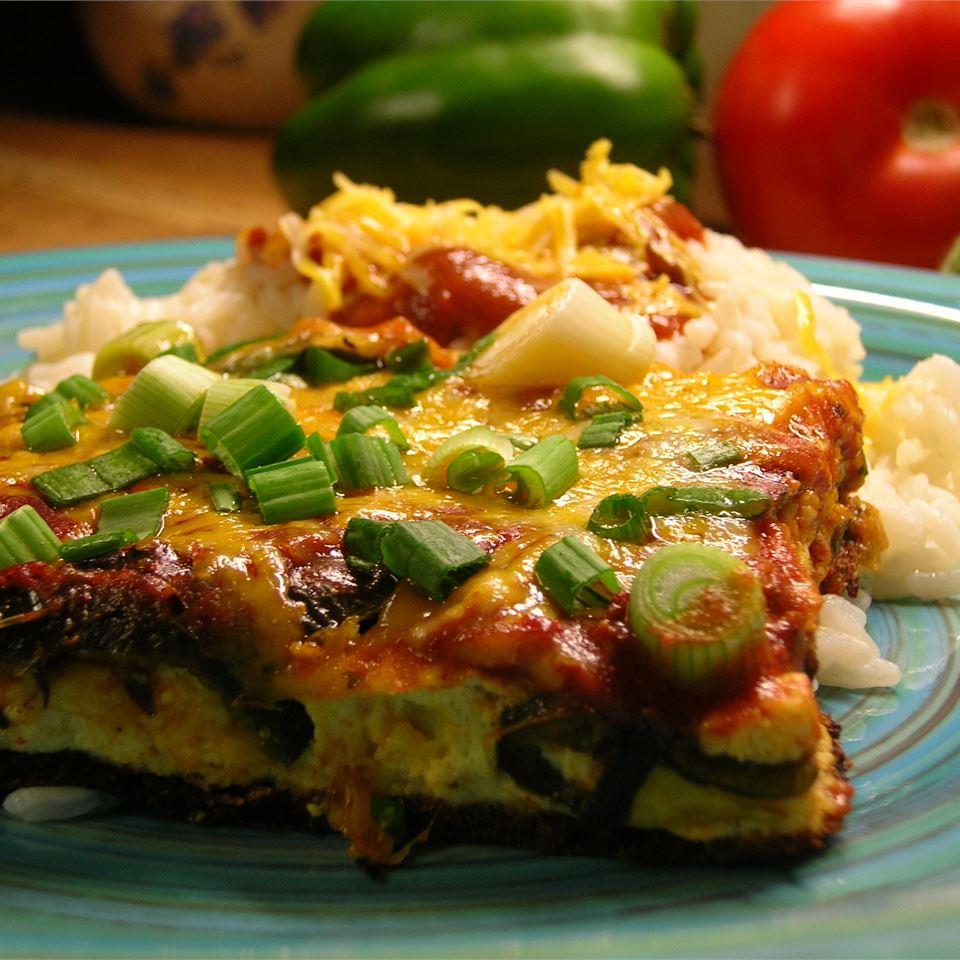
CHILI RELLENOS CASSEROLE

by Rebecca August 22, 2020
written by Rebecca

Prep time: 15 min | Cook: 45 min | Total: 1 hr | Servings: 6 | Yield: 6 servings

I prefer this with some kick so I use habanero cheese or pepper jack and add either in the filling. I cannot explain how great this casserole is. Delicious is an understatement. Mouth-watering? Absolutely! What I am sure of is this is one of the easiest and quickest to make. My go-to for a busy weeknight and superb to serve to company. Try it and I am a hundred percent sure that you’ll crave this over and over again.

INGREDIENTS

2 7-oz cans whole green chile peppers, drained

8-oz Monterey Jack cheese, shredded

8-oz Longhorn or Cheddar cheese, shredded

2 eggs, beaten

1 5-oz can evaporate milk

2 tablespoons all-purpose flour

½ cup milk

1 8-oz can tomato sauce

HOW TO MAKE CHILI RELLENOS CASSEROLE

Step 1: Prepare the oven. Preheat it to 350 degrees F or 175 degrees C.

Step 2: Then, with cooking spray grease a 9 x 13-inch baking dish.

Step 3: Evenly lay half of the chilies at the bottom of your prepared baking dish. Sprinkle over half of the Jack and Cheddar cheese, then, cover with the rest of the chilies.

Step 4: Add the eggs, milk, and flour in a bowl. Mix well and pour this on top of the chilies.

Step 5: Place inside the preheated oven and bake for about 25 minutes.

Step 6: Once done, remove from the oven, then, evenly pour the tomato sauce on top.

Step 7: Place the casserole back in the oven and bake for another 15 minutes.

Step 8: Take the casserole out from the oven and immediately sprinkle over the rest of the Jack and Cheddar cheeses before serving. Enjoy!

NOTE:

For a spicier variety, use a spicy cheese in the filling like habanero or pepper jack or add a dash of hot sauce to the egg batter.

Nutrition Facts:

Per Serving: 387.4 calories; 139.9 mg cholesterol; 1449.4 mg sodium; 23.9 g protein; 12 g carbohydrates

CHILI RELLENOS CASSEROLE

Rebecca Prep time: 15 min | Cook: 45 min | Total: 1 hr | Servings: 6 | Yield: 6 servings I prefer this with some kick so I use habanero cheese or pepper jack and add either in the filling.… Main Dish Recipes CHILI RELLENOS CASSEROLE European Print This
Serves: 6 Prep Time: 15 mins Cooking Time: 45 mins 45 mins
Nutrition facts: 387.4 calories 20 grams fat
Rating: 5.0/5
( 3 voted )

Ingredients

  • Step 1: Prepare the oven. Preheat it to 350 degrees F or 175 degrees C.
  • Step 2: Then, with cooking spray grease a 9 x 13-inch baking dish.
  • Step 3: Evenly lay half of the chilies at the bottom of your prepared baking dish. Sprinkle over half of the Jack and Cheddar cheese, then, cover with the rest of the chilies.
  • Step 4: Add the eggs, milk, and flour in a bowl. Mix well and pour this on top of the chilies.
  • Step 5: Place inside the preheated oven and bake for about 25 minutes.
  • Step 6: Once done, remove from the oven, then, evenly pour the tomato sauce on top.
  • Step 7: Place the casserole back in the oven and bake for another 15 minutes.
  • Step 8: Take the casserole out from the oven and immediately sprinkle over the rest of the Jack and Cheddar cheeses before serving. Enjoy!
  • NOTE:
  • For a spicier variety, use a spicy cheese in the filling like habanero or pepper jack or add a dash of hot sauce to the egg batter.

Instructions

2 7-oz cans whole green chile peppers, drained

8-oz Monterey Jack cheese, shredded

8-oz Longhorn or Cheddar cheese, shredded

2 eggs, beaten

1 5-oz can evaporate milk

2 tablespoons all-purpose flour

½ cup milk

1 8-oz can tomato sauce

August 22, 2020 0 comment
0 FacebookTwitterPinterestEmail
Newer Posts
Older Posts

Popular Posts

  • 1

    Crispy Crunchy Parmesan Potatoes

    March 21, 2020
  • 2

    CROCK POT SMOTHERED PORK CHOPS

    March 21, 2020
  • Facebook
  • Twitter

@2019 - All Right Reserved.


Back To Top