Cook it once
  • Home
  • Privacy Policy
  • Recipes
    • KETO
    • LC
    • WW
  • Tips
  • Contact
Cook it once
  • Home
  • Privacy Policy
  • Recipes
    • KETO
    • LC
    • WW
  • Tips
  • Contact
Category:

Main Dish Recipes

Main Dish Recipes

KEEP YOUR KITCHEN COOL WITH THIS SLOW COOKER PEACH UPSIDE DOWN CAKE

by Rebecca August 26, 2020
written by Rebecca

Prep: 30 min | Cook: 2 hrs | Additional: 30 min | Total: 3 hrs | Servings: 8 | Yield: 8 servings

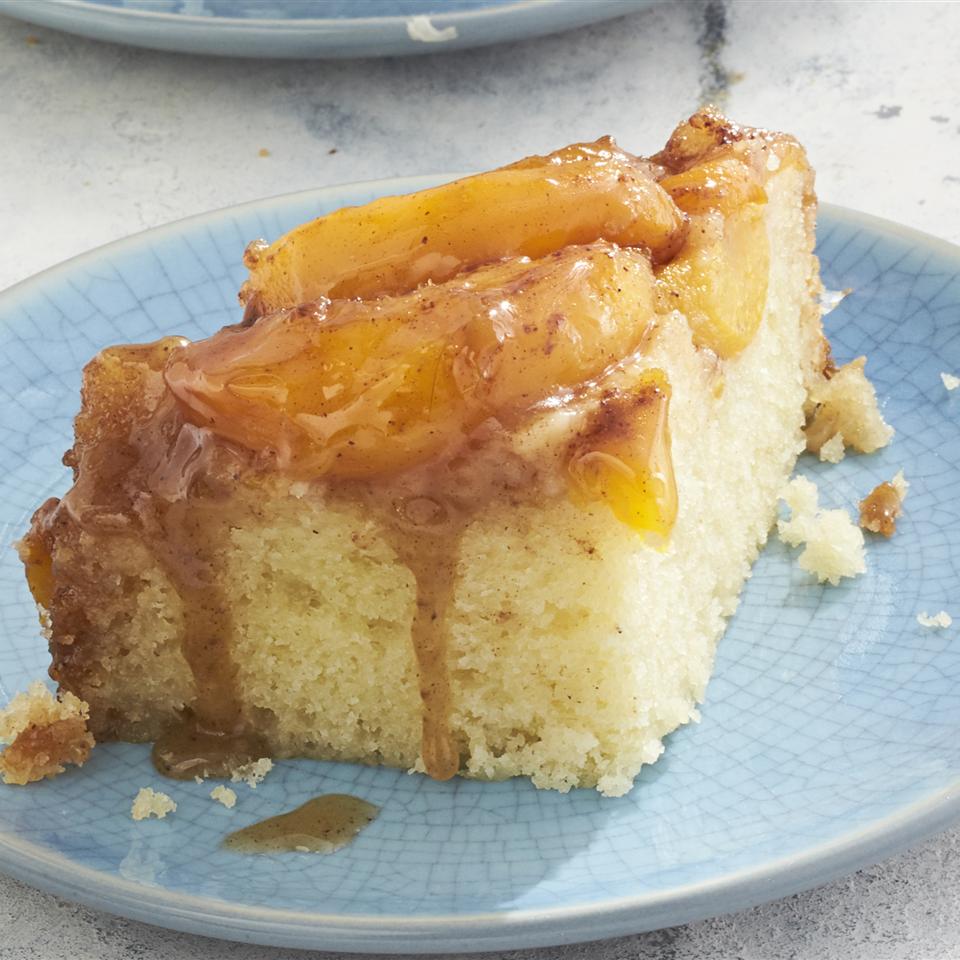
Happy International Dog Day! Today, I am pampering my fur baby. I am making him our favorite Peach Upside Down Cake. A warm, gooey, and luscious dessert that is insanely easy to make. This slow cooker cake unquestionably makes my life easier and the result is nothing but superb!

INGREDIENTS

3 15oz cans sliced peaches in a heavy syrup, drained well

5 tablespoons butter, melted

⅔ cup packed light brown sugar

1 teaspoon cinnamon

½ teaspoon nutmeg

1 ½ sticks butter softened

1 cup white sugar

2 large eggs

½ teaspoon pure almond extract

2 cups flour

2 teaspoon baking powder

½ teaspoon salt

1 cup whole milk

HOW TO MAKE SLOW COOKER PEACH UPSIDE DOWN CAKE

Step 1: Place the peach slices between layers of paper towels to dry for about 20 minutes. Gently press, replacing any soaked towels.

Step 2: In the meantime, add the melted butter into the bottom of a 6-quart oval slow cooker.

Step 3: In a bowl, combine the brown sugar, cinnamon, and nutmeg. Sprinkle this over the melted butter.

Step 4: In a tight layer, arrange the peaches on top of the brown sugar. If you need to make a partial second layer to fit the peaches, then do so.

Step 5: In a large bowl, beat the softened butter with an electric mixer for about 3 minutes until light and fluffy. Beat in the eggs, one at a time, beating thoroughly every after each addition. Then, add in the almond extract and beat well.

Step 6: In another bowl, whisk the flour, baking powder, and salt. Stir in the flour in batches alternately with the milk. Begin and end with the flour mixture. Mix the batter until incorporated. And place spoonfuls over the peaches, spreading evenly.

Step 7: To absorb any condensation when baking, drape the paper towels over the slow cooker. Then, cover with the lid. Cook for about 2 to 2 1/2 hours on high heat or until a skewer inserted in the center comes out clean.

Step 8: Then, remove the lid and paper towels. And with oven mittens, remove the liner from the slow cooker. Allow the cake to cool for at least 10 minutes before running a knife around the edge to carefully turn the cake out onto a serving plate.

Nutrition Facts:

Per Serving: 653.6 calories; 114.4 mg cholesterol; 486 mg sodium; 6.8 g protein; 100.8 g carbohydrates

KEEP YOUR KITCHEN COOL WITH THIS SLOW COOKER PEACH UPSIDE DOWN CAKE

Rebecca Prep: 30 min | Cook: 2 hrs | Additional: 30 min | Total: 3 hrs | Servings: 8 | Yield: 8 servings Happy International Dog Day! Today, I am pampering my fur baby. I am making him our favorite Peach Upside… Main Dish Recipes KEEP YOUR KITCHEN COOL WITH THIS SLOW COOKER PEACH UPSIDE DOWN CAKE European Print This
Serves: 8 Prep Time: 30 mins Cooking Time: 2 hrs 30 mins 2 hrs 30 mins
Nutrition facts: 653.6 calories 20 grams fat
Rating: 5.0/5
( 1 voted )

Ingredients

  • 3 15oz cans sliced peaches in a heavy syrup, drained well
  • 5 tablespoons butter, melted
  • ⅔ cup packed light brown sugar
  • 1 teaspoon cinnamon
  • ½ teaspoon nutmeg
  • 1 ½ sticks butter softened
  • 1 cup white sugar
  • 2 large eggs
  • ½ teaspoon pure almond extract
  • 2 cups flour
  • 2 teaspoon baking powder
  • ½ teaspoon salt
  • 1 cup whole milk

Instructions

Step 1: Place the peach slices between layers of paper towels to dry for about 20 minutes. Gently press, replacing any soaked towels.

Step 2: In the meantime, add the melted butter into the bottom of a 6-quart oval slow cooker.

Step 3: In a bowl, combine the brown sugar, cinnamon, and nutmeg. Sprinkle this over the melted butter.

Step 4: In a tight layer, arrange the peaches on top of the brown sugar. If you need to make a partial second layer to fit the peaches, then do so.

Step 5: In a large bowl, beat the softened butter with an electric mixer for about 3 minutes until light and fluffy. Beat in the eggs, one at a time, beating thoroughly every after each addition. Then, add in the almond extract and beat well.

Step 6: In another bowl, whisk the flour, baking powder, and salt. Stir in the flour in batches alternately with the milk. Begin and end with the flour mixture. Mix the batter until incorporated. And place spoonfuls over the peaches, spreading evenly.

Step 7: To absorb any condensation when baking, drape the paper towels over the slow cooker. Then, cover with the lid. Cook for about 2 to 2 1/2 hours on high heat or until a skewer inserted in the center comes out clean.

Step 8: Then, remove the lid and paper towels. And with oven mittens, remove the liner from the slow cooker. Allow the cake to cool for at least 10 minutes before running a knife around the edge to carefully turn the cake out onto a serving plate.
August 26, 2020 0 comment
0 FacebookTwitterPinterestEmail
Main Dish Recipes

CINNAMON PUDDING CAKE

by Rebecca August 26, 2020
written by Rebecca

Prep: 15 mins | Cook: 35 min | Total: 50 min | Serving: 12 | Yield: 1- 9 inch square pan

A luscious cake with an amazing gooey caramel sauce. Add a dollop of whipped cream or a scoop of vanilla ice cream on top and you got yourself the most amazing, heavenly delicious, and mouthwatering dessert. Impress your loved ones and friends with your baking magic. Serve them this no-fuss, indulgent pudding cake and it’ll rain praises! This cinnamon-flavored cake that is covered with a caramel-like topping and sprinkles of nuts and chopped apples on top will be your next obsession.

INGREDIENTS

2 cups all-purpose flour

1 cup white sugar

2 teaspoons baking powder

½ teaspoon salt

3 teaspoons ground cinnamon

1 cup milk

1 ¾ cups packed brown sugar

1 ½ cups water

2 tablespoons butter

½ cup chopped walnuts

¾ cup apple – peeled, cored, and chopped

HOW TO MAKE CINNAMON PUDDING CAKE

Step 1: Prepare the oven. Preheat it to 350 degrees F or 175 degrees C.

Step 2: Then, grease the base of a 9-inch square baking dish.

Step 3: In a large bowl, combine the flour, sugar, baking powder, salt, and cinnamon. Create a well in the middle and pour in the milk. Mix thoroughly, then, pour the mixture into the prepared pan.

Step 4: Add the brown sugar, water, and butter in a saucepan. Combine and bring to a boil. Then, pour this over the batter and sprinkle over some nuts and chopped apples.

Step 5: Place inside the preheated oven and bake for about 35 to 40 minutes until a toothpick inserted in the middle comes out clean.

Step 6: Remove the cake from the oven and serve warm. Enjoy!

NOTES:

Use a nice cinnamon, a strong-flavored cinnamon is suggested. Or just increase the amount if using a less strong cinnamon

This cake is great as is although you can add a dollop of whipped cream over or vanilla ice cream if preferred.

Nutrition Facts:

Per Serving: 327.1 calories; 6.7 mg cholesterol; 188.4 mg sodium; 3.7 g protein; 67.4 g carbohydrates

CINNAMON PUDDING CAKE

Rebecca Prep: 15 mins | Cook: 35 min | Total: 50 min | Serving: 12 | Yield: 1- 9 inch square pan A luscious cake with an amazing gooey caramel sauce. Add a dollop of whipped cream or a scoop… Main Dish Recipes CINNAMON PUDDING CAKE European Print This
Serves: 12 Prep Time: 15 mins Cooking Time: 35 mins 35 mins
Nutrition facts: 327.1 calories 20 grams fat
Rating: 5.0/5
( 1 voted )

Ingredients

  • 2 cups all-purpose flour
  • 1 cup white sugar
  • 2 teaspoons baking powder
  • ½ teaspoon salt
  • 3 teaspoons ground cinnamon
  • 1 cup milk
  • 1 ¾ cups packed brown sugar
  • 1 ½ cups water
  • 2 tablespoons butter
  • ½ cup chopped walnuts
  • ¾ cup apple - peeled, cored, and chopped

Instructions

Step 1: Prepare the oven. Preheat it to 350 degrees F or 175 degrees C.

Step 2: Then, grease the base of a 9-inch square baking dish.

Step 3: In a large bowl, combine the flour, sugar, baking powder, salt, and cinnamon. Create a well in the middle and pour in the milk. Mix thoroughly, then, pour the mixture into the prepared pan.

Step 4: Add the brown sugar, water, and butter in a saucepan. Combine and bring to a boil. Then, pour this over the batter and sprinkle over some nuts and chopped apples.

Step 5: Place inside the preheated oven and bake for about 35 to 40 minutes until a toothpick inserted in the middle comes out clean.

Step 6: Remove the cake from the oven and serve warm. Enjoy!

NOTES:

Use a nice cinnamon, a strong-flavored cinnamon is suggested. Or just increase the amount if using a less strong cinnamon

This cake is great as is although you can add a dollop of whipped cream over or vanilla ice cream if preferred.

August 26, 2020 0 comment
0 FacebookTwitterPinterestEmail
Main Dish Recipes

SMOTHERED HAMBURGER STEAK

by Rebecca August 26, 2020
written by Rebecca

Prep: 14 min | Cook: 36 mins | Total: 50 min | Servings: 8 | Yield: 8 servings

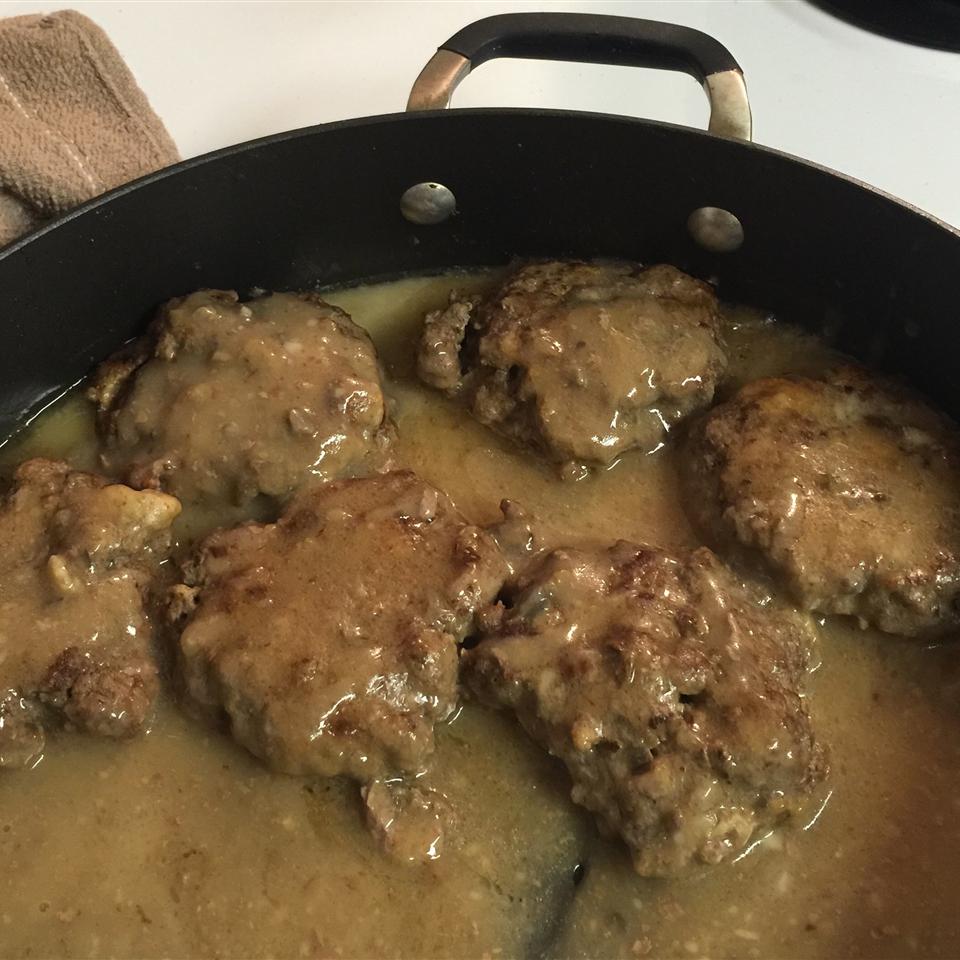
This classic Southern dish has so much savor and every bite is just amazing! Homemade burger steaks smothered into a luscious mushroom gravy – pretty simple, not fussy dinner idea that your whole family will love. This is the ultimate comfort food. It is way delicious you’ll be craving for this every day!

INGREDIENTS

2 eggs

2 tablespoons minced onion

1 tablespoon beef base

½ teaspoon black pepper

3 slices white bread

2 pounds lean ground beef

1 10.75oz can condensed cream of mushroom soup

1 10.75oz can water

1 dash Worcestershire sauce

HOW TO MAKE SMOTHERED HAMBURGER STEAK

Step 1: In a bowl, whisk the eggs, onion, beef base, and pepper. Add in the bread (tear into large pieces) and let the pieces soak up the mixture for several seconds before adding in the ground beef. Mix until incorporated.

Step 2: Form the meat mixture into 8 patties.

Step 3: Fry the patties n a large, heavy skillet over medium-high heat for about 8 minutes on each side until browned and the center is no longer pink.

Step 4: Remove from the skillet and set the cooked patties aside.

Step 5: Discard the excess grease from the skillet before whisking in the mushroom soup, water, and Worcestershire sauce until smooth. Add the patties back into the skillet, pouring the sauce over the patties. Bring the sauce into a boil over medium-high heat. Then, reduce the heat to simmer and continue cooking for about 20 minutes until the sauce thickened and the flavors blended.

NOTES:

Make sure to make your patties big because they will shrink a bit when cooking. And to keep the patties from puffing up too much, make a small indent in the middle using your thumb. These will guarantee that they will turn into hamburger steaks instead of meatballs.

If you are using an electric skillet, heat the skillet to 350 degrees F or 175 degrees C.

Nutrition Facts:

Per Serving: 297.6 calories; 120.8 mg cholesterol; 777.1 mg sodium; 25 g protein; 7.7 g carbohydrates

SMOTHERED HAMBURGER STEAK

Rebecca Prep: 14 min | Cook: 36 mins | Total: 50 min | Servings: 8 | Yield: 8 servings This classic Southern dish has so much savor and every bite is just amazing! Homemade burger steaks smothered into a luscious… Main Dish Recipes SMOTHERED HAMBURGER STEAK European Print This
Serves: 8 Prep Time: 14 mins Cooking Time: 36 mins 36 mins
Nutrition facts: 297.6 calories 20 grams fat
Rating: 3.5/5
( 2 voted )

Ingredients

  • 2 eggs
  • 2 tablespoons minced onion
  • 1 tablespoon beef base
  • ½ teaspoon black pepper
  • 3 slices white bread
  • 2 pounds lean ground beef
  • 1 10.75oz can condensed cream of mushroom soup
  • 1 10.75oz can water
  • 1 dash Worcestershire sauce

Instructions

Step 1: In a bowl, whisk the eggs, onion, beef base, and pepper. Add in the bread (tear into large pieces) and let the pieces soak up the mixture for several seconds before adding in the ground beef. Mix until incorporated.

Step 2: Form the meat mixture into 8 patties.

Step 3: Fry the patties n a large, heavy skillet over medium-high heat for about 8 minutes on each side until browned and the center is no longer pink.

Step 4: Remove from the skillet and set the cooked patties aside.

Step 5: Discard the excess grease from the skillet before whisking in the mushroom soup, water, and Worcestershire sauce until smooth. Add the patties back into the skillet, pouring the sauce over the patties. Bring the sauce into a boil over medium-high heat. Then, reduce the heat to simmer and continue cooking for about 20 minutes until the sauce thickened and the flavors blended.

NOTES:

Make sure to make your patties big because they will shrink a bit when cooking. And to keep the patties from puffing up too much, make a small indent in the middle using your thumb. These will guarantee that they will turn into hamburger steaks instead of meatballs.

If you are using an electric skillet, heat the skillet to 350 degrees F or 175 degrees C.

August 26, 2020 0 comment
0 FacebookTwitterPinterestEmail
Main Dish Recipes

ZUCCHINI TOMATO PIE

by Rebecca August 26, 2020
written by Rebecca

This looks a lot like a pizza. A pizza and a pie! This savory, super good Zucchini Tomato Pie has the best of everything. Healthy, fresh, and guilt-free. It is perfect to serve for breakfast or dinner! A gluten-free vegetarian pie that you can enjoy any time, any day!

INGREDIENTS

1 cup chopped zucchini

1 cup chopped tomato, drained and blotted dry

1/2 cup chopped green onions

3/4 cup grated parmesan cheese

1 cup Bisquick

3/4 cup milk

3 eggs

1 teaspoon no-salt lemon pepper

1 teaspoon garlic powder

1 teaspoon oregano

1-2 teaspoons sugar

1/2 teaspoon salt

HOW TO MAKE ZUCCHINI TOMATO PIE

Step 1: Prepare the oven. Preheat it to 400 degrees F.

Step 2: Then, lightly grease the bottom and side of a 9-inch pie plate.

Step 3: In a bowl, combine the chopped zucchini, tomato, and onion. Add in the cheese and mix well.

Step 4: Transfer into the prepared pie plate and spread.

Step 5: In another bowl, mix the rest of the ingredients using a fork until combined. Then, pour this over the cheese mixture.

Step 6: Place inside the preheated oven and bake for about 35 minutes or until a toothpick inserted in the middle comes out clean.

Step 7: Once done, remove from the oven and allow the pie to cool for at least 10 minutes.

NOTES:

Smaller tomatoes work great with this recipe like Roma and Campari or tomatoes in a vineyard. Using a beefsteak tomato is way too bigger and contains so much fat.

Place the pie in the oven with just the right temperature. Too much heat will lead to a browner pie edge. I suggest using a pie shield if available to protect the edges.

Keep cooking the pie if it appears watery in 5 minutes intervals to release the water. Cover the edges of the pie with foil or use a pie crust shield to ensure that the edges will not burn.

ZUCCHINI TOMATO PIE

Rebecca This looks a lot like a pizza. A pizza and a pie! This savory, super good Zucchini Tomato Pie has the best of everything. Healthy, fresh, and guilt-free. It is… Main Dish Recipes ZUCCHINI TOMATO PIE European Print This
Nutrition facts: 200 calories 20 grams fat
Rating: 5.0/5
( 1 voted )

Ingredients

  • 1 cup chopped zucchini
  • 1 cup chopped tomato, drained and blotted dry
  • 1/2 cup chopped green onions
  • 3/4 cup grated parmesan cheese
  • 1 cup Bisquick
  • 3/4 cup milk
  • 3 eggs
  • 1 teaspoon no-salt lemon pepper
  • 1 teaspoon garlic powder
  • 1 teaspoon oregano
  • 1-2 teaspoons sugar
  • 1/2 teaspoon salt

Instructions

Step 1: Prepare the oven. Preheat it to 400 degrees F.

Step 2: Then, lightly grease the bottom and side of a 9-inch pie plate.

Step 3: In a bowl, combine the chopped zucchini, tomato, and onion. Add in the cheese and mix well.

Step 4: Transfer into the prepared pie plate and spread.

Step 5: In another bowl, mix the rest of the ingredients using a fork until combined. Then, pour this over the cheese mixture.

Step 6: Place inside the preheated oven and bake for about 35 minutes or until a toothpick inserted in the middle comes out clean.

Step 7: Once done, remove from the oven and allow the pie to cool for at least 10 minutes.

NOTES:

Smaller tomatoes work great with this recipe like Roma and Campari or tomatoes in a vineyard. Using a beefsteak tomato is way too bigger and contains so much fat.

Place the pie in the oven with just the right temperature. Too much heat will lead to a browner pie edge. I suggest using a pie shield if available to protect the edges.

Keep cooking the pie if it appears watery in 5 minutes intervals to release the water. Cover the edges of the pie with foil or use a pie crust shield to ensure that the edges will not burn.

August 26, 2020 0 comment
0 FacebookTwitterPinterestEmail
Main Dish Recipes

BUTTERMILK PIE

by Rebecca August 26, 2020
written by Rebecca

Prep: 10 min | Cook: 1 hr 10 mins | Serving: 6 to 8

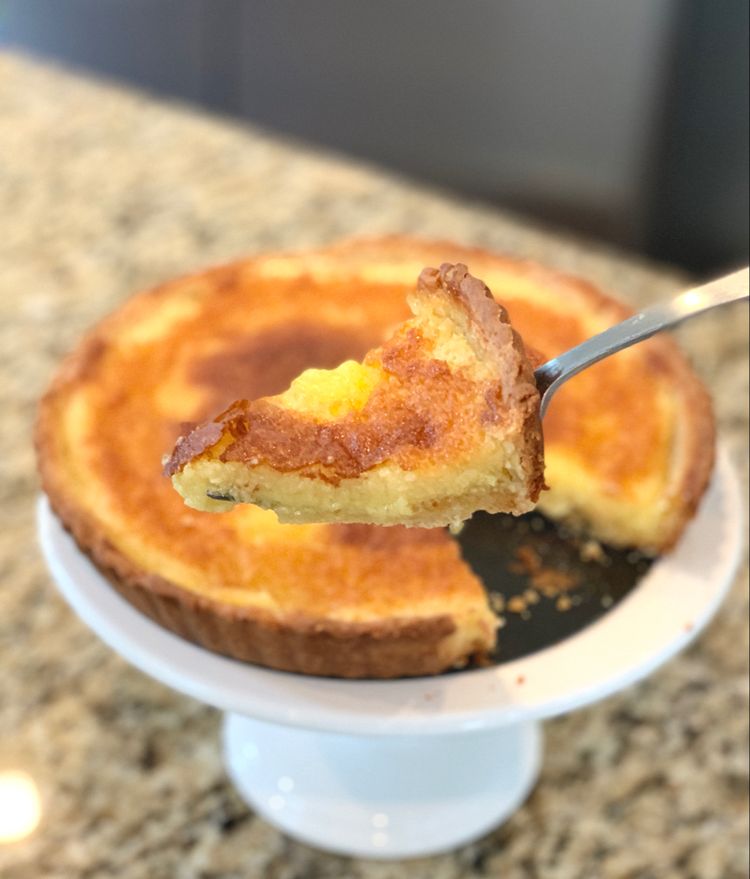
This one of a kind Buttermilk Pie is luxuriously sweet and fluffy with a subtly crackled sugar shell. A treat that is most loved by many. This traditional pie has been around for ages and it never fails to fill everyone’s tummy with goodness. I am very much lucky I have a grandmother that is obsessed with all kinds of pie. This buttermilk pie is one of her favorites. During my eighteenth birthday, she taught me how to make this. And instead of a birthday cake, we served this instead. I will not forget that day, it was so special, my loved ones singing me happy birthday. A simple celebration with my favorite pie and humans.

With only pantry ingredients, this pie is amazingly good. Pretty simple and not fussy, you can make this whenever you want! Best of the best and a real keeper!

INGREDIENTS

1 3/4 cups sugar

1 stick unsalted butter, room temp

3 large eggs

1/4 teaspoon vanilla extract

3 tablespoons all-purpose flour

pinch of salt

1 cup buttermilk

1 9-inch unbaked pie crust

HOW TO MAKE BUTTERMILK PIE

Step 1: In a bowl, place the sugar and butter. Cream until well blended.

Step 2: Then, one at a time, beat in the eggs until the mixture is smooth.

Step 3: Stir in the vanilla, salt, and flour, beat in buttermilk until thoroughly combined.

Step 4: Line a baking sheet with foil. Add the pie shell and fill it to the top with the buttermilk mixture.

Step 5: For the remaining batter, pour it into an ungreased custard cup.

Step 6: Place inside the oven and bake at 300 degrees for about an hour and 10 minutes.

Step 7: Once done, remove from the oven and allow the pie to sit until nearly cooled before serving.

Step 8: If not serving yet, store the pie in the fridge covered.

Nutrition facts: 200 calories | 20 grams fat

BUTTERMILK PIE

Rebecca Prep: 10 min | Cook: 1 hr 10 mins | Serving: 6 to 8 This one of a kind Buttermilk Pie is luxuriously sweet and fluffy with a subtly crackled sugar shell. A treat that… Main Dish Recipes BUTTERMILK PIE European Print This
Serves: 6-8 Prep Time: 10 mins Cooking Time: 1 hr 10 mins 1 hr 10 mins
Nutrition facts: 200 calories 20 fat
Rating: 5.0/5
( 1 voted )

Ingredients

  • 1 3/4 cups sugar
  • 1 stick unsalted butter, room temp
  • 3 large eggs
  • 1/4 teaspoon vanilla extract
  • 3 tablespoons all-purpose flour
  • pinch of salt
  • 1 cup buttermilk
  • 1 9-inch unbaked pie crust

Instructions

Step 1: In a bowl, place the sugar and butter. Cream until well blended.

Step 2: Then, one at a time, beat in the eggs until the mixture is smooth.

Step 3: Stir in the vanilla, salt, and flour, beat in buttermilk until thoroughly combined.

Step 4: Line a baking sheet with foil. Add the pie shell and fill it to the top with the buttermilk mixture.

Step 5: For the remaining batter, pour it into an ungreased custard cup.

Step 6: Place inside the oven and bake at 300 degrees for about an hour and 10 minutes.

Step 7: Once done, remove from the oven and allow the pie to sit until nearly cooled before serving.

Step 8: If not serving yet, store the pie in the fridge covered.

August 26, 2020 0 comment
0 FacebookTwitterPinterestEmail
Main Dish Recipes

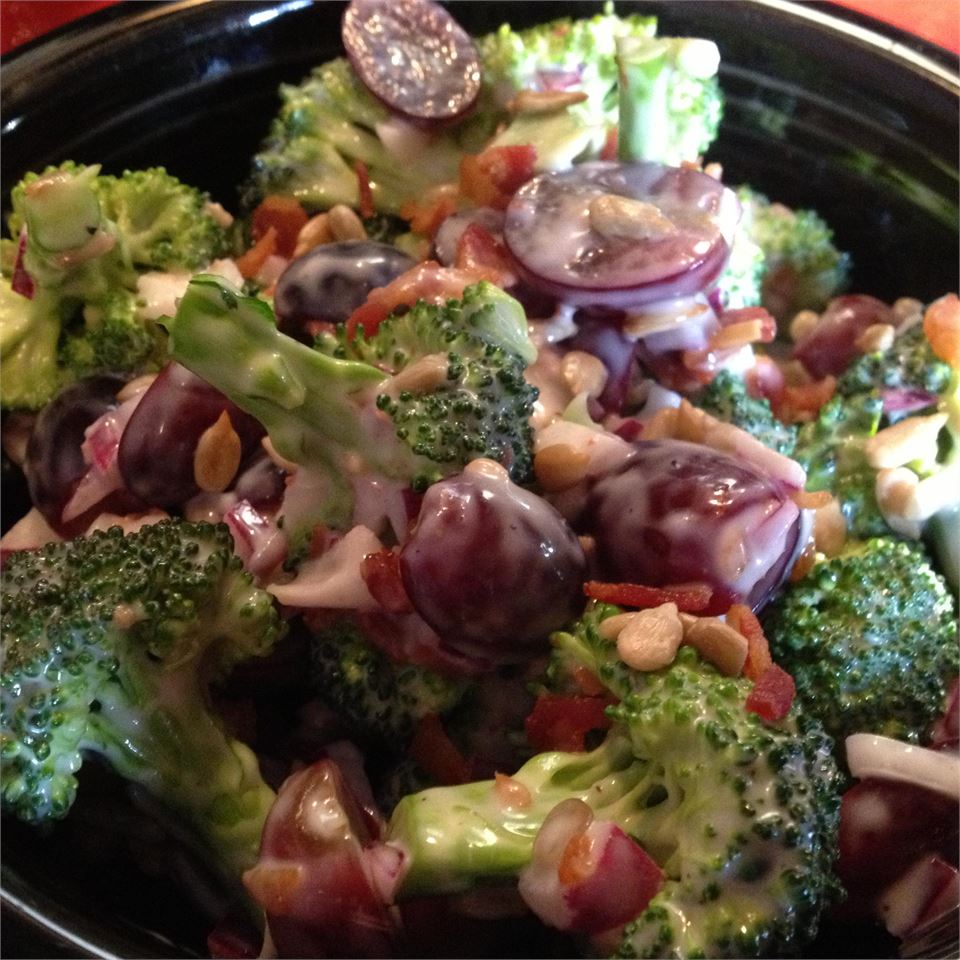
BROCCOLI SALAD WITH RED GRAPES, BACON, AND SUNFLOWER SEEDS

by Rebecca August 25, 2020
written by Rebecca

Prep: 20 mins | Cook: 10 mins | Additional: 2 hrs | Total: 2 hrs 30 mins | Servings: 8 | Yield: 8 servings

Wow! This recipe of salad just blew my mind! I love everything about this salad. From the broccoli to the sunflower seeds, from red grapes to bacon! It is just too complete. Everything you wish for a salad is present in this recipe. I have listed all the steps. Just follow them and you are in for a treat. Enjoy!

INGREDIENTS

8 slices bacon

⅓ cup sunflower seed kernels

1 large head broccoli, cut into bite-size pieces

⅓ cup diced red onion

1 cup seedless red grapes, halved

1 cup mayonnaise

3 tablespoons apple cider vinegar

2 tablespoons white sugar

1 pinch ground black pepper to taste

HOW TO MAKE BROCCOLI SALAD WITH RED GRAPES, BACON, AND SUNFLOWER SEEDS

Step 1: Place a skillet on the stove and turn the heat to medium-high.

Step 2: Place bacon and cook for 10 minutes or until the color turns brown and slightly toasted.

Step 3: Remove the bacon and place them on a plate with pepper towels. Remove the excess oil.

Step 4: Take 7 pieces of the bacon and crush. Add in a resealable bag with the sunflower seeds.

Step 5: In a medium mixing bowl, add in the grapes, broccoli, and onion. Stir until well mixed.

Step 6: Crush the rest of the bacon then place in a medium mixing bowl.

Step 7: Add in the sugar, vinegar, mayonnaise, and black pepper into the bowl with the crushed bacon.

Step 8: Pour dressing on top of the broccoli mixture. Toss until all the mixture is coated entirely.

Step 9: Cover the bowl with plastic wrap and place inside the fridge for 2 hours to incorporate all the flavors.

Step 10: Sprinkle the bacon-sunflower seed mixture on top of the salad. Make sure to spread it nicely.

Step 11: Serve and enjoy!

NOTES:

If you do not have sunflower seeds, you can use almonds instead. I only use red grapes with raisins and apple cider for the best result.

Sprinkle the crumbled bacon right away before serving to preserve its crunchiness.

Nutrition Facts:

Per Serving: 326.7 calories; 20.5 mg cholesterol; 382.4 mg sodium; 6.3 g protein; 12.5 g carbohydrates

BROCCOLI SALAD WITH RED GRAPES, BACON, AND SUNFLOWER SEEDS

Rebecca Prep: 20 mins | Cook: 10 mins | Additional: 2 hrs | Total: 2 hrs 30 mins | Servings: 8 | Yield: 8 servings Wow! This recipe of salad just blew my mind! I love everything about this salad. From the… Main Dish Recipes BROCCOLI SALAD WITH RED GRAPES, BACON, AND SUNFLOWER SEEDS European Print This
Serves: 8 Prep Time: 20 mins Cooking Time: 2 hrs 10 mins 2 hrs 10 mins
Nutrition facts: 326.7 calories 20 grams fat
Rating: 5.0/5
( 1 voted )

Ingredients

  • 8 slices bacon
  • ⅓ cup sunflower seed kernels
  • 1 large head broccoli, cut into bite-size pieces
  • ⅓ cup diced red onion
  • 1 cup seedless red grapes, halved
  • 1 cup mayonnaise
  • 3 tablespoons apple cider vinegar
  • 2 tablespoons white sugar
  • 1 pinch ground black pepper to taste

Instructions

Step 1: Place a skillet on the stove and turn the heat to medium-high.

Step 2: Place bacon and cook for 10 minutes or until the color turns brown and slightly toasted.

Step 3: Remove the bacon and place them on a plate with pepper towels. Remove the excess oil.

Step 4: Take 7 pieces of the bacon and crush. Add in a resealable bag with the sunflower seeds.

Step 5: In a medium mixing bowl, add in the grapes, broccoli, and onion. Stir until well mixed.

Step 6: Crush the rest of the bacon then place in a medium mixing bowl.

Step 7: Add in the sugar, vinegar, mayonnaise, and black pepper into the bowl with the crushed bacon.

Step 8: Pour dressing on top of the broccoli mixture. Toss until all the mixture is coated entirely.

Step 9: Cover the bowl with plastic wrap and place inside the fridge for 2 hours to incorporate all the flavors.

Step 10: Sprinkle the bacon-sunflower seed mixture on top of the salad. Make sure to spread it nicely.

Step 11: Serve and enjoy!

NOTES:

If you do not have sunflower seeds, you can use almonds instead. I only use red grapes with raisins and apple cider for the best result.

Sprinkle the crumbled bacon right away before serving to preserve its crunchiness.

August 25, 2020 0 comment
0 FacebookTwitterPinterestEmail
Main Dish Recipes

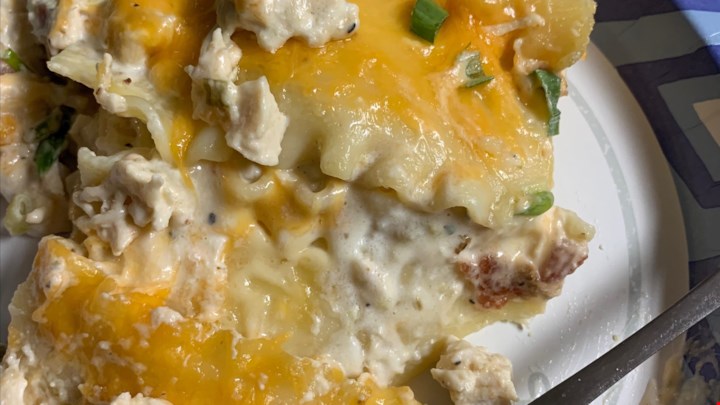
MY HUSBAND’S FAVORITE JALAPENO BACON CHICKEN LASAGNA

by Rebecca August 25, 2020
written by Rebecca

This recipe of lasagna will make your mouth water just by looking at the photo! All I can say is that you need to try this because not only that it is very easy to make, it is also very delicious! I am 100 percent sure that you and your loved ones will love this. Yes, I am confident about this recipe. Enjoy!

INGREDIENTS

1 bag of frozen chicken

Good seasoning Italian seasoning

Water

2 Philly Cream cheese, room temp

1 pint Half & Half

4 to 8oz can diced jalapenos

2 cups sour cream

2 tablespoons minced garlic

2 bunches Green onions- clean and dice/slice

24-32oz cheese- mixed- Mexican, cheddar and mozzarella

2 lb peppered bacon

2 boxes lasagna noodles

HOW TO MAKE JALAPENO BACON CHICKEN LASAGNA

Step 1: Prepare the slow cooker and set it to high for 4 hours.

Step 2: Prepare the chicken and slice into dices and prepare 1/2 cup of water and seasonings as well.

Step 3: Place a skillet on the stove and turn the heat to medium.

Step 4: Add in the bacon and cook until brown and crispy. Crumble the bacon and set aside.

Step 5: In a medium mixing bowl, add in the minced garlic, onion powder, and a can of jalapenos. Puree the three ingredients.

Step 6: In a large mixing bowl, add 2 packs of softened cream cheese and sour cream.

Step 7: Add in the pureed jalapeno and stir until well mixed. Use your hands to mix. Add more sliced chicken, bacon, green onions, and 1 cup of Mexican cheese.

Step 8: Cook the lasagna noodles. Refer to the instructions provided on the packaging. Add a little oil and salt before adding the noodles. Dran and rinse.

Step 9: Add in a layer of the noodles followed by the cheese then the chicken mixture. Repeat this process until all ingredients are placed in layers.

Step 10: Cover with aluminum foil and bake inside the oven for 45 minutes at 450 degrees C.

Step 11: Remove from the oven and take off the cover then add a lot of cheese on top.

Step 12: Put it back inside the oven and bake for another 10 minutes or until the cheese has melted completely.

Step 13: Remove from the oven and sprinkle the rest of the green onions on top.

Step 14: Serve and enjoy!

NOTE: 

You can use your preferred type of cheese. I only use the ones that I listed because it was the only ones available.

Nutrition facts: 200 calories | 20 grams fat

MY HUSBAND’S FAVORITE JALAPENO BACON CHICKEN LASAGNA

Rebecca This recipe of lasagna will make your mouth water just by looking at the photo! All I can say is that you need to try this because not only that… Main Dish Recipes MY HUSBAND’S FAVORITE JALAPENO BACON CHICKEN LASAGNA European Print This
Nutrition facts: 200 calories 20 fat
Rating: 5.0/5
( 1 voted )

Ingredients

  • 1 bag of frozen chicken
  • Good seasoning Italian seasoning
  • Water
  • 2 Philly Cream cheese, room temp
  • 1 pint Half & Half
  • 4 to 8oz can diced jalapenos
  • 2 cups sour cream
  • 2 tablespoons minced garlic
  • 2 bunches Green onions- clean and dice/slice
  • 24-32oz cheese- mixed- Mexican, cheddar and mozzarella
  • 2 lb peppered bacon
  • 2 boxes lasagna noodles

Instructions

Step 1: Prepare the slow cooker and set it to high for 4 hours.

Step 2: Prepare the chicken and slice into dices and prepare 1/2 cup of water and seasonings as well.

Step 3: Place a skillet on the stove and turn the heat to medium.

Step 4: Add in the bacon and cook until brown and crispy. Crumble the bacon and set aside.

Step 5: In a medium mixing bowl, add in the minced garlic, onion powder, and a can of jalapenos. Puree the three ingredients.

Step 6: In a large mixing bowl, add 2 packs of softened cream cheese and sour cream.

Step 7: Add in the pureed jalapeno and stir until well mixed. Use your hands to mix. Add more sliced chicken, bacon, green onions, and 1 cup of Mexican cheese.

Step 8: Cook the lasagna noodles. Refer to the instructions provided on the packaging. Add a little oil and salt before adding the noodles. Dran and rinse.

Step 9: Add in a layer of the noodles followed by the cheese then the chicken mixture. Repeat this process until all ingredients are placed in layers.

Step 10: Cover with aluminum foil and bake inside the oven for 45 minutes at 450 degrees C.

Step 11: Remove from the oven and take off the cover then add a lot of cheese on top.

Step 12: Put it back inside the oven and bake for another 10 minutes or until the cheese has melted completely.

Step 13: Remove from the oven and sprinkle the rest of the green onions on top.

Step 14: Serve and enjoy!

NOTE: 

You can use your preferred type of cheese. I only use the ones that I listed because it was the only ones available.

August 25, 2020 0 comment
0 FacebookTwitterPinterestEmail
Main Dish Recipes

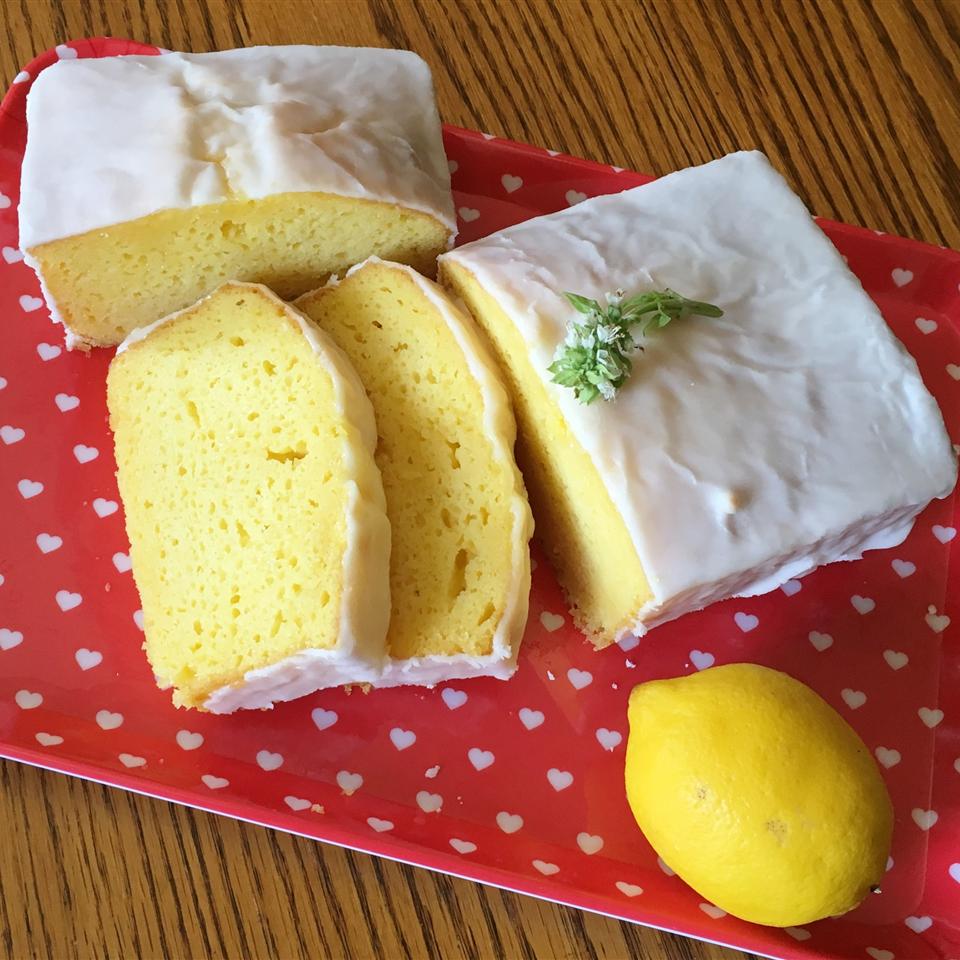
COPYCAT OF STARBUCKS® LEMON BREAD

by Rebecca August 25, 2020
written by Rebecca

Prep: 15 min | Cook: 50 mins | Additional: 50 min | Total: 1 hr 55 min | Servings: 12 | Yield: 2 loaves

I love Starbucks’ Lemon bread that is why I looked for recipes online that I can try that somehow tastes the same as the original. Luckily, I have found this amazing recipe. I am so glad that I tried it because I never would have tasted perfection if it wasn’t for this. It tastes exactly like the Starbucks’ amazing bread! Give this one a try and taste it yourself. The only one missing in this recipe is the coffee itself! Maybe next time I can share with you my take of their coffee. Anyway, you all have a great day. Enjoy!

INGREDIENTS

For the Cake:

1 18.25oz package yellow cake mix

1 4.3oz package non-instant lemon pudding mix

½ cup of vegetable oil

4 large eggs

8oz sour cream

½ cup milk

6 tablespoons freshly squeezed lemon juice

For the Icing:

2 ½ cups confectioners’ sugar

3 tablespoons of freshly squeezed lemon juice

HOW TO MAKE COPYCAT OF STARBUCKS® LEMON BREAD

Step 1: Ready the oven and preheat to 175 degrees C or 350 degrees F.

Step 2: Apply cooking spray in 2 loaf pans.

Step 3: In the bowl of the stand mixer, add in the cake mix, eggs, pudding mix, milk, 6 tablespoons of lemon juice, and sour cream. Beat for 2 to 3 minutes and transfer the mixture into the greased loaf pans.

Step 4: Place the pans inside the preheated oven and bake for 50 minutes or until a toothpick inserted in the middle comes out clean.

Step 5: Remove from the oven and let it sit on a wire rack to cool for 20 minutes.

Step 6: In a small bowl, add in 3 tablespoons of lemon juice and confectioners’ sugar. Whisk until well mixed.

Step 7: Spread the mixture on top and allow the bread to incorporate the flavor for 30 minutes.

Step 8: Slice into even pieces. Serve and enjoy!

Nutrition Facts:

Per Serving: 477.4 calories; 72 mg cholesterol; 371.9 mg sodium; 5 g protein; 70.8 g carbohydrates

COPYCAT OF STARBUCKS® LEMON BREAD

Rebecca Prep: 15 min | Cook: 50 mins | Additional: 50 min | Total: 1 hr 55 min | Servings: 12 | Yield: 2 loaves I love Starbucks’ Lemon bread that is why I looked for recipes online that I can try… Main Dish Recipes COPYCAT OF STARBUCKS® LEMON BREAD European Print This
Serves: 12 Prep Time: 15 mins Cooking Time: 1 hr 40 mins 1 hr 40 mins
Nutrition facts: 477.4 calories 20 grams fat
Rating: 5.0/5
( 1 voted )

Ingredients

  • For the Cake:
  • 1 18.25oz package yellow cake mix
  • 1 4.3oz package non-instant lemon pudding mix
  • ½ cup of vegetable oil
  • 4 large eggs
  • 8oz sour cream
  • ½ cup milk
  • 6 tablespoons freshly squeezed lemon juice
  • For the Icing:
  • 2 ½ cups confectioners' sugar
  • 3 tablespoons of freshly squeezed lemon juice

Instructions

Step 1: Ready the oven and preheat to 175 degrees C or 350 degrees F.

Step 2: Apply cooking spray in 2 loaf pans.

Step 3: In the bowl of the stand mixer, add in the cake mix, eggs, pudding mix, milk, 6 tablespoons of lemon juice, and sour cream. Beat for 2 to 3 minutes and transfer the mixture into the greased loaf pans.

Step 4: Place the pans inside the preheated oven and bake for 50 minutes or until a toothpick inserted in the middle comes out clean.

Step 5: Remove from the oven and let it sit on a wire rack to cool for 20 minutes.

Step 6: In a small bowl, add in 3 tablespoons of lemon juice and confectioners' sugar. Whisk until well mixed.

Step 7: Spread the mixture on top and allow the bread to incorporate the flavor for 30 minutes.

Step 8: Slice into even pieces. Serve and enjoy!

August 25, 2020 0 comment
0 FacebookTwitterPinterestEmail
Main Dish Recipes

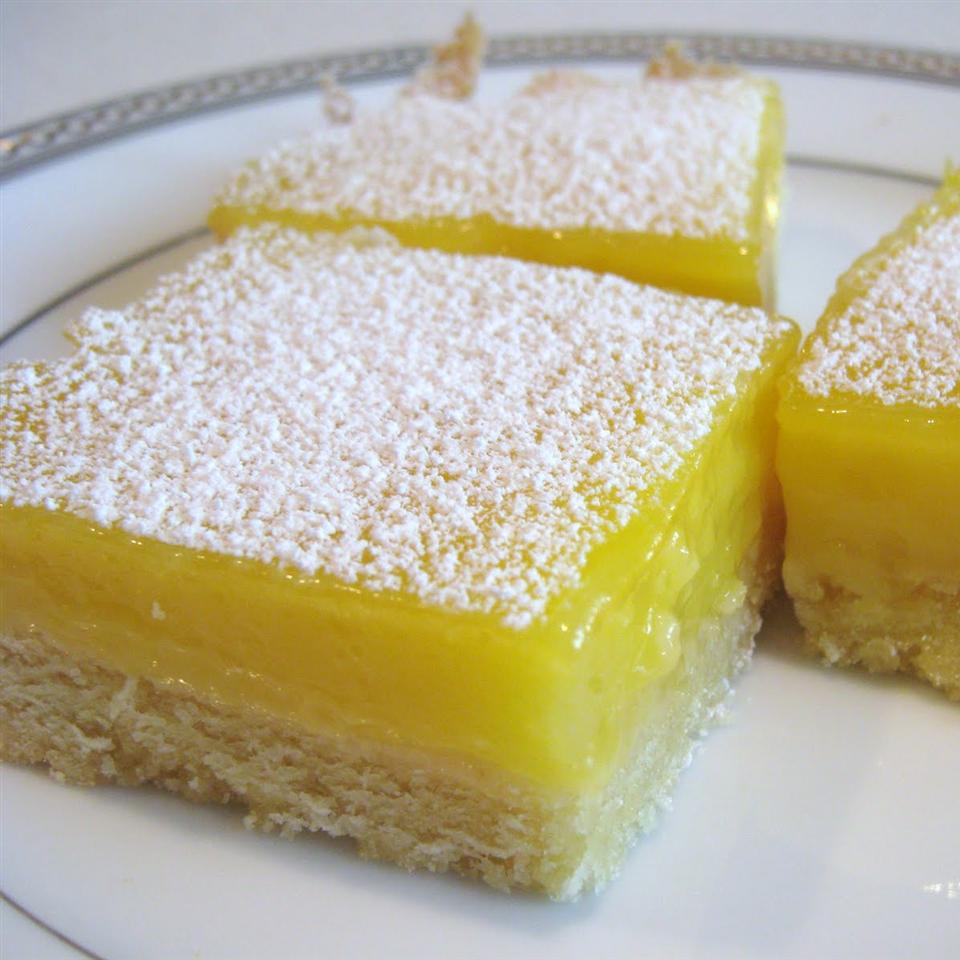
LEMON CHEESECAKE BARS

by Rebecca August 25, 2020
written by Rebecca

Prep: 10 min | Cook: 40 mins | Additional: 2 hrs 45 min | Total: 3 hrs 35 min | Servings: 16 | Yield: 1 9×13 pan

These bars have that perfect combination of sweet and tangy. The moist crust and the jelly-like lemon filling is so pretty you want to just stare at these bars before eating. Made with traditional shortbread crust, cheesecake, and lemon layers – these are the freshest and the most delish lemon cheesecake bars you’ll ever have.

INGREDIENTS

For the Crust:

1 ½ cups shortbread cookie crumbs

1 cup all-purpose flour

½ cup brown sugar

½ cup cold butter

For Cheesecake Filling:

2 8oz packages cream cheese softened

2 cups white sugar

4 eggs

4 tablespoons all-purpose flour

½ cup lemon juice

3 tablespoons lemon zest

½ teaspoon baking powder

4 teaspoons confectioners’ sugar

HOW TO MAKE LEMON CHEESECAKE BARS

Step 1: Prepare the oven. Preheat it to 350 degrees F or 175 degrees C.

Step 2: Then, with aluminum foil, line a 9 x 13-inch baking pan.

Step 3: In a medium bowl, mix the shortbread crumbs, flour, and brown sugar. Using 2 knives or a pastry blender, cut the butter into the mixture until it resembles coarse crumbs.

Step 4: At the bottom of the prepared pan, press the butter mixture.

Step 5: Place inside the preheated oven and bake for about 15 minutes.

Step 6: In the meantime, with an electric mixer, beat the cream cheese and white sugar until thoroughly blended. Add in the eggs and flour. Then, stir in the lemon juice, lemon zest, and baking powder.

Step 7: Pour this cream cheese mixture on top of the crust.

Step 8: Return in the oven and bake for another 25 to 28 minutes or until the center is set.

Step 9: Once the center is set, remove from the oven and allow the bar to cool completely for at least 45 minutes. Then, place in the fridge for 2 hours to chill.

Step 10: When ready to serve, sprinkle over the confectioners’ sugar. Enjoy!

NOTE:

To ensure that the batter will not get too much air as it will cause the cheesecake bars to puff up when baked, don’t overbeat the batter. Overbeating might cause the bars to collapse when taken out from the oven.

Nutrition Facts:

Per Serving: 411.3 calories; 95.5 mg cholesterol; 234.4 mg sodium; 6 g protein; 52.6 g carbohydrates

LEMON CHEESECAKE BARS

Rebecca Prep: 10 min | Cook: 40 mins | Additional: 2 hrs 45 min | Total: 3 hrs 35 min | Servings: 16 | Yield: 1 9×13 pan These bars have that perfect combination of sweet and tangy. The moist crust and… Main Dish Recipes LEMON CHEESECAKE BARS European Print This
Serves: 16 Prep Time: 10 mins1010 Cooking Time: 3 hrs 25 mins 3 hrs 25 mins
Nutrition facts: 411.3 calories 20 grams fat
Rating: 5.0/5
( 1 voted )

Ingredients

  • For the Crust:
  • 1 ½ cups shortbread cookie crumbs
  • 1 cup all-purpose flour
  • ½ cup brown sugar
  • ½ cup cold butter
  • For Cheesecake Filling:
  • 2 8oz packages cream cheese softened
  • 2 cups white sugar
  • 4 eggs
  • 4 tablespoons all-purpose flour
  • ½ cup lemon juice
  • 3 tablespoons lemon zest
  • ½ teaspoon baking powder
  • 4 teaspoons confectioners' sugar

Instructions

Step 1: Prepare the oven. Preheat it to 350 degrees F or 175 degrees C.

Step 2: Then, with aluminum foil, line a 9 x 13-inch baking pan.

Step 3: In a medium bowl, mix the shortbread crumbs, flour, and brown sugar. Using 2 knives or a pastry blender, cut the butter into the mixture until it resembles coarse crumbs.

Step 4: At the bottom of the prepared pan, press the butter mixture.

Step 5: Place inside the preheated oven and bake for about 15 minutes.

Step 6: In the meantime, with an electric mixer, beat the cream cheese and white sugar until thoroughly blended. Add in the eggs and flour. Then, stir in the lemon juice, lemon zest, and baking powder.

Step 7: Pour this cream cheese mixture on top of the crust.

Step 8: Return in the oven and bake for another 25 to 28 minutes or until the center is set.

Step 9: Once the center is set, remove from the oven and allow the bar to cool completely for at least 45 minutes. Then, place in the fridge for 2 hours to chill.

Step 10: When ready to serve, sprinkle over the confectioners' sugar. Enjoy!

NOTE:

To ensure that the batter will not get too much air as it will cause the cheesecake bars to puff up when baked, don't overbeat the batter. Overbeating might cause the bars to collapse when taken out from the oven.

August 25, 2020 0 comment
0 FacebookTwitterPinterestEmail
Main Dish Recipes

PEANUT BUTTER PIE WITH A CHEWY BROWNIE CRUST

by Rebecca August 25, 2020
written by Rebecca

Prep: 20 min | Cook: 30 mins | Total: 50 min

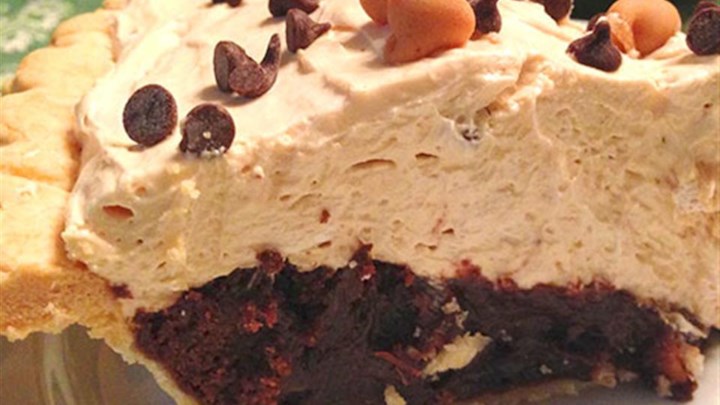
With slightly sweet, smooth, and creamy peanut butter filling and fudgy brownie crust, this heavenly brownie is the best dessert you’ll ever enjoy this Thanksgiving. Everyone is crazy in love with this pie. One bite and you’ll never go back!

INGREDIENTS

1 unbaked refrigerated single (9-inch) pie crust

1 15.5oz package brownie mix

1/4 cup peanut butter chips

1/3 cup Mott’s® Original Applesauce

3 tablespoons water

1 egg

1 8oz package cream cheese softened

1/2 cup creamy peanut butter

1 cup confectioners’ sugar

1 8oz container frozen whipped topping, thawed

2 tablespoons chopped peanuts

2 tablespoons mini semi-sweet chocolate chips

HOW TO MAKE PEANUT BUTTER PIE WITH A CHEWY BROWNIE CRUST

Step 1: Prepare the oven. Preheat it to 350 degrees F or 175 degrees C.

Step 2: In an ungreased 9-inch glass pie plate, add the pie crust according to package instruction. Then, flute the edge.

Step 3: In a bowl, add the brownie mix, peanut butter chips, apple sauce, water, and egg. To mix, stir 50 strokes.

Step 4: Transfer the batter into the unbaked pie crust.

Step 5: Place inside the preheated oven and bake for about 15 minutes. Then, cover the crust edges with aluminum foil and bake for another 15 to 20 minutes more or until the crust is golden brown and the center is set.

Step 6: Once done, remove from the oven and allow to cool for at least 20 minutes before placing in the fridge for an hour or so to cool completely.

Step 7: Meanwhile, using an electric mixer, beat the cream cheese, peanut butter, and confectioners’ sugar until smooth. Then, fold in the whipped topping. Evenly spread the mixture over the brownie and sprinkle over the peanuts and chocolate chips.

Step 8: Place the brownies inside the fridge for at least 30 minutes before serving.

Step 9: For any leftovers, cover and refrigerate.

Nutrition Facts:

Per Serving: 623 calories; 36.2 g fat; 43 mg cholesterol; 394 mg sodium; 69 g carbohydrates; 10.5 g protein

PEANUT BUTTER PIE WITH A CHEWY BROWNIE CRUST

Rebecca Prep: 20 min | Cook: 30 mins | Total: 50 min With slightly sweet, smooth, and creamy peanut butter filling and fudgy brownie crust, this heavenly brownie is the best dessert you’ll ever enjoy this… Main Dish Recipes PEANUT BUTTER PIE WITH A CHEWY BROWNIE CRUST European Print This
Prep Time: 20 mins Cooking Time: 30 mins 30 mins
Nutrition facts: 623 calories 36.2 fat
Rating: 5.0/5
( 1 voted )

Ingredients

  • 1 unbaked refrigerated single (9-inch) pie crust
  • 1 15.5oz package brownie mix
  • 1/4 cup peanut butter chips
  • 1/3 cup Mott's® Original Applesauce
  • 3 tablespoons water
  • 1 egg
  • 1 8oz package cream cheese softened
  • 1/2 cup creamy peanut butter
  • 1 cup confectioners' sugar
  • 1 8oz container frozen whipped topping, thawed
  • 2 tablespoons chopped peanuts
  • 2 tablespoons mini semi-sweet chocolate chips

Instructions

Step 1: Prepare the oven. Preheat it to 350 degrees F or 175 degrees C.

Step 2: In an ungreased 9-inch glass pie plate, add the pie crust according to package instruction. Then, flute the edge.

Step 3: In a bowl, add the brownie mix, peanut butter chips, apple sauce, water, and egg. To mix, stir 50 strokes.

Step 4: Transfer the batter into the unbaked pie crust.

Step 5: Place inside the preheated oven and bake for about 15 minutes. Then, cover the crust edges with aluminum foil and bake for another 15 to 20 minutes more or until the crust is golden brown and the center is set.

Step 6: Once done, remove from the oven and allow to cool for at least 20 minutes before placing in the fridge for an hour or so to cool completely.

Step 7: Meanwhile, using an electric mixer, beat the cream cheese, peanut butter, and confectioners' sugar until smooth. Then, fold in the whipped topping. Evenly spread the mixture over the brownie and sprinkle over the peanuts and chocolate chips.

Step 8: Place the brownies inside the fridge for at least 30 minutes before serving.

Step 9: For any leftovers, cover and refrigerate.

August 25, 2020 0 comment
0 FacebookTwitterPinterestEmail
Newer Posts
Older Posts

Popular Posts

  • 1

    Crispy Crunchy Parmesan Potatoes

    March 21, 2020
  • 2

    CROCK POT SMOTHERED PORK CHOPS

    March 21, 2020
  • Facebook
  • Twitter

@2019 - All Right Reserved.


Back To Top