Cook it once
  • Home
  • Privacy Policy
  • Recipes
    • KETO
    • LC
    • WW
  • Tips
  • Contact
Cook it once
  • Home
  • Privacy Policy
  • Recipes
    • KETO
    • LC
    • WW
  • Tips
  • Contact
Category:

Main Dish Recipes

Main Dish Recipes

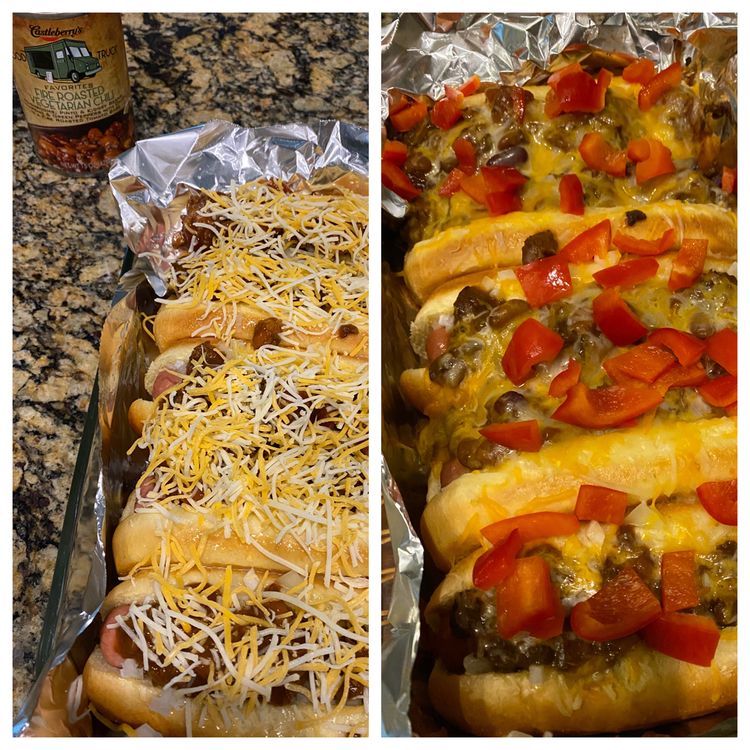
CHILI CHEESE HOT DOG BAKE

by Rebecca September 25, 2020
written by Rebecca

Total Time: 45 mins | Servings: 8 servings

I never would have thought that this is even possible! Baked Chili Cheese Hot Dog in buns are my new obsession! An easy, quick, and alternative way to enjoy our favourite. My mouth is watering because of this simple yet super flavorful hot dog in buns that are brushed with butter garlic and topped with scrumptious chilli cheese. I love the perfect crunch of the buns that compliments the fragrant flavour of the chilli cheese. A heck of a meal with a very satisfying filling!

Ingredients

8 Hot Dogs, rinsed and patted dry

8 Hot Dog Buns

2 Tablespoons Butter, melted

3 cloves garlic, minced

15.5 ounces Chili (1 can or about 2 cups)

1 cup grated Cheese

chopped green onions, for garnish

chopped tomatoes, for garnish

How to make Chili Cheese Hot Dog Bake

Step 1: Prepare the oven. Preheat it to 375 degrees F.

Step 2: Put the hot dogs in the buns and transfer them into a 9 x 13-inch baking dish.

Step 3: Melt the butter. Once melted, stir in the minced garlic.

Step 4: Brush the hot dogs and the buns with the garlic butter mixture.

Step 5: Place spoonfuls of chilli over the hot dog and spread.

Step 6: Then, sprinkle over with cheese.

Step 7: Place inside the preheated oven and bake for about 25 to 30 minutes, covered, until the buns are crispy and the cheese has melted.

Step 8: Remove from the oven and garnish with green onions and tomatoes before serving.

Step 9: Serve warm. Enjoy!

Nutrition Facts:

Calories: 332kcal | Carbohydrates: 35g | Protein: 15g | Fat: 15g | Saturated Fat: 7g | Cholesterol: 39mg | Sodium: 742mg | Potassium: 317mg | Fiber: 2g | Sugar: 6g | Vitamin A: 718IU | Vitamin C: 80mg | Calcium: 233mg | Iron: 3mg

CHILI CHEESE HOT DOG BAKE

Rebecca Total Time: 45 mins | Servings: 8 servings I never would have thought that this is even possible! Baked Chili Cheese Hot Dog in buns are my new obsession! An… Main Dish Recipes CHILI CHEESE HOT DOG BAKE European Print This
Serves: 8
Nutrition facts: 332 calories 15 fat
Rating: 5.0/5
( 1 voted )

Ingredients

  • 8 Hot Dogs, rinsed and patted dry
  • 8 Hot Dog Buns
  • 2 Tablespoons Butter, melted
  • 3 cloves garlic, minced
  • 15.5 ounces Chili (1 can or about 2 cups)
  • 1 cup grated Cheese
  • chopped green onions, for garnish
  • chopped tomatoes, for garnish

Instructions

Step 1: Prepare the oven. Preheat it to 375 degrees F.

Step 2: Put the hot dogs in the buns and transfer them into a 9 x 13-inch baking dish.

Step 3: Melt the butter. Once melted, stir in the minced garlic.

Step 4: Brush the hot dogs and the buns with the garlic butter mixture.

Step 5: Place spoonfuls of chilli over the hot dog and spread.

Step 6: Then, sprinkle over with cheese.

Step 7: Place inside the preheated oven and bake for about 25 to 30 minutes, covered, until the buns are crispy and the cheese has melted.

Step 8: Remove from the oven and garnish with green onions and tomatoes before serving.

Step 9: Serve warm. Enjoy!
September 25, 2020 0 comment
0 FacebookTwitterPinterestEmail
Main Dish Recipes

Easy No-Bake Chocolate Oatmeal Bars

by Rebecca September 24, 2020
written by Rebecca

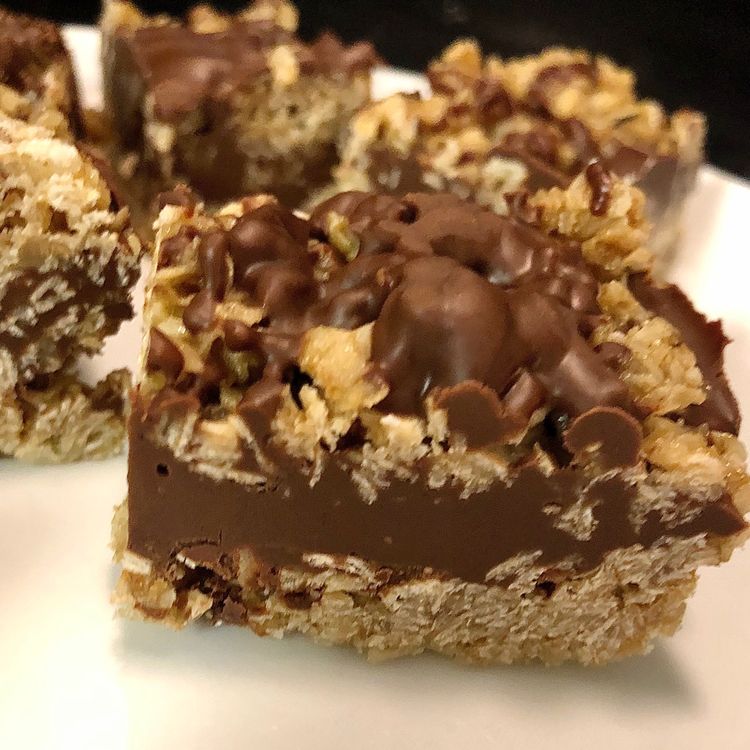
These unbelievably easy no-bake chocolate oatmeal bars will make your mouth water. Melt in your mouth delicious bars that are thick, chewy, and perfect for any occasion and potlucks. Excellent as homemade gifts and cookie exchange. Make a bunch and don’t worry because these freezes well. I am planning what to do this Holiday and I think instead of buying gifts, I am making them. And this no-bake bar is on my list. I am overly confident that everyone will love these rich, dense, and perfectly sweet irresistible treat.

Ingredients

1 cup (2 sticks) salted butter

1/2 cup light brown sugar, packed

1 tsp. pure vanilla extract

3 cups rolled oats

1/2 tsp. ground cinnamon

1/4 tsp. sea salt

1 cup milk chocolate chips

3/4 cup smooth peanut butter

How to make Easy No-Bake Chocolate Oatmeal Bars

Step 1: Using a parchment paper, line an 8 x 8-inch baking dish.

Step 2: In a medium saucepan, combine the butter, sugar, and vanilla extract. Heat until the butter has melted over medium-low heat while stirring to mix. Then, add in the oats, ground cinnamon, and salt.

Step 3: Cook for approximately 5 minutes while stirring.

Step 4: In the prepared baking pan, pour half of the mixture. Spread and press on the bottom of the pan.

Step 5: In a liquid measuring cup, add the chocolate chips with peanut butter. Melt in the microwave in 30-second increments until completely melted.

Step 6: Reserve some of the chocolate and peanut butter mixture. And pour the rest into the pan. Top it with the rest of the oat mixture. Slightly pressing down.

Step 7: Then, drizzle over the entire pan the reserved chocolate and peanut butter mixture.

Step 8: Place in the fridge to chill for at least 4 hours before serving. Enjoy!

Easy No-Bake Chocolate Oatmeal Bars

Rebecca These unbelievably easy no-bake chocolate oatmeal bars will make your mouth water. Melt in your mouth delicious bars that are thick, chewy, and perfect for any occasion and potlucks. Excellent… Main Dish Recipes Easy No-Bake Chocolate Oatmeal Bars European Print This
Nutrition facts: 200 calories 20 grams fat
Rating: 5.0/5
( 1 voted )

Ingredients

  • 1 cup (2 sticks) salted butter
  • 1/2 cup light brown sugar, packed
  • 1 tsp. pure vanilla extract
  • 3 cups rolled oats
  • 1/2 tsp. ground cinnamon
  • 1/4 tsp. sea salt
  • 1 cup milk chocolate chips
  • 3/4 cup smooth peanut butter

Instructions

Step 1: Using a parchment paper, line an 8 x 8-inch baking dish.

Step 2: In a medium saucepan, combine the butter, sugar, and vanilla extract. Heat until the butter has melted over medium-low heat while stirring to mix. Then, add in the oats, ground cinnamon, and salt.

Step 3: Cook for approximately 5 minutes while stirring.

Step 4: In the prepared baking pan, pour half of the mixture. Spread and press on the bottom of the pan.

Step 5: In a liquid measuring cup, add the chocolate chips with peanut butter. Melt in the microwave in 30-second increments until completely melted.

Step 6: Reserve some of the chocolate and peanut butter mixture. And pour the rest into the pan. Top it with the rest of the oat mixture. Slightly pressing down.

Step 7: Then, drizzle over the entire pan the reserved chocolate and peanut butter mixture.

Step 8: Place in the fridge to chill for at least 4 hours before serving. Enjoy!

September 24, 2020 0 comment
0 FacebookTwitterPinterestEmail
Main Dish Recipes

CINNAMON SUGAR AIR FRYER DONUTS (4-INGREDIENTS)

by Rebecca September 24, 2020
written by Rebecca

SERVINGS: 8 Donuts + 8 Holes

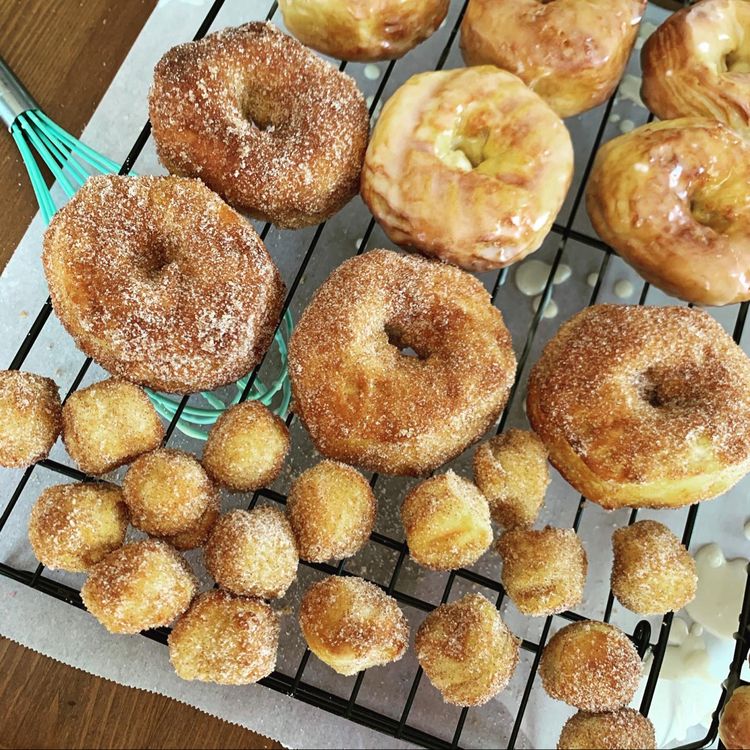
Super easy and quick air fry doughnuts that are coated with melted butter and cinnamon-sugar mixture. Simple 4-ingredient doughnuts and holes that you can whip up in 5 minutes! These delicious doughnuts are my new favourite! And are here to keep.

INGREDIENTS

1 can Jumbo Flaky Biscuits like Pillsbury Grands

1/2 cup granulated sugar

1/2 tbsp ground cinnamon

5 tbsp butter melted

How to make Easy Air Fryer Donuts

Step 1: Prepare the oven. Preheat it to 360 degrees. You simply need to turn the air fryer on at 330 degrees and allow it to run for approximately 3 to 5 minutes.

Step 2: Combine the cinnamon and sugar in a medium bowl and set aside.

Step 3: Cut the centre of each flaky biscuit with a 1-inch round cutter.

Step 4: Using a coconut oil spray, lightly coat the air fryer basket or use an olive oil spray. But using a non-stick spray like pam is not recommended as it could be harmful to the air fryer.

Step 5: Put in the air fryer the doughnuts not the holes and bake for about 5 minutes.

Step 6: Meanwhile, melt the butter.

Step 7: Brush the doughnuts with the melted butter using a silicone pastry brush to coat them. Dip the doughnuts with cinnamon-sugar mixture and roll around to cover. Using a spoon, coat the top, too. Then, shake the doughnuts gently to shake the excess cinnamon-sugar off.

Step 8: Serve immediately. Enjoy!

For the Donut Holes:

Set the timer to 3 minutes to air fry the holes. And do the same steps for dipping and adding the cinnamon-sugar mixture.

NUTRITION FACTS:

Serving: 8g | Calories: 113kcal | Carbohydrates: 13g | Protein: 1g | Fat: 7g | Saturated Fat: 1g | Sodium: 83mg | Fiber: 1g | Sugar: 12g | Vitamin A: 313IU | Calcium: 8mg | Iron: 1mg

CINNAMON SUGAR AIR FRYER DONUTS (4-INGREDIENTS)

Rebecca SERVINGS: 8 Donuts + 8 Holes Super easy and quick air fry doughnuts that are coated with melted butter and cinnamon-sugar mixture. Simple 4-ingredient doughnuts and holes that you can… Main Dish Recipes CINNAMON SUGAR AIR FRYER DONUTS (4-INGREDIENTS) European Print This
Serves: 8
Nutrition facts: 113 calories 7 fat
Rating: 5.0/5
( 1 voted )

Ingredients

  • 1 can Jumbo Flaky Biscuits like Pillsbury Grands
  • 1/2 cup granulated sugar
  • 1/2 tbsp ground cinnamon
  • 5 tbsp butter melted

Instructions

Step 1: Prepare the oven. Preheat it to 360 degrees. You simply need to turn the air fryer on at 330 degrees and allow it to run for approximately 3 to 5 minutes.

Step 2: Combine the cinnamon and sugar in a medium bowl and set aside.

Step 3: Cut the centre of each flaky biscuit with a 1-inch round cutter.

Step 4: Using a coconut oil spray, lightly coat the air fryer basket or use an olive oil spray. But using a non-stick spray like pam is not recommended as it could be harmful to the air fryer.

Step 5: Put in the air fryer the doughnuts not the holes and bake for about 5 minutes.

Step 6: Meanwhile, melt the butter.

Step 7: Brush the doughnuts with the melted butter using a silicone pastry brush to coat them. Dip the doughnuts with cinnamon-sugar mixture and roll around to cover. Using a spoon, coat the top, too. Then, shake the doughnuts gently to shake the excess cinnamon-sugar off.

Step 8: Serve immediately. Enjoy!

For the Donut Holes:

Set the timer to 3 minutes to air fry the holes. And do the same steps for dipping and adding the cinnamon-sugar mixture.

September 24, 2020 0 comment
0 FacebookTwitterPinterestEmail
Main Dish Recipes

EASY CHEESY TACO STICKS

by Rebecca September 24, 2020
written by Rebecca

PREP TIME: 15 mins | COOK TIME: 12 mins | SERVINGS: 4

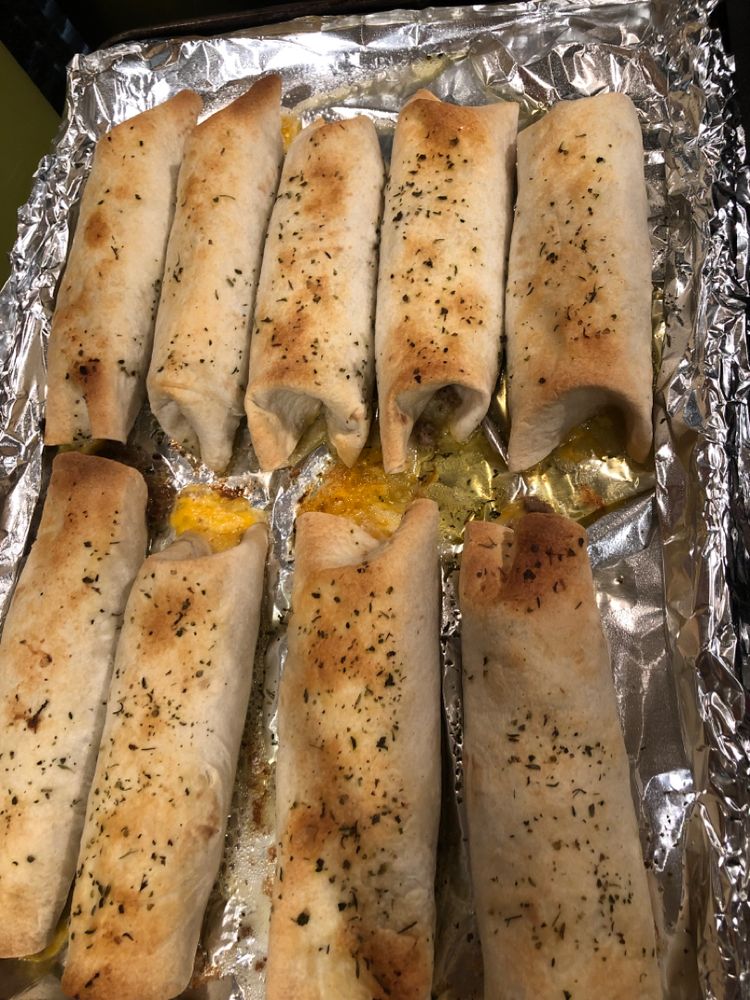
I love these easy Cheesy Taco Sticks – soft, buttery, stuffed with taco meat and gooey cheese. Serve these with salsa, sour cream, and guacamole dip for dinner or lunch, even snacks. Whenever I make these, I always ask the kids to give me a hand. It’s super easy that even my kids can do it. Pizza in a form of breadsticks! How amazing is that? We are obsessed with these mouthwatering cheesy taco sticks. One bite and we instantly fell crazy in love!

INGREDIENTS

1 pound lean ground beef

1 packet taco seasoning mix

1 tube refrigerated Pillsbury pizza dough

5 Colby jack cheese sticks cut in half

1/4 cup butter melted

1 teaspoon garlic powder

1 teaspoon dry parsley

HOW TO MAKE EASY CHEESY TACO STICKS

Step 1: Prepare the oven. Preheat it to 425 degrees F.

Step 2: Using a non-stick cooking spray, grease a large baking sheet.

Step 3: Add the ground beef in a skillet. Cook over medium heat while stirring often until thoroughly cooked. Drain excess fat before stirring in the taco seasoning.

Step 4: Remove the skillet from the heat and set the seasoned ground beef aside to cool.

Step 5: Lay flat the pizza dough and slice halfway lengthwise. Then, cut both in 5 equal rectangles to make 10 triangles.

Step 6: Add the cooled taco meat on the centre of the rectangles and top with half of the Colby Jack cheese stick.

Step 7: Seal by rolling up the pizza dough over the meat and cheese. Pinch it close to make a breadstick.

Step 8: Transfer each taco stick on the prepared baking sheet.

Step 9: In a small bowl, stir the butter, garlic powder, and dry parsley. And lavishly brush the tops of the breadsticks with the butter mixture.

Step 10: Place inside the preheated oven and bake for about 10 to 12 minutes or until golden brown.

Step 11: Remove from the oven and serve immediately. Enjoy!

EASY CHEESY TACO STICKS

Rebecca PREP TIME: 15 mins | COOK TIME: 12 mins | SERVINGS: 4 I love these easy Cheesy Taco Sticks – soft, buttery, stuffed with taco meat and gooey cheese. Serve… Main Dish Recipes EASY CHEESY TACO STICKS European Print This
Serves: 4 Prep Time: 15 mins Cooking Time: 12 mins 12 mins
Nutrition facts: 200 calories 20 grams fat
Rating: 3.9/5
( 8 voted )

Ingredients

  • 1 pound lean ground beef
  • 1 packet taco seasoning mix
  • 1 tube refrigerated Pillsbury pizza dough
  • 5 Colby jack cheese sticks cut in half
  • 1/4 cup butter melted
  • 1 teaspoon garlic powder
  • 1 teaspoon dry parsley

Instructions

Step 1: Prepare the oven. Preheat it to 425 degrees F.

Step 2: Using a non-stick cooking spray, grease a large baking sheet.

Step 3: Add the ground beef in a skillet. Cook over medium heat while stirring often until thoroughly cooked. Drain excess fat before stirring in the taco seasoning.

Step 4: Remove the skillet from the heat and set the seasoned ground beef aside to cool.

Step 5: Lay flat the pizza dough and slice halfway lengthwise. Then, cut both in 5 equal rectangles to make 10 triangles.

Step 6: Add the cooled taco meat on the centre of the rectangles and top with half of the Colby Jack cheese stick.

Step 7: Seal by rolling up the pizza dough over the meat and cheese. Pinch it close to make a breadstick.

Step 8: Transfer each taco stick on the prepared baking sheet.

Step 9: In a small bowl, stir the butter, garlic powder, and dry parsley. And lavishly brush the tops of the breadsticks with the butter mixture.

Step 10: Place inside the preheated oven and bake for about 10 to 12 minutes or until golden brown.

Step 11: Remove from the oven and serve immediately. Enjoy!

September 24, 2020 0 comment
0 FacebookTwitterPinterestEmail
Main Dish Recipes

German Chocolate Brownie Cookies

by Rebecca September 24, 2020
written by Rebecca

Prep Time: 15 minutes | Cook Time: 10 minutes | Yield: 24 cookies

These cookies are super soft and chewy, topped with gooey caramel topping and some chocolate drizzle. Such incredible cookies – delicious, perfectly sweet, and an easy fix.

Ingredients

For Brownie Cookies:

8 oz semisweet chocolate- chopped

2 tablespoons unsalted butter (room temperature)

2 eggs

½ cup + 2 Tbsp granulated sugar

½ teaspoon vanilla extract

½ cup all-purpose flour

¼ teaspoon baking powder

For German Chocolate Topping:

1 cup evaporated milk

1 cup of sugar

3 egg yolks

½ cup butter-softened

1 tsp. vanilla

1⅓ cup sweetened shredded coconut-toasted

11/4 cup chopped pecans-toasted

5 oz. melted chocolate- for drizzle

How to make German Chocolate Brownie Cookies

To make the cookies:

Step 1: Prepare the oven. Preheat it to 350 degrees F.

Step 2: Using a parchment paper, line two large baking sheets and set aside.

Step 3: In a heatproof bowl, add the butter and 8 oz. semisweet chocolate. Melt over a saucepan of barely simmering water while occasionally stirring until smooth.

Step 4: In a medium bowl, combine the eggs, vanilla, and granulated sugar.

Step 5: Whisk in a bowl the flour and baking powder.

Step 6: Stir in the cooled melted chocolate mixture into the egg mixture until incorporated.

Step 7: Gradually add in the flour mixture. Mix until combined. You can leave the batter in the fridge if the batter turns out too thin to scoop out.

Step 8: On the prepared baking sheets, scoop about half a tbsp of batter 2-inches apart to give the cookies space to flatten while baking.

Step 9: Place inside the preheated oven and bake for about 10 minutes or until firm on the outside. Do not overbake.

To make the topping:

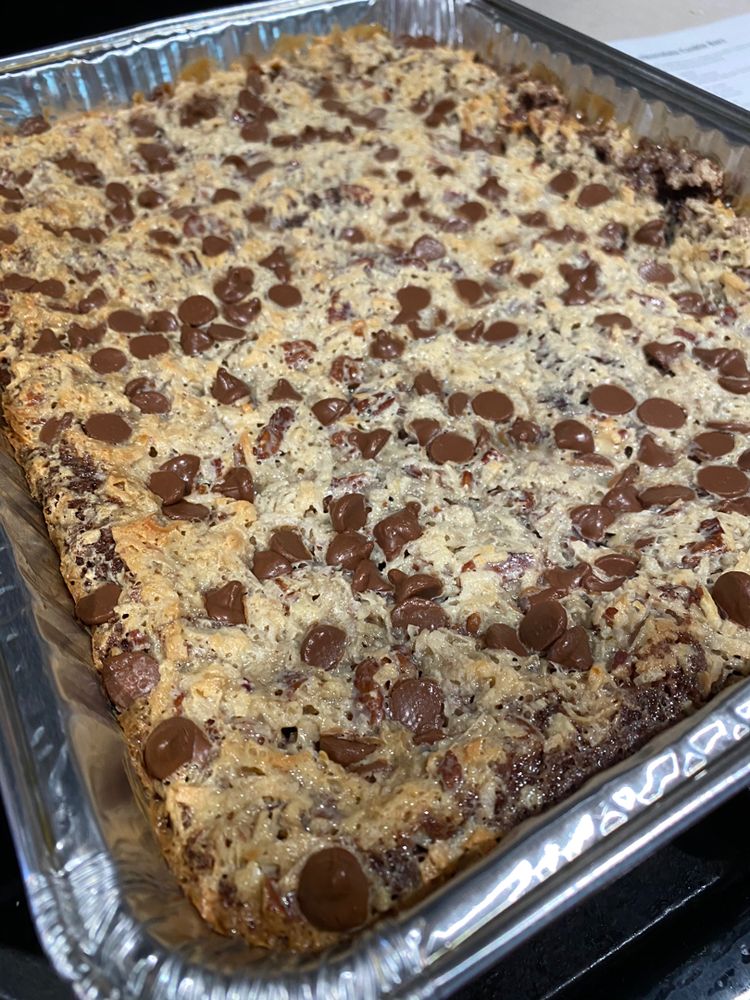
Step 1: In a large saucepan, combine the evaporated milk, sugar, egg yolks, and butter. Cook on a stovetop for about 12 minutes over medium heat, stirring until the mixture has thickened.

Step 2: Remove from the heat and immediately stir in the vanilla, toasted coconut, and pecans. Allow the mixture to cool. Enough to spread over the cookies.

Step 3: Once the cookies are cooled, spread the topping and drizzle with melted chocolate.

Step 4: Store in an airtight container and place in the fridge.

German Chocolate Brownie Cookies

Rebecca Prep Time: 15 minutes | Cook Time: 10 minutes | Yield: 24 cookies These cookies are super soft and chewy, topped with gooey caramel topping and some chocolate drizzle. Such… Main Dish Recipes German Chocolate Brownie Cookies European Print This
Serves: 24 Prep Time: 15 mins Cooking Time: 10 mins 10 mins
Nutrition facts: 200 calories 20 grams fat
Rating: 4.8/5
( 4 voted )

Ingredients

  • For Brownie Cookies:
  • 8 oz semisweet chocolate- chopped
  • 2 tablespoons unsalted butter (room temperature)
  • 2 eggs
  • ½ cup + 2 Tbsp granulated sugar
  • ½ teaspoon vanilla extract
  • ½ cup all-purpose flour
  • ¼ teaspoon baking powder
  • For German Chocolate Topping:
  • 1 cup evaporated milk
  • 1 cup of sugar
  • 3 egg yolks
  • ½ cup butter-softened
  • 1 tsp. vanilla
  • 1⅓ cup sweetened shredded coconut-toasted
  • 11/4 cup chopped pecans-toasted
  • 5 oz. melted chocolate- for drizzle

Instructions

To make the cookies:

Step 1: Prepare the oven. Preheat it to 350 degrees F.

Step 2: Using a parchment paper, line two large baking sheets and set aside.

Step 3: In a heatproof bowl, add the butter and 8 oz. semisweet chocolate. Melt over a saucepan of barely simmering water while occasionally stirring until smooth.

Step 4: In a medium bowl, combine the eggs, vanilla, and granulated sugar.

Step 5: Whisk in a bowl the flour and baking powder.

Step 6: Stir in the cooled melted chocolate mixture into the egg mixture until incorporated.

Step 7: Gradually add in the flour mixture. Mix until combined. You can leave the batter in the fridge if the batter turns out too thin to scoop out.

Step 8: On the prepared baking sheets, scoop about half a tbsp of batter 2-inches apart to give the cookies space to flatten while baking.

Step 9: Place inside the preheated oven and bake for about 10 minutes or until firm on the outside. Do not overbake.

To make the topping:

Step 1: In a large saucepan, combine the evaporated milk, sugar, egg yolks, and butter. Cook on a stovetop for about 12 minutes over medium heat, stirring until the mixture has thickened.

Step 2: Remove from the heat and immediately stir in the vanilla, toasted coconut, and pecans. Allow the mixture to cool. Enough to spread over the cookies.

Step 3: Once the cookies are cooled, spread the topping and drizzle with melted chocolate.

Step 4: Store in an airtight container and place in the fridge.

September 24, 2020 0 comment
0 FacebookTwitterPinterestEmail
Main Dish Recipes

Vegetarian Spinach Pumpkin Lasagna

by Rebecca September 24, 2020
written by Rebecca

PREP TIME: 30 MINS | COOK TIME: 40 MINS | TOTAL TIME: 1 HOUR 10 MINS | SERVES: 12

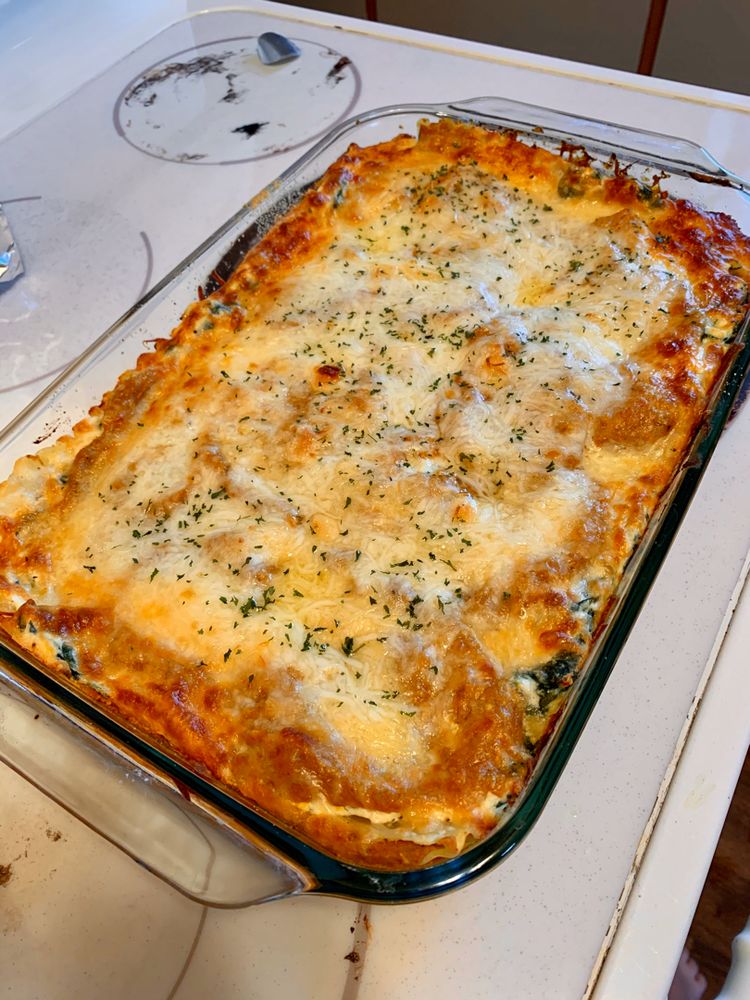
This healthy lasagna dish has loads of spinach, layers of cheese, and pumpkin puree. An astonishing Vegetarian Spinach Pumpkin Lasagna that is freezer and family-friendly.

Ingredients

For the noodles:

10 lasagna noodles

For the ricotta mixture:

1/2 tablespoon olive oil

6 ounces spinach (from 1 bag spinach)

1 (15 ounces) container part-skim ricotta

1 egg

½ teaspoon garlic powder

1/2 teaspoon salt

Freshly ground black pepper

For the pumpkin layer:

2 (15 ounce) cans pumpkin puree

½ cup milk (I like unsweetened almond milk, but any milk will work)

¼ teaspoon cinnamon

¼ teaspoon nutmeg

¼ teaspoon ginger

¼ teaspoon allspice

3/4 teaspoon salt

Freshly ground black pepper

For the layers:

3 cups shredded mozzarella cheese, divided (approximately 12 ounces)

1 cup grated parmesan cheese, divided

To garnish:

Fresh chopped parsley or small sage leaves

How to make Vegetarian Spinach Pumpkin Lasagna

Step 1: Prepare the oven. Preheat it to 400 degrees F.

Step 2: Using a nonstick spray, grease a 9 x 13-inch baking pan.

Step 3: Boil a large pot of water. Add the lasagna noodles and cook for about 5 to 6 minutes. Drain and instantly lay the noodles flat on an oiled baking sheet or cutting board to easily assemble the lasagna. Or you can soak in a very warm water not hot the lasagna noodles for about 20 to 30 minutes instead of boiling them.

Step 4: Meanwhile, add the spinach in a medium pan or skillet and cook in half a teaspoon of olive oil over medium heat. Season with a bit of salt and pepper and continue to cook until the spinach is wilted. Then, transfer in a medium bowl and cool for a minute or two.

Step 5: Add the spinach, ricotta, egg, garlic powder, salt, and pepper in a small bowl. Set aside.

Step 6: In a large bowl, add the pumpkin, milk, cinnamon, nutmeg, ginger, allspice, salt, and pepper to make the pumpkin mixture. Mix well until incorporated.

Step 7: To assemble: Over the bottom of the baking dish, spread a heaping cup of the pumpkin mixture, top with 5 cups of cooked lasagna noodles laying 4 vertical and 1 horizontal, followed by half of the spinach-ricotta cheese mixture, then top it all up with 3/4 cup shredded mozzarella.

Step 8: On top of the mozzarella, add a heaping cup of the pumpkin mixture. Sprinkle with half a cup of parmesan cheese.

Step 9: Do the same for the remaining ingredients: noodles, spinach-ricotta mixture, and 3/4 cup shredded mozzarella. Top with the rest of the pumpkin and half a cup of parmesan cheese. And for the final layer, sprinkle over the rest of the 1 1/2 shredded mozzarella cheese.

Step 10: Place inside the preheated oven and bake for about 25 minutes, covered with foil. Removing the foil, continue to bake for another 15 to 20 minutes or until the cheese begins to brown a tad.

Step 11: Remove from the oven and garnish with more parmesan and chopped sage or parsley. Allow cooling for at least 15 minutes before cutting.

Step 12: Serve and enjoy!

Notes:

There are two ways to freeze lasagna:

First, bake and freeze. Bake the lasagna and allow it to cool at room temperature before slicing into servings. Place the slices in a freezer-safe container and freeze. Or you can freeze the entire pan without slicing. You just need to make sure to double wrap the lasagna so it won’t dry out. And when ready to serve, thaw, then bake for about 30 to 45 minutes at 350 degrees F, covered.

Second is freezing the lasagna before baking. Assemble the lasagna following the above steps, double wrap using a plastic wrap, foil, and freeze. This will last frozen for up to 3 months. To serve, thaw out, and bake according to instructions.

Nutrition Facts:

Calories: 311kcal | Fat: 12.1g | Saturated fat: 5.3g | Carbohydrates: 31.3g | Fiber: 4.4g | Sugar: 4g | Protein: 19.1g

Vegetarian Spinach Pumpkin Lasagna

Rebecca PREP TIME: 30 MINS | COOK TIME: 40 MINS | TOTAL TIME: 1 HOUR 10 MINS | SERVES: 12 This healthy lasagna dish has loads of spinach, layers of cheese,… Main Dish Recipes Vegetarian Spinach Pumpkin Lasagna European Print This
Serves: 12 Prep Time: 30 mins Cooking Time: 40 mins 40 mins
Nutrition facts: 311 calories 12.1 fat
Rating: 5.0/5
( 1 voted )

Ingredients

  • For the noodles:
  • 10 lasagna noodles
  • For the ricotta mixture:
  • 1/2 tablespoon olive oil
  • 6 ounces spinach (from 1 bag spinach)
  • 1 (15 ounces) container part-skim ricotta
  • 1 egg
  • ½ teaspoon garlic powder
  • 1/2 teaspoon salt
  • Freshly ground black pepper
  • For the pumpkin layer:
  • 2 (15 ounce) cans pumpkin puree
  • ½ cup milk (I like unsweetened almond milk, but any milk will work)
  • ¼ teaspoon cinnamon
  • ¼ teaspoon nutmeg
  • ¼ teaspoon ginger
  • ¼ teaspoon allspice
  • 3/4 teaspoon salt
  • Freshly ground black pepper
  • For the layers:
  • 3 cups shredded mozzarella cheese, divided (approximately 12 ounces)
  • 1 cup grated parmesan cheese, divided
  • To garnish:
  • Fresh chopped parsley or small sage leaves

Instructions

Step 1: Prepare the oven. Preheat it to 400 degrees F.

Step 2: Using a nonstick spray, grease a 9 x 13-inch baking pan.

Step 3: Boil a large pot of water. Add the lasagna noodles and cook for about 5 to 6 minutes. Drain and instantly lay the noodles flat on an oiled baking sheet or cutting board to easily assemble the lasagna. Or you can soak in a very warm water not hot the lasagna noodles for about 20 to 30 minutes instead of boiling them.

Step 4: Meanwhile, add the spinach in a medium pan or skillet and cook in half a teaspoon of olive oil over medium heat. Season with a bit of salt and pepper and continue to cook until the spinach is wilted. Then, transfer in a medium bowl and cool for a minute or two.

Step 5: Add the spinach, ricotta, egg, garlic powder, salt, and pepper in a small bowl. Set aside.

Step 6: In a large bowl, add the pumpkin, milk, cinnamon, nutmeg, ginger, allspice, salt, and pepper to make the pumpkin mixture. Mix well until incorporated.

Step 7: To assemble: Over the bottom of the baking dish, spread a heaping cup of the pumpkin mixture, top with 5 cups of cooked lasagna noodles laying 4 vertical and 1 horizontal, followed by half of the spinach-ricotta cheese mixture, then top it all up with 3/4 cup shredded mozzarella.

Step 8: On top of the mozzarella, add a heaping cup of the pumpkin mixture. Sprinkle with half a cup of parmesan cheese.

Step 9: Do the same for the remaining ingredients: noodles, spinach-ricotta mixture, and 3/4 cup shredded mozzarella. Top with the rest of the pumpkin and half a cup of parmesan cheese. And for the final layer, sprinkle over the rest of the 1 1/2 shredded mozzarella cheese.

Step 10: Place inside the preheated oven and bake for about 25 minutes, covered with foil. Removing the foil, continue to bake for another 15 to 20 minutes or until the cheese begins to brown a tad.

Step 11: Remove from the oven and garnish with more parmesan and chopped sage or parsley. Allow cooling for at least 15 minutes before cutting.

Step 12: Serve and enjoy!

Notes:

There are two ways to freeze lasagna:

First, bake and freeze. Bake the lasagna and allow it to cool at room temperature before slicing into servings. Place the slices in a freezer-safe container and freeze. Or you can freeze the entire pan without slicing. You just need to make sure to double wrap the lasagna so it won't dry out. And when ready to serve, thaw, then bake for about 30 to 45 minutes at 350 degrees F, covered.

Second is freezing the lasagna before baking. Assemble the lasagna following the above steps, double wrap using a plastic wrap, foil, and freeze. This will last frozen for up to 3 months. To serve, thaw out, and bake according to instructions.

September 24, 2020 0 comment
0 FacebookTwitterPinterestEmail
Main Dish Recipes

Doritos Locos Taco Pasta Salad

by Rebecca September 24, 2020
written by Rebecca

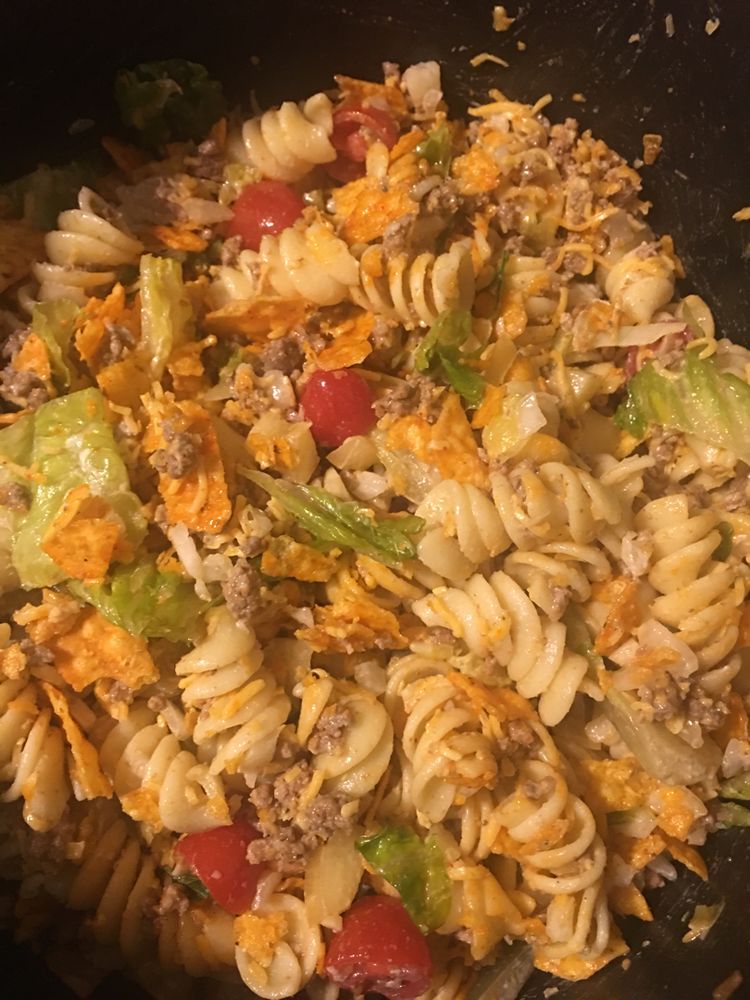
This Dorito Locos Taco Pasta Salad is the perfect meal for your whole family to enjoy. It has layers of your favourite mouthwatering loco taco in a bowl with huge flavours that burst in your mouth. This salad is an excellent addition to your weeknight meal. Impress your friends with this perfect taco night dish. Garnish with sour cream for that high rocketed experience. To make this scrumptious dish, you only need basic ingredients that you can easily find in your kitchen. Everything we love about a crunchy taco is in this pasta salad. This sensational side dish never fails to please the crowd. Great to bring to potlucks or serve to guests. If you are on the hunt for a light, outrageously delicious dinner, then your search ends here. Not to mention if you are crazy over tacos and Doritos I am confident that you’ll dig this. This is super good you want to dig straight in!

Ingredients

1/2 pound lean ground beef

1/2 pound rotini pasta

2 tbsp. Taco seasoning

1/2 yellow sweet pepper, chopped

1/4 small white onion, diced

1/2 pint grape tomatoes

1 cup shredded cheddar cheese

1/2 head iceberg lettuce, shredded

1/2 cup French dressing

1/4 cup sour cream

1 1/2 cup nacho cheese Doritos, crushed

How to make Doritos Locos Taco Pasta Salad

Step 1: Add the beef in a pan and cook over medium-high heat until browned. Drain excess grease, reserving 3 tablespoons.

Step 2: Add taco seasoning into the cooked beef and stir to mix. Set aside.

Step 3: According to the package direction, cook the rotini. Drain and set aside.

Step 4: In a large bowl, add the cooked rotini, ground beef, yellow sweet pepper, onion, grape tomatoes, shredded cheddar cheese, iceberg lettuce, french dressing, and crushed nacho cheese Doritos. Toss until incorporated.

Step 5: Before serving garnish with sour cream. Enjoy!

Doritos Locos Taco Pasta Salad

Rebecca This Dorito Locos Taco Pasta Salad is the perfect meal for your whole family to enjoy. It has layers of your favourite mouthwatering loco taco in a bowl with huge… Main Dish Recipes Doritos Locos Taco Pasta Salad European Print This
Nutrition facts: 200 calories 20 grams fat
Rating: 5.0/5
( 2 voted )

Ingredients

  • 1/2 pound lean ground beef
  • 1/2 pound rotini pasta
  • 2 tbsp. Taco seasoning
  • 1/2 yellow sweet pepper, chopped
  • 1/4 small white onion, diced
  • 1/2 pint grape tomatoes
  • 1 cup shredded cheddar cheese
  • 1/2 head iceberg lettuce, shredded
  • 1/2 cup French dressing
  • 1/4 cup sour cream
  • 1 1/2 cup nacho cheese Doritos, crushed

Instructions

Step 1: Add the beef in a pan and cook over medium-high heat until browned. Drain excess grease, reserving 3 tablespoons.

Step 2: Add taco seasoning into the cooked beef and stir to mix. Set aside.

Step 3: According to the package direction, cook the rotini. Drain and set aside.

Step 4: In a large bowl, add the cooked rotini, ground beef, yellow sweet pepper, onion, grape tomatoes, shredded cheddar cheese, iceberg lettuce, french dressing, and crushed nacho cheese Doritos. Toss until incorporated.

Step 5: Before serving garnish with sour cream. Enjoy!

September 24, 2020 0 comment
0 FacebookTwitterPinterestEmail
Main Dish Recipes

Upside Down Apple Cinnamon Roll Cake

by Rebecca September 24, 2020
written by Rebecca

Prep Time: 30 minutes | Cook Time: 1 hour 15 minutes | Yield: serves 10

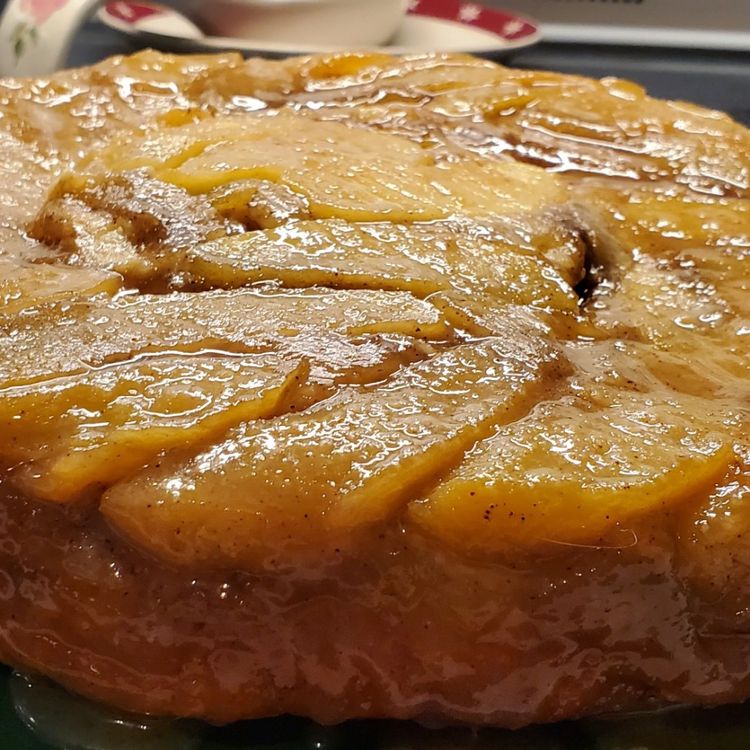
This cake is perfect for the fall baking season. With a decadent cream cheese filling, gooey homemade caramel sauce, top with fresh apples, this Upside Down Apple Cinnamon Roll Cake is a huge breakfast, brunch, dessert, or snack.

Ingredients

2 x 8 oz. refrigerated crescent dinner rolls or crescent dough sheets

2 Tablespoons butter-melted and slightly cooled

1/3 cup light brown sugar

2 teaspoons cinnamon

8 oz. cream cheese-softened

¼ cup of sugar

1 teaspoon vanilla

For the Caramel Sauce:

¾ cup butter

1 teaspoon salt

1 cup brown sugar

2 teaspoons light corn syrup

¼ cup heavy cream

2–3 apples-peeled and cut in ¼ inch slices

How to make Upside Down Apple Cinnamon Roll Cake

Step 1: Using a non-stick spray, grease a 9 x 2-inch round cake pan. Then, line with circle parchment paper the bottom of the pan, and grease. Set aside.

Step 2: For the caramel, melt 3/4 cup butter in a saucepan over medium heat. Add in the heavy cream, stir in the sugar, salt, corn syrup, and vanilla. Mix until the sugar has dissolved. Allow to boil for about 2 to 3 minutes or until the mixture begins to thicken.

Step 3: Add half of the caramel sauce in the prepared pan and set aside the rest for serving.

Step 4: Melt another 2 tablespoons of butter. Set aside.

Step 5: Whisk 1/3 cup of light brown sugar and 2 tsp of cinnamon in a small bowl. Set aside.

Step 6: In another bowl, combine the cream cheese, 1/4 cup sugar, and vanilla. Set aside.

Step 7: In the bottom of the pan, add the sliced apples over the caramel sauce.

Step 8: Spread 1 crescent dough sheet on a parchment paper lightly dusted with flour. Set aside. If in case what you are using is a crescent roll, seal the hole to make a large triangle.

Step 9: Do the same with the other tube of crescent dough.

Step 10: On the first crescent layer, spread over the cream cheese mixture.

Step 11: Then, add on top the other crescent dough rectangle.

Step 12: Brush the dough with 2 tablespoons of melted butter, then, sprinkle with cinnamon-sugar mixture. Tap the pan gently with your hands so the cinnamon sugar sticks to the dough.

Step 13: Slice an inch wide stripes with a pizza cutter or a sharp knife.

Step 14: Roll spirally the first stripe and arrange in the middle of the pan.

Step 15: Lift gently the other stripe and wrap it around the centre adding the strips continuously around the roll. Beginning where the other ended. Making sure not to wrap it tightly so the dough will still have some space to spread while rising when baking or you’ll end up with a stray raw.

Step 16: Just because the caramel might bubble and leak, I would suggest placing the pan on a large baking sheet lined with paper.
Step 17: Place inside the oven and bake for about 60 to 75 minutes at 350 degrees F or until the centre is completely cooked. Cover the top with aluminium foil if it begins browning too much.

Step 18: Remove from the oven and allow to cool in the pan for at least 30 minutes before inverting on a plate to cool completely.

Step 19: To serve, reheat the reserved caramel and drizzle over. Enjoy!

Nutrition Facts:

Amount Per Serving Calories 639 | % Daily Value* Total Fat 42.4g 54% | Cholesterol 69mg 23% | Sodium 429.5mg 19% | Total Carbohydrate 62.2g 23% | Sugars 39.7g | Protein 5.1g 10% | Vitamin A24%Vitamin C2%

Upside Down Apple Cinnamon Roll Cake

Rebecca Prep Time: 30 minutes | Cook Time: 1 hour 15 minutes | Yield: serves 10 This cake is perfect for the fall baking season. With a decadent cream cheese filling,… Main Dish Recipes Upside Down Apple Cinnamon Roll Cake European Print This
Serves: 10 Prep Time: 30 mins Cooking Time: 1 hr 15 mins 1 hr 15 mins
Nutrition facts: 639 calories 42.4 fat
Rating: 5.0/5
( 1 voted )

Ingredients

  • 2 x 8 oz. refrigerated crescent dinner rolls or crescent dough sheets
  • 2 Tablespoons butter-melted and slightly cooled
  • 1/3 cup light brown sugar
  • 2 teaspoons cinnamon
  • 8 oz. cream cheese-softened
  • ¼ cup of sugar
  • 1 teaspoon vanilla
  • For the Caramel Sauce:
  • ¾ cup butter
  • 1 teaspoon salt
  • 1 cup brown sugar
  • 2 teaspoons light corn syrup
  • ¼ cup heavy cream
  • 2–3 apples-peeled and cut in ¼ inch slices

Instructions

Step 1: Using a non-stick spray, grease a 9 x 2-inch round cake pan. Then, line with circle parchment paper the bottom of the pan, and grease. Set aside.

Step 2: For the caramel, melt 3/4 cup butter in a saucepan over medium heat. Add in the heavy cream, stir in the sugar, salt, corn syrup, and vanilla. Mix until the sugar has dissolved. Allow to boil for about 2 to 3 minutes or until the mixture begins to thicken.

Step 3: Add half of the caramel sauce in the prepared pan and set aside the rest for serving.

Step 4: Melt another 2 tablespoons of butter. Set aside.

Step 5: Whisk 1/3 cup of light brown sugar and 2 tsp of cinnamon in a small bowl. Set aside.

Step 6: In another bowl, combine the cream cheese, 1/4 cup sugar, and vanilla. Set aside.

Step 7: In the bottom of the pan, add the sliced apples over the caramel sauce.

Step 8: Spread 1 crescent dough sheet on a parchment paper lightly dusted with flour. Set aside. If in case what you are using is a crescent roll, seal the hole to make a large triangle.

Step 9: Do the same with the other tube of crescent dough.

Step 10: On the first crescent layer, spread over the cream cheese mixture.

Step 11: Then, add on top the other crescent dough rectangle.

Step 12: Brush the dough with 2 tablespoons of melted butter, then, sprinkle with cinnamon-sugar mixture. Tap the pan gently with your hands so the cinnamon sugar sticks to the dough.

Step 13: Slice an inch wide stripes with a pizza cutter or a sharp knife.

Step 14: Roll spirally the first stripe and arrange in the middle of the pan.

Step 15: Lift gently the other stripe and wrap it around the centre adding the strips continuously around the roll. Beginning where the other ended. Making sure not to wrap it tightly so the dough will still have some space to spread while rising when baking or you'll end up with a stray raw.

Step 16: Just because the caramel might bubble and leak, I would suggest placing the pan on a large baking sheet lined with paper.
Step 17: Place inside the oven and bake for about 60 to 75 minutes at 350 degrees F or until the centre is completely cooked. Cover the top with aluminium foil if it begins browning too much.

Step 18: Remove from the oven and allow to cool in the pan for at least 30 minutes before inverting on a plate to cool completely.

Step 19: To serve, reheat the reserved caramel and drizzle over. Enjoy!


September 24, 2020 0 comment
0 FacebookTwitterPinterestEmail
Main Dish Recipes

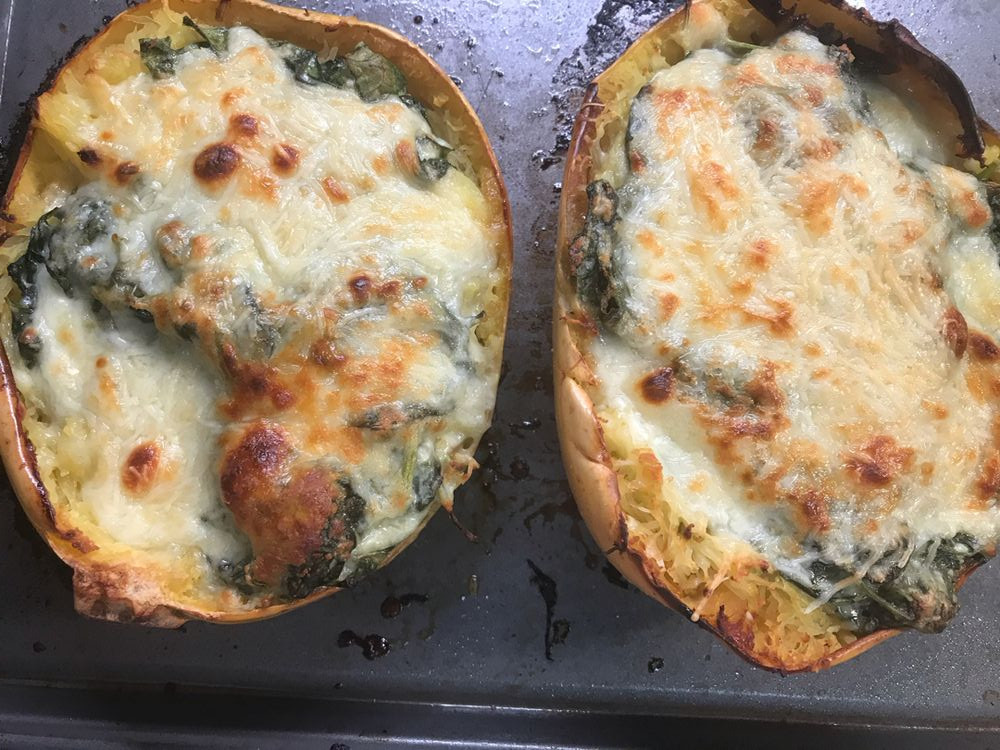
CHEESY GARLIC PARMESAN SPINACH SPAGHETTI SQUASH

by Rebecca September 24, 2020
written by Rebecca

PREP TIME: 10 MINS | COOK TIME: 1 HR | TOTAL TIME: 1 HR 10 MINS | SERVINGS: 4 SERVINGS

Dress your squash in a cheesy garlic Parmesan sauce with fresh spinach. A creamy, mouthwatering, flavorful, and amazing way to enjoy squash. So good you want to just dig right in!

INGREDIENTS

1 medium spaghetti squash (approx. 2-3lbs)

2.5 tbsp minced garlic

1 tsp avocado oil or olive oil

5 oz fresh spinach chopped

1/2 cup heavy cream

1 tbsp cream cheese (optional but delicious!)

1/2 cup freshly grated Parmesan cheese plus extra for topping

salt and pepper to taste

grated or sliced mozzarella for topping to taste

How to make Cheesy Garlic Parmesan Spinach Spaghetti Squash

Step 1: Prepare the oven. Preheat it to 400 degrees F.

Step 2: Slice in half lengthwise the spaghetti squash, then, remove the seeds.

Step 3: You can slightly soften the squash if you stick it in the microwave to cut it easily. But first, pierce the squash several times using a knife so it does not burst. Then, microwave for at about 3 minutes for smaller squash and 4 to 5 minutes for the large ones.

Step 4: Rub with a little amount of olive oil the cut side of the squash and transfer cut side down on the baking dish or sheet.

Step 5: Place in the preheated oven to roast for about 40 minutes or until fork-tender. Although, the cooking time depends on the size of the squash. Large slices will need more time to roast. Store the roasted squash in the fridge for a few days until ready to use.

Step 6: Meanwhile, heat a drizzle of oil in a medium pot or skillet over medium-high heat. once hot, saute the garlic until fragrant.

Step 7: Add in and stir the spinach until wilted. Then, the cream, cream cheese (optional), and Parmesan cheese. Stir well.

Step 8: To taste, season with salt and pepper before removing the pan from the heat.

Step 9: When done roasting, remove the squash from the oven and let it cool before separating and fluffing the strands using a fork.

Step 10: Pour in the middle of the squash boat the sauce and stir to combine. Top it with a small amount of mozzarella cheese and a little parm cheese if desired.

Step 11: Put the squash back in the oven and bake for about 20 minutes at 350 degrees F or until hot and bubbly.

Step 12: Adjust to broil and continue cooking on high for another minute or two for that golden cheesy topping.

Step 13: Serve immediately. Enjoy!

Notes:

Chicken is a great addition to this recipe. Stir the chicken with the sauce and veggie noodles or you can serve them alongside. Or opt for shrimp as they add extra flavour to the squash.

NUTRITION FACTS:

AMOUNT PER SERVING CALORIES 274 | % DAILY VALUE* | PROTEIN 8G16%
* PERCENT DAILY VALUES ARE BASED ON A 2000 CALORIE DIET.

CHEESY GARLIC PARMESAN SPINACH SPAGHETTI SQUASH

Rebecca PREP TIME: 10 MINS | COOK TIME: 1 HR | TOTAL TIME: 1 HR 10 MINS | SERVINGS: 4 SERVINGS Dress your squash in a cheesy garlic Parmesan sauce with… Main Dish Recipes CHEESY GARLIC PARMESAN SPINACH SPAGHETTI SQUASH European Print This
Serves: 4 Prep Time: 10 mins Cooking Time: 1 hr 1 hr
Nutrition facts: 274 calories 20 grams fat
Rating: 5.0/5
( 1 voted )

Ingredients

  • 1 medium spaghetti squash (approx. 2-3lbs)
  • 2.5 tbsp minced garlic
  • 1 tsp avocado oil or olive oil
  • 5 oz fresh spinach chopped
  • 1/2 cup heavy cream
  • 1 tbsp cream cheese (optional but delicious!)
  • 1/2 cup freshly grated Parmesan cheese plus extra for topping
  • salt and pepper to taste
  • grated or sliced mozzarella for topping to taste

Instructions

Step 1: Prepare the oven. Preheat it to 400 degrees F.

Step 2: Slice in half lengthwise the spaghetti squash, then, remove the seeds.

Step 3: You can slightly soften the squash if you stick it in the microwave to cut it easily. But first, pierce the squash several times using a knife so it does not burst. Then, microwave for at about 3 minutes for smaller squash and 4 to 5 minutes for the large ones.

Step 4: Rub with a little amount of olive oil the cut side of the squash and transfer cut side down on the baking dish or sheet.

Step 5: Place in the preheated oven to roast for about 40 minutes or until fork-tender. Although, the cooking time depends on the size of the squash. Large slices will need more time to roast. Store the roasted squash in the fridge for a few days until ready to use.

Step 6: Meanwhile, heat a drizzle of oil in a medium pot or skillet over medium-high heat. once hot, saute the garlic until fragrant.

Step 7: Add in and stir the spinach until wilted. Then, the cream, cream cheese (optional), and Parmesan cheese. Stir well.

Step 8: To taste, season with salt and pepper before removing the pan from the heat.

Step 9: When done roasting, remove the squash from the oven and let it cool before separating and fluffing the strands using a fork.

Step 10: Pour in the middle of the squash boat the sauce and stir to combine. Top it with a small amount of mozzarella cheese and a little parm cheese if desired.

Step 11: Put the squash back in the oven and bake for about 20 minutes at 350 degrees F or until hot and bubbly.

Step 12: Adjust to broil and continue cooking on high for another minute or two for that golden cheesy topping.

Step 13: Serve immediately. Enjoy!

Notes:

Chicken is a great addition to this recipe. Stir the chicken with the sauce and veggie noodles or you can serve them alongside. Or opt for shrimp as they add extra flavour to the squash.

September 24, 2020 0 comment
0 FacebookTwitterPinterestEmail
Main Dish Recipes

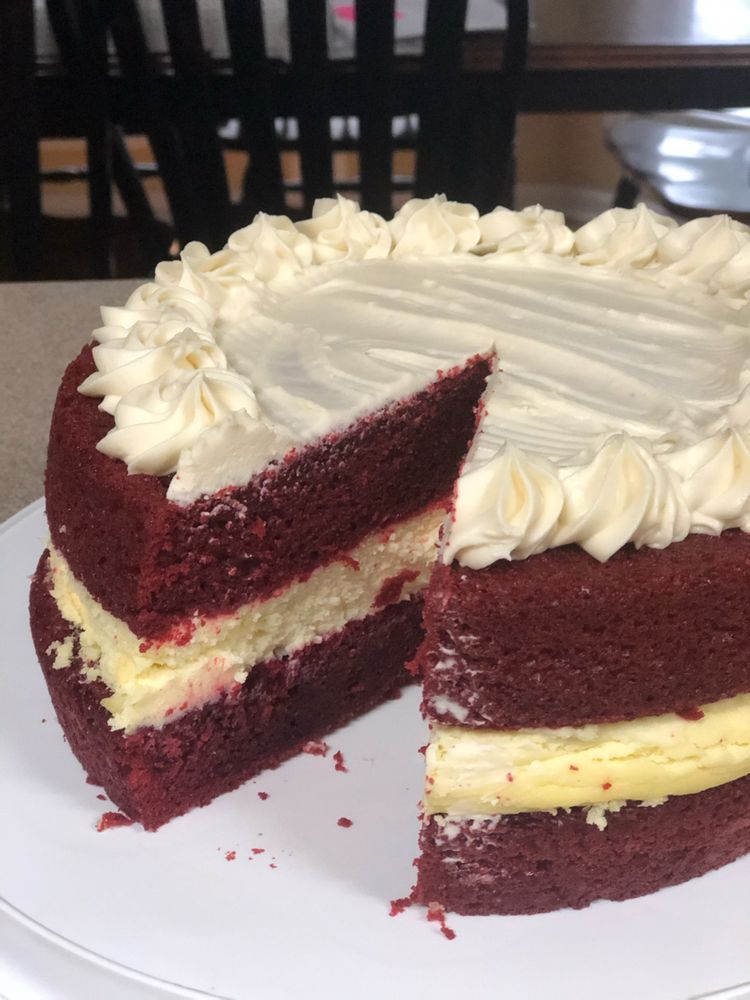
Homemade Red Velvet Cheesecake Recipe

by Rebecca September 24, 2020
written by Rebecca

Prep Time: 15 minutes | Cook Time: 1 hour 30 minutes | Chilling: 8 hours | Total Time: 1 hour 45 minutes | Servings: 16 servings

Red velvet in and out. This decadent cake screams red velvet all over – delicious, beautifully made, and perfect for any occasion.

Ingredients

Red Velvet Cake:

2 1/4 cups sifted cake flour, (sifted, then measured)2 1/4 cups sifted cake flour, (sifted, then measured)

2 tablespoons unsweetened cocoa powder2 tablespoons unsweetened cocoa powder

1 1/4 teaspoon baking powder1 1/4 teaspoon baking powder

1 teaspoon baking soda1 teaspoon baking soda

1/2 teaspoon kosher salt1/2 teaspoon kosher salt

1 cup full-fat buttermilk, room temperature1 cup full-fat buttermilk, room temperature

2 tbs red food colouring, (one bottle)2 tbs red food colouring, (one bottle)

1 teaspoon distilled white vinegar1 teaspoon distilled white vinegar

1 teaspoon vanilla extract1 teaspoon vanilla extract

1 1/2 cups sugar1 1/2 cups sugar

1/2 cup (1 stick) unsalted butter, room temperature1/2 cup (1 stick) unsalted butter, room temperature

2 large eggs, room temperature2 large eggs, room temperature

Cheesecake:

32 oz cream cheese

16 oz sour cream

2 cups of sugar

2 teaspoon vanilla

6 eggs

Topping:

1/2 cup heavy cream1/2 cup heavy cream

1 teaspoonful white chocolate instant pudding mix1 teaspoonful white chocolate instant pudding mix

2 tablespoons of sugar as needed2 tablespoons of sugar as needed

How to make Red Velvet Cheesecake

To make the Cake:

Step 1: Prepare the oven. Preheat it to 350 degrees F.

Step 2: In a bowl, sift the flour, cocoa powder, baking powder, baking soda, and salt.

Step 3: In another bowl, add the buttermilk, food colouring, vinegar, and vanilla. Blend until incorporated.

Step 4: In a large bowl, add the sugar and butter. Beat until light and fluffy.

Step 5: Add the eggs in, a piece at a time, beating every after each addition.

Step 6: In 3 additions, alternately beat in the dry ingredients with 2 additions of the buttermilk mixture.

Step 7: In the bottom of a greased and floured 10-inch springform, add about 1/4-inch of the cake batter.

Step 8: Add the remaining batter in a 13×9-inch or 9-inch cake pan.

Step 9: Place inside the preheated oven and bake for about 20 minutes or until inserted in the centre of the cake comes out clean.

Step 10: Remove the cakes from the oven and allow to cool in the pans for at least 5 minutes before turning out to cool entirely.

Step 11: Crumble into chunks the larger cake and set aside.

To make the Cheesecake:

Step 1: Prepare the oven. Preheat it to 375 degrees F.

Step 2: In a mixing bowl, beat the cream cheese, sour cream, sugar, vanilla, and eggs until smooth.

Step 3: Set aside half a cup of cake crumbs for the topping.

Step 4: Add the rest of the cake chunks into the cheesecake batter and fold.

Step 5: Transfer into a pan.

Step 6: Use an aluminium foil to cover the bottom of the springform and bring it up to the sides.

Step 7: In a larger pan with hot water that almost comes halfway up the sides, put the pan.

Step 8: Place indie the preheated oven and bake for about 45 minutes.

Step 9: Turn off the oven but keep the door close for an hour and don’t peak!

Step 10: After an hour, remove the pan from the bain-marie.

Step 11: Cover tightly and allow to come to room temperature.

Step 12: Then, place in the fridge to sir overnight.

To make the Topping:

Step 1: In a mixing bowl, whip the heavy cream until it begins to thicken.

Step 2: Add 1 tsp. instant pudding mix followed by 1 tbsp. sugar.

Step 3: Continue to whip until soft peaks form.

Step 4: Taste and add in more sugar if necessary.

Step 5: Pour the topping over the cooled cheesecake and sprinkle with the reserved red velvet cake crumbs.

Notes:

You can use a store-bought red velvet cake if in a rush, though, it will not be as good but it works fine.

Nutrition facts:

Calories: 590kcal | Carbohydrates: 62g | Protein: 8g | Fat: 34g | Saturated Fat: 20g | Cholesterol: 124mg | Sodium: 442mg | Potassium: 228mg | Sugar: 48g | Vitamin A: 1280IU | Vitamin C: 0.2mg | Calcium: 131mg | Iron: 0.6mg

Homemade Red Velvet Cheesecake Recipe

Rebecca Prep Time: 15 minutes | Cook Time: 1 hour 30 minutes | Chilling: 8 hours | Total Time: 1 hour 45 minutes | Servings: 16 servings Red velvet in and… Main Dish Recipes Homemade Red Velvet Cheesecake Recipe European Print This
Serves: 16 Prep Time: 15 mins Cooking Time: 1 hr 30 mins 1 hr 30 mins
Nutrition facts: 590 calories 34 fat
Rating: 5.0/5
( 1 voted )

Ingredients

  • Red Velvet Cake:
  • 2 1/4 cups sifted cake flour, (sifted, then measured)2 1/4 cups sifted cake flour, (sifted, then measured)
  • 2 tablespoons unsweetened cocoa powder2 tablespoons unsweetened cocoa powder
  • 1 1/4 teaspoon baking powder1 1/4 teaspoon baking powder
  • 1 teaspoon baking soda1 teaspoon baking soda
  • 1/2 teaspoon kosher salt1/2 teaspoon kosher salt
  • 1 cup full-fat buttermilk, room temperature1 cup full-fat buttermilk, room temperature
  • 2 tbs red food colouring, (one bottle)2 tbs red food colouring, (one bottle)
  • 1 teaspoon distilled white vinegar1 teaspoon distilled white vinegar
  • 1 teaspoon vanilla extract1 teaspoon vanilla extract
  • 1 1/2 cups sugar1 1/2 cups sugar
  • 1/2 cup (1 stick) unsalted butter, room temperature1/2 cup (1 stick) unsalted butter, room temperature
  • 2 large eggs, room temperature2 large eggs, room temperature
  • Cheesecake:
  • 32 oz cream cheese
  • 16 oz sour cream
  • 2 cups of sugar
  • 2 teaspoon vanilla
  • 6 eggs
  • Topping:
  • 1/2 cup heavy cream1/2 cup heavy cream
  • 1 teaspoonful white chocolate instant pudding mix1 teaspoonful white chocolate instant pudding mix
  • 2 tablespoons of sugar as needed2 tablespoons of sugar as needed

Instructions

To make the Cake:

Step 1: Prepare the oven. Preheat it to 350 degrees F.

Step 2: In a bowl, sift the flour, cocoa powder, baking powder, baking soda, and salt.

Step 3: In another bowl, add the buttermilk, food colouring, vinegar, and vanilla. Blend until incorporated.

Step 4: In a large bowl, add the sugar and butter. Beat until light and fluffy.

Step 5: Add the eggs in, a piece at a time, beating every after each addition.

Step 6: In 3 additions, alternately beat in the dry ingredients with 2 additions of the buttermilk mixture.

Step 7: In the bottom of a greased and floured 10-inch springform, add about 1/4-inch of the cake batter.

Step 8: Add the remaining batter in a 13x9-inch or 9-inch cake pan.

Step 9: Place inside the preheated oven and bake for about 20 minutes or until inserted in the centre of the cake comes out clean.

Step 10: Remove the cakes from the oven and allow to cool in the pans for at least 5 minutes before turning out to cool entirely.

Step 11: Crumble into chunks the larger cake and set aside.

To make the Cheesecake:

Step 1: Prepare the oven. Preheat it to 375 degrees F.

Step 2: In a mixing bowl, beat the cream cheese, sour cream, sugar, vanilla, and eggs until smooth.

Step 3: Set aside half a cup of cake crumbs for the topping.

Step 4: Add the rest of the cake chunks into the cheesecake batter and fold.

Step 5: Transfer into a pan.

Step 6: Use an aluminium foil to cover the bottom of the springform and bring it up to the sides.

Step 7: In a larger pan with hot water that almost comes halfway up the sides, put the pan.

Step 8: Place indie the preheated oven and bake for about 45 minutes.

Step 9: Turn off the oven but keep the door close for an hour and don't peak!

Step 10: After an hour, remove the pan from the bain-marie.

Step 11: Cover tightly and allow to come to room temperature.

Step 12: Then, place in the fridge to sir overnight.

To make the Topping:

Step 1: In a mixing bowl, whip the heavy cream until it begins to thicken.

Step 2: Add 1 tsp. instant pudding mix followed by 1 tbsp. sugar.

Step 3: Continue to whip until soft peaks form.

Step 4: Taste and add in more sugar if necessary.

Step 5: Pour the topping over the cooled cheesecake and sprinkle with the reserved red velvet cake crumbs.

Notes:

You can use a store-bought red velvet cake if in a rush, though, it will not be as good but it works fine.

September 24, 2020 0 comment
0 FacebookTwitterPinterestEmail
Newer Posts
Older Posts

Popular Posts

  • 1

    Crispy Crunchy Parmesan Potatoes

    March 21, 2020
  • 2

    CROCK POT SMOTHERED PORK CHOPS

    March 21, 2020
  • Facebook
  • Twitter

@2019 - All Right Reserved.


Back To Top