Cook it once
  • Home
  • Privacy Policy
  • Recipes
    • KETO
    • LC
    • WW
  • Tips
  • Contact
Cook it once
  • Home
  • Privacy Policy
  • Recipes
    • KETO
    • LC
    • WW
  • Tips
  • Contact
Category:

Main Dish Recipes

Main Dish Recipes

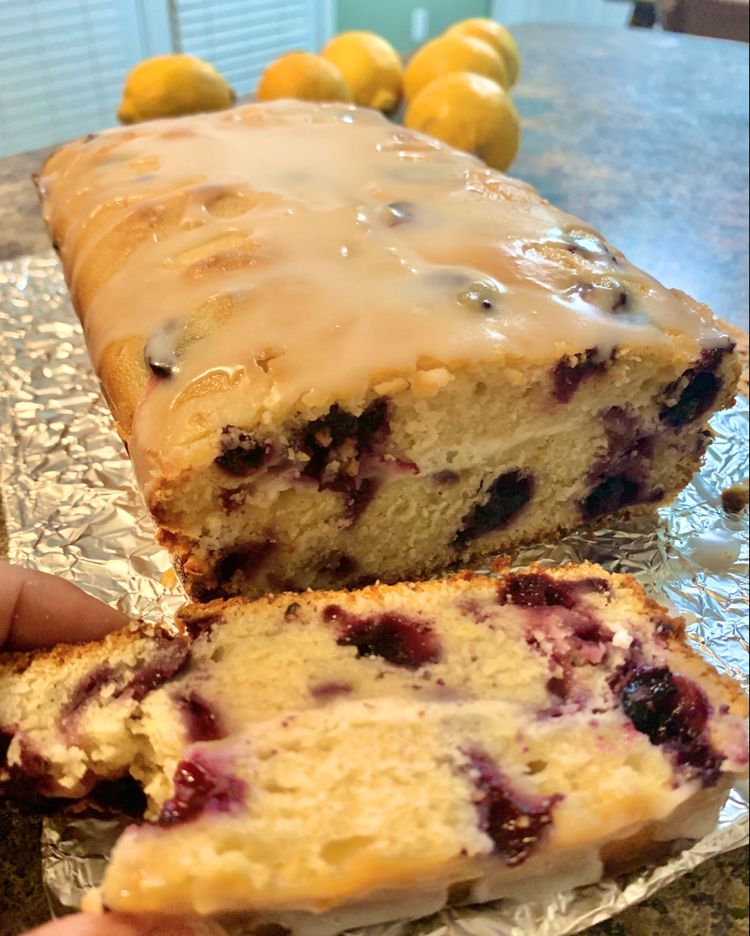
Cream Cheese-Filled Blueberry Lemon Bread

by Rebecca September 28, 2020
written by Rebecca

PREP TIME: 20 MINS | COOK TIME: 1 hr | TOTAL TIME: 1 HR 20 MINS | SERVINGS: 12

Enjoy all the goodness of spring with this sweet, tangy bread, filled with delicious blueberries and decadent cream cheese swirl! Treat yourself with a slice of this gloriously scrumptious treat and taste the freshness of lemon in every bite made extra special with an indulgent cream cheese swirl and loads of blueberries.

Ingredients

1/4 cup canola oil

1 cup sugar 200g

2 large eggs

1 cup plain 0% Greek yoghurt

1 teaspoon vanilla

juice of 1 lemon

1 1/2 cups all-purpose flour 188g

2 teaspoons baking powder

1/2 teaspoon salt

zest of 2 lemons or 3, if you like things tangy!

1 cup fresh or frozen blueberries

Cream Cheese Layer:

4 oz cream cheese 1/2 package

1/4 cup sugar 50g

1 egg white

Glaze:

1/2 cup powdered icing sugar

1-2 tablespoons lemon juice

How to make Cream Cheese Filled Blueberry Lemon Bread

Step 1: Prepare the oven. Preheat it to 350 degrees F.

Step 2: Lightly grease an 8 x 4-inch or 9 x 5-inch glass or silicon pan.

Step 3: Add the oil and sugar in a large bowl. Whisk until combined.

Step 4: Whisk in the eggs, yoghurt, vanilla, and juice until smooth.

Step 5: Add in and mix well the flour, baking powder, salt, and lemon zest until incorporated. Then, fold in the blueberries.

Step 6: To make the cream cheese layer: Add the cream cheese, sugar, and egg white in a medium bowl. Beat using an electric mixer until smooth.

Step 7: Into the prepared loaf pan, pour about 2/3 of the bread batter. Add and evenly spread all of the cream cheese mixtures on top of the batter. And pour the rest of the bread batter over the cream cheese mixture, smoothing evenly.

Step 8: Place inside the preheated oven and bake for about 60 to 70 minutes. After 30 minutes or when the top is golden, loosely cover with foil. Check the doneness by inserting a toothpick in the centre. When it comes out clean or with little moist crumbs the bread is done.

Step 9: Remove from the oven and allow the bread to cool to room temperature. Remember that the cream cheese sets as it cools.

Step 10: Slice and serve. For any leftovers, place in the fridge for up to 4 to 5 days.

To make the Glaze:

Step 11: Slowly mix the lemon juice into the powdered icing sugar until you reached your desired consistency. Note that you might not need all of the lemon juice.

Step 12: Drizzle the glaze on top of the loaf before serving.

Nutrition Facts:

Calories: 261cal | Carbohydrates: 41g | Protein: 5g | Fat: 9g | Saturated Fat: 2g | Cholesterol: 39mg | Sodium: 149mg | Potassium: 144mg | Fiber: 1g | Sugar: 28g | Vitamin A: 173IU | Vitamin C: 2mg | Calcium: 63mg | Iron: 1mg
Cream Cheese-Filled Blueberry Lemon Bread

Rebecca PREP TIME: 20 MINS | COOK TIME: 1 hr | TOTAL TIME: 1 HR 20 MINS | SERVINGS: 12 Enjoy all the goodness of spring with this sweet, tangy bread,… Main Dish Recipes Cream Cheese-Filled Blueberry Lemon Bread European Print This
Serves: 12 Prep Time: 20 mins Cooking Time: 1 hr 1 hr
Nutrition facts: 261 calories 9 fat
Rating: 5.0/5
( 1 voted )

Ingredients

  • 1/4 cup canola oil
  • 1 cup sugar 200g
  • 2 large eggs
  • 1 cup plain 0% Greek yoghurt
  • 1 teaspoon vanilla
  • juice of 1 lemon
  • 1 1/2 cups all-purpose flour 188g
  • 2 teaspoons baking powder
  • 1/2 teaspoon salt
  • zest of 2 lemons or 3, if you like things tangy!
  • 1 cup fresh or frozen blueberries
  • Cream Cheese Layer:
  • 4 oz cream cheese 1/2 package
  • 1/4 cup sugar 50g
  • 1 egg white
  • Glaze:
  • 1/2 cup powdered icing sugar
  • 1-2 tablespoons lemon juice

Instructions

Step 1: Prepare the oven. Preheat it to 350 degrees F.

Step 2: Lightly grease an 8 x 4-inch or 9 x 5-inch glass or silicon pan.

Step 3: Add the oil and sugar in a large bowl. Whisk until combined.

Step 4: Whisk in the eggs, yoghurt, vanilla, and juice until smooth.

Step 5: Add in and mix well the flour, baking powder, salt, and lemon zest until incorporated. Then, fold in the blueberries.

Step 6: To make the cream cheese layer: Add the cream cheese, sugar, and egg white in a medium bowl. Beat using an electric mixer until smooth.

Step 7: Into the prepared loaf pan, pour about 2/3 of the bread batter. Add and evenly spread all of the cream cheese mixtures on top of the batter. And pour the rest of the bread batter over the cream cheese mixture, smoothing evenly.

Step 8: Place inside the preheated oven and bake for about 60 to 70 minutes. After 30 minutes or when the top is golden, loosely cover with foil. Check the doneness by inserting a toothpick in the centre. When it comes out clean or with little moist crumbs the bread is done.

Step 9: Remove from the oven and allow the bread to cool to room temperature. Remember that the cream cheese sets as it cools.

Step 10: Slice and serve. For any leftovers, place in the fridge for up to 4 to 5 days.

To make the Glaze:

Step 11: Slowly mix the lemon juice into the powdered icing sugar until you reached your desired consistency. Note that you might not need all of the lemon juice.

Step 12: Drizzle the glaze on top of the loaf before serving.
September 28, 2020 0 comment
0 FacebookTwitterPinterestEmail
Main Dish Recipes

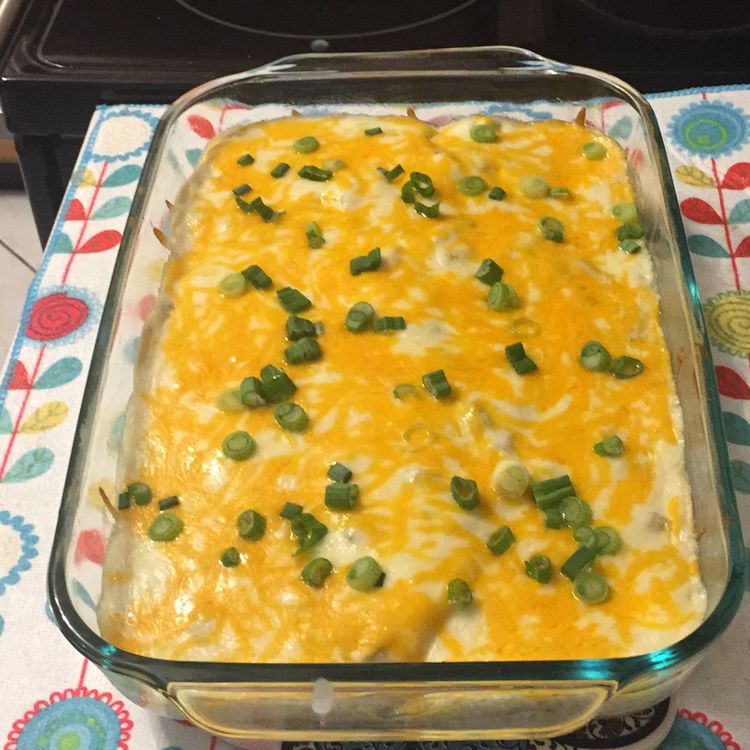
SOUR CREAM CHICKEN ENCHILADA BAKE

by Rebecca September 26, 2020
written by Rebecca

PREP TIME: 15 minutes | COOK TIME: 15 minutes | TOTAL TIME: 30 minutes

This creamy, delicious, enchilada casserole tastes heavenly. This mouthwatering meal is loaded with shredded chicken, sour cream, diced green chilis, cheese, and corn tortillas. A perfect addition to your weeknight menu that your whole family will surely love!

INGREDIENTS

3 cups shredded chicken breasts

12 corn or taco-size flour tortillas

2 cups mozzarella cheese, divided

1/4 cup butter

1/4 cup all-purpose flour

2 cups chicken broth

1 cup sour cream

1 teaspoon cumin

1 teaspoon salt

1/2 teaspoon pepper

2 4-ounce cans diced green chiles, drained

1 1/2 cups shredded cheddar cheese

2 tablespoons green onions

HOW TO MAKE SOUR CREAM CHICKEN ENCHILADA BAKE

Step 1: Prepare the oven. Preheat it to 375 degrees for flour tortillas or 350 degrees if using corn tortillas.

Step 2: In a medium saucepan, melt the butter. Once melted, stir in the flour. Pour in the broth, cook and stir until the mixture has thickened and bubbled.

Step 3: Add in the sour cream, cumin, salt, pepper, and green chiles, Stir and cook until it begins to bubble. bare in mind to not boil the mixture. Set aside.

Step 4: Then, grease a 9 x 13-inch baking dish.

Step 5: On the bottom of the prepared dish, place 6 tortillas. Slightly overlap so they can fit.

Step 6: Place the chicken over the tortillas and sprinkle with a cup of mozzarella. Add and spread half of the sour cream on top.

Step 7: Add the rest of the tortillas on top of the layers.

Step 8: Top it all up with the rest of the sour cream, mozzarella, and cheddar cheese.

Step 9: Place inside the preheated oven and bake for about 15 minutes.

Step 10: Remove from the oven and garnish with some green onions before serving. Enjoy!

NOTES:

To prepare the chicken, cook them in an instant pot. For this recipe, I used 4 pieces of thawed chicken breasts and slice them into little pieces. Then, add the pieces of chicken to the IP along with half a cup of chicken broth, 2 tbsp taco seasoning, 1 tsp cumin, and 1 tbsp chilli powder. Cover and simmer for 10 minutes. When done, instantly release the pressure and shred the chicken.

Or you may opt to use canned chicken, rotisserie chicken, or any fully cooked shredded chicken.

SOUR CREAM CHICKEN ENCHILADA BAKE

Rebecca PREP TIME: 15 minutes | COOK TIME: 15 minutes | TOTAL TIME: 30 minutes This creamy, delicious, enchilada casserole tastes heavenly. This mouthwatering meal is loaded with shredded chicken, sour… Main Dish Recipes SOUR CREAM CHICKEN ENCHILADA BAKE European Print This
Prep Time: 15 mins Cooking Time: 15 mins 15 mins
Nutrition facts: 200 calories 20 grams fat
Rating: 3.5/5
( 2 voted )

Ingredients

  • 3 cups shredded chicken breasts
  • 12 corn or taco-size flour tortillas
  • 2 cups mozzarella cheese, divided
  • 1/4 cup butter
  • 1/4 cup all-purpose flour
  • 2 cups chicken broth
  • 1 cup sour cream
  • 1 teaspoon cumin
  • 1 teaspoon salt
  • 1/2 teaspoon pepper
  • 2 4-ounce cans diced green chiles, drained
  • 1 1/2 cups shredded cheddar cheese
  • 2 tablespoons green onions

Instructions

Step 1: Prepare the oven. Preheat it to 375 degrees for flour tortillas or 350 degrees if using corn tortillas.

Step 2: In a medium saucepan, melt the butter. Once melted, stir in the flour. Pour in the broth, cook and stir until the mixture has thickened and bubbled.

Step 3: Add in the sour cream, cumin, salt, pepper, and green chiles, Stir and cook until it begins to bubble. bare in mind to not boil the mixture. Set aside.

Step 4: Then, grease a 9 x 13-inch baking dish.

Step 5: On the bottom of the prepared dish, place 6 tortillas. Slightly overlap so they can fit.

Step 6: Place the chicken over the tortillas and sprinkle with a cup of mozzarella. Add and spread half of the sour cream on top.

Step 7: Add the rest of the tortillas on top of the layers.

Step 8: Top it all up with the rest of the sour cream, mozzarella, and cheddar cheese.

Step 9: Place inside the preheated oven and bake for about 15 minutes.

Step 10: Remove from the oven and garnish with some green onions before serving. Enjoy!

NOTES:

To prepare the chicken, cook them in an instant pot. For this recipe, I used 4 pieces of thawed chicken breasts and slice them into little pieces. Then, add the pieces of chicken to the IP along with half a cup of chicken broth, 2 tbsp taco seasoning, 1 tsp cumin, and 1 tbsp chilli powder. Cover and simmer for 10 minutes. When done, instantly release the pressure and shred the chicken.

Or you may opt to use canned chicken, rotisserie chicken, or any fully cooked shredded chicken.

September 26, 2020 0 comment
0 FacebookTwitterPinterestEmail
Main Dish Recipes

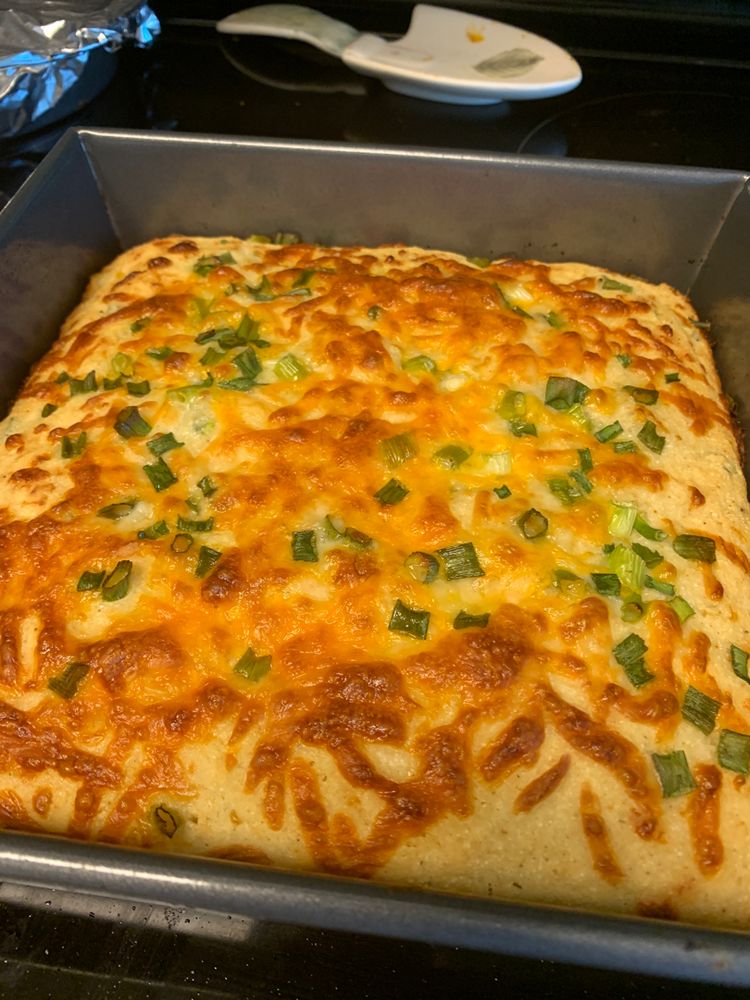
Cheesy Jalapeno Cornbread

by Rebecca September 26, 2020
written by Rebecca

Servings: 9 servings

Jazz up your usual cornbread with this amazing recipe. This cheesy jalapeno cornbread has so much flavour. It’ll turn your standard cornbread into an entirely different cornbread. Perfect to serve with soup, chilli, or salad for an over the top meal that the whole town will be talking about.

Ingredients

1 tablespoon vegetable, peanut, or canola oil

1-1/4 cups stone-ground yellow cornmeal (medium grind)

3/4 cup all-purpose flour (use half white flour and half whole wheat pastry flour)

2-1/2 teaspoons baking powder

1/2 teaspoon kosher salt

1/2 teaspoon ground black pepper

1/2 teaspoon ground cumin

1 cup + 2 tablespoons low-fat buttermilk*

1 large egg

2 tablespoons honey (optional)

3 green onions, chopped – both white and green parts (1/3 cup)

1 cup corn (fresh, canned, or frozen)

2 to 4 tablespoons minced jalapeno, depending on how much heat you want (remove seeds for less heat)

1 (4 oz.) can chop green chiles (drain any liquid)

1 1/2 cups (6 oz) shredded sharp or extra-sharp cheddar cheese (you can use full or low-fat cheese, but not fat-free)

How to make Cheesy Jalapeno Cornbread

Step 1: Grease an 8 x 8-inch pan by brushing it with oil. Place the prepared pan in a cool oven. Or use a 12-cup muffin pan or a cast-iron skillet.

Step 2: Prepare the oven. Preheat it to 400 degrees.

Step 3: In a large bowl, add the cornmeal, flour, baking powder, salt, cumin, and black pepper. Add buttermilk if desired. Whisk until incorporated.

Step 4: Add the egg, buttermilk or water, and honey in a separate bowl. Whisk until combined.

Step 5: Mix the egg mixture into the dry ingredients and stir until just combined. Remember to not overmix.

Step 6: Fold the onion, corn, jalapeno, green chiles, and cheese into the batter.

Step 7: Take the pan out of the oven. Transfer the batter into the pan and evenly spread.

Step 8: Place inside the preheated oven and bake for about 25 to 30 minutes or 18 to 20 minutes if using a 12-inch cast-iron skillet and muffin tins.

Step 9: Check the doneness by inserting a toothpick in the centre of the cornbread. When it comes out clean, it’s done baking.

Step 10: Allow cooling in the pan for at least 15 minutes to firm up for easy cutting.

Step 11: Serve and enjoy!

Notes:

Substitute the buttermilk with a cup plus 2 tbsp water and 4 tbsp plus 1 tsp dry buttermilk powder.

Nutritional information (per serving): 174 calories, 2.9g fat,1.2g sat. fat, 362mg sodium, 29g carbs, 1.9g fibre, 8.9g protein; Weight Watchers SmartPoints: 6

Cheesy Jalapeno Cornbread

Rebecca Servings: 9 servings Jazz up your usual cornbread with this amazing recipe. This cheesy jalapeno cornbread has so much flavour. It’ll turn your standard cornbread into an entirely different cornbread.… Main Dish Recipes Cheesy Jalapeno Cornbread European Print This
Serves: 9
Nutrition facts: 174 calories 2.9 fat
Rating: 5.0/5
( 1 voted )

Ingredients

  • 1 tablespoon vegetable, peanut, or canola oil
  • 1-1/4 cups stone-ground yellow cornmeal (medium grind)
  • 3/4 cup all-purpose flour (use half white flour and half whole wheat pastry flour)
  • 2-1/2 teaspoons baking powder
  • 1/2 teaspoon kosher salt
  • 1/2 teaspoon ground black pepper
  • 1/2 teaspoon ground cumin
  • 1 cup + 2 tablespoons low-fat buttermilk*
  • 1 large egg
  • 2 tablespoons honey (optional)
  • 3 green onions, chopped - both white and green parts (1/3 cup)
  • 1 cup corn (fresh, canned, or frozen)
  • 2 to 4 tablespoons minced jalapeno, depending on how much heat you want (remove seeds for less heat)
  • 1 (4 oz.) can chop green chiles (drain any liquid)
  • 1 1/2 cups (6 oz) shredded sharp or extra-sharp cheddar cheese (you can use full or low-fat cheese, but not fat-free)

Instructions

Step 1: Grease an 8 x 8-inch pan by brushing it with oil. Place the prepared pan in a cool oven. Or use a 12-cup muffin pan or a cast-iron skillet.

Step 2: Prepare the oven. Preheat it to 400 degrees.

Step 3: In a large bowl, add the cornmeal, flour, baking powder, salt, cumin, and black pepper. Add buttermilk if desired. Whisk until incorporated.

Step 4: Add the egg, buttermilk or water, and honey in a separate bowl. Whisk until combined.

Step 5: Mix the egg mixture into the dry ingredients and stir until just combined. Remember to not overmix.

Step 6: Fold the onion, corn, jalapeno, green chiles, and cheese into the batter.

Step 7: Take the pan out of the oven. Transfer the batter into the pan and evenly spread.

Step 8: Place inside the preheated oven and bake for about 25 to 30 minutes or 18 to 20 minutes if using a 12-inch cast-iron skillet and muffin tins.

Step 9: Check the doneness by inserting a toothpick in the centre of the cornbread. When it comes out clean, it's done baking.

Step 10: Allow cooling in the pan for at least 15 minutes to firm up for easy cutting.

Step 11: Serve and enjoy!

Notes:

Substitute the buttermilk with a cup plus 2 tbsp water and 4 tbsp plus 1 tsp dry buttermilk powder.

September 26, 2020 0 comment
0 FacebookTwitterPinterestEmail
Main Dish Recipes

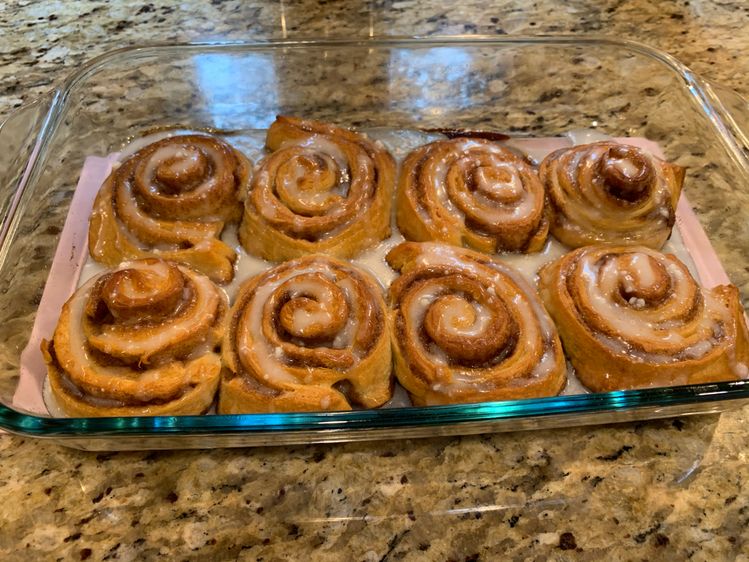
Crescent Roll Cinnamon Rolls

by Rebecca September 26, 2020
written by Rebecca

Prep Time: 10 minutes | Cook Time: 25 minutes | Servings: 6

Whip this up in less than 10 minutes using only crescent roll dough, butter, brown sugar, ground cinnamon, and powdered sugar with milk for the icing. Perfectly sweet, chewy, and delicious Crescent Roll Cinnamon Rolls. Excellent with a cup of coffee for breakfast or brunch. Serve this on your next Sunday brunch with your loved ones and friends alongside your favourite breakfast menu. And it’s going be a huge hit!

Ingredients

2 packages crescent roll dough 8 ounces each

3 tablespoons butter room temp/soft

1 cup brown sugar

½ tablespoon ground cinnamon

For icing:

1 cup powdered sugar

1 – 2 tablespoons milk

How to Make Crescent Roll Cinnamon Rolls

Step 1: Add the butter, brown sugar, and cinnamon in a bowl. Mix until combined.

Step 2: Lay the dough flat and pinch the triangle holes if needed.

Step 3: Add and evenly spread the cinnamon-sugar mixture on top of the dough.

Step 4: Then, roll the dough beginning at the shorter end.

Step 5: Slice the rolls into 6 evenly sized cinnamon rolls and transfer them in a baking dish or a large pie plate.

Step 6: Place inside the oven, positioning on the centre rack. Bake for about 25 to 30 minutes at 325 degrees F or until thoroughly cooked.

Step 7: In case the bottom is quickly cooking, transfer the dish on the lower rack for a couple of minutes.

Step 8: Meanwhile, make the glaze by whisking the powdered sugar and milk until incorporated.

Step 9: Once the rolls are done, remove from the oven and pour the glaze over the warm cinnamon buns. Enjoy!

Notes:

If you have the crescent dough sheet available, I recommend using that but not required.

You can calculate the calories based on the exact ingredients.

Nutrition Fact:

Calories: 325kcal

Crescent Roll Cinnamon Rolls

Rebecca Prep Time: 10 minutes | Cook Time: 25 minutes | Servings: 6 Whip this up in less than 10 minutes using only crescent roll dough, butter, brown sugar, ground cinnamon,… Main Dish Recipes Crescent Roll Cinnamon Rolls European Print This
Serves: 6 Prep Time: 10 mins Cooking Time: 25 mins 25 mins
Nutrition facts: 325 calories 20 grams fat
Rating: 5.0/5
( 1 voted )

Ingredients

  • 2 packages crescent roll dough 8 ounces each
  • 3 tablespoons butter room temp/soft
  • 1 cup brown sugar
  • ½ tablespoon ground cinnamon
  • For icing:
  • 1 cup powdered sugar
  • 1 - 2 tablespoons milk

Instructions

Step 1: Add the butter, brown sugar, and cinnamon in a bowl. Mix until combined.

Step 2: Lay the dough flat and pinch the triangle holes if needed.

Step 3: Add and evenly spread the cinnamon-sugar mixture on top of the dough.

Step 4: Then, roll the dough beginning at the shorter end.

Step 5: Slice the rolls into 6 evenly sized cinnamon rolls and transfer them in a baking dish or a large pie plate.

Step 6: Place inside the oven, positioning on the centre rack. Bake for about 25 to 30 minutes at 325 degrees F or until thoroughly cooked.

Step 7: In case the bottom is quickly cooking, transfer the dish on the lower rack for a couple of minutes.

Step 8: Meanwhile, make the glaze by whisking the powdered sugar and milk until incorporated.

Step 9: Once the rolls are done, remove from the oven and pour the glaze over the warm cinnamon buns. Enjoy!

Notes:

If you have the crescent dough sheet available, I recommend using that but not required.

You can calculate the calories based on the exact ingredients.

September 26, 2020 0 comment
0 FacebookTwitterPinterestEmail
Main Dish Recipes

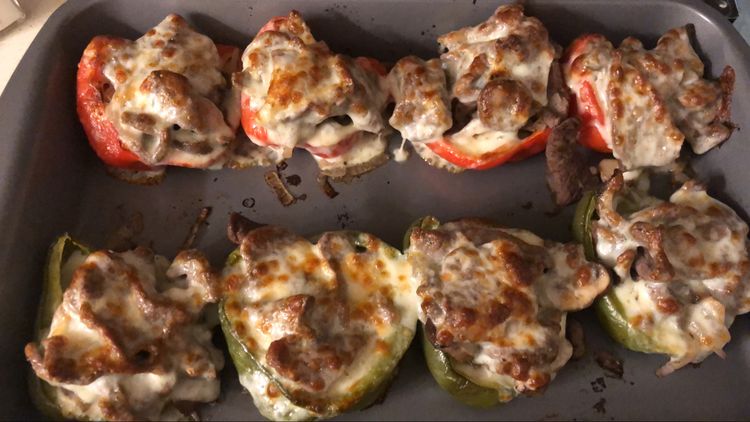
PHILLY CHEESE STEAK STUFFED PEPPERS

by Rebecca September 26, 2020
written by Rebecca

PREP TIME: 10 minutes | COOK TIME: 50 minutes | TOTAL TIME: 1-hour | YIELD: 4

This delicious low-carb meal is an excellent take to your favourite Philly Cheese Steak. Stuffed peppers are super fun to make not to mention easy and quick. With sliced roast beef, onions, peppers, mushrooms, and cheese, this dish surely soared high. It’s mouthwatering, a must-try, and to die for!

INGREDIENTS

4 large green bell peppers

16 ounces baby bells mushrooms, sliced, rough chopped

1 medium sweet onion, sliced, rough chopped

3/4 pound good quality deli roast beef, I bought a medium-rare one

3 tablespoons butter

2 cloves garlic, minced

Seasoned Salt & Seasoned Pepper to taste

8 thicker slices of Provolone Cheese, (can sub shredded Mozzarella)

HOW TO MAKE PHILLY CHEESESTEAK STUFFED PEPPERS

Step 1: Prepare the oven. Preheat it to 400 degrees.

Step 2: Remove the tops of the bell peppers and clean the inside. Chop and set aside.

Step 3: Slice the mushrooms and pepper and set aside.

Step 4: Chop the roast beef slightly and set aside.

Step 5: Using a non-stick cooking spray, grease your baking dish.

Step 6: Then, place the peppers on the prepared baking pan.

Step 7: On the bottom of the peppers, add a slice of cheese.

Step 8: Melt the butter in a skillet over medium heat. Once melted, saute the garlic, mushrooms, chopped pepper, and onion for about 20 minutes until caramelized.

Step 9: Add in the meat. Season with salt and pepper. Stir and cook for another 5 minutes.

Step 10: Evenly arrange the meat mixture between the peppers.

Step 11: Place inside the preheated oven, covered, and bake for about 20 minutes.

Step 12: Then, remove the cover and add slices of cheese on top of the peppers and continue to bake for another 10 minutes.

NUTRITION INFORMATION:

Amount Per Serving: CALORIES: 839 TOTAL FAT: 59g SATURATED FAT: 36g TRANS FAT: 0g UNSATURATED FAT: 19g CHOLESTEROL: 206mg SODIUM: 2310mg CARBOHYDRATES: 18g FIBER: 2g SUGAR: 10g PROTEIN: 61g

PHILLY CHEESE STEAK STUFFED PEPPERS

Rebecca PREP TIME: 10 minutes | COOK TIME: 50 minutes | TOTAL TIME: 1-hour | YIELD: 4 This delicious low-carb meal is an excellent take to your favourite Philly Cheese Steak.… Main Dish Recipes PHILLY CHEESE STEAK STUFFED PEPPERS European Print This
Serves: 4 Prep Time: 10 mins Cooking Time: 50 mins 50 mins
Nutrition facts: 839 calories 59 fat
Rating: 5.0/5
( 1 voted )

Ingredients

  • 4 large green bell peppers
  • 16 ounces baby bells mushrooms, sliced, rough chopped
  • 1 medium sweet onion, sliced, rough chopped
  • 3/4 pound good quality deli roast beef, I bought a medium-rare one
  • 3 tablespoons butter
  • 2 cloves garlic, minced
  • Seasoned Salt & Seasoned Pepper to taste
  • 8 thicker slices of Provolone Cheese, (can sub shredded Mozzarella)

Instructions

Step 1: Prepare the oven. Preheat it to 400 degrees.

Step 2: Remove the tops of the bell peppers and clean the inside. Chop and set aside.

Step 3: Slice the mushrooms and pepper and set aside.

Step 4: Chop the roast beef slightly and set aside.

Step 5: Using a non-stick cooking spray, grease your baking dish.

Step 6: Then, place the peppers on the prepared baking pan.

Step 7: On the bottom of the peppers, add a slice of cheese.

Step 8: Melt the butter in a skillet over medium heat. Once melted, saute the garlic, mushrooms, chopped pepper, and onion for about 20 minutes until caramelized.

Step 9: Add in the meat. Season with salt and pepper. Stir and cook for another 5 minutes.

Step 10: Evenly arrange the meat mixture between the peppers.

Step 11: Place inside the preheated oven, covered, and bake for about 20 minutes.

Step 12: Then, remove the cover and add slices of cheese on top of the peppers and continue to bake for another 10 minutes.

September 26, 2020 0 comment
0 FacebookTwitterPinterestEmail
Main Dish Recipes

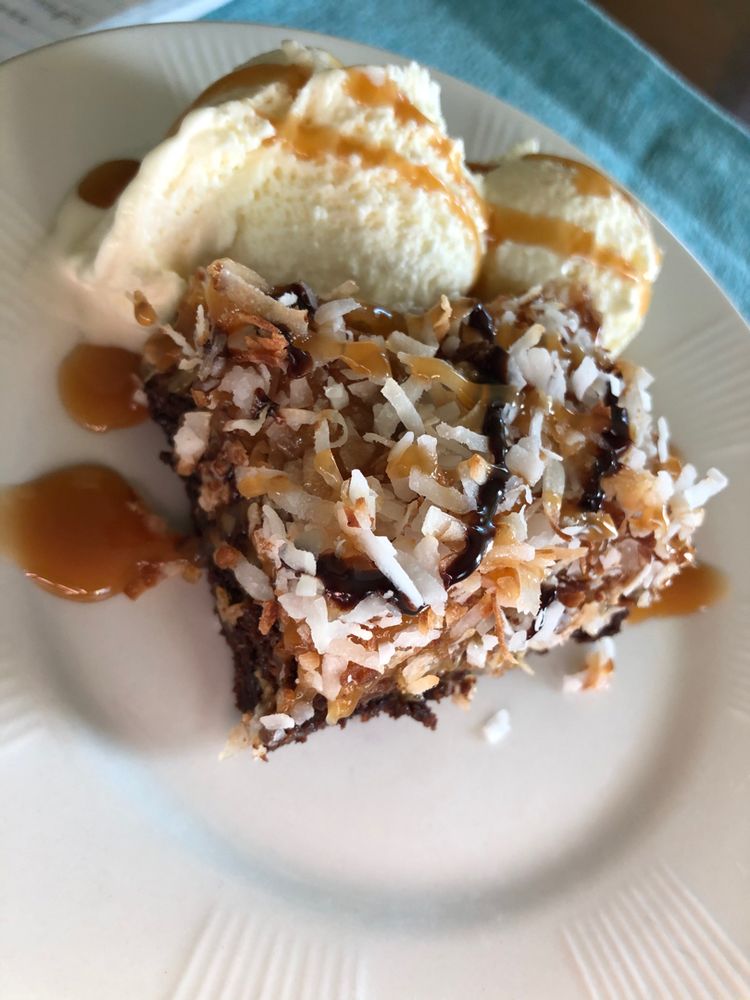
Samoa Brownies!

by Rebecca September 26, 2020
written by Rebecca

I am warning you, these brownies are addicting! With their outstanding flavours, you’d go back and forth for that second, third, up to the last piece. I will always pick dulce de leche over anything! Caramel is my weak point so you must understand now my obsession with these Samoa Brownies. Drizzle with some melted chocolate on top, chill before serving, and you are guaranteed the best tasting dessert of your life! A seriously easy and quick treat with layers of delicious goodness!

Ingredients

1 box of brownie mix (Duncan Hines is my favourite!) OR chocolate cake mix works too!

1 3.4oz can La Lechera (which is caramel flavoured condensed milk)

2 cups sweetened coconut flakes

1/4 cup evaporated milk

1/2 cup chocolate chips/melting chocolate

How to make Samoa Brownies

Step 1: According to package direction, prepare the brownies and bake in a 9 x 13-inch baking pan. Once done, remove from the oven and chill.

Step 2: On a baking sheet, add and spread the coconut.

Step 3: Bake the coconut for about 10 minutes to toast them on 350 degrees or until golden brown.

Step 4: Add the 13.4 ounces La Lechera and 1/4 cup evaporated milk in a microwave-safe dish. Cook for about 2 to 3 minutes, then, mix.

Step 5: Mix the coconut with the caramel mixture and combine well.

Step 6: Empty the caramel mixture over the cooked brownies.

Step 7: In a microwave-safe bowl, melt the chocolate chips for about 3 to 4 minutes on 50% powder. Don’t forget to stir every 40 seconds until melted.

Step 8: Fill the zip lock bag with the melted chocolate and cut the tip.

Step 9: Pipe the caramel-coated brownies on top with the melted chocolate.

Step 10: Place in the fridge to chill for at least 30 minutes before serving. Enjoy!

Samoa Brownies!

Rebecca I am warning you, these brownies are addicting! With their outstanding flavours, you’d go back and forth for that second, third, up to the last piece. I will always pick… Main Dish Recipes Samoa Brownies! European Print This
Nutrition facts: 200 calories 20 grams fat
Rating: 5.0/5
( 1 voted )

Ingredients

  • 1 box of brownie mix (Duncan Hines is my favourite!) OR chocolate cake mix works too!
  • 1 3.4oz can La Lechera (which is caramel flavoured condensed milk)
  • 2 cups sweetened coconut flakes
  • 1/4 cup evaporated milk
  • 1/2 cup chocolate chips/melting chocolate

Instructions

Step 1: According to package direction, prepare the brownies and bake in a 9 x 13-inch baking pan. Once done, remove from the oven and chill.

Step 2: On a baking sheet, add and spread the coconut.

Step 3: Bake the coconut for about 10 minutes to toast them on 350 degrees or until golden brown.

Step 4: Add the 13.4 ounces La Lechera and 1/4 cup evaporated milk in a microwave-safe dish. Cook for about 2 to 3 minutes, then, mix.

Step 5: Mix the coconut with the caramel mixture and combine well.

Step 6: Empty the caramel mixture over the cooked brownies.

Step 7: In a microwave-safe bowl, melt the chocolate chips for about 3 to 4 minutes on 50% powder. Don't forget to stir every 40 seconds until melted.

Step 8: Fill the zip lock bag with the melted chocolate and cut the tip.

Step 9: Pipe the caramel-coated brownies on top with the melted chocolate.

Step 10: Place in the fridge to chill for at least 30 minutes before serving. Enjoy!

September 26, 2020 0 comment
0 FacebookTwitterPinterestEmail
Main Dish Recipes

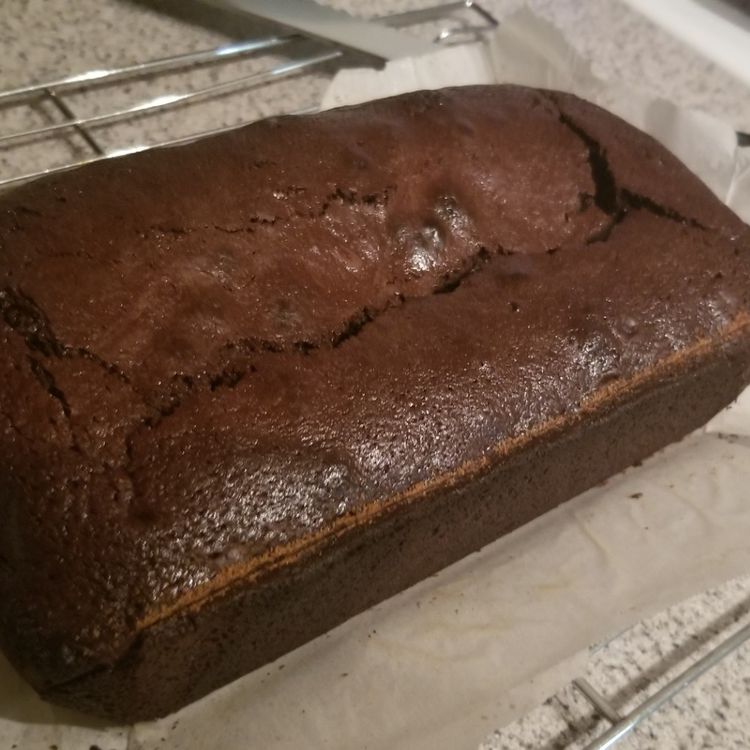
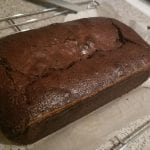
HOT FUDGE BROWNIE BREAD!

by Rebecca September 26, 2020
written by Rebecca

Introducing the Hot Fudge Brownie Bread that everyone is raving about! If you have an entire jar of hot fudge sitting in your pantry, then it’s time to make this. A pretty simple, easy, and quick drenched in chocolate bread that I am one hundred sure will be your family’s next obsession. Thick, perfectly sweet, and incredible hot fudge brownie bread that you can brag to all your friends and colleagues. Serve this gooey bread warm with a big glass of milk or coffee for breakfast. Or have a large slice for dessert. My mouth is watering just imagining the gooey drippy chocolate when you slice this bread. This is insanely addictive and you’ll be tempted not to share! Like when I made this last time, my kid never turned his back until it’s all gone! This is so good, you’ll crave for it over and over again. Some are asking if you can add in some nuts to this and it is a big fat yes! Dare to even make this in mini loaf pans and I promise it’ll be as awesome! This outrageously delicious hot fudge brownie bread is everything!

INGREDIENTS

1 box of Brownie Mix

1-11 oz. jar of Hot Fudge Sauce

3 large Eggs

1/3 cup Vegetable Oil

A bread loaf pan

HOW TO MAKE HOT FUDGE BROWNIE BREAD

Step 1: Add the brownie mix, hot fudge sauce, eggs, and vegetable oil in a medium bowl. Combine until smooth.

Step 2: Transfer the batter into a non-stick greased loaf pan until about 3/4 full.

Step 3: Place inside the oven and bake for about 45 minutes at 350 degrees or until cooked through.

Step 4: Remove from the oven and cool completely in the pan. You have to be patient or your bread will stick in the pan and your bread will lose its bottom.

HOT FUDGE BROWNIE BREAD!

Rebecca Introducing the Hot Fudge Brownie Bread that everyone is raving about! If you have an entire jar of hot fudge sitting in your pantry, then it’s time to make this.… Main Dish Recipes HOT FUDGE BROWNIE BREAD! European Print This
Nutrition facts: 200 calories 20 grams fat
Rating: 3.5/5
( 22 voted )

Ingredients

  • 1 box of Brownie Mix
  • 1-11 oz. jar of Hot Fudge Sauce
  • 3 large Eggs
  • 1/3 cup Vegetable Oil
  • A bread loaf pan

Instructions

Step 1: Add the brownie mix, hot fudge sauce, eggs, and vegetable oil in a medium bowl. Combine until smooth.

Step 2: Transfer the batter into a non-stick greased loaf pan until about 3/4 full.

Step 3: Place inside the oven and bake for about 45 minutes at 350 degrees or until cooked through.

Step 4: Remove from the oven and cool completely in the pan. You have to be patient or your bread will stick in the pan and your bread will lose its bottom.

September 26, 2020 0 comment
0 FacebookTwitterPinterestEmail
Main Dish Recipes

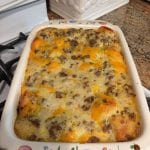
Biscuits and Gravy with Sausage and Egg Breakfast Casserole

by Rebecca September 26, 2020
written by Rebecca

Prep Time: 20 | Cook Time: 45 mins | Total Time: 65 mins (plus additional time if baking cold ingredients) | Yield: 8

This is yet another amazing breakfast casserole that you can enjoy even during lunch or dinner. Filled with biscuits, gravy, eggs, sausage, and cheese – this surely makes your mouth water! Perfect to serve when you have guests coming over for a Sunday morning breakfast.

Ingredients

8 count package of biscuit dough (we used Grands, which are slightly bigger)

6 eggs

1 (2 3/4 ounce) package peppered gravy mix (makes 2 cups)

1 lb sausage, any flavour

1 cup cheese, shredded

1/2 cup milk

salt and pepper to taste

How to make Biscuits and Gravy with Sausage and Egg Breakfast Casserole

Step 1: Prepare the oven. Preheat it to 350 degrees. And grease a 13 x 9-inch pan.

Step 2: In a skillet, cook the sausage until brown. Thoroughly drain the excess fat.

Step 3: Chip into an inch piece the biscuit dough and line them in the bottom of the pan.

Step 4: Over the biscuit pieces, layer over the cooked sausage.

Step 5: Sprinkle over the cheese.

Step 6: In a medium bowl, add the eggs, milk, salt, and pepper. Whisk until incorporated before pouring this over the layers.

Step 7: According to package instruction, make the gravy and pour all of it over the layers.

Step 8: Place inside the oven and bake for about 35 to 45 minutes or until thoroughly cooked.

Step 9: Remove from the oven and serve warm. Enjoy!

Notes:

1. This is a great make-ahead dish, too. Prepare this a night before and when ready to serve, pop in the oven and cook as directed above adding another 20 minutes. Although, you have to keep an eye to it when baking. If it starts browning too much, cover with a foil.

2. I recommend doubling the amount used to make the gravy.

Biscuits and Gravy with Sausage and Egg Breakfast Casserole

Rebecca Prep Time: 20 | Cook Time: 45 mins | Total Time: 65 mins (plus additional time if baking cold ingredients) | Yield: 8 This is yet another amazing breakfast casserole… Main Dish Recipes Biscuits and Gravy with Sausage and Egg Breakfast Casserole European Print This
Serves: 8 Prep Time: 20 mins Cooking Time: 45 mins 45 mins
Nutrition facts: 200 calories 20 grams fat
Rating: 3.1/5
( 39 voted )

Ingredients

  • 8 count package of biscuit dough (we used Grands, which are slightly bigger)
  • 6 eggs
  • 1 (2 3/4 ounce) package peppered gravy mix (makes 2 cups)
  • 1 lb sausage, any flavour
  • 1 cup cheese, shredded
  • 1/2 cup milk
  • salt and pepper to taste

Instructions

Step 1: Prepare the oven. Preheat it to 350 degrees. And grease a 13 x 9-inch pan.

Step 2: In a skillet, cook the sausage until brown. Thoroughly drain the excess fat.

Step 3: Chip into an inch piece the biscuit dough and line them in the bottom of the pan.

Step 4: Over the biscuit pieces, layer over the cooked sausage.

Step 5: Sprinkle over the cheese.

Step 6: In a medium bowl, add the eggs, milk, salt, and pepper. Whisk until incorporated before pouring this over the layers.

Step 7: According to package instruction, make the gravy and pour all of it over the layers.

Step 8: Place inside the oven and bake for about 35 to 45 minutes or until thoroughly cooked.

Step 9: Remove from the oven and serve warm. Enjoy!

Notes:

1. This is a great make-ahead dish, too. Prepare this a night before and when ready to serve, pop in the oven and cook as directed above adding another 20 minutes. Although, you have to keep an eye to it when baking. If it starts browning too much, cover with a foil.

2. I recommend doubling the amount used to make the gravy.

September 26, 2020 0 comment
0 FacebookTwitterPinterestEmail
Main Dish Recipes

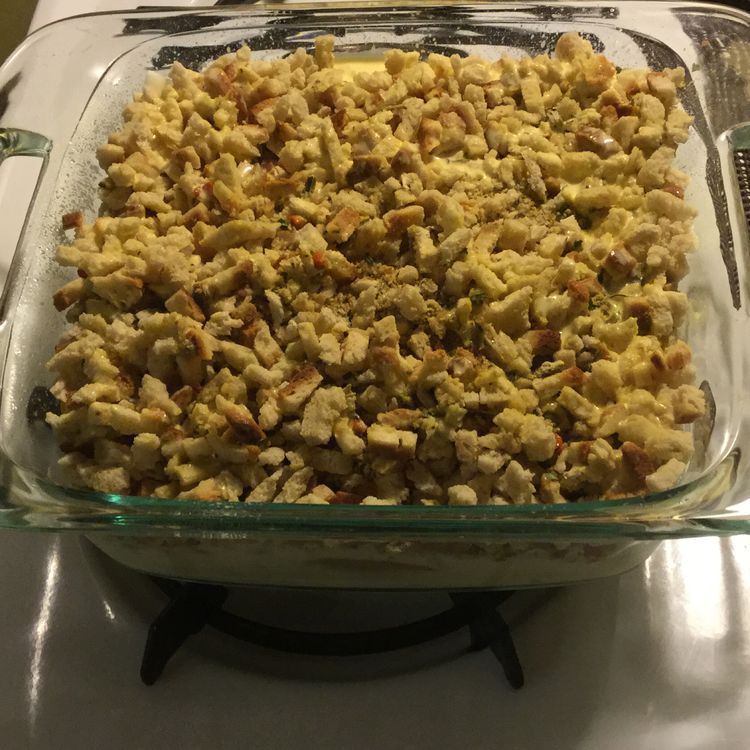
Cheesy Chicken Stuffing Casserole

by Rebecca September 26, 2020
written by Rebecca

PREP TIME: 15 mins | COOK TIME: 1 hr | TOTAL TIME: 1 hr 15 mins | SERVINGS: 6 servings

This no-fuss casserole is going to be your next perfect quick weeknight recipe – tender and juicy chicken breasts topped with cheese and stuffing. What else can you ask for? A hearty, mouthwatering, and bursting with flavours dish that will undoubtedly impress your loved ones. The best of the best comfort food that you can whip up in no time. Craving for a little stuffing? Give this casserole a try and I’m pretty sure that you’ll make this over and over. And the cheesy action going on is to die for! Grab a fork and get ready to be wowed!

INGREDIENTS

1 10.75 oz can cream of chicken soup

1/2 c. milk

1 8 oz package Mozzarella cheese slices

2 c. dry stuffing mix

1/2 c. butter melted

1 lb boneless skinless chicken breasts

How to make Cheesy Chicken Stuffing Casserole

Step 1: Prepare the oven. Preheat it to 350 degrees.

Step 2: Add the milk and cream of chicken soup in a medium mixing bowl. Mix until incorporated.

Step 3: In an 8 x 8-inch glass baking dish, layer the chicken breasts.

Step 4: Empty the chicken soup mixture over the chicken breasts.

Step 5: Place the cheese on top of the chicken breasts and sprinkle over the stuffing.

Step 6: Drizzle the butter over the layers.

Step 7: Place inside the preheated oven and bake for about an hour or until the chicken is thoroughly cooked and the stuffing turned golden brown.

NUTRITION FACTS:

Calories: 681kcal | Carbohydrates: 65g | Protein: 35g | Fat: 29g | Saturated Fat: 16g | Cholesterol: 120mg | Sodium: 1935mg | Potassium: 559mg | Fiber: 2g | Sugar: 8g | Vitamin A: 830IU | Vitamin C: 0.9mg | Calcium: 412mgIron: 3.9mg

Cheesy Chicken Stuffing Casserole

Rebecca PREP TIME: 15 mins | COOK TIME: 1 hr | TOTAL TIME: 1 hr 15 mins | SERVINGS: 6 servings This no-fuss casserole is going to be your next perfect… Main Dish Recipes Cheesy Chicken Stuffing Casserole European Print This
Serves: 6 Prep Time: 15 mins Cooking Time: 1 hr 1 hr
Nutrition facts: 681 calories 29 fat
Rating: 5.0/5
( 1 voted )

Ingredients

  • 1 10.75 oz can cream of chicken soup
  • 1/2 c. milk
  • 1 8 oz package Mozzarella cheese slices
  • 2 c. dry stuffing mix
  • 1/2 c. butter melted
  • 1 lb boneless skinless chicken breasts

Instructions

Step 1: Prepare the oven. Preheat it to 350 degrees.

Step 2: Add the milk and cream of chicken soup in a medium mixing bowl. Mix until incorporated.

Step 3: In an 8 x 8-inch glass baking dish, layer the chicken breasts.

Step 4: Empty the chicken soup mixture over the chicken breasts.

Step 5: Place the cheese on top of the chicken breasts and sprinkle over the stuffing.

Step 6: Drizzle the butter over the layers.

Step 7: Place inside the preheated oven and bake for about an hour or until the chicken is thoroughly cooked and the stuffing turned golden brown.

September 26, 2020 0 comment
0 FacebookTwitterPinterestEmail
Main Dish Recipes

ULTIMATE CHICKEN CASSEROLE

by Rebecca September 26, 2020
written by Rebecca

Prep Time: 10 minutes | Cook Time: 30 minutes | Servings: 8

A fully loaded casserole with tender noodles, shredded chicken, bacon, corn, and a lot more! I’m loving this ultimate chicken casserole with mouthwatering flavours that just burst in your mouth! This dish is perfect to use up your leftovers. Rummage your fridge and I’m sure you’ll find what you need to make this amazing casserole. A no fussy dish that you can easily throw together – simple, delicious, kid-friendly, and can feed the crowd. This one-pan meal is going be an excellent rotation to your weeknight menu. This is worth the try and a keeper!

Ingredients

2 cups egg noodles, cooked

2 cups chicken, cooked/shredded

2 cups corn (frozen or canned)

1 cup milk

2 cans cream of chicken soup *10 oz cans

1 onion, diced

1 tbsp garlic, minced

1/2 cup cheese, shredded (cheddar or any type)

1/2 cup bacon, cooked/chopped

3/4 cup French fried onions

salt/pepper (to taste)

How to make ULTIMATE Chicken Casserole

Step 1: Prepare the oven. Preheat it to 350 degrees.

Step 2: Using a cooking spray, grease a 9 x 13-inch pan.

Step 3: Combine the cooked pasta, chicken, corn, milk, cream of chicken, onion, garlic, cheese, bacon, salt, and pepper in a medium bowl.

Step 4: Transfer the mixture into the prepared pan.

Step 5: Evenly sprinkle over the French-fried onions.

Step 6: Put the pan in the preheated oven and bake for approximately 30 minutes.

Step 7: Take the pan out of the oven and serve the casserole warm. Enjoy!

Nutrition Facts:

Fat 17g26% | Saturated Fat 5g31% | Cholesterol 49mg16% | Sodium 927mg40% | Potassium 312mg9% | Carbohydrates 30g10% | Fiber 3g13% | Sugar 5g6% | Protein 21g42% | Vitamin A 351IU7% | Vitamin C 4mg5% | Calcium 108mg11% | Iron 2mg11%

ULTIMATE CHICKEN CASSEROLE

Rebecca Prep Time: 10 minutes | Cook Time: 30 minutes | Servings: 8 A fully loaded casserole with tender noodles, shredded chicken, bacon, corn, and a lot more! I’m loving this… Main Dish Recipes ULTIMATE CHICKEN CASSEROLE European Print This
Serves: 8 Prep Time: 10 mins Cooking Time: 30 mins 30 mins
Nutrition facts: 200 calories 17 fat
Rating: 5.0/5
( 1 voted )

Ingredients

  • 2 cups egg noodles, cooked
  • 2 cups chicken, cooked/shredded
  • 2 cups corn (frozen or canned)
  • 1 cup milk
  • 2 cans cream of chicken soup *10 oz cans
  • 1 onion, diced
  • 1 tbsp garlic, minced
  • 1/2 cup cheese, shredded (cheddar or any type)
  • 1/2 cup bacon, cooked/chopped
  • 3/4 cup French fried onions
  • salt/pepper (to taste)

Instructions

Step 1: Prepare the oven. Preheat it to 350 degrees.

Step 2: Using a cooking spray, grease a 9 x 13-inch pan.

Step 3: Combine the cooked pasta, chicken, corn, milk, cream of chicken, onion, garlic, cheese, bacon, salt, and pepper in a medium bowl.

Step 4: Transfer the mixture into the prepared pan.

Step 5: Evenly sprinkle over the French-fried onions.

Step 6: Put the pan in the preheated oven and bake for approximately 30 minutes.

Step 7: Take the pan out of the oven and serve the casserole warm. Enjoy!

September 26, 2020 0 comment
0 FacebookTwitterPinterestEmail
Newer Posts
Older Posts

Popular Posts

  • 1

    Crispy Crunchy Parmesan Potatoes

    March 21, 2020
  • 2

    CROCK POT SMOTHERED PORK CHOPS

    March 21, 2020
  • Facebook
  • Twitter

@2019 - All Right Reserved.


Back To Top