Cook it once
  • Home
  • Privacy Policy
  • Recipes
    • KETO
    • LC
    • WW
  • Tips
  • Contact
Cook it once
  • Home
  • Privacy Policy
  • Recipes
    • KETO
    • LC
    • WW
  • Tips
  • Contact
Category:

Main Dish Recipes

Main Dish Recipes

French Silk Pie Recipe (Chocolate Silk Pie)

by Rebecca October 2, 2020
written by Rebecca

Prep Time: 45 minutes | Cook Time: 15 minutes | Chilling time: 8 hours | Servings: 12 Servings

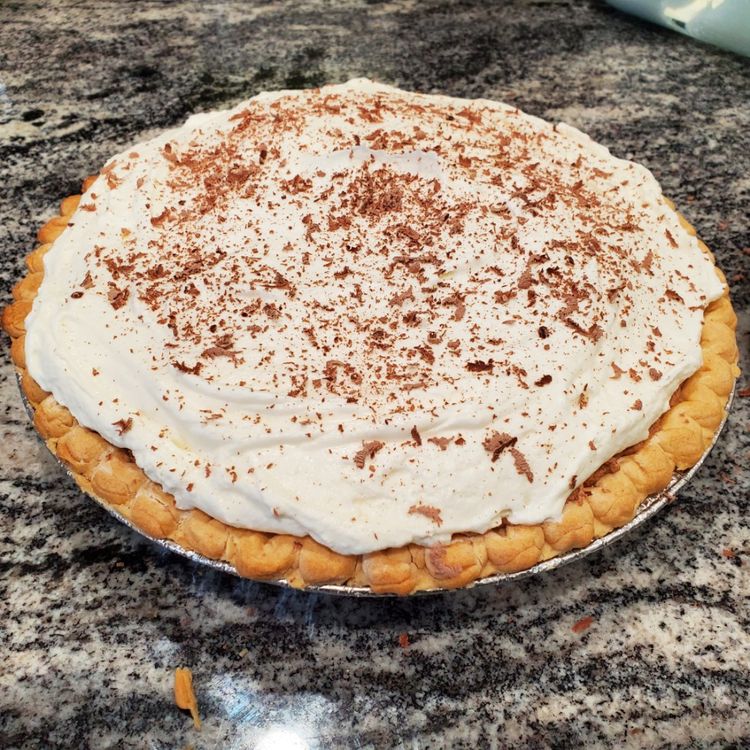
This French Silk Pie has a beautiful flaky crust filled with heavenly chocolate cream filling and topped with homemade whipped cream. A made from a scratch pie that you never know is possible! The process might look a bit too long but it’s all worth it!

Ingredients

Crust:

1 ¼ cups all-purpose flour

¼ tsp sea salt

1 tbs granulated sugar

½ cup shortening chilled

3-4 tbs ice water

Chocolate Silk Pie Filling:

¾ cup butter softened

¼ cup granulated sugar

1 cup powdered sugar

4 oz semi-sweet chocolate melted

1 tsp pure vanilla extract

Pinch of sea salt

3 eggs room temperature

¾ cup whipping cream whipped (measured in a liquid state, then whipped)

Whipped topping:

1 ¼ cups whipping cream measured in a liquid state, then whipped

½ cup powdered sugar

1 tsp pure vanilla extract

How to make French Silk Pie (Chocolate Silk Pie)

To make the Crust:

Step 1: In a food processor, put the flour, salt, and sugar. Pulse until incorporated.

Step 2: Add the shortening into the food processor followed by cold water. Combine until it resembles a coarse meal and the mixture starts to stick together and join when pinched.

Step 3: Grab the crumbly dough and form it into a ball.

Step 4: Wrap the ball-shaped dough in a plastic wrap and place in the fridge to set for about an hour or overnight.

Step 5: Once the dough is almost chilled, prepare the oven. Preheat it to 450 degrees F.

Step 6: Take the dough out of the fridge and on a well-floured surface or pastry cloth, roll the dough out.

Step 7: Transfer the dough in a deep 9-inch round pie plate. To form a crust, pinch the edges of the dough.

Step 8: Use a fork to pierce the dough or add pie weights over the crust.

Step 9: Place inside the preheated oven and bake for about 10 to 12 minutes or until the dough starts to brown. Deflate any bubbles that might form using a fork or sharp knife.

Step 10: Remove from the oven and allow to cool. Expedite the cooling process by setting the crust out on a cold day or the fridge.

To make Whipped Cream for the filling:

Step 1: In a standing mixer with a wire whisk attachment, add 3/4 whipping cream and whip on high until stiff peaks form.

Step 2: Place the whipped cream into an airtight container and store in the fridge.

To make the Whipped Topping:

Step 1: In a mixing bowl, add 1 1/2 whipping cream, powdered sugar, and vanilla. Beat on low speed using a standing mixer. Once the mixture starts to thicken, adjust the speed to high and beat for about 1 to 2 minutes or until stiff peaks form.

Step 2: Put in a different bowl or a large piping bag and place in the fridge.

To make the Chocolate Filling:

Step 1: Put the chocolate in the microwave to melt or over a double boiler. Hardly stirring until smooth. Set the melted chocolate aside and allow to cool.

Step 2: Using an electric mixer, cream the butter, sugar, powdered sugar, and vanilla for about 3 minutes or until the sugar is melted and the mixture turned light and fluffy.

Step 3: Add in the melted chocolate. Beat for about 60 seconds. And once halfway through, scrape down the sides.

Step 4: Crack the eggs one at a time, beating every after each addition for 2 minutes on medium speed.

Step 5: Lastly, fold in 3/4 cup whipping cream until the mixture is smooth.

To Assemble the French Silk Pie:

Step 1: Begin by spreading the chocolate filling evenly into the baked and cooled pie crust.

Step 2: Then, top with whipped cream by either spreading it over the pie using a spatula or piping on top to create a beautiful design.

Step 3: Chill in the fridge for about 4 hours or overnight.

Notes:

To freeze:  Put the constructed French Silk Pie in the freezer. It should be on a flat surface with lots of space to make sure the cake doesn’t get knocked while the whipped cream is still soft.

Place in the freezer for at least 2 hours or until the frosting is solid.

The pie can be frozen for up to 2 months, just wrap the cake tightly with a plastic wrap.

And to thaw:  All you need is to transfer the pie to the refrigerator for at least 24 hours before serving. Or thaw at room temperature, the downside is the risk of getting the pie too warm.

French Silk Pie Recipe (Chocolate Silk Pie)

Rebecca Prep Time: 45 minutes | Cook Time: 15 minutes | Chilling time: 8 hours | Servings: 12 Servings This French Silk Pie has a beautiful flaky crust filled with heavenly… Main Dish Recipes French Silk Pie Recipe (Chocolate Silk Pie) European Print This
Serves: 12 Prep Time: 45 mins Cooking Time: 15 mins 15 mins
Nutrition facts: 200 calories 20 grams fat
Rating: 5.0/5
( 1 voted )

Ingredients

  • Crust:
  • 1 ¼ cups all-purpose flour
  • ¼ tsp sea salt
  • 1 tbs granulated sugar
  • ½ cup shortening chilled
  • 3-4 tbs ice water
  • Chocolate Silk Pie Filling:
  • ¾ cup butter softened
  • ¼ cup granulated sugar
  • 1 cup powdered sugar
  • 4 oz semi-sweet chocolate melted
  • 1 tsp pure vanilla extract
  • Pinch of sea salt
  • 3 eggs room temperature
  • ¾ cup whipping cream whipped (measured in a liquid state, then whipped)
  • Whipped topping:
  • 1 ¼ cups whipping cream measured in a liquid state, then whipped
  • ½ cup powdered sugar
  • 1 tsp pure vanilla extract

Instructions

To make the Crust:

Step 1: In a food processor, put the flour, salt, and sugar. Pulse until incorporated.

Step 2: Add the shortening into the food processor followed by cold water. Combine until it resembles a coarse meal and the mixture starts to stick together and join when pinched.

Step 3: Grab the crumbly dough and form it into a ball.

Step 4: Wrap the ball-shaped dough in a plastic wrap and place in the fridge to set for about an hour or overnight.

Step 5: Once the dough is almost chilled, prepare the oven. Preheat it to 450 degrees F.

Step 6: Take the dough out of the fridge and on a well-floured surface or pastry cloth, roll the dough out.

Step 7: Transfer the dough in a deep 9-inch round pie plate. To form a crust, pinch the edges of the dough.

Step 8: Use a fork to pierce the dough or add pie weights over the crust.

Step 9: Place inside the preheated oven and bake for about 10 to 12 minutes or until the dough starts to brown. Deflate any bubbles that might form using a fork or sharp knife.

Step 10: Remove from the oven and allow to cool. Expedite the cooling process by setting the crust out on a cold day or the fridge.

To make Whipped Cream for the filling:

Step 1: In a standing mixer with a wire whisk attachment, add 3/4 whipping cream and whip on high until stiff peaks form.

Step 2: Place the whipped cream into an airtight container and store in the fridge.

To make the Whipped Topping:

Step 1: In a mixing bowl, add 1 1/2 whipping cream, powdered sugar, and vanilla. Beat on low speed using a standing mixer. Once the mixture starts to thicken, adjust the speed to high and beat for about 1 to 2 minutes or until stiff peaks form.

Step 2: Put in a different bowl or a large piping bag and place in the fridge.

To make the Chocolate Filling:

Step 1: Put the chocolate in the microwave to melt or over a double boiler. Hardly stirring until smooth. Set the melted chocolate aside and allow to cool.

Step 2: Using an electric mixer, cream the butter, sugar, powdered sugar, and vanilla for about 3 minutes or until the sugar is melted and the mixture turned light and fluffy.

Step 3: Add in the melted chocolate. Beat for about 60 seconds. And once halfway through, scrape down the sides.

Step 4: Crack the eggs one at a time, beating every after each addition for 2 minutes on medium speed.

Step 5: Lastly, fold in 3/4 cup whipping cream until the mixture is smooth.

To Assemble the French Silk Pie:

Step 1: Begin by spreading the chocolate filling evenly into the baked and cooled pie crust.

Step 2: Then, top with whipped cream by either spreading it over the pie using a spatula or piping on top to create a beautiful design.

Step 3: Chill in the fridge for about 4 hours or overnight.

Notes:

To freeze:  Put the constructed French Silk Pie in the freezer. It should be on a flat surface with lots of space to make sure the cake doesn't get knocked while the whipped cream is still soft.

Place in the freezer for at least 2 hours or until the frosting is solid.

The pie can be frozen for up to 2 months, just wrap the cake tightly with a plastic wrap.

And to thaw:  All you need is to transfer the pie to the refrigerator for at least 24 hours before serving. Or thaw at room temperature, the downside is the risk of getting the pie too warm.
October 2, 2020 0 comment
0 FacebookTwitterPinterestEmail
Main Dish Recipes

Christmas Tree Spinach Dip Breadsticks

by Rebecca October 1, 2020
written by Rebecca

Prep Time: 30 mins | Servings: 20

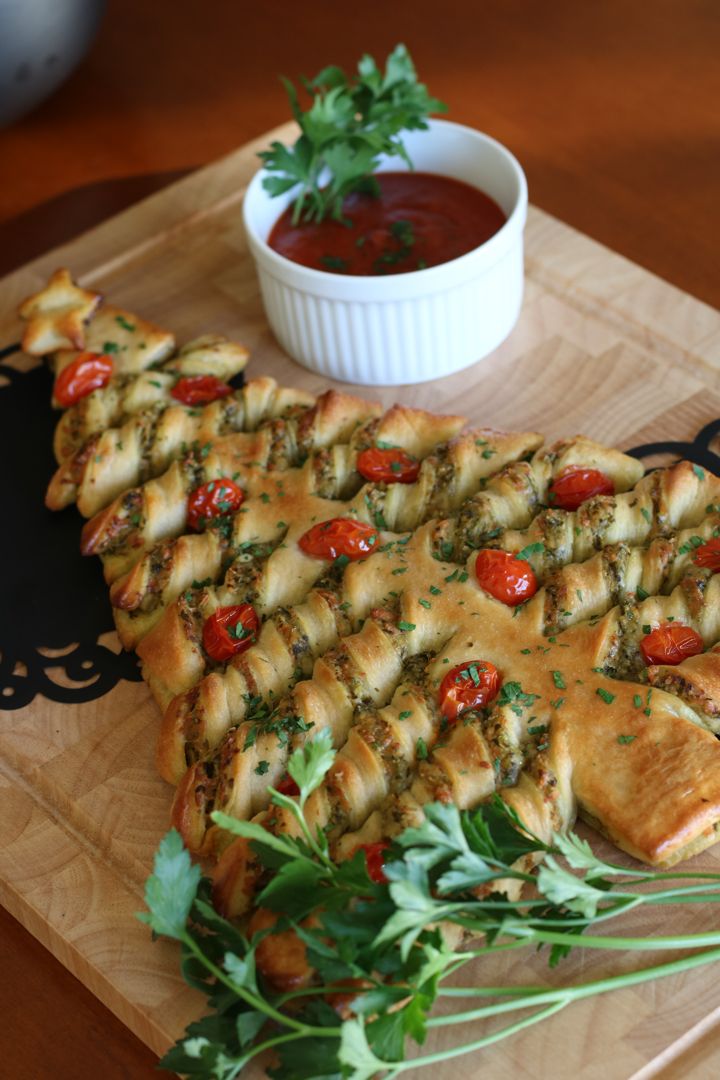
This is super cool! Christmas Tree Spinach Dip Breadsticks – delicious, looks complicated but surprisingly easy and fun to make! Perfect for the holiday. Impress your guests with this stuffed breadsticks in a Christmas Tree!

Ingredients

12 oz Frozen chopped spinach thawed and squeezed dry

6 oz cream cheese softened

2 cloves garlic, minced

1/2 teaspoon salt

1/2 teaspoon onion powder

1/4 teaspoon chilli powder

1/4 teaspoon pepper

1 teaspoon Italian seasoning

1/2 cup grated parmesan cheese

1 cup grated cheddar OR mozzarella cheese

1 tube refrigerated thin crust pizza crust

2 tablespoons butter

1/2 teaspoon Italian seasoning

1/2 teaspoon garlic salt

How to make Christmas Tree Spinach Dip Breadsticks

Step 1: Prepare the oven. Preheat it to 400 degrees.

Step 2: Add the spinach and cream cheese in a bowl. Beat well.

Step 3: Stir in the garlic, salt, onion powder, chilli powder, pepper, and Italian seasoning until combined.

Step 4: Then, add in the parmesan cheese and half of the cheddar or mozzarella cheese. Beat again until incorporated.

Step 5: Dispense the mixture onto a triangle-shaped pizza crust (unroll a pizza crust on a parchment paper and with a pizza cutter shape it like a Christmas tree).

Step 6: Top with another triangle-shaped pizza crust. Slicing from the middle to the edge leaving about an inch room per slices. Make sure to not slice all the way, we aim that the tree stays intact in the middle. Then, twist each slice to form a tree.

Step 7: Place in the preheated oven. Bake for approximately 22 minutes or until the top is almost golden brown and the bottom is cooked through.

Step 8: Meanwhile, melt the butter. Once melted, stir in the garlic salt and seasoning.

Step 9: Remove the Breadsticks from the oven and brush entirely with melted butter mixture.

Step 10: Serve warm. Enjoy!

Christmas Tree Spinach Dip Breadsticks

Rebecca Prep Time: 30 mins | Servings: 20 This is super cool! Christmas Tree Spinach Dip Breadsticks – delicious, looks complicated but surprisingly easy and fun to make! Perfect for the… Main Dish Recipes Christmas Tree Spinach Dip Breadsticks European Print This
Serves: 20 Prep Time: 30 mins
Nutrition facts: 200 calories 20 grams fat
Rating: 5.0/5
( 1 voted )

Ingredients

  • 12 oz Frozen chopped spinach thawed and squeezed dry
  • 6 oz cream cheese softened
  • 2 cloves garlic, minced
  • 1/2 teaspoon salt
  • 1/2 teaspoon onion powder
  • 1/4 teaspoon chilli powder
  • 1/4 teaspoon pepper
  • 1 teaspoon Italian seasoning
  • 1/2 cup grated parmesan cheese
  • 1 cup grated cheddar OR mozzarella cheese
  • 1 tube refrigerated thin crust pizza crust
  • 2 tablespoons butter
  • 1/2 teaspoon Italian seasoning
  • 1/2 teaspoon garlic salt

Instructions

Step 1: Prepare the oven. Preheat it to 400 degrees.

Step 2: Add the spinach and cream cheese in a bowl. Beat well.

Step 3: Stir in the garlic, salt, onion powder, chilli powder, pepper, and Italian seasoning until combined.

Step 4: Then, add in the parmesan cheese and half of the cheddar or mozzarella cheese. Beat again until incorporated.

Step 5: Dispense the mixture onto a triangle-shaped pizza crust (unroll a pizza crust on a parchment paper and with a pizza cutter shape it like a Christmas tree).

Step 6: Top with another triangle-shaped pizza crust. Slicing from the middle to the edge leaving about an inch room per slices. Make sure to not slice all the way, we aim that the tree stays intact in the middle. Then, twist each slice to form a tree.

Step 7: Place in the preheated oven. Bake for approximately 22 minutes or until the top is almost golden brown and the bottom is cooked through.

Step 8: Meanwhile, melt the butter. Once melted, stir in the garlic salt and seasoning.

Step 9: Remove the Breadsticks from the oven and brush entirely with melted butter mixture.

Step 10: Serve warm. Enjoy!

October 1, 2020 0 comment
0 FacebookTwitterPinterestEmail
Main Dish Recipes

GRANDMA’S OLD FASHIONED GOULASH

by Rebecca October 1, 2020
written by Rebecca

Yield: 10 SERVINGS

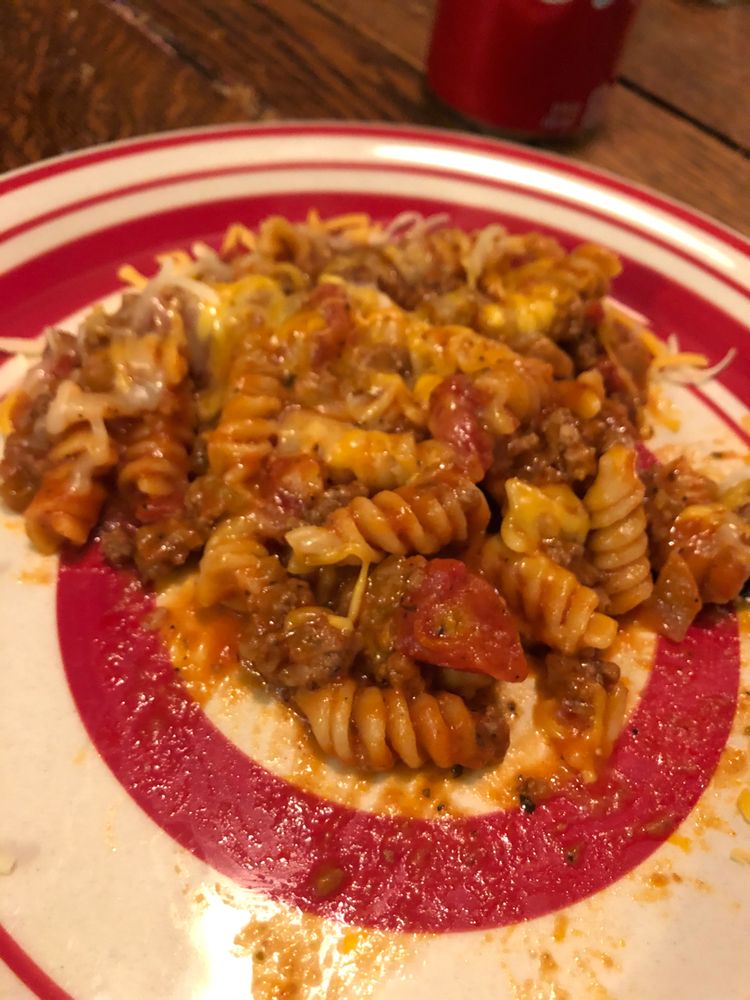
I love a warm and comforting bowl of Goulash with some melty cheddar cheese on top. This one-pot dish has everything you are asking for – red sauce, spices, pasta, and ground beef. A perfect combination that made this perfect Old fashioned Goulash like what our Grandmothers used to make. Don’t be afraid to tweak this recipe but this is awesome as is. Always a big hit, kids and adults approved, and you can never go wrong because it is pretty straightforward. Mouthwatering and tastes great as leftovers.

INGREDIENTS

2 pounds lean ground beef

2 large yellow onions, chopped

4 cloves garlic, chopped

2 cups of water

1 cup beef broth

Two 15-ounce cans tomato sauce

Two 15-ounce cans diced tomatoes

1 tablespoon Italian seasoning

1 tablespoon oregano

3 bay leaves

2 tablespoons Worcestershire sauce

½ teaspoon salt

½ teaspoon garlic powder

½ teaspoon pepper

2 cups elbow macaroni, uncooked

1 cup shredded cheddar cheese

How to make Old Fashioned Goulash

Step 1: Saute the ground beef in a dutch oven over medium-high heat. Break the meat up and cook until no longer pink. Remove excess fat.

Step 2: Add and saute the onions with the ground beef for about 5 minutes or until the onions are tender. Pour in 2 cups water and a cup of beef broth followed by the tomato sauce, tomatoes, garlic, bay leaves, Worcestershire sauce, and seasonings. Stir well before placing the lid on. Cook for 20 to 25 minutes more.

Step 3: Then, add in the macaroni and stir well. Cover and simmer for another 4 to 5 minutes or until the pasta is al dente. Don’t overcook the pasta.

Step 4: Take out of the heat and remove the bay leaves.

Step 5: Serve the Goulash warm with shredded cheddar cheese on top. Enjoy!

GRANDMA'S OLD FASHIONED GOULASH

Rebecca Yield: 10 SERVINGS I love a warm and comforting bowl of Goulash with some melty cheddar cheese on top. This one-pot dish has everything you are asking for – red… Main Dish Recipes GRANDMA’S OLD FASHIONED GOULASH European Print This
Serves: 10
Nutrition facts: 200 calories 20 grams fat
Rating: 5.0/5
( 2 voted )

Ingredients

  • 2 pounds lean ground beef
  • 2 large yellow onions, chopped
  • 4 cloves garlic, chopped
  • 2 cups of water
  • 1 cup beef broth
  • Two 15-ounce cans tomato sauce
  • Two 15-ounce cans diced tomatoes
  • 1 tablespoon Italian seasoning
  • 1 tablespoon oregano
  • 3 bay leaves
  • 2 tablespoons Worcestershire sauce
  • ½ teaspoon salt
  • ½ teaspoon garlic powder
  • ½ teaspoon pepper
  • 2 cups elbow macaroni, uncooked
  • 1 cup shredded cheddar cheese

Instructions

Step 1: Saute the ground beef in a dutch oven over medium-high heat. Break the meat up and cook until no longer pink. Remove excess fat.

Step 2: Add and saute the onions with the ground beef for about 5 minutes or until the onions are tender. Pour in 2 cups water and a cup of beef broth followed by the tomato sauce, tomatoes, garlic, bay leaves, Worcestershire sauce, and seasonings. Stir well before placing the lid on. Cook for 20 to 25 minutes more.

Step 3: Then, add in the macaroni and stir well. Cover and simmer for another 4 to 5 minutes or until the pasta is al dente. Don't overcook the pasta.

Step 4: Take out of the heat and remove the bay leaves.

Step 5: Serve the Goulash warm with shredded cheddar cheese on top. Enjoy!

October 1, 2020 0 comment
0 FacebookTwitterPinterestEmail
Main Dish Recipes

Chocolate Peanut Butter Poke Cake

by Rebecca October 1, 2020
written by Rebecca

YIELDS: 8 – 10 | PREP TIME: 15 MINS | TOTAL TIME: 50 MINS

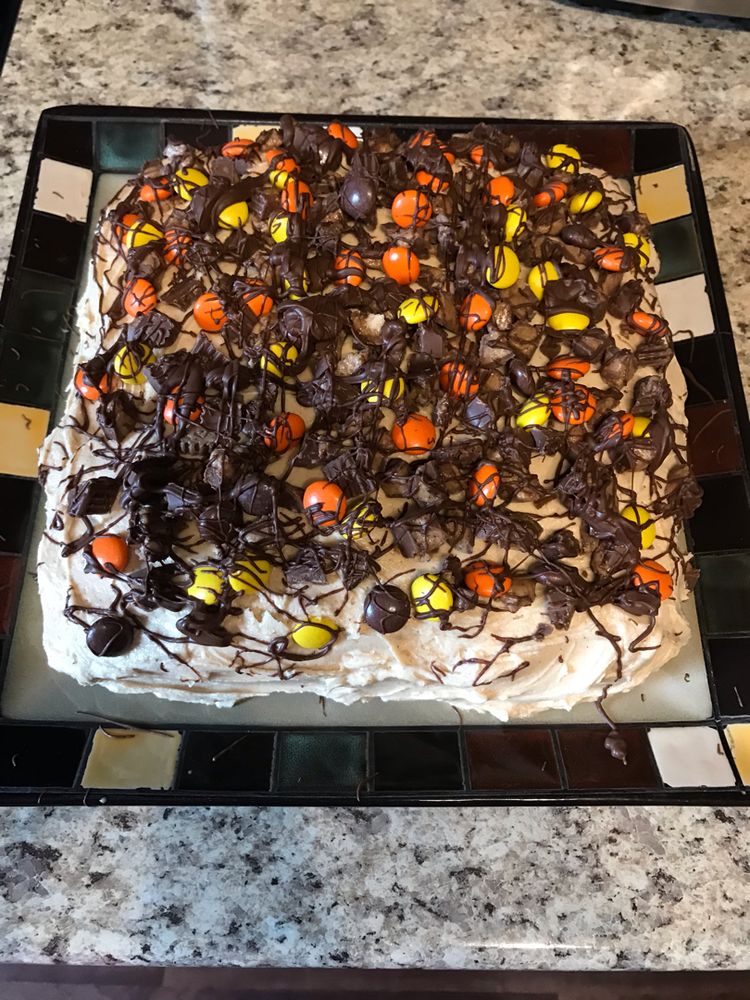
I will always pick this cake over anything else! Peanut butter and chocolate in a cake plus bits and pieces of my favourite Reese’s? Heck yes!

INGREDIENTS

CAKE:

1 box devil’s food cake, plus ingredients called for on the box

2 cups peanut butter, melted

1 cup chopped Reese’s Peanut Butter Cups

1 cup Reese’s Pieces

PEANUT BUTTER FROSTING:

1 cup peanut butter

10 tbsp. unsalted butter softened to room temperature

2 cups powdered sugar

2 tsp. pure vanilla extract

1/4 tsp. kosher salt

2 tbsp. heavy cream

How to Make a Chocolate Peanut Butter Poke Cake

To make the cake:

Step 1: Prepare the oven. Preheat it to 350 degrees.

Step 2: Using a parchment paper, line a 9 x 13-inch pan and grease with cooking spray.

Step 3: Follow the package direction the prepare the cake batter.

Step 4: Pour the batter into the prepared pan.

Step 5: Place inside the preheated oven and bake for about 25 minutes or until a toothpick inserted in the centre of the cake comes out clean.

Step 6: Remove the cake from the oven and allow to cool.

Step 7: Once completely cooled, poke holes all over the cake with the back of a wooden spoon.

Step 8: Pour over the entire cake with the melted butter to fill the holes. Set aside.

To make the Frosting:

Step 9: Add the peanut butter and butter in a large bowl. Cream with an electric mixer. Then, add in the powdered sugar, vanilla, and salt. Continue to beat until light and fluffy. To loosen the frosting, slowly mix in some cream if needed.

Step 10: Grab the cake and spread the frosting on the entire cake and top.

Step 11: Garnish with chopped Reese’s Peanut Butter Cups and Reese’s pieces on top.

Chocolate Peanut Butter Poke Cake

Rebecca YIELDS: 8 – 10 | PREP TIME: 15 MINS | TOTAL TIME: 50 MINS I will always pick this cake over anything else! Peanut butter and chocolate in a cake… Main Dish Recipes Chocolate Peanut Butter Poke Cake European Print This
Serves: 8-10 Prep Time: 15 mins Cooking Time: 35 mins 35 mins
Nutrition facts: 200 calories 20 grams fat
Rating: 5.0/5
( 1 voted )

Ingredients

  • CAKE:
  • 1 box devil's food cake, plus ingredients called for on the box
  • 2 cups peanut butter, melted
  • 1 cup chopped Reese's Peanut Butter Cups
  • 1 cup Reese's Pieces
  • PEANUT BUTTER FROSTING:
  • 1 cup peanut butter
  • 10 tbsp. unsalted butter softened to room temperature
  • 2 cups powdered sugar
  • 2 tsp. pure vanilla extract
  • 1/4 tsp. kosher salt
  • 2 tbsp. heavy cream

Instructions

To make the cake:

Step 1: Prepare the oven. Preheat it to 350 degrees.

Step 2: Using a parchment paper, line a 9 x 13-inch pan and grease with cooking spray.

Step 3: Follow the package direction the prepare the cake batter.

Step 4: Pour the batter into the prepared pan.

Step 5: Place inside the preheated oven and bake for about 25 minutes or until a toothpick inserted in the centre of the cake comes out clean.

Step 6: Remove the cake from the oven and allow to cool.

Step 7: Once completely cooled, poke holes all over the cake with the back of a wooden spoon.

Step 8: Pour over the entire cake with the melted butter to fill the holes. Set aside.

To make the Frosting:

Step 9: Add the peanut butter and butter in a large bowl. Cream with an electric mixer. Then, add in the powdered sugar, vanilla, and salt. Continue to beat until light and fluffy. To loosen the frosting, slowly mix in some cream if needed.

Step 10: Grab the cake and spread the frosting on the entire cake and top.

Step 11: Garnish with chopped Reese's Peanut Butter Cups and Reese's pieces on top.

October 1, 2020 0 comment
0 FacebookTwitterPinterestEmail
Main Dish Recipes

Super Secret Recipe For The Best Tasting Pineapple Upside Down Cake Ever

by Rebecca October 1, 2020
written by Rebecca

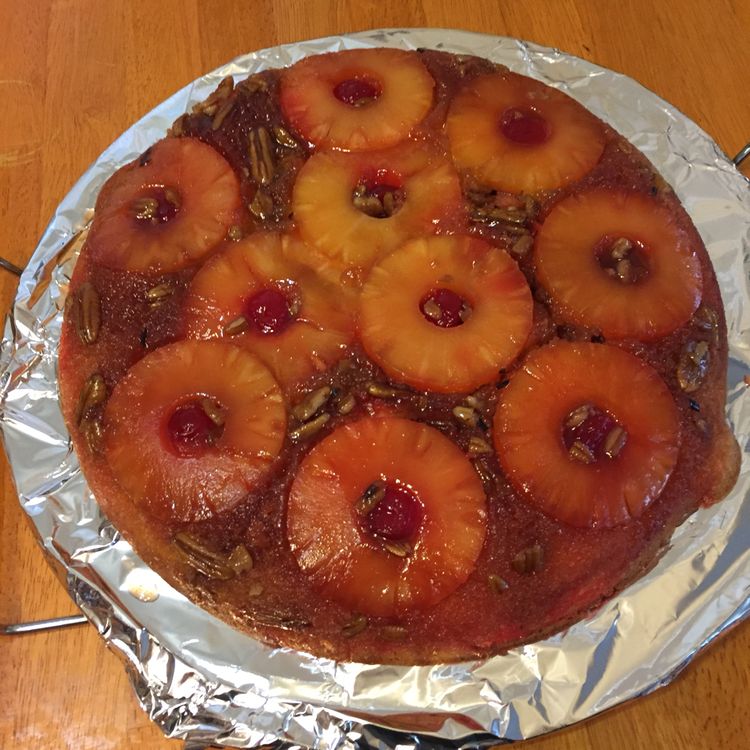
A gooey, buttery Pineapple Upside Down cake. By far, the best tasting and super moist pineapple cake in Town!

Ingredients

1 Duncan Hines Butter Golden Cake Mix

1 Stick of Butter

3 large eggs

1 1/3 cups Brown Sugar

1 20 oz. Can Pineapple Rings

1 20 oz. Can Crushed Pineapple

1 Sm Jar Maraschino Cherries

7 tbsp butter, softened

How to make Pineapple Upside Down

Step 1: Melt a stick of butter in a large 14-inch or 18-inch skillet over low heat.

Step 2: Then, turn the heat off and add in 1 1/3 cup brown sugar. Gentry stir using a spoon.

Step 3: Drain the juice and transfer the crushed pineapple in a container (reserve the juice). Do the same with the pineapple rings and place them into the same container.

Step 4: Add about 1/3 crushed pineapple into the brown sugar and butter mixture. Mix well and evenly spread on the bottom of the skillet.

Step 5: In a circle around the outer edges of the pan, add carefully the pineapple rings. Add maraschino cherry in the middle of each pineapple ring.

Step 6: Add the cake mix, 7 tbsp softened butter, 3 eggs, and half a cup reserved pineapple juice in another bowl. Pour in water (as stated in the box). Using a spoon or spatula, mix until moistened.

Step 7: Beat for about 4 minutes using a mixer at medium speed until all the lumps are gone.

Step 8: Add in the remaining drained crushed pineapple and mix gently.

Step 9: Pour the cake batter carefully on top of the pineapple rings. Make sure to not dispense the batter in the entire skillet.

Step 10: Spread evenly in an even layer.

Step 11: Place inside the oven and bake for about 85 minutes at 325 degrees.

Step 12: Once done, remove from the oven. Carefully invert the cake on a serving platter. But don’t remove the skillet yet. This will allow the brown sugar to drizzle down the cake for about 5 minutes.

Step 13: Then, remove the skillet and let the cake cool for 30 minutes.

Step 14: Serve either warm or cold. Enjoy!

Super Secret Recipe For The Best Tasting Pineapple Upside Down Cake Ever

Rebecca A gooey, buttery Pineapple Upside Down cake. By far, the best tasting and super moist pineapple cake in Town! Ingredients 1 Duncan Hines Butter Golden Cake Mix 1 Stick of… Main Dish Recipes Super Secret Recipe For The Best Tasting Pineapple Upside Down Cake Ever European Print This
Nutrition facts: 200 calories 20 grams fat
Rating: 5.0/5
( 1 voted )

Ingredients

  • 1 Duncan Hines Butter Golden Cake Mix
  • 1 Stick of Butter
  • 3 large eggs
  • 1 1/3 cups Brown Sugar
  • 1 20 oz. Can Pineapple Rings
  • 1 20 oz. Can Crushed Pineapple
  • 1 Sm Jar Maraschino Cherries
  • 7 tbsp butter, softened

Instructions

Step 1: Melt a stick of butter in a large 14-inch or 18-inch skillet over low heat.

Step 2: Then, turn the heat off and add in 1 1/3 cup brown sugar. Gentry stir using a spoon.

Step 3: Drain the juice and transfer the crushed pineapple in a container (reserve the juice). Do the same with the pineapple rings and place them into the same container.

Step 4: Add about 1/3 crushed pineapple into the brown sugar and butter mixture. Mix well and evenly spread on the bottom of the skillet.

Step 5: In a circle around the outer edges of the pan, add carefully the pineapple rings. Add maraschino cherry in the middle of each pineapple ring.

Step 6: Add the cake mix, 7 tbsp softened butter, 3 eggs, and half a cup reserved pineapple juice in another bowl. Pour in water (as stated in the box). Using a spoon or spatula, mix until moistened.

Step 7: Beat for about 4 minutes using a mixer at medium speed until all the lumps are gone.

Step 8: Add in the remaining drained crushed pineapple and mix gently.

Step 9: Pour the cake batter carefully on top of the pineapple rings. Make sure to not dispense the batter in the entire skillet.

Step 10: Spread evenly in an even layer.

Step 11: Place inside the oven and bake for about 85 minutes at 325 degrees.

Step 12: Once done, remove from the oven. Carefully invert the cake on a serving platter. But don't remove the skillet yet. This will allow the brown sugar to drizzle down the cake for about 5 minutes.

Step 13: Then, remove the skillet and let the cake cool for 30 minutes.

Step 14: Serve either warm or cold. Enjoy!

October 1, 2020 0 comment
0 FacebookTwitterPinterestEmail
Main Dish Recipes

Oven Roasted Zucchini and Squash

by Rebecca October 1, 2020
written by Rebecca

Prep Time: 5 mins | Cook Time: 10 mins | Total Time: 15 mins | Servings: 5

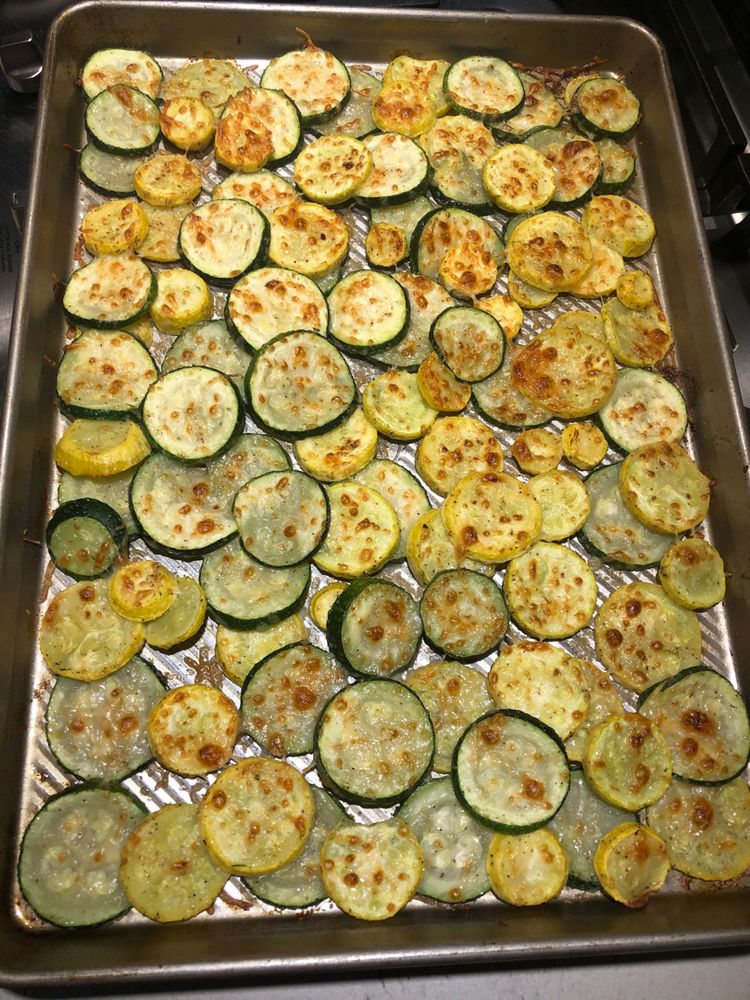
A simple and pretty easy oven roasted veggies to complete your meal tonight. Delicious and healthy, even your picky eaters will dig this. Oven Roasted Zucchini and Squash is a perfect addition to your weekly menu that your whole family will love! Bring the best out of these summer produce with a touch of seasoning and parmesan cheese. Pop in the oven and enjoy the little crunch that goes a long way.

Ingredients

2 large zucchini

2 large yellow squash

2 tsp. garlic powder

1/2 tsp ground black pepper

1/2 tsp salt or to taste

1/4 cup freshly grated parmesan cheese you can also use finely shredded parmesan cheese

2 tbsp olive oil

How to make Oven Roasted Zucchini and Squash

Step 1: Prepare the oven. Preheat it to 400 degrees.

Step 2: Into 1/4-inch round, slice the yellow squash and zucchini.

Step 3: Transfer into a large bowl the sliced zucchini and squash. Drizzle with olive oil and add in the garlic powder followed by pepper. Stir well to coat.

Step 4: On the prepared pan, spread the oiled zucchini and squash. Place the squash in a single layer if possible.

Step 5: Evenly sprinkle over the shredded cheese.

Step 6: Place in the oven and roast for approximately 9 to 10 minutes or until tender.

Step 7: Moving the pan to the top rack, adjust the oven to broil.

Step 8: Broil for about 2 to 3 minutes on high. Check on it to see if the zucchini and squash are crispy and brown the way you like it.

Step 9: Remove from the oven and serve immediately. Enjoy!

Nutrition facts:

Calories: 121kcal | Carbohydrates: 10g | Protein: 5g | Fat: 8g | Saturated Fat: 2g | Cholesterol: 4mg | Sodium: 91mg | Potassium: 699mg | Fiber: 3g | Sugar: 6g | Vitamin A: 560IU | Vitamin C: 45.1mg | Calcium: 96mg | Iron: 1.1mg

Oven Roasted Zucchini and Squash

Rebecca Prep Time: 5 mins | Cook Time: 10 mins | Total Time: 15 mins | Servings: 5 A simple and pretty easy oven roasted veggies to complete your meal tonight.… Main Dish Recipes Oven Roasted Zucchini and Squash European Print This
Serves: 5 Prep Time: 5 mins Cooking Time: 10 mins 10 mins
Nutrition facts: 121 calories 8 fat
Rating: 5.0/5
( 1 voted )

Ingredients

  • 2 large zucchini
  • 2 large yellow squash
  • 2 tsp. garlic powder
  • 1/2 tsp ground black pepper
  • 1/2 tsp salt or to taste
  • 1/4 cup freshly grated parmesan cheese you can also use finely shredded parmesan cheese
  • 2 tbsp olive oil

Instructions

Step 1: Prepare the oven. Preheat it to 400 degrees.

Step 2: Into 1/4-inch round, slice the yellow squash and zucchini.

Step 3: Transfer into a large bowl the sliced zucchini and squash. Drizzle with olive oil and add in the garlic powder followed by pepper. Stir well to coat.

Step 4: On the prepared pan, spread the oiled zucchini and squash. Place the squash in a single layer if possible.

Step 5: Evenly sprinkle over the shredded cheese.

Step 6: Place in the oven and roast for approximately 9 to 10 minutes or until tender.

Step 7: Moving the pan to the top rack, adjust the oven to broil.

Step 8: Broil for about 2 to 3 minutes on high. Check on it to see if the zucchini and squash are crispy and brown the way you like it.

Step 9: Remove from the oven and serve immediately. Enjoy!

October 1, 2020 0 comment
1 FacebookTwitterPinterestEmail
Main Dish Recipes

BAKED EASY CHEESY ZUCCHINI CASSEROLE RECIPE (ZUCCHINI GRATIN)

by Rebecca October 1, 2020
written by Rebecca

Prep Time: 10 minutes | Cook Time: 30 minutes | Total Time: 1 hour 25 minutes | Servings: 6

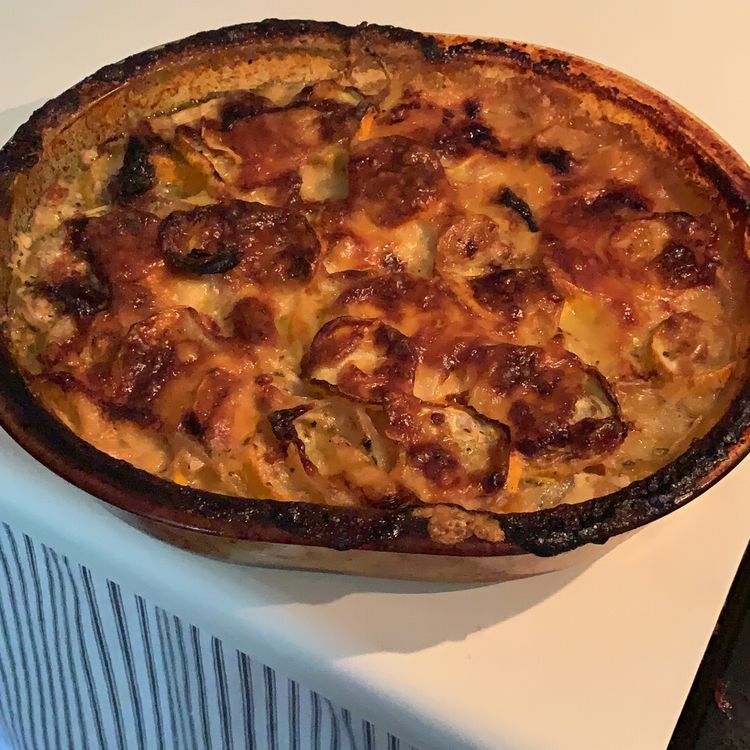
Amongst the simple few ingredients, this delicious zucchini gratin recipe takes only 10 minutes to prepare. A healthy, low carb and gluten-free Baked Cheesy Zucchini Casserole that is perfect for the whole family.

INGREDIENTS

3 medium Zucchini (sliced in 1/4″ thick slices)

Sea salt

Black pepper

1 1/2 cup Swiss Gruyere shredded cheese blend (or any shredded sharp cheese; divided)

3 oz Brie cheese (edges cut off)

1/3 cup Heavy cream

2 tbsp unsweetened almond milk (or any milk of choice)

1 tbsp Butter

2 cloves Garlic (minced or crushed)

1/2 tbsp Italian seasoning

How to make BAKED EASY CHEESY ZUCCHINI CASSEROLE RECIPE (ZUCCHINI GRATIN)

Step 1: Add the zucchini slices with sea salt and toss. Transfer into a colander and place it on top of the sink. Drain for about 45 minutes. Then, pat dry.

Step 2: Prepare the oven. Preheat it to 400 degrees F or 204 degrees C.

Step 3: Arrange the zucchini slices in a small 1.5-quart or 1.5-litre casserole dish in different overlapping rows. Between each row, very lightly sprinkle with half of the shredded cheese using approximately 3/4 cup of cheese. Lightly sprinkle with black pepper to season.

Step 4: In a small saucepan, combine the brie, cream, milk, and garlic.

Step 5: On the stovetop, heat for several minutes over low to medium-low heat. Stir frequently until the cheese has melted and the mixture is smooth. Add sea salt to taste if desired.

Step 6: Evenly pour the mixture over the zucchini.

Step 7: Then, sprinkle the rest of the 3/4 cup shredded cheese blend over followed by the Italian seasoning.

Step 8: Place inside the preheated oven and bake for about 30 to 35 minutes or until the cheese is dark golden brown and the zucchini is soft.

Nutrition Facts:

Calories 239 | Fat 19g | Protein 12g | Total Carbs 6g | Net Carbs 5g | Fiber 1g | Sugar 2g

BAKED EASY CHEESY ZUCCHINI CASSEROLE RECIPE (ZUCCHINI GRATIN)

Rebecca Prep Time: 10 minutes | Cook Time: 30 minutes | Total Time: 1 hour 25 minutes | Servings: 6 Amongst the simple few ingredients, this delicious zucchini gratin recipe takes… Main Dish Recipes BAKED EASY CHEESY ZUCCHINI CASSEROLE RECIPE (ZUCCHINI GRATIN) European Print This
Serves: 6 Prep Time: 10 mins Cooking Time: 30 mins 30 mins
Nutrition facts: 239 calories 19 fat
Rating: 5.0/5
( 1 voted )

Ingredients

  • 3 medium Zucchini (sliced in 1/4" thick slices)
  • Sea salt
  • Black pepper
  • 1 1/2 cup Swiss Gruyere shredded cheese blend (or any shredded sharp cheese; divided)
  • 3 oz Brie cheese (edges cut off)
  • 1/3 cup Heavy cream
  • 2 tbsp unsweetened almond milk (or any milk of choice)
  • 1 tbsp Butter
  • 2 cloves Garlic (minced or crushed)
  • 1/2 tbsp Italian seasoning

Instructions

Step 1: Add the zucchini slices with sea salt and toss. Transfer into a colander and place it on top of the sink. Drain for about 45 minutes. Then, pat dry.

Step 2: Prepare the oven. Preheat it to 400 degrees F or 204 degrees C.

Step 3: Arrange the zucchini slices in a small 1.5-quart or 1.5-litre casserole dish in different overlapping rows. Between each row, very lightly sprinkle with half of the shredded cheese using approximately 3/4 cup of cheese. Lightly sprinkle with black pepper to season.

Step 4: In a small saucepan, combine the brie, cream, milk, and garlic.

Step 5: On the stovetop, heat for several minutes over low to medium-low heat. Stir frequently until the cheese has melted and the mixture is smooth. Add sea salt to taste if desired.

Step 6: Evenly pour the mixture over the zucchini.

Step 7: Then, sprinkle the rest of the 3/4 cup shredded cheese blend over followed by the Italian seasoning.

Step 8: Place inside the preheated oven and bake for about 30 to 35 minutes or until the cheese is dark golden brown and the zucchini is soft.

October 1, 2020 0 comment
0 FacebookTwitterPinterestEmail
Main Dish Recipes

French Toast Foldover

by Rebecca October 1, 2020
written by Rebecca

Makes: 1 sandwich

A great Sunday brunch idea that is super easy to prepare. A combination of two breakfast staples in one – egg and toast. Start your day right with this delicious French Toast Foldover.

INGREDIENTS

3 eggs

¼ cup milk

Salt and pepper, to taste

2 slices SASKO More Slices White Bread

3 tbsp butter, softened

2 slices sandwich ham

1/3 cup grated cheese

½ spring onion, sliced

Serving suggestion:

Tomato sauce Chopped fresh parsley and chives

How to make French Toast Foldover

Step 1: Add the eggs and milk in a medium bowl. Whisk well and season to taste.

Step 2: Coat each side of the bread with butter. Set aside.

Step 3: Grab a pan that is large enough to fit the 2 slices of bread. Heat over medium heat.

Step 4: In the warm pan, add and melt a tbsp butter. Once melted, add in the egg mixture.

Step 5: Quickly add the 2 slices of bread in the omelette next to each other. Before flipping the bread, make sure that they soaked up some of the egg mixtures first.

Step 6: Flip the entire omelette once the egg is just set including the bread.

Step 7: Cook for about a minute allowing the bottom of the omelette to set and turn golden brown.

Step 8: Onto the two slices of bread, flip the four overlapping egg sides.

Step 9: Add ham on top of the other slice and sprinkle over grated cheese along with some spring onions.

Step 10: Turn the uncovered bread over the other slice to form a sandwich. Cook for 30 to 60 seconds more on both sides.

Step 11: Using a spatula, lift the omelette sandwich once both sides are golden brown and the cheese has melted. Transfer the omelette on a plate.

Step 12: Before serving, sprinkle the toast with chopped fresh herbs. Serve alongside tomato sauce dip. Enjoy!

French Toast Foldover

Rebecca Makes: 1 sandwich A great Sunday brunch idea that is super easy to prepare. A combination of two breakfast staples in one – egg and toast. Start your day right… Main Dish Recipes French Toast Foldover European Print This
Serves: 1
Nutrition facts: 200 calories 20 grams fat
Rating: 5.0/5
( 1 voted )

Ingredients

  • 3 eggs
  • ¼ cup milk
  • Salt and pepper, to taste
  • 2 slices SASKO More Slices White Bread
  • 3 tbsp butter, softened
  • 2 slices sandwich ham
  • 1/3 cup grated cheese
  • ½ spring onion, sliced
  • Serving suggestion:
  • Tomato sauce Chopped fresh parsley and chives

Instructions

Step 1: Add the eggs and milk in a medium bowl. Whisk well and season to taste.

Step 2: Coat each side of the bread with butter. Set aside.

Step 3: Grab a pan that is large enough to fit the 2 slices of bread. Heat over medium heat.

Step 4: In the warm pan, add and melt a tbsp butter. Once melted, add in the egg mixture.

Step 5: Quickly add the 2 slices of bread in the omelette next to each other. Before flipping the bread, make sure that they soaked up some of the egg mixtures first.

Step 6: Flip the entire omelette once the egg is just set including the bread.

Step 7: Cook for about a minute allowing the bottom of the omelette to set and turn golden brown.

Step 8: Onto the two slices of bread, flip the four overlapping egg sides.

Step 9: Add ham on top of the other slice and sprinkle over grated cheese along with some spring onions.

Step 10: Turn the uncovered bread over the other slice to form a sandwich. Cook for 30 to 60 seconds more on both sides.

Step 11: Using a spatula, lift the omelette sandwich once both sides are golden brown and the cheese has melted. Transfer the omelette on a plate.

Step 12: Before serving, sprinkle the toast with chopped fresh herbs. Serve alongside tomato sauce dip. Enjoy!

October 1, 2020 0 comment
0 FacebookTwitterPinterestEmail
Main Dish Recipes

Quesarito

by Rebecca October 1, 2020
written by Rebecca

YIELDS: 4 | PREP TIME: 10 MINS | TOTAL TIME: 40 MINS

This is awesome! Super easy and come together easily. Mouthwatering Quesarito that looks and smells good, and tastes fabulous!

INGREDIENTS

BEEF:

1 lb. ground beef

1 tsp. chilli powder

1/2 tsp. ground cumin

1/2 tsp. smoked paprika

kosher salt

Freshly ground black pepper

CILANTRO-LIME RICE:

2 cups cooked white rice

1 tbsp. lime juice

2 tbsp. finely chopped cilantro

QUESARITO ASSEMBLY:

8 large flour tortillas

1 1/2 cups shredded Cheddar

1 cup Nacho Cheese Sauce

1/2 cup sour cream

How to make Quesarito

Step 1: Prepare the beef: Add the beef, chilli powder, cumin, and paprika in a heated medium skillet over medium-high heat. Add sprinkles of salt and pepper and cook the beef for about 6 minutes or until no longer pink. drain any excess fat.

Step 2: To make the cilantro-lime rice: Add the white rice, lime juice, and cilantro in a medium bowl. Toss with a fork and set aside.

Step 3: To make the quesadillas: Heat over medium-high heat a large nonstick pan. Add the tortilla once the pan is hot and sprinkle with cheddar cheese. Place another tortilla on top and cook for about 2 minutes on each side until the cheese has melted. Do this with the rest of the tortillas and cheddar.

Step 4: To build the Quesaritos: On a cutting board or plate, place the quesadillas. Start with some rice, top it with meat, nacho cheese, then, sour cream. Roll it up like a burrito. Do the same for the rest of the ingredients.

Step 5: Rewarm over medium-high heat the nonstick pan. Add two Quesaritos once the pan is hot. Cook for 3 to 5 minutes on each side or until the outside is golden and somewhat crispy.

Step 6: Transfer on a serving plate and serve immediately. Enjoy!

Quesarito

Rebecca YIELDS: 4 | PREP TIME: 10 MINS | TOTAL TIME: 40 MINS This is awesome! Super easy and come together easily. Mouthwatering Quesarito that looks and smells good, and tastes… Main Dish Recipes Quesarito European Print This
Serves: 4 Prep Time: 10 mins Cooking Time: 30 mins 30 mins
Nutrition facts: 200 calories 20 grams fat
Rating: 5.0/5
( 1 voted )

Ingredients

  • BEEF:
  • 1 lb. ground beef
  • 1 tsp. chilli powder
  • 1/2 tsp. ground cumin
  • 1/2 tsp. smoked paprika
  • kosher salt
  • Freshly ground black pepper
  • CILANTRO-LIME RICE:
  • 2 cups cooked white rice
  • 1 tbsp. lime juice
  • 2 tbsp. finely chopped cilantro
  • QUESARITO ASSEMBLY:
  • 8 large flour tortillas
  • 1 1/2 cups shredded Cheddar
  • 1 cup Nacho Cheese Sauce
  • 1/2 cup sour cream

Instructions

Step 1: Prepare the beef: Add the beef, chilli powder, cumin, and paprika in a heated medium skillet over medium-high heat. Add sprinkles of salt and pepper and cook the beef for about 6 minutes or until no longer pink. drain any excess fat.

Step 2: To make the cilantro-lime rice: Add the white rice, lime juice, and cilantro in a medium bowl. Toss with a fork and set aside.

Step 3: To make the quesadillas: Heat over medium-high heat a large nonstick pan. Add the tortilla once the pan is hot and sprinkle with cheddar cheese. Place another tortilla on top and cook for about 2 minutes on each side until the cheese has melted. Do this with the rest of the tortillas and cheddar.

Step 4: To build the Quesaritos: On a cutting board or plate, place the quesadillas. Start with some rice, top it with meat, nacho cheese, then, sour cream. Roll it up like a burrito. Do the same for the rest of the ingredients.

Step 5: Rewarm over medium-high heat the nonstick pan. Add two Quesaritos once the pan is hot. Cook for 3 to 5 minutes on each side or until the outside is golden and somewhat crispy.

Step 6: Transfer on a serving plate and serve immediately. Enjoy!

October 1, 2020 0 comment
0 FacebookTwitterPinterestEmail
Main Dish Recipes

PUMPKIN CHOCOLATE CHIP COOKIES (SOFT BATCH)

by Rebecca October 1, 2020
written by Rebecca

Makes: (approximately) 3 dozen cookies

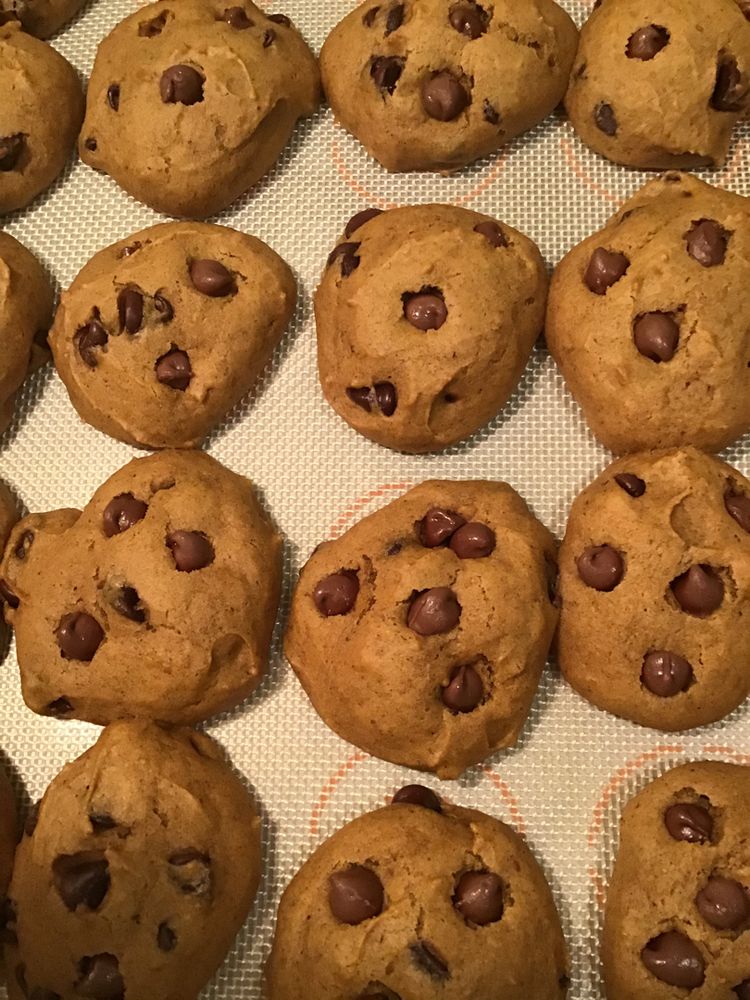
Pumpkin, spice, chocolate, and all things nice. All the goodness in one soft batch – kids and adults approved cookies with the perfect combination of spiced pumpkin and chocolate chips. Celebrate fall with these delicious Pumpkin Chocolate Chip Cookies.

INGREDIENTS

2 1/2 cups all-purpose flour

1 teaspoon baking soda

1 teaspoon baking powder

1 tablespoon pumpkin pie spice

1/2 teaspoon salt

1 1/2 cups granulated sugar

1/2 cup butter (1 stick), softened

1 cup pure pumpkin (I use Libby’s 100% pure pumpkin)

1 large egg

1 teaspoon pure vanilla extract

1 cup mini semi-sweet chocolate chips

HOW TO MAKE PUMPKIN CHOCOLATE CHIP COOKIES

Step 1: Prepare the oven. Preheat it to 350 degrees F.

Step 2: Use a parchment paper to line a baking sheet or grease.

Step 3: Add the flour, baking soda, baking powder, pumpkin pie spice, and salt in a medium-size bowl. And mix well.

Step 4: Place the butter and sugar in a separate large bowl. Beat well before adding the pumpkin, egg, and vanilla. Combine until the batter is smooth.

Step 5: Gradually add the flour into the pumpkin batter. Mix until just combined. Not to not over mix.

Step 6: Fold in the chocolate chips and again don’t over mix.

Step 7: Use a scooper to place rounded tablespoon size cookie dough on the prepared baking sheet.

Step 8: Place on the middle rack inside the preheated oven. Bake for about 15 to 18 minutes or until the edges are slightly golden brown and firm.

Step 9: Once done, remove from the oven and allow the cookies to cool for several minutes on the baking sheet before moving them on a cooling rack to cool completely.

TIP:

I love adding a couple more bits of chocolate chips by sprinkling them over each cookie. If desired, do this before baking.

PUMPKIN CHOCOLATE CHIP COOKIES (SOFT BATCH)

Rebecca Makes: (approximately) 3 dozen cookies Pumpkin, spice, chocolate, and all things nice. All the goodness in one soft batch – kids and adults approved cookies with the perfect combination of… Main Dish Recipes PUMPKIN CHOCOLATE CHIP COOKIES (SOFT BATCH) European Print This
Serves: 36
Nutrition facts: 200 calories 20 grams fat
Rating: 5.0/5
( 1 voted )

Ingredients

  • 2 1/2 cups all-purpose flour
  • 1 teaspoon baking soda
  • 1 teaspoon baking powder
  • 1 tablespoon pumpkin pie spice
  • 1/2 teaspoon salt
  • 1 1/2 cups granulated sugar
  • 1/2 cup butter (1 stick), softened
  • 1 cup pure pumpkin (I use Libby’s 100% pure pumpkin)
  • 1 large egg
  • 1 teaspoon pure vanilla extract
  • 1 cup mini semi-sweet chocolate chips

Instructions

Step 1: Prepare the oven. Preheat it to 350 degrees F.

Step 2: Use a parchment paper to line a baking sheet or grease.

Step 3: Add the flour, baking soda, baking powder, pumpkin pie spice, and salt in a medium-size bowl. And mix well.

Step 4: Place the butter and sugar in a separate large bowl. Beat well before adding the pumpkin, egg, and vanilla. Combine until the batter is smooth.

Step 5: Gradually add the flour into the pumpkin batter. Mix until just combined. Not to not over mix.

Step 6: Fold in the chocolate chips and again don't over mix.

Step 7: Use a scooper to place rounded tablespoon size cookie dough on the prepared baking sheet.

Step 8: Place on the middle rack inside the preheated oven. Bake for about 15 to 18 minutes or until the edges are slightly golden brown and firm.

Step 9: Once done, remove from the oven and allow the cookies to cool for several minutes on the baking sheet before moving them on a cooling rack to cool completely.

TIP:

I love adding a couple more bits of chocolate chips by sprinkling them over each cookie. If desired, do this before baking.

October 1, 2020 0 comment
0 FacebookTwitterPinterestEmail
Newer Posts
Older Posts

Popular Posts

  • 1

    Crispy Crunchy Parmesan Potatoes

    March 21, 2020
  • 2

    CROCK POT SMOTHERED PORK CHOPS

    March 21, 2020
  • Facebook
  • Twitter

@2019 - All Right Reserved.


Back To Top