Cook it once
  • Home
  • Privacy Policy
  • Recipes
    • KETO
    • LC
    • WW
  • Tips
  • Contact
Cook it once
  • Home
  • Privacy Policy
  • Recipes
    • KETO
    • LC
    • WW
  • Tips
  • Contact
Category:

Main Dish Recipes

Main Dish Recipes

Lemon Crinkle Cookie Recipe

by Rebecca October 3, 2020
written by Rebecca

Yield: 12 SERVINGS | Prep Time: 10 MINUTES | Cook Time: 10 MINUTES | Chilling Time: 1 HOUR | Total Time: 1 HOUR 20 MINUTES

We are all used to make chocolate crinkles and before this recipe, I have to admit that I was sceptical to even try lemon crinkles. But try it I did, and it was awesome! These adorable homemade lemon crinkles are made from fresh lemon zest and lemon juice – soft and chewy with the perfect balance of sweet and tart. Simply delicious!

Ingredients

1/2 Cup Unsalted Butter, (1 stick, softened)

3/4 Cup Granulated Sugar

1 Large Egg

1 Tablespoon Lemon Juice, (freshly squeezed)

1 Tablespoon Lemon Zest, (fresh)

1 Teaspoon Vanilla Extract

2 Cups All-Purpose Flour

1 Teaspoon Baking Powder

1/2 Teaspoon Salt

1/4 Teaspoon Baking Soda

2 1/2 Drops Yellow Food Coloring, (optional)

1 cup Powdered Sugar

How to make Lemon Crinkle Cookie

Step 1: Beat the butter and sugar with a hand mixer or stand mixer for about 3 minutes or until light and fluffy.

Step 2: Add in the egg, lemon juice, lemon zest, and vanilla. Beat again on low speed until incorporated.

Step 3: Add the flour, baking powder, salt, baking soda, and food colouring in the same bowl. Beating on low until no pieces of flour remain.

Step 4: Place in the fridge and chill for about an hour. After almost the time is up, prepare the oven. Preheat it to 350 degrees. Then, with parchment paper or silicone mats line 2 large baking sheets.

Step 5: Once chilled, remove the dough from the fridge and roll into teaspoon-sized balls.

Step 6: Dip the balls into the powdered sugar to coat them heavily. No need to shake the excess off, just place 2-inches apart from the heavily coated balls on the prepared baking.

Step 7: Place in the preheated oven and bake for about 8 to 10 minutes or until the edges are lightly browned. And the middle of the cookies will look somewhat soft and that’s okay.

Step 8: Allow the cookies to stay on the baking sheet to cool for at least 5 minutes. Then, transfer them on a wire rack to cool completely.

Step 9: In an airtight container, store the cookies for up to 5 days.

Notes:

Add more lemon zest if you prefer a more lemon flavour.

Slightly press down the dough before baking if you desire a flatter and less rounded cookies.

Be cautious about how much lemon you’ll want to add as the lemon flavour will be a bit stronger after the day the cookies are baked.

Nutrition Facts:

Amount Per Serving: CALORIES: 239 TOTAL FAT: 8g SATURATED FAT: 5g UNSATURATED FAT: 0g CHOLESTEROL: 38mg SODIUM: 195mg CARBOHYDRATES: 39g FIBER: 1g SUGAR: 22g PROTEIN: 3g

Lemon Crinkle Cookie Recipe

Rebecca Yield: 12 SERVINGS | Prep Time: 10 MINUTES | Cook Time: 10 MINUTES | Chilling Time: 1 HOUR | Total Time: 1 HOUR 20 MINUTES We are all used to… Main Dish Recipes Lemon Crinkle Cookie Recipe European Print This
Serves: 12 Prep Time: 10 mins Cooking Time: 10 mins 10 mins
Nutrition facts: 239 calories 8 fat
Rating: 5.0/5
( 1 voted )

Ingredients

  • 1/2 Cup Unsalted Butter, (1 stick, softened)
  • 3/4 Cup Granulated Sugar
  • 1 Large Egg
  • 1 Tablespoon Lemon Juice, (freshly squeezed)
  • 1 Tablespoon Lemon Zest, (fresh)
  • 1 Teaspoon Vanilla Extract
  • 2 Cups All-Purpose Flour
  • 1 Teaspoon Baking Powder
  • 1/2 Teaspoon Salt
  • 1/4 Teaspoon Baking Soda
  • 2 1/2 Drops Yellow Food Coloring, (optional)
  • 1 cup Powdered Sugar

Instructions

Step 1: Beat the butter and sugar with a hand mixer or stand mixer for about 3 minutes or until light and fluffy.

Step 2: Add in the egg, lemon juice, lemon zest, and vanilla. Beat again on low speed until incorporated.

Step 3: Add the flour, baking powder, salt, baking soda, and food colouring in the same bowl. Beating on low until no pieces of flour remain.

Step 4: Place in the fridge and chill for about an hour. After almost the time is up, prepare the oven. Preheat it to 350 degrees. Then, with parchment paper or silicone mats line 2 large baking sheets.

Step 5: Once chilled, remove the dough from the fridge and roll into teaspoon-sized balls.

Step 6: Dip the balls into the powdered sugar to coat them heavily. No need to shake the excess off, just place 2-inches apart from the heavily coated balls on the prepared baking.

Step 7: Place in the preheated oven and bake for about 8 to 10 minutes or until the edges are lightly browned. And the middle of the cookies will look somewhat soft and that's okay.

Step 8: Allow the cookies to stay on the baking sheet to cool for at least 5 minutes. Then, transfer them on a wire rack to cool completely.

Step 9: In an airtight container, store the cookies for up to 5 days.

Notes:

Add more lemon zest if you prefer a more lemon flavour.

Slightly press down the dough before baking if you desire a flatter and less rounded cookies.

Be cautious about how much lemon you'll want to add as the lemon flavour will be a bit stronger after the day the cookies are baked.

October 3, 2020 0 comment
0 FacebookTwitterPinterestEmail
Main Dish Recipes

Bacon-Wrapped Taquitos

by Rebecca October 2, 2020
written by Rebecca

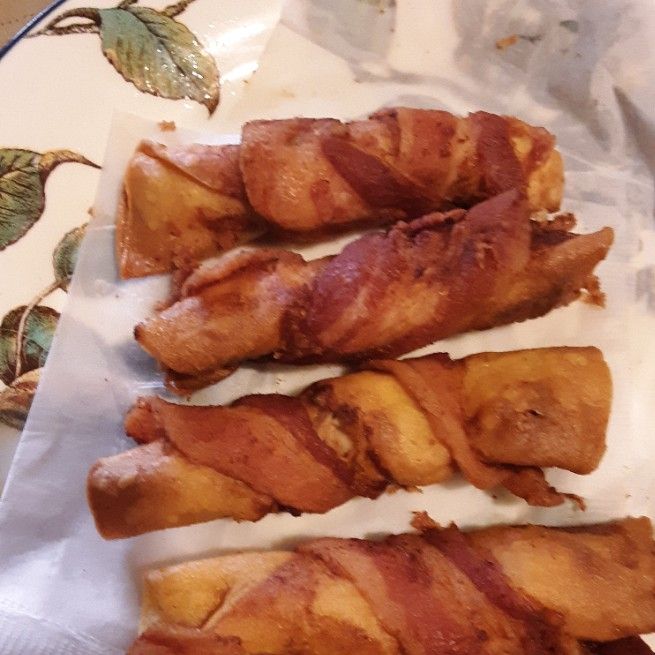
Taquitos are awesome the way they are but hey this bacon-wrapped version is a million times better! There’s nothing wrong with extra wrapping especially if it’s bacon. The smoky and salty flavour of bacon adds so much more to the usual chicken taquitos. And it’s pretty simple, fun, easy to make, and quickly put together. Serve these with your favourite ice-cold beer and go live your life! Next time, make plenty because everyone will never turn their back unless these delicious bacon-Wrapped Taquitos are gone!

Ingredients

1/4 cup ranch seasoning

1 cup sour cream

1 rotisserie chicken, shredded (about 3 cups)

2 pounds classic bacon

24 small (6-inch) corn tortillas

6 cups of vegetable oil

Cilantro, to garnish

Salsa, to serve

How to make Bacon-Wrapped Taquitos

Step 1: Place the shredded chicken into a large bowl.

Step 2: In a bowl, mix the ranch seasoning and sour cream.

Step 3: Set aside 1/4 cup of the mixture for serving.

Step 4: Add the shredded mixture into the rest of the mixture. Toss to incorporate.

Step 5: In a kitchen towel, wrap the tortillas. Microwave for about a minute on both sides. And keep them wrapped while rolling the taquitos.

Step 6: Place the tortillas on a flat surface. Then, fill the upper edge with around 2 tablespoons of the chicken filling. Tightly roll.

Step 7: Grab a strip of bacon and enclose the roll, securing with toothpicks on both ends. Do this for the remaining ingredients.

Step 8: Drizzle vegetable oil in a large heavy-bottom skillet. Heat to 350 degrees.

Step 9: Once the oil is hot, in batches, fry the taquitos for approximately 5 minutes or until the bacon is cooked. Flip them halfway through.

Step 10: Transfer on paper towels to drain.

Step 11: Serve the taquitos with cilantro, salsa, and more sour cream. Enjoy!

Bacon-Wrapped Taquitos

Rebecca Taquitos are awesome the way they are but hey this bacon-wrapped version is a million times better! There’s nothing wrong with extra wrapping especially if it’s bacon. The smoky and… Main Dish Recipes Bacon-Wrapped Taquitos European Print This
Nutrition facts: 200 calories 20 grams fat
Rating: 5.0/5
( 1 voted )

Ingredients

  • 1/4 cup ranch seasoning
  • 1 cup sour cream
  • 1 rotisserie chicken, shredded (about 3 cups)
  • 2 pounds classic bacon
  • 24 small (6-inch) corn tortillas
  • 6 cups of vegetable oil
  • Cilantro, to garnish
  • Salsa, to serve

Instructions

Step 1: Place the shredded chicken into a large bowl.

Step 2: In a bowl, mix the ranch seasoning and sour cream.

Step 3: Set aside 1/4 cup of the mixture for serving.

Step 4: Add the shredded mixture into the rest of the mixture. Toss to incorporate.

Step 5: In a kitchen towel, wrap the tortillas. Microwave for about a minute on both sides. And keep them wrapped while rolling the taquitos.

Step 6: Place the tortillas on a flat surface. Then, fill the upper edge with around 2 tablespoons of the chicken filling. Tightly roll.

Step 7: Grab a strip of bacon and enclose the roll, securing with toothpicks on both ends. Do this for the remaining ingredients.

Step 8: Drizzle vegetable oil in a large heavy-bottom skillet. Heat to 350 degrees.

Step 9: Once the oil is hot, in batches, fry the taquitos for approximately 5 minutes or until the bacon is cooked. Flip them halfway through.

Step 10: Transfer on paper towels to drain.

Step 11: Serve the taquitos with cilantro, salsa, and more sour cream. Enjoy!

October 2, 2020 0 comment
0 FacebookTwitterPinterestEmail
Main Dish Recipes

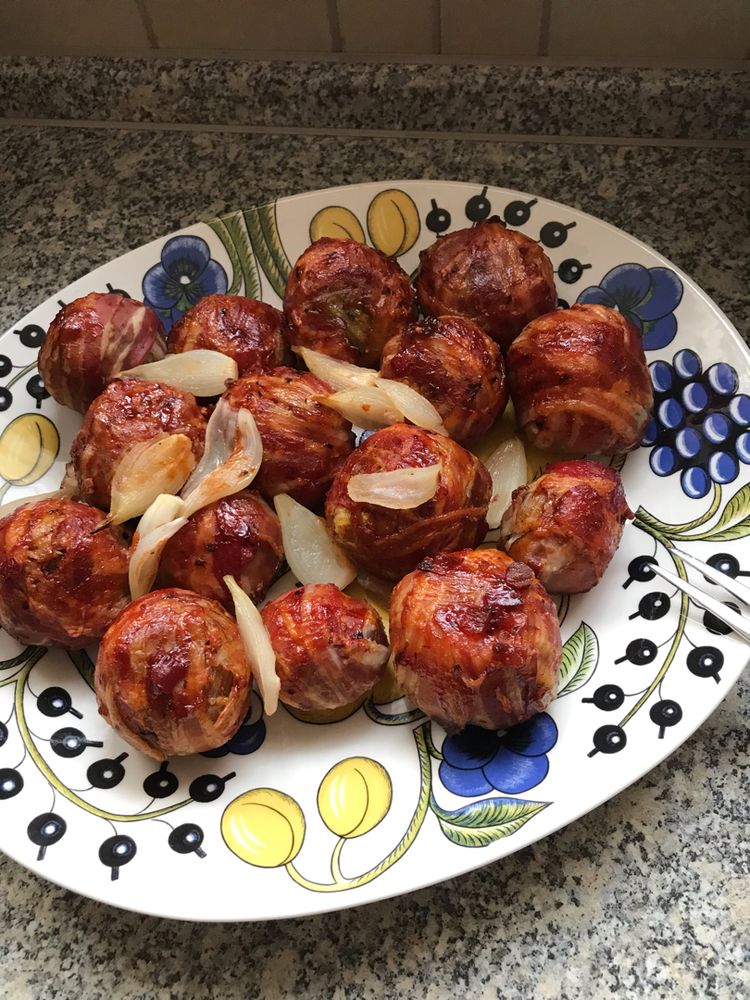
BBQ Onion Meatballs

by Rebecca October 2, 2020
written by Rebecca

Make your dream come true by trying out everyone’s new favourite – BBQ Onion Meatballs. Not fussy, pretty simple, fun to make, and will give you all the superb taste in a bite! With only a few simple and easy to find ingredients you’ll be able to make these whenever. Your all-time favourite meatballs and onion rings wrapped in bacon and clothed in BBQ sauce. Extraordinary! Cooked perfectly in the oven, these bacon-wrapped meatballs are bursting in flavour! I am confident that you’ll love these as we do. One bite and you’ll fall madly in love with these mouthwatering BB Onion Meatballs. Always a huge hit and deserves a big round of applause.

INGREDIENTS

2 large onions

400g beef mince

1 clove garlic, minced

1 egg

Few sprigs of parsley leaves, chopped

16 rashers streaky bacon

BBQ sauce

How to make BBQ Onion Meatballs

Step 1: Prepare the oven. Preheat it to 200 degrees C.

Step 2: Start by peeling the onions, then, trim the tops and bottoms. Strip the large outer layers away. Set aside.

Step 3: Chop finely the rest of the onion and transfer in a large bowl. Add in the mince, garlic, egg, parsley, and season with a plentiful amount of seasoning. Mix well.

Step 4: Divide the mixture into 4 balls.

Step 5: Wrap every ball between two large onion pieces. Make sure to at least fully enclose the meat.

Step 6: Envelope separately with streaked bacon, securing the ends with cocktail sticks.

Step 7: Place them on a lined baking tray.

Step 8: Put in the preheated oven and bake for about 40 minutes.

Step 9: Remove from the oven to brush each ball with BBQ sauce. Then, continue cooking for another 5 minutes.

Step 10: To serve, remove the cocktail sticks and serve immediately.

BBQ Onion Meatballs

Rebecca Make your dream come true by trying out everyone’s new favourite – BBQ Onion Meatballs. Not fussy, pretty simple, fun to make, and will give you all the superb taste… Main Dish Recipes BBQ Onion Meatballs European Print This
Nutrition facts: 200 calories 20 grams fat
Rating: 5.0/5
( 1 voted )

Ingredients

  • 2 large onions
  • 400g beef mince
  • 1 clove garlic, minced
  • 1 egg
  • Few sprigs of parsley leaves, chopped
  • 16 rashers streaky bacon
  • BBQ sauce

Instructions

Step 1: Prepare the oven. Preheat it to 200 degrees C.

Step 2: Start by peeling the onions, then, trim the tops and bottoms. Strip the large outer layers away. Set aside.

Step 3: Chop finely the rest of the onion and transfer in a large bowl. Add in the mince, garlic, egg, parsley, and season with a plentiful amount of seasoning. Mix well.

Step 4: Divide the mixture into 4 balls.

Step 5: Wrap every ball between two large onion pieces. Make sure to at least fully enclose the meat.

Step 6: Envelope separately with streaked bacon, securing the ends with cocktail sticks.

Step 7: Place them on a lined baking tray.

Step 8: Put in the preheated oven and bake for about 40 minutes.

Step 9: Remove from the oven to brush each ball with BBQ sauce. Then, continue cooking for another 5 minutes.

Step 10: To serve, remove the cocktail sticks and serve immediately.

October 2, 2020 0 comment
0 FacebookTwitterPinterestEmail
Main Dish Recipes

Flamin’ Hot Cheetos Wings

by Rebecca October 2, 2020
written by Rebecca

YIELDS: 6 SERVINGS | PREP TIME: 15 MINS | TOTAL TIME: 1 HOUR

I am pretty sure that you’ll love this next recipe. Guaranteed to take your hot wings to the next level! Coated with Flamin’ Hot Cheetos, your chicken wings will surely fire they’re way to everyone’s heart! Outrageously delicious and super addicting!

INGREDIENTS

2 lb. chicken wings

Kosher salt

Freshly ground black pepper

1/3 c. all-purpose flour

2 large eggs, beaten

1 (8.5-oz.) bag Flamin’ Hot Cheetos, crushed

1/4 c. hot sauce

2 tbsp. honey

4 tbsp. butter

1/4 c. buttermilk

2 tbsp. mayonnaise

3 tbsp. sour cream

2 tsp. freshly chopped dill

1/4 tsp. onion powder

1/4 tsp. garlic powder

Large pinch cayenne pepper

1/4 c. finely crumbled blue cheese

Celery sticks, for serving

How to make Flamin’ Hot Cheetos Wings

Step 1: Prepare the oven. Preheat it to 425 degrees.

Step 2: With salt and pepper, season the chicken wings. Dredge them next to flour, dip in egg, and Cheetos crumbs.

Step 3: On a large baking sheet, arrange the chicken in an even layer.

Step 4: Place inside the preheated oven and bake for about 18 to 20 minutes or until the chicken is thoroughly cooked.

Step 5: In the meantime, place the hot sauce, honey, and butter in a small bowl. Combine and microwave until the butter is melted and everything is mixed. Note to whisk every 15 seconds.

Step 6: Remove the wings from the oven and pour over the hot sauce mixture.

Step 7: Arrange the wings on a platter.

Step 8: Add the buttermilk, mayonnaise, sour cream, dill, onion powder, garlic powder, cayenne in a medium bowl. Whisk well before stirring in the blue cheese.

Step 9: Serve the wings hot alongside the dressing for dipping and some celery sticks.

Flamin' Hot Cheetos Wings

Rebecca YIELDS: 6 SERVINGS | PREP TIME: 15 MINS | TOTAL TIME: 1 HOUR I am pretty sure that you’ll love this next recipe. Guaranteed to take your hot wings to… Main Dish Recipes Flamin’ Hot Cheetos Wings European Print This
Serves: 6 Prep Time: 15 mins Cooking Time: 45 mins 45 mins
Nutrition facts: 200 calories 20 grams fat
Rating: 5.0/5
( 1 voted )

Ingredients

  • 2 lb. chicken wings
  • Kosher salt
  • Freshly ground black pepper
  • 1/3 c. all-purpose flour
  • 2 large eggs, beaten
  • 1 (8.5-oz.) bag Flamin' Hot Cheetos, crushed
  • 1/4 c. hot sauce
  • 2 tbsp. honey
  • 4 tbsp. butter
  • 1/4 c. buttermilk
  • 2 tbsp. mayonnaise
  • 3 tbsp. sour cream
  • 2 tsp. freshly chopped dill
  • 1/4 tsp. onion powder
  • 1/4 tsp. garlic powder
  • Large pinch cayenne pepper
  • 1/4 c. finely crumbled blue cheese
  • Celery sticks, for serving

Instructions

Step 1: Prepare the oven. Preheat it to 425 degrees.

Step 2: With salt and pepper, season the chicken wings. Dredge them next to flour, dip in egg, and Cheetos crumbs.

Step 3: On a large baking sheet, arrange the chicken in an even layer.

Step 4: Place inside the preheated oven and bake for about 18 to 20 minutes or until the chicken is thoroughly cooked.

Step 5: In the meantime, place the hot sauce, honey, and butter in a small bowl. Combine and microwave until the butter is melted and everything is mixed. Note to whisk every 15 seconds.

Step 6: Remove the wings from the oven and pour over the hot sauce mixture.

Step 7: Arrange the wings on a platter.

Step 8: Add the buttermilk, mayonnaise, sour cream, dill, onion powder, garlic powder, cayenne in a medium bowl. Whisk well before stirring in the blue cheese.

Step 9: Serve the wings hot alongside the dressing for dipping and some celery sticks.

October 2, 2020 0 comment
0 FacebookTwitterPinterestEmail
Main Dish Recipes

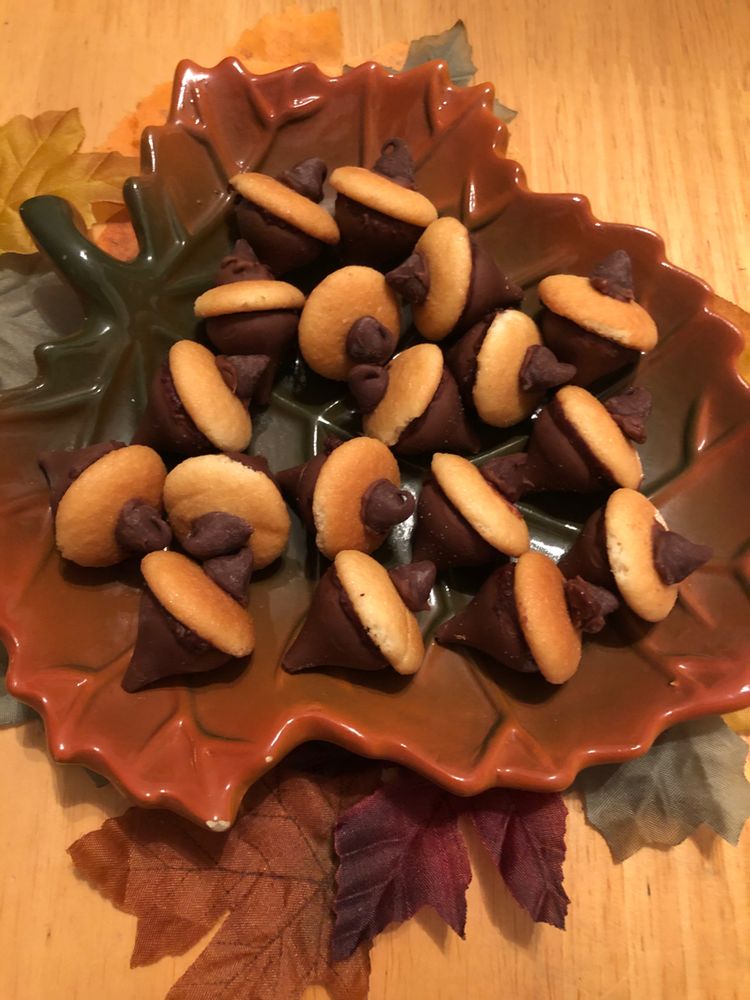
Chocolate Acorns

by Rebecca October 2, 2020
written by Rebecca

Prep Time: 35 MINUTES | Total Time: 35 MINUTES | Servings: 50 acorns

Are you ready for Fall or Thanksgiving? Grab these pantry ingredients and begin making the cutest chocolate acorns your kids will surely love! And these are no-bake, so you’ll save yourself the hassle of managing your oven time to make all you need for Thanksgiving. Ask the kids to help out and I’m sure they’ll find it hard to say no.

Ingredients

1/2 cup semisweet chocolate chips

50 mini Nilla wafer cookies

50 milk chocolate Hershey’s kisses, unwrapped

50 mini chocolate chips

How to make Chocolate Acorns

Step 1: Using a parchment paper, line a baking sheet and set aside.

Step 2: Place the semisweet chocolate chips in a small microwave-safe bowl. Melt in the microwave for about 45 seconds, then, stir until smooth. Continue to microwave if needed in 15 seconds interval.

Step 3: Transfer the melted chocolate with a spatula into a small Ziploc bag. Snip a small hole in the corner.

Step 4: Onto the flat side of the cookies, pipe a little amount of the chocolate. Quickly press a Hershey’s kiss on top. Do this for the rest of the cookies and Hershey’s kisses.

Step 5: Transfer the cookies, cookie side down on the prepared baking sheet.

Step 6: Put in the freezer to set for at least 5 minutes.

Step 7: To make the stem, pipe a small amount of the melted chocolate on a mini chocolate chip. Then, connect it to the top of the wafer.

Step 8: Return to the baking sheet and finish the rest of the acorns.

Step 9: Freeze again for 5 minutes more to completely set.

Nutrition Facts:

Calories: 43kcal | Carbohydrates: 5g | Protein: 1g | Fat: 2g | Saturated Fat: 1g | Cholesterol: 1mg | Sodium: 9mg | Potassium: 11mg | Fiber: 1g | Sugar: 4g | Vitamin A: 2IU | Calcium: 11mg | Iron: 1mg

Chocolate Acorns

Rebecca Prep Time: 35 MINUTES | Total Time: 35 MINUTES | Servings: 50 acorns Are you ready for Fall or Thanksgiving? Grab these pantry ingredients and begin making the cutest chocolate… Main Dish Recipes Chocolate Acorns European Print This
Serves: 50 Prep Time: 35 mins
Nutrition facts: 43 calories 2 fat
Rating: 5.0/5
( 1 voted )

Ingredients

  • 1/2 cup semisweet chocolate chips
  • 50 mini Nilla wafer cookies
  • 50 milk chocolate Hershey's kisses, unwrapped
  • 50 mini chocolate chips

Instructions

Step 1: Using a parchment paper, line a baking sheet and set aside.

Step 2: Place the semisweet chocolate chips in a small microwave-safe bowl. Melt in the microwave for about 45 seconds, then, stir until smooth. Continue to microwave if needed in 15 seconds interval.

Step 3: Transfer the melted chocolate with a spatula into a small Ziploc bag. Snip a small hole in the corner.

Step 4: Onto the flat side of the cookies, pipe a little amount of the chocolate. Quickly press a Hershey's kiss on top. Do this for the rest of the cookies and Hershey's kisses.

Step 5: Transfer the cookies, cookie side down on the prepared baking sheet.

Step 6: Put in the freezer to set for at least 5 minutes.

Step 7: To make the stem, pipe a small amount of the melted chocolate on a mini chocolate chip. Then, connect it to the top of the wafer.

Step 8: Return to the baking sheet and finish the rest of the acorns.

Step 9: Freeze again for 5 minutes more to completely set.

October 2, 2020 0 comment
0 FacebookTwitterPinterestEmail
Main Dish Recipes

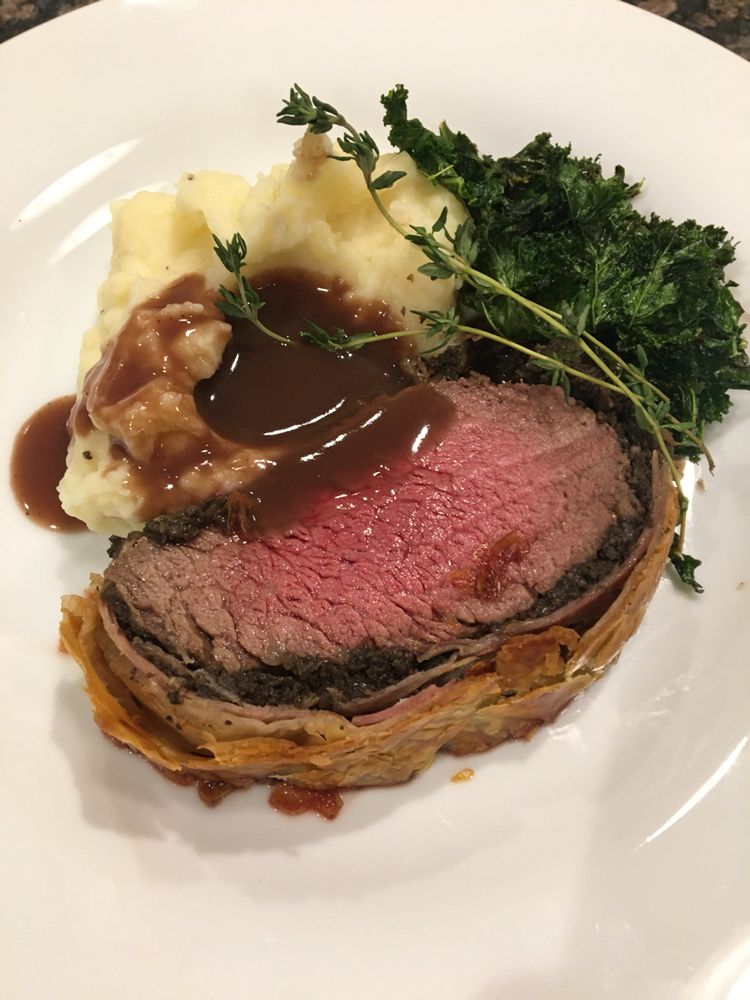
Beef Wellington

by Rebecca October 2, 2020
written by Rebecca

YIELDS: 6 SERVINGS | PREP TIME: 15 MINS | TOTAL TIME: 2 HOURS 30 MINS

Make everyone feel special with this mouthwatering Beef Willington! A heart-stopper beauty with extremely superb taste. A classic inside and out!

INGREDIENTS

1 (2 lb.) centre-cut beef tenderloin, trimmed

kosher salt

Freshly ground black pepper

Olive oil, for greasing

2 tbsp. Dijon mustard

1 1/2 lb. mixed mushrooms, roughly chopped

1 shallot, roughly chopped

Leaves from 1 thyme sprig

2 tbsp. unsalted butter

12 thin slices prosciutto

Flour, for dusting

14 oz. frozen puff pastry, thawed

1 large egg, beaten

Flaky salt, for sprinkling

To make the Beef Wellington

Step 1: Tie the tenderloin in four places with kitchen twine. Generously season with salt and pepper.

Step 2: Drizzle olive oil in the bottom of a heavy skillet. Heat over high heat. When nearly smoking, add and sear the tenderloin for about 2 minutes on both sides or until all sides and ends are well-browned. Place on a plate to cool. Then, snip the twine off and with mustard, coat all sides. And chill.

Step 3: In the meantime, make the duxelles by adding the mushrooms, shallots, and thyme in a food processor. Pulse until finely chopped.

Step 4: Melt the butter in a skillet over medium heat. Stir in the mushrooms and cook for about 25 minutes or until all the liquid has disappeared. Then, season with salt and pepper. Allow cooling in the fridge.

Step 5: On a work surface, place down the plastic wrap. Overlap to make the length and width twice of the tenderloin. On the plastic wrap, shingle the prosciutto into a rectangle huge enough to cover the tenderloin completely. Then, evenly and thinly spread the duxelles on top.

Step 6: Start by seasoning the tenderloin before placing it at the bottom of the prosciutto. Roll tightly the meat using plastic wrap into the prosciutto-mushroom mixture. As you roll, tuck the ends of the prosciutto, tightly twisting the ends of the wrap to form a log. Place in the fridge to chill and sustain its shape.

Step 7: Prepare the oven. Preheat it to 425 degrees.

Step 8: Spread out the puff pastry on a lightly floured work surface. Roll it into a rectangle making it a tad bigger than the prosciutto rectangle.

Step 9: Unwrap the tenderloin and lay it on the bottom of the puff pastry. Brush with egg washes the three edges of the pastry before lightly rolling the beef into the pastry.

Step 10: If needed, trim the extra pastry once the log is completely covered in puff pastry. Using a fork, crimp the edges to seal properly. Make a very tight cylinder by wrapping the roll in plastic wrap. Then, chill for at least 20 minutes.

Step 11: Unwrap and transfer to a foil-lined baking sheet. Brush the roll with egg wash, then, sprinkle over some flaky salt.

Step 12: Place inside the preheated oven and bake for about 40 to 45 minutes until golden and the middle is about 120 degrees F medium-rare.

Step 13: Allow the beef wellington to rest for at least 10 minutes before slicing. Serve and enjoy!

Beef Wellington

Rebecca YIELDS: 6 SERVINGS | PREP TIME: 15 MINS | TOTAL TIME: 2 HOURS 30 MINS Make everyone feel special with this mouthwatering Beef Willington! A heart-stopper beauty with extremely superb… Main Dish Recipes Beef Wellington European Print This
Serves: 6 Prep Time: 15 mins Cooking Time: 2 hrs 15 mins 2 hrs 15 mins
Nutrition facts: 200 calories 20 grams fat
Rating: 5.0/5
( 1 voted )

Ingredients

  • 1 (2 lb.) centre-cut beef tenderloin, trimmed
  • kosher salt
  • Freshly ground black pepper
  • Olive oil, for greasing
  • 2 tbsp. Dijon mustard
  • 1 1/2 lb. mixed mushrooms, roughly chopped
  • 1 shallot, roughly chopped
  • Leaves from 1 thyme sprig
  • 2 tbsp. unsalted butter
  • 12 thin slices prosciutto
  • Flour, for dusting
  • 14 oz. frozen puff pastry, thawed
  • 1 large egg, beaten
  • Flaky salt, for sprinkling

Instructions

Step 1: Tie the tenderloin in four places with kitchen twine. Generously season with salt and pepper.

Step 2: Drizzle olive oil in the bottom of a heavy skillet. Heat over high heat. When nearly smoking, add and sear the tenderloin for about 2 minutes on both sides or until all sides and ends are well-browned. Place on a plate to cool. Then, snip the twine off and with mustard, coat all sides. And chill.

Step 3: In the meantime, make the duxelles by adding the mushrooms, shallots, and thyme in a food processor. Pulse until finely chopped.

Step 4: Melt the butter in a skillet over medium heat. Stir in the mushrooms and cook for about 25 minutes or until all the liquid has disappeared. Then, season with salt and pepper. Allow cooling in the fridge.

Step 5: On a work surface, place down the plastic wrap. Overlap to make the length and width twice of the tenderloin. On the plastic wrap, shingle the prosciutto into a rectangle huge enough to cover the tenderloin completely. Then, evenly and thinly spread the duxelles on top.

Step 6: Start by seasoning the tenderloin before placing it at the bottom of the prosciutto. Roll tightly the meat using plastic wrap into the prosciutto-mushroom mixture. As you roll, tuck the ends of the prosciutto, tightly twisting the ends of the wrap to form a log. Place in the fridge to chill and sustain its shape.

Step 7: Prepare the oven. Preheat it to 425 degrees.

Step 8: Spread out the puff pastry on a lightly floured work surface. Roll it into a rectangle making it a tad bigger than the prosciutto rectangle.

Step 9: Unwrap the tenderloin and lay it on the bottom of the puff pastry. Brush with egg washes the three edges of the pastry before lightly rolling the beef into the pastry.

Step 10: If needed, trim the extra pastry once the log is completely covered in puff pastry. Using a fork, crimp the edges to seal properly. Make a very tight cylinder by wrapping the roll in plastic wrap. Then, chill for at least 20 minutes.

Step 11: Unwrap and transfer to a foil-lined baking sheet. Brush the roll with egg wash, then, sprinkle over some flaky salt.

Step 12: Place inside the preheated oven and bake for about 40 to 45 minutes until golden and the middle is about 120 degrees F medium-rare.

Step 13: Allow the beef wellington to rest for at least 10 minutes before slicing. Serve and enjoy!

October 2, 2020 0 comment
0 FacebookTwitterPinterestEmail
Main Dish Recipes

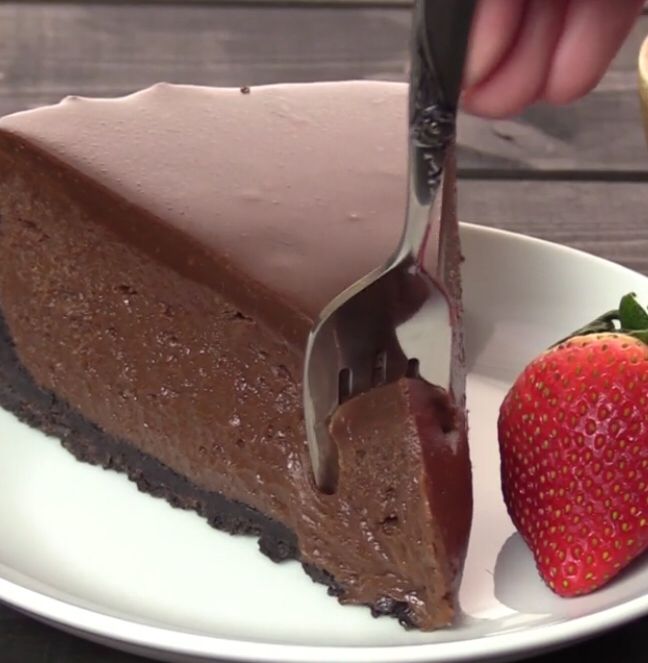
NUTELLA CHEESECAKE

by Rebecca October 2, 2020
written by Rebecca

Yield: 20 SERVINGS | Prep Time: 30 MINUTES | Cook Time: 1 HOUR 15 MINUTES | Additional Time: 10 HOURS | Total Time: 11 HOURS 45 MINUTES

For all the Nutella lovers, this decadent, creamy Nutella Cheesecake recipe promises you a gourmet bakery result. Not overly sweet, silky, and smooth, it’ll make you beg for more!

INGREDIENTS

CRUST:

2 1/2 cups (250 grams) fudge filled cookie crumbs, about 30 sandwich cookies

6 tablespoons (6 tablespoons) unsalted butter, melted

FILLING:

24 ounces (681 grams) cream cheese, softened

3/4 cup (180 millilitres) heavy cream

3/4 cup (150 grams) sugar

1 tablespoon vanilla extract

1/2 teaspoon salt

2 cups (560 grams) Nutella

4 large eggs, lightly beaten

GLAZE:

1 cup (280 grams) Nutella

1/2 cup (120 millilitres) heavy cream

HOW TO MAKE NUTELLA CHEESECAKE

TO MAKE THE CRUST:

Step 1: Prepare the oven. First, place the oven rack to the lower third area of the oven before preheating to 350 degrees F.

Step 2: Using an aluminium foil, tightly wrap the outer bottom of a 9-inch springform pan.

Step 3: In a mixing bowl, combine the cookie crumbs with the melted butter.

Step 4: In the bottom of the prepared pan, press the crumb mixture about 2-inches up the sides.

Step 5: Place inside the preheated oven and bake for about 10 minutes.

Step 6: Once done, remove from the oven and allow to cool.

TO MAKE THE FILLING:

Step 1: Adjust the temperature of the oven to 300 degrees F.

Step 2: Add the cream cheese, heavy cream, and sugar in a large mixing bowl. Beat using an electric mixer until smooth and fluffy.

Step 3: Then, add in the Nutella and continue to beat until fully combined. As needed, scrape down the sides of the bowl. Gently stir in the eggs with a silicone spatula until just incorporated.

Step 4: Empty the batter on top of the crust. Put the cheesecake in a roasting pan filled with enough hot water almost halfway the sides of the cheesecake pan.

Step 5: Bake in the preheated oven for an hour or until the edges are set and the centre is a bit jiggly. Turn off but don’t remove the cheesecake in the water bath. Let it stay in the oven for an hour more.

Step 6: When ready, take the cheesecake out of the water bath. Loosen it from the pan by running a small knife around the edges.

Step 7: Let it cool fully at room temperature. Then, place in the fridge overnight.

TO MAKE THE GLAZE:

Step 1: Transfer the cheesecake on a wire rack over a baking sheet.

Step 2: Allow the cream to boil over medium-low heat. Then, pour this on the Nutella bowl and mix until incorporated.

Step 3: Drench the cake in glaze and smooth it with an offset spatula. Let the glaze run over the edges and sides of the cheesecake.

Step 4: Place in the fridge for at least an hour or until the glaze is set.

NOTES:

The texture of the cheesecake is softer and creamier compare to a normal cheesecake. Similar to a thick and silky mousse, thus, the cheesecake is easier to slice when frozen or very cold. Although, for optimal texture, I say let the slices sit at room temperature for at least 20 to 30 minutes before serving.

Don’t substitute the heavy cream with milk. It’s necessary for this recipe.

Remember that this cheesecake has a texture of a mousse so using a regular cake pan is not recommended. Plus, regular cake pans will not be able to hold all the batter as it is not tall enough.

Baking variation:

You can make this in 24 muffin cups as well. Just line the muffin cups with paper. Bake for about 20 to 25 minutes. And when done, turn the oven off but leave the cheesecake in the oven for an hour more.

MAKE AHEAD TIP:

Tightly cover the baked and chilled cheesecake and store in the fridge for up to 4 days.

Or store in the freezer for up to 2 months. Just cover tightly. When ready to serve, slice while frozen and sit at room temperature for at least 15 to 30 minutes.

Nutrition Facts:

Amount Per Serving: CALORIES: 380

NUTELLA CHEESECAKE

Rebecca Yield: 20 SERVINGS | Prep Time: 30 MINUTES | Cook Time: 1 HOUR 15 MINUTES | Additional Time: 10 HOURS | Total Time: 11 HOURS 45 MINUTES For all the… Main Dish Recipes NUTELLA CHEESECAKE European Print This
Serves: 20 Prep Time: 30 mins Cooking Time: 11 hrs 15 mins 11 hrs 15 mins
Nutrition facts: 380 calories 20 grams fat
Rating: 5.0/5
( 1 voted )

Ingredients

  • CRUST:
  • 2 1/2 cups (250 grams) fudge filled cookie crumbs, about 30 sandwich cookies
  • 6 tablespoons (6 tablespoons) unsalted butter, melted
  • FILLING:
  • 24 ounces (681 grams) cream cheese, softened
  • 3/4 cup (180 millilitres) heavy cream
  • 3/4 cup (150 grams) sugar
  • 1 tablespoon vanilla extract
  • 1/2 teaspoon salt
  • 2 cups (560 grams) Nutella
  • 4 large eggs, lightly beaten
  • GLAZE:
  • 1 cup (280 grams) Nutella
  • 1/2 cup (120 millilitres) heavy cream

Instructions

TO MAKE THE CRUST:

Step 1: Prepare the oven. First, place the oven rack to the lower third area of the oven before preheating to 350 degrees F.

Step 2: Using an aluminium foil, tightly wrap the outer bottom of a 9-inch springform pan.

Step 3: In a mixing bowl, combine the cookie crumbs with the melted butter.

Step 4: In the bottom of the prepared pan, press the crumb mixture about 2-inches up the sides.

Step 5: Place inside the preheated oven and bake for about 10 minutes.

Step 6: Once done, remove from the oven and allow to cool.

TO MAKE THE FILLING:

Step 1: Adjust the temperature of the oven to 300 degrees F.

Step 2: Add the cream cheese, heavy cream, and sugar in a large mixing bowl. Beat using an electric mixer until smooth and fluffy.

Step 3: Then, add in the Nutella and continue to beat until fully combined. As needed, scrape down the sides of the bowl. Gently stir in the eggs with a silicone spatula until just incorporated.

Step 4: Empty the batter on top of the crust. Put the cheesecake in a roasting pan filled with enough hot water almost halfway the sides of the cheesecake pan.

Step 5: Bake in the preheated oven for an hour or until the edges are set and the centre is a bit jiggly. Turn off but don't remove the cheesecake in the water bath. Let it stay in the oven for an hour more.

Step 6: When ready, take the cheesecake out of the water bath. Loosen it from the pan by running a small knife around the edges.

Step 7: Let it cool fully at room temperature. Then, place in the fridge overnight.

TO MAKE THE GLAZE:

Step 1: Transfer the cheesecake on a wire rack over a baking sheet.

Step 2: Allow the cream to boil over medium-low heat. Then, pour this on the Nutella bowl and mix until incorporated.

Step 3: Drench the cake in glaze and smooth it with an offset spatula. Let the glaze run over the edges and sides of the cheesecake.

Step 4: Place in the fridge for at least an hour or until the glaze is set.

NOTES:

The texture of the cheesecake is softer and creamier compare to a normal cheesecake. Similar to a thick and silky mousse, thus, the cheesecake is easier to slice when frozen or very cold. Although, for optimal texture, I say let the slices sit at room temperature for at least 20 to 30 minutes before serving.

Don't substitute the heavy cream with milk. It's necessary for this recipe.

Remember that this cheesecake has a texture of a mousse so using a regular cake pan is not recommended. Plus, regular cake pans will not be able to hold all the batter as it is not tall enough.

Baking variation:

You can make this in 24 muffin cups as well. Just line the muffin cups with paper. Bake for about 20 to 25 minutes. And when done, turn the oven off but leave the cheesecake in the oven for an hour more.

MAKE AHEAD TIP:

Tightly cover the baked and chilled cheesecake and store in the fridge for up to 4 days.

Or store in the freezer for up to 2 months. Just cover tightly. When ready to serve, slice while frozen and sit at room temperature for at least 15 to 30 minutes.

October 2, 2020 0 comment
0 FacebookTwitterPinterestEmail
Main Dish Recipes

BEST VANILLA BUTTERCREAM FROSTING

by Rebecca October 2, 2020
written by Rebecca

Yield: 5 CUPS | Prep Time: 15 MINUTES | Total Time: 15 MINUTES

I love the traditional vanilla buttercream frosting- with its light, creamy texture, this homemade frosting goes along with just anything! From cupcakes, cakes, or cookies! Nothing will beat the classic! And with a few simple ingredients, this best frosting comes together in a heartbeat!

INGREDIENTS

1 1/2 cups (340 g) unsalted butter, softened

5 1/2 cups (660 g) confectioners’ sugar, sifted

1 tablespoon vanilla extract

1/4 teaspoon salt

6 tablespoons heavy cream, room temperature

HOW TO MAKE THE BEST VANILLA BUTTERCREAM FROSTING

Step 1: Add the butter into a large mixing bowl with a handheld electric mixer or to a bowl of a stand mixer. Beat for about 5 minutes on medium-high speed until creamy and pale.

Step 2: Add in 1/2 confectioner’s sugar. Continue to beat on low speed until the sugar has completely moistened. Turning the speed to medium-high and beating for another 3 to 5 minutes until combined.

Step 3: Then, add in the rest of the confectioner’s sugar. Again, beat on low until moistened, then, adjusting to medium-high and beating until combined for approximately 3 to 5 minutes.

Step 4: Add in the vanilla and salt. Adjust the mixer to low and gradually add in 3 tbsp heavy cream. Set the speed to medium-high and beat for another 3 to 5 minutes until the cream is combined. Scraping the sides and bottom of the bowl after 2 minutes.

Step 5: Check to see the consistency and if needed, add half tbsp of cream at a time. The consistency of the frosting must be soft and spreadable. It should not be too loose that the frosting can’t hold its form.

NOTES:

Before adding in the butter, properly softened it first. Not too soft that it looks oily but soft enough to bend.

The recipe will allow you to make 12 cupcakes or a double layer cake. Or half the recipe to make 12 cupcakes and a single layer cake,

To add some pop of colour, I recommend using gel food colouring. Adding in your desired amount during step 4.

MAKE AHEAD TIP:

You can store the frosting in an airtight container in the fridge for up to 2 weeks. And before mixing, allow the buttercream to come to room temperature. Just set it out on the counter for several hours.

Or freeze the frosting. Place in the freezer for up to 3 months. When it is time to use, thaw the frosting in the fridge overnight. And allow to come to room temperature to soften.

Nutrition facts:

Amount Per Serving: CALORIES: 214 TOTAL FAT: 13g SATURATED FAT: 8g TRANS FAT: 0g UNSATURATED FAT: 4g CHOLESTEROL: 35mg SODIUM: 25mg CARBOHYDRATES: 25g FIBER: 0g SUGAR: 25g PROTEIN: 0g

BEST VANILLA BUTTERCREAM FROSTING

Rebecca Yield: 5 CUPS | Prep Time: 15 MINUTES | Total Time: 15 MINUTES I love the traditional vanilla buttercream frosting- with its light, creamy texture, this homemade frosting goes along… Main Dish Recipes BEST VANILLA BUTTERCREAM FROSTING European Print This
Serves: 5 Prep Time: 15 mins
Nutrition facts: 214 calories 13 fat
Rating: 5.0/5
( 1 voted )

Ingredients

  • 1 1/2 cups (340 g) unsalted butter, softened
  • 5 1/2 cups (660 g) confectioners’ sugar, sifted
  • 1 tablespoon vanilla extract
  • 1/4 teaspoon salt
  • 6 tablespoons heavy cream, room temperature

Instructions

Step 1: Add the butter into a large mixing bowl with a handheld electric mixer or to a bowl of a stand mixer. Beat for about 5 minutes on medium-high speed until creamy and pale.

Step 2: Add in 1/2 confectioner's sugar. Continue to beat on low speed until the sugar has completely moistened. Turning the speed to medium-high and beating for another 3 to 5 minutes until combined.

Step 3: Then, add in the rest of the confectioner's sugar. Again, beat on low until moistened, then, adjusting to medium-high and beating until combined for approximately 3 to 5 minutes.

Step 4: Add in the vanilla and salt. Adjust the mixer to low and gradually add in 3 tbsp heavy cream. Set the speed to medium-high and beat for another 3 to 5 minutes until the cream is combined. Scraping the sides and bottom of the bowl after 2 minutes.

Step 5: Check to see the consistency and if needed, add half tbsp of cream at a time. The consistency of the frosting must be soft and spreadable. It should not be too loose that the frosting can't hold its form.

NOTES:

Before adding in the butter, properly softened it first. Not too soft that it looks oily but soft enough to bend.

The recipe will allow you to make 12 cupcakes or a double layer cake. Or half the recipe to make 12 cupcakes and a single layer cake,

To add some pop of colour, I recommend using gel food colouring. Adding in your desired amount during step 4.

MAKE AHEAD TIP:

You can store the frosting in an airtight container in the fridge for up to 2 weeks. And before mixing, allow the buttercream to come to room temperature. Just set it out on the counter for several hours.

Or freeze the frosting. Place in the freezer for up to 3 months. When it is time to use, thaw the frosting in the fridge overnight. And allow to come to room temperature to soften.

October 2, 2020 0 comment
0 FacebookTwitterPinterestEmail
Main Dish Recipes

Chocolate Buttercream Frosting

by Rebecca October 2, 2020
written by Rebecca

PREP TIME: 5 minutes | TOTAL TIME: 5 minutes | SERVINGS: 24 cupcakes

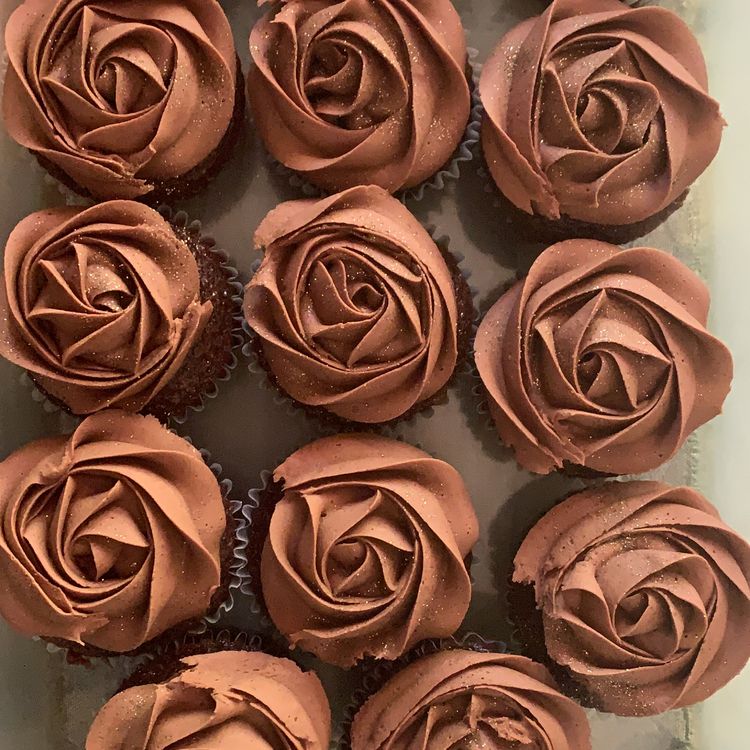
Chocolate buttercream frosting is one of the most loved, simplest, and easiest to make. Perfectly sweet with silky chocolate texture. And it’s made with just a basic ingredient – cocoa powder! One of the best frosting that is excellent for any cupcakes and all occasions!

INGREDIENTS

1 cup salted butter1 (at room temperature)

3 ½-4 cups powdered sugar

1/2 cup unsweetened cocoa powder

1 teaspoon vanilla extract

2-3 tablespoons whole milk, half-and-half, or cream

How to make Chocolate Buttercream Frosting

Step 1: Using a hand or stand electric mixer, beat the butter on medium speed for about 3 to 4 minutes or until pale. Scrape the sides of the bowl as needed.

Step 2: Add in 3½ cups powdered sugar, cocoa powder, vanilla, and 2 tbsp of milk. Mix again, this time on low until everything is incorporated.

Step 3: You can add a tablespoon of milk if the frosting turns out too dry or 2 tbsp powdered sugar at a time if it’s too wet until the mixture is on spreadable consistency.

NOTES:

In place of salted butter, you can use unsalted with few pinches of salt. The butter should be at the right temperature (72 F), and when pressed, the butter should give a bit but still stays in shape. It should be soft and melty.

Sift the powdered sugar and cocoa first because they might be lumpy before adding them in the butter, making them easy to combine with the butter.

Heavy cream will guarantee you a slightly lighter and fluffier frosting, but milk or half-and-half will work just fine, too.

NUTRITION FACTS:

SERVING: 1serving CALORIES: 141kcal (7%) CARBOHYDRATES: 18g (6%) FAT: 7g (11%) SATURATED FAT: 5g (25%) CHOLESTEROL: 20mg (7%) SODIUM: 68mg (3%) POTASSIUM: 31mg (1%) SUGAR: 17g (19%) VITAMIN A: 235IU (5%) CALCIUM: 6mg (1%) IRON: 0.3mg (2%)

Chocolate Buttercream Frosting

Rebecca PREP TIME: 5 minutes | TOTAL TIME: 5 minutes | SERVINGS: 24 cupcakes Chocolate buttercream frosting is one of the most loved, simplest, and easiest to make. Perfectly sweet with… Main Dish Recipes Chocolate Buttercream Frosting European Print This
Serves: 24 Prep Time: 5 mins
Nutrition facts: 141 calories 7 fat
Rating: 5.0/5
( 1 voted )

Ingredients

  • 1 cup salted butter1 (at room temperature)
  • 3 ½-4 cups powdered sugar
  • 1/2 cup unsweetened cocoa powder
  • 1 teaspoon vanilla extract
  • 2-3 tablespoons whole milk, half-and-half, or cream

Instructions

Step 1: Using a hand or stand electric mixer, beat the butter on medium speed for about 3 to 4 minutes or until pale. Scrape the sides of the bowl as needed.

Step 2: Add in 3½ cups powdered sugar, cocoa powder, vanilla, and 2 tbsp of milk. Mix again, this time on low until everything is incorporated.

Step 3: You can add a tablespoon of milk if the frosting turns out too dry or 2 tbsp powdered sugar at a time if it's too wet until the mixture is on spreadable consistency.

NOTES:

In place of salted butter, you can use unsalted with few pinches of salt. The butter should be at the right temperature (72 F), and when pressed, the butter should give a bit but still stays in shape. It should be soft and melty.

Sift the powdered sugar and cocoa first because they might be lumpy before adding them in the butter, making them easy to combine with the butter.

Heavy cream will guarantee you a slightly lighter and fluffier frosting, but milk or half-and-half will work just fine, too.


October 2, 2020 0 comment
0 FacebookTwitterPinterestEmail
Main Dish Recipes

Rice Krispie Treat Pumpkins

by Rebecca October 2, 2020
written by Rebecca

Prep Time: 20 mins. | Total Time: 20 mins. | Servings: 12

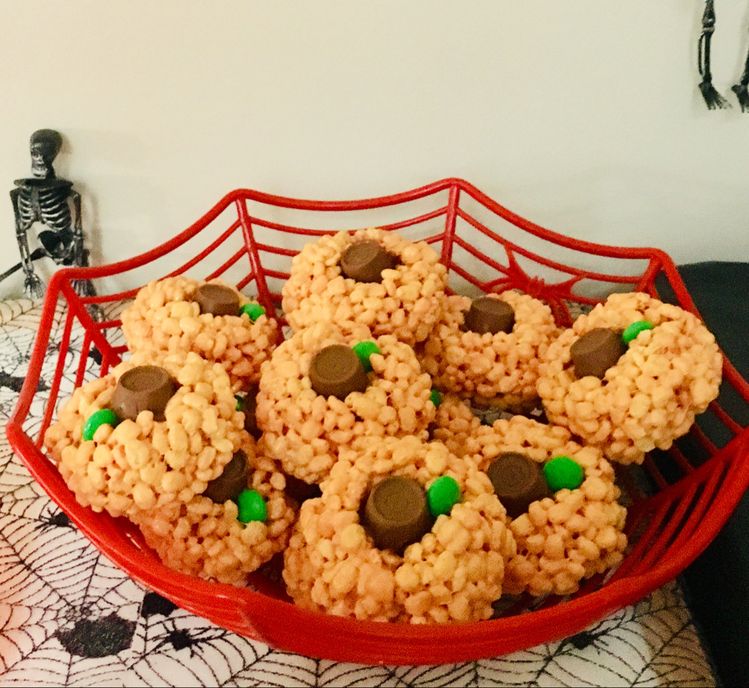
These balls are so much fun! I made them with my kids the other day and they were so happy. This recipe is a great bonding experience with your kids! It is nice to prepare food with the ones you love, right? Anyway, you can use two different colours for this besides yellow and red. Not only do they look beautiful, but they also taste so good! These little treats will surely bring a big smile on your faces. Feel free to add more ingredients if needed. Give it your take. Enjoy!

Ingredients

1/4 cup butter

1 bag large marshmallows approximately 40 marshmallows

6 cups Rice Krispies

Red & Yellow Liquid Food Coloring

Mini Rolos

Green M&M’s

1/4 cup cooking oil or melted butter in a small bowl

How to make Rice Krispie Treat Pumpkins

Step 1: Place a large pot on the stove and turn the heat to low.

Step 2: Add the butter and allow it to melt.

Step 3: Add the marshmallows and stir until well mixed with the butter.

Step 4: Remove the pot from the heat. Add droplets of yellow food colouring into the mixture
followed by the colour red and stir every drop until you achieve your preferred colour.

Step 5: Stir in the Rice Krispies.

Step 6: Rub oil or butter all over your hands. Get a load of the Rice Krispie mixture and form
small balls out of it.

Step 7: Place the balls on a parchment paper.

Step 8: Add a Mini Rolo on top of each pumpkin as stem and green M&M for the leaf.

Step 9: Let them cool at room temperature to harden.

Notes:

If you are going to use gloves, you don’t need to oil it up to prevent the balls from sticking. They don’t stick on gloves.

Rice Krispie Treat Pumpkins

Rebecca Prep Time: 20 mins. | Total Time: 20 mins. | Servings: 12 These balls are so much fun! I made them with my kids the other day and they were… Main Dish Recipes Rice Krispie Treat Pumpkins European Print This
Serves: 12 Prep Time: 20 mins
Nutrition facts: 200 calories 20 grams fat
Rating: 5.0/5
( 1 voted )

Ingredients

  • 1/4 cup butter
  • 1 bag large marshmallows approximately 40 marshmallows
  • 6 cups Rice Krispies
  • Red & Yellow Liquid Food Coloring
  • Mini Rolos
  • Green M&M's
  • 1/4 cup cooking oil or melted butter in a small bowl

Instructions

Step 1: Place a large pot on the stove and turn the heat to low.

Step 2: Add the butter and allow it to melt.

Step 3: Add the marshmallows and stir until well mixed with the butter.

Step 4: Remove the pot from the heat. Add droplets of yellow food colouring into the mixture
followed by the colour red and stir every drop until you achieve your preferred colour.

Step 5: Stir in the Rice Krispies.

Step 6: Rub oil or butter all over your hands. Get a load of the Rice Krispie mixture and form
small balls out of it.

Step 7: Place the balls on a parchment paper.

Step 8: Add a Mini Rolo on top of each pumpkin as stem and green M&M for the leaf.

Step 9: Let them cool at room temperature to harden.

Notes:

If you are going to use gloves, you don't need to oil it up to prevent the balls from sticking. They don't stick on gloves.

October 2, 2020 0 comment
0 FacebookTwitterPinterestEmail
Newer Posts
Older Posts

Popular Posts

  • 1

    Crispy Crunchy Parmesan Potatoes

    March 21, 2020
  • 2

    CROCK POT SMOTHERED PORK CHOPS

    March 21, 2020
  • Facebook
  • Twitter

@2019 - All Right Reserved.


Back To Top