Cook it once
  • Home
  • Privacy Policy
  • Recipes
    • KETO
    • LC
    • WW
  • Tips
  • Contact
Cook it once
  • Home
  • Privacy Policy
  • Recipes
    • KETO
    • LC
    • WW
  • Tips
  • Contact
Category:

Main Dish Recipes

Main Dish Recipes

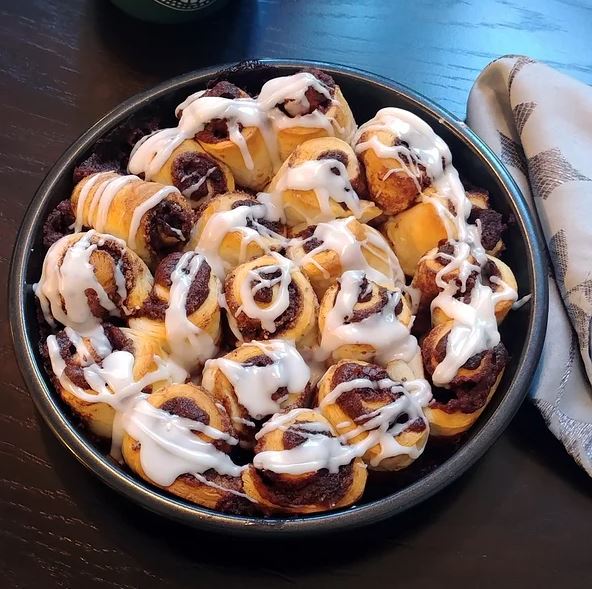
Biscuit Cinnamon Rolls

by Rebecca October 7, 2020
written by Rebecca

Prep: 20 mins | Cook: 15 mins | Total: 35 mins | Servings: 20

I’m up for some easy and cost-effective recipes today. And the first that came to mind is this Biscuit Cinnamon Rolls. Perfect for breakfast, dessert, or as a late-night feast. Surely everyone will dig this delicious treat. Quick, not fussy, simple, not to mention uses only a few pantry ingredients and guaranteed to give you a superb result.

Ingredients

butter for greasing

2 tablespoons brown sugar

Filling:

½ cup white sugar

2 tablespoons ground cinnamon

2 tablespoons brown sugar

1 tablespoon vanilla extract

Glaze:

½ cup confectioners’ sugar

2 teaspoons milk

Biscuits:

1 (10 counts) package refrigerated biscuit dough

¼ cup butter, melted

How to make Biscuit Cinnamon Rolls

Step 1: Prepare the oven. Preheat it to 350 degrees F or 175 degrees C.

Step 2: Grease the bottom of an 8-inch round or square pan with butter. And sprinkle the bottom with 2 tbsp brown sugar.

Step 3: In a bowl, add the sugar, cinnamon, 2 tbsp brown sugar, and vanilla extract. Mix the filling until incorporated.

Step 4: To make the glaze, mix the confectioner’s sugar with milk in a separate bowl until combined.

Step 5: Roll or punch each biscuit until flat.

Step 6: Soak in melted butter and generously sprinkle with filling mixture.

Step 7: Roll each dough up and slice in halves. Transfer into the prepared pan cut-side down.

Step 8: Do the same for the rest to make 20 pieces of rolls.

Step 9: Place inside the preheated oven and bake for about 15 minutes or until the tops starts to brown.

Step 10: When done, remove the biscuit cinnamon rolls from the oven and glaze.

Nutrition Facts:

Per Serving: 115.9 calories; protein 1g 2% DV; carbohydrates 17.5g 6% DV; fat 4.8g 7% DV; cholesterol 7.8mg 3% DV; sodium 161.2mg 6% DV.

Biscuit Cinnamon Rolls

Rebecca Prep: 20 mins | Cook: 15 mins | Total: 35 mins | Servings: 20 I’m up for some easy and cost-effective recipes today. And the first that came to mind… Main Dish Recipes Biscuit Cinnamon Rolls European Print This
Serves: 20 Prep Time: 20 mins Cooking Time: 15 mins 15 mins
Nutrition facts: 115.9 calories 4.8 fat
Rating: 5.0/5
( 1 voted )

Ingredients

  • butter for greasing
  • 2 tablespoons brown sugar
  • Filling:
  • ½ cup white sugar
  • 2 tablespoons ground cinnamon
  • 2 tablespoons brown sugar
  • 1 tablespoon vanilla extract
  • Glaze:
  • ½ cup confectioners' sugar
  • 2 teaspoons milk
  • Biscuits:
  • 1 (10 counts) package refrigerated biscuit dough
  • ¼ cup butter, melted

Instructions

Step 1: Prepare the oven. Preheat it to 350 degrees F or 175 degrees C.

Step 2: Grease the bottom of an 8-inch round or square pan with butter. And sprinkle the bottom with 2 tbsp brown sugar.

Step 3: In a bowl, add the sugar, cinnamon, 2 tbsp brown sugar, and vanilla extract. Mix the filling until incorporated.

Step 4: To make the glaze, mix the confectioner's sugar with milk in a separate bowl until combined.

Step 5: Roll or punch each biscuit until flat.

Step 6: Soak in melted butter and generously sprinkle with filling mixture.

Step 7: Roll each dough up and slice in halves. Transfer into the prepared pan cut-side down.

Step 8: Do the same for the rest to make 20 pieces of rolls.

Step 9: Place inside the preheated oven and bake for about 15 minutes or until the tops starts to brown.

Step 10: When done, remove the biscuit cinnamon rolls from the oven and glaze.
October 7, 2020 0 comment
0 FacebookTwitterPinterestEmail
Main Dish Recipes

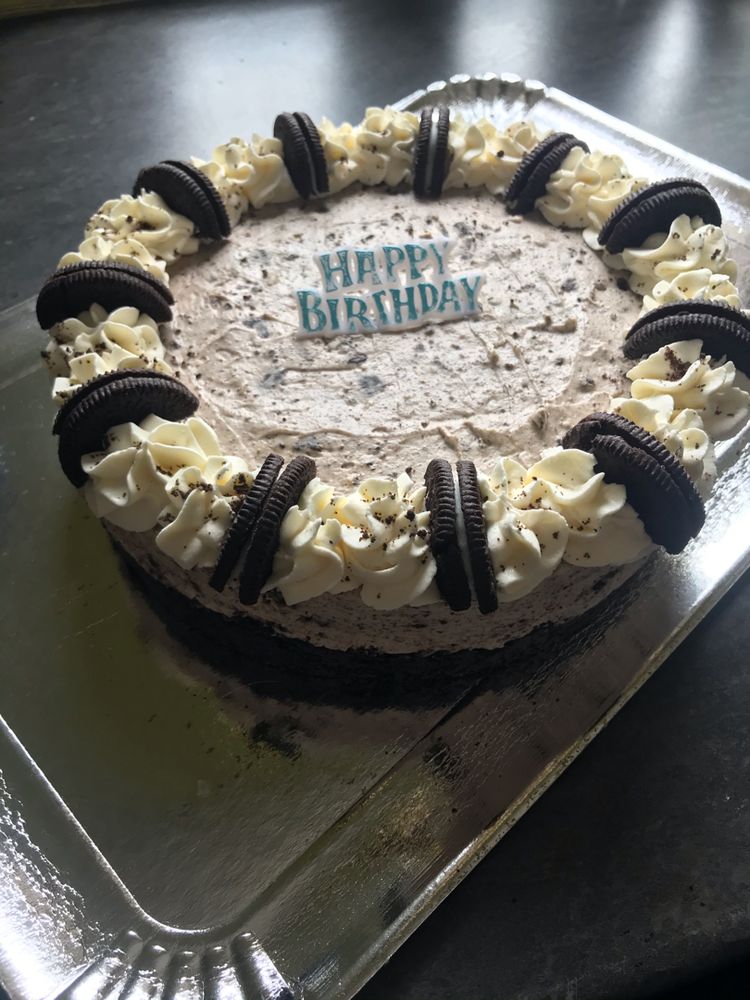
No Bake Oreo Cheesecake

by Rebecca October 6, 2020
written by Rebecca

PREP TIME: 20 MINS | TOTAL TIME: 20 MINS | SERVINGS: 12

Silky smooth Oreo Cheesecake with loads of Oreo chunks in every bite. A no-bake dessert to enjoy not only during summer days but all year round! Calls for only a few simple ingredients, almost a no-brainer, and easily come together.

Ingredients

1/4 cup melted butter

50 Oreo cookies (2 300g packages) divided

1/2 cup white chocolate chips

24 oz cream cheese (3 250g/8oz packages)

1 1/2 cups powdered sugar

1 1/4 cup heavy whipping cream divided

How to make No-Bake Oreo Cheesecake

To make the Crust:

Step 1: In a food processor, add the melted butter and 1300 gram package of Oreo cookies. Pulse until smooth and the crumbs begin to stick together.

Step 2: Pour the crumbs into a 9-inch springform pan and press on the bottom and around half-inch up the sides.

To make the Filling:

Step 3: Add the white chocolate chips with 1/4 cup cream in a medium bowl. Microwave for about 20 seconds on high, stirring until melted and smooth. Set aside.

Step 4: Place the cream cheese in a large bowl. Beat using an electric mixer until smooth before adding in the sugar and melted white chocolate. Beat some more until incorporated.

Step 5: Add in the rest 1 cup cream. Beating on low until combined and on high for about 3 to 4 minutes or until thickened and fluffy. Beat until stiff peaks form.

Step 6: Set aside 5 Oreo cookies for later and add the rest into a large ziptop bag. Use a rolling pin or any hard object to crush the cookies.

Step 7: Then, stir the crushed Oreo cookies into the cheesecake filling.

Step 8: Pour and spread this on top of the prepared crust.

Step 9: Cover and place in the fridge to chill for at least 5 to 6 hours or overnight.

Step 10: When ready, slice, and serve. Enjoy!

Nutrition Facts:

Calories: 646cal | Carbohydrates: 57g | Protein: 7g | Fat: 44g | Saturated Fat: 23g | Cholesterol: 108mg | Sodium: 462mg | Potassium: 225mg | Fiber: 1g | Sugar: 41g | Vitamin A: 1245IU | Vitamin C: 0.2mg | Calcium: 99mg | Iron: 4.6mg

No Bake Oreo Cheesecake

Rebecca PREP TIME: 20 MINS | TOTAL TIME: 20 MINS | SERVINGS: 12 Silky smooth Oreo Cheesecake with loads of Oreo chunks in every bite. A no-bake dessert to enjoy not… Main Dish Recipes No Bake Oreo Cheesecake European Print This
Serves: 12 Prep Time: 20 mins
Nutrition facts: 646 calories 44 fat
Rating: 5.0/5
( 1 voted )

Ingredients

  • 1/4 cup melted butter
  • 50 Oreo cookies (2 300g packages) divided
  • 1/2 cup white chocolate chips
  • 24 oz cream cheese (3 250g/8oz packages)
  • 1 1/2 cups powdered sugar
  • 1 1/4 cup heavy whipping cream divided

Instructions

To make the Crust:

Step 1: In a food processor, add the melted butter and 1300 gram package of Oreo cookies. Pulse until smooth and the crumbs begin to stick together.

Step 2: Pour the crumbs into a 9-inch springform pan and press on the bottom and around half-inch up the sides.

To make the Filling:

Step 3: Add the white chocolate chips with 1/4 cup cream in a medium bowl. Microwave for about 20 seconds on high, stirring until melted and smooth. Set aside.

Step 4: Place the cream cheese in a large bowl. Beat using an electric mixer until smooth before adding in the sugar and melted white chocolate. Beat some more until incorporated.

Step 5: Add in the rest 1 cup cream. Beating on low until combined and on high for about 3 to 4 minutes or until thickened and fluffy. Beat until stiff peaks form.

Step 6: Set aside 5 Oreo cookies for later and add the rest into a large ziptop bag. Use a rolling pin or any hard object to crush the cookies.

Step 7: Then, stir the crushed Oreo cookies into the cheesecake filling.

Step 8: Pour and spread this on top of the prepared crust.

Step 9: Cover and place in the fridge to chill for at least 5 to 6 hours or overnight.

Step 10: When ready, slice, and serve. Enjoy!

October 6, 2020 0 comment
0 FacebookTwitterPinterestEmail
Main Dish Recipes

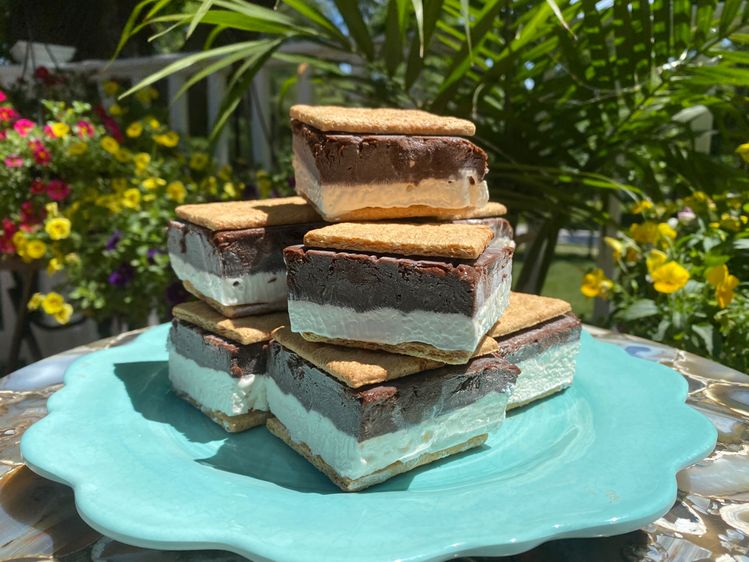
EASY FROZEN S’MORE SANDWICHES

by Rebecca October 6, 2020
written by Rebecca

Prep Time: 20 mins | Freezing Time: 6 hrs | Total Time: 20 mins | Servings: 15

This never gets old – everything S’mores! S’more when it first came about became almost like a tradition. These have many forms and one of my favourites is this Frozen S’more sandwich. Munching on the amazing refreshing flavours of these frozen sandwich is a nice way to cool off on a hot summer day.

Ingredients

1 box instant chocolate pudding

2.5 cups cold milk

16 graham crackers

7 oz marshmallow creme

4 oz cream cheese softened

8 oz frozen whipped topping thawed

How to make Frozen S’mores

Step 1: Using a foil or parchment paper, line a 9 x 13-inch pan. Let the paper to overhang.

Step 2: Add the pudding mix and milk in a medium bowl. Whisk until smooth and creamy. Transfer into the prepared pan, spreading evenly.

Step 3: Chill the chocolate layer.

Step 4: Meanwhile, make the marshmallow layer by beating the cream cheese and marshmallow cream until smooth. And fold in the whipping topping.

Step 5: Add and spread the marshmallow layer on top of the chocolate layer.

Step 6: Freeze the layers, covered, for at least 6 hours or until firm to cut through. Take the layers off the pan using the foil overhang and transfer it on a cutting board.

Step 7: Grab the graham crackers and break 15 pieces of graham in half. Cutting the pudding and marshmallow layers the same size as the graham crackers in 15 individual squares.

Step 8: Between the two graham crackers, sandwich the pudding and marshmallow layers.

Step 9: Serve right away or place in an airtight container or bag and store in the freezer. Graham crackers stored for a while in the freezer will be slightly softened. To serve when frozen, let the sandwich rest for at least 10 minutes at room temperature for the best texture.

EASY FROZEN S’MORE SANDWICHES

Rebecca Prep Time: 20 mins | Freezing Time: 6 hrs | Total Time: 20 mins | Servings: 15 This never gets old – everything S’mores! S’more when it first came about… Main Dish Recipes EASY FROZEN S’MORE SANDWICHES European Print This
Serves: 15 Prep Time: 20 mins
Nutrition facts: 200 calories 20 grams fat
Rating: 5.0/5
( 1 voted )

Ingredients

  • 1 box instant chocolate pudding
  • 2.5 cups cold milk
  • 16 graham crackers
  • 7 oz marshmallow creme
  • 4 oz cream cheese softened
  • 8 oz frozen whipped topping thawed

Instructions

Step 1: Using a foil or parchment paper, line a 9 x 13-inch pan. Let the paper to overhang.

Step 2: Add the pudding mix and milk in a medium bowl. Whisk until smooth and creamy. Transfer into the prepared pan, spreading evenly.

Step 3: Chill the chocolate layer.

Step 4: Meanwhile, make the marshmallow layer by beating the cream cheese and marshmallow cream until smooth. And fold in the whipping topping.

Step 5: Add and spread the marshmallow layer on top of the chocolate layer.

Step 6: Freeze the layers, covered, for at least 6 hours or until firm to cut through. Take the layers off the pan using the foil overhang and transfer it on a cutting board.

Step 7: Grab the graham crackers and break 15 pieces of graham in half. Cutting the pudding and marshmallow layers the same size as the graham crackers in 15 individual squares.

Step 8: Between the two graham crackers, sandwich the pudding and marshmallow layers.

Step 9: Serve right away or place in an airtight container or bag and store in the freezer. Graham crackers stored for a while in the freezer will be slightly softened. To serve when frozen, let the sandwich rest for at least 10 minutes at room temperature for the best texture.

October 6, 2020 0 comment
0 FacebookTwitterPinterestEmail
Main Dish Recipes

Chocolate Custard Horns

by Rebecca October 6, 2020
written by Rebecca

Satisfy your sweet tooth with these easy and quick Chocolate Custard Horns. These adorable decadent chocolate pastries are always the star of any gatherings. Filled and dipped in chocolate, this delicious treat will always be the favourite of kids and adults alike.

Ingredients

Chocolate Custard Horns:

1 sheet puff pastry

Egg, beaten

2 bars chocolate

Chocolate Custard:

2 egg yolks

20 grams of sugar

15 grams of flour

200 cups milk

1 bar chocolate

10 grams unsweetened cocoa

How to make Chocolate Custard Horns

To make the Chocolate Custard Horns:

Step 1: Begin by thawing the pastry sheets. Then, cut them into half-inch strips.

Step 2: Around the forms, wrap the strips, overlapping while wrapping.

Step 3: Brush the pastry sheets with a beaten egg.

Step 4: Place inside the oven and bake at 200 degrees C for about 15 minutes.

Step 5: Meanwhile, melt 2 chocolate bars. Set aside.

Step 6: Into the pastry horns, pipe the chocolate custard. Dip the end into the melted chocolate and allow to set on parchment paper.

Step 7: Once the melted chocolate hardens, the Chocolate Custard Horns are ready to serve. Enjoy!

To make the Chocolate Custard:

Step 1: In a bowl, mix 2 egg yolks with 20 grams sugar until incorporated.

Step 2: Then, sift in the flour and unsweetened cocoa. Stir well.

Step 3: In little amounts, add in the milk, beating every after each addition.

Step 4: Using a plastic wrap, cover the bowl and microwave at 600 watts for about 2 minutes.

Step 5: Break and mix the chocolate into the hot mixture. Whisk with a wire rack until melted and microwave for about 2 minutes. Then, set aside to cool.

Step 6: Place the cooled mixture into the fridge until thick and smooth before filling into a piping bag.

Chocolate Custard Horns

Rebecca Satisfy your sweet tooth with these easy and quick Chocolate Custard Horns. These adorable decadent chocolate pastries are always the star of any gatherings. Filled and dipped in chocolate, this… Main Dish Recipes Chocolate Custard Horns European Print This
Nutrition facts: 200 calories 20 grams fat
Rating: 5.0/5
( 1 voted )

Ingredients

  • Chocolate Custard Horns:
  • 1 sheet puff pastry
  • Egg, beaten
  • 2 bars chocolate
  • Chocolate Custard:
  • 2 egg yolks
  • 20 grams of sugar
  • 15 grams of flour
  • 200 cups milk
  • 1 bar chocolate
  • 10 grams unsweetened cocoa

Instructions

To make the Chocolate Custard Horns:

Step 1: Begin by thawing the pastry sheets. Then, cut them into half-inch strips.

Step 2: Around the forms, wrap the strips, overlapping while wrapping.

Step 3: Brush the pastry sheets with a beaten egg.

Step 4: Place inside the oven and bake at 200 degrees C for about 15 minutes.

Step 5: Meanwhile, melt 2 chocolate bars. Set aside.

Step 6: Into the pastry horns, pipe the chocolate custard. Dip the end into the melted chocolate and allow to set on parchment paper.

Step 7: Once the melted chocolate hardens, the Chocolate Custard Horns are ready to serve. Enjoy!

To make the Chocolate Custard:

Step 1: In a bowl, mix 2 egg yolks with 20 grams sugar until incorporated.

Step 2: Then, sift in the flour and unsweetened cocoa. Stir well.

Step 3: In little amounts, add in the milk, beating every after each addition.

Step 4: Using a plastic wrap, cover the bowl and microwave at 600 watts for about 2 minutes.

Step 5: Break and mix the chocolate into the hot mixture. Whisk with a wire rack until melted and microwave for about 2 minutes. Then, set aside to cool.

Step 6: Place the cooled mixture into the fridge until thick and smooth before filling into a piping bag.

October 6, 2020 0 comment
0 FacebookTwitterPinterestEmail
Main Dish Recipes

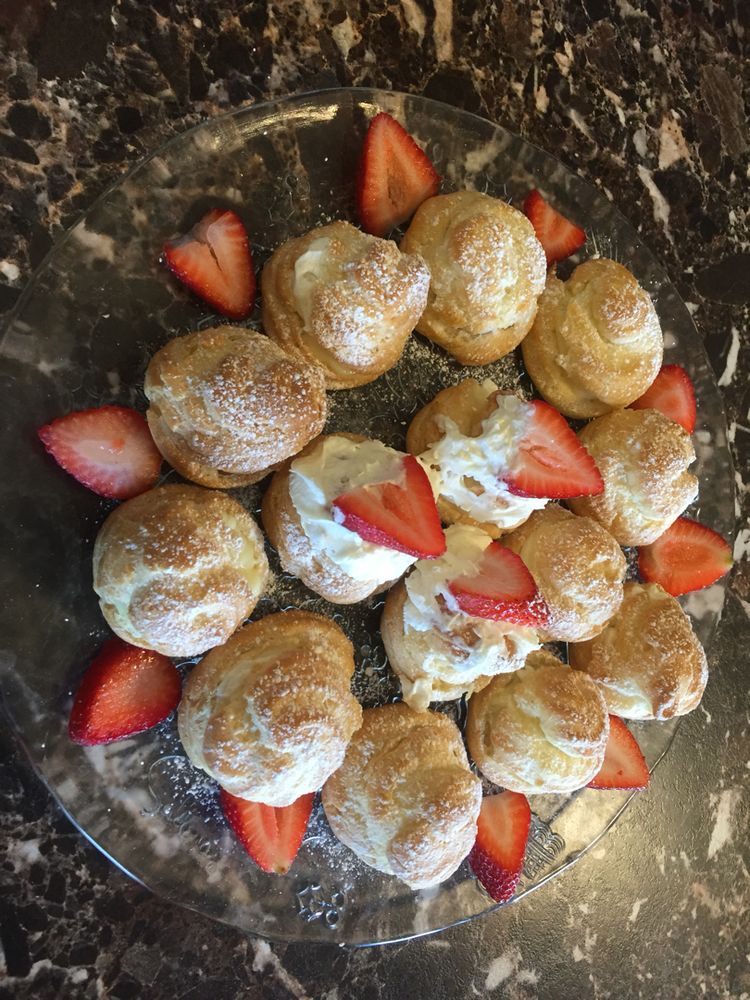
Cream Puffs Recipe

by Rebecca October 6, 2020
written by Rebecca

Prep Time: 30 minutes | Cook Time: 30 minutes | Total Time: 1 hour | Servings: 28 cream puffs

Get creative because these cream puffs are surprisingly easy to make. Experiment with different fillings or toppings and have a fun and delicious treat whenever!

Ingredients

Choux Pastry:

1/2 cup water

1/2 cup whole milk

8 Tbsp unsalted butter

1 tsp granulated sugar

1/4 tsp salt

1 cup all-purpose flour measured correctly

4 eggs (large), room temperature

Cream Filling and Garnish:

2 cups heavy whipping cream chilled

4 Tbsp granulated sugar

1 tsp vanilla extract

28 raspberries optional

1 Tbsp powdered sugar to garnish

How to make Cream Puffs

To Make the Cream Puffs:

Step 1: Prepare the oven. Preheat it to 425 degrees F.

Step 2: Use a Silpat or parchment paper to line a rimmed baking sheet.

Step 3: Combine half a cup water, half cup milk, 8 tbsp butter, a tsp sugar, and 1/4 tsp salt in a medium saucepan. Boil over medium heat. Then, take the pan out of the heat and stir in a cup of flour using a wooden spoon.

Step 4: Heat the mixture over medium heat for about 1 1/2 to 2 minutes while constantly stirring. This will release the extra moisture and partly cook the flour. On the bottom of the pan, a thin film will form and the dough will shape into a smooth ball.

Step 5: Place the dough in a large mixing bowl. Use an electric mixer to beat and cool the mixture a bit for a minute over medium speed. Add in the eggs, a piece at a time, beating every after each addition until combined. Continue beating the dough for another minute until smooth and a thick ribbon forms when pulled up.

Step 6: Fill a piping bag with the dough. The piping bag should be fitted with a half-inch round tip.

Step 7: On the prepared baking sheet, pipe an inch apart 28 puffs with 1 1/2-inch diameter and half-inch tall rounds. Avoid creating peaks, if do, lightly wet your fingertip with water and smooth them out.

Step 8: Place inside the preheated oven and bake for about 10 minutes. Don’t peak, simply adjust the oven temperature to 325 degrees F and continue baking for another 20 to 22 minutes or until the tops golden brown.

Step 9: When done, remove from the oven and transfer on wire racks to cool completely.

To Make the Whipped Cream:

Step 10: Combine 2 cups of heavy cream, 4 tbsp sugar, and a teaspoon vanilla extract in a large mixing bowl. Beat for about 2 minutes on medium-high speed until fluffy and stiff peaks form. Place this in the piping bag with a large open star tip.

Step 11: Fill the cooled puffs with cream. By either piping, the cream into the puffs, pushing the pastry tip into the sides until the cream pushes back. Or cutting the puff’s tops and pipping cream inside with a pastry bag. And pushing raspberry down in the middle if you’d like, then covering with the other tops.

Step 12: Before serving, dust with powdered sugar. Enjoy!

Notes:

End piping and release the pressure before lifting the bag up. To end without a tip, immediately swirl the tip around the side.

Nutrition Facts:

Amount Per Serving: Calories 125 | Fat 10g15% | Saturated Fat 6g38% | Cholesterol 55mg18% | Sodium 38mg2% | Potassium 34mg1% | Carbohydrates 6g2% | Sugar 2g2% | Protein 1g2% | Vitamin A 390IU8% | Vitamin C 0.7mg1% | Calcium 22mg2% | Iron 0.3mg2%

Cream Puffs Recipe

Rebecca Prep Time: 30 minutes | Cook Time: 30 minutes | Total Time: 1 hour | Servings: 28 cream puffs Get creative because these cream puffs are surprisingly easy to make.… Main Dish Recipes Cream Puffs Recipe European Print This
Serves: 28 Prep Time: 30 mins Cooking Time: 30 mins 30 mins
Nutrition facts: 125 calories 10 fat
Rating: 5.0/5
( 1 voted )

Ingredients

  • Choux Pastry:
  • 1/2 cup water
  • 1/2 cup whole milk
  • 8 Tbsp unsalted butter
  • 1 tsp granulated sugar
  • 1/4 tsp salt
  • 1 cup all-purpose flour measured correctly
  • 4 eggs (large), room temperature
  • Cream Filling and Garnish:
  • 2 cups heavy whipping cream chilled
  • 4 Tbsp granulated sugar
  • 1 tsp vanilla extract
  • 28 raspberries optional
  • 1 Tbsp powdered sugar to garnish

Instructions

To Make the Cream Puffs:

Step 1: Prepare the oven. Preheat it to 425 degrees F.

Step 2: Use a Silpat or parchment paper to line a rimmed baking sheet.

Step 3: Combine half a cup water, half cup milk, 8 tbsp butter, a tsp sugar, and 1/4 tsp salt in a medium saucepan. Boil over medium heat. Then, take the pan out of the heat and stir in a cup of flour using a wooden spoon.

Step 4: Heat the mixture over medium heat for about 1 1/2 to 2 minutes while constantly stirring. This will release the extra moisture and partly cook the flour. On the bottom of the pan, a thin film will form and the dough will shape into a smooth ball.

Step 5: Place the dough in a large mixing bowl. Use an electric mixer to beat and cool the mixture a bit for a minute over medium speed. Add in the eggs, a piece at a time, beating every after each addition until combined. Continue beating the dough for another minute until smooth and a thick ribbon forms when pulled up.

Step 6: Fill a piping bag with the dough. The piping bag should be fitted with a half-inch round tip.

Step 7: On the prepared baking sheet, pipe an inch apart 28 puffs with 1 1/2-inch diameter and half-inch tall rounds. Avoid creating peaks, if do, lightly wet your fingertip with water and smooth them out.

Step 8: Place inside the preheated oven and bake for about 10 minutes. Don't peak, simply adjust the oven temperature to 325 degrees F and continue baking for another 20 to 22 minutes or until the tops golden brown.

Step 9: When done, remove from the oven and transfer on wire racks to cool completely.

To Make the Whipped Cream:

Step 10: Combine 2 cups of heavy cream, 4 tbsp sugar, and a teaspoon vanilla extract in a large mixing bowl. Beat for about 2 minutes on medium-high speed until fluffy and stiff peaks form. Place this in the piping bag with a large open star tip.

Step 11: Fill the cooled puffs with cream. By either piping, the cream into the puffs, pushing the pastry tip into the sides until the cream pushes back. Or cutting the puff's tops and pipping cream inside with a pastry bag. And pushing raspberry down in the middle if you'd like, then covering with the other tops.

Step 12: Before serving, dust with powdered sugar. Enjoy!

Notes:

End piping and release the pressure before lifting the bag up. To end without a tip, immediately swirl the tip around the side.

October 6, 2020 0 comment
0 FacebookTwitterPinterestEmail
Main Dish Recipes

Puff Pastry Cream Horns

by Rebecca October 6, 2020
written by Rebecca

Prep Time: 30m | Bake/Cook Time: 20m | Yield: 8 servings | Freeze: 30 minutes

With only five-ingredients, you can be able to whip up these cuties. Puff Pastry Cream Horns also known as Italian Cream Horns are a fun dessert. Golden, flaky horns filled with whipped cream, custard, or buttercream icing. Kids and adults are all going crazy over these delicious wonders! They are surprisingly easy to make, you can even ask the kids to help out!

Ingredients

1 sheet frozen puff pastry, thawed

1 egg

1 cup heavy cream

1/2 cup divided Imperial Sugar Confectioners Powdered Sugar

1 teaspoon vanilla extract

How to make Puff Pastry Cream Horns

Step 1: Start by greasing 8 cream horn metal cones or metal cannoli forms.

Step 2: Cut in half-inch wide strips the puff pastry with a knife or rolling cutter.

Step 3: Starting at one end, wind pastry around the cone, overlapping layers in spiral form. Do this for the rest and cover. Place in the fridge for at least 30 minutes.

Step 4: Prepare the oven. Preheat it to 400 degrees F.

Step 5: Mix the egg with a teaspoon of water to make an egg wash just before baking. Brush the puff pastry with the egg wash and sprinkle about 3 tbsp powdered sugar on all sides. Transfer them on a parchment-lined baking pan, seam side down.

Step 6: Place inside the preheated oven and bake for about 20 minutes or until golden brown.

Step 7: When done, remove from the oven and let the cones cool on metal forms.

Step 8: Meanwhile, whip the heavy cream until soft peaks form to make the filling. Add in the rest of the confectioner’s sugar and vanilla and whip more until stiff.

Step 9: Pipe the cooled pastry with cream and refrigerate.

Puff Pastry Cream Horns

Rebecca Prep Time: 30m | Bake/Cook Time: 20m | Yield: 8 servings | Freeze: 30 minutes With only five-ingredients, you can be able to whip up these cuties. Puff Pastry Cream… Main Dish Recipes Puff Pastry Cream Horns European Print This
Serves: 8 Prep Time: 30 mins Cooking Time: 20 mins 20 mins
Nutrition facts: 200 calories 20 grams fat
Rating: 5.0/5
( 1 voted )

Ingredients

  • 1 sheet frozen puff pastry, thawed
  • 1 egg
  • 1 cup heavy cream
  • 1/2 cup divided Imperial Sugar Confectioners Powdered Sugar
  • 1 teaspoon vanilla extract

Instructions

Step 1: Start by greasing 8 cream horn metal cones or metal cannoli forms.

Step 2: Cut in half-inch wide strips the puff pastry with a knife or rolling cutter.

Step 3: Starting at one end, wind pastry around the cone, overlapping layers in spiral form. Do this for the rest and cover. Place in the fridge for at least 30 minutes.

Step 4: Prepare the oven. Preheat it to 400 degrees F.

Step 5: Mix the egg with a teaspoon of water to make an egg wash just before baking. Brush the puff pastry with the egg wash and sprinkle about 3 tbsp powdered sugar on all sides. Transfer them on a parchment-lined baking pan, seam side down.

Step 6: Place inside the preheated oven and bake for about 20 minutes or until golden brown.

Step 7: When done, remove from the oven and let the cones cool on metal forms.

Step 8: Meanwhile, whip the heavy cream until soft peaks form to make the filling. Add in the rest of the confectioner's sugar and vanilla and whip more until stiff.

Step 9: Pipe the cooled pastry with cream and refrigerate.

October 6, 2020 0 comment
0 FacebookTwitterPinterestEmail
Main Dish Recipes

CINNAMON SUGAR CHOCOLATE CREAM HORNS

by Rebecca October 6, 2020
written by Rebecca

Prep Time: 30 mins | Cook Time: 25 mins | Total Time: 55 mins | Servings: 12

Looks complicated but trust me they are easy and super amusing to make! Cinnamon Sugar Chocolate Cream Horns are a fun snack and decadent dessert. Coated with cinnamon sugar with a layer of chocolate ganache inside and filled with chocolate whipped cream – heaven!

Ingredients

Horns/cones:

12 sugar ice-cream cones

Aluminium foil as much needed to cover the cones

2 sheets of frozen Pepperidge Farm® Puff Pastry thawed

¼ tsp cinnamon powder

2 tbsp granulated sugar

2 tbsp milk

Chocolate Cream:

1 and a half cup heavy whipping cream

¼ cup of cocoa powder

½ cup powdered sugar

Chocolate Ganache:

½ cup of chocolate chips

½ cup heavy whipping cream

How to make Cinnamon Sugar Chocolate Cream Horns

To make the horns/cones:

Step 1: Prepare the oven. Preheat it to 400 degrees F.

Step 2: Use parchment paper to line a baking tray. Set aside.

Step 3: Add the sugar and cinnamon powder in a bowl and mix well.

Step 4: Using aluminium foil, wrap the ice cream cone individually. Cover any loose ends if necessary.

Step 5: Sprinkle flour on the working surface. Thaw the Pepperidge Farm® Puff Pastry on it, rolling into 10 x 15-inch and dividing into equal 1-inch strips.

Step 6: Twist the wrapped cones and strips from the pointy end wrap overlapping each cone by 1/3. Snipping off any extra and making sure to not wrap until the very end as it expands when baking and it can get difficult to remove the sugar cones.

Step 7: Brush each cone with milk or egg wash.

Step 8: Sprinkle evenly the cones with cinnamon sugar.

Step 9: Transfer them pointy end facing up on the pre-lined tray.

Step 10: Place inside the preheated oven and bake for about 20 to 25 minutes or until golden brown.

Step 11: When done, remove from the oven and pull the wrapped ice-cream cones out gently. Allow cooling completely.

To make the Chocolate Ganache:

Step 1: Add the heavy whipping cream in a microwave-safe bowl and microwave for about 45 seconds.

Step 2: Then, add in the chocolate chips and allow to sit for at least 5 minutes.

Step 3: Stir until incorporated to ready the Chocolate Ganache. Set aside.

To make the Chocolate Cream:

Step 1: Freeze for at least 15 minutes the mixing bowl with the beater.

Step 2: Take it out from the fridge and add in the cream, powdered sugar, and cocoa powder. Beat for approximately 5 minutes or until stiff peaks form.

Step 3: Fill with the Chocolate cream a piping bag with a Wilton 2D tip or any tip or nozzle you desired.

To Assemble The Cream Horns:

Step 1: Drizzle using a spoon the insides of each cooled sugar-coated cones with chocolate ganache, twisting to evenly spread. Shake any excess off.

Step 2: In the chocolate ganache, dip the open end of the horn. And sit them vertically in a stand or cup to dry.

Step 3: Place in the fridge for at least 30 to 45 minutes or until the ganache is set.

Step 4: Fill with the chocolate whipped cream the inside of each cone until full.

CINNAMON SUGAR CHOCOLATE CREAM HORNS

Rebecca Prep Time: 30 mins | Cook Time: 25 mins | Total Time: 55 mins | Servings: 12 Looks complicated but trust me they are easy and super amusing to make!… Main Dish Recipes CINNAMON SUGAR CHOCOLATE CREAM HORNS European Print This
Serves: 12 Prep Time: 30 mins Cooking Time: 25 mins 25 mins
Nutrition facts: 200 calories 20 grams fat
Rating: 5.0/5
( 1 voted )

Ingredients

  • Horns/cones:
  • 12 sugar ice-cream cones
  • Aluminium foil as much needed to cover the cones
  • 2 sheets of frozen Pepperidge Farm® Puff Pastry thawed
  • ¼ tsp cinnamon powder
  • 2 tbsp granulated sugar
  • 2 tbsp milk
  • Chocolate Cream:
  • 1 and a half cup heavy whipping cream
  • ¼ cup of cocoa powder
  • ½ cup powdered sugar
  • Chocolate Ganache:
  • ½ cup of chocolate chips
  • ½ cup heavy whipping cream

Instructions

To make the horns/cones:

Step 1: Prepare the oven. Preheat it to 400 degrees F.

Step 2: Use parchment paper to line a baking tray. Set aside.

Step 3: Add the sugar and cinnamon powder in a bowl and mix well.

Step 4: Using aluminium foil, wrap the ice cream cone individually. Cover any loose ends if necessary.

Step 5: Sprinkle flour on the working surface. Thaw the Pepperidge Farm® Puff Pastry on it, rolling into 10 x 15-inch and dividing into equal 1-inch strips.

Step 6: Twist the wrapped cones and strips from the pointy end wrap overlapping each cone by 1/3. Snipping off any extra and making sure to not wrap until the very end as it expands when baking and it can get difficult to remove the sugar cones.

Step 7: Brush each cone with milk or egg wash.

Step 8: Sprinkle evenly the cones with cinnamon sugar.

Step 9: Transfer them pointy end facing up on the pre-lined tray.

Step 10: Place inside the preheated oven and bake for about 20 to 25 minutes or until golden brown.

Step 11: When done, remove from the oven and pull the wrapped ice-cream cones out gently. Allow cooling completely.

To make the Chocolate Ganache:

Step 1: Add the heavy whipping cream in a microwave-safe bowl and microwave for about 45 seconds.

Step 2: Then, add in the chocolate chips and allow to sit for at least 5 minutes.

Step 3: Stir until incorporated to ready the Chocolate Ganache. Set aside.

To make the Chocolate Cream:

Step 1: Freeze for at least 15 minutes the mixing bowl with the beater.

Step 2: Take it out from the fridge and add in the cream, powdered sugar, and cocoa powder. Beat for approximately 5 minutes or until stiff peaks form.

Step 3: Fill with the Chocolate cream a piping bag with a Wilton 2D tip or any tip or nozzle you desired.

To Assemble The Cream Horns:

Step 1: Drizzle using a spoon the insides of each cooled sugar-coated cones with chocolate ganache, twisting to evenly spread. Shake any excess off.

Step 2: In the chocolate ganache, dip the open end of the horn. And sit them vertically in a stand or cup to dry.

Step 3: Place in the fridge for at least 30 to 45 minutes or until the ganache is set.

Step 4: Fill with the chocolate whipped cream the inside of each cone until full.

October 6, 2020 0 comment
0 FacebookTwitterPinterestEmail
Main Dish Recipes

Lemon Meringue Pie Cannoli

by Rebecca October 6, 2020
written by Rebecca

Prep: 20 MIN | Total: 45 MIN | Servings: 8

A fusion of lemon meringue pie and cannoli – crispy, flaky crust with a pop of tart lemon flavour and the sweetness of marshmallow fluff and cream. A swirl of exciting flavours in a mouthful. These have the perfect balance of tangy and sweet in crunchy pie shells. This Lemon Meringue Pie Cannoli is a must-try and a must-have.

Ingredients

1box (14.1 oz) Pillsbury™ Refrigerated Pie Crust, thawed

1egg

1teaspoon water

3/4cup lemon curd

1/2cup marshmallow fluff

1cup frozen whipped topping, thawed

1 teaspoon lemon zest, optional

How to make Lemon Meringue Pie Cannoli

Step 1: Prepare the oven. Preheat it to 425 degrees F.

Step 2: Using a non-stick baking spray, grease 8 cannoli forms.

Step 3: Cut the unrolled pie dough in four 4 1/2-inch circles.

Step 4: Whisk the egg and water to make an egg wash.

Step 5: Wrap the cannoli form with a pie dough circle and seal the edges with the egg wash. Place on a parchment paper-lined baking sheet. Do this for the rest and freeze for at least 10 minutes.

Step 6: When ready to bake, remove from the baking sheet from the fridge.

Step 7: Place inside the preheated oven and bake for about 10 to 12 minutes or until lightly golden brown.

Step 8: Cool for at least 10 minutes before carefully removing from the cannoli forms to cool fully.

Step 9: Meanwhile, combine the lemon curd and marshmallow fluff. Add and stir in the whipped topping. Fill a disposable pastry or ziptop bag with the filling.

Step 10: Cut the tip of the bag and before serving, pipe the pie filling into each pie crust cannoli shells.

Step 11: Sprinkle the ends of cannoli pie filling with lemon zest if desired.

Step 12: Serve and enjoy!

Lemon Meringue Pie Cannoli

Rebecca Prep: 20 MIN | Total: 45 MIN | Servings: 8 A fusion of lemon meringue pie and cannoli – crispy, flaky crust with a pop of tart lemon flavour and… Main Dish Recipes Lemon Meringue Pie Cannoli European Print This
Serves: 8 Prep Time: 20 mins
Nutrition facts: 200 calories 20 grams fat
Rating: 5.0/5
( 1 voted )

Ingredients

  • 1box (14.1 oz) Pillsbury™ Refrigerated Pie Crust, thawed
  • 1egg
  • 1teaspoon water
  • 3/4cup lemon curd
  • 1/2cup marshmallow fluff
  • 1cup frozen whipped topping, thawed
  • 1 teaspoon lemon zest, optional

Instructions

Step 1: Prepare the oven. Preheat it to 425 degrees F.

Step 2: Using a non-stick baking spray, grease 8 cannoli forms.

Step 3: Cut the unrolled pie dough in four 4 1/2-inch circles.

Step 4: Whisk the egg and water to make an egg wash.

Step 5: Wrap the cannoli form with a pie dough circle and seal the edges with the egg wash. Place on a parchment paper-lined baking sheet. Do this for the rest and freeze for at least 10 minutes.

Step 6: When ready to bake, remove from the baking sheet from the fridge.

Step 7: Place inside the preheated oven and bake for about 10 to 12 minutes or until lightly golden brown.

Step 8: Cool for at least 10 minutes before carefully removing from the cannoli forms to cool fully.

Step 9: Meanwhile, combine the lemon curd and marshmallow fluff. Add and stir in the whipped topping. Fill a disposable pastry or ziptop bag with the filling.

Step 10: Cut the tip of the bag and before serving, pipe the pie filling into each pie crust cannoli shells.

Step 11: Sprinkle the ends of cannoli pie filling with lemon zest if desired.

Step 12: Serve and enjoy!

October 6, 2020 0 comment
0 FacebookTwitterPinterestEmail
Main Dish Recipes

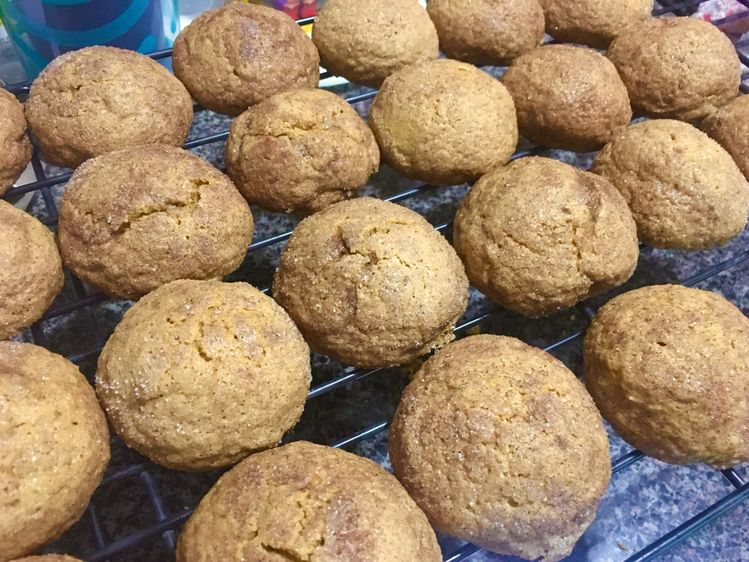
Pumpkin Spice Cookies

by Rebecca October 6, 2020
written by Rebecca

Prep Time: 20 mins | Cook Time: 10 mins | Total Time: 2 hrs 30 mins | Servings: 30 cookies

These soft and chewy cookies are a must-have this fall. With cinnamon-sugar coating and flavours of pumpkin, vanilla extract, and fall spices, these Pumpkin Spice Cookies are always a huge hit.

Ingredients

2 and 1/2 cups all-purpose flour, spooned and levelled

2 teaspoons cornstarch

1/2 teaspoon cream of tartar

3/4 teaspoons baking soda

1/4 teaspoon salt

2 teaspoons cinnamon

1/2 teaspoon nutmeg

1/8 teaspoons ground cloves

3/4 cup unsalted butter, softened to room temperature

3/4 cup packed brown sugar

1/2 cup granulated sugar

1 large egg

2 teaspoons vanilla

1/2 cup canned pumpkin (not pumpkin pie filling)

Cinnamon Sugar Coating:

1/4 cup granulated sugar

1 and 1/2 teaspoons cinnamon

How to make Pumpkin Spice Cookies

Step 1: Mix well the flour, cornstarch, cream of tartar, baking soda, salt, cinnamon, nutmeg, and ground cloves.

Step 2: Add the butter and sugar in another bowl and beat until fluffy. Adjust the mixer to low speed and beat in the egg, vanilla, and pumpkin.

Step 3: Gradually add in the flour mixture. Beat until the dough is very sticky.

Step 4: Use a cling film to cover the bowl. Place inside the fridge for at least 2 hours up to 2 days.

Step 5: Remove the dough from the fridge when ready to bake.

Step 6: Prepare the oven. Preheat it to 350 degrees F.

Step 7: With silicone baking mats or parchment paper, line 2 cookie trays.

Step 8: Add the sugar and cinnamon in a small bowl. Whisk well.

Step 9: Shape the dough into about 1.5 tbsp balls. Roll them in the cinnamon-sugar mixture.

Step 10: Place the coated dough 2-inches apart on the prepared cookie sheets and flatten slightly.

Step 11: Place inside the preheated oven and bake for about 8 to 10 minutes or until the tops are set.

Nutrition Fact:

Calories: 123kcal

Pumpkin Spice Cookies

Rebecca Prep Time: 20 mins | Cook Time: 10 mins | Total Time: 2 hrs 30 mins | Servings: 30 cookies These soft and chewy cookies are a must-have this fall.… Main Dish Recipes Pumpkin Spice Cookies European Print This
Serves: 30 Prep Time: 20 mins Cooking Time: 10 mins 10 mins
Nutrition facts: 123 calories 20 grams fat
Rating: 5.0/5
( 1 voted )

Ingredients

  • 2 and 1/2 cups all-purpose flour, spooned and levelled
  • 2 teaspoons cornstarch
  • 1/2 teaspoon cream of tartar
  • 3/4 teaspoons baking soda
  • 1/4 teaspoon salt
  • 2 teaspoons cinnamon
  • 1/2 teaspoon nutmeg
  • 1/8 teaspoons ground cloves
  • 3/4 cup unsalted butter, softened to room temperature
  • 3/4 cup packed brown sugar
  • 1/2 cup granulated sugar
  • 1 large egg
  • 2 teaspoons vanilla
  • 1/2 cup canned pumpkin (not pumpkin pie filling)
  • Cinnamon Sugar Coating:
  • 1/4 cup granulated sugar
  • 1 and 1/2 teaspoons cinnamon

Instructions

Step 1: Mix well the flour, cornstarch, cream of tartar, baking soda, salt, cinnamon, nutmeg, and ground cloves.

Step 2: Add the butter and sugar in another bowl and beat until fluffy. Adjust the mixer to low speed and beat in the egg, vanilla, and pumpkin.

Step 3: Gradually add in the flour mixture. Beat until the dough is very sticky.

Step 4: Use a cling film to cover the bowl. Place inside the fridge for at least 2 hours up to 2 days.

Step 5: Remove the dough from the fridge when ready to bake.

Step 6: Prepare the oven. Preheat it to 350 degrees F.

Step 7: With silicone baking mats or parchment paper, line 2 cookie trays.

Step 8: Add the sugar and cinnamon in a small bowl. Whisk well.

Step 9: Shape the dough into about 1.5 tbsp balls. Roll them in the cinnamon-sugar mixture.

Step 10: Place the coated dough 2-inches apart on the prepared cookie sheets and flatten slightly.

Step 11: Place inside the preheated oven and bake for about 8 to 10 minutes or until the tops are set.

October 6, 2020 0 comment
0 FacebookTwitterPinterestEmail
Main Dish Recipes

THE BEST BREAD PUDDING

by Rebecca October 6, 2020
written by Rebecca

Prep Time: 30 minutes | Cook Time: 55 minutes | Total Time: 1 hour 25 minutes | Servings: 12 slices

Puddings are one of my favourite recipes. It can’t get easier and simpler with pudding. This filled with cinnamon and nutmeg bread pudding is the best pudding that has long been a crowd favoured.

Ingredients

1 16 oz loaf French bread1 16 oz loaf French bread

5 eggs5 eggs

1 cup sugar1 cup sugar

1 1/2 cup milk1 1/2 cup milk

1 1/2 cup heavy cream1 1/2 cup heavy cream

2 tsp vanilla2 tsp vanilla

1 tsp cinnamon1 tsp cinnamon

1/2 tsp nutmeg1/2 tsp nutmeg

Sauce:

1 cup heavy cream1 cup heavy cream

1 Tbs flour1 Tbs flour

1/2 cup sugar1/2 cup sugar

4 Tbs butter4 Tbs butter

1 tsp vanilla1 tsp vanilla

How to make The Best Bread Pudding

Step 1: Prepare the oven. Preheat it to 350 degrees.

Step 2: Using a non-stick cooking spray, grease a 9 x 13-inch baking dish.

Step 3: Slice the bread into 1-inch to 2-inch squares. Transfer the pieces into a large bowl.

Step 4: Add the milk, cream, eggs, sugar, vanilla, cinnamon, and nutmeg in another bowl. Whisk until combined.

Step 5: Pour the milk mixture over the bread and gently stir to coat. Allow the pieces of bread to soak into the mixture for at least 20 minutes.

Step 6: When set, layer the soaked bread into the prepared baking dish.

Step 7: Place inside the preheated oven and bake for about 50 to 60 minutes or until the middle is set.

Step 8: Meanwhile, add the sugar, flour, and heavy cream in a saucepan and whisk until incorporated.

Step 9: Then, add in the butter and melt on medium heat until the liquid begins to boil.

Step 10: Stir until a bit thickened before removing from the heat. Then, whisk in the vanilla.

Nutrition facts:

Calories: 447kcal | Carbohydrates: 47g | Protein: 8g | Fat: 25g | Saturated Fat: 15g | Cholesterol: 149mg | Sodium: 263mg | Potassium: 145mg | Fiber: 0g | Sugar: 27g | Vitamin A: 995IU | Vitamin C: 0.3mg | Calcium: 96mg | Iron: 1.6mg

THE BEST BREAD PUDDING

Rebecca Prep Time: 30 minutes | Cook Time: 55 minutes | Total Time: 1 hour 25 minutes | Servings: 12 slices Puddings are one of my favourite recipes. It can’t get… Main Dish Recipes THE BEST BREAD PUDDING European Print This
Serves: 12 Prep Time: 30 mins Cooking Time: 55 mins 55 mins
Nutrition facts: 447 calories 25 fat
Rating: 5.0/5
( 1 voted )

Ingredients

  • 1 16 oz loaf French bread1 16 oz loaf French bread
  • 5 eggs5 eggs
  • 1 cup sugar1 cup sugar
  • 1 1/2 cup milk1 1/2 cup milk
  • 1 1/2 cup heavy cream1 1/2 cup heavy cream
  • 2 tsp vanilla2 tsp vanilla
  • 1 tsp cinnamon1 tsp cinnamon
  • 1/2 tsp nutmeg1/2 tsp nutmeg
  • Sauce:
  • 1 cup heavy cream1 cup heavy cream
  • 1 Tbs flour1 Tbs flour
  • 1/2 cup sugar1/2 cup sugar
  • 4 Tbs butter4 Tbs butter
  • 1 tsp vanilla1 tsp vanilla

Instructions

Step 1: Prepare the oven. Preheat it to 350 degrees.

Step 2: Using a non-stick cooking spray, grease a 9 x 13-inch baking dish.

Step 3: Slice the bread into 1-inch to 2-inch squares. Transfer the pieces into a large bowl.

Step 4: Add the milk, cream, eggs, sugar, vanilla, cinnamon, and nutmeg in another bowl. Whisk until combined.

Step 5: Pour the milk mixture over the bread and gently stir to coat. Allow the pieces of bread to soak into the mixture for at least 20 minutes.

Step 6: When set, layer the soaked bread into the prepared baking dish.

Step 7: Place inside the preheated oven and bake for about 50 to 60 minutes or until the middle is set.

Step 8: Meanwhile, add the sugar, flour, and heavy cream in a saucepan and whisk until incorporated.

Step 9: Then, add in the butter and melt on medium heat until the liquid begins to boil.

Step 10: Stir until a bit thickened before removing from the heat. Then, whisk in the vanilla.

October 6, 2020 0 comment
0 FacebookTwitterPinterestEmail
Newer Posts
Older Posts

Popular Posts

  • 1

    Crispy Crunchy Parmesan Potatoes

    March 21, 2020
  • 2

    CROCK POT SMOTHERED PORK CHOPS

    March 21, 2020
  • Facebook
  • Twitter

@2019 - All Right Reserved.


Back To Top