Cook it once
  • Home
  • Privacy Policy
  • Recipes
    • KETO
    • LC
    • WW
  • Tips
  • Contact
Cook it once
  • Home
  • Privacy Policy
  • Recipes
    • KETO
    • LC
    • WW
  • Tips
  • Contact
Category:

Main Dish Recipes

Main Dish Recipes

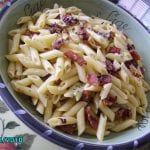
Bacon and Parmesan Penne Pasta

by Rebecca May 6, 2020
written by Rebecca

Who wouldn’t love pasta? The whole family loves pasta, so we’ve got it quite often. For some Asians, eating pasta symbolizes long life that is people usually serve this during Birthdays and New Year. Sometimes the delicious food is the simplest. It’s so easy to prepare this recipe and so tasteful that you may become addicted to it. For bacon lovers, this one is a takeaway, it’s a great choice. Its white sauce will enchant you even more.

Nothing can beat the ease of boiling some noodles in your favorite sauce and tossing into a handful of other ingredients. It is creamy, cheesy, and filled with delicious bacon. And best of all, this is one of the few things that can be agreed on by everyone.

Preparation time: 10 minutes
Cooking time: 20 minutes
Serves: 8

Ingredients:

1 pound bacon, coarsely chopped

1 onion, chopped

1 pound dry penne pasta

¼ cup olive oil

½ cup grated Parmesan cheese

Directions:

In a saucepan, place the chopped bacon and onion on medium heat and cook and mix until the bacon is crunchy and the onion becomes brown for about 10 minutes. (You want can replace the olive oil butter with a 2 tbsp of bacon drippings)

During the cooking process of bacon and onion, fill a large pot with lightly salted water to bring high heat to a rolling boil. When the water has boiled, stir in the penne and boil again. Cook the pasta uncovered, and mix occasionally until it is cooked, cooked for approximately 11 minutes until the pasta is still firm to bite. Drain the pasta, transfer to a large bowl and coat the pasta with the olive oil.

Drain the bacon grease from the saucepan, leave a few tbsp and taste. Mix in the pasta, and sprinkle the Parmesan cheese on top. Stir to mix both the pasta and the cheese, and serve.
Bacon and Parmesan Penne Pasta

Rebecca Who wouldn’t love pasta? The whole family loves pasta, so we’ve got it quite often. For some Asians, eating pasta symbolizes long life that is people usually serve this during… Main Dish Recipes Bacon and Parmesan Penne Pasta European Print This
Nutrition facts: 200 calories 20 grams fat
Rating: 5.0/5
( 1 voted )

Ingredients

  • 1 pound bacon, coarsely chopped
  • 1 onion, chopped
  • 1 pound dry penne pasta
  • ¼ cup olive oil
  • ½ cup grated Parmesan cheese

Instructions

In a saucepan, place the chopped bacon and onion on medium heat and cook and mix until the bacon is crunchy and the onion becomes brown for about 10 minutes. (You want can replace the olive oil butter with a 2 tbsp of bacon drippings)

During the cooking process of bacon and onion, fill a large pot with lightly salted water to bring high heat to a rolling boil. When the water has boiled, stir in the penne and boil again. Cook the pasta uncovered, and mix occasionally until it is cooked, cooked for approximately 11 minutes until the pasta is still firm to bite. Drain the pasta, transfer to a large bowl and coat the pasta with the olive oil.

Drain the bacon grease from the saucepan, leave a few tbsp and taste. Mix in the pasta, and sprinkle the Parmesan cheese on top. Stir to mix both the pasta and the cheese, and serve.

May 6, 2020 0 comment
0 FacebookTwitterPinterestEmail
Main Dish Recipes

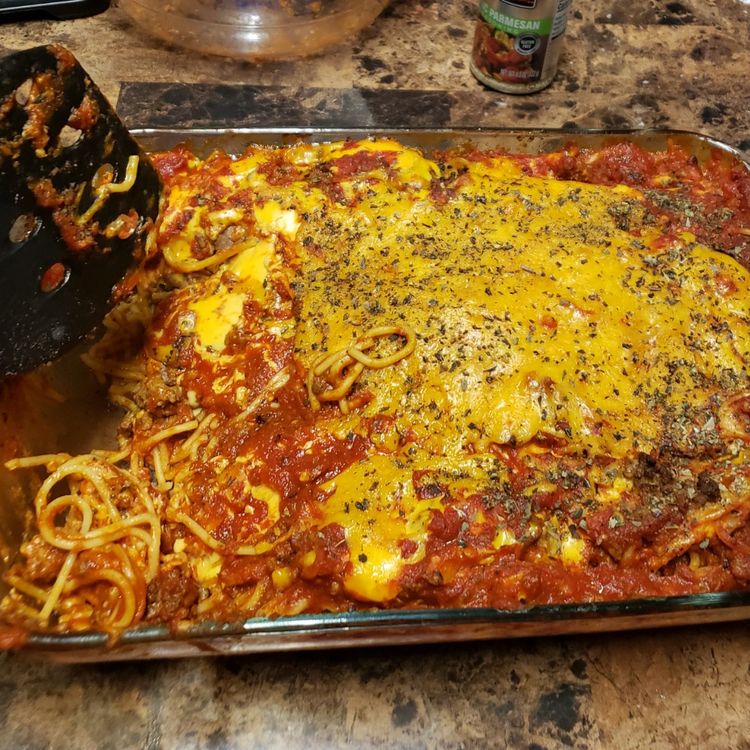
Ultimate Cheesy Baked Spaghetti (Kids LOVE it!)

by Rebecca May 6, 2020
written by Rebecca

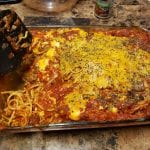
It became my family’s tradition to serve baked spaghetti during Saturdays. We all love baked spaghetti, not just my kids but everyone in my family. My eldest tagged this as the “family-friendly” dish and I agree. I’m pretty sure that once you try it, you’ll be saying the same thing, too. And it’s very easy to make, even my kids can prepare it!

Dress up your regular spaghetti, make it the Ultimate Cheesy Baked Spaghetti. Surely, your family will love the crispy cheesy top layer and ground beef filling of this super delicious dish!

Ingredients

1 pound spaghetti

1 pound ground beef

1 yellow onion, chopped

4 cups of Marinara Sauce

1/2 tsp. kosher salt

2 large eggs

5 Tbsp. unsalted butter, melted

2 cups of cottage cheese, divided4 cups of mozzarella cheese, shredded

How to make Cheesy Baked Spaghetti

Step 1: Prepare the oven by preheating to 350 degrees. Then, spray 9 x 13-inch baking dish with vegetable oil spray.

Step 2: Put the pasta in a pot and cook slightly less than 2 minutes of the direction.

Step 3: In a large skillet, add meat and onions and cook on medium-high heat. Break apart the meat, stirring once in a while until brown and fully cooked.

Step 4: Pour the Marina sauce over the meat and mix well.

Step 5: In a large pan, toss the noodles in the salt, eggs, and butter.

Step 6: Put half of the noodles in the bottom of the prepared baking dish, then add half of the cottage cheese, half of the meat sauce, and half of the mozzarella.

Step 7: Now, top it off with the remaining pasta, cottage cheese, meat sauce, and mozzarella.

Step 8: Cover the baking dish with foil. Place inside the preheated oven and bake for 30 minutes. Then, remove the foil and bake for another 15 minutes or until the cheese is crispy and golden brown. Serve and enjoy!

Ultimate Cheesy Baked Spaghetti (Kids LOVE it!)

Rebecca It became my family’s tradition to serve baked spaghetti during Saturdays. We all love baked spaghetti, not just my kids but everyone in my family. My eldest tagged this as… Main Dish Recipes Ultimate Cheesy Baked Spaghetti (Kids LOVE it!) European Print This
Nutrition facts: 200 calories 20 grams fat
Rating: 5.0/5
( 1 voted )

Ingredients

  • 1 pound spaghetti
  • 1 pound ground beef
  • 1 yellow onion, chopped
  • 4 cups of Marinara Sauce
  • 1/2 tsp. kosher salt
  • 2 large eggs
  • 5 Tbsp. unsalted butter, melted
  • 2 cups of cottage cheese, divided4 cups of mozzarella cheese, shredded

Instructions

Step 1: Prepare the oven by preheating to 350 degrees. Then, spray 9 x 13-inch baking dish with vegetable oil spray.

Step 2: Put the pasta in a pot and cook slightly less than 2 minutes of the direction.

Step 3: In a large skillet, add meat and onions and cook on medium-high heat. Break apart the meat, stirring once in a while until brown and fully cooked.

Step 4: Pour the Marina sauce over the meat and mix well.

Step 5: In a large pan, toss the noodles in the salt, eggs, and butter.

Step 6: Put half of the noodles in the bottom of the prepared baking dish, then add half of the cottage cheese, half of the meat sauce, and half of the mozzarella.

Step 7: Now, top it off with the remaining pasta, cottage cheese, meat sauce, and mozzarella.

Step 8: Cover the baking dish with foil. Place inside the preheated oven and bake for 30 minutes. Then, remove the foil and bake for another 15 minutes or until the cheese is crispy and golden brown. Serve and enjoy!

May 6, 2020 0 comment
0 FacebookTwitterPinterestEmail
Main Dish Recipes

How to Make Haystack Cookies (in 20 minutes!)

by Rebecca May 6, 2020
written by Rebecca

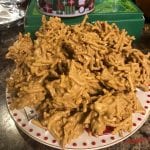
How about a cookie you can make in 20 minutes without baking? Yeah, you read it right. Today’s recipe is Haystack Cookies. I made these delicious cookies yesterday. It was really good and the aroma was heavenly. With very minimal ingredients, you can make something so delicious that your friends or kids will think is store-bought. I was so lucky because all the ingredients I needed were available at home. My kids introduced me to this recipe by the way. They said they saw it on TV and listed the ingredients and steps to make it. I’m so glad that they did because I never would have known these amazing cookies! Just follow these simple steps and I am 100% sure that you will be able to make it from scratch. Well, I did! Just take a look at the picture. I’m sure you know what I am talking about. I am proud to share this recipe with you. Oh God, if only I could just give you one right now. A simple cookie could be the highlight of your day! Make that possible by making Haystack Cookies! Have fun baking and stay safe always. Until my next recipe!

Ingredients

12 ounces of white chocolate disks, (melting disks work better than chips which tend to burn)

12 ounces of butterscotch chips

1 c. peanut butter, (avoid natural peanut butter)

12 ounces of chow mein noodles

How to Make Haystack Cookies

In a large microwavable glass bowl, combine the butterscotch chips and white chocolate.

Place in the oven for 30 seconds. Stir in between until it melts completely. (This process should take 90 seconds in total.)

Add the peanut butter and chow mein noodles then stir until completely mixed.

Spoon out 30 cookies onto the two parchment paper baking sheets and leave at room temperature for 1 hour or refrigerate for 10 minutes to make cookies hard. Serve!

How to Make Haystack Cookies (in 20 minutes!)

Rebecca How about a cookie you can make in 20 minutes without baking? Yeah, you read it right. Today’s recipe is Haystack Cookies. I made these delicious cookies yesterday. It was… Main Dish Recipes How to Make Haystack Cookies (in 20 minutes!) European Print This
Nutrition facts: 200 calories 20 grams fat
Rating: 5.0/5
( 1 voted )

Ingredients

  • 12 ounces of white chocolate disks, (melting disks work better than chips which tend to burn)
  • 12 ounces of butterscotch chips
  • 1 c. peanut butter, (avoid natural peanut butter)
  • 12 ounces of chow mein noodles

Instructions

In a large microwavable glass bowl, combine the butterscotch chips and white chocolate.

Place in the oven for 30 seconds. Stir in between until it melts completely. (This process should take 90 seconds in total.)

Add the peanut butter and chow mein noodles then stir until completely mixed.

Spoon out 30 cookies onto the two parchment paper baking sheets and leave at room temperature for 1 hour or refrigerate for 10 minutes to make cookies hard. Serve!

May 6, 2020 0 comment
0 FacebookTwitterPinterestEmail
Main Dish Recipes

Cracker Barrel Hashbrown Casserole (Best Copycat)

by Rebecca May 6, 2020
written by Rebecca

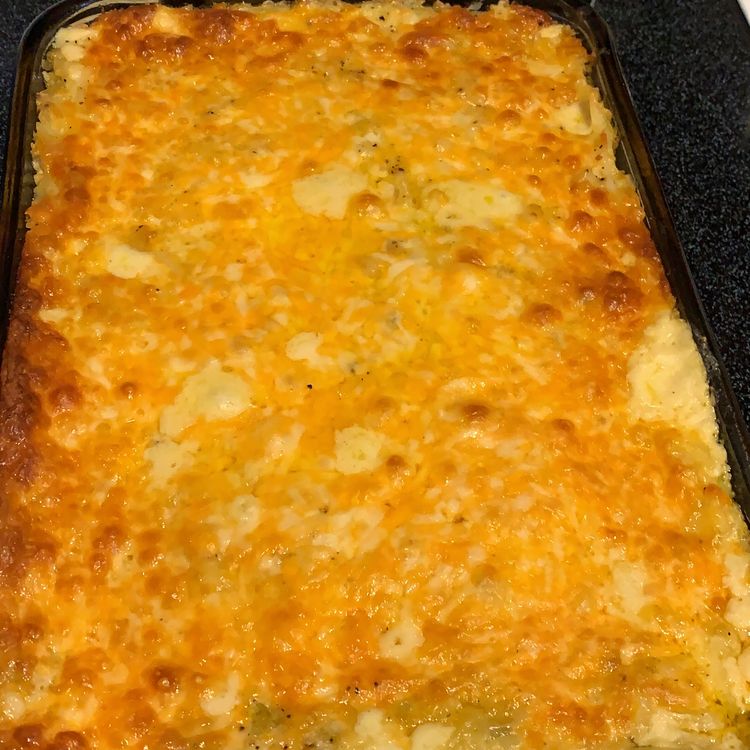
Hash brown is my kid’s weakness. She likes everything with hash brown. Good thing, it’s so easy to make, yet deliciously addicting. It’s perfect to serve as is or with some add-ons like cooked/minced ham, sausage, bacon, or chicken. And if you like vegetables like me, you can add them too. Maybe some bell peppers, chiles, jalapenos, or broccoli. And please don’t forget the cheese (Colby, cheddar jack, Monterey jack, or Boursin)! Sometimes, I sprinkle some crispy fried onions to it as well for some extra flavor (just for myself though, my daughter hates fried onions).

This casserole can be made ahead of time, too. I just store it in the fridge, make sure my hash browns are thawed, patted dry before I combine it with the other ingredients the day after.

Ingredients

32 oz. frozen hash browns, thawed*

½ c. butter, melted

10.5 oz. cream of chicken soup, (you can use cream of cheddar if desired)

16 oz. sour cream

1 small onion, finely diced

2 cups of cheddar cheese, grated

1/3 tsp. pepper

How to make Cracker Barrel Hashbrown Casserole

Step 1: Ready the oven. Preheat to 350 degrees.

Step 2: To save cooking time, make sure the hash browns are thawed. Defrost them first, or you can place the hash browns in the microwave to speed up the process.

Step 3: Pat hash browns dry.

Step 4: In a large bowl, combine the melted butter, cream of chicken soup, sour cream, diced onions, pepper, and 1 cup of cheddar cheese with the hash browns. Set aside the other half of the cheddar cheese.

Step 5: Transfer the mixture in a greased 9 x 13-inch casserole dish. Top with the remaining cheddar cheese.

Step 6: Place inside the preheated oven and bake for 35 minutes over 350 degrees, uncovered.

Step 7: Increase the heat of the oven to 375 degrees and bake for another 10 minutes.

Step 8: Once the top begins to crisp and brown, remove from the oven.

Step 9: Let it sit for 10 minutes. Serve and enjoy!

Cracker Barrel Hashbrown Casserole (Best Copycat)

Rebecca Hash brown is my kid’s weakness. She likes everything with hash brown. Good thing, it’s so easy to make, yet deliciously addicting. It’s perfect to serve as is or with… Main Dish Recipes Cracker Barrel Hashbrown Casserole (Best Copycat) European Print This
Nutrition facts: 200 calories 20 grams fat
Rating: 5.0/5
( 1 voted )

Ingredients

  • 32 oz. frozen hash browns, thawed*
  • ½ c. butter, melted
  • 10.5 oz. cream of chicken soup, (you can use cream of cheddar if desired)
  • 16 oz. sour cream
  • 1 small onion, finely diced
  • 2 cups of cheddar cheese, grated
  • 1/3 tsp. pepper

Instructions

Step 1: Ready the oven. Preheat to 350 degrees.

Step 2: To save cooking time, make sure the hash browns are thawed. Defrost them first, or you can place the hash browns in the microwave to speed up the process.

Step 3: Pat hash browns dry.

Step 4: In a large bowl, combine the melted butter, cream of chicken soup, sour cream, diced onions, pepper, and 1 cup of cheddar cheese with the hash browns. Set aside the other half of the cheddar cheese.

Step 5: Transfer the mixture in a greased 9 x 13-inch casserole dish. Top with the remaining cheddar cheese.

Step 6: Place inside the preheated oven and bake for 35 minutes over 350 degrees, uncovered.

Step 7: Increase the heat of the oven to 375 degrees and bake for another 10 minutes.

Step 8: Once the top begins to crisp and brown, remove from the oven.

Step 9: Let it sit for 10 minutes. Serve and enjoy!

May 6, 2020 0 comment
0 FacebookTwitterPinterestEmail
Main Dish Recipes

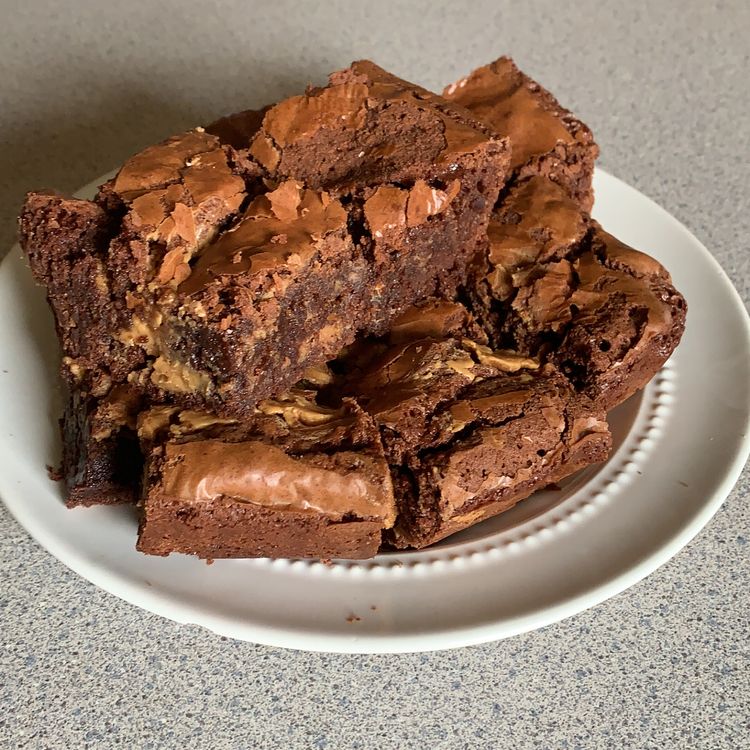
The Best Ever Peanut Butter Brownies (FUDGY AND CHEWY)

by Rebecca May 6, 2020
written by Rebecca

This dessert is pretty easy to make, in just under 30 minutes you’ll have a super moist and delicious homemade brownie! It’s an ultimate favorite for those (who like me) is crazy with peanut butter. Either make this from scratch or a mix, pretty sure you’ll still be able to get a fudgy and chewy peanut butter brownies.

By the way, before you start baking, make sure to measure your ingredients and prepare what you need. It’s easier that way (for me of course). And be careful, these peanut butter brownies are deliciously addicting. Happy baking!

Ingredients

3 Tbsp. butter

2 Tbsp. milk

1/2 c. sugar

1.5 c. chocolate chips

2 eggs

1 tsp. vanilla

1/2 c. flour

2 tsp. flour (to mix with peanut butter cups)

1/4 tsp. baking soda

1/4 tsp. salt

1/2 c. chopped mini peanut butter cups

1/2 c. peanut butter

How to make Peanut Butter Brownies

Step 1: Prepare the oven by preheating it to 350 degrees. Line with parchment paper an 8 x 8-inch baking dish.

Step 2: Stir the butter, milk, sugar over medium heat until it just starts to boil, then remove from the heat.

Step 3: Add the chocolate chips and stir until completely melted and smooth. Let it cool for about 5 minutes.

Step 4: Now, add and beat the eggs and vanilla.

Step 5: Mix the 1/2 cup of flour, salt, and baking soda. Stir until just combined.

Step 6: Toss some peanut butter pieces and 2 teaspoons of flour in a small bowl.

Step 7: Then, fold the peanut butter cups into the batter.

Step 8: Transfer the brownie batter into the prepared baking pan.

Step 9: Garnish the top of the batter with dollops of peanut butter (use a small cookie scoop if any). Then, swirl the peanut butter through the top of the butter with a knife.

Step 10: Place in the preheated oven and bake for 30 minutes.

Step 11: Once done, remove from the oven. Cool for a bit before slicing. Serve and enjoy!

The Best Ever Peanut Butter Brownies (FUDGY AND CHEWY)

Rebecca This dessert is pretty easy to make, in just under 30 minutes you’ll have a super moist and delicious homemade brownie! It’s an ultimate favorite for those (who like me)… Main Dish Recipes The Best Ever Peanut Butter Brownies (FUDGY AND CHEWY) European Print This
Nutrition facts: 200 calories 20 grams fat
Rating: 5.0/5
( 1 voted )

Ingredients

  • 3 Tbsp. butter
  • 2 Tbsp. milk
  • 1/2 c. sugar
  • 1.5 c. chocolate chips
  • 2 eggs
  • 1 tsp. vanilla
  • 1/2 c. flour
  • 2 tsp. flour (to mix with peanut butter cups)
  • 1/4 tsp. baking soda
  • 1/4 tsp. salt
  • 1/2 c. chopped mini peanut butter cups
  • 1/2 c. peanut butter

Instructions

Step 1: Prepare the oven by preheating it to 350 degrees. Line with parchment paper an 8 x 8-inch baking dish.

Step 2: Stir the butter, milk, sugar over medium heat until it just starts to boil, then remove from the heat.

Step 3: Add the chocolate chips and stir until completely melted and smooth. Let it cool for about 5 minutes.

Step 4: Now, add and beat the eggs and vanilla.

Step 5: Mix the 1/2 cup of flour, salt, and baking soda. Stir until just combined.

Step 6: Toss some peanut butter pieces and 2 teaspoons of flour in a small bowl.

Step 7: Then, fold the peanut butter cups into the batter.

Step 8: Transfer the brownie batter into the prepared baking pan.

Step 9: Garnish the top of the batter with dollops of peanut butter (use a small cookie scoop if any). Then, swirl the peanut butter through the top of the butter with a knife.

Step 10: Place in the preheated oven and bake for 30 minutes.

Step 11: Once done, remove from the oven. Cool for a bit before slicing. Serve and enjoy!

May 6, 2020 0 comment
0 FacebookTwitterPinterestEmail
Main Dish Recipes

Filipino Adobo Chicken (One-Pot Crazy Tender!)

by Rebecca May 6, 2020
written by Rebecca

This is a classic Filipino dish. It’s incredibly flavorful, although, at first you’ll think that it does not taste good it is! It’s well balanced and best served with a sticky steamed white rice. Chicken Adobo is a favorite among all my Filipino friends, and I thank them for sharing it with me. I give this dish a 5 star every time. I think the secret is to not skip the marinating time because this allows the chicken to absorb the flavors of the garlic cloves, soy sauce, vinegar, and pepper. Another thing that I love about this recipe is how tender the chicken is.

When my boyfriend came over last night, I proudly prepared this for him. When he tasted it he was like, wow! He loved it so much, he ate it all! We are planning to visit her mom this weekend and he asked me to cook this for her and I will! I’m sure she’ll love it, too.

Ingredients

6 chicken thighs bone-in and skin-on

1/2 c. soy sauce

1/2 c. white vinegar

4 cloves garlic crushed

1 Tbsp. black peppercorns

4 bay leaves

How to make Filipino Adobo Chicken

Step 1: In a large bowl, add the chicken thighs, soy sauce, white vinegar, crushed garlic, black peppercorns, and bay leaves. Marinade for 4 hours to absorb all the flavors. I use only chicken thighs and legs because these are the two best cuts to use in this dish.

Step 2: Prepare the oven by preheating to 375 degrees.

Step 3: Now, place the chicken (skin side down) to a large dutch oven. Pour the sauce over the chicken and bake for 30 minutes, covered.

Step 4: Remove the cover, then turn the chicken over. Generously glaze each chicken thighs with sauce. Cover and cook for another 30 minutes or until the chicken are browned and the sauce is reduced. Transfer to a serving plate. Serve and enjoy!

Filipino Adobo Chicken (One-Pot Crazy Tender!)

Rebecca This is a classic Filipino dish. It’s incredibly flavorful, although, at first you’ll think that it does not taste good it is! It’s well balanced and best served with a… Main Dish Recipes Filipino Adobo Chicken (One-Pot Crazy Tender!) European Print This
Nutrition facts: 200 calories 20 grams fat
Rating: 5.0/5
( 1 voted )

Ingredients

  • 6 chicken thighs bone-in and skin-on
  • 1/2 c. soy sauce
  • 1/2 c. white vinegar
  • 4 cloves garlic crushed
  • 1 Tbsp. black peppercorns
  • 4 bay leaves

Instructions

Step 1: In a large bowl, add the chicken thighs, soy sauce, white vinegar, crushed garlic, black peppercorns, and bay leaves. Marinade for 4 hours to absorb all the flavors. I use only chicken thighs and legs because these are the two best cuts to use in this dish.

Step 2: Prepare the oven by preheating to 375 degrees.

Step 3: Now, place the chicken (skin side down) to a large dutch oven. Pour the sauce over the chicken and bake for 30 minutes, covered.

Step 4: Remove the cover, then turn the chicken over. Generously glaze each chicken thighs with sauce. Cover and cook for another 30 minutes or until the chicken are browned and the sauce is reduced. Transfer to a serving plate. Serve and enjoy!

May 6, 2020 0 comment
0 FacebookTwitterPinterestEmail
Main Dish RecipesTips

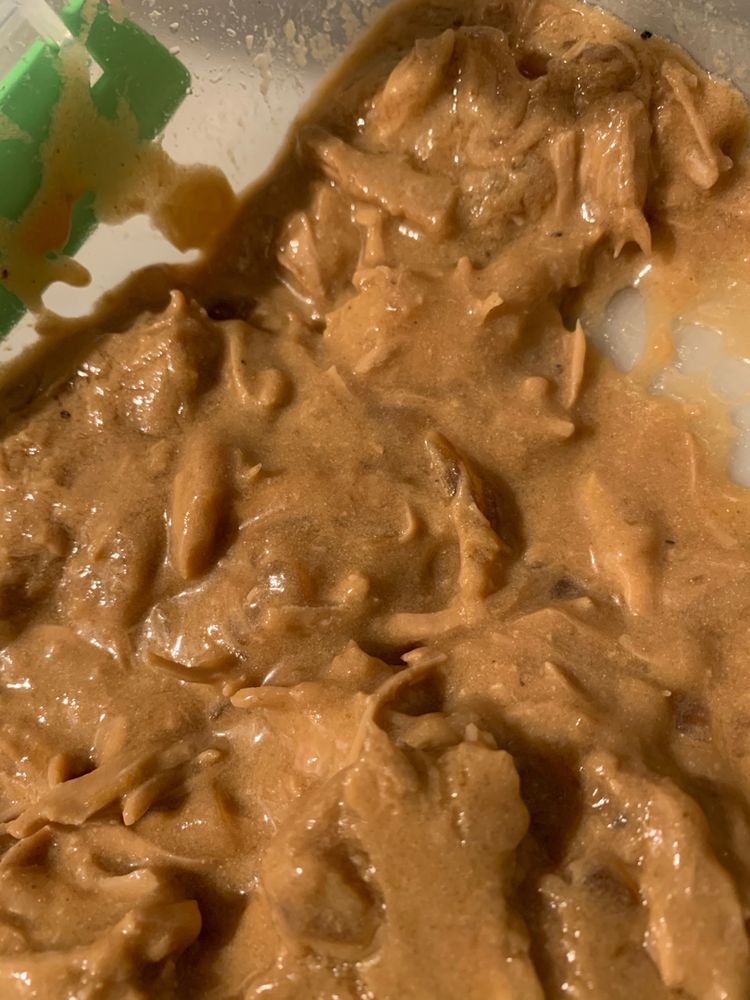
Slow Cooker Chicken and Gravy

by Rebecca May 6, 2020
written by Rebecca


This Chicken and Gravy is so versatile that you can use variations and still get the same flavorful and saucy result. So, feel free to swap the chicken breasts with whatever boneless, skinless meat available; pork chops, turkey breasts, or chicken thighs. You can even use cream of mushroom instead of chicken soup and add some diced mushrooms, too. Substitute chicken broth with beef broth, add veggies (carrots or peas) and make your gravy mix. You are welcome to use canned condensed cream of chicken soup or a homemade Cream of Chicken Soup (you’ll find the recipe below). This dish never gets old, it’s a Southern classic that sure gives the whole family a hearty and warm feeling.

Ingredients

1 1/2 c. water

2 packets of chicken gravy mix

1 1/4 c. Condensed Chicken Soup

1 tsp. garlic powder

1/2 tsp. kosher salt

1/2 tsp. paprika

1/4 tsp. coarse ground black pepper

3 whole chicken breasts, boneless skinless (about a pound)

1/2 c. sour cream

How to make Slow Cooker Chicken and Gravy

Season the chicken breasts with the garlic powder, black pepper, and salt.

In a slow cooker, pour water. Add the gravy packets, condensed chicken soup, garlic powder, salt, paprika, and pepper. Whisk until smooth.

Place the chicken breasts into the slow cooker. Flip on both sides to coat the breasts well.

Cover and cook for 4-5 hours on low heat.

Once cooked, remove the chicken breasts from the slow cooker, and shred or cut (as desired).

Put the sour cream into the slow cooker and whisk until smooth. Pour over the chicken before serving.

For the Homemade gravy Mix

In a food processor, blend 3 tablespoons of chicken bouillon granules, 1/2 teaspoon pepper, and 1 1/2 teaspoons of poultry seasoning. Sift into 3/4 cup plus 1 tablespoon flour. Combine and store in an airtight container. Place in a cool dry place. This homemade gravy mix can be stored up to 6 months!

Slow Cooker Chicken and Gravy

Rebecca   This Chicken and Gravy is so versatile that you can use variations and still get the same flavorful and saucy result. So, feel free to swap the chicken breasts… Main Dish Recipes Slow Cooker Chicken and Gravy European Print This
Nutrition facts: 200 calories 20 grams fat
Rating: 4.5/5
( 2 voted )

Ingredients

  • 1 1/2 c. water
  • 2 packets of chicken gravy mix
  • 1 1/4 c. Condensed Chicken Soup
  • 1 tsp. garlic powder
  • 1/2 tsp. kosher salt
  • 1/2 tsp. paprika
  • 1/4 tsp. coarse ground black pepper
  • 3 whole chicken breasts, boneless skinless (about a pound)
  • 1/2 c. sour cream

Instructions

Season the chicken breasts with the garlic powder, black pepper, and salt.

In a slow cooker, pour water. Add the gravy packets, condensed chicken soup, garlic powder, salt, paprika, and pepper. Whisk until smooth.

Place the chicken breasts into the slow cooker. Flip on both sides to coat the breasts well.

Cover and cook for 4-5 hours on low heat.

Once cooked, remove the chicken breasts from the slow cooker, and shred or cut (as desired).

Put the sour cream into the slow cooker and whisk until smooth. Pour over the chicken before serving.

For the Homemade gravy Mix

In a food processor, blend 3 tablespoons of chicken bouillon granules, 1/2 teaspoon pepper, and 1 1/2 teaspoons of poultry seasoning. Sift into 3/4 cup plus 1 tablespoon flour. Combine and store in an airtight container. Place in a cool dry place. This homemade gravy mix can be stored up to 6 months!

May 6, 2020 0 comment
0 FacebookTwitterPinterestEmail
Main Dish Recipes

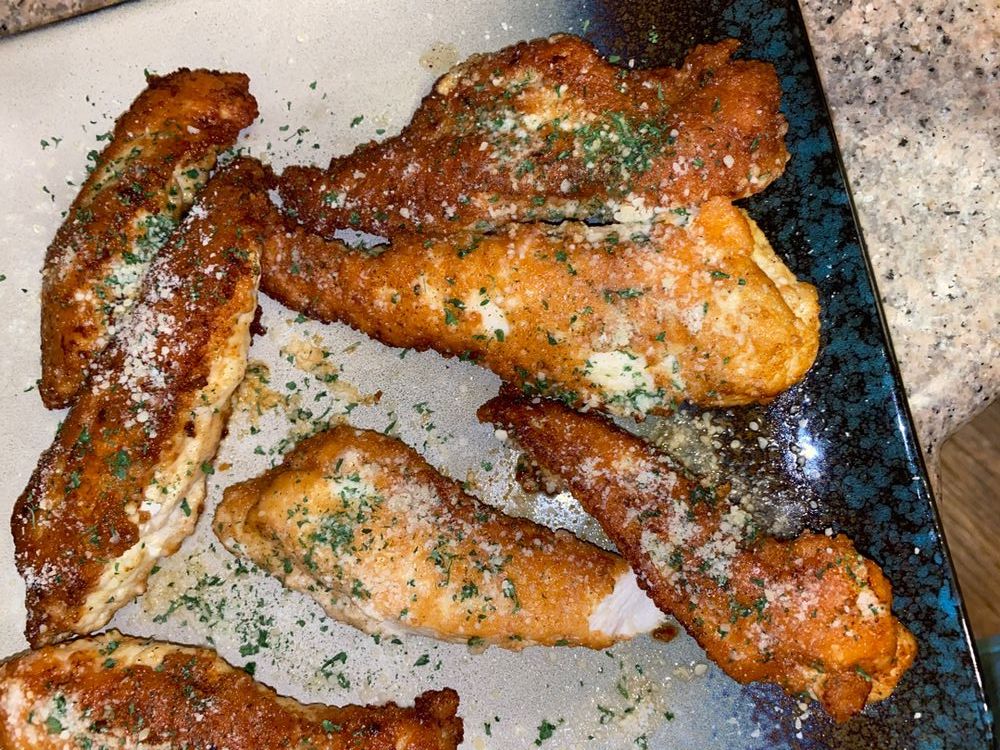
PARMESAN CRUSTED CHICKEN

by Rebecca May 6, 2020
written by Rebecca

All-day, all week chicken. It’s my daughter’s favorite and I always run out of ideas on how to prepare them. She doesn’t want to eat anything but chicken almost all the time! I can’t forget this one time that she requested for me to cook a Parmesan Crusted Chicken. I was like, what? Then she showed me a recipe. From then on, whenever she’s throwing tantrums, I prepare this for her (it became her new favorite!). Good thing, it’s very easy to prepare; just pound some chicken breasts, coat in parmesan, and fried. And you have a crispy parmesan-crusted chicken and a happy kid!

INGREDIENTS

2 lb Boneless Skinless Chicken Breast

1 Egg

1 tablespoon Water

1 teaspoon minced Garlic

1/2 teaspoon salt

1/2 teaspoon Black Pepper

2 cups Shredded Parmesan Cheese

4 tablespoon butter

2 tablespoon Olive Oil

HOW TO MAKE PARMESAN CRUSTED CHICKEN

Step 1: To prepare the chicken breasts, cut each in half, then pound to about half-inch thick.

Step 2: In a bowl, beat the egg with water until blended.

Step 3: Add the garlic, salt, and pepper. Whisk to combine.

Step 4: Put the parmesan in a separate bowl.

Step 5: Coat the chicken pieces in the egg mixture.

Step 6: Remove any excess egg mixture.

Step 7: Then, place the cut chickens in the parmesan, making sure the tops are sprinkled with more. Turn the chicken and repeat the process on the other side. Shake off any excess parmesan.

Step 8: Put the butter and oil in a large pan over high heat.

Step 9: Place the chicken breasts on the heated pan until edges are brown or for about 3 minutes allowing the cheese sticks to the chicken.

Step 10: Gently press the chicken breasts with a spatula and turn it over. Let it cook until again the edges are brown.

Step 11: Once chickens are cooked, remove from heat and transfer to a serving plate. Serve and enjoy!

PARMESAN CRUSTED CHICKEN

Rebecca All-day, all week chicken. It’s my daughter’s favorite and I always run out of ideas on how to prepare them. She doesn’t want to eat anything but chicken almost all… Main Dish Recipes PARMESAN CRUSTED CHICKEN European Print This
Nutrition facts: 200 calories 20 grams fat
Rating: 5.0/5
( 1 voted )

Ingredients

  • 2 lb Boneless Skinless Chicken Breast
  • 1 Egg
  • 1 tablespoon Water
  • 1 teaspoon minced Garlic
  • 1/2 teaspoon salt
  • 1/2 teaspoon Black Pepper
  • 2 cups Shredded Parmesan Cheese
  • 4 tablespoon butter
  • 2 tablespoon Olive Oil

Instructions

Step 1: To prepare the chicken breasts, cut each in half, then pound to about half-inch thick.

Step 2: In a bowl, beat the egg with water until blended.

Step 3: Add the garlic, salt, and pepper. Whisk to combine.

Step 4: Put the parmesan in a separate bowl.

Step 5: Coat the chicken pieces in the egg mixture.

Step 6: Remove any excess egg mixture.

Step 7: Then, place the cut chickens in the parmesan, making sure the tops are sprinkled with more. Turn the chicken and repeat the process on the other side. Shake off any excess parmesan.

Step 8: Put the butter and oil in a large pan over high heat.

Step 9: Place the chicken breasts on the heated pan until edges are brown or for about 3 minutes allowing the cheese sticks to the chicken.

Step 10: Gently press the chicken breasts with a spatula and turn it over. Let it cook until again the edges are brown.

Step 11: Once chickens are cooked, remove from heat and transfer to a serving plate. Serve and enjoy!

May 6, 2020 0 comment
0 FacebookTwitterPinterestEmail
Main Dish Recipes

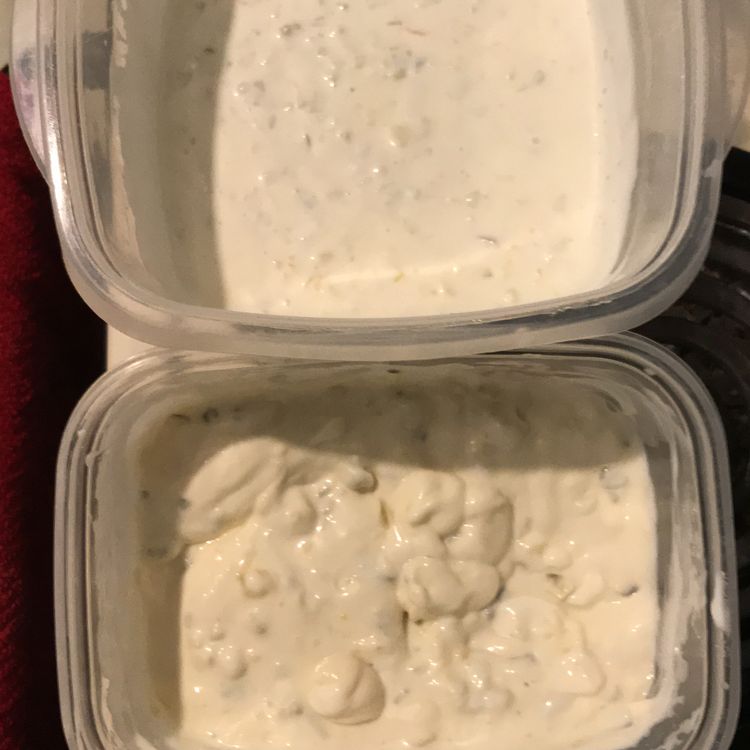
Easy Tartar Sauce (BETTER than bottled in 2 mins!)

by Rebecca May 6, 2020
written by Rebecca

Whenever I go to the supermarket I always end up hoarding bottled sauce or dips. We just love dips and sauces at home especially my kids. One day, I thought, why not make them myself? I have found and tried many recipes and so far I think I nailed them all (that’s how much we’re crazy about dips and sauces!). One stood out though, it’s pretty simple to make and I think I did better compared to the bottled sauce/dip that I normally bought.

Once, I served a platter of fish sticks, battered fish, and crispy fish tacos with tartar sauce during movie night. My kids asked me why the sauce tastes different and I told them that I made it. From then on, they never run out of excuses to request for the same platter every movie night. They love the tartar sauce and we never bought another bottled sauce/dips ever since!

This Tartar sauce is so simple, you just need to mix the ingredients. The only trick maybe is to let the sauce rest in the fridge for some time for the flavors to come out. You are also welcome to swap the dill pickles with chop up bread and butter pickles or use sweet relish instead. For the pickle juice, you can replace it with half the amount of lemon juice. And instead of minced onions, you can use a half teaspoon of onion powder.

Ingredients

2 cups of mayonnaise

2 Tbsp. dill pickles minced

2 Tbsp. pickle juice

2 Tbsp. minced onion

How to make Easy Tartar Sauce

Step 1: In a small bowl, mix the mayonnaise, minced dill pickles, pickle juice, and onions.

Step 2: To get the best flavor, place the Tartar Sauce inside the refrigerator and chill for at least 2-3 hours. Serve the tartar sauce with all the tasty plates of seafood you can eat.

Easy Tartar Sauce (BETTER than bottled in 2 mins!)

Rebecca Whenever I go to the supermarket I always end up hoarding bottled sauce or dips. We just love dips and sauces at home especially my kids. One day, I thought,… Main Dish Recipes Easy Tartar Sauce (BETTER than bottled in 2 mins!) European Print This
Nutrition facts: 200 calories 20 grams fat
Rating: 5.0/5
( 1 voted )

Ingredients

  • 2 cups of mayonnaise
  • 2 Tbsp. dill pickles minced
  • 2 Tbsp. pickle juice
  • 2 Tbsp. minced onion

Instructions

Step 1: In a small bowl, mix the mayonnaise, minced dill pickles, pickle juice, and onions.

Step 2: To get the best flavor, place the Tartar Sauce inside the refrigerator and chill for at least 2-3 hours. Serve the tartar sauce with all the tasty plates of seafood you can eat.

May 6, 2020 0 comment
0 FacebookTwitterPinterestEmail
Main Dish Recipes

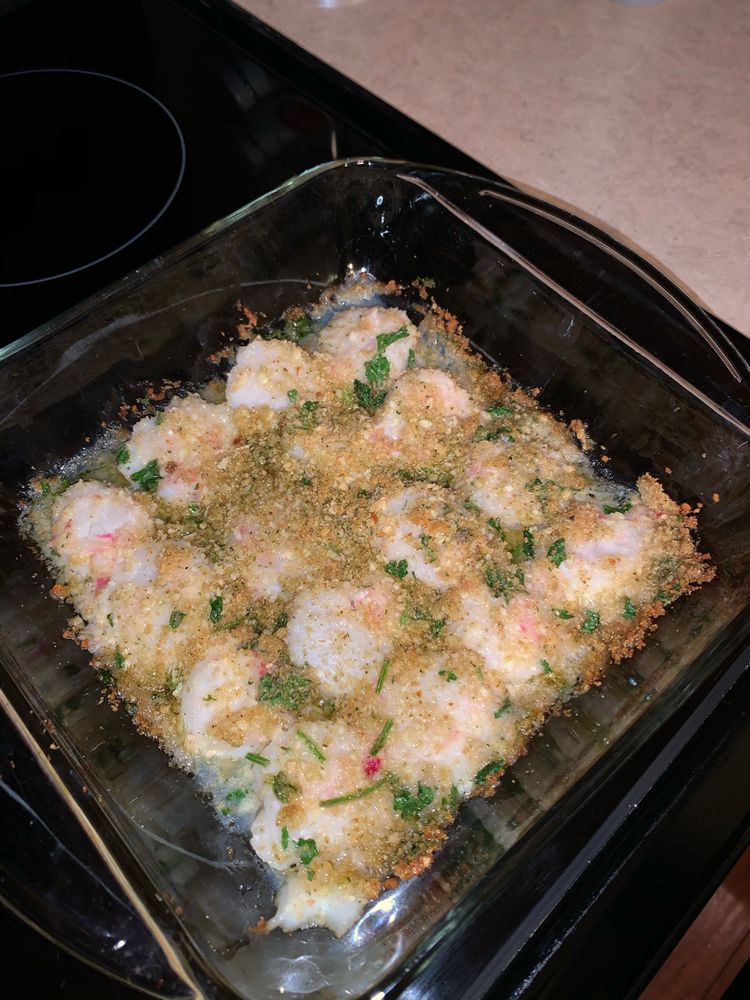
Crispy Baked Scallops (with Buttery Panko topping!)

by Rebecca May 6, 2020
written by Rebecca

Scallops are my husband’s favorite. It’s like he’s always on the hunt for the best scallops whenever we go. I remember when we visited Nova Scotia last year, he’s gone crazy. There he got to eat the best scallops (according to him, which I agree). Almost every day he devoured them. I never have seen him so excited and it was by far the best trip!

So when we got home I promise him that I’ll learn how to cook his favorite (he begs me ever since to cook for him). Thank goodness I came across this quick and easy recipe to prepare the scallops of his dream. So, if you love scallops like my husband, this recipe is for you.

He describes this as “heaven in every bite”. It’s buttery, crispy, and super delish. We love it with some freshly squeezed lemon juice drizzled on top as it adds an extra zesty flavor to the already amazing Crispy Baked Scallops.

Ingredients

16 large sea scallops, (1 – 1 1/2 pounds)

1/2 tsp. kosher salt

1/4 tsp. coarse ground black pepper

1/4 tsp. paprika

1/8 tsp. cayenne pepper

1/2 c. panko bread crumbs

4 Tbsp. Parmesan cheese, grated

2 Tbsp. parsley, chopped

4 Tbsp. unsalted butter, melted

2 Tbsp. extra-virgin olive oil

How to make Crispy Baked Scallops

Step 1: Prepare the oven by preheating it 400 degrees.

Step 2: Dry the scallops with paper towels. Make sure to remove any attached side-muscle (because they are tough to eat). Pinch and tear it away from the scallops.

Step 3: In a bowl, combine the salt, pepper, paprika, cayenne, panko, Parmesan, parsley, olive oil, and butter. Stir until well-combined.

Step 4: Place the scallops in an 8 x 10-inch baking pan. Pour the bread crumbs mixture over the scallops to cover completely.

Step 5: Put the dish in the oven and bake for 15-18 minutes or until the top is browned.

Step 6: Once cooked, transfer to a serving plate. Serve and enjoy!

Crispy Baked Scallops (with Buttery Panko topping!)

Rebecca Scallops are my husband’s favorite. It’s like he’s always on the hunt for the best scallops whenever we go. I remember when we visited Nova Scotia last year, he’s gone… Main Dish Recipes Crispy Baked Scallops (with Buttery Panko topping!) European Print This
Nutrition facts: 200 calories 20 grams fat
Rating: 4.5/5
( 2 voted )

Ingredients

  • 16 large sea scallops, (1 - 1 1/2 pounds)
  • 1/2 tsp. kosher salt
  • 1/4 tsp. coarse ground black pepper
  • 1/4 tsp. paprika
  • 1/8 tsp. cayenne pepper
  • 1/2 c. panko bread crumbs
  • 4 Tbsp. Parmesan cheese, grated
  • 2 Tbsp. parsley, chopped
  • 4 Tbsp. unsalted butter, melted
  • 2 Tbsp. extra-virgin olive oil

Instructions

Step 1: Prepare the oven by preheating it 400 degrees.

Step 2: Dry the scallops with paper towels. Make sure to remove any attached side-muscle (because they are tough to eat). Pinch and tear it away from the scallops.

Step 3: In a bowl, combine the salt, pepper, paprika, cayenne, panko, Parmesan, parsley, olive oil, and butter. Stir until well-combined.

Step 4: Place the scallops in an 8 x 10-inch baking pan. Pour the bread crumbs mixture over the scallops to cover completely.

Step 5: Put the dish in the oven and bake for 15-18 minutes or until the top is browned.

Step 6: Once cooked, transfer to a serving plate. Serve and enjoy!

May 6, 2020 0 comment
0 FacebookTwitterPinterestEmail
Newer Posts
Older Posts

Popular Posts

  • 1

    Crispy Crunchy Parmesan Potatoes

    March 21, 2020
  • 2

    CROCK POT SMOTHERED PORK CHOPS

    March 21, 2020
  • Facebook
  • Twitter

@2019 - All Right Reserved.


Back To Top