Cook it once
  • Home
  • Privacy Policy
  • Recipes
    • KETO
    • LC
    • WW
  • Tips
  • Contact
Cook it once
  • Home
  • Privacy Policy
  • Recipes
    • KETO
    • LC
    • WW
  • Tips
  • Contact
Category:

Main Dish Recipes

Main Dish Recipes

Peaches And Cream Cake

by Rebecca October 10, 2020
written by Rebecca

Prep Time: 15 minutes | Cook Time: 55 minutes | Total Time: 1 hour 10 minutes | SERVINGS: 8 servings

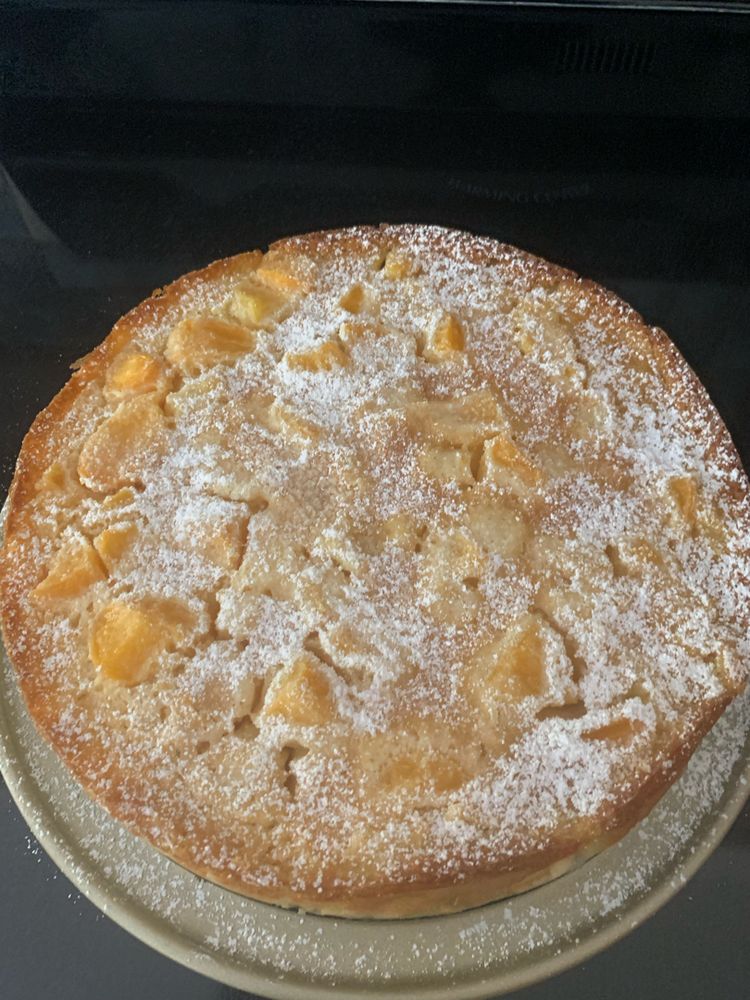
A wonderful summer dessert with loads of fresh peaches! Mildly sweet with a creamy batter that’s barely set on the outside and creamy inside, and don’t forget the fresh peaches which is the highlight of this amazingly delicious Peaches and Cream Cake.

INGREDIENTS

2/3 cup white sugar (scant 2/3 cup)

1 large egg

1 large egg yolk

1 tsp vanilla

1/3 cup butter (melted)

1/2 cup all-purpose flour

1 tsp baking powder

6 Tbsp whole milk (at room temperature)

6-7 fresh peaches

How to make Peaches And Cream Cake

Step 1: Grease and line with a round parchment paper an 8 or 9-inch springform pan. Sprinkle with a little amount of brown sugar inside and wrap the outside of the pan with a piece of aluminium foil.

Step 2: Prepare the oven. Preheat it to 355 degrees F.

Step 3: Peel and cut flesh off sides of the peaches. Chop in chunks, but not too small, and set aside.

Step 4: Next, melt the butter and set aside to cool.

Step 5: Add the flour and baking powder in a medium bowl. Whisk until incorporated and set aside.

Step 6: Meanwhile, whisk the eggs and sugar for about 2 to 3 minutes or until light and fluffy. Stir in the vanilla and the melted butter until incorporated. Pour in the milk and add in the flour sifted with baking powder. Whisk until combined before folding in the peaches.

Step 7: Transfer the batter in the prepared pan. If you want a bit more peaches, you can add more. If desired, sprinkle over some white sugar before baking to have that sweet top crust.

Step 8: Place inside the preheated oven and bake for about 50 to 55 minutes.

Step 9: Once done, remove from the oven to a cooling rack, still in the pan to cool completely.

Step 10: Then, place in the fridge until ready to use. Or when serving right away, use a knife to remove the outer ring by running around the outside of the cake.

Step 11: Slice the cake and serve either cooled, at room temperature, or somewhat re-warmed. If preferred, dust with icing sugar or a scoop of vanilla ice cream or a dollop of sweetened whipped cream. Enjoy!

NOTES:

For best accuracy, use a gram measurement if available.

Let the cake cool completely in the pan because it’ll be very loose. And place in the fridge to set for a couple of hours so it’ll be easier to slice.

NUTRITION FACTS:

Calories: 229kcal | Carbohydrates: 34g | Protein: 3g | Fat: 9g | Saturated Fat: 5g | Cholesterol: 67mg | Sodium: 83mg | Potassium: 308mg | Fiber: 1gSugar: 26g | Vitamin A: 685IU | Vitamin C: 7.4mg | Calcium: 55mg | Iron: 0.9mg

Peaches And Cream Cake

Rebecca Prep Time: 15 minutes | Cook Time: 55 minutes | Total Time: 1 hour 10 minutes | SERVINGS: 8 servings A wonderful summer dessert with loads of fresh peaches! Mildly… Main Dish Recipes Peaches And Cream Cake European Print This
Serves: 8 Prep Time: 15 mins Cooking Time: 55 mins 55 mins
Nutrition facts: 229 calories 9 fat
Rating: 5.0/5
( 1 voted )

Ingredients

  • 2/3 cup white sugar (scant 2/3 cup)
  • 1 large egg
  • 1 large egg yolk
  • 1 tsp vanilla
  • 1/3 cup butter (melted)
  • 1/2 cup all-purpose flour
  • 1 tsp baking powder
  • 6 Tbsp whole milk (at room temperature)
  • 6-7 fresh peaches

Instructions

Step 1: Grease and line with a round parchment paper an 8 or 9-inch springform pan. Sprinkle with a little amount of brown sugar inside and wrap the outside of the pan with a piece of aluminium foil.

Step 2: Prepare the oven. Preheat it to 355 degrees F.

Step 3: Peel and cut flesh off sides of the peaches. Chop in chunks, but not too small, and set aside.

Step 4: Next, melt the butter and set aside to cool.

Step 5: Add the flour and baking powder in a medium bowl. Whisk until incorporated and set aside.

Step 6: Meanwhile, whisk the eggs and sugar for about 2 to 3 minutes or until light and fluffy. Stir in the vanilla and the melted butter until incorporated. Pour in the milk and add in the flour sifted with baking powder. Whisk until combined before folding in the peaches.

Step 7: Transfer the batter in the prepared pan. If you want a bit more peaches, you can add more. If desired, sprinkle over some white sugar before baking to have that sweet top crust.

Step 8: Place inside the preheated oven and bake for about 50 to 55 minutes.

Step 9: Once done, remove from the oven to a cooling rack, still in the pan to cool completely.

Step 10: Then, place in the fridge until ready to use. Or when serving right away, use a knife to remove the outer ring by running around the outside of the cake.

Step 11: Slice the cake and serve either cooled, at room temperature, or somewhat re-warmed. If preferred, dust with icing sugar or a scoop of vanilla ice cream or a dollop of sweetened whipped cream. Enjoy!

NOTES:

For best accuracy, use a gram measurement if available.

Let the cake cool completely in the pan because it'll be very loose. And place in the fridge to set for a couple of hours so it'll be easier to slice.
October 10, 2020 0 comment
0 FacebookTwitterPinterestEmail
Main Dish Recipes

Healthy Blueberry Oatmeal Muffins

by Rebecca October 9, 2020
written by Rebecca

PREP TIME: 15 mins | COOK TIME: 20 mins | TOTAL TIME: 35 mins | SERVINGS: 24

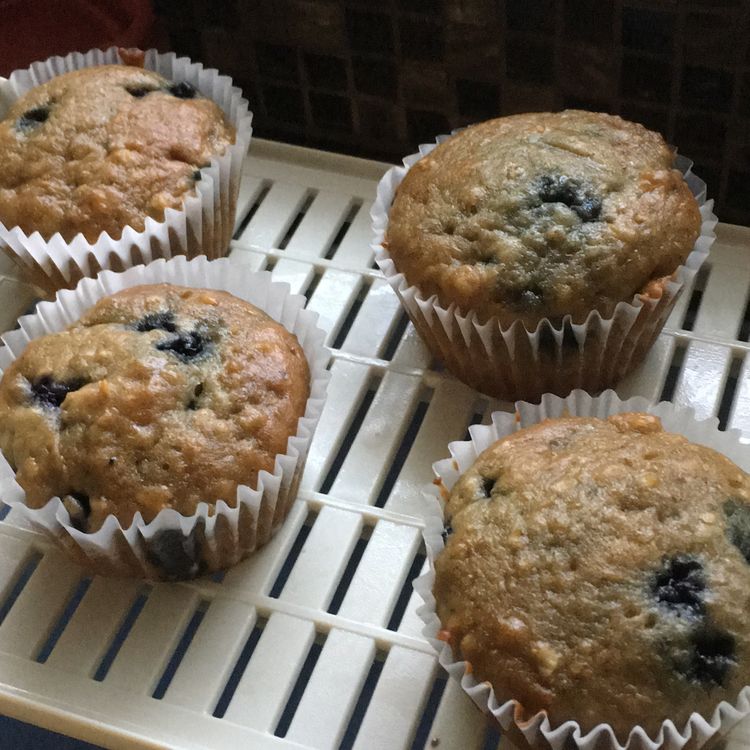
I love blueberry muffin and this recipe is my go-to whenever I’m craving for some muffin time. Packed with whole grains, fibre, protein, and juicy berries – these tasty, healthy blueberry oatmeal muffins are the perfect grab and go breakfast or snack.

Ingredients

1 cup quick oats (100g)

1 cup hot water

1 1/2 cups brown sugar lightly packed (240g)

3/4 cup 0% plain Greek yoghurt (155g)

1/2 cup unsweetened applesauce (115g)

1/4 cup canola oil (50g)

3 eggs

1 tablespoon vanilla

3 teaspoons baking powder

1 teaspoon baking soda

1 teaspoon cinnamon

1/4 teaspoon salt

2 cups whole wheat flour (260g)

3 cups fresh or frozen blueberries (300g)

How to make Healthy Blueberry Oatmeal Muffins

Step 1: Prepare the oven. Preheat it to 350 degrees F.

Step 2: In a medium bowl, combine the oats with hot water. Let it sit for at least 5 to 10 minutes.

Step 3: To make the batter, add the brown sugar, yoghurt, applesauce, oil, eggs, and vanilla in a large bowl. Whisk until smooth.

Step 4: Then, stir in the baking powder, baking soda, cinnamon, and salt until smooth.

Step 5: Take the soaked oats and stir them into the batter mix until evenly incorporated.

Step 6: Add the flour and berries and mix until just combined. Make sure to not overmix.

Step 7: Fill the lightly greased 24 cups muffin pan with the batter until around 3/4 full.

Step 8: Place inside the preheated oven and bake for about 20 to 25 minutes. Check the doneness by inserting a toothpick in the centre of the muffin. Once the toothpick comes out clean, the muffins are done.

Nutrition Facts:

Calories: 145cal | Carbohydrates: 26g | Protein: 3g | Fat: 3g | Cholesterol: 20mg | Sodium: 85mg | Potassium: 151mg | Fiber: 1g | Sugar: 16g | Vitamin A: 40IU | Vitamin C: 1.8mg | Calcium: 50mg | Iron: 0.8mg

Healthy Blueberry Oatmeal Muffins

Rebecca PREP TIME: 15 mins | COOK TIME: 20 mins | TOTAL TIME: 35 mins | SERVINGS: 24 I love blueberry muffin and this recipe is my go-to whenever I’m craving… Main Dish Recipes Healthy Blueberry Oatmeal Muffins European Print This
Serves: 24 Prep Time: 15 mins Cooking Time: 20 mins 20 mins
Nutrition facts: 145 calories 3 fat
Rating: 5.0/5
( 1 voted )

Ingredients

  • 1 cup quick oats (100g)
  • 1 cup hot water
  • 1 1/2 cups brown sugar lightly packed (240g)
  • 3/4 cup 0% plain Greek yoghurt (155g)
  • 1/2 cup unsweetened applesauce (115g)
  • 1/4 cup canola oil (50g)
  • 3 eggs
  • 1 tablespoon vanilla
  • 3 teaspoons baking powder
  • 1 teaspoon baking soda
  • 1 teaspoon cinnamon
  • 1/4 teaspoon salt
  • 2 cups whole wheat flour (260g)
  • 3 cups fresh or frozen blueberries (300g)

Instructions

Step 1: Prepare the oven. Preheat it to 350 degrees F.

Step 2: In a medium bowl, combine the oats with hot water. Let it sit for at least 5 to 10 minutes.

Step 3: To make the batter, add the brown sugar, yoghurt, applesauce, oil, eggs, and vanilla in a large bowl. Whisk until smooth.

Step 4: Then, stir in the baking powder, baking soda, cinnamon, and salt until smooth.

Step 5: Take the soaked oats and stir them into the batter mix until evenly incorporated.

Step 6: Add the flour and berries and mix until just combined. Make sure to not overmix.

Step 7: Fill the lightly greased 24 cups muffin pan with the batter until around 3/4 full.

Step 8: Place inside the preheated oven and bake for about 20 to 25 minutes. Check the doneness by inserting a toothpick in the centre of the muffin. Once the toothpick comes out clean, the muffins are done.

October 9, 2020 0 comment
0 FacebookTwitterPinterestEmail
Main Dish Recipes

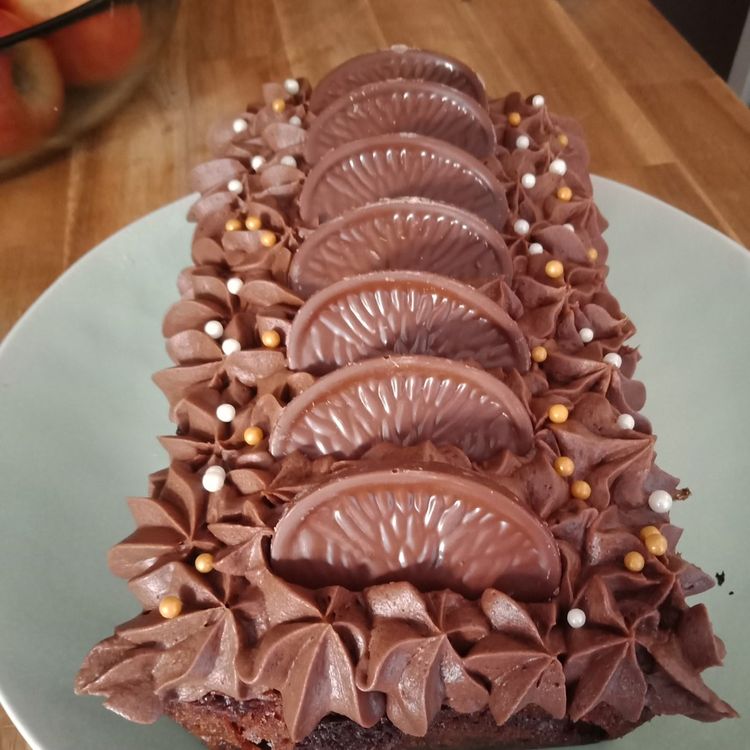
Chocolate Orange Loaf Cake

by Rebecca October 9, 2020
written by Rebecca

Prep Time: 20 minutes | Cook Time: 1 hour | Total Time: 1 hour 20 minutes | Servings: 10

Orange and chocolate, two of my favourite combination! This moist and decadent Chocolate Orange Loaf Cake has been my long obsession. A simple, not fussy loaf cake that has superb classic flavours we all love!

Ingredients

Sponge:

200 g butter or baking spread

200 g Caster sugar

2 tsp orange extract

4 Eggs large

1 tbsp Milk

175 g Self-raising flour

25 g Cocoa powder

1/4 tsp Baking powder

1/2 a Terry’s Chocolate Orange chopped up – optional

Buttercream:

150 g butter or baking spread

275 g Icing sugar

25 g Cocoa powder

1 tsp orange extract

1 1/2 tbsp Milk

Decoration:

1/2 a Terry’s Chocolate Orange

Orange sprinkles optional

How to make Chocolate Orange Loaf Cake

Step 1: Prepare the oven. Preheat it to 160 degrees C (fan) or 180 degrees C or 350 degrees F (gas mark).

Step 2: Generously grease a 2lb loaf tin, then, line.

Step 3: In a bowl, add the butter and caster sugar. Mix with an electric mixer or a spoon until light and fluffy.

Step 4: Whisk in the orange extract, eggs, and milk until smooth.

Step 5: Add in the flour, baking powder, and cocoa powder. Mix until completely incorporated.

Step 6: Then, fold in the chopped Terry’s Chocolate Orange.

Step 7: In the prepared loaf tin, pour the mixture. Place inside the preheated oven and bake for about an hour or until a skewer inserted in the middle of the cake comes out clean.

Step 8: Remove from the oven and allow to cool completely.

To make the buttercream:

Step 9: Combine the butter, cocoa powder, and icing sugar with an electric mixer until the mixture begins to combine.

Step 10: Then, stir in the orange extract and milk until smooth.

Step 11: Fill the piping bag with the buttercream. Pipe the loaf cake or use a spoon or spatula to spread the buttercream.

Step 12: Garnish the loaf cake with the rest of the Terry’s Chocolate Orange pieces and some sprinkles, if desired.

Step 13: Serve or store in a cool place in an airtight container for up to 3 days.

Chocolate Orange Loaf Cake

Rebecca Prep Time: 20 minutes | Cook Time: 1 hour | Total Time: 1 hour 20 minutes | Servings: 10 Orange and chocolate, two of my favourite combination! This moist and… Main Dish Recipes Chocolate Orange Loaf Cake European Print This
Serves: 10 Prep Time: 20 mins Cooking Time: 1 hr 1 hr
Nutrition facts: 200 calories 20 grams fat
Rating: 5.0/5
( 1 voted )

Ingredients

  • Sponge:
  • 200 g butter or baking spread
  • 200 g Caster sugar
  • 2 tsp orange extract
  • 4 Eggs large
  • 1 tbsp Milk
  • 175 g Self-raising flour
  • 25 g Cocoa powder
  • 1/4 tsp Baking powder
  • 1/2 a Terry's Chocolate Orange chopped up - optional
  • Buttercream:
  • 150 g butter or baking spread
  • 275 g Icing sugar
  • 25 g Cocoa powder
  • 1 tsp orange extract
  • 1 1/2 tbsp Milk
  • Decoration:
  • 1/2 a Terry's Chocolate Orange
  • Orange sprinkles optional

Instructions

Step 1: Prepare the oven. Preheat it to 160 degrees C (fan) or 180 degrees C or 350 degrees F (gas mark).

Step 2: Generously grease a 2lb loaf tin, then, line.

Step 3: In a bowl, add the butter and caster sugar. Mix with an electric mixer or a spoon until light and fluffy.

Step 4: Whisk in the orange extract, eggs, and milk until smooth.

Step 5: Add in the flour, baking powder, and cocoa powder. Mix until completely incorporated.

Step 6: Then, fold in the chopped Terry's Chocolate Orange.

Step 7: In the prepared loaf tin, pour the mixture. Place inside the preheated oven and bake for about an hour or until a skewer inserted in the middle of the cake comes out clean.

Step 8: Remove from the oven and allow to cool completely.

To make the buttercream:

Step 9: Combine the butter, cocoa powder, and icing sugar with an electric mixer until the mixture begins to combine.

Step 10: Then, stir in the orange extract and milk until smooth.

Step 11: Fill the piping bag with the buttercream. Pipe the loaf cake or use a spoon or spatula to spread the buttercream.

Step 12: Garnish the loaf cake with the rest of the Terry's Chocolate Orange pieces and some sprinkles, if desired.

Step 13: Serve or store in a cool place in an airtight container for up to 3 days.

October 9, 2020 0 comment
0 FacebookTwitterPinterestEmail
Main Dish Recipes

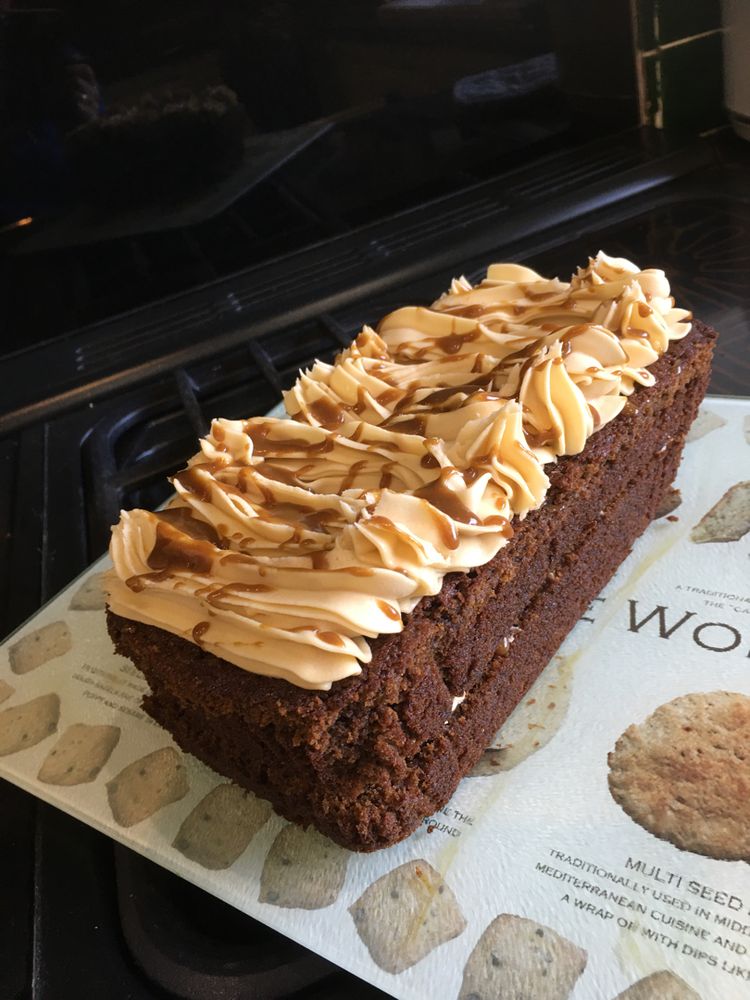
Sticky Toffee Loaf Cake!

by Rebecca October 9, 2020
written by Rebecca

Prep Time: 20 mins | Cook Time: 50 mins | Decorating Time: 30 mins | Total Time: 1 hr 40 mins | Servings: 12 Slices

Everything Sticky Toffee – sponge, frosting, and sauce! This perfectly sweet, delicious, and beautiful loaf cake makes me super excited always!

Ingredients

Sponge:

200 g Medjool Dates

1 tsp Bicarbonate of Soda

150 ml of Boiling Water

100 g Unsalted Butter

175 g Dark Brown Sugar

3 Medium Eggs

200 g Self Raising Flour

100 g Black Treacle

1 tsp Vanilla Extract

Sauce:

150 ml Double Cream

1 tbsp Black Treacle

75 g Dark Brown Sugar

50 g Unsalted Butter

Buttercream:

150 g Unsalted Butter

300 g Icing Sugar

75 g Sticky Toffee Sauce

Decoration:

Sprinkles

Fudge Pieces

Sticky Toffee Sauce

How to make Sticky Toffee Loaf Cake

To make the Sponge:

Step 1: Prepare the oven. Preheat it to 180 degrees C or 160 degrees F.

Step 2: Use parchment paper to line a 2lb loaf tin.

Step 3: Remove the stones from the Medjool dates before chopping them up. Place in a bowl with Bicarbonate of Soda and boiling water. Let it rest for about 10 minutes. Then, puree in a blender or food processor until smooth.

Step 4: Place the unsalted butter and dark brown sugar in a bowl. Mix using a hand mixer until light and fluffy.

Step 5: Add in the eggs, a piece at a time, beating every after each addition.

Step 6: Stir in the flour, Treacle, vanilla, and the pureed date mixture until smooth.

Step 7: Transfer the mixture into the prepared tin and bake in the preheated oven for about 45 to 50 minutes.

Step 8: Remove from the oven and allow to cool for at least 10 minutes in the tin before placing on a wire rack to completely cool.

To make the Sauce:

Step 1: In a pan, add all the sauce ingredients. Heating on low until the butter melts and the ingredients are mixed.

Step 2: Let the mixture boil for a minute, then, remove from the heat and set aside to cool completely. Occasionally stirring so the skin will not set.

To make the Buttercream:

Step 1: In a bowl, add the unsalted butter and mix with a hand mixer until supple.

Step 2: Beat in the icing sugar until completely mixed before adding in the cooled sticky toffee sauce. Mix again until incorporated.

To Decorate:

Step 1: Fill a piping bag with the buttercream filling and decorate the cake. Drizzle the cake with some more Sticky Toffee Sauce and sprinkle with your desired sprinkles.

Step 2: Serve and enjoy!

Notes:

Store the cake in the fridge for up to 3 to 4 days. Although the sponge may dry a bit it’ll still be delicious.

Make a homemade Toffee Sauce or buy instead.

Nutrition Facts:

Amount Per Serving: Calories 553 | Fat 26g40% | Saturated Fat 16g100% | Cholesterol 117mg39% | Sodium 141mg6% | Potassium 336mg10% | Carbohydrates 78g26% | Fiber 2g8% | Sugar 63g70% | Protein 4g8% | Vitamin A 900IU18% | Vitamin C 1mg1% | Calcium 72mg7% | Iron 1mg6%

Sticky Toffee Loaf Cake!

Rebecca Prep Time: 20 mins | Cook Time: 50 mins | Decorating Time: 30 mins | Total Time: 1 hr 40 mins | Servings: 12 Slices Everything Sticky Toffee – sponge,… Main Dish Recipes Sticky Toffee Loaf Cake! European Print This
Serves: 12 Prep Time: 20 mins Cooking Time: 1 hr 20 mins 1 hr 20 mins
Nutrition facts: 553 calories 26 fat
Rating: 5.0/5
( 1 voted )

Ingredients

  • Sponge:
  • 200 g Medjool Dates
  • 1 tsp Bicarbonate of Soda
  • 150 ml of Boiling Water
  • 100 g Unsalted Butter
  • 175 g Dark Brown Sugar
  • 3 Medium Eggs
  • 200 g Self Raising Flour
  • 100 g Black Treacle
  • 1 tsp Vanilla Extract
  • Sauce:
  • 150 ml Double Cream
  • 1 tbsp Black Treacle
  • 75 g Dark Brown Sugar
  • 50 g Unsalted Butter
  • Buttercream:
  • 150 g Unsalted Butter
  • 300 g Icing Sugar
  • 75 g Sticky Toffee Sauce
  • Decoration:
  • Sprinkles
  • Fudge Pieces
  • Sticky Toffee Sauce

Instructions

To make the Sponge:

Step 1: Prepare the oven. Preheat it to 180 degrees C or 160 degrees F.

Step 2: Use parchment paper to line a 2lb loaf tin.

Step 3: Remove the stones from the Medjool dates before chopping them up. Place in a bowl with Bicarbonate of Soda and boiling water. Let it rest for about 10 minutes. Then, puree in a blender or food processor until smooth.

Step 4: Place the unsalted butter and dark brown sugar in a bowl. Mix using a hand mixer until light and fluffy.

Step 5: Add in the eggs, a piece at a time, beating every after each addition.

Step 6: Stir in the flour, Treacle, vanilla, and the pureed date mixture until smooth.

Step 7: Transfer the mixture into the prepared tin and bake in the preheated oven for about 45 to 50 minutes.

Step 8: Remove from the oven and allow to cool for at least 10 minutes in the tin before placing on a wire rack to completely cool.

To make the Sauce:

Step 1: In a pan, add all the sauce ingredients. Heating on low until the butter melts and the ingredients are mixed.

Step 2: Let the mixture boil for a minute, then, remove from the heat and set aside to cool completely. Occasionally stirring so the skin will not set.

To make the Buttercream:

Step 1: In a bowl, add the unsalted butter and mix with a hand mixer until supple.

Step 2: Beat in the icing sugar until completely mixed before adding in the cooled sticky toffee sauce. Mix again until incorporated.

To Decorate:

Step 1: Fill a piping bag with the buttercream filling and decorate the cake. Drizzle the cake with some more Sticky Toffee Sauce and sprinkle with your desired sprinkles.

Step 2: Serve and enjoy!

Notes:

Store the cake in the fridge for up to 3 to 4 days. Although the sponge may dry a bit it'll still be delicious.

Make a homemade Toffee Sauce or buy instead.


October 9, 2020 0 comment
0 FacebookTwitterPinterestEmail
Main Dish Recipes

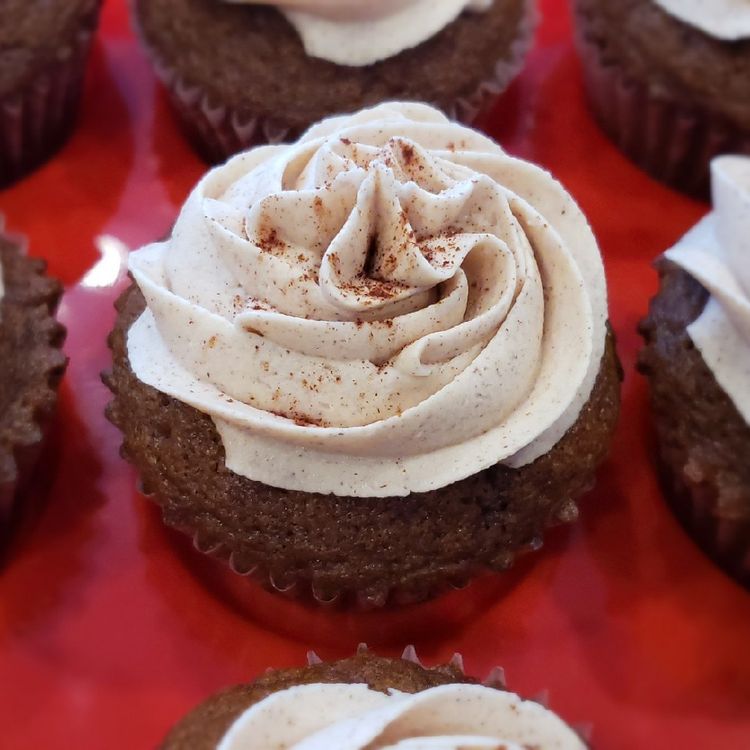
Gingerbread Cupcakes with Cinnamon Vanilla Buttercream Frosting

by Rebecca October 9, 2020
written by Rebecca

Prep Time: 15 minutes | Cook Time: 20 minutes | Total Time: 35 minutes | Servings: 12 cupcakes

These delightful, beautiful cupcakes give me that nostalgic feeling every time. A classic taste that never fails to put smiles on every face. Moist and dense, these Gingerbread Cupcakes with Cinnamon Vanilla Buttercream Frosting are a beautiful display to the dessert table this Holiday.

Ingredients

Gingerbread Cupcakes:

1 1/2 cups all-purpose flour

1 teaspoon baking soda

1 1/2 teaspoons ground cinnamon

1 teaspoon ground ginger

1/2 teaspoon ground nutmeg

1/4 teaspoon ground allspice

1/4 teaspoon salt

1/2 cup unsalted butter- at room temperature

1/2 cup dark brown sugar, packed

1 egg – at room temperature

1/2 cup molasses

1/2 cup milk- at room temperature

Cinnamon Vanilla Buttercream Frosting:

1/2 cup unsalted butter- at room temperature

1 teaspoon ground cinnamon

1 tablespoon vanilla extract

2 cups powdered sugar

How to make Gingerbread Cupcakes with Cinnamon Vanilla Buttercream Frosting

To make the Gingerbread Cupcakes:

Step 1: Prepare the oven. Preheat it to 350 degrees F.

Step 2: Using paper liners line a cupcake pan.

Step 3: In a medium bowl, add the all-purpose flour, baking soda, ground cinnamon, ground ginger, ground nutmeg, ground allspice, and salt. Stir well until incorporated.

Step 4: Beat the butter and dark brown sugar with an electric mixer until blended. Add in the egg followed by the molasses and blend until mixed. Gradually add in the milk, then, the flour mixture, stirring until evenly blended. If needed, scrape down the sides of the bowl.

Step 5: Fill the prepared cupcake pan wells until almost 2/3 full.

Step 6: Place inside the preheated oven and bake for about 18 to 20 minutes or until the cupcakes when touching springs back. Or use a toothpick, insert it in the centre of the cupcake. When it comes out clean the cupcake is done.

Step 7: Remove from the oven and set aside to cool.

To make the Cinnamon Vanilla Buttercream Frosting:

Step 1: Beat the butter with an electric mixer until almost whipped.

Step 2: Stir in the cinnamon and vanilla until smoothly mixed.

Step 3: Slowly add in the powdered sugar and beat until completely blended and smooth.

Step 4: Take the Cooled Gingerbread Cupcakes and frost using a butter knife, a small spatula, or a piping bag with tip.

Notes:

Make sure to allow the butter, egg, and milk to come to room temperature at least an hour before baking.

Experiment and have fun, decorate your cupcakes as desired. Just double the recipe for the frosting to serve all the cupcakes.

You can store the cupcakes in the fridge for up to 7 days when placed in an airtight container.

For the unfrosted cupcakes, store them in the freezer and use within 4 to 6 months for the best result.

The frosting can be stored in the freezer inside an air-tight container for up to 3 months.

Nutrition Facts:

Serving: 1cupcake | Calories: 364kcal | Carbohydrates: 53g | Protein: 2g | Fat: 16g | Saturated Fat: 10g | Cholesterol: 55mg | Sodium: 160mg | Potassium: 252mg | Sugar: 39g | Vitamin A: 510IU | Calcium: 67mg | Iron: 1.6mg

Gingerbread Cupcakes with Cinnamon Vanilla Buttercream Frosting

Rebecca Prep Time: 15 minutes | Cook Time: 20 minutes | Total Time: 35 minutes | Servings: 12 cupcakes These delightful, beautiful cupcakes give me that nostalgic feeling every time. A… Main Dish Recipes Gingerbread Cupcakes with Cinnamon Vanilla Buttercream Frosting European Print This
Serves: 12 Prep Time: 15 mins Cooking Time: 20 mins 20 mins
Nutrition facts: 364 calories 16 fat
Rating: 3.8/5
( 5 voted )

Ingredients

  • Gingerbread Cupcakes:
  • 1 1/2 cups all-purpose flour
  • 1 teaspoon baking soda
  • 1 1/2 teaspoons ground cinnamon
  • 1 teaspoon ground ginger
  • 1/2 teaspoon ground nutmeg
  • 1/4 teaspoon ground allspice
  • 1/4 teaspoon salt
  • 1/2 cup unsalted butter- at room temperature
  • 1/2 cup dark brown sugar, packed
  • 1 egg - at room temperature
  • 1/2 cup molasses
  • 1/2 cup milk- at room temperature
  • Cinnamon Vanilla Buttercream Frosting:
  • 1/2 cup unsalted butter- at room temperature
  • 1 teaspoon ground cinnamon
  • 1 tablespoon vanilla extract
  • 2 cups powdered sugar

Instructions

To make the Gingerbread Cupcakes:

Step 1: Prepare the oven. Preheat it to 350 degrees F.

Step 2: Using paper liners line a cupcake pan.

Step 3: In a medium bowl, add the all-purpose flour, baking soda, ground cinnamon, ground ginger, ground nutmeg, ground allspice, and salt. Stir well until incorporated.

Step 4: Beat the butter and dark brown sugar with an electric mixer until blended. Add in the egg followed by the molasses and blend until mixed. Gradually add in the milk, then, the flour mixture, stirring until evenly blended. If needed, scrape down the sides of the bowl.

Step 5: Fill the prepared cupcake pan wells until almost 2/3 full.

Step 6: Place inside the preheated oven and bake for about 18 to 20 minutes or until the cupcakes when touching springs back. Or use a toothpick, insert it in the centre of the cupcake. When it comes out clean the cupcake is done.

Step 7: Remove from the oven and set aside to cool.

To make the Cinnamon Vanilla Buttercream Frosting:

Step 1: Beat the butter with an electric mixer until almost whipped.

Step 2: Stir in the cinnamon and vanilla until smoothly mixed.

Step 3: Slowly add in the powdered sugar and beat until completely blended and smooth.

Step 4: Take the Cooled Gingerbread Cupcakes and frost using a butter knife, a small spatula, or a piping bag with tip.

Notes:

Make sure to allow the butter, egg, and milk to come to room temperature at least an hour before baking.

Experiment and have fun, decorate your cupcakes as desired. Just double the recipe for the frosting to serve all the cupcakes.

You can store the cupcakes in the fridge for up to 7 days when placed in an airtight container.

For the unfrosted cupcakes, store them in the freezer and use within 4 to 6 months for the best result.

The frosting can be stored in the freezer inside an air-tight container for up to 3 months.

October 9, 2020 0 comment
0 FacebookTwitterPinterestEmail
Main Dish Recipes

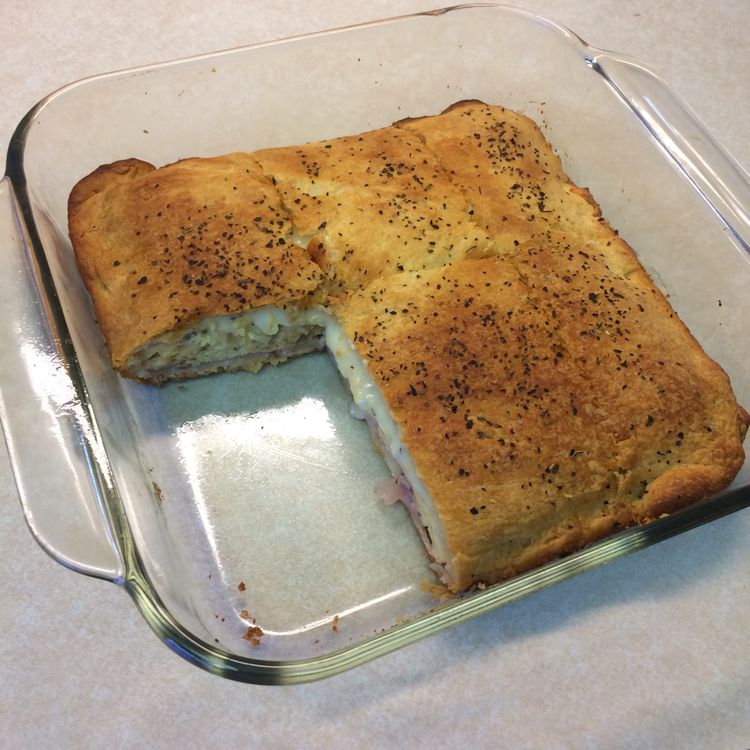
Crescent Breakfast Squares

by Rebecca October 9, 2020
written by Rebecca

YIELDS: 6 – 8 | PREP TIME: 10 MINS | TOTAL TIME: 1 HOUR

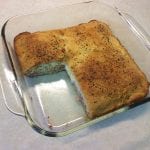
This genius hack has become a crowd favourite. Eggs, cheese, and spices packed in crisp, perfectly golden crescent dough. Fun and delicious breakfast squares to start your day right.

INGREDIENTS

Cooking spray

12 large eggs

1/4 c. milk

3 tbsp. butter, divided

Kosher salt

Freshly ground black pepper

2 cans crescent dough

1/2 lb. deli ham, sliced

1/4 c. finely chopped chives

12 slices cheddar

1 tsp. poppy seeds

1 tsp. sesame seeds

1 tsp. minced onion

1 tsp. dried garlic

Flaky sea salt

How to make Crescent Breakfast Squares

Step 1: Prepare the oven. Preheat it to 375 degrees.

Step 2: Use a cooking spray to grease a baking sheet. Set aside.

Step 3: Add the eggs and milk in a large bowl. Whisk until combined.

Step 4: Melt a tbsp butter in a large nonstick pan over medium heat. Once foamy, adjust the heat to low and add in the egg mixture. Cook until the eggs are just set, stirring frequently using a spatula. Season with salt and pepper before removing from heat.

Step 5: On a greased baking sheet, unroll a can of the crescent. Make sure to close any gaps by pinching the seams together to make a solid layer.

Step 6: Add the ham followed by the scrambled eggs, then, the chives, and cheese.

Step 7: Unroll another roll of the crescent on top and seal.

Step 8: In the microwave, melt the rest of the butter. Brush the top of the crescent dough with the melted butter and sprinkle with poppy seeds, sesame seeds, minced onion, and dried garlic. Lastly, season with flaky salt.

Step 9: Place inside the preheated oven and bake for about 25 to 30 minutes or until the dough turned golden and cooked through. Cover with foil, if the dough is browning over quickly.

Step 10: Remove from the oven and allow to cool for at least 15 minutes. Slice into squares and serve. Enjoy!

Crescent Breakfast Squares

Rebecca YIELDS: 6 – 8 | PREP TIME: 10 MINS | TOTAL TIME: 1 HOUR This genius hack has become a crowd favourite. Eggs, cheese, and spices packed in crisp, perfectly… Main Dish Recipes Crescent Breakfast Squares European Print This
Serves: 6-8 Prep Time: 10 mins
Nutrition facts: 200 calories 20 grams fat
Rating: 5.0/5
( 1 voted )

Ingredients

  • Cooking spray
  • 12 large eggs
  • 1/4 c. milk
  • 3 tbsp. butter, divided
  • Kosher salt
  • Freshly ground black pepper
  • 2 cans crescent dough
  • 1/2 lb. deli ham, sliced
  • 1/4 c. finely chopped chives
  • 12 slices cheddar
  • 1 tsp. poppy seeds
  • 1 tsp. sesame seeds
  • 1 tsp. minced onion
  • 1 tsp. dried garlic
  • Flaky sea salt

Instructions

Step 1: Prepare the oven. Preheat it to 375 degrees.

Step 2: Use a cooking spray to grease a baking sheet. Set aside.

Step 3: Add the eggs and milk in a large bowl. Whisk until combined.

Step 4: Melt a tbsp butter in a large nonstick pan over medium heat. Once foamy, adjust the heat to low and add in the egg mixture. Cook until the eggs are just set, stirring frequently using a spatula. Season with salt and pepper before removing from heat.

Step 5: On a greased baking sheet, unroll a can of the crescent. Make sure to close any gaps by pinching the seams together to make a solid layer.

Step 6: Add the ham followed by the scrambled eggs, then, the chives, and cheese.

Step 7: Unroll another roll of the crescent on top and seal.

Step 8: In the microwave, melt the rest of the butter. Brush the top of the crescent dough with the melted butter and sprinkle with poppy seeds, sesame seeds, minced onion, and dried garlic. Lastly, season with flaky salt.

Step 9: Place inside the preheated oven and bake for about 25 to 30 minutes or until the dough turned golden and cooked through. Cover with foil, if the dough is browning over quickly.

Step 10: Remove from the oven and allow to cool for at least 15 minutes. Slice into squares and serve. Enjoy!

October 9, 2020 0 comment
0 FacebookTwitterPinterestEmail
Main Dish Recipes

Ratatouille

by Rebecca October 9, 2020
written by Rebecca

Servings: 8

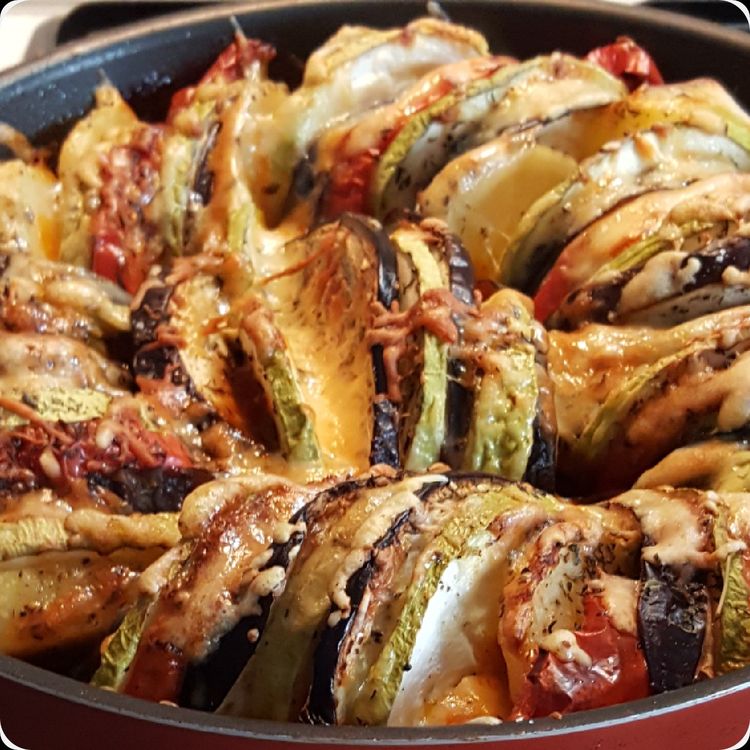
I was intrigued by Ratatouille when I first watched the movie. And darn, it’s good! I mean both the dish and the movie. It’s an art to make this delicious main or side and surprisingly easy.

Ingredients

VEGGIES:

2 eggplants

6 Roma tomatoes

2 yellow squashes

2 zucchinis

SAUCE:

2 tablespoons olive oil

1 onion, diced

4 cloves garlic, minced

1 red bell pepper, diced

1 yellow bell pepper, diced

salt, to taste

pepper, to taste

28 oz can of crushed tomatoes(795 g)

2 tablespoons chopped fresh basil, from 8-10 leaves

HERB SEASONING:

2 tablespoons chopped fresh basil, from 8-10 leaves

1 teaspoon garlic, minced

2 tablespoons chopped fresh parsley

2 teaspoons fresh thyme

salt, to taste

pepper, to taste

4 tablespoons olive oil

How to make Ratatouille

Step 1: Prepare the oven. Preheat it to 375 degrees F or 190 degrees C.

Step 2: Slice into almost 1/16-inch or 1-mm rounds the eggplants, tomatoes, squash, and zucchini. Set aside.

To make the Sauce:

Step 3: In a 12-inch or 30cm oven-safe pan, heat the olive oil over medium-high heat.

Step 4: Add the onion, garlic, and bell peppers. Saute and cook for about 10 minutes or until soft. Season with salt and pepper before adding the crushed tomatoes. Stir until completely incorporated.

Step 5: Take the pan out of the heat and quickly add in the basil. Stir again. Using a spatula, smooth the surface of the sauce.

Step 6: On top of the sauce arrange from the outer edge the sliced veggies to the middle of the pan alternately. You can do something like this; eggplant, tomato, squash, then, zucchini. And season with salt and pepper.

To make the herb seasoning:

Step 7: Add the basil, garlic, parsley, thyme, salt, pepper, and olive oil in a small bowl. Mix well.

Step 8: Then, over the vegetables, spoon the herb seasoning.

Step 9: Place inside the preheated oven and bake for about 40 minutes, covered in foil. Remove the cover and bake for 20 minutes more or until the veggies are soft.

Step 10: Remove from the oven and serve immediately. Perfect as a main dish or side. Enjoy!

NOTE:

When reheating, cover with foil and heat in the oven at 350 degrees F or 180 degrees C for about 15 minutes. Or microwave accordingly.

Nutrition Facts:

Calories: 230 | Fat: 11g | Carbs: 32g | Fiber: 8g | Sugar: 16g | Protein: 5g

Ratatouille

Rebecca Servings: 8 I was intrigued by Ratatouille when I first watched the movie. And darn, it’s good! I mean both the dish and the movie. It’s an art to make… Main Dish Recipes Ratatouille European Print This
Serves: 8
Nutrition facts: 230 calories 11 fat
Rating: 5.0/5
( 1 voted )

Ingredients

  • VEGGIES:
  • 2 eggplants
  • 6 Roma tomatoes
  • 2 yellow squashes
  • 2 zucchinis
  • SAUCE:
  • 2 tablespoons olive oil
  • 1 onion, diced
  • 4 cloves garlic, minced
  • 1 red bell pepper, diced
  • 1 yellow bell pepper, diced
  • salt, to taste
  • pepper, to taste
  • 28 oz can of crushed tomatoes(795 g)
  • 2 tablespoons chopped fresh basil, from 8-10 leaves
  • HERB SEASONING:
  • 2 tablespoons chopped fresh basil, from 8-10 leaves
  • 1 teaspoon garlic, minced
  • 2 tablespoons chopped fresh parsley
  • 2 teaspoons fresh thyme
  • salt, to taste
  • pepper, to taste
  • 4 tablespoons olive oil

Instructions

Step 1: Prepare the oven. Preheat it to 375 degrees F or 190 degrees C.

Step 2: Slice into almost 1/16-inch or 1-mm rounds the eggplants, tomatoes, squash, and zucchini. Set aside.

To make the Sauce:

Step 3: In a 12-inch or 30cm oven-safe pan, heat the olive oil over medium-high heat.

Step 4: Add the onion, garlic, and bell peppers. Saute and cook for about 10 minutes or until soft. Season with salt and pepper before adding the crushed tomatoes. Stir until completely incorporated.

Step 5: Take the pan out of the heat and quickly add in the basil. Stir again. Using a spatula, smooth the surface of the sauce.

Step 6: On top of the sauce arrange from the outer edge the sliced veggies to the middle of the pan alternately. You can do something like this; eggplant, tomato, squash, then, zucchini. And season with salt and pepper.

To make the herb seasoning:

Step 7: Add the basil, garlic, parsley, thyme, salt, pepper, and olive oil in a small bowl. Mix well.

Step 8: Then, over the vegetables, spoon the herb seasoning.

Step 9: Place inside the preheated oven and bake for about 40 minutes, covered in foil. Remove the cover and bake for 20 minutes more or until the veggies are soft.

Step 10: Remove from the oven and serve immediately. Perfect as a main dish or side. Enjoy!

NOTE:

When reheating, cover with foil and heat in the oven at 350 degrees F or 180 degrees C for about 15 minutes. Or microwave accordingly.


October 9, 2020 0 comment
0 FacebookTwitterPinterestEmail
Main Dish Recipes

Cranberry Brie Bites

by Rebecca October 9, 2020
written by Rebecca

YIELDS: 24 | PREP TIME: 20 MINS | TOTAL TIME: 35 MINS

If you are looking for the perfect appetizer, then these guys will do the rest for you. Always a fan favourite and easily gone in seconds! Super delicious, come together easily and quickly, not to mention they are super cute! The pop of colours give these away quickly, appetizing to look at, and the taste is exquisite!

The tangy cranberry sauce, creamy Brie cheese, pecans, and a sprig of rosemary make these crispy bites irresistible! Not at all fussy because of the canned crescent dough. Simple Cranberry Brie Bites that have all the amazing flavours and textures in one bite – sweet, tangy, creamy brie all stacked into buttery, flaky crescent dough cups. These picturesque bite-sized miniature appetizer that everyone loves and enjoy will certainly make your holiday this year and the years to come.

INGREDIENTS

1 (8-oz.) tube crescent dough

Cooking spray, for pan

Flour, for surface

1 (8-oz.) wheel of brie

1/2 c. whole berry cranberry sauce

1/4 c. chopped pecans

6 sprigs of rosemary, cut into 1″ pieces

How to make Cranberry Brie Bites

Step 1: Prepare the oven. Preheat it to 375 degrees.

Step 2: Use a cooking spray to grease a mini muffin tin.

Step 3: Roll out the crescent dough on a lightly floured surface. Pinch the seams together and cut into squares.

Step 4: Transfer the squares into the prepared muffin tin slots.

Step 5: Then, slice the brie into small parts. Place the pieces inside each crescent dough.

Step 6: Add spoonful of cranberry sauce on top of each, and some chopped pecans, and a small sprig of rosemary.

Step 7: Place inside the preheated oven and bake for about 15 minutes or until the crescent pastry is golden.

Cranberry Brie Bites

Rebecca YIELDS: 24 | PREP TIME: 20 MINS | TOTAL TIME: 35 MINS If you are looking for the perfect appetizer, then these guys will do the rest for you. Always… Main Dish Recipes Cranberry Brie Bites European Print This
Serves: 24 Prep Time: 20 mins
Nutrition facts: 200 calories 20 grams fat
Rating: 5.0/5
( 1 voted )

Ingredients

  • 1 (8-oz.) tube crescent dough
  • Cooking spray, for pan
  • Flour, for surface
  • 1 (8-oz.) wheel of brie
  • 1/2 c. whole berry cranberry sauce
  • 1/4 c. chopped pecans
  • 6 sprigs of rosemary, cut into 1" pieces

Instructions

Step 1: Prepare the oven. Preheat it to 375 degrees.

Step 2: Use a cooking spray to grease a mini muffin tin.

Step 3: Roll out the crescent dough on a lightly floured surface. Pinch the seams together and cut into squares.

Step 4: Transfer the squares into the prepared muffin tin slots.

Step 5: Then, slice the brie into small parts. Place the pieces inside each crescent dough.

Step 6: Add spoonful of cranberry sauce on top of each, and some chopped pecans, and a small sprig of rosemary.

Step 7: Place inside the preheated oven and bake for about 15 minutes or until the crescent pastry is golden.

October 9, 2020 0 comment
0 FacebookTwitterPinterestEmail
Main Dish Recipes

Pull-Apart Pigs In A Blanket

by Rebecca October 9, 2020
written by Rebecca

YIELDS: 10 SERVINGS | PREP TIME: 15 MINS | TOTAL TIME: 1 HOUR 25 MINS

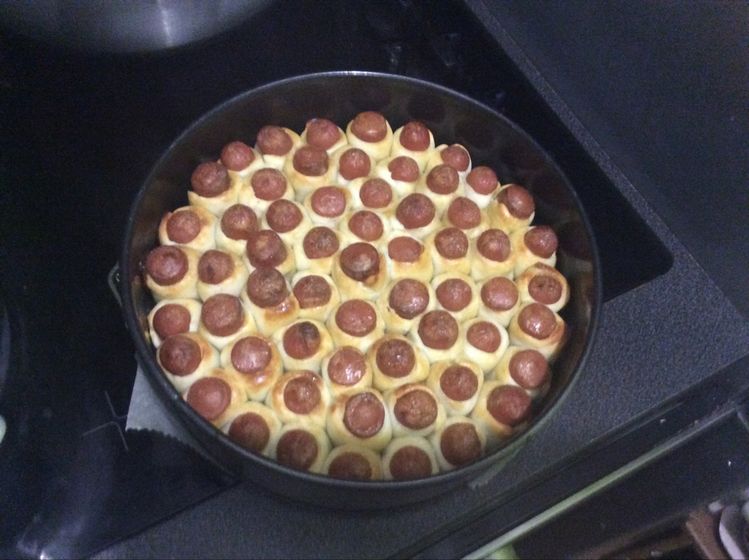
These Pull-Apart Pigs In A Blanket are super easy and fun to make. Bake in perfection to have that nice brown colour and insanely crunchy texture. Just make sure to not pack the pigs in a blanket very tightly because they won’t bake! Lesson learned for me and a helpful tip for you. And don’t forget the dipping sauce!

INGREDIENTS

Cooking spray

6 tbsp. melted butter

1 tsp. Italian seasoning

1 tsp. garlic powder

Pinch kosher salt

Pinch crushed red pepper flakes

All-purpose flour

1 tube Pillsbury pizza dough

2 (12-oz.) packages cocktail wieners

DIPPING SAUCES:

Marinara, warmed

Mustard

Ranch

How to make Pull-Apart Pigs In A Blanket

Step 1: Prepare the oven. Preheat it to 400 degrees.

Step 2: Use a cooking spray to grease an 8-inch springform pan.

Step 3: Add the butter, Italian seasoning, and garlic powder in a small bowl. Whisk until incorporated, then, season with salt and pepper flakes.

Step 4: Unroll the pizza dough on a lightly floured surface. Slice into 1 to 2-inch rectangles.

Step 5: Brush with butter mixture the tops of each rectangle. Wrap in pizza dough each of the cocktail wieners. Seal by pinching the seam shut.

Step 6: Transfer in the prepared springform pan standing upright the pigs in a blanket. Make sure to not pack them tightly or else the dough won’t bake.

Step 7: Take the rest of the melted butter mixture and brush the tops.

Step 8: Place inside the preheated oven and bake for about 50 to 55 minutes until golden.

Step 9: Remove from the oven and allow to cool for at least 10 minutes before taking the pigs in a blanket out of the pan.

Step 10: Serve immediately with dipping sauce. Enjoy!

Pull-Apart Pigs In A Blanket

Rebecca YIELDS: 10 SERVINGS | PREP TIME: 15 MINS | TOTAL TIME: 1 HOUR 25 MINS These Pull-Apart Pigs In A Blanket are super easy and fun to make. Bake in… Main Dish Recipes Pull-Apart Pigs In A Blanket European Print This
Serves: 10 Prep Time: 15 mins
Nutrition facts: 200 calories 20 grams fat
Rating: 5.0/5
( 1 voted )

Ingredients

  • Cooking spray
  • 6 tbsp. melted butter
  • 1 tsp. Italian seasoning
  • 1 tsp. garlic powder
  • Pinch kosher salt
  • Pinch crushed red pepper flakes
  • All-purpose flour
  • 1 tube Pillsbury pizza dough
  • 2 (12-oz.) packages cocktail wieners
  • DIPPING SAUCES:
  • Marinara, warmed
  • Mustard
  • Ranch

Instructions

Step 1: Prepare the oven. Preheat it to 400 degrees.

Step 2: Use a cooking spray to grease an 8-inch springform pan.

Step 3: Add the butter, Italian seasoning, and garlic powder in a small bowl. Whisk until incorporated, then, season with salt and pepper flakes.

Step 4: Unroll the pizza dough on a lightly floured surface. Slice into 1 to 2-inch rectangles.

Step 5: Brush with butter mixture the tops of each rectangle. Wrap in pizza dough each of the cocktail wieners. Seal by pinching the seam shut.

Step 6: Transfer in the prepared springform pan standing upright the pigs in a blanket. Make sure to not pack them tightly or else the dough won't bake.

Step 7: Take the rest of the melted butter mixture and brush the tops.

Step 8: Place inside the preheated oven and bake for about 50 to 55 minutes until golden.

Step 9: Remove from the oven and allow to cool for at least 10 minutes before taking the pigs in a blanket out of the pan.

Step 10: Serve immediately with dipping sauce. Enjoy!

October 9, 2020 0 comment
0 FacebookTwitterPinterestEmail
Main Dish Recipes

Ham And Cheese Squares

by Rebecca October 9, 2020
written by Rebecca

Super fun, insanely delicious, and an excellent snack and sides for any meal! These deep-fried ham and cheese squares look so fancy but are remarkably simple to make.

INGREDIENT

500g potatoes, peeled and chopped in half

1 egg

50g parmesan

2 tbsp chopped chives

Salt & freshly ground black pepper

12 slices gouda cheese

6 large slices ham

200g plain flour

250g fine breadcrumbs

4 eggs, whisked

Vegetable oil for frying

HOW TO MAKE HAM AND CHEESE SQUARES

To prepare the mashed potatoes:

Step 1: In a large pan, add the potatoes. Pour in cold water enough to cover the potatoes.

Step 2: Add dashes of salt and bring to a boil over medium-high heat. Cooking the potatoes until soft.

Step 3: When done, transfer the one at a time the potatoes to a ricer. Pushed each to form particles and add in the egg, parmesan, chives, salt, and pepper. Stir well until incorporated and set aside.

To prepare the cheese and ham:

Step 4: On a chopping board, lay the hams, top each with 2 slices of cheese. Do this for the rest of the ham and cheese, ending in the cheese layer.

Step 5: To keep everything together, press them down and cut the excess to make a large rectangle.

Step 6: Slice the large triangle into small squares making around 18 to 24 sizes depending on the size.

To assemble:

Step 7: Dust your hands with flour. And take a little scoop of mashed potato and make it into a ball. Flatten with your palm and add a ham and cheese square in the potato.

Step 8: Encase with the potato the ham and cheese square and transfer on a plate. Copy the same step for the rest of the ham and cheese squares. When done, place in the fridge to chill for at least 20 minutes.

Step 9: Add an inch of oil in a large frying pan. Gently heat. At the same, adjusting the heat of the oven to 160 degrees C.

Step 10: Get the squares from the fridge and prepare the bowls of flour, egg, and breadcrumbs.

Step 11: Dip each square in flour, then, in the egg, and breadcrumbs.

Step 12: At this time, the oil is already heated. Add the squares in the pan and fry on each side until golden brown.

Step 13: Then, transfer the fried squares onto a baking tray and bake in the preheated oven for about 5 minutes until heated through.

Step 14: Allow cooling for at least 3 to 4 minutes before slicing.

Step 15: Serve and enjoy!

Ham And Cheese Squares

Rebecca Super fun, insanely delicious, and an excellent snack and sides for any meal! These deep-fried ham and cheese squares look so fancy but are remarkably simple to make. INGREDIENT 500g… Main Dish Recipes Ham And Cheese Squares European Print This
Nutrition facts: 200 calories 20 grams fat
Rating: 5.0/5
( 1 voted )

Ingredients

  • 500g potatoes, peeled and chopped in half
  • 1 egg
  • 50g parmesan
  • 2 tbsp chopped chives
  • Salt & freshly ground black pepper
  • 12 slices gouda cheese
  • 6 large slices ham
  • 200g plain flour
  • 250g fine breadcrumbs
  • 4 eggs, whisked
  • Vegetable oil for frying

Instructions

To prepare the mashed potatoes:

Step 1: In a large pan, add the potatoes. Pour in cold water enough to cover the potatoes.

Step 2: Add dashes of salt and bring to a boil over medium-high heat. Cooking the potatoes until soft.

Step 3: When done, transfer the one at a time the potatoes to a ricer. Pushed each to form particles and add in the egg, parmesan, chives, salt, and pepper. Stir well until incorporated and set aside.

To prepare the cheese and ham:

Step 4: On a chopping board, lay the hams, top each with 2 slices of cheese. Do this for the rest of the ham and cheese, ending in the cheese layer.

Step 5: To keep everything together, press them down and cut the excess to make a large rectangle.

Step 6: Slice the large triangle into small squares making around 18 to 24 sizes depending on the size.

To assemble:

Step 7: Dust your hands with flour. And take a little scoop of mashed potato and make it into a ball. Flatten with your palm and add a ham and cheese square in the potato.

Step 8: Encase with the potato the ham and cheese square and transfer on a plate. Copy the same step for the rest of the ham and cheese squares. When done, place in the fridge to chill for at least 20 minutes.

Step 9: Add an inch of oil in a large frying pan. Gently heat. At the same, adjusting the heat of the oven to 160 degrees C.

Step 10: Get the squares from the fridge and prepare the bowls of flour, egg, and breadcrumbs.

Step 11: Dip each square in flour, then, in the egg, and breadcrumbs.

Step 12: At this time, the oil is already heated. Add the squares in the pan and fry on each side until golden brown.

Step 13: Then, transfer the fried squares onto a baking tray and bake in the preheated oven for about 5 minutes until heated through.

Step 14: Allow cooling for at least 3 to 4 minutes before slicing.

Step 15: Serve and enjoy!

October 9, 2020 0 comment
0 FacebookTwitterPinterestEmail
Newer Posts
Older Posts

Popular Posts

  • 1

    Crispy Crunchy Parmesan Potatoes

    March 21, 2020
  • 2

    CROCK POT SMOTHERED PORK CHOPS

    March 21, 2020
  • Facebook
  • Twitter

@2019 - All Right Reserved.


Back To Top