Cook it once
  • Home
  • Privacy Policy
  • Recipes
    • KETO
    • LC
    • WW
  • Tips
  • Contact
Cook it once
  • Home
  • Privacy Policy
  • Recipes
    • KETO
    • LC
    • WW
  • Tips
  • Contact
Category:

Main Dish Recipes

Main Dish Recipes

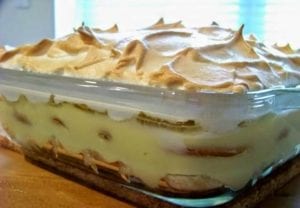
Old-Fashioned Banana Pudding

by Rebecca May 27, 2020
written by Rebecca

What a wonderful day to make this incredible dessert! Today, I woke up with a new look on life. It is nice and sunny weather out there and what better way to spend the day sitting on the front porch and enjoying this amazing banana pudding? It’s refreshing, a total treat, so delicious, sweet, and nice. This is a great recipe; basic, and super easy to make but the result is outstanding!

Ingredients

1/4 c. all-purpose flour

Pinch of table salt

1 tsp. pure vanilla extract

About 45 vanilla wafers, such as Nilla

8 bananas, sliced 1/4 inch thick

2 c. whole milk

6 eggs, separated

1 1/4 c. sugar

How to make Old-Fashioned Banana Pudding

Ready the oven and preheat to 350 degrees F.

Pour the milk into the saucepan then place it on the stove. Turn the heat to medium and simmer.

Beat eggs then pour them into a separate saucepan. Add about 3/4 cup of sugar and whisk until the texture turns thick. Add salt and flour and stir until all ingredients are well-mixed.

Combine the milk mixture and egg mixture. Mix until completely blended then put back on the stove on low heat. (Remember to mix well until smooth before bringing to a boil.) Whisk for 2 minutes until the mixture becomes creamy and thick. Once thick, add in the vanilla extract and stir until all ingredients are incorporated. Transfer into a bowl then set aside.

Put 1 layer of the vanilla wafers on the bottom of the 9×13 baking dish. Pour in half of the pastry cream over the top of the wafers. Arrange the bananas over the cream evenly. Place the 2nd layer of the wafers over the bananas then pour in the last of the pastry cream on top of the wafers.

Crack eggs and separate the yolks from the whites. Pour the egg whites in a mixer with an attached whisk. Beat on high speed until it turns creamy looking. Add in the remaining sugar 1 scoop at a time and whisk. Spread the meringue mixture over the pastry cream. (Remember to cover the entire thing and seal the edges.) Use a spatula to make curls.

Place in the oven and bake for 15-20 minutes until color turns a little toasted or brown. Serve and enjoy!

Old-Fashioned Banana Pudding

Rebecca What a wonderful day to make this incredible dessert! Today, I woke up with a new look on life. It is nice and sunny weather out there and what better… Main Dish Recipes Old-Fashioned Banana Pudding European Print This
Nutrition facts: 200 calories 20 grams fat
Rating: 5.0/5
( 1 voted )

Ingredients

  • 1/4 c. all-purpose flour
  • Pinch of table salt
  • 1 tsp. pure vanilla extract
  • About 45 vanilla wafers, such as Nilla
  • 8 bananas, sliced 1/4 inch thick
  • 2 c. whole milk
  • 6 eggs, separated
  • 1 1/4 c. sugar

Instructions

Ready the oven and preheat to 350 degrees F.

Pour the milk into the saucepan then place it on the stove. Turn the heat to medium and simmer.

Beat eggs then pour them into a separate saucepan. Add about 3/4 cup of sugar and whisk until the texture turns thick. Add salt and flour and stir until all ingredients are well-mixed.

Combine the milk mixture and egg mixture. Mix until completely blended then put back on the stove on low heat. (Remember to mix well until smooth before bringing to a boil.) Whisk for 2 minutes until the mixture becomes creamy and thick. Once thick, add in the vanilla extract and stir until all ingredients are incorporated. Transfer into a bowl then set aside.

Put 1 layer of the vanilla wafers on the bottom of the 9x13 baking dish. Pour in half of the pastry cream over the top of the wafers. Arrange the bananas over the cream evenly. Place the 2nd layer of the wafers over the bananas then pour in the last of the pastry cream on top of the wafers.

Crack eggs and separate the yolks from the whites. Pour the egg whites in a mixer with an attached whisk. Beat on high speed until it turns creamy looking. Add in the remaining sugar 1 scoop at a time and whisk. Spread the meringue mixture over the pastry cream. (Remember to cover the entire thing and seal the edges.) Use a spatula to make curls.

Place in the oven and bake for 15-20 minutes until color turns a little toasted or brown. Serve and enjoy!
May 27, 2020 0 comment
0 FacebookTwitterPinterestEmail
Main Dish Recipes

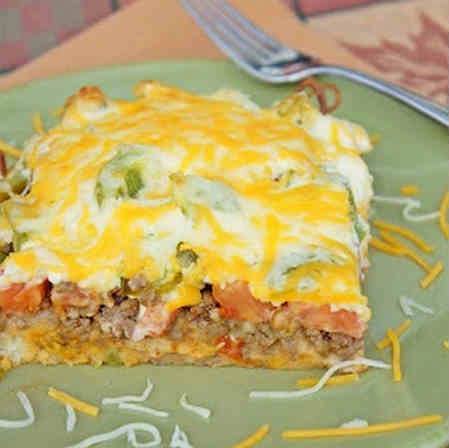
JOHN WAYNE CASSEROLE

by Rebecca May 27, 2020
written by Rebecca

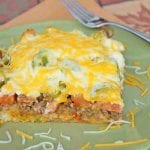
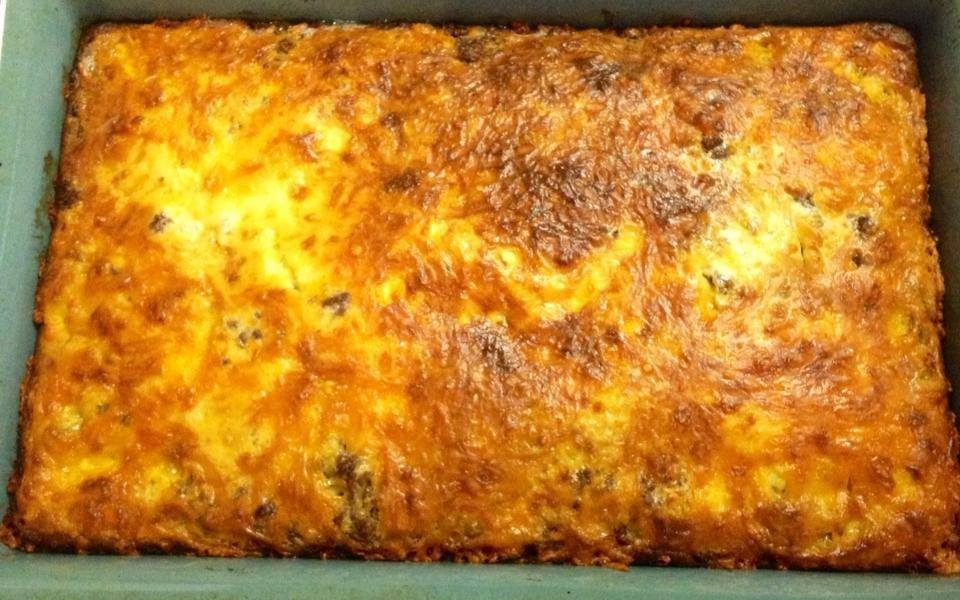
I have never been more in love in my life with food! This awesome casserole just took my heart away. Yesterday I made this incredible dish from scratch after I saw the recipe online. It was the most amazing casserole I’ve ever tasted. The flavors are just too complex and simple at the same time. I don’t know about you but anything with beef and cheese in it will always be the best! Try this recipe today. Enjoy!

INGREDIENTS

2 pounds ground beef, browned, crumbled and drained

1 1-oz. packet taco seasoning

¾ cups of water

1 small onion, sliced thin in about 1-inch pieces

1 red bell pepper, sliced thin in about 1-inch pieces

2 ¼ cups Bisquick mix

⅔ cup of water

½ cup mayonnaise

½ cup sour cream

8 ounces sharp cheddar cheese, shredded and divided

2 Roma tomatoes, sliced thin

1 4-oz. can green chiles

HOW TO MAKE JOHN WAYNE CASSEROLE

Step 1: Ready the oven then preheat to 325 degrees F. Apply cooking spray(Non-stick) onto the 9×13-inch baking dish.

Step 2: Place a 12-inch skillet on the stove and put the ground beef. Cook until the beef turns color brown. Drain the excess oil and pour 3/4 cup of water followed by the taco seasoning pack.

Step 3: Add in peppers and onion once the beef mixture is boiling. Simmer for 3-5 minutes on low heat. When peppers and onions are soft, set aside.

Step 4: Make a soft dough by mixing 2/3 cup of water and biscuit mix in a small bowl. Whisk until the texture turns creamy. Place the dough on the bottom area of the baking dish with 1/2 inch sides. Use parchment paper to press the dough on the bottom and use a spatula to level the sides.

Step 5: Add sour cream, half of the cheese, and mayonnaise in a small bowl then whisk gently until creamy.

Step 6: Place the cooked ground beef over the dough and spread it until covered. Top with the sliced tomatoes followed by green chilies.

Step 7: Pour sour cream mixture followed by half of the cheese.

Step 8: Place in the oven and bake for 30-35 minutes or until the sides look kind of toasted. Enjoy!

JOHN WAYNE CASSEROLE

Rebecca I have never been more in love in my life with food! This awesome casserole just took my heart away. Yesterday I made this incredible dish from scratch after I… Main Dish Recipes JOHN WAYNE CASSEROLE European Print This
Nutrition facts: 200 calories 20 grams fat
Rating: 5.0/5
( 1 voted )

Ingredients

  • 2 pounds ground beef, browned, crumbled and drained
  • 1 1-oz. packet taco seasoning
  • ¾ cups of water
  • 1 small onion, sliced thin in about 1-inch pieces
  • 1 red bell pepper, sliced thin in about 1-inch pieces
  • 2 ¼ cups Bisquick mix
  • ⅔ cup of water
  • ½ cup mayonnaise
  • ½ cup sour cream
  • 8 ounces sharp cheddar cheese, shredded and divided
  • 2 Roma tomatoes, sliced thin
  • 1 4-oz. can green chiles

Instructions

Step 1: Ready the oven then preheat to 325 degrees F. Apply cooking spray(Non-stick) onto the 9x13-inch baking dish.

Step 2: Place a 12-inch skillet on the stove and put the ground beef. Cook until the beef turns color brown. Drain the excess oil and pour 3/4 cup of water followed by the taco seasoning pack.

Step 3: Add in peppers and onion once the beef mixture is boiling. Simmer for 3-5 minutes on low heat. When peppers and onions are soft, set aside.

Step 4: Make a soft dough by mixing 2/3 cup of water and biscuit mix in a small bowl. Whisk until the texture turns creamy. Place the dough on the bottom area of the baking dish with 1/2 inch sides. Use parchment paper to press the dough on the bottom and use a spatula to level the sides.

Step 5: Add sour cream, half of the cheese, and mayonnaise in a small bowl then whisk gently until creamy.

Step 6: Place the cooked ground beef over the dough and spread it until covered. Top with the sliced tomatoes followed by green chilies.

Step 7: Pour sour cream mixture followed by half of the cheese.

Step 8: Place in the oven and bake for 30-35 minutes or until the sides look kind of toasted. Enjoy!

May 27, 2020 0 comment
0 FacebookTwitterPinterestEmail
Main Dish Recipes

The Pioneer Woman’s Cinnamon Rolls – Perfect for Family Breakfast!

by Rebecca May 27, 2020
written by Rebecca

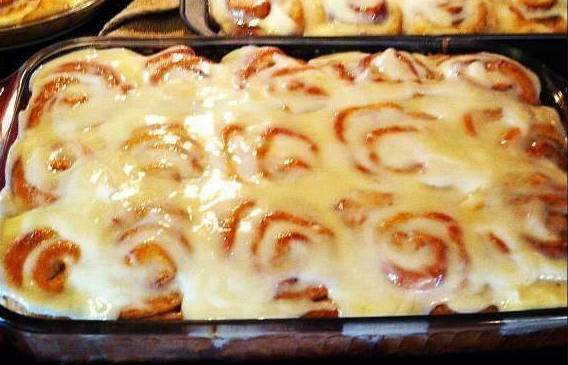
I’m addicted to cinnamon rolls. They’re so pretty, it’s like when I look at them I’m lost in swirls, and they’re delicious! These rolls are fluffy, soft, topped with delightful maple syrup.

Ingredients

1-quart whole milk

1 c. vegetable oil

1 c. sugar

2 pkg. Active Dry Yeast

8 c. (plus 1 c. extra, separated) All-purpose flour

1 tsp. (heaping) baking powder

1 tsp. (scant) baking soda

1 tbsp. (heaping) salt

1 3 c. (to 4 cups) melted butter

Generous sprinkling of Cinnamon

For the Maple Frosting

1 bag powdered sugar

2 tsp. maple flavoring

1/2 c. milk

1/4 c. melted butter

1/4 c. brewed coffee

1/8 tsp. salt

How to make Cinnamon Rolls

In a pan, mix the milk, vegetable oil, and sugar. Heat until just about to reach the boiling point. Small bubbles start to appear around the edges. Then, turn off the heat and cool to 45 minutes to an hour. Once the mixture is lukewarm or warm, sprinkle the Active Dry Yeast packages and sit it for a minute. Add in 8 cups of all-purpose flour. Mix until incorporated. Cover and let it rise for at least an hour.

After an hour, add 1 more cup of flour, baking powder, baking soda, and salt into the mixture. Stir until well combined. (The dough can be refrigerated; just cover it, place it inside the fridge until you need it. Don’t forget to check on it, because once it starts to overflow out of the pan, you could just punch it down.)

Generously flour your working area. Then, form half of the dough into a rectangle. Roll thin while maintaining a generally rectangular shape.

Drizzle 1 1/2 to 2 cups of melted butter on top. Dust the dough with 1 cup of sugar, followed by butter, and cinnamon.

Start rolling the dough in a neat line beginning on the opposite end towards you. Make sure to keep the roll tight and pinch the seam of the roll to seal it.

Spread 1 tablespoon of melted butter to coat a 7-inch round foil cake or pie pan. And begin to cut the rolls approximately 3/4 to an inch thick. Then, layer the pieces in the buttered pans.

Follow the same process for the other half of the dough. Before baking let the rolls rise first for 20 to 30 minutes. Place the rolls inside the oven and bake at 375 degrees for about 15-18 minutes until light golden brown.

To make the frosting, mix all the frosting ingredients and stir until smooth. The texture should be thick but pourable. Adjust the taste if needed. Then, generously drizzle the frosting over the warm rolls.

The Pioneer Woman's Cinnamon Rolls - Perfect for Family Breakfast!

Rebecca I’m addicted to cinnamon rolls. They’re so pretty, it’s like when I look at them I’m lost in swirls, and they’re delicious! These rolls are fluffy, soft, topped with delightful… Main Dish Recipes The Pioneer Woman’s Cinnamon Rolls – Perfect for Family Breakfast! European Print This
Nutrition facts: 200 calories 20 grams fat
Rating: 5.0/5
( 2 voted )

Ingredients

  • 1-quart whole milk
  • 1 c. vegetable oil
  • 1 c. sugar
  • 2 pkg. Active Dry Yeast
  • 8 c. (plus 1 c. extra, separated) All-purpose flour
  • 1 tsp. (heaping) baking powder
  • 1 tsp. (scant) baking soda
  • 1 tbsp. (heaping) salt
  • 1 3 c. (to 4 cups) melted butter
  • A generous sprinkling of Cinnamon
  • For the Maple Frosting
  • 1 bag powdered sugar
  • 2 tsp. maple flavoring
  • 1/2 c. milk
  • 1/4 c. melted butter
  • 1/4 c. brewed coffee
  • 1/8 tsp. salt

Instructions

In a pan, mix the milk, vegetable oil, and sugar. Heat until just about to reach the boiling point. Small bubbles start to appear around the edges. Then, turn off the heat and cool to 45 minutes to an hour. Once the mixture is lukewarm or warm, sprinkle the Active Dry Yeast packages and sit it for a minute. Add in 8 cups of all-purpose flour. Mix until incorporated. Cover and let it rise for at least an hour.

After an hour, add 1 more cup of flour, baking powder, baking soda, and salt into the mixture. Stir until well combined. (The dough can be refrigerated; just cover it, place it inside the fridge until you need it. Don't forget to check on it, because once it starts to overflow out of the pan, you could just punch it down.)

Generously flour your working area. Then, form half of the dough into a rectangle. Roll thin while maintaining a generally rectangular shape.

Drizzle 1 1/2 to 2 cups of melted butter on top. Dust the dough with 1 cup of sugar, followed by butter, and cinnamon.

Start rolling the dough in a neat line beginning on the opposite end towards you. Make sure to keep the roll tight and pinch the seam of the roll to seal it.

Spread 1 tablespoon of melted butter to coat a 7-inch round foil cake or pie pan. And begin to cut the rolls approximately 3/4 to an inch thick. Then, layer the pieces in the buttered pans.

Follow the same process for the other half of the dough. Before baking let the rolls rise first for 20 to 30 minutes. Place the rolls inside the oven and bake at 375 degrees for about 15-18 minutes until light golden brown.

To make the frosting, mix all the frosting ingredients and stir until smooth. The texture should be thick but pourable. Adjust the taste if needed. Then, generously drizzle the frosting over the warm rolls.

May 27, 2020 0 comment
0 FacebookTwitterPinterestEmail
Main Dish Recipes

PRALINE CRUNCH

by Rebecca May 27, 2020
written by Rebecca

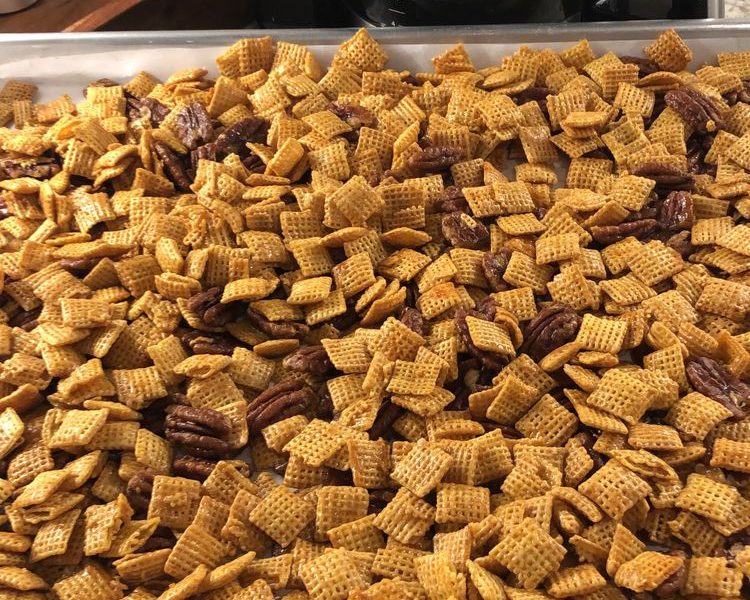
I am speechless. This is just wow! I super love it but I wish I never would have known it because of OMG! I am crazy about this! This is just hands-down addictive! The first time I made it, this disappeared pretty fast. So I would suggest doubling the batch like what I always do now. And try adding a bag of Fritos and some salted peanuts for a sweet and salty combination that sure hit the right spot. This is so perfect for movie nights, picnics, for a bbq, campfires, or when you are just sitting there and doing nothing. Just don’t get too overwhelmed because before you know it none of your pants will fit you no more! Oh, how can something so easy and quick to make tastes so good?

INGREDIENTS

8 cups of Crispix cereal

2 cup of pecan halves

1/2 cup of brown sugar, packed

1/2 cup of corn syrup

1/2 cup of butter

1 teaspoon vanilla extract

1/2 teaspoon baking soda

HOW TO MAKE PRALINE CRUNCH

Step 1: Prepare the oven by preheating it to 250 degrees F.

Step 2: Combine the cereal and pecans in a large bowl.

Step 3: Place the brown sugar, corn syrup, and butter in a medium saucepan. Heat it over medium-high heat. Bring the mixture to a boil while stirring occasionally.

Step 4: Once boiling, remove from the heat and stir in the vanilla and baking soda.

Step 5: Pour it over the cereal mixture. Toss carefully to evenly coat the cereal and pecans.

Step 6: Empty the bowl of cereal mixture into a 9 x 13-inch pan.

Step 7: Place the pan inside the preheated oven and bake for an hour. Make sure to stir the cereal mixture every 20 minutes.

Step 8: Remove from the oven and pour onto a wax or parchment paper to cool completely.

Step 9: Break into pieces. Serve and enjoy!

PRALINE CRUNCH

Rebecca I am speechless. This is just wow! I super love it but I wish I never would have known it because of OMG! I am crazy about this! This is… Main Dish Recipes PRALINE CRUNCH European Print This
Nutrition facts: 200 calories 20 grams fat
Rating: 5.0/5
( 1 voted )

Ingredients

  • 8 cups of Crispix cereal
  • 2 cup of pecan halves
  • 1/2 cup of brown sugar, packed
  • 1/2 cup of corn syrup
  • 1/2 cup of butter
  • 1 teaspoon vanilla extract
  • 1/2 teaspoon baking soda

Instructions

Step 1: Prepare the oven by preheating it to 250 degrees F.

Step 2: Combine the cereal and pecans in a large bowl.

Step 3: Place the brown sugar, corn syrup, and butter in a medium saucepan. Heat it over medium-high heat. Bring the mixture to a boil while stirring occasionally.

Step 4: Once boiling, remove from the heat and stir in the vanilla and baking soda.

Step 5: Pour it over the cereal mixture. Toss carefully to evenly coat the cereal and pecans.

Step 6: Empty the bowl of cereal mixture into a 9 x 13-inch pan.

Step 7: Place the pan inside the preheated oven and bake for an hour. Make sure to stir the cereal mixture every 20 minutes.

Step 8: Remove from the oven and pour onto a wax or parchment paper to cool completely.

Step 9: Break into pieces. Serve and enjoy!

May 27, 2020 0 comment
0 FacebookTwitterPinterestEmail
Main Dish Recipes

BEST RANCH YOU’LL EVER TASTE AND ITS HOMEMADE

by Rebecca May 27, 2020
written by Rebecca

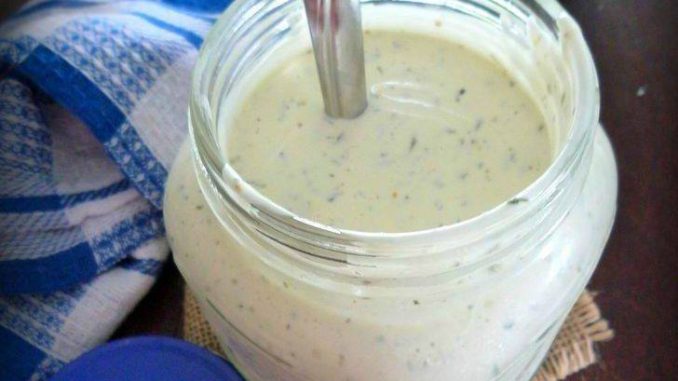
The ranch is a very popular dressing. It’s creamy but not heavy, it’s not bland nor too flavorful, it’s simple. There are a lot of ranch recipes online and believe me it’s overwhelming but this by far is another DIY homemade recipe that’s worth your time. Like the others, it’s very easy and quick to make. I think what differentiates it from the others is the dry mix. It’s not overpowering, just enough to make this ranch a hit. It’s rich, fresh, tangy, sweet, and creamy. I love ranch and my kids do too. They even asked me to teach them how to make it and I think they already perfected it! LOL. But hey, teach them early, right? When I learned how to make this ranch, we never buy one bottled dressing ever again. And this homemade ranch is so much better because it’s all-natural and doesn’t have all the chemicals of a store-bought ranch. It’s great as a topping or dipping sauce for almost everything; from chicken sandwiches, onion rings, even for pizza! For me, I want it more as a salad dressing, or as a dipping sauce.

INGREDIENTS

¼ cup Black Pepper

1 1/2 cup Parsley Flakes

½ cup Garlic Salt

2 tablespoons Kosher Salt

¼ cup Granulated Garlic

3/4 cup Granulated Onion

2 tablespoons Dill Weed

2 cups of mayonnaise

2 cups of buttermilk

1 1/2 cups of sour cream

1 teaspoon of lemon juice

HOW TO MAKE RANCH DRESSING

Step 1: Combine the black pepper, parsley, garlic salt, Kosher salt, garlic, onion, and dill weed.

Step 2: Pour the dry mix in an airtight container. This will make about 3 ½ cups of dry mix.

Step 3: To make the dressing, place 2 tablespoons of dry mix, 2 cups of mayonnaise, buttermilk, sour cream, and 1 teaspoon of lemon juice in a bowl. Whisk until incorporated. Place inside the fridge and let it sit for at least 2 hours.

BEST RANCH YOU’LL EVER TASTE AND ITS HOMEMADE

Rebecca The ranch is a very popular dressing. It’s creamy but not heavy, it’s not bland nor too flavorful, it’s simple. There are a lot of ranch recipes online and believe… Main Dish Recipes BEST RANCH YOU’LL EVER TASTE AND ITS HOMEMADE European Print This
Nutrition facts: 200 calories 20 grams fat
Rating: 5.0/5
( 1 voted )

Ingredients

  • ¼ cup Black Pepper
  • 1 1/2 cup Parsley Flakes
  • ½ cup Garlic Salt
  • 2 tablespoons Kosher Salt
  • ¼ cup Granulated Garlic
  • 3/4 cup Granulated Onion
  • 2 tablespoons Dill Weed
  • 2 cups of mayonnaise
  • 2 cups of buttermilk
  • 1 1/2 cups of sour cream
  • 1 teaspoon of lemon juice

Instructions

Step 1: Combine the black pepper, parsley, garlic salt, Kosher salt, garlic, onion, and dill weed.

Step 2: Pour the dry mix in an airtight container. This will make about 3 ½ cups of dry mix.

Step 3: To make the dressing, place 2 tablespoons of dry mix, 2 cups of mayonnaise, buttermilk, sour cream, and 1 teaspoon of lemon juice in a bowl. Whisk until incorporated. Place inside the fridge and let it sit for at least 2 hours.

May 27, 2020 0 comment
0 FacebookTwitterPinterestEmail
Main Dish Recipes

Cheeseburger in Paradise by Jimmy Buffett

by Rebecca May 27, 2020
written by Rebecca

Ah, cheeseburger, it’s perfect for picky eaters and all ages. I have never known anyone that hates cheeseburger. I think it is one of those dishes that will never get old. Whenever or wherever you might be, I am sure that cheeseburger is always on your list. I have found this recipe not long ago and the first time that I made it, it got a crazy 5 star rating (almost a round of applause. LOL). It’s loaded with beef, it’s gooey, flavorful, delicious, quick to prepare, and a pretty easy meal to make that the whole family will love and enjoy. I will be making this again soon.

INGREDIENTS

1 lb lean ground beef

1 large onion; chopped

1/2 teaspoon of seasoned salt

1/2 teaspoon of garlic powder

1 dash Worcester sauce

1 cup of cheddar cheese; shredded

1 cup of milk

1/2 cup of Original Bisquick mix

How to make Cheeseburger in Paradise

Step 1: Prepare the oven by preheating it to 400 degrees F.

Step 2: Grease a 9-inch pie plate with a non-stick cooking spray.

Step 3: Put the beef and chopped onion in a skillet and cook over medium heat for about 10 minutes or until the beef is brown. Drain any excess fat.

Step 4: Sprinkle in some salt, garlic powder, and stir in the Worcester sauce.

Step 5: Pour the mixture into the greased pie plate and spread evenly.

Step 6: Sprinkle generously the shredded cheese over the top of the beef.

Step 7: Whisk the milk, eggs, and Bisquick in a small bowl. Mix well until incorporated (make sure to leave no lumps as much as you can).

Step 8: Then, pour it over the meat mixture.

Step 9: Place inside the preheated oven and bake for 25 minutes. It’s done when the knife inserted in the middle comes out clean. Serve and enjoy!

Tip:
Instead of using 1 cup cheddar cheese, you can just use 3/4 cheddar and 1/4 mozzarella (if desired).

Cheeseburger in Paradise by Jimmy Buffett

Rebecca Ah, cheeseburger, it’s perfect for picky eaters and all ages. I have never known anyone that hates cheeseburger. I think it is one of those dishes that will never get… Main Dish Recipes Cheeseburger in Paradise by Jimmy Buffett European Print This
Nutrition facts: 200 calories 20 grams fat
Rating: 5.0/5
( 1 voted )

Ingredients

  • 1 lb lean ground beef
  • 1 large onion; chopped
  • 1/2 teaspoon of seasoned salt
  • 1/2 teaspoon of garlic powder
  • 1 dash Worcester sauce
  • 1 cup of cheddar cheese; shredded
  • 1 cup of milk
  • 1/2 cup of Original Bisquick mix

Instructions

Step 1: Prepare the oven by preheating it to 400 degrees F.

Step 2: Grease a 9-inch pie plate with a non-stick cooking spray.

Step 3: Put the beef and chopped onion in a skillet and cook over medium heat for about 10 minutes or until the beef is brown. Drain any excess fat.

Step 4: Sprinkle in some salt, garlic powder, and stir in the Worcester sauce.

Step 5: Pour the mixture into the greased pie plate and spread evenly.

Step 6: Sprinkle generously the shredded cheese over the top of the beef.

Step 7: Whisk the milk, eggs, and Bisquick in a small bowl. Mix well until incorporated (make sure to leave no lumps as much as you can).

Step 8: Then, pour it over the meat mixture.

Step 9: Place inside the preheated oven and bake for 25 minutes. It's done when the knife inserted in the middle comes out clean. Serve and enjoy!

Tip:
Instead of using 1 cup cheddar cheese, you can just use 3/4 cheddar and 1/4 mozzarella (if desired).

May 27, 2020 0 comment
0 FacebookTwitterPinterestEmail
Main Dish Recipes

Banana Creme Bundt Cake

by Rebecca May 27, 2020
written by Rebecca

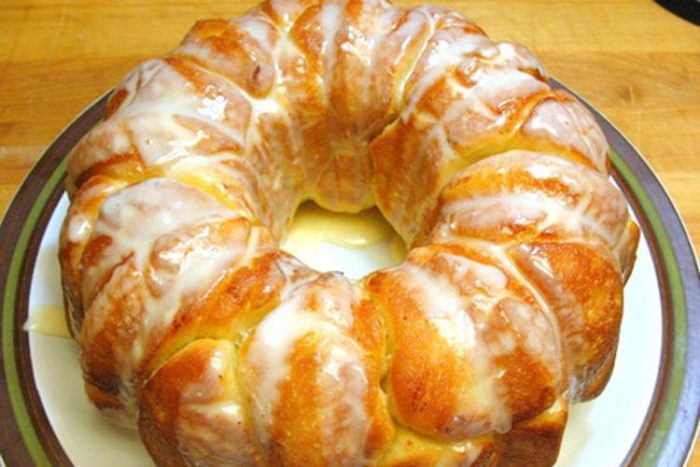
It’s been too long since I have a good old banana creme bundt cake for dessert. No, I did not forget how to make it, nor not like it. It’s one of those desserts that I grew up eating. My mom loved to make this, it’s one of those recipes that she kept over the years. I think the bundt form of this cake makes it extra special. It’s classic, beautifully formed, and the cake is super moist, and scrumptious! It’s so delightful! I love this dessert because it’s simple, the ingredients are basic, plus it’s easy to make, but the result is astonishing. It does not need glazing or whatnot, just dust it with confectioner’s sugar. But if you prefer to pour some glaze over it, it’s gonna be amazing too! And some more chopped pecans will not hurt. I think I’ll be making this regularly from now on. I loved it then, and this banana creme bundt cake will always have a special place in my heart.

Ingredient

2 bananas

1 (3 oz) package of banana instant pudding

1 cup of water

1 yellow cake mix

4 eggs

¼ cup of oil

½ cup of finely chopped pecans

How to make Banana Creme Bundt Cake

Step 1: Put the bananas in a large mixing bowl. Mash the bananas.

Step 2: Add in the pudding, 1 cup of water, cake mix, eggs, and oil. Mix at medium speed for 2 minutes.

Step 3: Then, stir in the pecans.

Step 4: Meanwhile, preheat the oven to 350 degrees.

Step 5: Pour the mixture into a greased and floured bundt pan.

Step 6: Place the pan inside the preheated oven and bake for 60 minutes.

Step 7: Don’t remove the cake yet from the bundt pan, let it cool first for 15 minutes.

Step 8: Remove the cake and let it cool completely.

Step 9: Finally, sprinkle the top with powdered sugar. Serve and enjoy!

Banana Creme Bundt Cake

Rebecca It’s been too long since I have a good old banana creme bundt cake for dessert. No, I did not forget how to make it, nor not like it. It’s… Main Dish Recipes Banana Creme Bundt Cake European Print This
Nutrition facts: 200 calories 20 grams fat
Rating: 5.0/5
( 1 voted )

Ingredients

  • 2 bananas
  • 1 (3 oz) package of banana instant pudding
  • 1 cup of water
  • 1 yellow cake mix
  • 4 eggs
  • ¼ cup of oil
  • ½ cup of finely chopped pecans

Instructions

Step 1: Put the bananas in a large mixing bowl. Mash the bananas.

Step 2: Add in the pudding, 1 cup of water, cake mix, eggs, and oil. Mix at medium speed for 2 minutes.

Step 3: Then, stir in the pecans.

Step 4: Meanwhile, preheat the oven to 350 degrees.

Step 5: Pour the mixture into a greased and floured bundt pan.

Step 6: Place the pan inside the preheated oven and bake for 60 minutes.

Step 7: Don't remove the cake yet from the bundt pan, let it cool first for 15 minutes.

Step 8: Remove the cake and let it cool completely.

Step 9: Finally, sprinkle the top with powdered sugar. Serve and enjoy!

May 27, 2020 0 comment
0 FacebookTwitterPinterestEmail
Main Dish Recipes

Mexican Dip

by Rebecca May 27, 2020
written by Rebecca

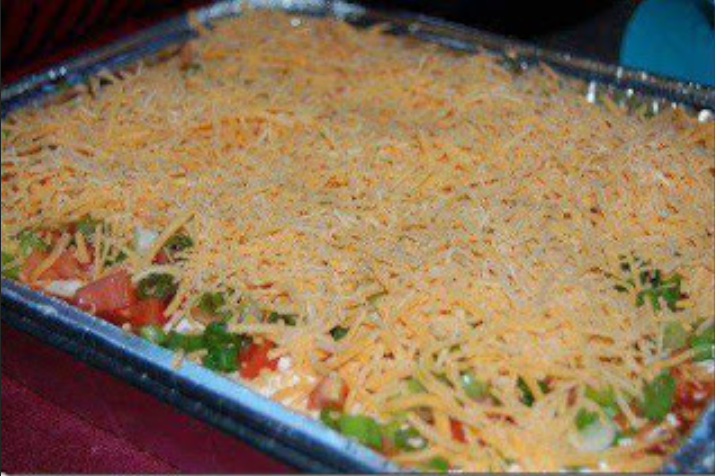
It’s another taco Tuesday for everybody! And nothing beats a good homemade Mexican dip that’s so easy to prepare. I have been making this for too long and I can say that this is by far the easiest, quickest, and the most delicious dip you will ever taste! And this guaranteed to add flavor and flair to your next meal! Try adding jalapenos too for a nice kick. I often serve this during game day, taco Tuesdays, or if I’m craving for something Mexican (which is too often). Also, whenever I’m feeling lazy to cook, I just grab some chips, dip them in this cheesy, yummy dip and I’m all set. And for a late-night snack, I put out some veggies or crackers and dip them in this. Hearty, easy, and delicious! I occasionally have some leftover whenever I make this dip but if I do I store them in the fridge and it could last up to three days.

Ingredients

2 8oz cream cheese boxes

2 big spoonfuls sour cream.

2 packages of taco seasoning

shredded lettuce

chopped black olives

chopped green pepper

chopped tomatoes

4 cups of shredded Mexican Cheese

How to make Mexican Dip

Step 1: In a bowl, beat the cream cheese and sour cream until smooth. Then, add in the taco seasoning.

Step 2: Evenly spread the mixture into a large glass dish. Top it with some lettuce, green onions, tomatoes, and sliced black olives.

Step 3: Sprinkle a generous amount of cheddar cheese on top. For the chips, use any corn chips you like.

Tip: You can probably use more or fewer toppings depends on how you like it. If you’re planning to bring this to a party or picnic, I would recommend using a disposable 9 x 13-inch aluminum pan. The great thing about this recipe is it can be splitter into 2 round cake pans.

Mexican Dip

Rebecca It’s another taco Tuesday for everybody! And nothing beats a good homemade Mexican dip that’s so easy to prepare. I have been making this for too long and I can… Main Dish Recipes Mexican Dip European Print This
Nutrition facts: 200 calories 20 grams fat
Rating: 5.0/5
( 1 voted )

Ingredients

  • 2 8oz cream cheese boxes
  • 2 big spoonfuls sour cream.
  • 2 packages of taco seasoning
  • shredded lettuce
  • chopped black olives
  • chopped green pepper
  • chopped tomatoes
  • 4 cups of shredded Mexican Cheese

Instructions

Step 1: In a bowl, beat the cream cheese and sour cream until smooth. Then, add in the taco seasoning.

Step 2: Evenly spread the mixture into a large glass dish. Top it with some lettuce, green onions, tomatoes, and sliced black olives.

Step 3: Sprinkle a generous amount of cheddar cheese on top. For the chips, use any corn chips you like.

Tip: You can probably use more or fewer toppings depends on how you like it. If you're planning to bring this to a party or picnic, I would recommend using a disposable 9 x 13-inch aluminum pan. The great thing about this recipe is it can be splitter into 2 round cake pans.

May 27, 2020 0 comment
0 FacebookTwitterPinterestEmail
Main Dish Recipes

Old Fashioned Potato Cakes

by Rebecca May 27, 2020
written by Rebecca

These are like pancakes but made of potatoes. My kid adores them, these are like the healthier version of pancakes. It is the easiest and quickest meal or snack that kids enjoy. I labeled it as the simple circle of joy for the young and adult. I know it sounds cheesy but my husband and my kid think it’s appropriate and kinda funny. And for me, this is just the perfect recipe for any leftover mashed potatoes. It’s so easy that even my 7-year daughter old can do it! You are welcome to add some spice and herbs in it, or maybe a bit of meat or veggies, pretty much anything that you have in your fridge. Sprinkle some cheese over and serve it as a snack or turn it into a hearty light meal with some leftover chicken or turkey. As for my kid, she loves it with sour cream on top, and I like it with some extra bacon bits. The combination is endless! This recipe never gets old, a real keeper! A simple base recipe that you can modify to your liking.

Ingredients

2 cups of mashed potatoes

1 cup of all-purpose flour

1 onion, diced

1 egg

½ teaspoon of ground black pepper

½ teaspoon of salt

½ cup of vegetable oil, or as needed

How to make Old Fashioned Potato Cakes

Step 1: In a large bowl, place the mashed potato, flour, onion, egg, black pepper, and salt. Mix the ingredients until a batter-like consistency is reached.

Step 2: Pour vegetable oil in a skillet and heat it over medium heat.

Step 3: Scoop the batter and shape it into a 4-inch circle. Make 4 pieces of the circle formed batter and carefully drop them into the hot oil. Cook for about 5 minutes on each side until golden brown.

Step 4: Once cooked, remove the cakes with a slotted spoon. Transfer to paper towels to drain. Repeat the process with the rest of the batter.

Old Fashioned Potato Cakes

Rebecca These are like pancakes but made of potatoes. My kid adores them, these are like the healthier version of pancakes. It is the easiest and quickest meal or snack that… Main Dish Recipes Old Fashioned Potato Cakes European Print This
Nutrition facts: 200 calories 20 grams fat
Rating: 4.5/5
( 2 voted )

Ingredients

  • 2 cups of mashed potatoes
  • 1 cup of all-purpose flour
  • 1 onion, diced
  • 1 egg
  • ½ teaspoon of ground black pepper
  • ½ teaspoon of salt
  • ½ cup of vegetable oil, or as needed

Instructions

Step 1: In a large bowl, place the mashed potato, flour, onion, egg, black pepper, and salt. Mix the ingredients until a batter-like consistency is reached.

Step 2: Pour vegetable oil in a skillet and heat it over medium heat.

Step 3: Scoop the batter and shape it into a 4-inch circle. Make 4 pieces of the circle formed batter and carefully drop them into the hot oil. Cook for about 5 minutes on each side until golden brown.

Step 4: Once cooked, remove the cakes with a slotted spoon. Transfer to paper towels to drain. Repeat the process with the rest of the batter.

May 27, 2020 0 comment
0 FacebookTwitterPinterestEmail
Main Dish Recipes

Bill’s Sausage Gravy

by Rebecca May 27, 2020
written by Rebecca

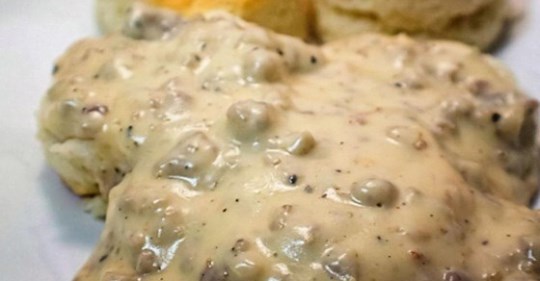
I love making this. Ever since I got this recipe I fell in love. It’s so great, very easy, and fast to make. Before I used to buy the dry-packaged gravy mix, but now I don’t have to, and will never buy it ever again. This sausage gravy is so fantastic, the consistency is perfect, and this by far is the best sausage gravy I have made and will be making over and over again. Another perfected Southern breakfast dish added to my recipe list. Extremely delicious!

Sometimes, when I want a bit of zing I add a pinch of cayenne pepper to spice it up a notch. And generously pour it over hot biscuits for a late-night dinner after a long day at work – nothing beats a homecooked meal.

Ingredients

1 (12 ounces) package maple-flavored sausage

3 tablespoons of butter

1/4 cup of all-purpose flour

3 cups of whole milk

salt and pepper to taste

How to make Bill’s Sausage Gravy

Step 1: Cook the sausage in a large, deep skillet over medium-high heat until brown.

Step 2: With a slotted spoon, remove the sausage. Leave the drippings in the pan.

Step 3: Put in the butter in the skillet and melt. Add in the flour and mix until smooth.

Step 4: Cook over medium heat until the flour is brown. Slowly whisk in the milk and continue cooking until thickened.

Step 5: Then, season with salt and pepper and stir in the cooked sausage.

Step 6: Lower the heat and let it simmer for 12 to 15 minutes. If in case, the gravy turned out too thick, you can just stir in a little more milk to get the desired consistency.

Step 7: Once you get your desired consistency, remove the gravy from the heat, and generously pour it over some hot biscuits. Add a pinch of cayenne pepper for a little kick (if desired). Serve and enjoy!

Bill's Sausage Gravy

Rebecca I love making this. Ever since I got this recipe I fell in love. It’s so great, very easy, and fast to make. Before I used to buy the dry-packaged… Main Dish Recipes Bill’s Sausage Gravy European Print This
Nutrition facts: 200 calories 20 grams fat
Rating: 5.0/5
( 1 voted )

Ingredients

  • 1 (12 ounces) package maple-flavored sausage
  • 3 tablespoons of butter
  • 1/4 cup of all-purpose flour
  • 3 cups of whole milk
  • salt and pepper to taste

Instructions

Step 1: Cook the sausage in a large, deep skillet over medium-high heat until brown.

Step 2: With a slotted spoon, remove the sausage. Leave the drippings in the pan.

Step 3: Put in the butter in the skillet and melt. Add in the flour and mix until smooth.

Step 4: Cook over medium heat until the flour is brown. Slowly whisk in the milk and continue cooking until thickened.

Step 5: Then, season with salt and pepper and stir in the cooked sausage.

Step 6: Lower the heat and let it simmer for 12 to 15 minutes. If in case, the gravy turned out too thick, you can just stir in a little more milk to get the desired consistency.

Step 7: Once you get your desired consistency, remove the gravy from the heat, and generously pour it over some hot biscuits. Add a pinch of cayenne pepper for a little kick (if desired). Serve and enjoy!

May 27, 2020 0 comment
0 FacebookTwitterPinterestEmail
Newer Posts
Older Posts

Popular Posts

  • 1

    Crispy Crunchy Parmesan Potatoes

    March 21, 2020
  • 2

    CROCK POT SMOTHERED PORK CHOPS

    March 21, 2020
  • Facebook
  • Twitter

@2019 - All Right Reserved.


Back To Top