Cook it once
  • Home
  • Privacy Policy
  • Recipes
    • KETO
    • LC
    • WW
  • Tips
  • Contact
Cook it once
  • Home
  • Privacy Policy
  • Recipes
    • KETO
    • LC
    • WW
  • Tips
  • Contact
Monthly Archives

June 2020

Main Dish Recipes

Slow Cooker Brown Sugar Kielbasa Bites

by Rebecca June 20, 2020
written by Rebecca

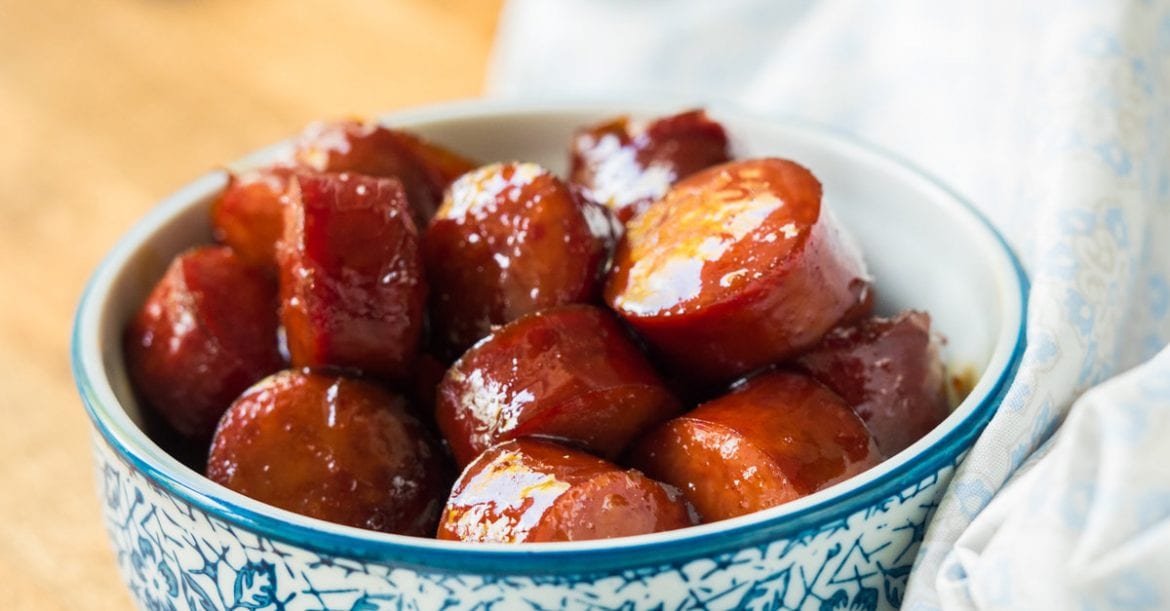
I have done it! The slow cooker brown sugar Kielbasa bites recipe that I was dying to try ever since. I used to make it using a skillet but I thought I tried the slow cooker version. It may not have the crunch unlike the skillet version but it does not disappoint. Turned out great like what I was expecting it to be.

I’m a fan of slow cooker recipes. They take time to cook but the result is to die for. And I am a mom so I get to do other things while the slow cooker does its thing. I work at home, so I juggle work and chores every day. When I first learned about slow cooker recipes I fell in love immediately. My kids love Brown Sugar Kielbasa Bites. I make this almost every week. They love the skillet version so much because they are crunchy but when they tasted the slow cooker kielbasa they light up like fire! It’s the best appetizer, flavorful, delicious, and with a little kick because of the chili powder. This 4-ingredients kielbasa bites recipe is very easy to make, simple, and a guaranteed hit whenever we have guests. It’s an amazing appetizer or paired with rice for an easy dinner.

INGREDIENTS

2 lbs Kielbasa, sliced into bite-sized pieces

3/4 cup cola

1 cup brown sugar

1/2 teaspoon chili powder (optional)

How to make Slow Cooker Brown Sugar Kielbasa Bites

Step 1: Place the bite-size pieces o Kielbasa, cola, brown sugar, and chili powder into a 3-quart slow cooker. Stir until incorporated.

Step 2: Cook the mixture on low for 6 hours, covered, or 3 hours on high. Make sure to stir occasionally.

Step 3: Serve the Kielbasa Bites immediately. Enjoy!

Note: This recipe you can also prepare on a stovetop. You just need to combine the ingredients in a medium saucepan. Simmer for 15 to 30 minutes over medium heat.

Rebecca I have done it! The slow cooker brown sugar Kielbasa bites recipe that I was dying to try ever since. I used to make it using a skillet but I… Main Dish Recipes Slow Cooker Brown Sugar Kielbasa Bites European Print This
Nutrition facts: 200 calories 20 grams fat
Rating: 4.3/5
( 3 voted )

Ingredients

  • 2 lbs Kielbasa, sliced into bite-sized pieces
  • 3/4 cup cola
  • 1 cup brown sugar
  • 1/2 teaspoon chili powder (optional)

Instructions

Step 1: Place the bite-size pieces o Kielbasa, cola, brown sugar, and chili powder into a 3-quart slow cooker. Stir until incorporated.

Step 2: Cook the mixture on low for 6 hours, covered, or 3 hours on high. Make sure to stir occasionally.

Step 3: Serve the Kielbasa Bites immediately. Enjoy!

Note: This recipe you can also prepare on a stovetop. You just need to combine the ingredients in a medium saucepan. Simmer for 15 to 30 minutes over medium heat.
June 20, 2020 0 comment
0 FacebookTwitterPinterestEmail
Main Dish Recipes

Peanut Butter Cheesecake Cookies

by Rebecca June 20, 2020
written by Rebecca

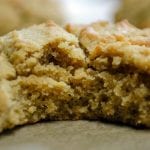
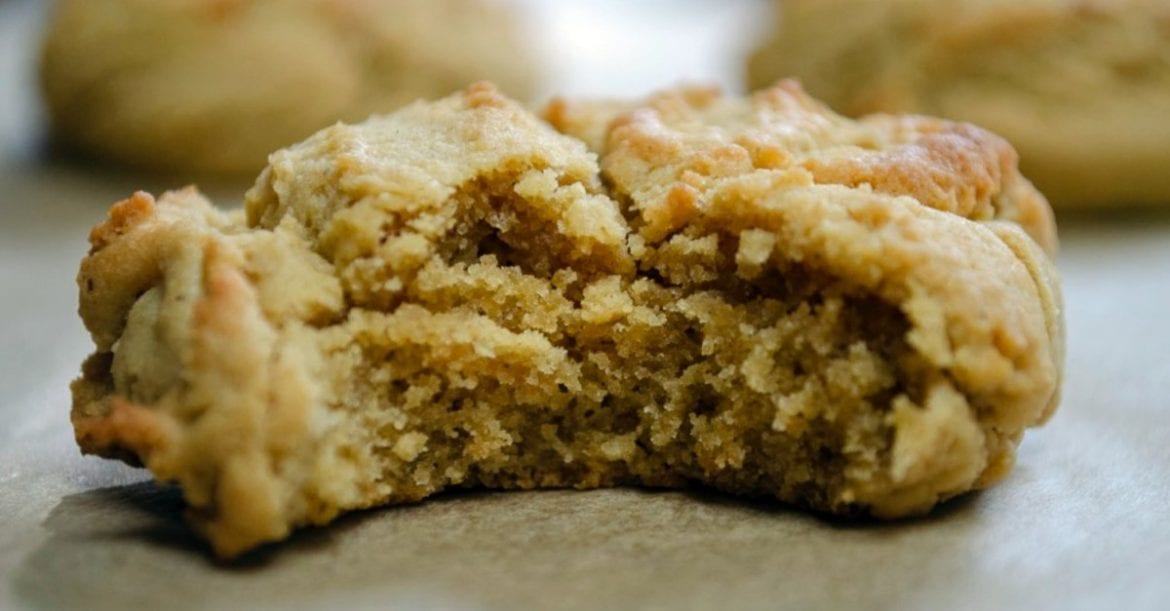
Peanut butter and cheesecake anyone? The combination of my two favorites in a cookie is amazeballs! This is a pretty easy recipe that anyone can follow. So if you are dying to taste these Peanut Butter Cheesecake Cookies I would suggest that you give it a try. Experience these chewy and amazingly delicious cookies in a blink. One bite and you will be wearing that smile throughout the day. Have a sugary kind of day yeah all!

INGREDIENTS

1 cup (8 oz) full fat cream cheese

1 cup creamy peanut butter

3/4 cup brown sugar

1/4 cup granulated sugar

1 1/2 teaspoons vanilla extract

2 eggs

2 1/4 cups all-purpose flour

1 teaspoon kosher salt

1 teaspoon baking soda

How to make Peanut Butter Cheesecake Cookies

Step 1: Place the peanut butter, cream cheese, sugars, and vanilla in a medium bowl and cream the ingredients using an electric mixer until incorporated.

Step 2: Add in the eggs one at a time. make sure to mix in between each addition.

Step 3: Mix the flour, salt, and baking soda in another bowl.

Step 4: Pour the dry ingredients into the wet ingredients and mix on low speed until well combined.

Step 5: Place the dough in the refrigerator to chill for an hour or up to 2 days.

Step 6: Remove from the fridge when ready to bake.

Step 7: Prepare the oven. Preheat it to 350 degrees F.

Step 8: Scoop around 2 tablespoons-sized balls and place them into a cookies sheet. Flatten slightly using your hand. Do this for the rest of the dough.

Step 9: Place indie the preheated oven and bake for about 8 to 10 minutes or until the edges are golden brown. The cookies will continue to cook when they come out of the oven.

Step 10: Don’t remove the cookies yet, let them cool on the baking sheet for at least 5 minutes. Then, transfer the cookies to a wire rack to cool completely.

Peanut Butter Cheesecake Cookies

Rebecca Peanut butter and cheesecake anyone? The combination of my two favorites in a cookie is amazeballs! This is a pretty easy recipe that anyone can follow. So if you are… Main Dish Recipes Peanut Butter Cheesecake Cookies European Print This
Nutrition facts: 200 calories 20 grams fat
Rating: 5.0/5
( 1 voted )

Ingredients

  • 1 cup (8 oz) full fat cream cheese
  • 1 cup creamy peanut butter
  • 3/4 cup brown sugar
  • 1/4 cup granulated sugar
  • 1 1/2 teaspoons vanilla extract
  • 2 eggs
  • 2 1/4 cups all-purpose flour
  • 1 teaspoon kosher salt
  • 1 teaspoon baking soda

Instructions

Step 1: Place the peanut butter, cream cheese, sugars, and vanilla in a medium bowl and cream the ingredients using an electric mixer until incorporated.

Step 2: Add in the eggs one at a time. make sure to mix in between each addition.

Step 3: Mix the flour, salt, and baking soda in another bowl.

Step 4: Pour the dry ingredients into the wet ingredients and mix on low speed until well combined.

Step 5: Place the dough in the refrigerator to chill for an hour or up to 2 days.

Step 6: Remove from the fridge when ready to bake.

Step 7: Prepare the oven. Preheat it to 350 degrees F.

Step 8: Scoop around 2 tablespoons-sized balls and place them into a cookies sheet. Flatten slightly using your hand. Do this for the rest of the dough.

Step 9: Place indie the preheated oven and bake for about 8 to 10 minutes or until the edges are golden brown. The cookies will continue to cook when they come out of the oven.

Step 10: Don't remove the cookies yet, let them cool on the baking sheet for at least 5 minutes. Then, transfer the cookies to a wire rack to cool completely.


June 20, 2020 0 comment
0 FacebookTwitterPinterestEmail
Main Dish Recipes

HOMEMADE LEMON PUDDING CAKE

by Rebecca June 20, 2020
written by Rebecca

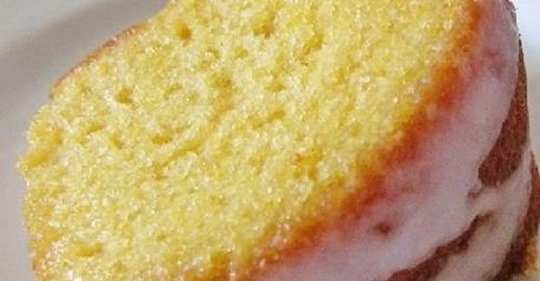
A nice homemade lemon pudding cake for breakfast or snack makes me feel light and happy. This pudding cake has gooey sauce at the bottom with a deep lemon flavor. It is a sponge-like cake that is so easy to make. Tangy, not so sweet, and ultimately delicious!

INGREDIENTS

1 package of jello lemon pie filling (small packet, equals 2 cups or 4 servings)

1½ cups of white granulated sugar

¾ cup unsalted butter softened

4 teaspoons baking powder

1¾ cups all-purpose flour

2 tablespoons fresh lemon zest

1 teaspoon vanilla extract

1¼ cup whole milk

3 tablespoons cornstarch

canola oil

1 teaspoon salt

4 eggs

HOW TO MAKE HOMEMADE LEMON PUDDING CAKE

Step 1: Prepare the oven. Preheat it to 325 degrees F. Grease and flour a 12 cup capacity standard Bundt pan.

Step 2: Whisk the flour, cornstarch, baking powder, and salt in a medium bowl. Set aside.

Step 3: Cream the butter and granulated sugar using an electric mixer on medium speed for about 3 minutes or until light and fluffy.

Step 4: Mix the lemon pie until thoroughly combined.

Step 5: Beat in the eggs one at a time, and mix after each addition.

Step 6: Stir int he lemon zest.

Step 7: In a large measuring cup or bowl, combine the milk, oil, and vanilla extract.

Step 8: Into a bowl, pour the dry ingredients alternately with a third of the wet ingredients. Mix thoroughly every after each addition and end with the wet ingredients. After the last addition, mix for 2 minutes more on medium speed.

Step 9: Carefully pour the batter into the prepared Bunt pan.

Step 10: Place inside the preheated oven and bake for 50 to 60 minutes. Insert a toothpick in the middle, once it comes out clean your cake is done.

Step 11: Remove the cake from the oven and invert onto a baking rack to cool.

Step 12: Once the cake is completely cooled, frost it with a lemon buttercream icing and sprinkle some lemon zest over the icing if desired.

Rebecca A nice homemade lemon pudding cake for breakfast or snack makes me feel light and happy. This pudding cake has gooey sauce at the bottom with a deep lemon flavor.… Main Dish Recipes HOMEMADE LEMON PUDDING CAKE European Print This
Nutrition facts: 200 calories 20 grams fat
Rating: 3.3/5
( 4 voted )

Ingredients

  • 1 package of jello lemon pie filling (small packet, equals 2 cups or 4 servings)
  • 1½ cups of white granulated sugar
  • ¾ cup unsalted butter softened
  • 4 teaspoons baking powder
  • 1¾ cups all-purpose flour
  • 2 tablespoons fresh lemon zest
  • 1 teaspoon vanilla extract
  • 1¼ cup whole milk
  • 3 tablespoons cornstarch
  • canola oil
  • 1 teaspoon salt
  • 4 eggs

Instructions

Step 1: Prepare the oven. Preheat it to 325 degrees F. Grease and flour a 12 cup capacity standard Bundt pan.

Step 2: Whisk the flour, cornstarch, baking powder, and salt in a medium bowl. Set aside.

Step 3: Cream the butter and granulated sugar using an electric mixer on medium speed for about 3 minutes or until light and fluffy.

Step 4: Mix the lemon pie until thoroughly combined.

Step 5: Beat in the eggs one at a time, and mix after each addition.

Step 6: Stir int he lemon zest.

Step 7: In a large measuring cup or bowl, combine the milk, oil, and vanilla extract.

Step 8: Into a bowl, pour the dry ingredients alternately with a third of the wet ingredients. Mix thoroughly every after each addition and end with the wet ingredients. After the last addition, mix for 2 minutes more on medium speed.

Step 9: Carefully pour the batter into the prepared Bunt pan.

Step 10: Place inside the preheated oven and bake for 50 to 60 minutes. Insert a toothpick in the middle, once it comes out clean your cake is done.

Step 11: Remove the cake from the oven and invert onto a baking rack to cool.

Step 12: Once the cake is completely cooled, frost it with a lemon buttercream icing and sprinkle some lemon zest over the icing if desired.


June 20, 2020 0 comment
0 FacebookTwitterPinterestEmail
Main Dish Recipes

Boston Cream Pie Poke Cake

by Rebecca June 20, 2020
written by Rebecca

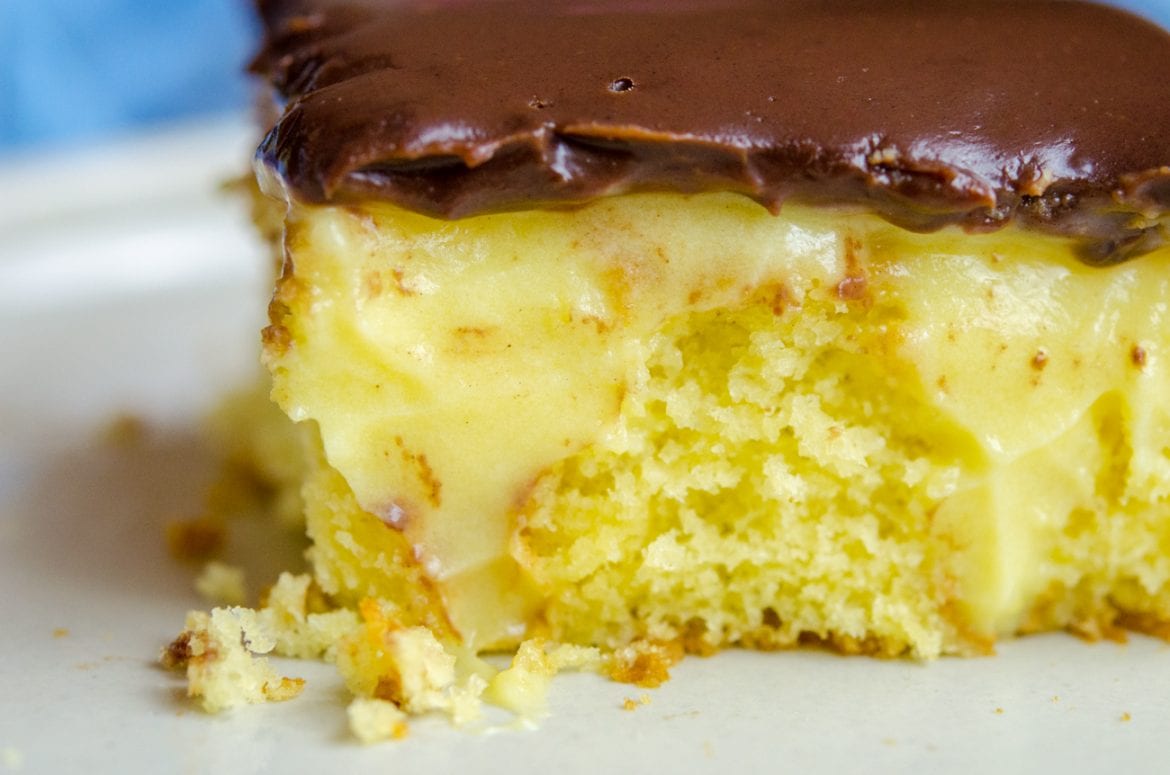
This is one of the best cakes I have ever tasted in my life! I can’t believe how easy it is to make such an amazing cake. It has very minimal ingredients too. 6 basic ingredients that perfectly complement each other. I mean, who would have thought that this list of things will make a perfect cake? You will put this on your best cake list. I am certain of that! Give this a try today and I promise that it will not disappoint you. I made this today with a little hesitation because I thought it’s a waste of time but I was wrong. I think it’s time for you to go to your kitchen and see if you have all these ingredients. Enjoy!

INGREDIENTS

1 box yellow cake mix, plus ingredients called for on the package

2 (3.4 oz) boxes instant vanilla pudding

4 cups of milk

1 teaspoon vanilla extract

12 oz bag chocolate chips

1 1/2 cups heavy cream

How to make Boston Cream Pie Poke Cake

Step 1: Refer to the instructions written on the package to prepare the yellowcake. Place in a 9×13-inch pan. Let it cool to room temperature.

Step 2: Poke little holes on the cake using a spoon.

Step 3: In a medium bowl, pour milk, vanilla extract, and instant pudding. Whisk until lightly mixed then transfer into the pan. Pour it on top of the cake and refrigerate for 1 hour.

Step 4: Make the Chocolate Ganache.

Step 5: In a heatproof bowl, add chocolate chips and heat on the stove or in the microwave until melted.

Step 6: Add in hot cream on top of the chocolate chips and leave it for 5 minutes. Stir until well-blended and let it cool to room temperature for 10 minutes.

Step 7: Transfer the melted chocolate into the pan. Spread it on top of the cake using a spatula. Refrigerate for at least 4 hours or overnight before slicing.

Step 8: Serve and enjoy!

Boston Cream Pie Poke Cake

Rebecca This is one of the best cakes I have ever tasted in my life! I can’t believe how easy it is to make such an amazing cake. It has very… Main Dish Recipes Boston Cream Pie Poke Cake European Print This
Nutrition facts: 200 calories 20 grams fat
Rating: 3.5/5
( 36 voted )

Ingredients

  • 1 box yellow cake mix, plus ingredients called for on the package
  • 2 (3.4 oz) boxes instant vanilla pudding
  • 4 cups of milk
  • 1 teaspoon vanilla extract
  • 12 oz bag chocolate chips
  • 1 1/2 cups heavy cream

Instructions

Step 1: Refer to the instructions written on the package to prepare the yellowcake. Place in a 9x13-inch pan. Let it cool to room temperature.

Step 2: Poke little holes on the cake using a spoon.

Step 3: In a medium bowl, pour milk, vanilla extract, and instant pudding. Whisk until lightly mixed then transfer into the pan. Pour it on top of the cake and refrigerate for 1 hour.

Step 4: Make the Chocolate Ganache.

Step 5: In a heatproof bowl, add chocolate chips and heat on the stove or in the microwave until melted.

Step 6: Add in hot cream on top of the chocolate chips and leave it for 5 minutes. Stir until well-blended and let it cool to room temperature for 10 minutes.

Step 7: Transfer the melted chocolate into the pan. Spread it on top of the cake using a spatula. Refrigerate for at least 4 hours or overnight before slicing.

Step 8: Serve and enjoy!

June 20, 2020 0 comment
0 FacebookTwitterPinterestEmail
Main Dish Recipes

Southern Style Hush Puppies

by Rebecca June 20, 2020
written by Rebecca

I am so excited to share this with you today! I just learned how to make these cute little hush puppies and I could not get enough of it! These little treats will blow your mind. They may be small but do not underestimate the big joy they could give you. I made these yesterday. My sister and my niece visited us. We had a nice barbecue and for dessert, I made Southern Style Hush Puppies. They were a hit. It was my first time trying it and I am so glad that I did. It went from small treats to huge smiles to our faces. We ate it as is but I have read that it also goes well with honey butter as a dipping sauce. Maybe you can try it. As for me, I will try several dips that will go well with this Hush puppies. I am just starting to explore this recipe so everything can happen!

INGREDIENTS

3/4 c self-rising flour

1 cup self-rising cornmeal (not mixed)

1 large egg, lightly beaten

1 small onion, finely minced (use sweet onion)

1 pinch garlic powder

1 pinch onion powder

1 pinch old bay seasoning

1 tablespoon sugar

3/4 to 1 cup buttermilk

canola oil for frying

How to make Southern Style Hush Puppies

Step 1: Combine cornmeal, and flour in a large mixing bowl. Mix until well-mixed then add spices, onion, and egg. Whisk until all ingredients are blended.

Step 2: Pour in the buttermilk and use a fork to stir until well-mixed. The texture you are looking for is a little stiff. Try adding more buttermilk if it’s still not stiff.

Step 3: Pour oil in a deep fryer and heat to 375 degrees. Scoop the dough using a teaspoon and drop it into the boiling hot oil. Once the dough goes up and the color turns golden brown, they are ready to remove.

Step 4: Let them drain the excess oil on a paper towel.

Step 5: Serve hot and enjoy!

Note: You can serve them as is or with honey butter.

Southern Style Hush Puppies

Rebecca I am so excited to share this with you today! I just learned how to make these cute little hush puppies and I could not get enough of it! These… Main Dish Recipes Southern Style Hush Puppies European Print This
Nutrition facts: 200 calories 20 grams fat
Rating: 5.0/5
( 1 voted )

Ingredients

  • 3/4 c self-rising flour
  • 1 cup self-rising cornmeal (not mixed)
  • 1 large egg, lightly beaten
  • 1 small onion, finely minced (use sweet onion)
  • 1 pinch garlic powder
  • 1 pinch onion powder
  • 1 pinch old bay seasoning
  • 1 tablespoon sugar
  • 3/4 to 1 cup buttermilk
  • canola oil for frying

Instructions

Step 1: Combine cornmeal, and flour in a large mixing bowl. Mix until well-mixed then add spices, onion, and egg. Whisk until all ingredients are blended.

Step 2: Pour in the buttermilk and use a fork to stir until well-mixed. The texture you are looking for is a little stiff. Try adding more buttermilk if it's still not stiff.

Step 3: Pour oil in a deep fryer and heat to 375 degrees. Scoop the dough using a teaspoon and drop it into the boiling hot oil. Once the dough goes up and the color turns golden brown, they are ready to remove.

Step 4: Let them drain the excess oil on a paper towel.

Step 5: Serve hot and enjoy!

Note: You can serve them as is or with honey butter.

June 20, 2020 0 comment
0 FacebookTwitterPinterestEmail
Main Dish Recipes

Slow Cooker Cream Cheese Chicken Chili

by Rebecca June 20, 2020
written by Rebecca

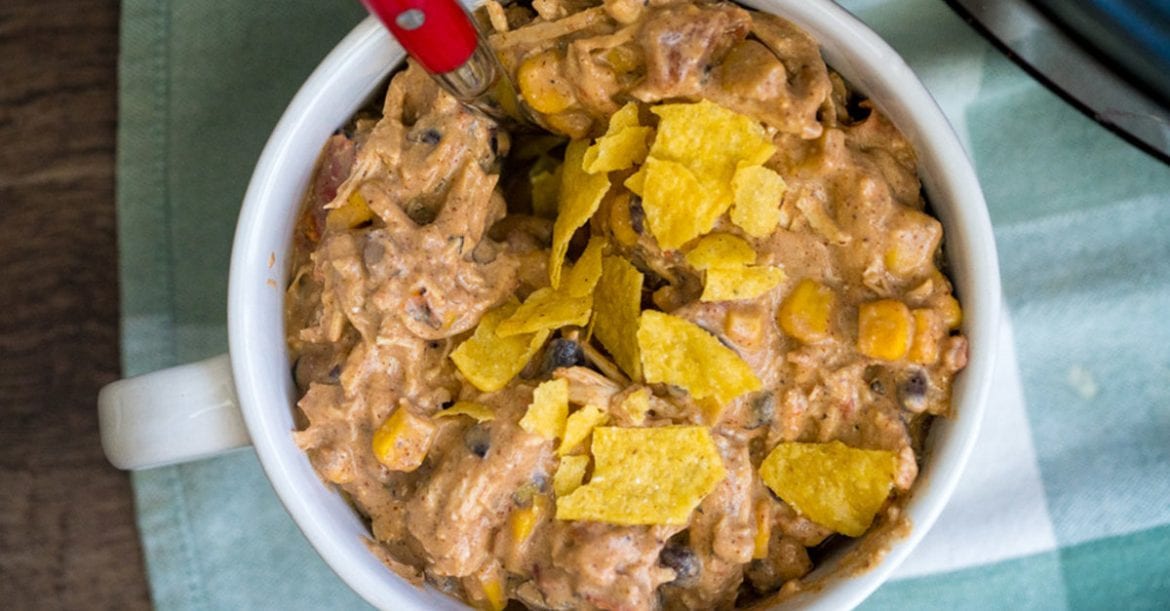
Slow cooking to perfection! This is my favorite dish to prepare on a Sunday afternoon. I usually prepare it around 1 in the afternoon so come dinner time, it’s ready! For busy people like me and you, this is the perfect dish to prepare. In between the time of 1 to 6 hours, we can still do our work or other chores. It is very beneficial if you think about it. Not only that it tastes really good but it’s also hassle-free to prepare. You just have to let the slow cooker do the magic. By the way, you can eat it with steamed rice or mashed potato or anything you wish to eat it with. Enjoy!

INGREDIENTS

2 boneless, skinless chicken breasts

1 (10.75 oz.) can fire-roasted tomatoes and green peppers

1 (10.75 oz.) can whole corn kernels, undrained

1 (10. 75 oz.) can black beans, rinsed and drained

1 (1 oz.) packet dry ranch dressing mix

1 tablespoon chili powder

1 teaspoon cumin

1 teaspoon onion powder

1 teaspoon garlic powder

1/2 teaspoon paprika

1 (8 oz.) package cream cheese, room temperature

Kosher salt and freshly ground pepper, to taste

Rice or cornbread, garnish, optional

How to make Slow Cooker Cream Cheese Chicken Chili

Step 1: Prepare the slow cooker. Put the chicken in the slow cooker then sprinkle a generous amount of salt and pepper to taste.

Step 2: Toss in the corn, black beans, and tomatoes. Pour the chili powder, cumin, onion, ranch mix, paprika, and garlic powder.

Step 3: Put the soft cream cheese over the top of the other ingredients.

Step 4: Cover and turn the setting to low and cook for 6 hours or 3 hours on high.

Step 5: 20 minutes before 6 hours or 3 hours, stir the mixture until the cream cheese is completely incorporated with the rest of the ingredients.

Step 6: Remove from the oven and strip the chicken using two forks.

Step 7: Let it sit for at least 5 minutes to cool.

Step 8: Serve with hot steamed rice. Enjoy!

Slow Cooker Cream Cheese Chicken Chili

Rebecca Slow cooking to perfection! This is my favorite dish to prepare on a Sunday afternoon. I usually prepare it around 1 in the afternoon so come dinner time, it’s ready!… Main Dish Recipes Slow Cooker Cream Cheese Chicken Chili European Print This
Nutrition facts: 200 calories 20 grams fat
Rating: 5.0/5
( 1 voted )

Ingredients

  • 2 boneless, skinless chicken breasts
  • 1 (10.75 oz.) can fire-roasted tomatoes and green peppers
  • 1 (10.75 oz.) can whole corn kernels, undrained
  • 1 (10. 75 oz.) can black beans, rinsed and drained
  • 1 (1 oz.) packet dry ranch dressing mix
  • 1 tablespoon chili powder
  • 1 teaspoon cumin
  • 1 teaspoon onion powder
  • 1 teaspoon garlic powder
  • 1/2 teaspoon paprika
  • 1 (8 oz.) package cream cheese, room temperature
  • Kosher salt and freshly ground pepper, to taste
  • Rice or cornbread, garnish, optional

Instructions

Step 1: Prepare the slow cooker. Put the chicken in the slow cooker then sprinkle a generous amount of salt and pepper to taste.

Step 2: Toss in the corn, black beans, and tomatoes. Pour the chili powder, cumin, onion, ranch mix, paprika, and garlic powder.

Step 3: Put the soft cream cheese over the top of the other ingredients.

Step 4: Cover and turn the setting to low and cook for 6 hours or 3 hours on high.

Step 5: 20 minutes before 6 hours or 3 hours, stir the mixture until the cream cheese is completely incorporated with the rest of the ingredients.

Step 6: Remove from the oven and strip the chicken using two forks.

Step 7: Let it sit for at least 5 minutes to cool.

Step 8: Serve with hot steamed rice. Enjoy!

June 20, 2020 0 comment
0 FacebookTwitterPinterestEmail
Main Dish Recipes

Breakfast Casserole – Easy & Flexible

by Rebecca June 20, 2020
written by Rebecca

Are you looking for a breakfast meal that would not only satisfying but is very easy to make as well? Well, you came to the right page. This recipe I am sharing with you today is my favorite breakfast dish to cook. It is a perfect combination of creaminess and saltiness. It’s just pure joy! If you feel like adding mashed potato to make it a complete meal, you are more than welcome to do so. I encourage you to add potatoes. It’s awesome with this dish. I also add chopped green bell peppers for color and taste as well. Another good thing about this recipe is that you can always add your preferred ingredients. For example, if I don’t have sausage, I sometimes add bacon or ham. It depends on what you have and what you prefer to eat. I hope you like it. Enjoy!

INGREDIENTS

1 can(s) crescent rolls

1 lb pork sausage

6 eggs

1/2 cup milk

1 cup mozzarella cheese, shredded

1 cup cheddar cheese, shredded

How to make Breakfast Casserole

Step 1: Ready the oven and preheat to 350 degrees.

Step 2: Place a skillet on the stove and turn the heat to medium. Add the sausage and cook until brown. Drain the excess oil.

Step 3: Apply cooking spray in a 9×13 pan.

Step 4: Unroll the crescent roll and arrange them on the bottom part of the pan. Press to make an even layer.

Step 5: Compress and seal the seams together.

Step 6: Add the cooked sausage into the crust. Spread to make a layer.

Step 7: In a small bowl, pour milk and add eggs. Season with salt and pepper then whisk until well-blended.

Step 8: Transfer the eggs and milk mixture into the sausage then sprinkle cheese on top.

Step 9: Place inside the oven and bake for 30 minutes or until the eggs are cooked through.

Step 10: Remove from the oven. Serve and enjoy!

Note: You can use ham instead of bacon.

Breakfast Casserole – Easy & Flexible

Rebecca Are you looking for a breakfast meal that would not only satisfying but is very easy to make as well? Well, you came to the right page. This recipe I… Main Dish Recipes Breakfast Casserole – Easy & Flexible European Print This
Nutrition facts: 200 calories 20 grams fat
Rating: 4.4/5
( 8 voted )

Ingredients

  • 1 can(s) crescent rolls
  • 1 lb pork sausage
  • 6 eggs
  • 1/2 cup milk
  • 1 cup mozzarella cheese, shredded
  • 1 cup cheddar cheese, shredded

Instructions

Step 1: Ready the oven and preheat to 350 degrees.

Step 2: Place a skillet on the stove and turn the heat to medium. Add the sausage and cook until brown. Drain the excess oil.

Step 3: Apply cooking spray in a 9x13 pan.

Step 4: Unroll the crescent roll and arrange them on the bottom part of the pan. Press to make an even layer.

Step 5: Compress and seal the seams together.

Step 6: Add the cooked sausage into the crust. Spread to make a layer.

Step 7: In a small bowl, pour milk and add eggs. Season with salt and pepper then whisk until well-blended.

Step 8: Transfer the eggs and milk mixture into the sausage then sprinkle cheese on top.

Step 9: Place inside the oven and bake for 30 minutes or until the eggs are cooked through.

Step 10: Remove from the oven. Serve and enjoy!

Note: You can use ham instead of bacon.

June 20, 2020 0 comment
0 FacebookTwitterPinterestEmail
Main Dish Recipes

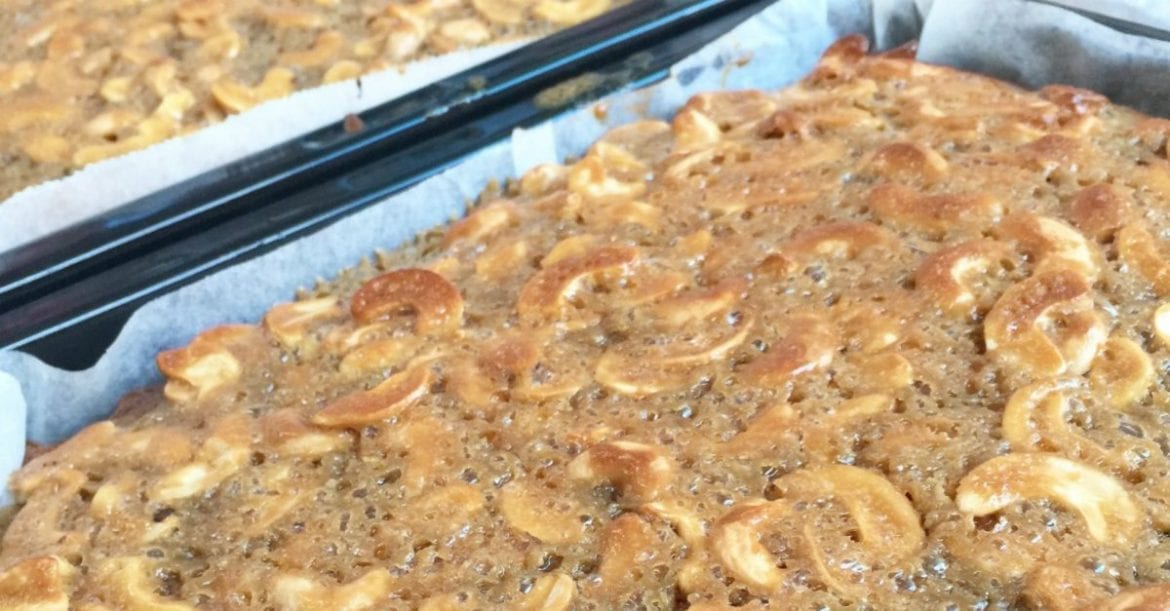
Amish Cashew Crunch

by Rebecca June 20, 2020
written by Rebecca

A nice sweet treat after a greasy lunch. I remember my grandma making this amazing dessert. This is her favorite dessert to prepare. I can’t blame her because we all love it. My sisters and I always craved it. We used to sneak out of the house to go to our grandma’s house. We would eat and spend the whole weekend there. Of course, our mom let us because she knew that grandma could use the company. She lived alone and what gives her joy is when her grandkids visit her. one Saturday, she taught us how to make this delicious treat. We all gathered in the kitchen and witnessed her do her thing and it was awesome! She knew how to work around the kitchen. We all learned a lot that day. Now that I am married and have two wonderful kids, I always find time to teach my children to cook. Whether it’s a simple or difficult dish, I let them try it so they’d know how to appreciate the foods they eat. To my grams, I love you, and thank you for everything!

INGREDIENTS

2 cups cashew halves

2 sticks unsalted butter

1 cup white sugar

1 tablespoon light corn syrup

1 teaspoon vanilla extract

1/2 teaspoon salt

How to make Amish Cashew Crunch

Step 1: Arrange parchment paper in a baking sheet and apply the cooking spray. Set it aside.

Step 2: Place a medium casserole on the stove and turn the heat to medium. Add butter, corn syrup, and sugar and cook for 10 minutes. Remove from the heat.

Step 3: Pour vanilla into the corn syrup mixture and stir until well-mixed.

Step 4: Toss in the cashews and stir until fully coated with the syrup mixture.

Step 5: Transfer the mixture into the sprayed cookie sheet. Spread in an even layer.

Step 6: Season with salt and let it cool to room temperature.

Step 7: Serve and enjoy!

Amish Cashew Crunch

Rebecca A nice sweet treat after a greasy lunch. I remember my grandma making this amazing dessert. This is her favorite dessert to prepare. I can’t blame her because we all… Main Dish Recipes Amish Cashew Crunch European Print This
Nutrition facts: 200 calories 20 grams fat
Rating: 5.0/5
( 1 voted )

Ingredients

  • 2 cups cashew halves
  • 2 sticks unsalted butter
  • 1 cup white sugar
  • 1 tablespoon light corn syrup
  • 1 teaspoon vanilla extract
  • 1/2 teaspoon salt

Instructions

Step 1: Arrange parchment paper in a baking sheet and apply the cooking spray. Set it aside.

Step 2: Place a medium casserole on the stove and turn the heat to medium. Add butter, corn syrup, and sugar and cook for 10 minutes. Remove from the heat.

Step 3: Pour vanilla into the corn syrup mixture and stir until well-mixed.

Step 4: Toss in the cashews and stir until fully coated with the syrup mixture.

Step 5: Transfer the mixture into the sprayed cookie sheet. Spread in an even layer.

Step 6: Season with salt and let it cool to room temperature.

Step 7: Serve and enjoy!

June 20, 2020 0 comment
0 FacebookTwitterPinterestEmail
Main Dish Recipes

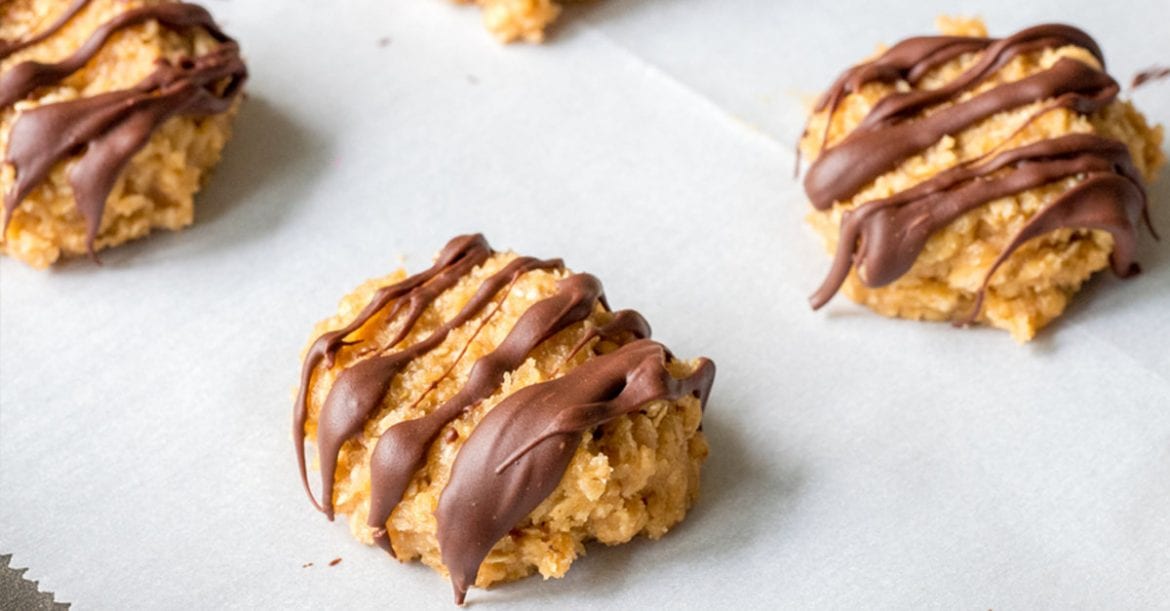
No-Bake Preacher Cookies

by Rebecca June 20, 2020
written by Rebecca

If you love no-bake recipes like I do, this is for you. Easy and quick to make no-bake Preacher Cookies that have time long history. These simple no-bake cookies are whip up super quickly, perfect for when you have unannounced guests coming over. The combination of chocolate and peanut butter is my favorite and the oats give these cookies substance and a distinct texture. I like how pretty these cookies look with chocolate drizzled over the top. What are you waiting for? Grab a piece and satisfy your sweet tooth with these guilt-free No-Bake Preacher Cookies.

INGREDIENTS

3 cups quick-cooking oats, uncooked

2 cups of sugar

1 cup peanut butter

1 stick + 1 tablespoon unsalted butter, divided

½ cup milk

1 teaspoon vanilla

½ cup of chocolate chips

How to make No-Bake Preacher Cookies

Step 1: Place the oats in a large bowl. Set aside. Then, use a parchment paper to line a baking sheet. Although, a flat surface like maybe a countertop works, too.

Step 2: In a saucepan, melt 1 stick of butter on medium-high heat. Stir constantly until the butter is melted. Let it boil for a minute and remove the pan from the heat. Stir in the peanut butter and vanilla extract until incorporated.

Step 3: Drizzle the butter mixture over the reserved oats and mix in the milk and sugar. Stir until well combined.

Step 4: Ladle a teaspoon full of batter and place onto the baking sheet. Press down the batter to flatten.

Step 5: Place the chocolate chips with a tablespoon of unsalted butter in a microwave-safe dish. Stir every 20 seconds until the chocolate is fully melted.

Step 6: Drizzle the chocolate over the cookies with a spoon. And let the chocolate set before serving. You can chill the cookies in the fridge for an hour, then transfer to a serving plate or keep in an airtight container.

No-Bake Preacher Cookies

Rebecca If you love no-bake recipes like I do, this is for you. Easy and quick to make no-bake Preacher Cookies that have time long history. These simple no-bake cookies are… Main Dish Recipes No-Bake Preacher Cookies European Print This
Nutrition facts: 200 calories 20 grams fat
Rating: 5.0/5
( 1 voted )

Ingredients

  • 3 cups quick-cooking oats, uncooked
  • 2 cups of sugar
  • 1 cup peanut butter
  • 1 stick + 1 tablespoon unsalted butter, divided
  • ½ cup milk
  • 1 teaspoon vanilla
  • ½ cup of chocolate chips

Instructions

Step 1: Place the oats in a large bowl. Set aside. Then, use a parchment paper to line a baking sheet. Although, a flat surface like maybe a countertop works, too.

Step 2: In a saucepan, melt 1 stick of butter on medium-high heat. Stir constantly until the butter is melted. Let it boil for a minute and remove the pan from the heat. Stir in the peanut butter and vanilla extract until incorporated.

Step 3: Drizzle the butter mixture over the reserved oats and mix in the milk and sugar. Stir until well combined.

Step 4: Ladle a teaspoon full of batter and place onto the baking sheet. Press down the batter to flatten.

Step 5: Place the chocolate chips with a tablespoon of unsalted butter in a microwave-safe dish. Stir every 20 seconds until the chocolate is fully melted.

Step 6: Drizzle the chocolate over the cookies with a spoon. And let the chocolate set before serving. You can chill the cookies in the fridge for an hour, then transfer to a serving plate or keep in an airtight container.

June 20, 2020 0 comment
0 FacebookTwitterPinterestEmail
Main Dish Recipes

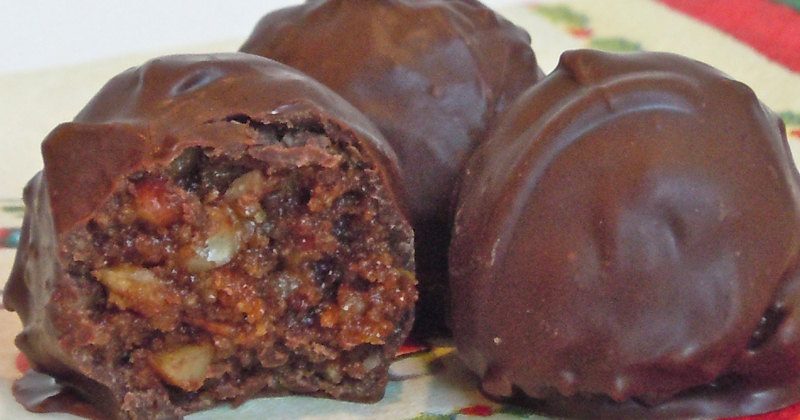
Pecan Pie Balls

by Rebecca June 19, 2020
written by Rebecca

Amazeballs! From pie to balls – these Pecan Pie Balls are super delicious, soft with a nutty flavor. Have it with a splash of bourbon or a substitute for a non-alcoholic version.

INGREDIENTS

2 1/2 cups pecans, toasted and chopped

1 cup graham crackers, crushed (vanilla wafers, Oreos can be subbed if you do not like graham crackers)

1 cup brown sugar, firmly packed

1/2 teaspoon salt (if you can not handle the sodium, don’t use it!)

2 tablespoons maple syrup

1/4 cup bourbon, brandy or spiced rum. non-alcoholic version: use almond extract, rum extract, or any other that may suit your taste. add a little water/juice to equal the liquid amount.

1 teaspoon vanilla

7 oz dark chocolate bark. If you prefer white chocolate go for it!

1 teaspoon coarse sea salt (optional)

How to make Pecan Pie Balls

Step 1: In a large bowl, combine the pecans, graham crackers, brown sugar, and salt.

Step 2: Drizzle the maple syrup, pour the bourbon, and add in the vanilla.

Step 3: Mix the ingredients thoroughly with your hands. You can substitute the bourbon with some almond extract for a non-alcoholic version. Or you can try to use a non-alcohol rum flavoring.

Step 4: When the ingredients are incorporated, scoop a tablespoon-size, and form a ball. Do this for the remaining mixture.

Step 5: Line a cookie sheet with parchment paper. Place the balls on the cookie sheet and freeze for at least 2 hours. Although the balls are already made, roll them again with your slight water damped hands to ensure the balls are smooth before you dip them in chocolates.

Step 6: Meanwhile, as per package instruction, melt the chocolate bark in a double boiler or microwave.

Step 7: Take out the frozen balls and dip each ball into the melted chocolate bark. And place them back on the cookie sheet.

Step 8: Sprinkle with a little sea salt before the chocolates hardened. Although, this is optional but highly recommended.

Step 9: Serve them as is or freeze first for t least 15 minutes. These are great when frozen. Enjoy!

Pecan Pie Balls

Rebecca Amazeballs! From pie to balls – these Pecan Pie Balls are super delicious, soft with a nutty flavor. Have it with a splash of bourbon or a substitute for a… Main Dish Recipes Pecan Pie Balls European Print This
Nutrition facts: 200 calories 20 grams fat
Rating: 4.0/5
( 2 voted )

Ingredients

  • 2 1/2 cups pecans, toasted and chopped
  • 1 cup graham crackers, crushed (vanilla wafers, Oreos can be subbed if you do not like graham crackers)
  • 1 cup brown sugar, firmly packed
  • 1/2 teaspoon salt (if you can not handle the sodium, don’t use it!)
  • 2 tablespoons maple syrup
  • 1/4 cup bourbon, brandy or spiced rum. non-alcoholic version: use almond extract, rum extract, or any other that may suit your taste. add a little water/juice to equal the liquid amount.
  • 1 teaspoon vanilla
  • 7 oz dark chocolate bark. If you prefer white chocolate go for it!
  • 1 teaspoon coarse sea salt (optional)

Instructions

Step 1: In a large bowl, combine the pecans, graham crackers, brown sugar, and salt.

Step 2: Drizzle the maple syrup, pour the bourbon, and add in the vanilla.

Step 3: Mix the ingredients thoroughly with your hands. You can substitute the bourbon with some almond extract for a non-alcoholic version. Or you can try to use a non-alcohol rum flavoring.

Step 4: When the ingredients are incorporated, scoop a tablespoon-size, and form a ball. Do this for the remaining mixture.

Step 5: Line a cookie sheet with parchment paper. Place the balls on the cookie sheet and freeze for at least 2 hours. Although the balls are already made, roll them again with your slight water damped hands to ensure the balls are smooth before you dip them in chocolates.

Step 6: Meanwhile, as per package instruction, melt the chocolate bark in a double boiler or microwave.

Step 7: Take out the frozen balls and dip each ball into the melted chocolate bark. And place them back on the cookie sheet.

Step 8: Sprinkle with a little sea salt before the chocolates hardened. Although, this is optional but highly recommended.

Step 9: Serve them as is or freeze first for t least 15 minutes. These are great when frozen. Enjoy!

June 19, 2020 0 comment
0 FacebookTwitterPinterestEmail
Newer Posts
Older Posts

Popular Posts

  • 1

    Crispy Crunchy Parmesan Potatoes

    March 21, 2020
  • 2

    CROCK POT SMOTHERED PORK CHOPS

    March 21, 2020
  • Facebook
  • Twitter

@2019 - All Right Reserved.


Back To Top