Cook it once
  • Home
  • Privacy Policy
  • Recipes
    • KETO
    • LC
    • WW
  • Tips
  • Contact
Cook it once
  • Home
  • Privacy Policy
  • Recipes
    • KETO
    • LC
    • WW
  • Tips
  • Contact
Monthly Archives

June 2020

Main Dish Recipes

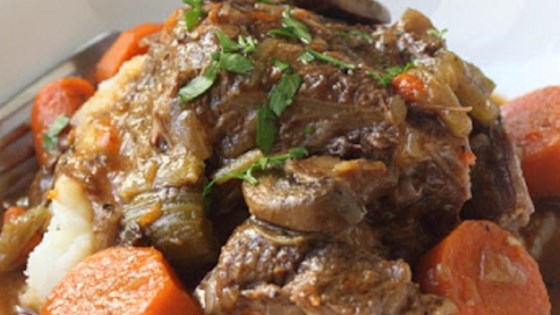
Slow Cooker Beef Pot Roast

by Rebecca June 23, 2020
written by Rebecca

My mouth is watering because of this Beef Pot Roast. The beef is meltingly tender with vegetables and potatoes that are smothered in rich gravy. I cannot think of a perfect dinner to serve that is warm, hearty, and deliciously flavorful than this fall apart beef.

INGREDIENTS

1 (5 pounds) bone-in beef pot roast

salt and pepper to taste

1 tablespoon all-purpose flour, or as needed

2 tablespoons vegetable oil

8 ounces sliced mushrooms

1 medium onion, chopped

2 cloves garlic, minced

1 tablespoon butter

1 1/2 tablespoons all-purpose flour

1 tablespoon tomato paste

2 1/2 cups chicken broth

3 medium carrots, cut into chunks

2 stalks celery, cut into chunks

1 sprig fresh rosemary

2 sprigs fresh thyme

How to make Slow Cooker Beef Pot Roast

Step 1: Don’t be shy with the salt and pepper, generously season both sides of the roast.

Step 2: Then, sprinkle some flour on the top of the meat, pat, and shake off any excess flour.

Step 3: In a large skillet, heat the vegetable oil over medium-high heat.

Step 4: Cook both sides of the roast for about 5 to 6 minutes each side until browned. Once the roast is well browned, remove from the skillet and set aside.

Step 5: Decrease the heat to medium and saute the mushrooms and butter. Cook for about 3 to 4 minutes.

Step 6: Add the onion and cook for 5 minutes or until translucent.

Step 7: Stir in the garlic and saute for a minute.

Step 8: Add 1 1/2 tablespoons of flour and cook for a minute.

Step 9: Pour the tomato paste and again cook for another minute.

Step 10: Slowly pour in the chicken stock and stir to combine. Continue to cook until simmer and remover from the heat.

Step 11: Drop the sliced carrots and celery into the slow cooker.

Step 12: Finally, put the roast over the vegetables. Make sure to include any accumulated juice.

Step 13: Sprinkle in some rosemary and thyme.

Step 14: And pour the onion and mushroom mixture on top of the roast.

Step 15: Turn the slow cooker to high and continue cooking the roast for 5 to 6 hours, covered, until the meat is fork-tender.

Step 16: Once done, remove any fat from the surface and strip off the bones. Then, season with salt and pepper to taste.
Slow Cooker Beef Pot Roast

Rebecca My mouth is watering because of this Beef Pot Roast. The beef is meltingly tender with vegetables and potatoes that are smothered in rich gravy. I cannot think of a… Main Dish Recipes Slow Cooker Beef Pot Roast European Print This
Nutrition facts: 200 calories 20 grams fat
Rating: 5.0/5
( 1 voted )

Ingredients

  • 1 (5 pounds) bone-in beef pot roast
  • salt and pepper to taste
  • 1 tablespoon all-purpose flour, or as needed
  • 2 tablespoons vegetable oil
  • 8 ounces sliced mushrooms
  • 1 medium onion, chopped
  • 2 cloves garlic, minced
  • 1 tablespoon butter
  • 1 1/2 tablespoons all-purpose flour
  • 1 tablespoon tomato paste
  • 2 1/2 cups chicken broth
  • 3 medium carrots, cut into chunks
  • 2 stalks celery, cut into chunks
  • 1 sprig fresh rosemary
  • 2 sprigs fresh thyme

Instructions

Step 1: Don't be shy with the salt and pepper, generously season both sides of the roast.

Step 2: Then, sprinkle some flour on the top of the meat, pat, and shake off any excess flour.

Step 3: In a large skillet, heat the vegetable oil over medium-high heat.

Step 4: Cook both sides of the roast for about 5 to 6 minutes each side until browned. Once the roast is well browned, remove from the skillet and set aside.

Step 5: Decrease the heat to medium and saute the mushrooms and butter. Cook for about 3 to 4 minutes.

Step 6: Add the onion and cook for 5 minutes or until translucent.

Step 7: Stir in the garlic and saute for a minute.

Step 8: Add 1 1/2 tablespoons of flour and cook for a minute.

Step 9: Pour the tomato paste and again cook for another minute.

Step 10: Slowly pour in the chicken stock and stir to combine. Continue to cook until simmer and remover from the heat.

Step 11: Drop the sliced carrots and celery into the slow cooker.

Step 12: Finally, put the roast over the vegetables. Make sure to include any accumulated juice.

Step 13: Sprinkle in some rosemary and thyme.

Step 14: And pour the onion and mushroom mixture on top of the roast.

Step 15: Turn the slow cooker to high and continue cooking the roast for 5 to 6 hours, covered, until the meat is fork-tender.

Step 16: Once done, remove any fat from the surface and strip off the bones. Then, season with salt and pepper to taste.
June 23, 2020 0 comment
0 FacebookTwitterPinterestEmail
Main Dish Recipes

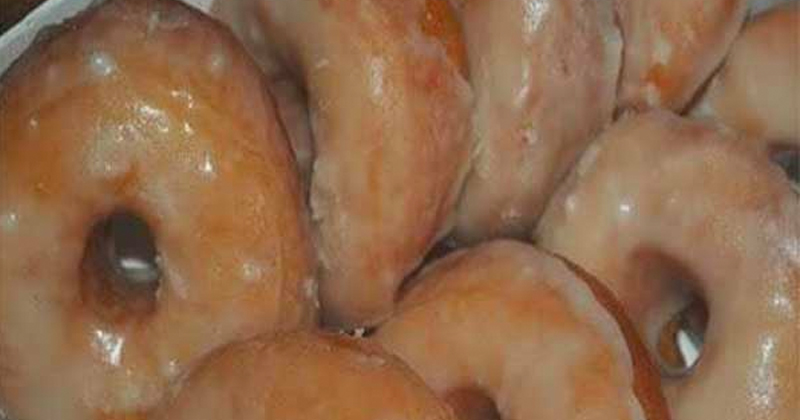
Krispy Kreme Donuts

by Rebecca June 23, 2020
written by Rebecca

These little treats made our weekend very special. My cousins and their kids went to the house for a simple family gathering. We had a barbecue and burgers. We bonded and talked a lot. It was the perfect weekend. For dessert, we tried this one recipe we watched on TV that day. It was this Krispy Kreme Donuts. We decided to make it together with the kids. It was so fun. They were so excited by the idea of cooking. Aside from being easy to make, these little treats are very delicious. Well, the name speaks for itself, right? They taste like Krispy Kreme! Give it a try so you’d know what I’m talking about.

INGREDIENTS

2 cups scalded milk

1/2 cup butter

2/3 cup sugar, divided

1 teaspoon salt

2 tablespoons yeast

4 eggs (beaten)

1/4 teaspoon nutmeg

7 cups sifted flour

For the Glaze

3 cups powdered sugar

1/2 teaspoon salt

1/2 teaspoon vanilla

1/2 cup cold water

How to make Krispy Kreme Donuts

Step 1: In a medium bowl, add 3 cups of sugar, 1/2 teaspoon salt, 1/2 teaspoon vanilla, 1/2 cold water. Whisk until well-mixed.

Step 2: In a small bowl, pour hot milk and add butter then wait for the butter to melt. Add salt and 1 teaspoon sugar then let it cool. Add the yeast, 3 cups of flour, remaining sugar, eggs, and nutmeg. Add the remaining flour.

Step 3: Pummel for 5 minutes and let it rise for 1 1/2 hours. Roll the dough out the slice into shapes. (Remember not to unroll the dough.)

Step 4: Let the dough rise for 45 minutes.

Step 5: Place a pan on the stove and turn the heat to 365 degrees C. When the oil is hot, add the dough and fry for 1 to 2 minutes on each side until the color turns brown. You fry the doughnut holes first followed by the donuts.

Step 6: Place the fried donuts onto a plate with a paper towel to drain the excess oil then dip into the glaze. Serve and enjoy!

Krispy Kreme Donuts

Rebecca These little treats made our weekend very special. My cousins and their kids went to the house for a simple family gathering. We had a barbecue and burgers. We bonded… Main Dish Recipes Krispy Kreme Donuts European Print This
Nutrition facts: 200 calories 20 grams fat
Rating: 5.0/5
( 1 voted )

Ingredients

  • 2 cups scalded milk
  • 1/2 cup butter
  • 2/3 cup sugar, divided
  • 1 teaspoon salt
  • 2 tablespoons yeast
  • 4 eggs (beaten)
  • 1/4 teaspoon nutmeg
  • 7 cups sifted flour
  • For the Glaze
  • 3 cups powdered sugar
  • 1/2 teaspoon salt
  • 1/2 teaspoon vanilla
  • 1/2 cup cold water

Instructions

Step 1: In a medium bowl, add 3 cups of sugar, 1/2 teaspoon salt, 1/2 teaspoon vanilla, 1/2 cold water. Whisk until well-mixed.

Step 2: In a small bowl, pour hot milk and add butter then wait for the butter to melt. Add salt and 1 teaspoon sugar then let it cool. Add the yeast, 3 cups of flour, remaining sugar, eggs, and nutmeg. Add the remaining flour.

Step 3: Pummel for 5 minutes and let it rise for 1 1/2 hours. Roll the dough out the slice into shapes. (Remember not to unroll the dough.)

Step 4: Let the dough rise for 45 minutes.

Step 5: Place a pan on the stove and turn the heat to 365 degrees C. When the oil is hot, add the dough and fry for 1 to 2 minutes on each side until the color turns brown. You fry the doughnut holes first followed by the donuts.

Step 6: Place the fried donuts onto a plate with a paper towel to drain the excess oil then dip into the glaze. Serve and enjoy!

June 23, 2020 0 comment
0 FacebookTwitterPinterestEmail
Main Dish Recipes

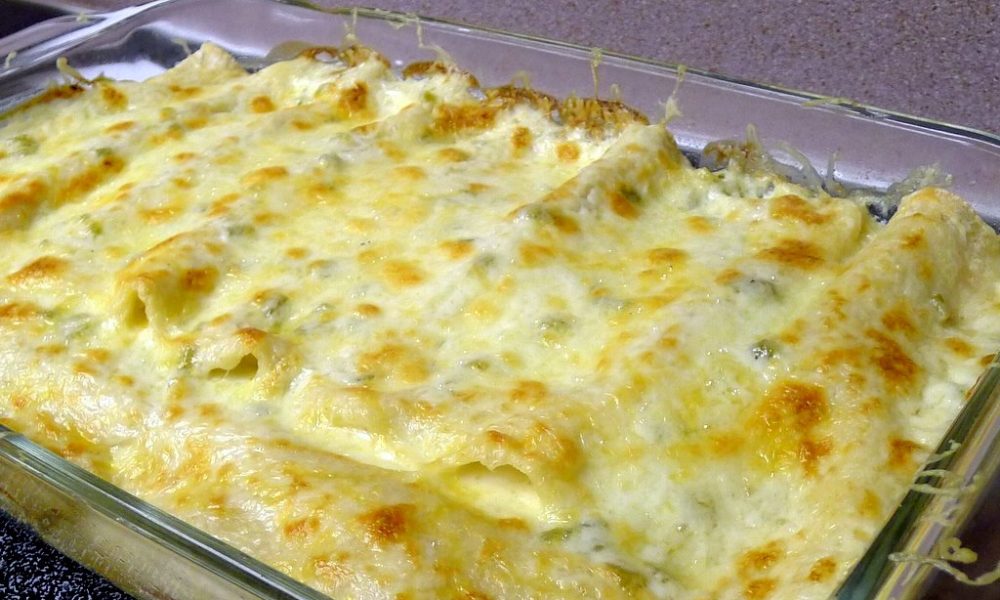
White Chicken Enchiladas

by Rebecca June 23, 2020
written by Rebecca

These bad boys were the highlight of my week! From the moment I learned how easy it is to make this amazing dish, I was non-stop. I cooked it pretty much every day! I just love the taste of melted cheese on tortillas. Since the first time I ate tortilla, I fell in love with it. As of now, you should know that Enchilada is my favorite food. It is my comfort food. Happy or sad, it is always what I crave for. I am not a great chef, I try but most of the time, I fail. This was the first time I perfected a dish that is why I am so excited to share this with you today. I really hope you enjoy this recipe!

Ingredients

8-10 flour tortillas (soft taco size)

2 cups of cooked and shredded chicken

2 cups of shredded Monterey Jack cheese

3 tbsps of butter

3 tbsps of flour

2 cups of chicken broth

1 cup of sour cream

1 (4 oz) can of diced green chiles

How to make White Chicken Enchiladas

Step 1: Grease a 9×13 pan.

Step 2: In a medium bowl, add 1 cup of cheese and chicken. Stir until well-mixed then roll it up in tortillas and put them into the greased pan.

Step 3: Place a pan on the stove and turn the heat to medium. Add the butter and wait until it is melted then add in the flour. Whisk for a minute until creamy. Pour the broth and whisk again until well-blended.

Step 4: When the sauce is thick, remove the pan from the stove and add the chilies and sour cream into the mixture, Stirn until well-mixed.

Step 5: Pour the mixture on top of the prepared enchiladas. Garnish with the rest of the cheese.

Step 6: Place inside the oven and bake for 25 to 30 minutes at 350 degrees C.

Step 7: Remove from the oven. Serve and enjoy!

White Chicken Enchiladas

Rebecca These bad boys were the highlight of my week! From the moment I learned how easy it is to make this amazing dish, I was non-stop. I cooked it pretty… Main Dish Recipes White Chicken Enchiladas European Print This
Nutrition facts: 200 calories 20 grams fat
Rating: 5.0/5
( 1 voted )

Ingredients

  • 8-10 flour tortillas (soft taco size)
  • 2 cups of cooked and shredded chicken
  • 2 cups of shredded Monterey Jack cheese
  • 3 tbsps of butter
  • 3 tbsps of flour
  • 2 cups of chicken broth
  • 1 cup of sour cream
  • 1 (4 oz) can of diced green chiles

Instructions

Step 1: Grease a 9x13 pan.

Step 2: In a medium bowl, add 1 cup of cheese and chicken. Stir until well-mixed then roll it up in tortillas and put them into the greased pan.

Step 3: Place a pan on the stove and turn the heat to medium. Add the butter and wait until it is melted then add in the flour. Whisk for a minute until creamy. Pour the broth and whisk again until well-blended.

Step 4: When the sauce is thick, remove the pan from the stove and add the chilies and sour cream into the mixture, Stirn until well-mixed.

Step 5: Pour the mixture on top of the prepared enchiladas. Garnish with the rest of the cheese.

Step 6: Place inside the oven and bake for 25 to 30 minutes at 350 degrees C.

Step 7: Remove from the oven. Serve and enjoy!

June 23, 2020 0 comment
0 FacebookTwitterPinterestEmail
Main Dish Recipes

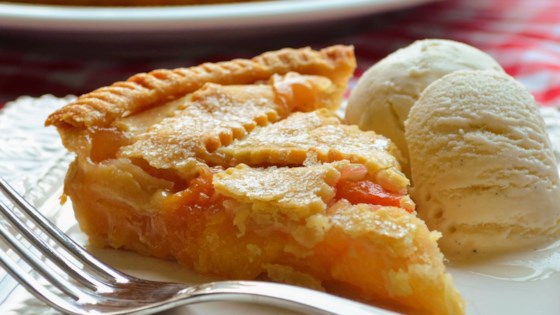
Chef John’s Peach Pie

by Rebecca June 23, 2020
written by Rebecca

This might be one of the best Pies I have ever had! My friend hooked me up with this recipe a couple of weeks ago. At first, I was hesitant to make it because it was difficult to execute the procedures but when I tried it, it wasn’t difficult at all. You just need to follow it step by step and don’t skip. I hope you like it! Enjoy!

INGREDIENTS

3 pounds fresh freestone peaches, peeled and sliced

1 cup white sugar, divided

1 tiny pinch salt

1/4 cup all-purpose flour

1 tablespoon cornstarch

1 teaspoon lemon juice

1 pinch cayenne pepper

1 pinch ground cinnamon

1 pastry for a 10-inch double-crust pie

1 1/2 tablespoons butter, cut into tiny pieces

1 tablespoon heavy whipping cream, or to taste

1 tablespoon white sugar, or to taste

How to make Chef John’s Peach Pie

Ready the oven and preheat to 350 degrees F.

In a medium bowl, add 1/2 cup sugar, salt, and peaches. Stir until well-mixed and let it chill for at least 30 minutes. Strain the juice from the peaches. Set aside the juice and put the peaches back to the bowl.

Pour the juice into a saucepan and place it on the stove. Turn the heat to high until it boils. Turn the heat to medium and cook for another 5 to 10 minutes until the sauce becomes thick and turns into syrup.

In a small bowl, add cornstarch, flour, and 1/2 cup sugar. Whisk until well-blended.

Add lemon juice, cinnamon, and cayenne pepper into the saucepan with the peaches then transfer the flour and whisk until fully coated.

Add in the peach syrup into the peach mixture. Stir until well-mixed.

Fit a 10-inch pie plate by rolling out half of the pastry. Put the crust on the bottom of the pie plate then transfer ours in the peach filling. Press down the pie plate against the surface for the fillings to set properly then top with butter.

Roll the other half of the crust into an 11-inch round shape and slice it into 1-inch strips. Use a pastry wheel or any kind of knife.

Arrange 5 pie crusts on top of the pie. Swerve the rest of the pastry dough strips to make a crisscross pattern on top.

Fold the edges of the crisscrossed strips on the bottom crust and compress.

Add cream on top. Use a brush to spread the cream then top with 1 tablespoon of sugar.

Place in the preheated oven for 1 hour and 15 minutes or until it becomes bubbly and the color turns to brown. Remove from the oven and place on a wire rack to cool to room temperature. Serve and Enjoy!

Chef John’s Peach Pie

Rebecca This might be one of the best Pies I have ever had! My friend hooked me up with this recipe a couple of weeks ago. At first, I was hesitant… Main Dish Recipes Chef John’s Peach Pie European Print This
Nutrition facts: 200 calories 20 grams fat
Rating: 5.0/5
( 1 voted )

Ingredients

  • 3 pounds fresh freestone peaches, peeled and sliced
  • 1 cup white sugar, divided
  • 1 tiny pinch salt
  • 1/4 cup all-purpose flour
  • 1 tablespoon cornstarch
  • 1 teaspoon lemon juice
  • 1 pinch cayenne pepper
  • 1 pinch ground cinnamon
  • 1 pastry for a 10-inch double-crust pie
  • 1 1/2 tablespoons butter, cut into tiny pieces
  • 1 tablespoon heavy whipping cream, or to taste
  • 1 tablespoon white sugar, or to taste

Instructions

Ready the oven and preheat to 350 degrees F.

In a medium bowl, add 1/2 cup sugar, salt, and peaches. Stir until well-mixed and let it chill for at least 30 minutes. Strain the juice from the peaches. Set aside the juice and put the peaches back to the bowl.

Pour the juice into a saucepan and place it on the stove. Turn the heat to high until it boils. Turn the heat to medium and cook for another 5 to 10 minutes until the sauce becomes thick and turns into syrup.

In a small bowl, add cornstarch, flour, and 1/2 cup sugar. Whisk until well-blended.

Add lemon juice, cinnamon, and cayenne pepper into the saucepan with the peaches then transfer the flour and whisk until fully coated.

Add in the peach syrup into the peach mixture. Stir until well-mixed.

Fit a 10-inch pie plate by rolling out half of the pastry. Put the crust on the bottom of the pie plate then transfer ours in the peach filling. Press down the pie plate against the surface for the fillings to set properly then top with butter.

Roll the other half of the crust into an 11-inch round shape and slice it into 1-inch strips. Use a pastry wheel or any kind of knife.

Arrange 5 pie crusts on top of the pie. Swerve the rest of the pastry dough strips to make a crisscross pattern on top.

Fold the edges of the crisscrossed strips on the bottom crust and compress.

Add cream on top. Use a brush to spread the cream then top with 1 tablespoon of sugar.

Place in the preheated oven for 1 hour and 15 minutes or until it becomes bubbly and the color turns to brown. Remove from the oven and place on a wire rack to cool to room temperature. Serve and Enjoy!

June 23, 2020 0 comment
0 FacebookTwitterPinterestEmail
Main Dish Recipes

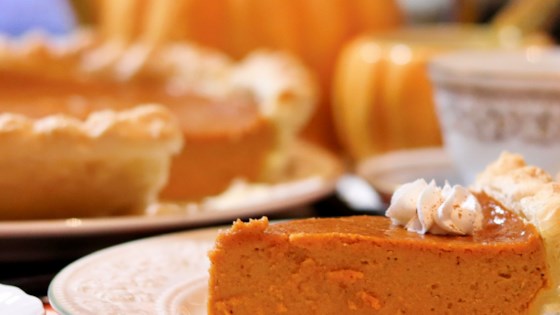
Perfect Pumpkin Pie

by Rebecca June 23, 2020
written by Rebecca

I remember this perfect Pumpkin Pie to be the highlight of every family gathering we had when I was a kid. My mom makes this whenever our relatives pay a visit. She always says that a great pie will make a family even tighter than ever. I didn’t get it when I was little but now, I understand that it is not just food, it is more than that, it is a tradition that you look forward to. That was kind of a long introduction, right? It’s just that I feel so excited and nostalgic sharing this with you today. Anyway, going back to the recipe itself, my favorite ingredient for this recipe is the ground ginger. I don’t know, for me, it’s kind of unusual to put ginger in a pie but it goes well with the rest of the ingredients. It gives a nice different flavor to it. I guess you just have to taste it yourself!

INGREDIENTS

1 (15 ounces) can pumpkin

1 (14 ounces) can EAGLE BRAND(R) Sweetened Condensed Milk

2 large eggs

1 teaspoon ground cinnamon

1/2 teaspoon ground ginger

1/2 teaspoon ground nutmeg

1/2 teaspoon salt

1 (9 inches) unbaked pie crust

How to make Perfect Pumpkin Pie

Step 1: Ready the oven and preheat to 425 degrees F.

Step 2: In a medium bowl, add eggs, spices, salt, and sweetened condensed milk. Whisk until well-blended and the texture becomes smooth and creamy.

Step 3: Transfer the mixture into the prepared crust.

Step 4: Place inside the preheated oven and bake for 15 minutes.

Step 5: After 15 minutes, turn the heat down to 350 degrees F then bake for another 35 to 40 minutes in until a bread knife comes out clean after inserting into the middle part of the pie.

Step 6: Remove from the oven and let it sit on a wire rack to cool to room temperature.

Step 6: Garnish with anything you prefer. Serve and enjoy!

Note: Do not forget to put the leftovers in the fridge.

Perfect Pumpkin Pie

Rebecca I remember this perfect Pumpkin Pie to be the highlight of every family gathering we had when I was a kid. My mom makes this whenever our relatives pay a… Main Dish Recipes Perfect Pumpkin Pie European Print This
Nutrition facts: 200 calories 20 grams fat
Rating: 5.0/5
( 1 voted )

Ingredients

  • 1 (15 ounces) can pumpkin
  • 1 (14 ounces) can EAGLE BRAND(R) Sweetened Condensed Milk
  • 2 large eggs
  • 1 teaspoon ground cinnamon
  • 1/2 teaspoon ground ginger
  • 1/2 teaspoon ground nutmeg
  • 1/2 teaspoon salt
  • 1 (9 inches) unbaked pie crust

Instructions

Step 1: Ready the oven and preheat to 425 degrees F.

Step 2: In a medium bowl, add eggs, spices, salt, and sweetened condensed milk. Whisk until well-blended and the texture becomes smooth and creamy.

Step 3: Transfer the mixture into the prepared crust.

Step 4: Place inside the preheated oven and bake for 15 minutes.

Step 5: After 15 minutes, turn the heat down to 350 degrees F then bake for another 35 to 40 minutes in until a bread knife comes out clean after inserting into the middle part of the pie.

Step 6: Remove from the oven and let it sit on a wire rack to cool to room temperature.

Step 6: Garnish with anything you prefer. Serve and enjoy!

Note: Do not forget to put the leftovers in the fridge.

June 23, 2020 0 comment
0 FacebookTwitterPinterestEmail
Main Dish Recipes

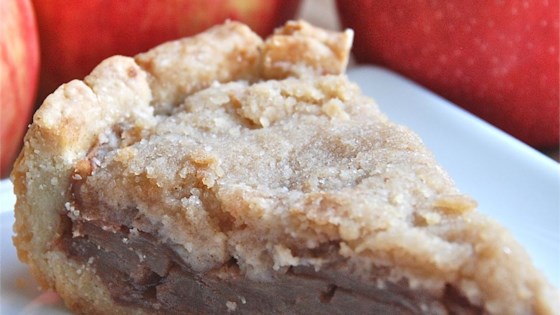
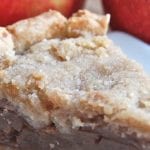
Apple Crumble Pie

by Rebecca June 23, 2020
written by Rebecca

Apples are great but it’s time to make it perfect! Today’s recipe is a combination of sweetness and aroma. I am one hundred percent sure that once you open the oven after 40 minutes or so, your home is gonna smell like heaven! 7 basic ingredients that are easy to find and 6 easy steps to guide you to perfection. I am so glad that I tried this out because my kids love it! It’s something you want to eat on a Sunday afternoon with your loved ones. By the way, this is best served warm with lemon juice or iced tea. I can’t give you more astonishing details about this recipe, you just have to try it yourself. Remember to close your windows once you open the oven to contain that perfect smell from the Pie and to avoid many visitors because once they smell that perfect aroma, they would want a piece of this Apple Crumble Pie! Have fun and you all have an amazing day!

INGREDIENTS

1 (9 inches) deep-dish pie crust

5 cups apples – peeled, cored and thinly sliced

1/2 cup white sugar

3/4 teaspoon ground cinnamon

1/3 cup white sugar

3/4 cup all-purpose flour

6 tablespoons butter

How to make Apple Crumble Pie

Step 1: Ready the oven and preheat 400 degrees F or 200 degrees C.

Step 2: Add the cut apples and arrange them in the uncooked pie shell.

Step 3: In a small bowl, add cinnamon and 1/2 cup of sugar. Whisk until well-mixed then pour the mixture over the sliced apples.

Step 4: In another, all bowl, add flour and 1/3 cup of sugar, and butter. Whisk until the butter is combined with flour or it becomes crumbly. Transfer the mixture into the apple mixture.

Step 5: Place inside the oven and bake for 40 minutes or until the apples are tender and the top part becomes light brown.

Step 6: Remove from the oven. Serve and enjoy!

Apple Crumble Pie

Rebecca Apples are great but it’s time to make it perfect! Today’s recipe is a combination of sweetness and aroma. I am one hundred percent sure that once you open the… Main Dish Recipes Apple Crumble Pie European Print This
Nutrition facts: 200 calories 20 grams fat
Rating: 5.0/5
( 1 voted )

Ingredients

  • 1 (9 inches) deep-dish pie crust
  • 5 cups apples – peeled, cored and thinly sliced
  • 1/2 cup white sugar
  • 3/4 teaspoon ground cinnamon
  • 1/3 cup white sugar
  • 3/4 cup all-purpose flour
  • 6 tablespoons butter

Instructions

Step 1: Ready the oven and preheat 400 degrees F or 200 degrees C.

Step 2: Add the cut apples and arrange them in the uncooked pie shell.

Step 3: In a small bowl, add cinnamon and 1/2 cup of sugar. Whisk until well-mixed then pour the mixture over the sliced apples.

Step 4: In another, all bowl, add flour and 1/3 cup of sugar, and butter. Whisk until the butter is combined with flour or it becomes crumbly. Transfer the mixture into the apple mixture.

Step 5: Place inside the oven and bake for 40 minutes or until the apples are tender and the top part becomes light brown.

Step 6: Remove from the oven. Serve and enjoy!

June 23, 2020 0 comment
0 FacebookTwitterPinterestEmail
Main Dish Recipes

TURTLE CARAMEL CAKE

by Rebecca June 23, 2020
written by Rebecca

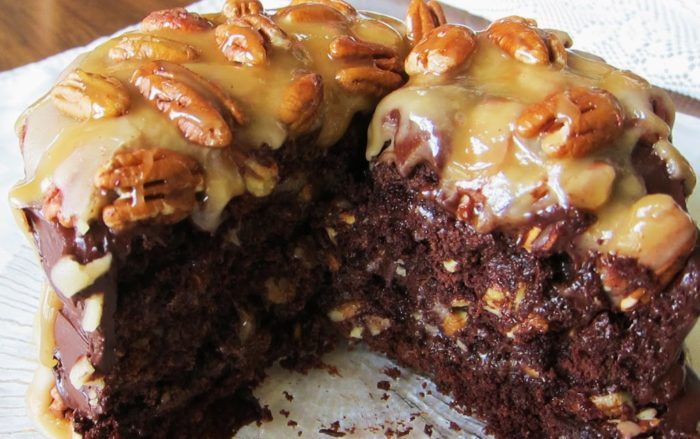
This cake is layered in heavenly rich chocolate, caramel buttercream, caramel sauce, and chopped pecans. A super moist, chocolatey, caramelly, and delicious celebration cake that pleases the crowd.

Well, hello there gorgeous! Would you believe if I tell you that this cake is not difficult to make? It may look intimidating but believe me, you, yeah you can even make such a delicious and pretty cake like that of a pastry shop. I’m no chef but when I first made this Turtle flavored dessert, I nailed it! My secret? I just closely followed the direction below. LOL. This beauty has four layers of moist and fudgy chocolate cake layers, salted caramel buttercream frosting, with a homemade salted caramel pecan sauce. The caramel drip and chopped pecans on top are a masterpiece! I’ve never seen such a pretty concoction in my life! This might need a little practice to perfect but it’s so darn irresistible, tempting, I want to make it over and over again.

INGREDIENTS

1 cup of chocolate chips

2 cups pecans

3/4 cup melted butter

1/2 cup evaporated milk

1 (14 ounces) bags caramels

1 1/3 cups water

1/3 cup oil

3 eggs

1 (18 ounce) boxes German chocolate cake mix

HOW TO MAKE TURTLE CARAMEL CAKE

Step 1: Prepare the oven. Preheat it to 350 degrees.

Step 2: As directed on the package direction, prepare the cake mix and pour half of the batter in a 13 x 9-inch pan.

Step 3: Place inside the preheated oven and bake for about 15 minutes.

Step 4: Once done, remove from the oven and let the cake cool.

Step 5: Place the caramels, milk, and butter in a double boiler. Mix and continue stirring until melted.

Step 6: Drizzle the melted caramel over the cooled cake.

Step 7: Sprinkle a cup of pecans and chocolate chips on top.

Step 8: And pour the remaining batter on top and continue to bake for 20 minutes more.

TURTLE CARAMEL CAKE

Rebecca This cake is layered in heavenly rich chocolate, caramel buttercream, caramel sauce, and chopped pecans. A super moist, chocolatey, caramelly, and delicious celebration cake that pleases the crowd. Well, hello… Main Dish Recipes TURTLE CARAMEL CAKE European Print This
Nutrition facts: 200 calories 20 grams fat
Rating: 5.0/5
( 1 voted )

Ingredients

  • 1 cup of chocolate chips
  • 2 cups pecans
  • 3/4 cup melted butter
  • 1/2 cup evaporated milk
  • 1 (14 ounces) bags caramels
  • 1 1/3 cups water
  • 1/3 cup oil
  • 3 eggs
  • 1 (18 ounce) boxes German chocolate cake mix

Instructions

Step 1: Prepare the oven. Preheat it to 350 degrees.

Step 2: As directed on the package direction, prepare the cake mix and pour half of the batter in a 13 x 9-inch pan.

Step 3: Place inside the preheated oven and bake for about 15 minutes.

Step 4: Once done, remove from the oven and let the cake cool.

Step 5: Place the caramels, milk, and butter in a double boiler. Mix and continue stirring until melted.

Step 6: Drizzle the melted caramel over the cooled cake.

Step 7: Sprinkle a cup of pecans and chocolate chips on top.

Step 8: And pour the remaining batter on top and continue to bake for 20 minutes more.

June 23, 2020 0 comment
0 FacebookTwitterPinterestEmail
Main Dish Recipes

Delicious MEXICAN STUFFED SHELLS

by Rebecca June 23, 2020
written by Rebecca

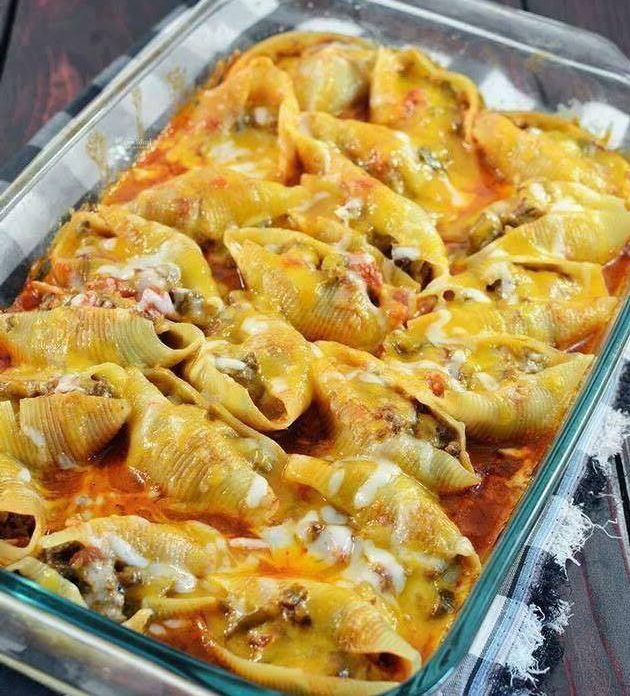
If you are looking for a perfect Mexican-style dinner, then, look no more because this recipe for a Mexican Stuffed shell is all you need. It is a jumbo pasta dish that is filled with everything you love about tacos. It is stuffed with taco meat, covered with shredded cheese that’s beloved by many, and is baked to perfection. I love how creamy this dish is, what more is that you can make this with either chicken or ground beef. It is a traditional Mexican dish that is hearty, comforting, delicious, and a cult favorite!

INGREDIENTS

1 lb ground beef

1 (1 1/4 ounce) package taco seasoning (can use low-sodium)

1 (4 ounces) package cream cheese

14 -16 large pasta shells

1 cup of salsa

1 cup taco sauce (NOT enchilada sauce)

1 cup cheddar cheese, shredded

1 cup Monterey jack cheese, shredded

1 1/2 cups tortilla chips, crushed (optional)

3 green onions, chopped

1 cup sour cream

HOW TO MAKE MEXICAN STUFFED SHELLS

Step 1: Prepare the oven. Preheat it to 350 degrees.

Step 2: Cook the ground beef in a frying pan, then, add in the taco seasoning. Prepare according to the package instructions.

Step 3: Stir in the cream cheese and simmer until the cheese is melted, covered. Make sure to blend thoroughly and set aside to cool completely.

Step 4: Meanwhile, cook the pasta shells following the package instruction and drain.

Step 5: Pour the pasta shells on a baking sheet and set out individually so they don’t stick together.

Step 6: In a 9 x 13-inch baking dish, pour the salsa at the bottom and make sure to stuff each pasta shell with the meat mixture.

Step 7: And place the shells in the dish open side up. Then, cover with taco sauce.

Step 8: Place inside the preheated oven and bake for 30 minutes, covered with foil.

Step 9: After baking for 30 minutes, add sprinkle the shredded cheese and continue baking for 10 to 15 minutes, uncovered.

Step 10: Once done, remove from the oven and top with green onions. Serve with sour cream or more salsa, your choice.

Delicious MEXICAN STUFFED SHELLS

Rebecca If you are looking for a perfect Mexican-style dinner, then, look no more because this recipe for a Mexican Stuffed shell is all you need. It is a jumbo pasta… Main Dish Recipes Delicious MEXICAN STUFFED SHELLS European Print This
Nutrition facts: 200 calories 20 grams fat
Rating: 5.0/5
( 1 voted )

Ingredients

  • 1 lb ground beef
  • 1 (1 1/4 ounce) package taco seasoning (can use low-sodium)
  • 1 (4 ounces) package cream cheese
  • 14 -16 large pasta shells
  • 1 cup of salsa
  • 1 cup taco sauce (NOT enchilada sauce)
  • 1 cup cheddar cheese, shredded
  • 1 cup Monterey jack cheese, shredded
  • 1 1/2 cups tortilla chips, crushed (optional)
  • 3 green onions, chopped
  • 1 cup sour cream

Instructions

Step 1: Prepare the oven. Preheat it to 350 degrees.

Step 2: Cook the ground beef in a frying pan, then, add in the taco seasoning. Prepare according to the package instructions.

Step 3: Stir in the cream cheese and simmer until the cheese is melted, covered. Make sure to blend thoroughly and set aside to cool completely.

Step 4: Meanwhile, cook the pasta shells following the package instruction and drain.

Step 5: Pour the pasta shells on a baking sheet and set out individually so they don't stick together.

Step 6: In a 9 x 13-inch baking dish, pour the salsa at the bottom and make sure to stuff each pasta shell with the meat mixture.

Step 7: And place the shells in the dish open side up. Then, cover with taco sauce.

Step 8: Place inside the preheated oven and bake for 30 minutes, covered with foil.

Step 9: After baking for 30 minutes, add sprinkle the shredded cheese and continue baking for 10 to 15 minutes, uncovered.

Step 10: Once done, remove from the oven and top with green onions. Serve with sour cream or more salsa, your choice.

June 23, 2020 0 comment
0 FacebookTwitterPinterestEmail
Main Dish Recipes

Grandma’s Heavenly Divinity

by Rebecca June 23, 2020
written by Rebecca

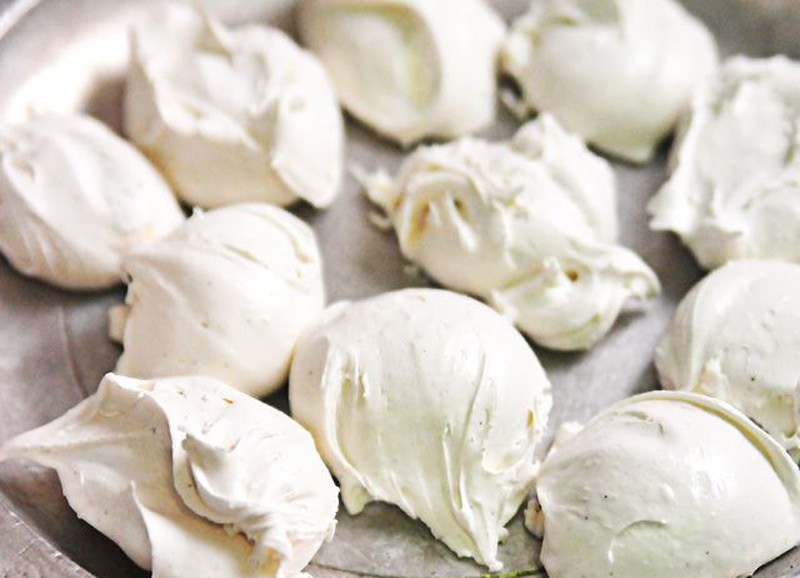
This is the most treasured recipe of my beloved Grandmother. What a sweet and nice lady she was. This is a masterpiece, a perfect Divinity recipe that has been passed around my family for ages. This is too great not share. One important thing though that you guys should remember is that these candies are best made on those days that the humidity is low to no humidity. This recipe is straight from my Grandma’s cookbook. A book which she passed on to my mother, and now to me. To tell you the truth, this is just one of the many recipes she wrote on her treasure book. Whenever I make my Grandma’s Heavenly Divinity I remembered her. How she worked her magic in the kitchen. She was one of a kind, my idol, and my inspiration. This will always have a special in my heart. This Divinity is pure heaven; fluffy, with a cloud-like meringue texture, with some bits of nuts or cherries. A sugary treat to satisfy your sweet tooth.

INGREDIENTS

2 1/2 cups sugar

1/2 cup light corn syrup

1/2 cup water

1/4 teaspoon salt

2 egg whites

1 teaspoon vanilla

1/2 cup chopped pecans (optional) or 1/2 cup cherries (optional)

How to make Grandma’s Heavenly Divinity

Step 1: Combine the sugar, corn syrup, water, and salt in a 2-quart saucepan.

Step 2: Cook in 260 degrees to the hardball stage while stirring until sugar dissolved.

Step 3: Meanwhile, beat the white of the eggs until stiff peaks form.

Step 4: When the temperature of the syrup reached 260 degrees, slowly add in the egg whites while beating with an electric mixer at high speed.

Step 5: Stir in the vanilla for about 4 to 5 minutes or until the candy holds its shape.

Step 6: Mix in some chopped nuts or cherries if desired.

Step 7: Then, immediately drop a teaspoon of the candy onto waxed papers and swirl the top.

Grandma’s Heavenly Divinity

Rebecca This is the most treasured recipe of my beloved Grandmother. What a sweet and nice lady she was. This is a masterpiece, a perfect Divinity recipe that has been passed… Main Dish Recipes Grandma’s Heavenly Divinity European Print This
Nutrition facts: 200 calories 20 grams fat
Rating: 5.0/5
( 1 voted )

Ingredients

  • 2 1/2 cups sugar
  • 1/2 cup light corn syrup
  • 1/2 cup water
  • 1/4 teaspoon salt
  • 2 egg whites
  • 1 teaspoon vanilla
  • 1/2 cup chopped pecans (optional) or 1/2 cup cherries (optional)

Instructions

Step 1: Combine the sugar, corn syrup, water, and salt in a 2-quart saucepan.

Step 2: Cook in 260 degrees to the hardball stage while stirring until sugar dissolved.

Step 3: Meanwhile, beat the white of the eggs until stiff peaks form.

Step 4: When the temperature of the syrup reached 260 degrees, slowly add in the egg whites while beating with an electric mixer at high speed.

Step 5: Stir in the vanilla for about 4 to 5 minutes or until the candy holds its shape.

Step 6: Mix in some chopped nuts or cherries if desired.

Step 7: Then, immediately drop a teaspoon of the candy onto waxed papers and swirl the top.

June 23, 2020 0 comment
0 FacebookTwitterPinterestEmail
Main Dish Recipes

Pistachio Fluff Dessert

by Rebecca June 20, 2020
written by Rebecca

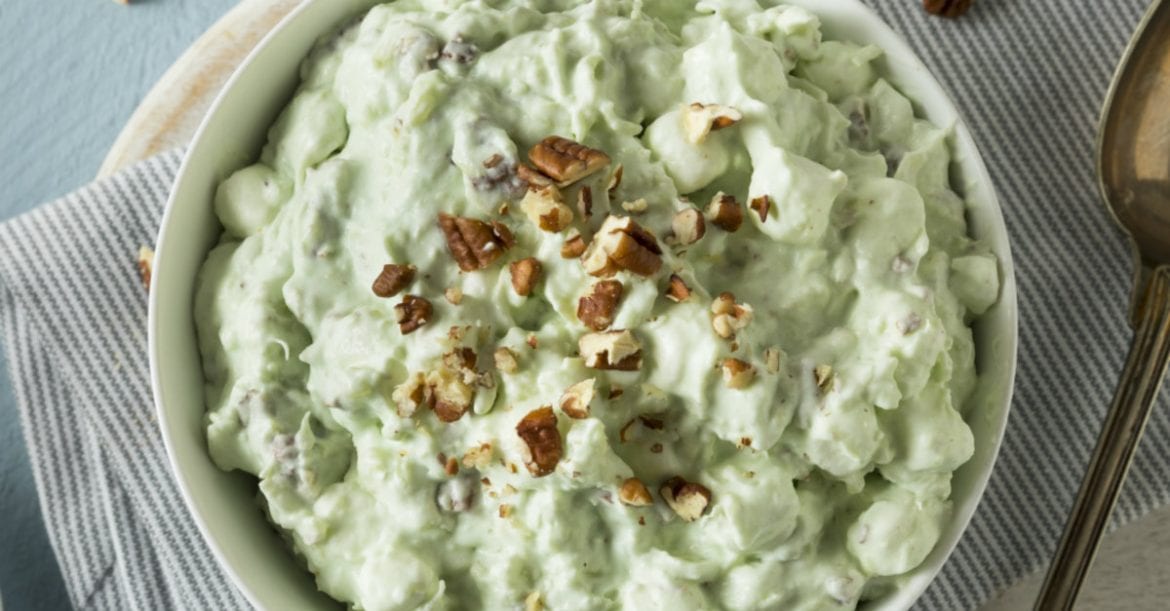
My go-to dessert. I love how simple this Pistachio Fluff is to make, a dump-and-go classic that is incredibly delicious and easy to prepare. I would recommend toasting the walnuts though for a couple of minutes for that added flavor. Trust me this will change everything! Then, dump all the ingredients in a bowl and fold. Pop inside the fridge to chill for an hour or two and you are ready to serve. Easy, right? Everyone wants easy, especially when you end up with a satisfying and deliciously sweet fluff desert. Bonus if you love Pistacho so much just like me.

Ever since I was told that being cheap is not a bad thing. Growing up I realized that it is true. Just like this Pistachio Fluff, it is not only simple to make but it is cost-efficient. Nothing fancy, just a simple, fast, sweet, and satisfying dessert that is amazingly delicious. It is great to bring to any party, potluck, or serve on holidays. It brings memories of my childhood, too. It is my favorite ever since I was young and I am happy that my kids love this fluff as well.

INGREDIENTS

2 packages instant pistachio pudding mix

16 ounces frozen whipped topping, thawed

20 ounces canned crushed pineapple, with juices

1 cup mini marshmallows

1/2 cup walnuts, chopped

How to make Pistachio Fluff Dessert

Step 1: Prepare the oven and heat it to 350 degrees F.

Step 2: Place the walnuts inside the oven and toast them for about 5 to 10 minutes to get that extra flavor. Although, this step is optional.

Step 3: In a large bowl, combine the pudding mix and pineapple.

Step 4: Stir in the marshmallows with the walnuts until incorporated.

Step 5: And fold in the whipped topping until fully coated.

Step 6: Place inside the fridge to chill for at least 1 to 2 hours before serving, covered.

Pistachio Fluff Dessert

Rebecca My go-to dessert. I love how simple this Pistachio Fluff is to make, a dump-and-go classic that is incredibly delicious and easy to prepare. I would recommend toasting the walnuts… Main Dish Recipes Pistachio Fluff Dessert European Print This
Nutrition facts: 200 calories 20 grams fat
Rating: 5.0/5
( 1 voted )

Ingredients

  • 2 packages instant pistachio pudding mix
  • 16 ounces frozen whipped topping, thawed
  • 20 ounces canned crushed pineapple, with juices
  • 1 cup mini marshmallows
  • 1/2 cup walnuts, chopped

Instructions

Step 1: Prepare the oven and heat it to 350 degrees F.

Step 2: Place the walnuts inside the oven and toast them for about 5 to 10 minutes to get that extra flavor. Although, this step is optional.

Step 3: In a large bowl, combine the pudding mix and pineapple.

Step 4: Stir in the marshmallows with the walnuts until incorporated.

Step 5: And fold in the whipped topping until fully coated.

Step 6: Place inside the fridge to chill for at least 1 to 2 hours before serving, covered.

June 20, 2020 0 comment
0 FacebookTwitterPinterestEmail
Newer Posts
Older Posts

Popular Posts

  • 1

    Crispy Crunchy Parmesan Potatoes

    March 21, 2020
  • 2

    CROCK POT SMOTHERED PORK CHOPS

    March 21, 2020
  • Facebook
  • Twitter

@2019 - All Right Reserved.


Back To Top