Cook it once
  • Home
  • Privacy Policy
  • Recipes
    • KETO
    • LC
    • WW
  • Tips
  • Contact
Cook it once
  • Home
  • Privacy Policy
  • Recipes
    • KETO
    • LC
    • WW
  • Tips
  • Contact
Monthly Archives

June 2020

Main Dish Recipes

CHILI RELLENOS CASSEROLE

by Rebecca June 25, 2020
written by Rebecca

Let’s go Mexico! I am a fan of this amazing casserole. It is well seasoned, satisfying, and heartwarming. The flavors bursting inside your mouth in every bite is an experience you will never forget. Delicious!

INGREDIENTS

1 pound ground sirloin

1/2 cup chopped onion

3/4 cup red bell pepper

1 teaspoon olive oil

1/2 teaspoon salt

1/4 teaspoon pepper

1/2 teaspoon garlic powder

1 teaspoon cumin

1/4 teaspoon allspice

2 4 ounce cans chopped green chilis

1 1/2 cups shredded sharp cheddar cheese, and a little more for the top of the casserole

1 cup milk

1/2 cup sour cream

1/4 cup flour

4 eggs beaten

dash of Tobasco

toppings of sour cream, black sliced olives, and chopped green onions

HOW TO MAKE CHILI RELLENOS CASSEROLE

Step 1: Heat the olive oil in a medium-sized skillet. Saute the onion, garlic, and bell pepper. Add in a dash of salt and cook until the onion is translucent.

Step 2: Add in the ground beef and season with salt and pepper. Sprinkle the cumin, allspice, then continue cooking until the beef is browned and cooked through. But do not overcook the beef as it is still going into the oven.

Step 3: Drain away all the fat from the beef mixture by setting your skillet at an angle and use a paper towel to soak up all the grease.

Step 4: Add a can of Achilles in a 9 x 13 x 1 1/2-inch baking dish. Spread the chilis evenly at the bottom of the pan.

Step 5: Spatter over the sharp cheese and pour the drained ground beef mixture on top. Spread evenly.

Step 6: Add in the second can of chilis on top of the meat.

Step 7: Stir the milk, sour cream, flour, salt, pepper, beaten eggs, and a dash of Tobasco in a small mixing bowl. Mix until smooth. Then, pour evenly over the dish.

Step 8: Place inside the oven and bake at 350 degrees for 45 to 50 minutes. Ten minutes before the dish is done, remove from the oven and sprinkle some cheese on top. Return to the oven and continue baking. You can turn the oven on broil if the dish is not brown enough when it hits 50 minutes. It will only take about 5 minutes or so, watch the casserole carefully so it will not burn.

Step 9: Once cooked, remove from the oven and cut into squares before serving. Top with sour cream, black olives, and chopped green onions. Enjoy!

CHILI RELLENOS CASSEROLE

Rebecca Let’s go Mexico! I am a fan of this amazing casserole. It is well seasoned, satisfying, and heartwarming. The flavors bursting inside your mouth in every bite is an experience… Main Dish Recipes CHILI RELLENOS CASSEROLE European Print This
Nutrition facts: 200 calories 20 grams fat
Rating: 4.5/5
( 2 voted )

Ingredients

  • 1 pound ground sirloin
  • 1/2 cup chopped onion
  • 3/4 cup red bell pepper
  • 1 teaspoon olive oil
  • 1/2 teaspoon salt
  • 1/4 teaspoon pepper
  • 1/2 teaspoon garlic powder
  • 1 teaspoon cumin
  • 1/4 teaspoon allspice
  • 2 4 ounce cans chopped green chilis
  • 1 1/2 cups shredded sharp cheddar cheese, and a little more for the top of the casserole
  • 1 cup milk
  • 1/2 cup sour cream
  • 1/4 cup flour
  • 4 eggs beaten
  • dash of Tobasco
  • toppings of sour cream, black sliced olives, and chopped green onions

Instructions

Step 1: Heat the olive oil in a medium-sized skillet. Saute the onion, garlic, and bell pepper. Add in a dash of salt and cook until the onion is translucent.

Step 2: Add in the ground beef and season with salt and pepper. Sprinkle the cumin, allspice, then continue cooking until the beef is browned and cooked through. But do not overcook the beef as it is still going into the oven.

Step 3: Drain away all the fat from the beef mixture by setting your skillet at an angle and use a paper towel to soak up all the grease.

Step 4: Add a can of Achilles in a 9 x 13 x 1 1/2-inch baking dish. Spread the chilis evenly at the bottom of the pan.

Step 5: Spatter over the sharp cheese and pour the drained ground beef mixture on top. Spread evenly.

Step 6: Add in the second can of chilis on top of the meat.

Step 7: Stir the milk, sour cream, flour, salt, pepper, beaten eggs, and a dash of Tobasco in a small mixing bowl. Mix until smooth. Then, pour evenly over the dish.

Step 8: Place inside the oven and bake at 350 degrees for 45 to 50 minutes. Ten minutes before the dish is done, remove from the oven and sprinkle some cheese on top. Return to the oven and continue baking. You can turn the oven on broil if the dish is not brown enough when it hits 50 minutes. It will only take about 5 minutes or so, watch the casserole carefully so it will not burn.

Step 9: Once cooked, remove from the oven and cut into squares before serving. Top with sour cream, black olives, and chopped green onions. Enjoy!


June 25, 2020 0 comment
0 FacebookTwitterPinterestEmail
Main Dish Recipes

Victory’s Taco Tater Tot Casserole

by Rebecca June 25, 2020
written by Rebecca

This casserole is by far the best tater tot casserole I’ve had for years! It’s very easy to make, the ingredients are simple, but the result is superb! My family loves it, they want it either with ketchup or with their favorite taco sauce. This casserole is a real victory, a winner. It is so satisfying, bursting with flavors, and super delicious! Our week will never be complete if I have not served this. This casserole is what my kids are looking forward to every week. This 5-star casserole is to die for! Cheesy, hearty, and mouthwatering. Great for game nights, family dinner, to serve whenever you have guests, and a lot more. This is an impressive Taco Tater Tot Casserole that screams Victory! This casserole never fails to impress the crowd, unquestionably a great dish that everyone loves and thrilled about. Don’t be left behind, try this Tater Tot Casserole and you will be surprised. This is an awesome change from your usual chili.

INGREDIENTS

2 lbs lean ground beef

1 (1 1/4 ounce) package taco seasoning

1 (15 ounce) can corn, drained

1 (10 3/4 ounce) can Fiesta nacho cheese soup

1 (32 ounce) package tater tots

1 (8 ounce) package cheddar cheese

How to make Victory’s Taco Tater Tot Casserole

Step 1: Place the beef in a skillet and cook until browned. Drain any excess fat.

Step 2: Mix in the taco seasoning and water. Let it simmer for about 5 minutes.

Step 3: Add in the corn soup.

Step 4: Pour the mixture into a 9 x 13-inch pan and top it with the tater tots.

Step 5: Place inside the oven and bake at 350 degrees for about 35 minutes.

Step 6: Remove from the oven and sprinkle the cheese over. Then, put the pan back into the oven and bake for 5 minutes more or until the cheese is melted.

Step 7: Once done, remove from the oven and add in some ketchup or taco sauce before serving. Enjoy!

Victory’s Taco Tater Tot Casserole

Rebecca This casserole is by far the best tater tot casserole I’ve had for years! It’s very easy to make, the ingredients are simple, but the result is superb! My family… Main Dish Recipes Victory’s Taco Tater Tot Casserole European Print This
Nutrition facts: 200 calories 20 grams fat
Rating: 4.5/5
( 2 voted )

Ingredients

  • 2 lbs lean ground beef
  • 1 (1 1/4 ounce) package taco seasoning
  • 1 (15 ounce) can corn, drained
  • 1 (10 3/4 ounce) can Fiesta nacho cheese soup
  • 1 (32 ounce) package tater tots
  • 1 (8 ounce) package cheddar cheese

Instructions

Step 1: Place the beef in a skillet and cook until browned. Drain any excess fat.

Step 2: Mix in the taco seasoning and water. Let it simmer for about 5 minutes.

Step 3: Add in the corn soup.

Step 4: Pour the mixture into a 9 x 13-inch pan and top it with the tater tots.

Step 5: Place inside the oven and bake at 350 degrees for about 35 minutes.

Step 6: Remove from the oven and sprinkle the cheese over. Then, put the pan back into the oven and bake for 5 minutes more or until the cheese is melted.

Step 7: Once done, remove from the oven and add in some ketchup or taco sauce before serving. Enjoy!

June 25, 2020 0 comment
0 FacebookTwitterPinterestEmail
Main Dish Recipes

Homemade Peanut Butter Cups

by Rebecca June 25, 2020
written by Rebecca

Two of my favorites in a cup – peanut butter and chocolate! Nothing beats a homemade peanut butter cups made with so much love. Refrigerate them or leave them at room temperature for a creamier and softer bite. Either way, these sweet little cups satisfy my sweet tooth and my nutty cravings. There are many things I love about these cups, first because it is so easy to make even my kids can do it! The ingredients are pretty straightforward, all of them I am sure you already have. They are amazing to give as a do-it-your-own gift. And because I love peanut butter! I can finish a tub of peanut butter in a heartbeat without me even realizing it. Crazy, right? So this Homemade Peanut Butter Cups are perfect for me. They remind me of Reese’s. Before I was so obsessed with Reese’s but figured why not do something similar myself? I mean I still love Reese’s but these cute little homemade cups are so much more amazing! It’s cost-efficient, and I usually make them in batches, I just stash them in the freezer.

INGREDIENTS

1 cup butter, melted

2 cups graham crackers, crushed

2 cups confectioner’s sugar

1 cup peanut butter

1 1/2 cups semi-sweet chocolate chips

4 tablespoons peanut butter

How to make Homemade Peanut Butter Cups

Step 1: Use paper liners to line your muffin tins and grease them with cooking spray.

Step 2: In a bowl, place the butter, graham crackers, confectioner’s sugar, and a cup of peanut butter. Mix well until incorporated.

Step 3: Spoon about 1 – 1 1/2 tablespoons of the mixture into the muffin liners. Pressing the mixture into the bottom of the greased liners.

Step 4: Melt the chocolate chips with 4 tablespoons of peanut butter.

Step 5: Once melted, spoon the filling over the liners. Use a spoon to smooth the tops of the cups.

Step 6: Then, put the muffin tins inside the fridge to set.

Homemade Peanut Butter Cups

Rebecca Two of my favorites in a cup – peanut butter and chocolate! Nothing beats a homemade peanut butter cups made with so much love. Refrigerate them or leave them at… Main Dish Recipes Homemade Peanut Butter Cups European Print This
Nutrition facts: 200 calories 20 grams fat
Rating: 5.0/5
( 1 voted )

Ingredients

  • 1 cup butter, melted
  • 2 cups graham crackers, crushed
  • 2 cups confectioner’s sugar
  • 1 cup peanut butter
  • 1 1/2 cups semi-sweet chocolate chips
  • 4 tablespoons peanut butter

Instructions

Step 1: Use paper liners to line your muffin tins and grease them with cooking spray.

Step 2: In a bowl, place the butter, graham crackers, confectioner's sugar, and a cup of peanut butter. Mix well until incorporated.

Step 3: Spoon about 1 - 1 1/2 tablespoons of the mixture into the muffin liners. Pressing the mixture into the bottom of the greased liners.

Step 4: Melt the chocolate chips with 4 tablespoons of peanut butter.

Step 5: Once melted, spoon the filling over the liners. Use a spoon to smooth the tops of the cups.

Step 6: Then, put the muffin tins inside the fridge to set.


June 25, 2020 0 comment
0 FacebookTwitterPinterestEmail
Main Dish Recipes

Wedding Potatoes

by Rebecca June 25, 2020
written by Rebecca

These amazing potatoes will blow your minds! I have known this recipe since I was a kid. See, my mom is a chef. In her younger years, she used to cook for different kinds of occasions. Birthdays, graduations, and even weddings. This recipe is one of her best sellers. As simple as it is, it was one of the best Potato recipe I have ever tasted. I remember the first time I tasted this. I think it was on my 8th birthday. I remember eating only this instead of the different foods that day. I don’t know but it had an amazing taste to it that I couldn’t stop eating it. That was the day it became my favorite food ever! Give it a try friends and I am 100 percent sure that this will be a part of your list of top foods to eat on pretty much every day! Enjoy!

INGREDIENTS

2 lbs hash browns

1/2 cup butter

2 (10 3/4 ounce) cans condensed cream of chicken soup

1-pint sour cream (or Greek Yogurt)

1/2 teaspoon salt

3/4 cup onion, chopped

1 tablespoon butter

2 cups longhorn cheese, grated, firmly packed

1 1/2 cups corn flakes, crushed

4 tablespoons butter, melted

How to make Wedding Potatoes

Step 1: Place a casserole on the stove and turn the heat to medium. Add in the 1 tablespoon of butter and let it melt. Add in the chopped onions and saute until translucent.

Step 2: Add in all the ingredients except from the 4 tablespoons of butter and cornflakes.

Step 3: Pour the potato mixture into the 9×13-inch baking pan.

Step 4: Mix butter and cornflakes. Spread the mixture on top of the casserole.

Step 5: Place inside the oven and bake for 40 to 50 minutes at 350 degrees F. Once the texture is bubbly, you’re done!

Step 6: Remove from the oven and let it sit on a wire rack.

Step 7: Serve hot and enjoy!

Wedding Potatoes

Rebecca These amazing potatoes will blow your minds! I have known this recipe since I was a kid. See, my mom is a chef. In her younger years, she used to… Main Dish Recipes Wedding Potatoes European Print This
Nutrition facts: 200 calories 20 grams fat
Rating: 5.0/5
( 1 voted )

Ingredients

  • 2 lbs hash browns
  • 1/2 cup butter
  • 2 (10 3/4 ounce) cans condensed cream of chicken soup
  • 1-pint sour cream (or Greek Yogurt)
  • 1/2 teaspoon salt
  • 3/4 cup onion, chopped
  • 1 tablespoon butter
  • 2 cups longhorn cheese, grated, firmly packed
  • 1 1/2 cups corn flakes, crushed
  • 4 tablespoons butter, melted

Instructions

Step 1: Place a casserole on the stove and turn the heat to medium. Add in the 1 tablespoon of butter and let it melt. Add in the chopped onions and saute until translucent.

Step 2: Add in all the ingredients except from the 4 tablespoons of butter and cornflakes.

Step 3: Pour the potato mixture into the 9x13-inch baking pan.

Step 4: Mix butter and cornflakes. Spread the mixture on top of the casserole.

Step 5: Place inside the oven and bake for 40 to 50 minutes at 350 degrees F. Once the texture is bubbly, you're done!

Step 6: Remove from the oven and let it sit on a wire rack.

Step 7: Serve hot and enjoy!

June 25, 2020 0 comment
0 FacebookTwitterPinterestEmail
Main Dish Recipes

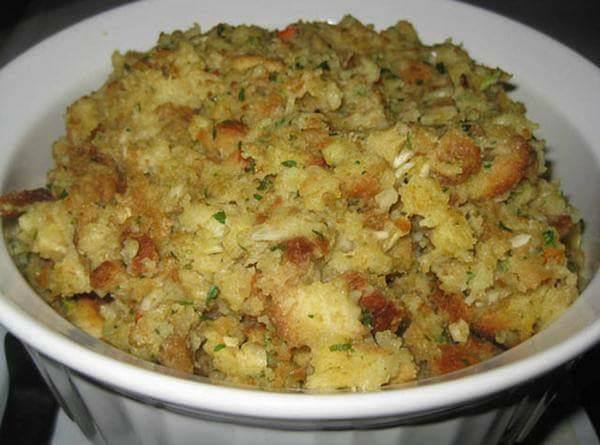
My Mom’s Perfect Thanksgiving Stuffing

by Rebecca June 25, 2020
written by Rebecca

A perfect stuffing to make an excellent turkey will make or break your Thanksgiving. Worry no more because My Mom’s Perfect Thanksgiving Stuffing got you covered.

INGREDIENTS

1 onion, diced

1 green pepper, diced

1 cup butter

3/4 cup diced celery (celery seed can be used, maybe a teaspoon or so)

2 eggs, beaten

2 cups canned chicken broth

1 16 oz. bag of pepperidge farm herbed seasoned stuffing (is crumbs, not cubes or croutons and is sold in a blue & white bag)

1 16-20 oz. bag soft bread cubes

garlic

poultry seasoning

fresh parsley or dried parsley flakes

1/2 teaspoon oregano

1 Reynolds turkey-sized baking bag

How to make My Mom’s Perfect Thanksgiving Stuffing

Step 1: Place the bag of bread crumbs with the Pepperidge Farm herbed seasoned stuffing into a large bowl and mix well. Set aside.

Step 2: Melt the butter in a frypan over medium-high heat. Saute the onions, green pepper, and celery. Cook until soft and translucent.

Step 3: Carefully pour the melted butter with the vegetables over the bread cubes and crumbs. And Mix in the 2 beaten eggs. Mix until incorporated.

Step 4: Add in a teaspoon of garlic powder, poultry seasoning, 2 tablespoons of dried parsley, and a tablespoon of oregano. Mix until well combined.

Step 5: Pour the chicken broth over the mixture making sure that the stuffing absorbs all of the liquid. You don’t want it though to be downright wet, just a little more than damp to make sure that it doesn’t dry out when baking.

Step 6: Thoroughly mix to make sure that the ingredients are incorporated.

Step 7: Stuff the turkey, make sure to pack both ends tightly but not too tight. Refrigerate any leftover stuffing. You can put the leftover in the oven along with the turkey exactly 45 minutes before the turkey is done for extra stuffing.

Step 8: Rub the softened butter all over the turkey using your fingers until coated. Sprinkle a bit of paprika over the entire turkey.

Step 9: Before you put the turkey inside the baking bag, first put 2 tablespoons of flour inside the bag. Then, push the turkey into the bag, close tightly, and make 3 slits across the top of the bag for ventilation. Place the baking bag with the turkey in it into a roaster pan. Cover and bake. The baking time depends on the size of the turkey you are using.

Cook’s note: Since you are using a baking bag, no basting is required, although, you can baste it still (your choice) one or two times when baking. The baking bag also ut the baking time by 3 or 4 hours to an hour while still holding in the juices and keeping the turkey moist and juicy.

My Mom’s Perfect Thanksgiving Stuffing

Rebecca A perfect stuffing to make an excellent turkey will make or break your Thanksgiving. Worry no more because My Mom’s Perfect Thanksgiving Stuffing got you covered. INGREDIENTS 1 onion, diced… Main Dish Recipes My Mom’s Perfect Thanksgiving Stuffing European Print This
Nutrition facts: 200 calories 20 grams fat
Rating: 5.0/5
( 1 voted )

Ingredients

  • 1 onion, diced
  • 1 green pepper, diced
  • 1 cup butter
  • 3/4 cup diced celery (celery seed can be used, maybe a teaspoon or so)
  • 2 eggs, beaten
  • 2 cups canned chicken broth
  • 1 16 oz. bag of pepperidge farm herbed seasoned stuffing (is crumbs, not cubes or croutons and is sold in a blue & white bag)
  • 1 16-20 oz. bag soft bread cubes
  • garlic
  • poultry seasoning
  • fresh parsley or dried parsley flakes
  • 1/2 teaspoon oregano
  • 1 Reynolds turkey-sized baking bag

Instructions

Step 1: Place the bag of bread crumbs with the Pepperidge Farm herbed seasoned stuffing into a large bowl and mix well. Set aside.

Step 2: Melt the butter in a frypan over medium-high heat. Saute the onions, green pepper, and celery. Cook until soft and translucent.

Step 3: Carefully pour the melted butter with the vegetables over the bread cubes and crumbs. And Mix in the 2 beaten eggs. Mix until incorporated.

Step 4: Add in a teaspoon of garlic powder, poultry seasoning, 2 tablespoons of dried parsley, and a tablespoon of oregano. Mix until well combined.

Step 5: Pour the chicken broth over the mixture making sure that the stuffing absorbs all of the liquid. You don't want it though to be downright wet, just a little more than damp to make sure that it doesn't dry out when baking.

Step 6: Thoroughly mix to make sure that the ingredients are incorporated.

Step 7: Stuff the turkey, make sure to pack both ends tightly but not too tight. Refrigerate any leftover stuffing. You can put the leftover in the oven along with the turkey exactly 45 minutes before the turkey is done for extra stuffing.

Step 8: Rub the softened butter all over the turkey using your fingers until coated. Sprinkle a bit of paprika over the entire turkey.

Step 9: Before you put the turkey inside the baking bag, first put 2 tablespoons of flour inside the bag. Then, push the turkey into the bag, close tightly, and make 3 slits across the top of the bag for ventilation. Place the baking bag with the turkey in it into a roaster pan. Cover and bake. The baking time depends on the size of the turkey you are using.

Cook's note: Since you are using a baking bag, no basting is required, although, you can baste it still (your choice) one or two times when baking. The baking bag also ut the baking time by 3 or 4 hours to an hour while still holding in the juices and keeping the turkey moist and juicy.

June 25, 2020 0 comment
0 FacebookTwitterPinterestEmail
Main Dish Recipes

Twice Baked Potato Casserole

by Rebecca June 25, 2020
written by Rebecca

This is the best way to eat potatoes! I have never tasted anything like this before. I am so glad that I tried it out because I never would have known how awesome this recipe is. I only discovered this recipe through a friend. To Maya, thank you for this! I am so excited to share this with you today. Everyone needs to get a bite of this incredible dish so here you go. Enjoy!

INGREDIENTS

8 medium russet potatoes, scrubbed

2 tablespoons olive oil

1 lb bacon, cooked, crumbled, and divided

2 cups sharp cheddar cheese, grated and divided

1/2 cup mayonnaise

1 cup sour cream

6 green onions, sliced and divided

Kosher salt and freshly ground black pepper, to taste

How to make Twice Baked Potato Casserole

Step 1: Ready the oven and preheat to 400 degrees F.

Step 2: Apply cooking spray in a 9×9-inch baking dish.

Step 3: Rub olive oil all over the potatoes and season with a little salt.

Step 4: Put the greased and season potatoes in the prepared baking dish and place inside the oven. Bake for 45 to 60 minutes. Flip the potatoes halfway to 45 or 60 minutes.

Step 5: Reduce the temperature to 350 degrees F.

Step 6: Remove the potatoes from the oven.

Step 7: Slice the potatoes into small cuts. Put them on a clean large bowl.

Step 8: Pour sour cream and mayonnaise and stir until the potatoes are fully covered.

Step 9: Toss in 3/4 bacon, 3/4 green onion, 1 1/2 cups of cheese. Stir until all ingredients are well combined.

Step 10: Transfer the mixture into the prepared baking dish. Sprinkle the remaining cheese and bacon on top.

Step 11: Cover the baking dish with aluminum foil and place inside the oven. Bake for 20 minutes then remove the cover and bake for another 10 minutes until the cheese is completely melted.

Step 12: Remove from the oven and let it sit on a wire rack. Sprinkle green onions.

Step 13: Serve hot and enjoy!

Twice Baked Potato Casserole

Rebecca This is the best way to eat potatoes! I have never tasted anything like this before. I am so glad that I tried it out because I never would have… Main Dish Recipes Twice Baked Potato Casserole European Print This
Nutrition facts: 200 calories 20 grams fat
Rating: 5.0/5
( 1 voted )

Ingredients

  • 8 medium russet potatoes, scrubbed
  • 2 tablespoons olive oil
  • 1 lb bacon, cooked, crumbled, and divided
  • 2 cups sharp cheddar cheese, grated and divided
  • 1/2 cup mayonnaise
  • 1 cup sour cream
  • 6 green onions, sliced and divided
  • Kosher salt and freshly ground black pepper, to taste

Instructions

Step 1: Ready the oven and preheat to 400 degrees F.

Step 2: Apply cooking spray in a 9x9-inch baking dish.

Step 3: Rub olive oil all over the potatoes and season with a little salt.

Step 4: Put the greased and season potatoes in the prepared baking dish and place inside the oven. Bake for 45 to 60 minutes. Flip the potatoes halfway to 45 or 60 minutes.

Step 5: Reduce the temperature to 350 degrees F.

Step 6: Remove the potatoes from the oven.

Step 7: Slice the potatoes into small cuts. Put them on a clean large bowl.

Step 8: Pour sour cream and mayonnaise and stir until the potatoes are fully covered.

Step 9: Toss in 3/4 bacon, 3/4 green onion, 1 1/2 cups of cheese. Stir until all ingredients are well combined.

Step 10: Transfer the mixture into the prepared baking dish. Sprinkle the remaining cheese and bacon on top.

Step 11: Cover the baking dish with aluminum foil and place inside the oven. Bake for 20 minutes then remove the cover and bake for another 10 minutes until the cheese is completely melted.

Step 12: Remove from the oven and let it sit on a wire rack. Sprinkle green onions.

Step 13: Serve hot and enjoy!


June 25, 2020 0 comment
0 FacebookTwitterPinterestEmail
Main Dish Recipes

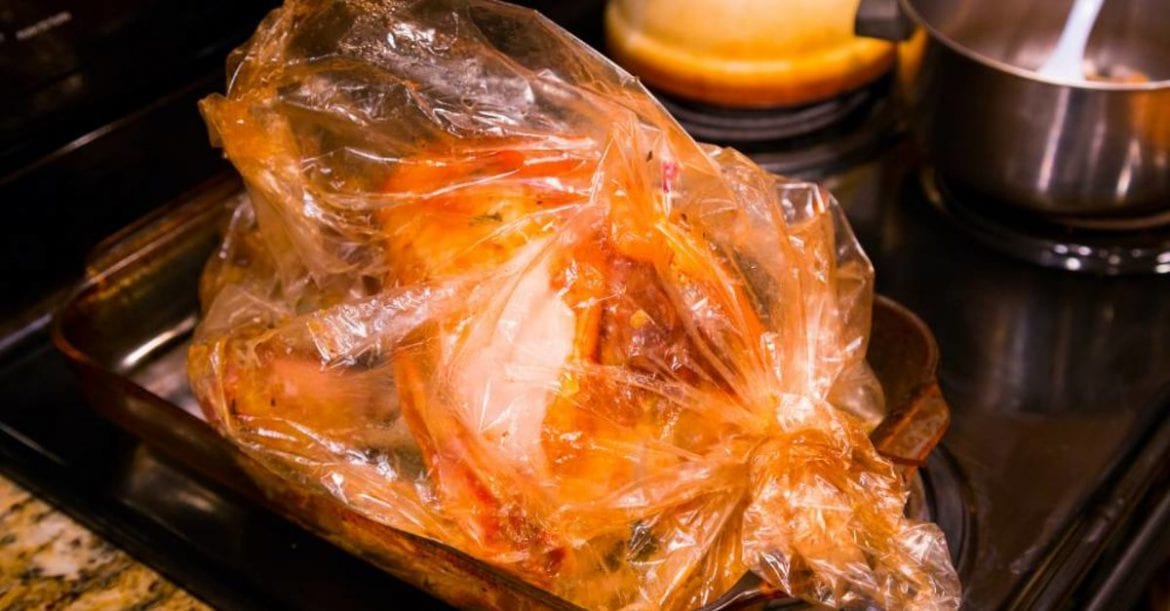
How To Cook A Turkey In A Roasting Bag

by Rebecca June 25, 2020
written by Rebecca

Thanksgiving is gonna be awesome with this amazing recipe! Last year I made this and it was a hit! My family, especially my youngest kid, loved it. It was the best thanksgiving and I hope this year would be perfect as well. Anyway, I have listed all the steps you need to follow to achieve perfection. Enjoy and advanced Happy Thanksgiving!

INGREDIENTS

1 oven roasting bag, 19×23 ½-inch

1 turkey (8 to 24-pounds), thawed, giblets and neck removed, rinsed and dried

2 tablespoons butter, melted

1 large onion, quartered

4 – 6 cloves garlic, peeled

3 carrots, peeled and cut into 1-inch pieces

1 tablespoon all-purpose flour

1 tablespoon coarse salt

1 teaspoon black pepper

1 teaspoon poultry seasoning

1 teaspoon paprika

½ teaspoon crushed red pepper flakes

½ teaspoon ground ginger

1 teaspoon dried thyme

How To Cook A Turkey In A Roasting Bag

Step 1: Ready the oven and preheat to 350 degrees F.

Step 2: Combine dried thyme, ground ginger, crushed red pepper flakes, paprika, poultry seasoning, salt, and pepper in a medium bowl. Stir until well-mixed.

Step 3: Add flour in the roasting bag then put the bag in a big 2-inch roasting pan.

Step 4: Add in the garlic cloves, sliced carrot, and onion wedges inside the roasting bag.

Step 5: Spread butter on the turkey then rub seasoning mix all over the turkey.

Step 6: Put the coated turkey inside the roasting bag on top of the carrots and onions.

Step 7: Close the roasting bag and cook in twine then slit 4 or 6 holes on the roasting bag.

Step 8: Place the roasting pan inside the oven and bake. Bake time depends on the weight of the turkey as I have listed below.

Step 9: Check if the turkey reaches 180 degrees F on the thickest portion of the thigh part and remove it from the oven. Let it sit inside the bag for 15 minutes for the turkey to incorporate all the juices.

Step 10: Carve the turkey and serve! Enjoy!

Use a carving fork to lift turkey from bag and transfer to a carving board. Carve and enjoy!

Turkey Cooking Time:

1 1/2-2 hours – 8-12 lb turkey
2-2 1/2 hours  12-16 lb turkey
2 1/2-3 hours – 16-20 lb turkey
3-3 1/2 hours – 20-24 lb turkey

How To Cook A Turkey In A Roasting Bag

Rebecca Thanksgiving is gonna be awesome with this amazing recipe! Last year I made this and it was a hit! My family, especially my youngest kid, loved it. It was the… Main Dish Recipes How To Cook A Turkey In A Roasting Bag European Print This
Nutrition facts: 200 calories 20 grams fat
Rating: 5.0/5
( 1 voted )

Ingredients

  • 1 oven roasting bag, 19×23 ½-inch
  • 1 turkey (8 to 24-pounds), thawed, giblets and neck removed, rinsed and dried
  • 2 tablespoons butter, melted
  • 1 large onion, quartered
  • 4 - 6 cloves garlic, peeled
  • 3 carrots, peeled and cut into 1-inch pieces
  • 1 tablespoon all-purpose flour
  • 1 tablespoon coarse salt
  • 1 teaspoon black pepper
  • 1 teaspoon poultry seasoning
  • 1 teaspoon paprika
  • ½ teaspoon crushed red pepper flakes
  • ½ teaspoon ground ginger
  • 1 teaspoon dried thyme

Instructions

Step 1: Ready the oven and preheat to 350 degrees F.

Step 2: Combine dried thyme, ground ginger, crushed red pepper flakes, paprika, poultry seasoning, salt, and pepper in a medium bowl. Stir until well-mixed.

Step 3: Add flour in the roasting bag then put the bag in a big 2-inch roasting pan.

Step 4: Add in the garlic cloves, sliced carrot, and onion wedges inside the roasting bag.

Step 5: Spread butter on the turkey then rub seasoning mix all over the turkey.

Step 6: Put the coated turkey inside the roasting bag on top of the carrots and onions.

Step 7: Close the roasting bag and cook in twine then slit 4 or 6 holes on the roasting bag.

Step 8: Place the roasting pan inside the oven and bake. Bake time depends on the weight of the turkey as I have listed below.

Step 9: Check if the turkey reaches 180 degrees F on the thickest portion of the thigh part and remove it from the oven. Let it sit inside the bag for 15 minutes for the turkey to incorporate all the juices.

Step 10: Carve the turkey and serve! Enjoy!

Use a carving fork to lift turkey from bag and transfer to a carving board. Carve and enjoy!

Turkey Cooking Time:

1 1/2-2 hours - 8-12 lb turkey
2-2 1/2 hours  12-16 lb turkey
2 1/2-3 hours - 16-20 lb turkey
3-3 1/2 hours - 20-24 lb turkey

June 25, 2020 0 comment
0 FacebookTwitterPinterestEmail
Main Dish Recipes

Cinnamon Sugared Pecans

by Rebecca June 25, 2020
written by Rebecca

Imagine how good these cinnamon sugared pecans taste? And the smell when they are in the oven is heaven! Gosh, they are wonderful, delicious, and the easiest and quickest to make. A real handy to make a bunch for later snacking and for everybody! This is my favorite treat, satisfy my sweet tooth in a nutty way, and my go-to midday snack. All you need are some simple ingredients, toss them together, bake, and voilà you got yourself a sweet, cinnamon-spiced, and perfectly chewy coated pecans.

Who would have thought that such a simple treat can be so awesome and addictive? I love pecans even when I was a child. Everything with pecans I try to copy and this is one of those recipes that I have been keeping all these years. Not only that it is so easy and quick to make but this treat is so tempting, the taste and the smell are so irresistible. The cinnamon caramel coating is insanely good. Although you can use almonds, I prefer pecans more because they are more delicate and have more cracks and crevices for the sugar mixture to coat. This is a simple, mouthwatering treat that everyone can make.

INGREDIENTS

1 egg white

4 cups pecans

1/2 cup white sugar

2 teaspoons ground cinnamon

1/2 teaspoon salt

How to make Cinnamon Sugared Pecans

Step 1: Prepare the oven. Preheat it to 325 degrees F or 165 degrees C.

Step 2: In a large bowl, beat the egg white using an electric mixer until foamy.

Step 3: Stir in the pecans until they are thoroughly coated.

Step 4: In another bowl, place the sugar, cinnamon, and salt. Mix until well combined.

Step 5: Add in the pecans and mix until well coated.

Step 6: Pour and evenly spread the coated pecans onto the baking sheet.

Step 7: Place inside the preheated oven and bake for about 25 minutes or until crisp and fragrant.

Cinnamon Sugared Pecans

Rebecca Imagine how good these cinnamon sugared pecans taste? And the smell when they are in the oven is heaven! Gosh, they are wonderful, delicious, and the easiest and quickest to… Main Dish Recipes Cinnamon Sugared Pecans European Print This
Nutrition facts: 200 calories 20 grams fat
Rating: 5.0/5
( 1 voted )

Ingredients

  • 1 egg white
  • 4 cups pecans
  • 1/2 cup white sugar
  • 2 teaspoons ground cinnamon
  • 1/2 teaspoon salt

Instructions

Step 1: Prepare the oven. Preheat it to 325 degrees F or 165 degrees C.

Step 2: In a large bowl, beat the egg white using an electric mixer until foamy.

Step 3: Stir in the pecans until they are thoroughly coated.

Step 4: In another bowl, place the sugar, cinnamon, and salt. Mix until well combined.

Step 5: Add in the pecans and mix until well coated.

Step 6: Pour and evenly spread the coated pecans onto the baking sheet.

Step 7: Place inside the preheated oven and bake for about 25 minutes or until crisp and fragrant.

June 25, 2020 0 comment
0 FacebookTwitterPinterestEmail
Main Dish Recipes

Grandma’s Homemade Potato Soup

by Rebecca June 25, 2020
written by Rebecca

Grandma’s Homemade Potato Soup is super comforting, the easiest and the tastiest you’ll ever sink your spoon into. It is satisfying and the best homemade potato soup.

There are also a lot of variation you will enjoy:

Potato Soup with Cajun Sauce: Slice into 1-inch pieces a one pound andouille sausage. Cook in oil until browned and set aside.

Cheesy Ham and Potato Soup: Add 2 cups of smoked ham into the cubed potatoes. Stir in 1 1/2 cups of shredded cheddar cheese just before serving and cook until melted.

Instant Pot or Electronic Pressure Cooker: Prepare the potatoes as instructed and set aside. Meanwhile, melt the butter, then, add in the potato mixture and toss to coat. Pour just enough water or chicken broth plus an inch to cover the potatoes. Gradually stir in half of the milk and cover to cook on high for 10 minutes. After 10 minutes, let the pressure release and open the pot to mash the potatoes. Stir in the rest of the milk and add the chicken broth or water as needed to reach your desired consistency. Garnish with cheese.

So there you go. Choose whatever variation works for you, either way, it is going to be amazing!

INGREDIENTS

2 pounds of russet potatoes, peeled and cut into large chunks (about 1-1/2 inch)

1/2 cup of chopped sweet onion

1/2 cup chopped celery

3 tablespoons all-purpose flour

Kosher salt and freshly cracked black pepper, to taste

1/4 to 1/2 cup (1/2 to 1 stick) salted butter

Water to cover

1 (12 ounce) can evaporated milk

Shredded cheese, for garnish, optional

How to make Grandma’s Homemade Potato Soup

Step 1: Mix the potatoes, onion, celery, flour, salt, and pepper for 10 minutes and set aside.

Step 2: Melt the butter in a soup pot or Dutch oven. Then, add in the potato mixture and stir until coated thoroughly. Pour enough water just to cover the potatoes, heat, and bring to a boil. Once boiling, stir in the milk and reduce to a simmer. Cook uncovered while stirring occasionally for 25 to 30 minutes or until the potatoes are soft. Adjust according to taste and continue to cook, uncovered, until you reach your desired consistency.

Step 3: Garnish with shredded cheese. Serve immediately. Enjoy!

Cook’s Notes: If you want your potatoes less chunky, you can use an immersion blender or potato masher to puree the potatoes. You can also use some green onions. Even garnish it with crumbled bacon for that extra crunch and flavor.

Grandma’s Homemade Potato Soup

Rebecca Grandma’s Homemade Potato Soup is super comforting, the easiest and the tastiest you’ll ever sink your spoon into. It is satisfying and the best homemade potato soup. There are also… Main Dish Recipes Grandma’s Homemade Potato Soup European Print This
Nutrition facts: 200 calories 20 grams fat
Rating: 5.0/5
( 2 voted )

Ingredients

  • 2 pounds of russet potatoes, peeled and cut into large chunks (about 1-1/2 inch)
  • 1/2 cup of chopped sweet onion
  • 1/2 cup chopped celery
  • 3 tablespoons all-purpose flour
  • Kosher salt and freshly cracked black pepper, to taste
  • 1/4 to 1/2 cup (1/2 to 1 stick) salted butter
  • Water to cover
  • 1 (12 ounce) can evaporated milk
  • Shredded cheese, for garnish, optional

Instructions

Step 1: Mix the potatoes, onion, celery, flour, salt, and pepper for 10 minutes and set aside.

Step 2: Melt the butter in a soup pot or Dutch oven. Then, add in the potato mixture and stir until coated thoroughly. Pour enough water just to cover the potatoes, heat, and bring to a boil. Once boiling, stir in the milk and reduce to a simmer. Cook uncovered while stirring occasionally for 25 to 30 minutes or until the potatoes are soft. Adjust according to taste and continue to cook, uncovered, until you reach your desired consistency.

Step 3: Garnish with shredded cheese. Serve immediately. Enjoy!

Cook’s Notes: If you want your potatoes less chunky, you can use an immersion blender or potato masher to puree the potatoes. You can also use some green onions. Even garnish it with crumbled bacon for that extra crunch and flavor.

June 25, 2020 0 comment
0 FacebookTwitterPinterestEmail
Main Dish Recipes

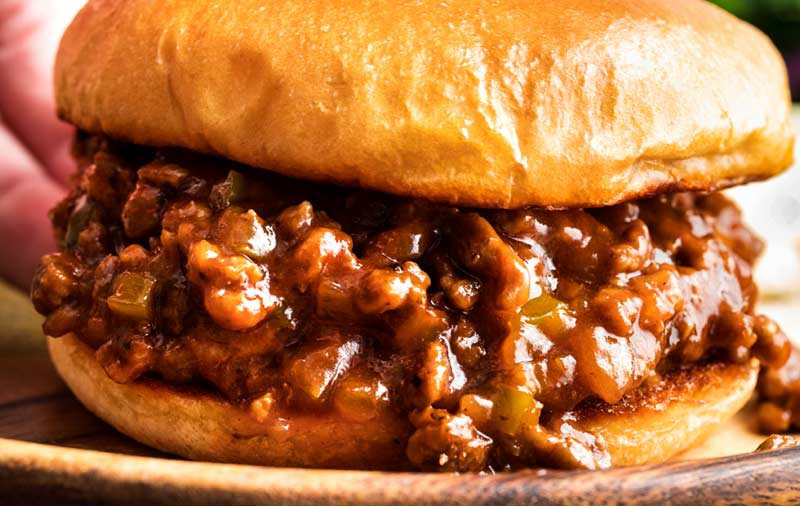
HOMEMADE SLOPPY JOES

by Rebecca June 25, 2020
written by Rebecca

I woke up today feeling under the weather. Man, the weather is darn crazy these past few days. Just like yesterday, when I stepped out of the house the sun was burning and then it suddenly rained. When I woke up earlier I was so weak to even stand up, but hey the husband is here so he prepared my favorite. Homemade Sloppy Joes! This beauty cheered me up like crazy! The sweet and savory combination is insanely good, messy but satisfying. My husband nailed it! Not too sweet, not too spicy, just perfectly balanced Sloppy Joes to cheer me up! This homemade sloppy joe is the best in history! Mouthwatering and super delicious!

INGREDIENTS

1 tablespoon butter

1 teaspoon olive oil

1 lb. ground beef

1/3 green bell pepper, minced

1/2 large yellow onion, minced

3 cloves garlic, minced

1 tablespoon tomato paste

2/3 cup ketchup

1/3 cup water

1 tablespoon brown sugar

1 teaspoon yellow mustard

3/4 teaspoon chili powder

1/2 teaspoon Worcestershire sauce

1/2 teaspoon kosher salt

1/4 teaspoon red pepper flakes (optional)

1/4 teaspoon black pepper

dash of hot sauce (optional)

HOW TO MAKE HOMEMADE SLOPPY JOES

Step 1: In a large skillet, melt the butter over medium-high heat. Add in the beef, break it into crumbles, and cook for about 5 minutes until browned. Drain any excess fat.

Step 2: Saute the onion and bell pepper in the same skillet for 2 to 3 minutes until tender. Then, add in the garlic and cook for 30 seconds until fragrant. Put the beef back into the skillet and pour the tomato paste. Stir until incorporated.

Step 3: Stir in the ketchup, water, brown sugar, mustard, chili powder, Worcestershire sauce, salt, red pepper flakes, and black pepper. Mix the ingredients until well combined.

Step 4: Cook for 10 to 15 minutes over medium heat or until the mixture reached your desired consistency. Once done, remove from the heat and serve immediately with toasted buns. Enjoy!

HOMEMADE SLOPPY JOES

Rebecca I woke up today feeling under the weather. Man, the weather is darn crazy these past few days. Just like yesterday, when I stepped out of the house the sun… Main Dish Recipes HOMEMADE SLOPPY JOES European Print This
Nutrition facts: 200 calories 20 grams fat
Rating: 5.0/5
( 1 voted )

Ingredients

  • 1 tablespoon butter
  • 1 teaspoon olive oil
  • 1 lb. ground beef
  • 1/3 green bell pepper, minced
  • 1/2 large yellow onion, minced
  • 3 cloves garlic, minced
  • 1 tablespoon tomato paste
  • 2/3 cup ketchup
  • 1/3 cup water
  • 1 tablespoon brown sugar
  • 1 teaspoon yellow mustard
  • 3/4 teaspoon chili powder
  • 1/2 teaspoon Worcestershire sauce
  • 1/2 teaspoon kosher salt
  • 1/4 teaspoon red pepper flakes (optional)
  • 1/4 teaspoon black pepper
  • dash of hot sauce (optional)

Instructions

Step 1: In a large skillet, melt the butter over medium-high heat. Add in the beef, break it into crumbles, and cook for about 5 minutes until browned. Drain any excess fat.

Step 2: Saute the onion and bell pepper in the same skillet for 2 to 3 minutes until tender. Then, add in the garlic and cook for 30 seconds until fragrant. Put the beef back into the skillet and pour the tomato paste. Stir until incorporated.

Step 3: Stir in the ketchup, water, brown sugar, mustard, chili powder, Worcestershire sauce, salt, red pepper flakes, and black pepper. Mix the ingredients until well combined.

Step 4: Cook for 10 to 15 minutes over medium heat or until the mixture reached your desired consistency. Once done, remove from the heat and serve immediately with toasted buns. Enjoy!

June 25, 2020 0 comment
0 FacebookTwitterPinterestEmail
Newer Posts
Older Posts

Popular Posts

  • 1

    Crispy Crunchy Parmesan Potatoes

    March 21, 2020
  • 2

    CROCK POT SMOTHERED PORK CHOPS

    March 21, 2020
  • Facebook
  • Twitter

@2019 - All Right Reserved.


Back To Top