Cook it once
  • Home
  • Privacy Policy
  • Recipes
    • KETO
    • LC
    • WW
  • Tips
  • Contact
Cook it once
  • Home
  • Privacy Policy
  • Recipes
    • KETO
    • LC
    • WW
  • Tips
  • Contact
Monthly Archives

June 2020

Main Dish Recipes

CHEESY SMOKED SAUSAGE AND POTATO CASSEROLE

by Rebecca June 27, 2020
written by Rebecca

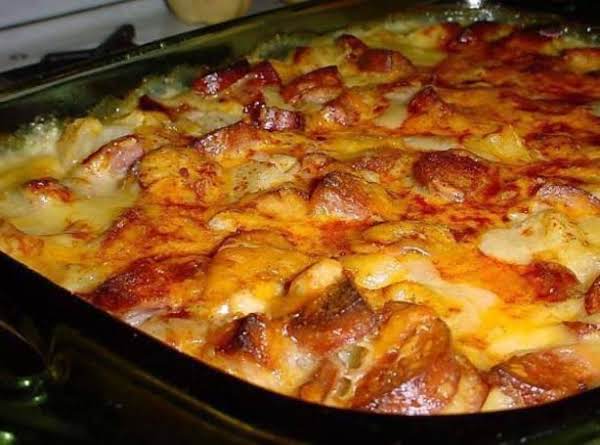
A super cheesy and creamy side dish with sliced smoked sausage is the super comfort food! It can be a side or a main dish, and you will never go wrong with a cheesy smoked sausage and potato casserole. This is what I described as comforting and satisfying; the cheesiness, meltiness, creaminess of this casserole is to die for! And the flavors just burst inside your mouth in every bite. A mouthwatering dish that is always a winner! A keeper! Plus, it is very easy to make, the ingredients are quite long but simple and easy to find. This casserole is fabulously cheesy, and with this recipe, you get both in every bite – potatoes, and meat. The wedges of smoked sausage add so much salty, meaty flavor to this side dish. And its creamy and smooth sauce is just wow!

INGREDIENTS

3 cups potatoes, peeled, boiled and cubed

1 lb skinless smoked sausage

4 tablespoons butter

4 tablespoons flour

2 cups of milk

1/2 teaspoon salt

1/4 teaspoon pepper

1/8 teaspoon paprika

1/2 lb Velveeta cheese cubed

1/2 cup shredded cheddar cheese

HOW TO MAKE CHEESY SMOKED SAUSAGE AND POTATO CASSEROLE

Step 1: Slice the skinless smoked sausage in half and lengthwise, then chop it into half-inch pieces. Cook the chopped potatoes in a frying pan, turning frequently for about 15 minutes or until slightly browned.

Step 2: Ready the oven. Preheat it to 3250 degrees F.

Step 3: Place the potatoes in a 2-quart casserole dish. Add in the meat and gently toss.

Step 4: In a saucepan, mix the butter, flour, milk, salt, pepper, and Velveeta over medium heat, Stir constantly until warm, melted, and smooth.

Step 5: Carefully pour the cheese sauce over the potatoes and meat.

Step 6: Sprinkle the shredded cheddar cheese on top of the casserole, and evenly dust the top with paprika.

Step 7: Place inside the preheated oven and bake for 35 to 45 minutes or until the top is golden brown and the cheese is melted.

CHEESY SMOKED SAUSAGE AND POTATO CASSEROLE

Rebecca A super cheesy and creamy side dish with sliced smoked sausage is the super comfort food! It can be a side or a main dish, and you will never go… Main Dish Recipes CHEESY SMOKED SAUSAGE AND POTATO CASSEROLE European Print This
Nutrition facts: 200 calories 20 grams fat
Rating: 5.0/5
( 3 voted )

Ingredients

  • 3 cups potatoes, peeled, boiled and cubed
  • 1 lb skinless smoked sausage
  • 4 tablespoons butter
  • 4 tablespoons flour
  • 2 cups of milk
  • 1/2 teaspoon salt
  • 1/4 teaspoon pepper
  • 1/8 teaspoon paprika
  • 1/2 lb Velveeta cheese cubed
  • 1/2 cup shredded cheddar cheese

Instructions

Step 1: Slice the skinless smoked sausage in half and lengthwise, then chop it into half-inch pieces. Cook the chopped potatoes in a frying pan, turning frequently for about 15 minutes or until slightly browned.

Step 2: Ready the oven. Preheat it to 3250 degrees F.

Step 3: Place the potatoes in a 2-quart casserole dish. Add in the meat and gently toss.

Step 4: In a saucepan, mix the butter, flour, milk, salt, pepper, and Velveeta over medium heat, Stir constantly until warm, melted, and smooth.

Step 5: Carefully pour the cheese sauce over the potatoes and meat.

Step 6: Sprinkle the shredded cheddar cheese on top of the casserole, and evenly dust the top with paprika.

Step 7: Place inside the preheated oven and bake for 35 to 45 minutes or until the top is golden brown and the cheese is melted.
June 27, 2020 0 comment
0 FacebookTwitterPinterestEmail
Main Dish Recipes

Homemade Cinnamon Roll Casserole

by Rebecca June 27, 2020
written by Rebecca

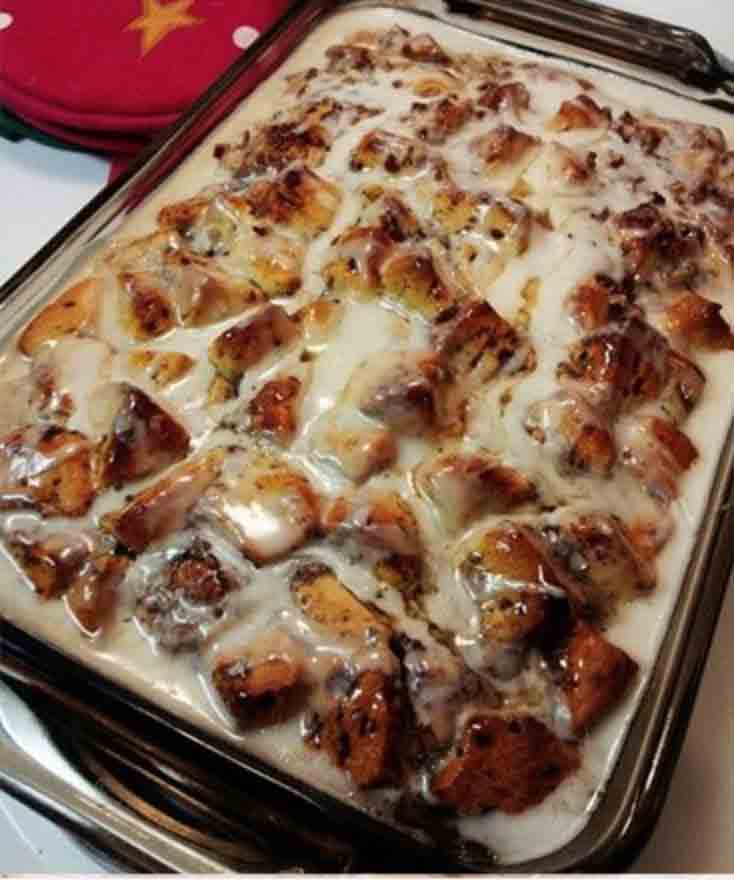
My favorite breakfast! It does not only taste amazing but it smells heavenly, too! This homemade cinnamon roll casserole bakes up pretty quickly for an easy breakfast or brunch with your loved ones. I loved it for so many reasons! Because it’s very easy to make as it uses refrigerated cinnamon roll dough that takes less than 15 minutes to prepare. This you can make even the night before and bake it in the morning so it stays fresh and delicious. And you can use the canned frosting for a quick powdered sugar drizzle. Amazing, right? Your breakfast or brunch will never be the same again when you have this cinnamon roll casserole on your table. It is comforting and delicious, and everyone loves it!

INGREDIENTS

2 tablespoons of melted butter or baking spray

2 cans (12.4 oz each) Pillsbury® refrigerated cinnamon rolls with icing

4 eggs

1/2 cup heavy whipping cream

2 teaspoons ground cinnamon

2 teaspoons vanilla

1 cup chopped Pecans

1/4 cup maple syrup

For the Garnish

Icing from cinnamon rolls

Maple syrup (if desired) –I found it was sweet enough without it

How to make Homemade Cinnamon Roll Casserole

Step 1: Prepare the oven. Preheat it to 375 degrees F.

Step 2: Melt the butter and pour it into a 13 x 9-inch or 3-quart ungreased glass baking dish.

Step 3: Divide the cans of dough into 16 rolls and set the icing aside. Slice the rolls into 8 pieces. Place them over the butter.

Step 4: Beat the eggs in a medium bowl. Add in the cream, cinnamon, and vanilla. Mix until well blended.

Step 5: Pour the mixture over the rolled dough pieces then, sprinkle over the pecans, and drizzle the top with 1/4 cup syrup.

Step 6: Place inside the preheated oven and bake for 20 to 28 minutes or until golden brown.

Step 7: Microwave the icing on medium heat for 10 to 15 seconds or until the icing is thin enough to drizzle.

Homemade Cinnamon Roll Casserole

Rebecca My favorite breakfast! It does not only taste amazing but it smells heavenly, too! This homemade cinnamon roll casserole bakes up pretty quickly for an easy breakfast or brunch with… Main Dish Recipes Homemade Cinnamon Roll Casserole European Print This
Nutrition facts: 200 calories 20 grams fat
Rating: 4.5/5
( 2 voted )

Ingredients

  • 2 tablespoons of melted butter or baking spray
  • 2 cans (12.4 oz each) Pillsbury® refrigerated cinnamon rolls with icing
  • 4 eggs
  • 1/2 cup heavy whipping cream
  • 2 teaspoons ground cinnamon
  • 2 teaspoons vanilla
  • 1 cup chopped Pecans
  • 1/4 cup maple syrup
  • For the Garnish
  • Icing from cinnamon rolls
  • Maple syrup (if desired) –I found it was sweet enough without it

Instructions

Step 1: Prepare the oven. Preheat it to 375 degrees F.

Step 2: Melt the butter and pour it into a 13 x 9-inch or 3-quart ungreased glass baking dish.

Step 3: Divide the cans of dough into 16 rolls and set the icing aside. Slice the rolls into 8 pieces. Place them over the butter.

Step 4: Beat the eggs in a medium bowl. Add in the cream, cinnamon, and vanilla. Mix until well blended.

Step 5: Pour the mixture over the rolled dough pieces then, sprinkle over the pecans, and drizzle the top with 1/4 cup syrup.

Step 6: Place inside the preheated oven and bake for 20 to 28 minutes or until golden brown.

Step 7: Microwave the icing on medium heat for 10 to 15 seconds or until the icing is thin enough to drizzle.

June 27, 2020 0 comment
0 FacebookTwitterPinterestEmail
Main Dish Recipes

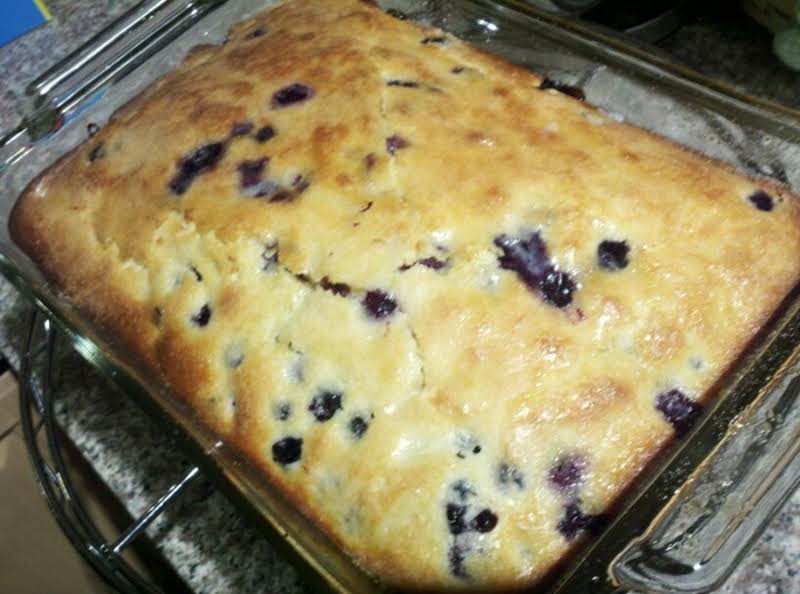
Super & Easy Blueberry Coffee Cake

by Rebecca June 27, 2020
written by Rebecca

This is a super and easy cake recipe that everyone loved! This is a soft, deliciously moist coffee cake that is filled with blueberries and has a crunchy, sweet crumb topping. This recipe is a based recipe to make this amazing cake or even muffins! And no one will ever say no to blueberries, or cake, or muffins! Try it and I am sure you are gonna love it. This brings blueberries into a new level! A 2.0 version of blueberry cakes out there. Experience the flavors bursting inside your mouth in every bite and this smells wonderful, too!

INGREDIENTS

1 egg, beaten

1/2 cup sugar

1 1/4 cups flour

2 teaspoons baking powder

3/4 teaspoon salt

1/2 cup milk

3 tablespoons butter, melted

1 cup blueberries, fresh

For the Topping

1 tablespoon butter, melted

2 tablespoons sugar

How to make Super & Easy Blueberry Coffee Cake

Step 1: Place the egg and sugar in a mixing bowl and beat until thick.

Step 2: Combine the flour, baking powder, and salt in a separate bowl.

Step 3: Add the flour and milk alternately into the egg mixture and make sure to beat after each addition.

Step 4: Stir in the melted butter until incorporated.

Step 5: And fold in the blueberries.

Step 6: Pour the batter into an 8-inch floured and greased square baking pan. And sprinkle the top with 2 tablespoons of sugar.

Step 7: Place inside the fridge and chill overnight, covered.

Step 8: When ready to prepare. Preheat the oven to 350 degrees.

Step 9: Take the pan out from the fridge and place it inside the preheated oven. Bake for about 35 minutes or until the top springs back when touched. Then, brush the top with the remaining melted butter. Let it cool before cutting. Serve and enjoy!

A note: To make muffins using this exact recipe, bake them for 18 to 20 minutes and before removing from the oven check to make sure that the tops spring back when lightly touched.

Super & Easy Blueberry Coffee Cake

Rebecca This is a super and easy cake recipe that everyone loved! This is a soft, deliciously moist coffee cake that is filled with blueberries and has a crunchy, sweet crumb… Main Dish Recipes Super & Easy Blueberry Coffee Cake European Print This
Nutrition facts: 200 calories 20 grams fat
Rating: 5.0/5
( 1 voted )

Ingredients

  • 1 egg, beaten
  • 1/2 cup sugar
  • 1 1/4 cups flour
  • 2 teaspoons baking powder
  • 3/4 teaspoon salt
  • 1/2 cup milk
  • 3 tablespoons butter, melted
  • 1 cup blueberries, fresh
  • For the Topping
  • 1 tablespoon butter, melted
  • 2 tablespoons sugar

Instructions

Step 1: Place the egg and sugar in a mixing bowl and beat until thick.

Step 2: Combine the flour, baking powder, and salt in a separate bowl.

Step 3: Add the flour and milk alternately into the egg mixture and make sure to beat after each addition.

Step 4: Stir in the melted butter until incorporated.

Step 5: And fold in the blueberries.

Step 6: Pour the batter into an 8-inch floured and greased square baking pan. And sprinkle the top with 2 tablespoons of sugar.

Step 7: Place inside the fridge and chill overnight, covered.

Step 8: When ready to prepare. Preheat the oven to 350 degrees.

Step 9: Take the pan out from the fridge and place it inside the preheated oven. Bake for about 35 minutes or until the top springs back when touched. Then, brush the top with the remaining melted butter. Let it cool before cutting. Serve and enjoy!

A note: To make muffins using this exact recipe, bake them for 18 to 20 minutes and before removing from the oven check to make sure that the tops spring back when lightly touched.

June 27, 2020 0 comment
0 FacebookTwitterPinterestEmail
Main Dish Recipes

Easy Kolacky Christmas Recipe

by Rebecca June 27, 2020
written by Rebecca

A melt-in-your-mouth Kolacky cookie with sweet preserves fillings is no-fuss Christmas giveaways or treats for all ages. All you need are simple and easy to find ingredients to make these sweet and beautiful kolackies. And don’t forget to dust these cookies with extra powdered sugar before serving or stacking them into boxes as gifts! These amazing, cute kolackies is an easy traditional cookie that has been around for ages. I’ve seen others make it open but I prefer mine folded over and centers pinched. You are welcome to be creative, either way, these kolackies are a real treat!

INGREDIENTS

1 (8 ounces) package cream cheese, softened

1 cup butter

1/2 cup confectioners’ sugar

2 cups all-purpose flour

1 (12.5 ounces) can apricot fruit filling (such as Solo(R))

1/4 cup confectioners’ sugar for dusting

How to make Easy Kolacky Christmas

Step 1: Put the cream cheese and butter in a large bowl. Use an electric mixer to beat until smooth and creamy.

Step 2: Mix in a half cup of the confectioner’s sugar.

Step 3: Gradually add in the flour and beat well.

Step 4: Cover and place inside the fridge for at least 3 hours or overnight.

Step 5: When ready to bake. Prepare the oven. Preheat it to 375 degrees F or 190 degrees C.

Step 6: Roll out the chilled dough to 1/8-inch on a well-floured board. Using a pizza wheel, cut the dough into 2 1/2-inch squares.

Step 7: Put about 2 tablespoons of filling into the center of each square and make sure not to overfill. Then, fold the opposite corners of the squares into the middle to encase the dough and pinch to seal. The filling should peek out a bit on both ends.

Step 8: Transfer the dough onto an ungreased baking sheet.

Step 9: Place inside the preheated oven and bake for about 12 minutes or until set but not brown. Transfer the cookies to wire racks to cool.

Step 10: Dust the cooled kolacky with remaining powdered sugar before serving. Enjoy!

Easy Kolacky Christmas Recipe

Rebecca A melt-in-your-mouth Kolacky cookie with sweet preserves fillings is no-fuss Christmas giveaways or treats for all ages. All you need are simple and easy to find ingredients to make these… Main Dish Recipes Easy Kolacky Christmas Recipe European Print This
Nutrition facts: 200 calories 20 grams fat
Rating: 5.0/5
( 1 voted )

Ingredients

  • 1 (8 ounces) package cream cheese, softened
  • 1 cup butter
  • 1/2 cup confectioners’ sugar
  • 2 cups all-purpose flour
  • 1 (12.5 ounces) can apricot fruit filling (such as Solo(R))
  • 1/4 cup confectioners’ sugar for dusting

Instructions

Step 1: Put the cream cheese and butter in a large bowl. Use an electric mixer to beat until smooth and creamy.

Step 2: Mix in a half cup of the confectioner's sugar.

Step 3: Gradually add in the flour and beat well.

Step 4: Cover and place inside the fridge for at least 3 hours or overnight.

Step 5: When ready to bake. Prepare the oven. Preheat it to 375 degrees F or 190 degrees C.

Step 6: Roll out the chilled dough to 1/8-inch on a well-floured board. Using a pizza wheel, cut the dough into 2 1/2-inch squares.

Step 7: Put about 2 tablespoons of filling into the center of each square and make sure not to overfill. Then, fold the opposite corners of the squares into the middle to encase the dough and pinch to seal. The filling should peek out a bit on both ends.

Step 8: Transfer the dough onto an ungreased baking sheet.

Step 9: Place inside the preheated oven and bake for about 12 minutes or until set but not brown. Transfer the cookies to wire racks to cool.

Step 10: Dust the cooled kolacky with remaining powdered sugar before serving. Enjoy!

June 27, 2020 0 comment
0 FacebookTwitterPinterestEmail
Main Dish Recipes

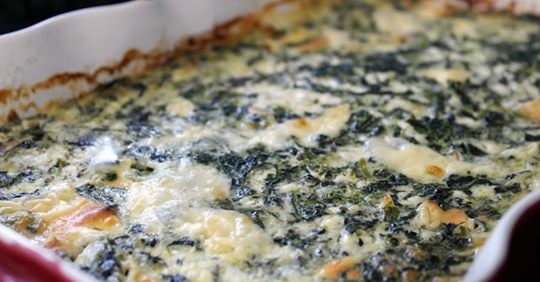
Holiday Spinach Casserole

by Rebecca June 27, 2020
written by Rebecca

Growing up I never liked Spinach. I can’t remember why though but no soul was able to force me to eat it. Until I got older and realized that I am missing out! This Spinach Casserole is the very first spinach dish I have ever eaten and I instantly fell in love! It was a holiday maybe almost ten years ago. After a year of working abroad, I went home to spend the holidays with my parents. They knew that I don’t eat spinach yet they still served me this and thank goodness they did because I would have never known that this leafy green vegetable is amazing! Not only for its health benefits but it tastes great, too! This creamy, cheesy Holiday Spinach Casserole is a keeper. The spinach flavor blends in perfectly and it sorts of set like a souffle. I brought the recipe with me and I have been making this since! This casserole is an amazing no-fuss dish that is to die for! Super rich, cheesy, and so delightful!

INGREDIENTS

6 tablespoons butter

8 oz white American cheese

6 beaten eggs

6 tablespoons flour

4 cups small curd cottage cheese

3 packages of frozen spinach

How to make Holiday Spinach Casserole

Step 1: Prepare the oven. Preheat it to 350 degrees.

Step 2: Slice the butter and cheese into 1/4-inch cubes and set aside.

Step 3: Crack the eggs into a medium bowl and beat lightly.

Step 4: Mix in the flour, cottage cheese, butter, and American cheese. Feel free to add a pinch of salt and pepper or don’t, depending on what you prefer.

Step 5: Add in the spinach and mix them well into the mixture.

Step 6: Pour the mixture into a greased ovenproof dish or a round ovenproof Pyrex bowl.

Step 7: Place inside the preheated oven and bake for an hour.

Step 8: Once done, remove from the oven and serve immediately. Enjoy!

Holiday Spinach Casserole

Rebecca Growing up I never liked Spinach. I can’t remember why though but no soul was able to force me to eat it. Until I got older and realized that I… Main Dish Recipes Holiday Spinach Casserole European Print This
Nutrition facts: 200 calories 20 grams fat
Rating: 5.0/5
( 1 voted )

Ingredients

  • 6 tablespoons butter
  • 8 oz white American cheese
  • 6 beaten eggs
  • 6 tablespoons flour
  • 4 cups small curd cottage cheese
  • 3 packages of frozen spinach

Instructions

Step 1: Prepare the oven. Preheat it to 350 degrees.

Step 2: Slice the butter and cheese into 1/4-inch cubes and set aside.

Step 3: Crack the eggs into a medium bowl and beat lightly.

Step 4: Mix in the flour, cottage cheese, butter, and American cheese. Feel free to add a pinch of salt and pepper or don't, depending on what you prefer.

Step 5: Add in the spinach and mix them well into the mixture.

Step 6: Pour the mixture into a greased ovenproof dish or a round ovenproof Pyrex bowl.

Step 7: Place inside the preheated oven and bake for an hour.

Step 8: Once done, remove from the oven and serve immediately. Enjoy!

June 27, 2020 0 comment
0 FacebookTwitterPinterestEmail
Main Dish Recipes

Cherries Jubilee Cheesecake Bars

by Rebecca June 27, 2020
written by Rebecca

This reminds me of strawberry cheesecake I used to eat when I was younger. Except that this is easier to make. A no-fuss alternative to your traditional cheesecake. It is so rich, sweet, and cherry. I feel light and uplifted whenever I see and eat these cherries jubilee cheesecake bars. This is too pretty for such a simple dessert and so darn delicious! It is amazing to serve at any gathering and bring to potlucks. Surely everyone will admire these pinkies and would want a piece for themselves. The ingredients are simple and easy to find, all you need are eggs, cherry chip cake mix, butter, cream cheese, and cherry frosting which is already made. Put all of these together, bake, and voila! You have yourself a delicious Cherries Jubilee Cheesecake Bars. Easy peasy, right? You can serve this with whipped cream or a scoop of vanilla ice cream or just eat it as is. This is a real treat, a must-try!

INGREDIENTS

3 eggs

1 pkg cherry chip cake mix

1/2 cup butter, room temperature

2 large 8 oz. packages of cream cheese

1 tub cherry frosting(already made)

How to make Cherries Jubilee Cheesecake Bars

Step 1: Prepare the oven. Preheat it to 350 degrees.

Step 2: In a bowl, place the cake mix and butter. Beat until crumbly, then, reserve 1 cup of the dry ingredient.

Step 3: Press the cake mix and butter mixture into a 9 x 13-inch pan.

Step 4: In another bowl, beat the cream cheese, eggs, and frosting mix until well combined.

Step 5: Pour it over the crust and top with the reserved crumbs.

Step 6: Place inside the preheated oven and bake for 45 minutes. Once done, remove from the oven and refrigerate for at least 2 hours or more.

Step 7: Once set, get the cheesecake out from the fridge and cut into 4 x 6 rows. Serve and enjoy!

Cherries Jubilee Cheesecake Bars

Rebecca This reminds me of strawberry cheesecake I used to eat when I was younger. Except that this is easier to make. A no-fuss alternative to your traditional cheesecake. It is… Main Dish Recipes Cherries Jubilee Cheesecake Bars European Print This
Nutrition facts: 200 calories 20 grams fat
Rating: 5.0/5
( 1 voted )

Ingredients

  • 3 eggs
  • 1 pkg cherry chip cake mix
  • 1/2 cup butter, room temperature
  • 2 large 8 oz. packages of cream cheese
  • 1 tub cherry frosting(already made)

Instructions

Step 1: Prepare the oven. Preheat it to 350 degrees.

Step 2: In a bowl, place the cake mix and butter. Beat until crumbly, then, reserve 1 cup of the dry ingredient.

Step 3: Press the cake mix and butter mixture into a 9 x 13-inch pan.

Step 4: In another bowl, beat the cream cheese, eggs, and frosting mix until well combined.

Step 5: Pour it over the crust and top with the reserved crumbs.

Step 6: Place inside the preheated oven and bake for 45 minutes. Once done, remove from the oven and refrigerate for at least 2 hours or more.

Step 7: Once set, get the cheesecake out from the fridge and cut into 4 x 6 rows. Serve and enjoy!

June 27, 2020 0 comment
0 FacebookTwitterPinterestEmail
Main Dish Recipes

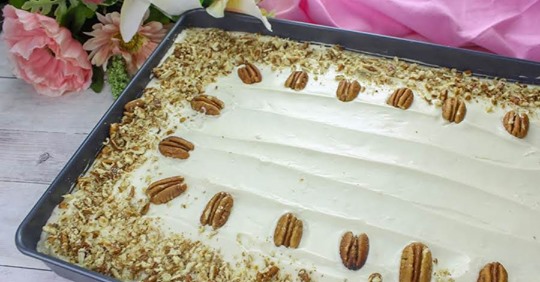
Hummingbird Cake

by Rebecca June 27, 2020
written by Rebecca

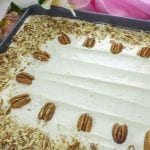
This is my go-to Thanksgiving cake. Hummingbird Cake is a banana-pineapple spice cake that is especially moist with my favorite tropical flavors. The combination of banana and pineapple in this cake is exceptional and of course, with its amazing cream cheese frosting, this cake is a winner! A Southern masterpiece, a lavishly, aromatic dessert that is topped with cream cheese frosting and chopped pecans.

INGREDIENTS

2 box Duncan Hines yellow cake mixes

6 eggs

water for mixing cake mixes, go by directions on boxes

use melted butter for cake mixes instead of oil, for amount go by directions on box

1 can(s) crushed pineapple, 20 oz., drained

3 bananas, cut and smashed

1 1/2 teaspoon cinnamon

2 tablespoons vanilla extract

1 cup chopped pecans

1 dash(es) salt

FOR THE CREAM CHEESE FROSTING

1 pkg cream cheese softened, 8 oz.

1 pkg confectioners’ sugar, 16 oz.

1 stick salted butter, softened

1-2 tablespoons milk

1/2 tablespoon vanilla extract

How to Make Hummingbird Cake

Step 1: Ready the oven. Preheat it to 350 degrees. Grease a 12 x 18-inch pan or a 9 x 13-inch pan. If using a 9 x 13-inch pan you have to cut the ingredients in half.

Step 2: Prepare the cake mix by following the direction written on the box. Use melted butter in place of oil. And stir in the vanilla extract.

Step 3: Put in the pineapple, mashed bananas, cinnamon, salt, and pecans. Mix until incorporated.

Step 4: Pour the mixture into the prepared pan.

Step 5: Place inside the preheated oven and bake for 25 to 30 minutes. Once the inserted toothpick in the middle comes out clean, the cake is perfect. Remove from the oven and let the cake cool.

Step 6: To make the frosting, put the cream cheese into a mixing bowl. Add in the butter, confectioner’s sugar, and vanilla. Mix well until combined.

Step 7: Stir in the milk a little at a time until you get your desired consistency.

Step 8: And generously frost the cooled cake.

Hummingbird Cake

Rebecca This is my go-to Thanksgiving cake. Hummingbird Cake is a banana-pineapple spice cake that is especially moist with my favorite tropical flavors. The combination of banana and pineapple in this… Main Dish Recipes Hummingbird Cake European Print This
Nutrition facts: 200 calories 20 grams fat
Rating: 5.0/5
( 1 voted )

Ingredients

  • 2 box Duncan Hines yellow cake mixes
  • 6 eggs
  • water for mixing cake mixes, go by directions on boxes
  • use melted butter for cake mixes instead of oil, for amount go by directions on box
  • 1 can(s) crushed pineapple, 20 oz., drained
  • 3 bananas, cut and smashed
  • 1 1/2 teaspoon cinnamon
  • 2 tablespoons vanilla extract
  • 1 cup chopped pecans
  • 1 dash(es) salt
  • FOR THE CREAM CHEESE FROSTING
  • 1 pkg cream cheese softened, 8 oz.
  • 1 pkg confectioners’ sugar, 16 oz.
  • 1 stick salted butter, softened
  • 1-2 tablespoons milk
  • 1/2 tablespoon vanilla extract

Instructions

Step 1: Ready the oven. Preheat it to 350 degrees. Grease a 12 x 18-inch pan or a 9 x 13-inch pan. If using a 9 x 13-inch pan you have to cut the ingredients in half.

Step 2: Prepare the cake mix by following the direction written on the box. Use melted butter in place of oil. And stir in the vanilla extract.

Step 3: Put in the pineapple, mashed bananas, cinnamon, salt, and pecans. Mix until incorporated.

Step 4: Pour the mixture into the prepared pan.

Step 5: Place inside the preheated oven and bake for 25 to 30 minutes. Once the inserted toothpick in the middle comes out clean, the cake is perfect. Remove from the oven and let the cake cool.

Step 6: To make the frosting, put the cream cheese into a mixing bowl. Add in the butter, confectioner's sugar, and vanilla. Mix well until combined.

Step 7: Stir in the milk a little at a time until you get your desired consistency.

Step 8: And generously frost the cooled cake.

June 27, 2020 0 comment
0 FacebookTwitterPinterestEmail
Main Dish Recipes

Amish Chicken (it makes its own gravy while baking)

by Rebecca June 27, 2020
written by Rebecca

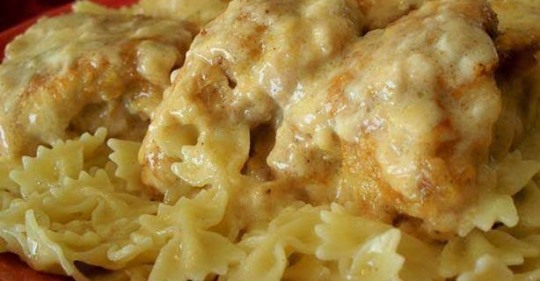
Are you tired of eating your chicken and preparing the gravy at the same time? Well, this might be your lucky day. I learned about this recipe last week and I could not get enough of it! I have prepared and cooked this dish pretty much every day last week. That’s how good it is!

This dish is a combination of chicken and gravy in one baking pan! Yeah, you read it right! A very hassle-free meal to prepare for your family. I usually eat this with steamed rice. It’s the best! You can also eat it with mashed potatoes but I prefer rice. Make sure to cook the chicken with the given time frame and do not overcook it because the chicken will get rubbery. Well, we all know that right? Check from time to time to make sure the chicken is golden brown! Give it a try. You are in for a treat! Enjoy!

INGREDIENTS

6 -8 chicken pieces, cleaned

1 cup flour

2 teaspoons garlic powder

1 tablespoon salt

1 teaspoon pepper

2 teaspoons paprika

1 1/2 cups heavy whipping cream

1 1/2 cups water

How to cook Amish Chicken

Step 1: Add the flour, garlic powder, paprika, salt, and pepper in a medium mixing bowl. Whisk until all the ingredients are well-blended.

Step 2: Coat the chicken by tossing them in the flour.

Step 3: Apply cooking spray in a baking dish.

Step 4: Place the coated chicken into the baking dish. Arrange them skin side up.

Step 5: In a small bowl, pour the water and cream. Stir until well-mixed.

Step 6: Transfer the cream mixture over the chicken.

Step 7: Place the baking dish inside the oven and bake for 1 1/2 hours at 350 degrees C or until the color of the chicken turns golden brown.

Step 8: Remove the baking dish from the oven and let it sit on a wire rack for 5 minutes.

Step 9: Sprinkle spring onions on top.

Step 10: Serve and enjoy!

Amish Chicken (it makes its own gravy while baking)

Rebecca Are you tired of eating your chicken and preparing the gravy at the same time? Well, this might be your lucky day. I learned about this recipe last week and… Main Dish Recipes Amish Chicken (it makes its own gravy while baking) European Print This
Nutrition facts: 200 calories 20 grams fat
Rating: 3.5/5
( 134 voted )

Ingredients

  • 6 -8 chicken pieces, cleaned
  • 1 cup flour
  • 2 teaspoons garlic powder
  • 1 tablespoon salt
  • 1 teaspoon pepper
  • 2 teaspoons paprika
  • 1 1/2 cups heavy whipping cream
  • 1 1/2 cups water

Instructions

Step 1: Add the flour, garlic powder, paprika, salt, and pepper in a medium mixing bowl. Whisk until all the ingredients are well-blended.

Step 2: Coat the chicken by tossing them in the flour.

Step 3: Apply cooking spray in a baking dish.

Step 4: Place the coated chicken into the baking dish. Arrange them skin side up.

Step 5: In a small bowl, pour the water and cream. Stir until well-mixed.

Step 6: Transfer the cream mixture over the chicken.

Step 7: Place the baking dish inside the oven and bake for 1 1/2 hours at 350 degrees C or until the color of the chicken turns golden brown.

Step 8: Remove the baking dish from the oven and let it sit on a wire rack for 5 minutes.

Step 9: Sprinkle spring onions on top.

Step 10: Serve and enjoy!

June 27, 2020 0 comment
1 FacebookTwitterPinterestEmail
Main Dish Recipes

Easy oven-baked frittata

by Rebecca June 27, 2020
written by Rebecca

It’s a nice day to cook something good! Hi Friends, today I’m gonna share with you this amazing dish I have recently learned. It’s the Easy oven-bake Frittata! All you need for this dish is to let the oven do all the magic for you. Prepare all the ingredients and place them in the oven. That’s how easy it is! Enjoy!

INGREDIENTS

2 medium (400g) Sebago potatoes

2 tablespoons olive oil

1 red onion, chopped

70g pancetta, chopped

100g baby spinach

200g red grape tomatoes halved

1 red capsicum, chopped

8 eggs

1/2 cup thickened cream

1/2 cup shredded parmesan cheese

1/4 cup grated tasty cheese

How to Make Easy oven-baked frittata

Step 1: Ready the oven and preheat to 200 degrees C.

Step 2: Apply cooking spray in a 26cm x 16.5cm ovenproof dish.

Step 3: Punch 4 holes in each potato using a skewer.

Step 4: Put the potatoes in a microwave-safe bowl.

Step 5: Place inside the microwave and turn the setting to high and cook for 4 minutes until cooked through and tender.

Step 6: Remove from the microwave and let it sit on a wire rack to cool to room temperature then cut into thin slices.

Step 7: Place a non-stick pan on the stove and turn the heat to medium. Add allow it to bubble.

Step 8: Saute chopped onion for 3 minutes until translucent then add the pancetta. Cook the pancetta for another 3 to 4 minutes until the color turns golden.

Step 9: Toss in the spinach and cook for 1 minute or until halfway wilted.

Step 10:In medium mixing bowl, add tomatoes, capsicum, and onion mixture. Stir until well-combined.

Step 11: Arrange half of the potatoes in one layer into the prepared baking dish. Spread half of the onion mixture on top. Repeat this process with the rest of the ingredients.

Step 12: Beat eggs in a bowl. Whisk until creamy. Pour the beaten eggs on top of the vegetable mixture then garnish with taste and parmesan cheese.

Step 13: Place inside the oven and bake for 30 to 35 minutes or until the top of the cake turns color gold.

Step 14: Remove from the oven and let it sit on a wire to cool for at least 5 minutes.

Step 15: Serve and enjoy!

Easy oven-baked frittata

Rebecca It’s a nice day to cook something good! Hi Friends, today I’m gonna share with you this amazing dish I have recently learned. It’s the Easy oven-bake Frittata! All you… Main Dish Recipes Easy oven-baked frittata European Print This
Nutrition facts: 200 calories 20 grams fat
Rating: 5.0/5
( 1 voted )

Ingredients

  • 2 medium (400g) Sebago potatoes
  • 2 tablespoons olive oil
  • 1 red onion, chopped
  • 70g pancetta, chopped
  • 100g baby spinach
  • 200g red grape tomatoes halved
  • 1 red capsicum, chopped
  • 8 eggs
  • 1/2 cup thickened cream
  • 1/2 cup shredded parmesan cheese
  • 1/4 cup grated tasty cheese

Instructions

Step 1: Ready the oven and preheat to 200 degrees C.

Step 2: Apply cooking spray in a 26cm x 16.5cm ovenproof dish.

Step 3: Punch 4 holes in each potato using a skewer.

Step 4: Put the potatoes in a microwave-safe bowl.

Step 5: Place inside the microwave and turn the setting to high and cook for 4 minutes until cooked through and tender.

Step 6: Remove from the microwave and let it sit on a wire rack to cool to room temperature then cut into thin slices.

Step 7: Place a non-stick pan on the stove and turn the heat to medium. Add allow it to bubble.

Step 8: Saute chopped onion for 3 minutes until translucent then add the pancetta. Cook the pancetta for another 3 to 4 minutes until the color turns golden.

Step 9: Toss in the spinach and cook for 1 minute or until halfway wilted.

Step 10:In medium mixing bowl, add tomatoes, capsicum, and onion mixture. Stir until well-combined.

Step 11: Arrange half of the potatoes in one layer into the prepared baking dish. Spread half of the onion mixture on top. Repeat this process with the rest of the ingredients.

Step 12: Beat eggs in a bowl. Whisk until creamy. Pour the beaten eggs on top of the vegetable mixture then garnish with taste and parmesan cheese.

Step 13: Place inside the oven and bake for 30 to 35 minutes or until the top of the cake turns color gold.

Step 14: Remove from the oven and let it sit on a wire to cool for at least 5 minutes.

Step 15: Serve and enjoy!

June 27, 2020 0 comment
0 FacebookTwitterPinterestEmail
Main Dish Recipes

Delicious raspberry and white chocolate slice

by Rebecca June 26, 2020
written by Rebecca

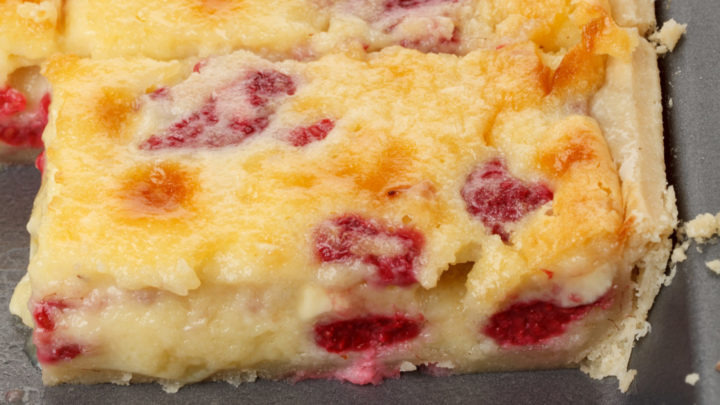
This is the perfect treat to whip up on evenings that you feel like craving for something sweet without spending too much time in the kitchen and exerting too much effort to cook. This raspberry and white chocolate slice requires only seven simple ingredients to make. It is super delicious, light and fresh, and just the right amount of sweetness. The raspberry and white chocolate combination is amazing! I love to pair a slice of this deliciously sweet and fresh raspberry and white chocolate with a cup of my favorite coffee for snacks or a cup of tea for a late evening bite. This is my go-to whenever I want something sweet, light, and fresh. A real treat for the family to enjoy. Indulge yourself with this delicious raspberry and white chocolate slice after a long day at work, you deserve it! Enjoy!

INGREDIENTS

375 grams pack ready-rolled shortcrust pastry

500 grams mascarpone

100 grams golden caster sugar

100 grams ground almonds

2 large eggs

250 grams fresh raspberries

100 grams white chocolate, roughly chopped

How to make Raspberry and white chocolate slice

Step 1: Prepare the oven. Preheat it to 160 degrees C.

Step 2: On a lightly floured surface, roll out the pastry and mold it into a 30 x 20 cm tin.

Step 3: Fill the lined baking paper with baking beans and cook for about 10 minutes. Remove the beans and paper and place inside the oven and cook for 5 minutes more.

Step 4: In a bowl, place the mascarpone, sugar, almonds, and eggs. Whisk until incorporated. Then, fold in the raspberries and chocolate.

Step 5: Pour the mixture into the tin. Place inside the preheated oven and bake for 20 to 25 minutes until lightly golden and just set.

Step 6: Turn the oven off and open the door. Leave the traybake inside the oven to gradually cool. Slice before serving. Enjoy!

Delicious raspberry and white chocolate slice

Rebecca This is the perfect treat to whip up on evenings that you feel like craving for something sweet without spending too much time in the kitchen and exerting too much… Main Dish Recipes Delicious raspberry and white chocolate slice European Print This
Nutrition facts: 200 calories 20 grams fat
Rating: 5.0/5
( 1 voted )

Ingredients

  • 375 grams pack ready-rolled shortcrust pastry
  • 500 grams mascarpone
  • 100 grams golden caster sugar
  • 100 grams ground almonds
  • 2 large eggs
  • 250 grams fresh raspberries
  • 100 grams white chocolate, roughly chopped

Instructions

Step 1: Prepare the oven. Preheat it to 160 degrees C.

Step 2: On a lightly floured surface, roll out the pastry and mold it into a 30 x 20 cm tin.

Step 3: Fill the lined baking paper with baking beans and cook for about 10 minutes. Remove the beans and paper and place inside the oven and cook for 5 minutes more.

Step 4: In a bowl, place the mascarpone, sugar, almonds, and eggs. Whisk until incorporated. Then, fold in the raspberries and chocolate.

Step 5: Pour the mixture into the tin. Place inside the preheated oven and bake for 20 to 25 minutes until lightly golden and just set.

Step 6: Turn the oven off and open the door. Leave the traybake inside the oven to gradually cool. Slice before serving. Enjoy!

June 26, 2020 0 comment
0 FacebookTwitterPinterestEmail
Newer Posts
Older Posts

Popular Posts

  • 1

    Crispy Crunchy Parmesan Potatoes

    March 21, 2020
  • 2

    CROCK POT SMOTHERED PORK CHOPS

    March 21, 2020
  • Facebook
  • Twitter

@2019 - All Right Reserved.


Back To Top