Cook it once
  • Home
  • Privacy Policy
  • Recipes
    • KETO
    • LC
    • WW
  • Tips
  • Contact
Cook it once
  • Home
  • Privacy Policy
  • Recipes
    • KETO
    • LC
    • WW
  • Tips
  • Contact
Monthly Archives

June 2020

Main Dish Recipes

Lemon Butter Baked Shrimp

by Rebecca June 3, 2020
written by Rebecca

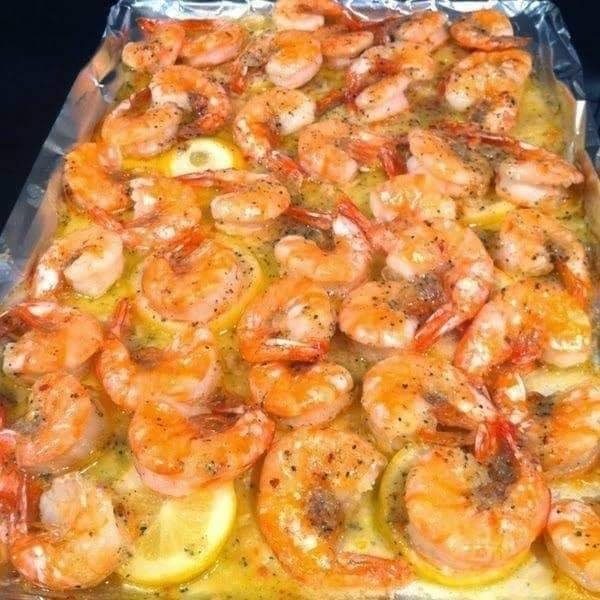
I’m in love with shrimps! Would you believe that I can eat shrimps every day? And this recipe for a Lemon Butter Baked Shrimp is one of my favorite. It’s simple, easy to put together, and quick. Plus, like what the famous Julia Child said “With enough butter, anything is good.” I couldn’t agree more! So if you are looking for a quick and easy weeknight meal, look no further as these shrimps are ready in 20 minutes with easy to get ingredients. Fresh, crunchy, buttery, and zesty! I’m pretty sure you and your family will love and enjoy this dish. It has lots of flavors, satisfying and delicious. I’m making myself some lemon butter baked shrimps tonight. Oh, I’m craving! Just looking at the picture, makes me want to eat it. I am not kidding, once you taste this you’ll be craving for more. I do.

Ingredients

1 lb. raw shrimp, cleaned, peeled and deveined

8 tablespoons butter (1 stick), melted

3 cloves garlic, minced (my addition)

1 packet of Good Seasons Italian all-natural seasoning

1 1/2 lemon, sliced into circles

1 tablespoon dried parsley leaves

1 teaspoon black pepper, ground

How to make Lemon Butter Baked Shrimp

Step 1: Prepare the oven. Preheat it to 350 degrees F.

Step 2: Mix the melted butter and minced garlic in a small bowl. And pour it over a 9 x 111-inch glass casserole dish. Make sure to spread it evenly on the bottom of the dish.

Step 3: Place the lemon slices in a single layer on top of the butter.

Step 4: Then, top the lemon slices with the cleaned and deveined shrimp

Step 5: Dust the shrimp with the Italian Seasoning and sprinkle with parsley and pepper.

Step 6: Place the pan inside the oven and bake for 15 minutes. When done, remove the pan from the oven. Transfer the shrimps to a serving plate. Serve and enjoy!

Lemon Butter Baked Shrimp

Rebecca I’m in love with shrimps! Would you believe that I can eat shrimps every day? And this recipe for a Lemon Butter Baked Shrimp is one of my favorite. It’s… Main Dish Recipes Lemon Butter Baked Shrimp European Print This
Nutrition facts: 200 calories 20 grams fat
Rating: 4.5/5
( 2 voted )

Ingredients

  • 1 lb. raw shrimp, cleaned, peeled and deveined
  • 8 tablespoons butter (1 stick), melted
  • 3 cloves garlic, minced (my addition)
  • 1 packet of Good Seasons Italian all-natural seasoning
  • 1 1/2 lemon, sliced into circles
  • 1 tablespoon dried parsley leaves
  • 1 teaspoon black pepper, ground

Instructions

Step 1: Prepare the oven. Preheat it to 350 degrees F.

Step 2: Mix the melted butter and minced garlic in a small bowl. And pour it over a 9 x 111-inch glass casserole dish. Make sure to spread it evenly on the bottom of the dish.

Step 3: Place the lemon slices in a single layer on top of the butter.

Step 4: Then, top the lemon slices with the cleaned and deveined shrimp

Step 5: Dust the shrimp with the Italian Seasoning and sprinkle with parsley and pepper.

Step 6: Place the pan inside the oven and bake for 15 minutes. When done, remove the pan from the oven. Transfer the shrimps to a serving plate. Serve and enjoy!
June 3, 2020 0 comment
0 FacebookTwitterPinterestEmail
Main Dish Recipes

Homemade Kentucky Blackberry Cobbler

by Rebecca June 3, 2020
written by Rebecca

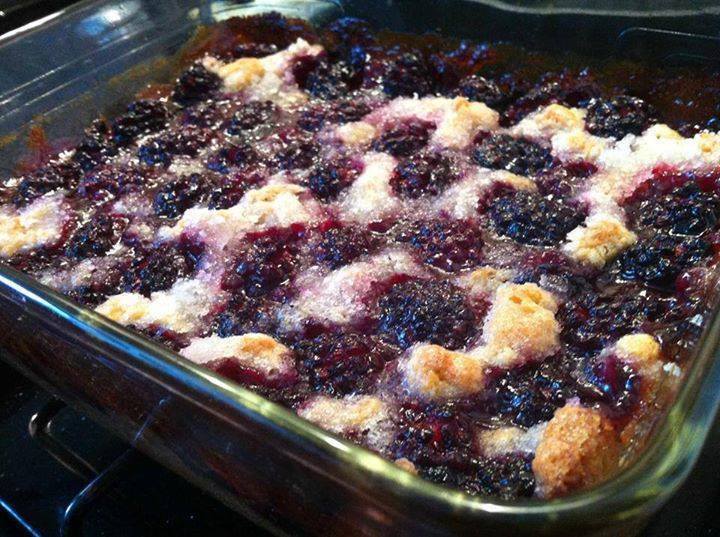
The easiest steps to bake the best blackberries cobbler! This may look difficult to make but I assure you that you can pull this off! Just follow these steps that I simplified for you. Surprise your family and friends by this outstanding treat. I made this yesterday and the reactions I got were gold! They were so impressed by the simplicity and fanciness of this cobbler!

For additional flavor, try adding grated lemon or lime zest before baking it. It will give a refreshing taste to the cobbler. You can also add raspberries. Combine it with the blackberries to take it to the next level. The complex taste of both fruits will make you wanna eat more. The recipe itself is perfect but if you want to spice things up a little, you are more than welcome to try! We are all artists in our ways, so make sure to always bring it to everything you do! Enjoy!

Ingredients

2 1/2 cup blackberries, washed

1 cup sugar

1 cup flour

2 teaspoon baking powder

1/2 teaspoon salt

1 cup milk

1/2 cup unsalted butter, melted

How to make Homemade Kentucky Blackberry Cobbler

Step 1: In a large bowl, combine sugar and berries. Stir until well-mixed. Leave it for 25 to 30 minutes to incorporate the flavors.

Step 2: Ready the oven and preheat to 350 degrees.

Step 3: In the same bowl with the berries, add milk, flour, baking powder, and salt. Stir using a wooden spoon until well-mixed.

Step 4: Add the melted butter and mix using your hands, remember to wash your hands first. Mix until all flavors are well-combined and until you see a few clumps.

Step 5: Apply parchment paper onto a medium baking dish then pour in the batter.

Step 6: Top with the macerated blackberries plus the sugar. Spread evenly on top of the batter.

Step 7: Bake in the oven for 45 to 55 minutes. Enjoy!

Homemade Kentucky Blackberry Cobbler

Rebecca The easiest steps to bake the best blackberries cobbler! This may look difficult to make but I assure you that you can pull this off! Just follow these steps that… Main Dish Recipes Homemade Kentucky Blackberry Cobbler European Print This
Nutrition facts: 200 calories 20 grams fat
Rating: 5.0/5
( 1 voted )

Ingredients

  • 2 1/2 cup blackberries, washed
  • 1 cup sugar
  • 1 cup flour
  • 2 teaspoon baking powder
  • 1/2 teaspoon salt
  • 1 cup milk
  • 1/2 cup unsalted butter, melted

Instructions

Step 1: In a large bowl, combine sugar and berries. Stir until well-mixed. Leave it for 25 to 30 minutes to incorporate the flavors.

Step 2: Ready the oven and preheat to 350 degrees.

Step 3: In the same bowl with the berries, add milk, flour, baking powder, and salt. Stir using a wooden spoon until well-mixed.

Step 4: Add the melted butter and mix using your hands, remember to wash your hands first. Mix until all flavors are well-combined and until you see a few clumps.

Step 5: Apply parchment paper onto a medium baking dish then pour in the batter.

Step 6: Top with the macerated blackberries plus the sugar. Spread evenly on top of the batter.

Step 7: Bake in the oven for 45 to 55 minutes. Enjoy!

June 3, 2020 0 comment
0 FacebookTwitterPinterestEmail
Main Dish Recipes

Red Lobster’s Cheese Biscuit In A Loaf

by Rebecca June 3, 2020
written by Rebecca

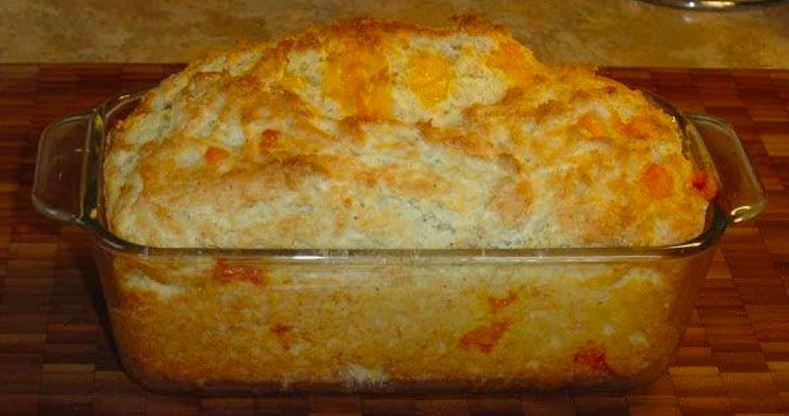
I spend my days checking recipes online, I guess it became my favorite pastime. I’m amazed how everything is rapidly changing, before we only rely on cookbooks but now everything is almost online. I found this recipe online for a Red Lobster’s Cheese Biscuit In A Loaf not long ago. I was just searching for biscuit recipes then I saw this and I thought I should give it a try. Good thing I did because this became my favorite loaf for my afternoon tea. It is lathered with butter and very satisfying. And pretty easy to make, too.

INGREDIENTS

3 cups of flour

1 tablespoon of baking powder

1 teaspoon of salt

1/4 teaspoon of cayenne pepper

1/8 teaspoon of black pepper

4 ounces cheddar cheese, cut into 1/4 inch cubes

1 1/4 cups of milk

3/4 cup of sour cream

3 tablespoons of butter, melted

1 egg, lightly beaten

How to make Red Lobster’s Cheese Biscuit In A Loaf

Step 1: Prepare the oven. Preheat it to 350 degrees. Grease a 9 x 5-inch loaf with oil.

Step 2: Whisk the flour, baking powder, salt, cayenne pepper, and black pepper in a bowl. Combine until incorporated. Stir in the cheese cubes until they are fully covered in flour mixture. This way, the cheese will prevent from sinking to the bottom of the loaf of bread.

Step 3: In another bowl, whisk the milk, sour cream, butter, and egg. Mix until well blended.

Step 4: Now, fold the wet ingredients into the dry ingredients. And stir until just combined.

Step 5: Evenly spread the mixture into the greased loaf pan.

Step 6: Place the pan inside the preheated oven and bake for 45 to 50 minutes. Insert a toothpick in the middle of the loaf, when it comes out clean its’s done.

Step 7: Remove the pan from the oven and let the loaf cool for 10 minutes before removing it from the pan. Then, allow the loaf to cool for an hour. Slice and serve. Enjoy!

Red Lobster's Cheese Biscuit In A Loaf

Rebecca I spend my days checking recipes online, I guess it became my favorite pastime. I’m amazed how everything is rapidly changing, before we only rely on cookbooks but now everything… Main Dish Recipes Red Lobster’s Cheese Biscuit In A Loaf European Print This
Nutrition facts: 200 calories 20 grams fat
Rating: 5.0/5
( 1 voted )

Ingredients

  • 3 cups of flour
  • 1 tablespoon of baking powder
  • 1 teaspoon of salt
  • 1/4 teaspoon of cayenne pepper
  • 1/8 teaspoon of black pepper
  • 4 ounces cheddar cheese, cut into 1/4 inch cubes
  • 1 1/4 cups of milk
  • 3/4 cup of sour cream
  • 3 tablespoons of butter, melted
  • 1 egg, lightly beaten

Instructions

Step 1: Prepare the oven. Preheat it to 350 degrees. Grease a 9 x 5-inch loaf with oil.

Step 2: Whisk the flour, baking powder, salt, cayenne pepper, and black pepper in a bowl. Combine until incorporated. Stir in the cheese cubes until they are fully covered in flour mixture. This way, the cheese will prevent from sinking to the bottom of the loaf of bread.

Step 3: In another bowl, whisk the milk, sour cream, butter, and egg. Mix until well blended.

Step 4: Now, fold the wet ingredients into the dry ingredients. And stir until just combined.

Step 5: Evenly spread the mixture into the greased loaf pan.

Step 6: Place the pan inside the preheated oven and bake for 45 to 50 minutes. Insert a toothpick in the middle of the loaf, when it comes out clean its's done.

Step 7: Remove the pan from the oven and let the loaf cool for 10 minutes before removing it from the pan. Then, allow the loaf to cool for an hour. Slice and serve. Enjoy!

June 3, 2020 0 comment
0 FacebookTwitterPinterestEmail
Main Dish Recipes

Crab and Shrimp Seafood Bisque

by Rebecca June 3, 2020
written by Rebecca

I’m a seafood lover and this Seafood Bisque is one way that I enjoy and indulge in seafoods. It’s rich, creamy, and smooth. An easy and delicious way to surrender yourself in seafood goodness. This is indeed an extraordinary soup – great as a first course or an entree or if you just want seafood bisque any time of the day.

Ingredients

3 tablespoons of butter

2 tablespoons of chopped green onion

2 tablespoons of chopped celery

3 tablespoons of all-purpose flour

2 1/2 cups of milk

1/2 teaspoon of freshly ground black pepper

1 tablespoon of tomato paste

1 cup of heavy whipping cream

8 ounces of crab meat

4 to 8 ounces of small cooked shrimp or other seafood

2 tablespoon of sherry win

How to make Crab and Shrimp Seafood Bisque

Step 1: In a large saucepan or Dutch oven, melt the butter over medium-low heat. Add in the chopped green onion and celery. Saute and stir until tender.

Step 2: Mix in the flour and blend until well incorporated with the butter and vegetables. Continue to cook and stir for 2 minutes.

Step 3: Meanwhile, warm the milk in a separate saucepan over medium heat.

Step 4: Gradually stir in the warm milk into the flour, butter, and vegetables. Continue to cook and stir until the mixture is thickened.

Step 5: Stir in the freshly ground black pepper, tomato paste, and heavy cream.

Step 6: You can puree the soup in a blender or food processor if desired and return it into the saucepan.

Step 7: Add in the crab, shrimp, and the sherry. And bring it to a simmer.

Step 8: When done, remove from fire. Serve immediately. Enjoy!

Tip:

Substitute the shrimp with small cooked bay scallops or lobster. Replace the green onions with finely chopped shallots. And if you’d like you can garnish the soup with thinly sliced green onion tops, cilantro, or parsley. Even add a spoonful of sour cream, and, swirl.

Crab and Shrimp Seafood Bisque

Rebecca I’m a seafood lover and this Seafood Bisque is one way that I enjoy and indulge in seafoods. It’s rich, creamy, and smooth. An easy and delicious way to surrender… Main Dish Recipes Crab and Shrimp Seafood Bisque European Print This
Nutrition facts: 200 calories 20 grams fat
Rating: 5.0/5
( 1 voted )

Ingredients

  • 3 tablespoons of butter
  • 2 tablespoons of chopped green onion
  • 2 tablespoons of chopped celery
  • 3 tablespoons of all-purpose flour
  • 2 1/2 cups of milk
  • 1/2 teaspoon of freshly ground black pepper
  • 1 tablespoon of tomato paste
  • 1 cup of heavy whipping cream
  • 8 ounces of crab meat
  • 4 to 8 ounces of small cooked shrimp or other seafood
  • 2 tablespoon of sherry win

Instructions

Step 1: In a large saucepan or Dutch oven, melt the butter over medium-low heat. Add in the chopped green onion and celery. Saute and stir until tender.

Step 2: Mix in the flour and blend until well incorporated with the butter and vegetables. Continue to cook and stir for 2 minutes.

Step 3: Meanwhile, warm the milk in a separate saucepan over medium heat.

Step 4: Gradually stir in the warm milk into the flour, butter, and vegetables. Continue to cook and stir until the mixture is thickened.

Step 5: Stir in the freshly ground black pepper, tomato paste, and heavy cream.

Step 6: You can puree the soup in a blender or food processor if desired and return it into the saucepan.

Step 7: Add in the crab, shrimp, and the sherry. And bring it to a simmer.

Step 8: When done, remove from fire. Serve immediately. Enjoy!

Tip:

Substitute the shrimp with small cooked bay scallops or lobster. Replace the green onions with finely chopped shallots. And if you'd like you can garnish the soup with thinly sliced green onion tops, cilantro, or parsley. Even add a spoonful of sour cream, and, swirl.

June 3, 2020 0 comment
0 FacebookTwitterPinterestEmail
Main Dish Recipes

Apple Dumplings

by Rebecca June 3, 2020
written by Rebecca

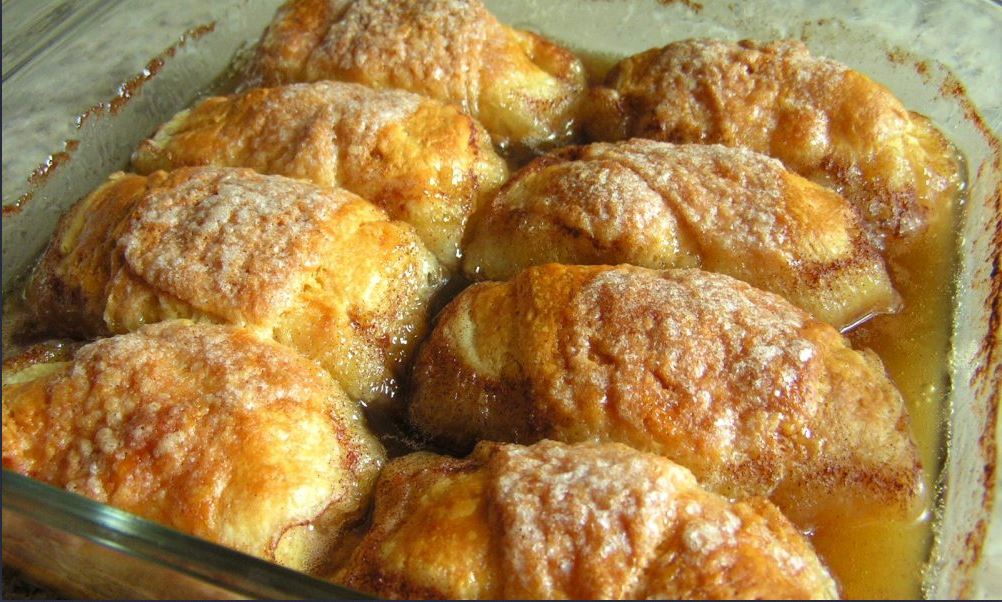
This recipe is awesome! It’s true what they said – this is beyond imaginable. The texture is perfect; crispy on top, soft and dumplingy on the bottom. These apple dumplings are a roll of sweetness, butteriness, and they are absolutely divine! I’ve found this recipe online and I thought, hey this is an excellent idea since my kids love apple so much. I gave it a try and the result is unbelievable! It’s hands-down delicious, and when paired with ice cream, it’s heaven on a plate! Plus, it is super easy to make. I think this is the easiest and quickest dessert I’ve made for a long time. The sauce is superb, too! So don’t throw it away, instead drizzle it over the apple dumplings for even more flavor. These are melt-in-your-mouth delicious!

INGREDIENTS

2 whole Granny Smith Apples

2 cans (8 Oz. Cans) of Crescent Rolls

2 sticks Butter

1-1/2 cup of Sugar

1 teaspoon of Vanilla

Cinnamon, to taste

1 can (12 Oz.) of Mountain Dew Soda

How to make Apple Dumplings

Step 1: Start by peeling and coring the apples. Then, cut them into 8 slices each.

Step 2: Prepare the oven. Preheat it to 350 degrees. Then, butter a 9 x 13-inch pan.

Step 3: Open the can of crescent rolls and unroll the dough. Roll up an apple slice in each of the crescent rolls.

Step 4: In a saucepan, melt the butter, and add the sugar barely stirring. Add in the vanilla and stir.

Step 5: Empty the mixture over the apples. Then, pour in the mountain dew around the edges of the pan. And sprinkle with cinnamon.

Step 6: Place inside the preheated oven and bake for 40 minutes.

Step 7: When done, remove from the oven. Transfer to a serving plate and spoon some of the sweet sauces from the pan and drizzle over the apple dumplings. Serve with ice cream. Enjoy!

Apple Dumplings

Rebecca This recipe is awesome! It’s true what they said – this is beyond imaginable. The texture is perfect; crispy on top, soft and dumplingy on the bottom. These apple dumplings… Main Dish Recipes Apple Dumplings European Print This
Nutrition facts: 200 calories 20 grams fat
Rating: 5.0/5
( 1 voted )

Ingredients

  • 2 whole Granny Smith Apples
  • 2 cans (8 Oz. Cans) of Crescent Rolls
  • 2 sticks Butter
  • 1-1/2 cup of Sugar
  • 1 teaspoon of Vanilla
  • Cinnamon, to taste
  • 1 can (12 Oz.) of Mountain Dew Soda

Instructions

Step 1: Start by peeling and coring the apples. Then, cut them into 8 slices each.

Step 2: Prepare the oven. Preheat it to 350 degrees. Then, butter a 9 x 13-inch pan.

Step 3: Open the can of crescent rolls and unroll the dough. Roll up an apple slice in each of the crescent rolls.

Step 4: In a saucepan, melt the butter, and add the sugar barely stirring. Add in the vanilla and stir.

Step 5: Empty the mixture over the apples. Then, pour in the mountain dew around the edges of the pan. And sprinkle with cinnamon.

Step 6: Place inside the preheated oven and bake for 40 minutes.

Step 7: When done, remove from the oven. Transfer to a serving plate and spoon some of the sweet sauces from the pan and drizzle over the apple dumplings. Serve with ice cream. Enjoy!

June 3, 2020 0 comment
0 FacebookTwitterPinterestEmail
Main Dish Recipes

Chocolate Brownie Cake – So Good, You’ll Want To Lick Your Fingers Clean

by Rebecca June 3, 2020
written by Rebecca

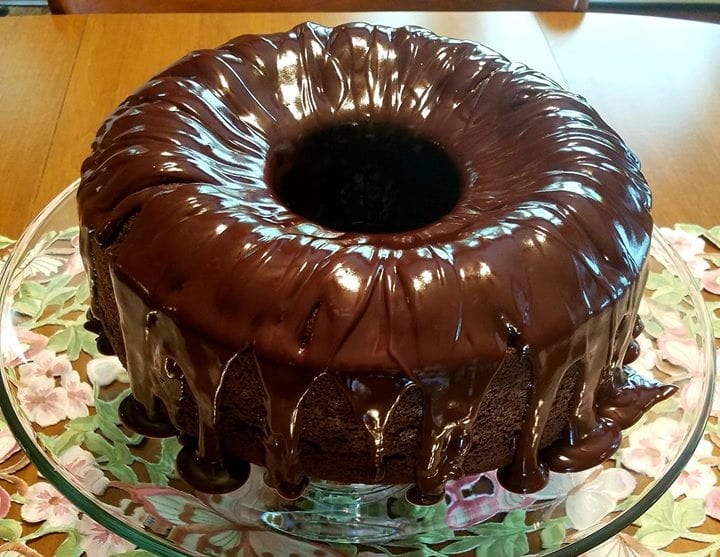
This classic chocolate brownie cake is one of the easiest cake to make, the quickest, and downright delicious! The inside is splendid and moist. A real treat that both kids and adults alike would enjoy. I have made this countless times already and it’s a hit every time. I love it with some fresh strawberries and raspberries, and it’s perfect when paired with vanilla ice cream, too! Some say that it’s great with almonds or pecans, although, I haven’t tried it yet but I think they’re right. I’ll be making this over the weekend for a friend. I am sure she’s gonna love it!

INGREDIENTS

1 box chocolate cake mix

1 box fudge brownie mix

4 large eggs

1+1/4 cup of water

1 cup of oil

For the Ganache

1 cup of heavy whipping cream

1 (12oz) bag semi-sweet chocolate morsels

How to make Chocolate Brownie Cake

To make the Cake

Step 1: Prepare the oven. Preheat to 350 degrees. Spray with bakers spray or butter and flour a bundt pan.

Step 2: In a large bowl, combine the cake mix, brownie mix, eggs, water, and oil. Whisk for 2 minutes making sure that lumps are mostly gone.

Step 3: Pour the batter into the greased bundt pan.

Step 4: Place inside the preheated oven and bake for 50 to 55 minutes.

Step 5: Once done baking, remove the pan from the oven and allow the cake to cool for 5 minutes. Then, carefully turn the cake out onto a cooling rack. Let it the cake cool for another 30 minutes.

To make the Ganache

Step 1: In a large microwave-safe bowl, place the heavy whipping cream and beat for 2 minutes. Make sure that the cream is just about boiling.

Step 2: Pour the chocolate morses into the cream. It may rise and bubble, so don’t freak out.

Step 3: Let it sit for 5 minutes, then, whisk the chocolate and cream for a minute until shiny and smooth.

Step 4: Pour the ganache over the cooled cake. Slice and serve. Enjoy!

Chocolate Brownie Cake – So Good, You’ll Want To Lick Your Fingers Clean

Rebecca This classic chocolate brownie cake is one of the easiest cake to make, the quickest, and downright delicious! The inside is splendid and moist. A real treat that both kids… Main Dish Recipes Chocolate Brownie Cake – So Good, You’ll Want To Lick Your Fingers Clean European Print This
Nutrition facts: 200 calories 20 grams fat
Rating: 5.0/5
( 1 voted )

Ingredients

  • 1 box chocolate cake mix
  • 1 box fudge brownie mix
  • 4 large eggs
  • 1+1/4 cup of water
  • 1 cup of oil
  • For the Ganache
  • 1 cup of heavy whipping cream
  • 1 (12oz) bag semi-sweet chocolate morsels

Instructions

To make the Cake

Step 1: Prepare the oven. Preheat to 350 degrees. Spray with bakers spray or butter and flour a bundt pan.

Step 2: In a large bowl, combine the cake mix, brownie mix, eggs, water, and oil. Whisk for 2 minutes making sure that lumps are mostly gone.

Step 3: Pour the batter into the greased bundt pan.

Step 4: Place inside the preheated oven and bake for 50 to 55 minutes.

Step 5: Once done baking, remove the pan from the oven and allow the cake to cool for 5 minutes. Then, carefully turn the cake out onto a cooling rack. Let it the cake cool for another 30 minutes.

To make the Ganache

Step 1: In a large microwave-safe bowl, place the heavy whipping cream and beat for 2 minutes. Make sure that the cream is just about boiling.

Step 2: Pour the chocolate morses into the cream. It may rise and bubble, so don't freak out.

Step 3: Let it sit for 5 minutes, then, whisk the chocolate and cream for a minute until shiny and smooth.

Step 4: Pour the ganache over the cooled cake. Slice and serve. Enjoy!

June 3, 2020 0 comment
0 FacebookTwitterPinterestEmail
Main Dish Recipes

Pecan Tarts

by Rebecca June 3, 2020
written by Rebecca

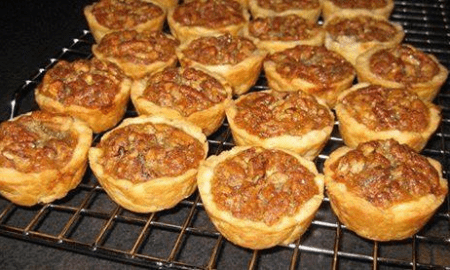
Pecan tarts are a classic and traditional dessert that has been a favorite for a long time. It’s super easy to make and many have made their version of it already. But this recipe is the best if you’ll ask me. These tarts are amazingly delicious, heavenly, and enough to make to our dessert menu. These are great with vanilla ice cream, so rich and creamy. The flaky cream cheese-based is a total game-changer. If my mids love it I’m sure you’ll love these as well. My kids are so picky and they seldom like desserts that are too sweet. But they are crazy in love with these tarts!

Ingredients

1- 3oz. pkg. cream cheese softened

1 stick of margarine or butter, softened

1 cup flour

Dash of salt

For the Filling

2 eggs, beaten

1 cup brown sugar

2 tablespoons margarine or butter, melted

1 teaspoon vanilla

Dash of salt

1 cup pecans, chopped

How to make Pecan Tarts

Step 1: In a bowl, blend the cream cheese, margarine, flour, and salt. Then, shape into 24 individual balls. Press each ball into a 1 3/4 muffin tins. Make sure to press the dough in the bottom and sides using your fingers and do not leave any holes.

To make the filling
Step 2: In a bowl, combine the eggs, brown sugar, margarine, vanilla, and salt. Do not beat using a beater or the tops will be crusty. We want a nutty texture so mix well by hand.

Step 3: Evenly divide the pecans in the pastry shells. Then, pour the filling in the shells and fill 2/3 of the shells.

Step 4: Place inside the oven and bake for 20 to 25 minutes at 350 degrees. Once done, remove from the oven and let it cool slightly before removing from the pans.

Step 5: Remove from the pans and cool completely on wire racks. This recipe makes 24 nutty and rich tarts. Serve and enjoy!

Pecan Tarts

Rebecca Pecan tarts are a classic and traditional dessert that has been a favorite for a long time. It’s super easy to make and many have made their version of it… Main Dish Recipes Pecan Tarts European Print This
Nutrition facts: 200 calories 20 grams fat
Rating: 5.0/5
( 1 voted )

Ingredients

  • 1- 3oz. pkg. cream cheese softened
  • 1 stick of margarine or butter, softened
  • 1 cup flour
  • Dash of salt
  • For the Filling
  • 2 eggs, beaten
  • 1 cup brown sugar
  • 2 tablespoons margarine or butter, melted
  • 1 teaspoon vanilla
  • Dash of salt
  • 1 cup pecans, chopped

Instructions

Step 1: In a bowl, blend the cream cheese, margarine, flour, and salt. Then, shape into 24 individual balls. Press each ball into a 1 3/4 muffin tins. Make sure to press the dough in the bottom and sides using your fingers and do not leave any holes.

To make the filling
Step 2: In a bowl, combine the eggs, brown sugar, margarine, vanilla, and salt. Do not beat using a beater or the tops will be crusty. We want a nutty texture so mix well by hand.

Step 3: Evenly divide the pecans in the pastry shells. Then, pour the filling in the shells and fill 2/3 of the shells.

Step 4: Place inside the oven and bake for 20 to 25 minutes at 350 degrees. Once done, remove from the oven and let it cool slightly before removing from the pans.

Step 5: Remove from the pans and cool completely on wire racks. This recipe makes 24 nutty and rich tarts. Serve and enjoy!

June 3, 2020 0 comment
0 FacebookTwitterPinterestEmail
Main Dish Recipes

Peanut Butter-Chocolate No-Bake Cookies

by Rebecca June 2, 2020
written by Rebecca

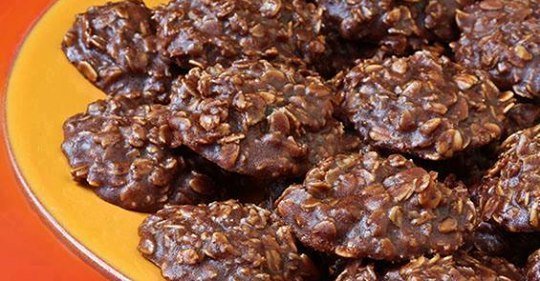
The combination of peanut butter and chocolate in this recipe is perfect. Another no-bake cookie that hits every spot. Whoever thought of this recipe is a genius! I love no-bake desserts because they are the easiest and one of the yummiest. This is a keeper. Something that I would want my kids to learn to make and their kids in the future.

This recipe I’ve stumbled upon when I was browsing Pinterest. I’ve saved it, but had no time to make it. If I remembered it right. I first did this on the first day of quarantine. I think the quarantine made me a great cook. I’ve mastered a lot of recipes including this no-bake peanut butter – chocolate cookies. I’ve done this many times because the kids love it so much! It’s soft, it’s chocolatey, it’s sweet, and the peanut butter along with the ingredients of this cookie is superb! Doesn’t matter if you make a lot because these can be stored in an airtight container to enjoy anytime!

Ingredients

2 cups of white sugar

½ cup of butter

½ cup of milk

⅓ cup of unsweetened cocoa powder

⅔ cup of peanut butter

3 cups of quick-cooking oats

½ cup of chopped peanuts (optional)

2 teaspoons of vanilla extract

How to make Peanut Butter-Chocolate No-Bake Cookies

Step 1: In a medium saucepan, combine the sugar, butter, milk, and cocoa. Prepare your cookie sheet. Place a piece of wax paper or foil at the bottom.

Step 2: Cook the combined ingredients over medium heat. Stir constantly until the mixture is at a rolling boil.

Step 3: Remove the skillet from the heat and cool for a minute.

Step 4: Then, stir the peanut butter. Add in the oats, peanuts, and vanilla. Mix until incorporated.

Step 5: And quickly drop the mixture by heaping teaspoons onto the wax paper or foil. Let it cool completely. These cookies can be stored in a cool, dry place.

Peanut Butter-Chocolate No-Bake Cookies

Rebecca The combination of peanut butter and chocolate in this recipe is perfect. Another no-bake cookie that hits every spot. Whoever thought of this recipe is a genius! I love no-bake… Main Dish Recipes Peanut Butter-Chocolate No-Bake Cookies European Print This
Nutrition facts: 200 calories 20 grams fat
Rating: 5.0/5
( 1 voted )

Ingredients

  • 2 cups of white sugar
  • ½ cup of butter
  • ½ cup of milk
  • ⅓ cup of unsweetened cocoa powder
  • ⅔ cup of peanut butter
  • 3 cups of quick-cooking oats
  • ½ cup of chopped peanuts (optional)
  • 2 teaspoons of vanilla extract

Instructions

Step 1: In a medium saucepan, combine the sugar, butter, milk, and cocoa. Prepare your cookie sheet. Place a piece of wax paper or foil at the bottom.

Step 2: Cook the combined ingredients over medium heat. Stir constantly until the mixture is at a rolling boil.

Step 3: Remove the skillet from the heat and cool for a minute.

Step 4: Then, stir the peanut butter. Add in the oats, peanuts, and vanilla. Mix until incorporated.

Step 5: And quickly drop the mixture by heaping teaspoons onto the wax paper or foil. Let it cool completely. These cookies can be stored in a cool, dry place.

June 2, 2020 0 comment
0 FacebookTwitterPinterestEmail
Main Dish Recipes

Mom’s Goulash

by Rebecca June 2, 2020
written by Rebecca

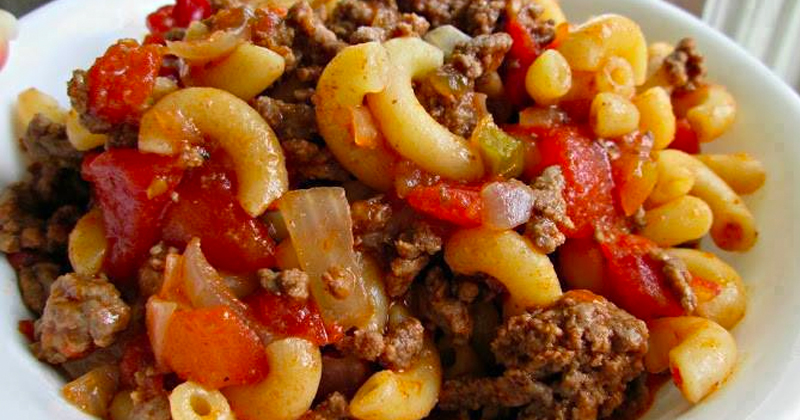
I’ve never known Goulash until I tasted it when we visited my in-laws. I instantly fell in love and asked for the recipe. I’ve been making it since. My kids love it and my husband is so happy because it’s the exact dish that he grew up with. This dish is beefy, full of tomatoes, and you can use either noodles or macaroni. But I prefer macaroni, you can use whatever you like and the result is the same delicious, flavorful, and fulfilling Goulash. I’m happy to share this recipe with you. I’m confident that this will hit your dinner menu. There are a lot of Goulash recipes you’ll find on the net, but this is the simplest. Thanks to my in-law for teaching me how making it and for giving me the recipe. My husband is crazy about it. It’s a keeper. I’ll pass this along with my kids and my kids to theirs. Try it for yourself, I’m sure you’ll love it as much as we do. Follow the recipe and you’re almost there. Enjoy!

Ingredients

1/2 lb Macaroni

1 1/2 lbs ground beef

1 large onion, diced garlic salt, pepper, chili powder, and hot sauce to taste

2 (14.5 Oz) cans whole stewed tomatoes, undrained

2 tablespoons ketchup

Tomato juice as needed

How to make Mom’s Goulash

Step 1: Cook the macaroni following the package instructions until al dente.

Step 2: Meanwhile, cook the ground beef and onion in a large skillet or Dutch oven until browned. Drain excess oil.

Step 3: Season the browned ground beef and onion with spices to taste.

Step 4: Mashed tomatoes in a large bowl, using a potato masher. Then, add to the cooked beef along with the ketchup.

Step 5: Drain the macaroni and add to the beef mixture. Stir well. Taste and add the additional seasoning as needed.

Step 6: For a juicy Goulash you can add more tomato juice.

Mom's Goulash

Rebecca I’ve never known Goulash until I tasted it when we visited my in-laws. I instantly fell in love and asked for the recipe. I’ve been making it since. My kids… Main Dish Recipes Mom’s Goulash European Print This
Nutrition facts: 200 calories 20 grams fat
Rating: 5.0/5
( 1 voted )

Ingredients

  • 1/2 lb Macaroni
  • 1 1/2 lbs ground beef
  • 1 large onion, diced garlic salt, pepper, chili powder, and hot sauce to taste
  • 2 (14.5 Oz) cans whole stewed tomatoes, undrained
  • 2 tablespoons ketchup
  • Tomato juice as needed

Instructions

Step 1: Cook the macaroni following the package instructions until al dente.

Step 2: Meanwhile, cook the ground beef and onion in a large skillet or Dutch oven until browned. Drain excess oil.

Step 3: Season the browned ground beef and onion with spices to taste.

Step 4: Mashed tomatoes in a large bowl, using a potato masher. Then, add to the cooked beef along with the ketchup.

Step 5: Drain the macaroni and add to the beef mixture. Stir well. Taste and add the additional seasoning as needed.

Step 6: For a juicy Goulash you can add more tomato juice.


June 2, 2020 0 comment
0 FacebookTwitterPinterestEmail
Main Dish Recipes

Not Yo’ Mama’s Banana Pudding

by Rebecca June 2, 2020
written by Rebecca

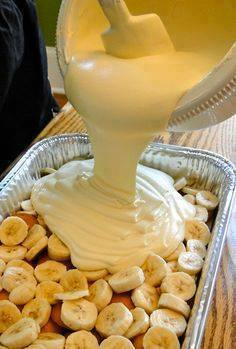
This is another Southern recipe that’s worth your time. It’s an easy dessert to make, a true Southern dessert that has luscious layers of pudding, whipped cream, ripe bananas, and cookies. It’s impossible to resist.

My kids are not a fan of bananas. I find it hard always to let them eat bananas. So I always figure out a way for them to eat bananas and this recipe is one great idea to include bananas. This banana pudding is one of their favorites. They always want it after a meal. This has been the most awaited every after dinner. It’s great with whipped cream or vanilla ice cream or drizzle it with some chocolate or caramel sauce on top. Paired it with a freshly brewed coffee for an afternoon snack. I enjoy bringing this on gatherings, it’s a hit, and everyone rate it 5 stars! Try it for yourself and it will not disappoint.

Ingredients

1 (14-ounce) can sweetened condensed milk

1 (12-ounce) container frozen whipped topping, thawed, or equal amount sweetened whipped cream

2 bags Pepperidge Farm Chessmen cookies

6 to 8 bananas, sliced

2 cups of milk

1 (5-ounce) box instant French vanilla pudding

1 (8-ounce) package cream cheese, softened

How to make Not Yo’ Mama’s Banana Pudding

Step 1: In a 13 x 9 x 2-inch dish, line 1 bag of cookies and layer the bananas over.

Step 2: Combine the milk and pudding in a bowl. Mix and blend well using a handheld electric mixer.

Step 3: Mix in the cream cheese and condensed milk in a separate bowl. Combine until smooth.

Step 4: Then, fold the whipped topping into the cream cheese mixture.

Step 5: Add the cream cheese mixture into the pudding mixture. Mix until incorporated.

Step 6: Evenly pour the mixture into the cookies and banana, then, cover with the remaining cookies. Place inside the oven to chill until ready to serve.

Not Yo' Mama's Banana Pudding

Rebecca This is another Southern recipe that’s worth your time. It’s an easy dessert to make, a true Southern dessert that has luscious layers of pudding, whipped cream, ripe bananas, and… Main Dish Recipes Not Yo’ Mama’s Banana Pudding European Print This
Nutrition facts: 200 calories 20 grams fat
Rating: 5.0/5
( 1 voted )

Ingredients

  • 1 (14-ounce) can sweetened condensed milk
  • 1 (12-ounce) container frozen whipped topping, thawed, or equal amount sweetened whipped cream
  • 2 bags Pepperidge Farm Chessmen cookies
  • 6 to 8 bananas, sliced
  • 2 cups of milk
  • 1 (5-ounce) box instant French vanilla pudding
  • 1 (8-ounce) package cream cheese, softened

Instructions

Step 1: In a 13 x 9 x 2-inch dish, line 1 bag of cookies and layer the bananas over.

Step 2: Combine the milk and pudding in a bowl. Mix and blend well using a handheld electric mixer.

Step 3: Mix in the cream cheese and condensed milk in a separate bowl. Combine until smooth.

Step 4: Then, fold the whipped topping into the cream cheese mixture.

Step 5: Add the cream cheese mixture into the pudding mixture. Mix until incorporated.

Step 6: Evenly pour the mixture into the cookies and banana, then, cover with the remaining cookies. Place inside the oven to chill until ready to serve.


June 2, 2020 0 comment
0 FacebookTwitterPinterestEmail
Newer Posts
Older Posts

Popular Posts

  • 1

    Crispy Crunchy Parmesan Potatoes

    March 21, 2020
  • 2

    CROCK POT SMOTHERED PORK CHOPS

    March 21, 2020
  • Facebook
  • Twitter

@2019 - All Right Reserved.


Back To Top