Cook it once
  • Home
  • Privacy Policy
  • Recipes
    • KETO
    • LC
    • WW
  • Tips
  • Contact
Cook it once
  • Home
  • Privacy Policy
  • Recipes
    • KETO
    • LC
    • WW
  • Tips
  • Contact
Monthly Archives

June 2020

Main Dish Recipes

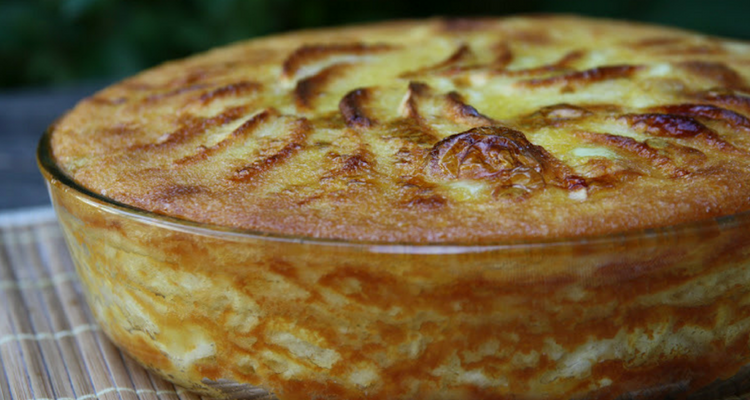
My grandmother’s soft apple cake…….. Hummmmmmm too good.

by Rebecca June 13, 2020
written by Rebecca

I love apples and this recipe is perfect because it uses fresh apple with flour, semi-salted butter, sugar, and eggs. It will take only these simple and easy to find ingredients to make this soft and super good apple cake. The apple chunks nestled in this moist and fluffy cake is the best! How can a simple cake be this good? I asked this myself, too when I first made this. But I guess the essence of simplicity is what makes this cake special. This is hands down one of the easiest and quickest desserts I have ever made! It is a light, soft, buttery apple cake that satisfies your cravings. Have a bite of this gorgeous and have a happy day!

INGREDIENTS

3.5 oz flour

1 apple

3.5 oz semi-salted butter

1/2 cup brown sugar

2 eggs

1 pack of yeast

How to make Apple Cake

Step 1: Prepare the oven. preheat it to 350 degrees F.

Step 2: Cut the apple in half on the cooking board. Remove the core and seeds. Then, cut into small pieces.

Step 3: Place the pieces of apple in a saucepan and cook over high heat. And add about 3 tablespoons of brown sugar.

Step 4: Melt the butter in the microwave.

Step 5: Transfer the melted butter in a bowl and add in the brown sugar. Mix until incorporated.

Step 6: In a different bowl, break the eggs and beat with a fork. Then, add to the melted butter.

Step 7: Mix the flour and yeast in a soup plate.

Step 8: Sift the flour and yeast mixture over the caramelized apple.

Step 9: make sure to mix thoroughly.

Step 10: Grease with butter a 5 x 9-inch mold.

Step 11: Pour everything in the greased mold. Place inside the preheated oven and bake for 45 minutes.

Step 12: Once done, remove from the oven and carefully coat with film while the cake is still hot.
My grandmother’s soft apple cake…….. Hummmmmmm too good.

Rebecca I love apples and this recipe is perfect because it uses fresh apple with flour, semi-salted butter, sugar, and eggs. It will take only these simple and easy to find… Main Dish Recipes My grandmother’s soft apple cake…….. Hummmmmmm too good. European Print This
Nutrition facts: 200 calories 20 grams fat
Rating: 5.0/5
( 1 voted )

Ingredients

  • 3.5 oz flour
  • 1 apple
  • 3.5 oz semi-salted butter
  • 1/2 cup brown sugar
  • 2 eggs
  • 1 pack of yeast

Instructions

Step 1: Prepare the oven. preheat it to 350 degrees F.

Step 2: Cut the apple in half on the cooking board. Remove the core and seeds. Then, cut into small pieces.

Step 3: Place the pieces of apple in a saucepan and cook over high heat. And add about 3 tablespoons of brown sugar.

Step 4: Melt the butter in the microwave.

Step 5: Transfer the melted butter in a bowl and add in the brown sugar. Mix until incorporated.

Step 6: In a different bowl, break the eggs and beat with a fork. Then, add to the melted butter.

Step 7: Mix the flour and yeast in a soup plate.

Step 8: Sift the flour and yeast mixture over the caramelized apple.

Step 9: make sure to mix thoroughly.

Step 10: Grease with butter a 5 x 9-inch mold.

Step 11: Pour everything in the greased mold. Place inside the preheated oven and bake for 45 minutes.

Step 12: Once done, remove from the oven and carefully coat with film while the cake is still hot.
June 13, 2020 0 comment
0 FacebookTwitterPinterestEmail
Main Dish Recipes

Southern Creamy Pralines

by Rebecca June 13, 2020
written by Rebecca

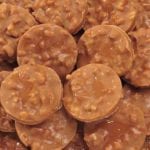
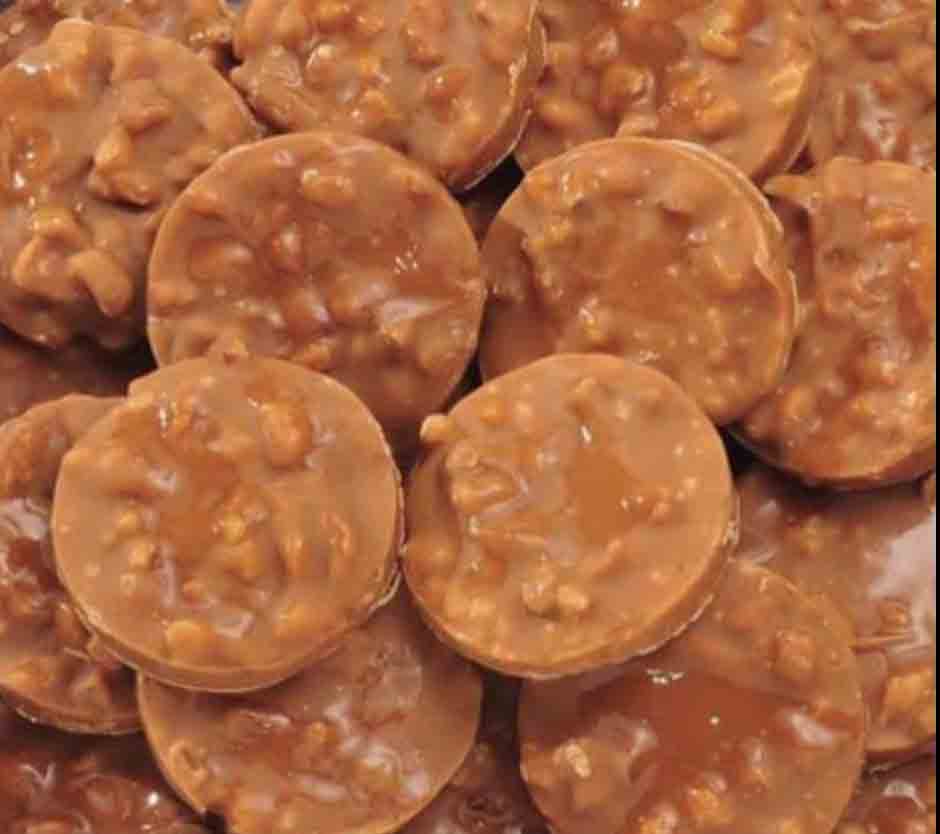
This easy to make Southen Creamy Pralines are made with sugar, buttermilk, corn syrup, and pecans. It’s a no-fuss recipe that needs just some simple ingredients that are easily found. Another Southern recipe that has been putting a smile on our faces for ages. These pralines are seriously addicting, so good you’ll never stop eating. It has an awesome brown sugar and buttermilk flavor that is pure heaven! It’s candy, it’s a cookie that surely melts in your mouth!

I’m dying to share this recipe. I’m darn excited, I have a big smile on my face right now and I wish you guys can see it. These pralines are awesome, great as a homemade gift, or just for snacking. I’m a praline lover and tasted a lot of pralines but this by far is the best I’ve ever had! It’s not chewy, not soft, and definitely not hard, it’s just perfect!

INGREDIENTS

3 cups of sugar

1 cup whole fat buttermilk

1/4 cup light corn syrup

1 pinch salt

1 teaspoon baking soda

1 teaspoon vanilla extract

4 cups of pecans

How to make Southern Creamy Pralines

Step 1: In a very large pan, combine the sugar, buttermilk, corn syrup, and salt. Bring to a rolling boil.

Step 2: Pour in the soda and stir. It will foam considerably, it’s normal so don’t worry.

Step 3: Cook until a soft-ball is formed when dropped in cold water. You can use a candy thermometer, too. When it reads 235 degrees F the syrup is at a soft-ball stage.

Step 4: Remove the pan from the heat. Mix in the vanilla and beat until the color changes and the mixture thickened.

Step 5: Add in the pecans and stir.

Step 6: Spoon or scoop the mixture and drop on a well-greased non-stick cookie sheet with foil or wax paper. Make sure to this step fast before the candy hardened.

Southern Creamy Pralines

Rebecca This easy to make Southen Creamy Pralines are made with sugar, buttermilk, corn syrup, and pecans. It’s a no-fuss recipe that needs just some simple ingredients that are easily found.… Main Dish Recipes Southern Creamy Pralines European Print This
Nutrition facts: 200 calories 20 grams fat
Rating: 4.0/5
( 4 voted )

Ingredients

  • 3 cups of sugar
  • 1 cup whole fat buttermilk
  • 1/4 cup light corn syrup
  • 1 pinch salt
  • 1 teaspoon baking soda
  • 1 teaspoon vanilla extract
  • 4 cups of pecans

Instructions

Step 1: In a very large pan, combine the sugar, buttermilk, corn syrup, and salt. Bring to a rolling boil.

Step 2: Pour in the soda and stir. It will foam considerably, it's normal so don't worry.

Step 3: Cook until a soft-ball is formed when dropped in cold water. You can use a candy thermometer, too. When it reads 235 degrees F the syrup is at a soft-ball stage.

Step 4: Remove the pan from the heat. Mix in the vanilla and beat until the color changes and the mixture thickened.

Step 5: Add in the pecans and stir.

Step 6: Spoon or scoop the mixture and drop on a well-greased non-stick cookie sheet with foil or wax paper. Make sure to this step fast before the candy hardened.

June 13, 2020 0 comment
0 FacebookTwitterPinterestEmail
Main Dish Recipes

Southern Sweet Potato Casserole

by Rebecca June 13, 2020
written by Rebecca

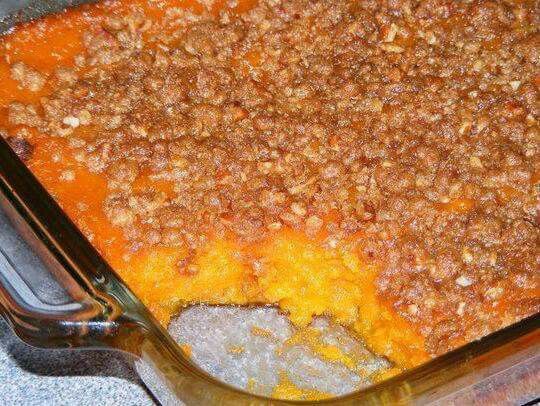
This casserole is a dessert-like side dish that is made with mashed potato, sugar, butter, eggs, and milk. It’s topped with melted butter, brown sugar, and chopped pecans that are mixed to form a melt in your mouth, crunchy, and buttery topping. It’s an easy recipe to make with as you noticed simple and readily available ingredients. An awesome dish to serve on Thanksgiving, for a potluck, or a simple dinner with family and friends. An all year round dish that enjoyed by families all over the world! This casserole deserves a 5-star because it steals all the attention. A sweet, traditional Southern potato casserole for all season.

Big thanks to my Mother for teaching me how to make this great casserole. I grew up to this dish, and it will always have a special place in my heart. I’m sure to pass the recipe to my kids. This casserole is my family’s favorite, and the most requested. I only make this on special occasions, however, as requested by my kids and husband, we make it a point to serve this every Sunday. What a nice dish to share with your loved one.

INGREDIENTS

3 cups sweet potatoes

1⁄2 cup sugar

1⁄2 cup butter

2 eggs, beaten

1 teaspoon vanilla

1⁄3 cup milk

For the Topping

1⁄3 cup melted butter

1 cup light brown sugar

1⁄2 cup flour

1 cup chopped pecans

How to make Southern Sweet Potato Casserole

Step 1: Boil the potatoes. Remove from heat, drain, and mash.

Step 2: In a bowl, mix the sugar, butter, eggs, vanilla, and milk.

Step 3: Pour the mixture into a 13 x 9-inch baking dish.

Step 4: To make the topping, melt the butter. Stir in the brown sugar, flour, and chopped pecans. Mix until well combined.

Step 5: Pour the topping evenly over the potato mixture.

Step 6: Place inside the oven and bake at 350 degrees for about 25 minutes. Once done, remove from the oven and serve immediately.

Southern Sweet Potato Casserole

Rebecca This casserole is a dessert-like side dish that is made with mashed potato, sugar, butter, eggs, and milk. It’s topped with melted butter, brown sugar, and chopped pecans that are… Main Dish Recipes Southern Sweet Potato Casserole European Print This
Nutrition facts: 200 calories 20 grams fat
Rating: 5.0/5
( 1 voted )

Ingredients

  • 3 cups sweet potatoes
  • 1⁄2 cup sugar
  • 1⁄2 cup butter
  • 2 eggs, beaten
  • 1 teaspoon vanilla
  • 1⁄3 cup milk
  • For the Topping
  • 1⁄3 cup melted butter
  • 1 cup light brown sugar
  • 1⁄2 cup flour
  • 1 cup chopped pecans

Instructions

Step 1: Boil the potatoes. Remove from heat, drain, and mash.

Step 2: In a bowl, mix the sugar, butter, eggs, vanilla, and milk.

Step 3: Pour the mixture into a 13 x 9-inch baking dish.

Step 4: To make the topping, melt the butter. Stir in the brown sugar, flour, and chopped pecans. Mix until well combined.

Step 5: Pour the topping evenly over the potato mixture.

Step 6: Place inside the oven and bake at 350 degrees for about 25 minutes. Once done, remove from the oven and serve immediately.

June 13, 2020 0 comment
0 FacebookTwitterPinterestEmail
Main Dish Recipes

LEMON CURD COOKIES

by Rebecca June 13, 2020
written by Rebecca

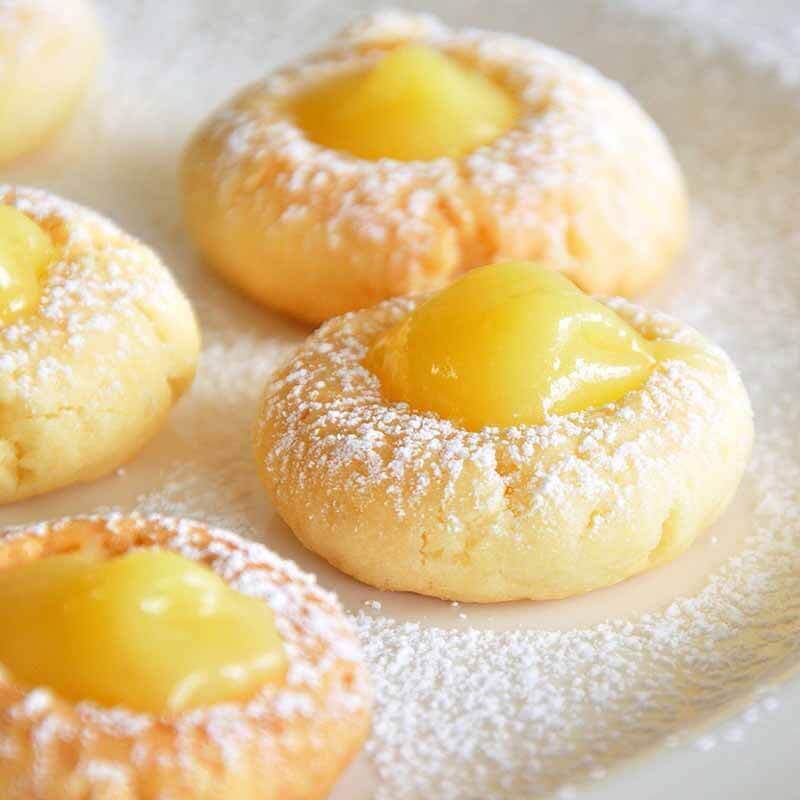
Pretty. These lemon curd cookies are one of the prettiest I’ve seen today. It’s refreshing to look at, and they taste amazing! A nice, tender, and a bit flaky cookies that you can easily make. I’m sure the kids will closely look at them first before popping them in their mouth because these are darn gorgeous! And they are a great gift to give to friends and colleagues. I’m sure they will be impressed by how skilled you are like a baker. Wink.

INGREDIENTS

1 cup unsalted butter, softened

½ cup granulated sugar

2 large egg yolks

1 tablespoon grated lemon zest

1 tablespoon fresh lemon juice

½ teaspoon kosher salt

2½ cup all-purpose flour

1 cup Lemon Curd, or store-bought

HOW TO MAKE LEMON CURD COOKIES

Step 1: Ready the oven and preheat to 350 degrees.

Step 2: Apply non-stick liner or parchment paper into a half-sheet-pan baking sheet.

Step 3: In a large bowl, add sugar and butter. Use a hand mixer to mix it properly. Beat until well-blended.

Step 4: In the same bowl with the butter mixture, add flour, and beat until incorporated well. Bind the dough in the same bowl.

Step 5: Create 1-inch balls out of the dough. Use a tablespoon to form it.

Step 6: Put each ball into the lined sheets. Leave a 1-inch space on each ball.

Step 7: Apply flour to your finger then press the middle part of the ball to create a small indentation.

Step 8: Place the sheet in the oven and bake for 18 to 20 minutes or until it becomes lightly golden.

Step 9: Remove from the oven and add the curd to the small indentation in the middle of each ball.

Step 10: Out it back to the oven and bake for another 2 minutes until the curd is cooked.

Step 11: For the remaining cookies, brush the edges with confectioners’ sugar and bake in the oven.

Step 12: Serve hot and enjoy!

LEMON CURD COOKIES

Rebecca Pretty. These lemon curd cookies are one of the prettiest I’ve seen today. It’s refreshing to look at, and they taste amazing! A nice, tender, and a bit flaky cookies… Main Dish Recipes LEMON CURD COOKIES European Print This
Nutrition facts: 200 calories 20 grams fat
Rating: 4.5/5
( 2 voted )

Ingredients

  • 1 cup unsalted butter, softened
  • ½ cup granulated sugar
  • 2 large egg yolks
  • 1 tablespoon grated lemon zest
  • 1 tablespoon fresh lemon juice
  • ½ teaspoon kosher salt
  • 2½ cup all-purpose flour
  • 1 cup Lemon Curd, or store-bought

Instructions

Step 1: Ready the oven and preheat to 350 degrees.

Step 2: Apply non-stick liner or parchment paper into a half-sheet-pan baking sheet.

Step 3: In a large bowl, add sugar and butter. Use a hand mixer to mix it properly. Beat until well-blended.

Step 4: In the same bowl with the butter mixture, add flour, and beat until incorporated well. Bind the dough in the same bowl.

Step 5: Create 1-inch balls out of the dough. Use a tablespoon to form it.

Step 6: Put each ball into the lined sheets. Leave a 1-inch space on each ball.

Step 7: Apply flour to your finger then press the middle part of the ball to create a small indentation.

Step 8: Place the sheet in the oven and bake for 18 to 20 minutes or until it becomes lightly golden.

Step 9: Remove from the oven and add the curd to the small indentation in the middle of each ball.

Step 10: Out it back to the oven and bake for another 2 minutes until the curd is cooked.

Step 11: For the remaining cookies, brush the edges with confectioners' sugar and bake in the oven.

Step 12: Serve hot and enjoy!

June 13, 2020 0 comment
0 FacebookTwitterPinterestEmail
Main Dish Recipes

Amish Onion Fritters

by Rebecca June 13, 2020
written by Rebecca

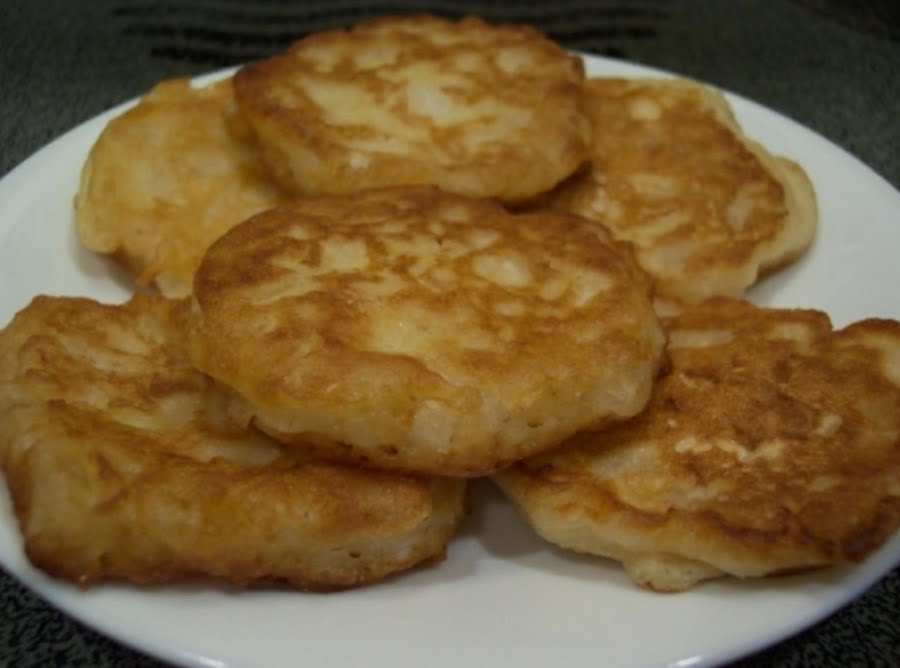
Are the burgers done? I got the Amish Onion Fritters ready! These two are perfect together! Maybe next time I’ll write my recipe for my amazing burgers but for now, let’s talk about this amazing Onion Fritters. This is very easy to make. All you need to do is follow these 8 simple steps that I have provided for you and make sure you have all the ingredients needed. Oh boy, you are less than 30 minutes away from perfection. I just love the taste of toasted onion and not just regular fried onion, this one is coated perfectly. You can eat it as is but if you wish to eat it with sauce, try mixing mayonnaise, ketchup, freshly chopped celery, salt, and pepper. It takes it to the next level! I think it’s time to open a cold beer, sit on your front porch, and dig into this Amish Onion Fritters! Enjoy!

INGREDIENTS

3/4 cup flour

1 tablespoon sugar

1 tablespoon cornmeal

2 teaspoons baking powder

1-2 teaspoons salt-according to taste

3/4 cup milk

2 1/2 cups chopped onions

oil for frying

How to make Amish Onion Fritters

Step 1: In a large bowl, add 3/4 cup of flour, 1 tablespoon of sugar, 1 tablespoon cornmeal, 2 teaspoons of baking powder, 1-2 teaspoons of salt. Whisk until well-mixed.

Step 2: Pour milk the same bowl as the dry ingredients and stir until well-mixed and the batter becomes thick.

Step 3: Toss in the onions and mix.

Step 4: Place a 1/2-inch skillet on the stove and turn the heat to medium-high. Add oil and wait for it to become hot.

Step 5: Scoop the batter 1 tablespoon at a time and drop each into the hot oil and flatten them out.

Step 6: Fry each side until it becomes crispy.

Step 7: Meanwhile, prepare a clean plate. Line with paper towels.

Step 8: Drain the oil of the Fritters by putting them into the paper towels.

Step 8: Serve and enjoy!

Amish Onion Fritters

Rebecca Are the burgers done? I got the Amish Onion Fritters ready! These two are perfect together! Maybe next time I’ll write my recipe for my amazing burgers but for now,… Main Dish Recipes Amish Onion Fritters European Print This
Nutrition facts: 200 calories 20 grams fat
Rating: 5.0/5
( 1 voted )

Ingredients

  • 3/4 cup flour
  • 1 tablespoon sugar
  • 1 tablespoon cornmeal
  • 2 teaspoons baking powder
  • 1-2 teaspoons salt-according to taste
  • 3/4 cup milk
  • 2 1/2 cups chopped onions
  • oil for frying

Instructions

Step 1: In a large bowl, add 3/4 cup of flour, 1 tablespoon of sugar, 1 tablespoon cornmeal, 2 teaspoons of baking powder, 1-2 teaspoons of salt. Whisk until well-mixed.

Step 2: Pour milk the same bowl as the dry ingredients and stir until well-mixed and the batter becomes thick.

Step 3: Toss in the onions and mix.

Step 4: Place a 1/2-inch skillet on the stove and turn the heat to medium-high. Add oil and wait for it to become hot.

Step 5: Scoop the batter 1 tablespoon at a time and drop each into the hot oil and flatten them out.

Step 6: Fry each side until it becomes crispy.

Step 7: Meanwhile, prepare a clean plate. Line with paper towels.

Step 8: Drain the oil of the Fritters by putting them into the paper towels.

Step 8: Serve and enjoy!

June 13, 2020 0 comment
0 FacebookTwitterPinterestEmail
Main Dish Recipes

Cheesy Baked Asparagus

by Rebecca June 13, 2020
written by Rebecca

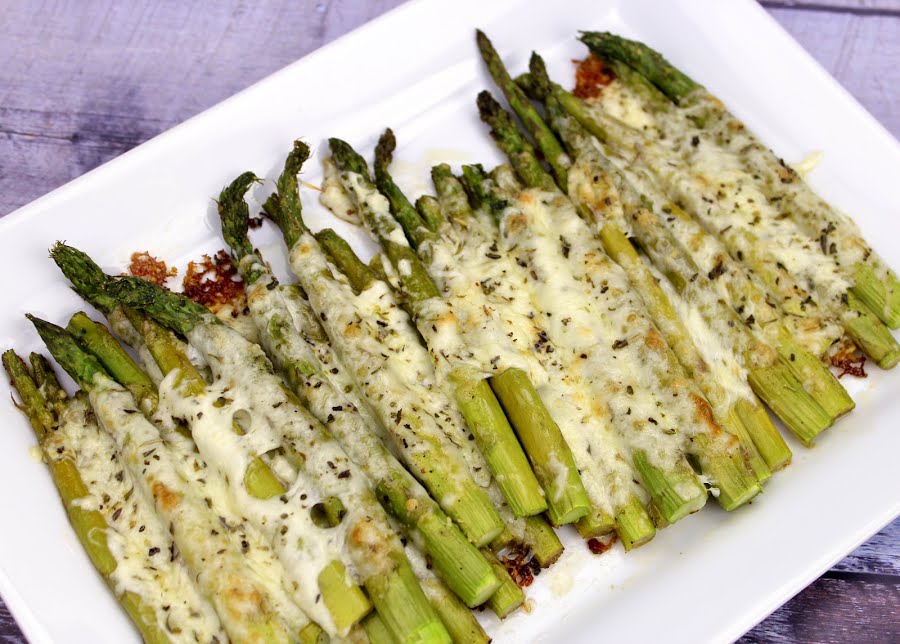
Want a  healthy and delicious meal? Try this Cheesy Baked Asparagus today! It will surely satisfy your craving for great food. This is what I prepare almost every day for the past month. It is just perfect for everything! For example, instead of just eating your regular asparagus with your steak, try this cheesy approach to the asparagus. It complements really nice with the steak. You can eat it without any main dish because it is a complete meal itself. I mean, cheese and asparagus is a pretty heavy meal. Don’t you get tired of just eating regular asparagus? Any grilled meat is perfect with this recipe. Next time you have people over, surprise them by this. I hope you get to try this. By the way, for an extra twist, try adding fresh chili. It’s the best!

INGREDIENTS

1 bunch asparagus, woody ends trimmed

3 tablespoons butter, melted

1 tablespoon grated Parmesan cheese

3/4 cup shredded mozzarella cheese

To use for the Italian seasoning

1/2 teaspoon house seasoning (equal parts garlic powder, onion powder and pepper…combine and store in an airtight container)

How to make Cheesy Baked Asparagus

Step 1: Line tinfoil into a baking sheet.

Step 2: Place a small pan on the stove and turn the heat to medium. Add butter and let it melt.

Step 3: Add the asparagus into the lined baking sheet and pour the melted butter.

Step 4: Add the Parmesan cheese and the house seasoning on top. Spread it over the asparagus.

Step 5: Place in the oven and bake for 15 minutes at 400 degrees.

Step 6: Remove from the oven and sprinkle with mozzarella cheese and a small amount of the Italian seasoning on top.

Step 7: Return to the oven and let the cheese melt for at least 7 minutes. Once the cheese appears to be color brown, you’re done!

Step 8: Remove from the oven. Serve and enjoy!

Cheesy Baked Asparagus

Rebecca Want a  healthy and delicious meal? Try this Cheesy Baked Asparagus today! It will surely satisfy your craving for great food. This is what I prepare almost every day for… Main Dish Recipes Cheesy Baked Asparagus European Print This
Nutrition facts: 200 calories 20 grams fat
Rating: 5.0/5
( 1 voted )

Ingredients

  • 1 bunch asparagus, woody ends trimmed
  • 3 tablespoons butter, melted
  • 1 tablespoon grated Parmesan cheese
  • 3/4 cup shredded mozzarella cheese
  • To use for the Italian seasoning
  • 1/2 teaspoon house seasoning (equal parts garlic powder, onion powder and pepper…combine and store in an airtight container)

Instructions

Step 1: Line tinfoil into a baking sheet.

Step 2: Place a small pan on the stove and turn the heat to medium. Add butter and let it melt.

Step 3: Add the asparagus into the lined baking sheet and pour the melted butter.

Step 4: Add the Parmesan cheese and the house seasoning on top. Spread it over the asparagus.

Step 5: Place in the oven and bake for 15 minutes at 400 degrees.

Step 6: Remove from the oven and sprinkle with mozzarella cheese and a small amount of the Italian seasoning on top.

Step 7: Return to the oven and let the cheese melt for at least 7 minutes. Once the cheese appears to be color brown, you're done!

Step 8: Remove from the oven. Serve and enjoy!

June 13, 2020 0 comment
0 FacebookTwitterPinterestEmail
Main Dish Recipes

Blackberry Cobbler

by Rebecca June 13, 2020
written by Rebecca

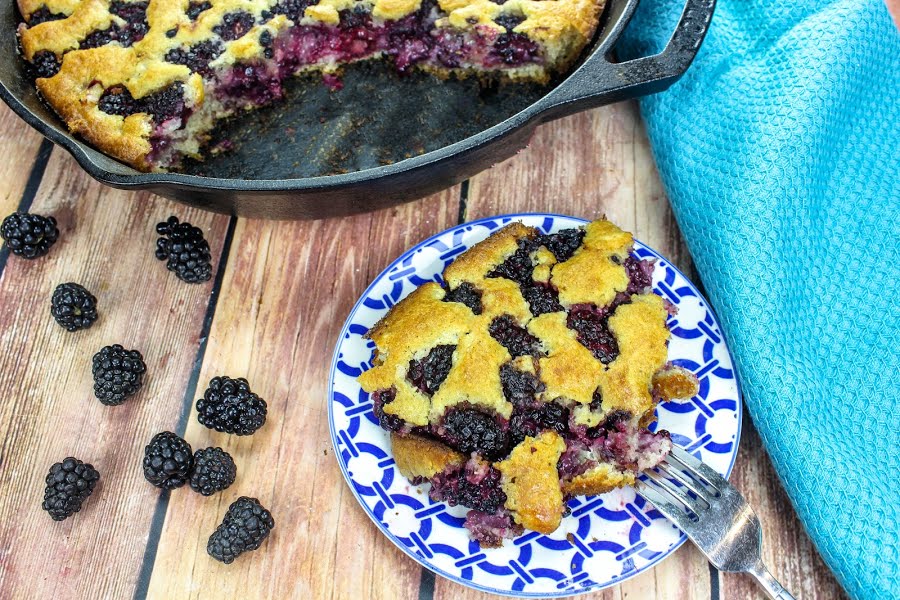
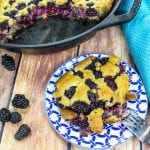
I am so pleased to share this with you today. I saw this recipe on TV the other day and I am so glad that I decided to try it out. It is really easy to make so don’t worry if you are not an expert in the kitchen like me. I simplified the steps for you. If you have these ingredients, I don’t see a reason why you should not try this today! I promise you, it is awesome! The taste of the blackberries and the sweetness of the other ingredients will surely get your taste buds and most importantly, your heart! This Cobbler will not disappoint you. I instantly fell in love with it. it was love at first bite!

INGREDIENTS

1 3/4 cups all-purpose flour

2/3 cup sugar

1 pinch salt

1/4 teaspoon apple pie spice

3 teaspoon baking powder

1 1/4 cups milk (not fat-free)

1/2 teaspoon vanilla extract

6 tablespoons unsalted butter

1 1/2 lb fresh or frozen blackberries

How to make Blackberry Cobbler

Step 1: Ready the oven and preheat to 350 degrees.

Step 2: In a large bowl, sift the dry ingredients and mix.

Step 3: Pour a little milk and vanilla at a time while whisking until the batter becomes thick. Leave the batter to sit for 15 minutes.

Step 4: Place a metal baking pan on the stove and turn the heat to low. Add in the butter and wait for it to melt. Stir the melted butter.

Step 5: Pour the batter into the pan with the melted butter and stir it.

Step 6: Spread the blackberries right away on top of the batter.

Step 7: Place in the oven and bake for 55 minutes until the batter becomes puffy and the blackberries are cooked.

Step 8: Remove from the oven and place on a wire rack.

Step 9: Top with any flavor of ice cream you prefer or whipped cream. Serve and enjoy!

Blackberry Cobbler

Rebecca I am so pleased to share this with you today. I saw this recipe on TV the other day and I am so glad that I decided to try it… Main Dish Recipes Blackberry Cobbler European Print This
Nutrition facts: 200 calories 20 grams fat
Rating: 5.0/5
( 1 voted )

Ingredients

  • 1 3/4 cups all-purpose flour
  • 2/3 cup sugar
  • 1 pinch salt
  • 1/4 teaspoon apple pie spice
  • 3 teaspoon baking powder
  • 1 1/4 cups milk (not fat-free)
  • 1/2 teaspoon vanilla extract
  • 6 tablespoons unsalted butter
  • 1 1/2 lb fresh or frozen blackberries

Instructions

Step 1: Ready the oven and preheat to 350 degrees.

Step 2: In a large bowl, sift the dry ingredients and mix.

Step 3: Pour a little milk and vanilla at a time while whisking until the batter becomes thick. Leave the batter to sit for 15 minutes.

Step 4: Place a metal baking pan on the stove and turn the heat to low. Add in the butter and wait for it to melt. Stir the melted butter.

Step 5: Pour the batter into the pan with the melted butter and stir it.

Step 6: Spread the blackberries right away on top of the batter.

Step 7: Place in the oven and bake for 55 minutes until the batter becomes puffy and the blackberries are cooked.

Step 8: Remove from the oven and place on a wire rack.

Step 9: Top with any flavor of ice cream you prefer or whipped cream. Serve and enjoy!

June 13, 2020 0 comment
0 FacebookTwitterPinterestEmail
Main Dish Recipes

Old Fashioned Pumpkin Bread

by Rebecca June 13, 2020
written by Rebecca

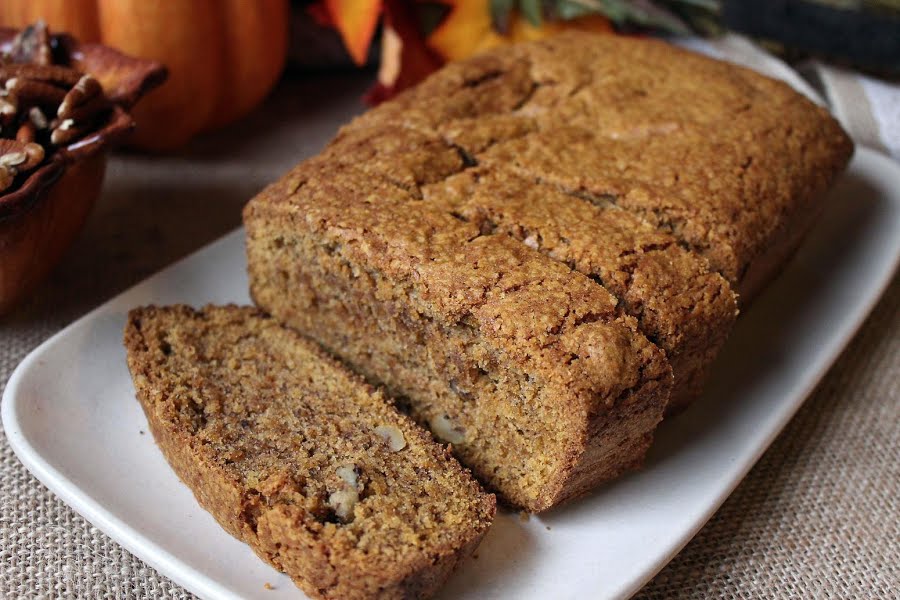
This is a classic, no-fuss, simple bread recipe that is a keeper. This Old fashioned pumpkin bread is great for breakfast or dessert, a perfect gift-giving idea, and by far the best pumpkin bread I ever had in my life! A dark, moist loaf flavored with pumpkin, and spices and is great to serve as is or with some whipped cream cheese spread. Just thinking of it makes my mouth water. And the secret to a perfect pumpkin bread is to know when to stop mixing. You have to make sure to mix just until blended to keep the moisture.

INGREDIENTS

1 can(s) 100% pure pumpkin, 15 oz can (use the whole can)

3 cups of sugar

3 eggs

1 cup of vegetable oil

3 cups all-purpose flour

1/2 teaspoon salt

1/2 teaspoon baking powder

1 teaspoon ground clove

1 teaspoon ground cinnamon

1 teaspoon ground nutmeg

1 teaspoon baking soda

1 cup ground pecans *add pecans in last after the batter is mixed*

How to make Old Fashioned Pumpkin Bread

Step 1: Prepare the oven. Preheat it to 350 degrees.

Step 2: Combine the pumpkin, eggs, and vegetable oil in a mixer. Then, add the sugar and mix until just incorporated.

Step 3: In another bowl, combine the flour, salt, baking powder, clove, cinnamon, nutmeg, and baking soda.

Step 4: Add in the dry ingredients into the wet ingredients. Slowly add using a measuring cup or a spoon while mixing between each addition. Make sure to not over mix your batter.

Step 5: Once the dry and wet ingredients are well incorporated, you can add in the pecans. Evenly mix until combined.

Step 6: Prepare two grease and flour bread pans. Then, pout the batter halfway through the pans.

Step 7: Place inside the preheated oven and bake for 45 to 60 minutes.

Note: This bread should be bake in 3 (1 lb) coffee cans but if you happen to not find any coffee pans, feel free to use the bead pans.

Old Fashioned Pumpkin Bread

Rebecca This is a classic, no-fuss, simple bread recipe that is a keeper. This Old fashioned pumpkin bread is great for breakfast or dessert, a perfect gift-giving idea, and by far… Main Dish Recipes Old Fashioned Pumpkin Bread European Print This
Nutrition facts: 200 calories 20 grams fat
Rating: 5.0/5
( 1 voted )

Ingredients

  • 1 can(s) 100% pure pumpkin, 15 oz can (use the whole can)
  • 3 cups of sugar
  • 3 eggs
  • 1 cup of vegetable oil
  • 3 cups all-purpose flour
  • 1/2 teaspoon salt
  • 1/2 teaspoon baking powder
  • 1 teaspoon ground clove
  • 1 teaspoon ground cinnamon
  • 1 teaspoon ground nutmeg
  • 1 teaspoon baking soda
  • 1 cup ground pecans *add pecans in last after the batter is mixed*

Instructions

Step 1: Prepare the oven. Preheat it to 350 degrees.

Step 2: Combine the pumpkin, eggs, and vegetable oil in a mixer. Then, add the sugar and mix until just incorporated.

Step 3: In another bowl, combine the flour, salt, baking powder, clove, cinnamon, nutmeg, and baking soda.

Step 4: Add in the dry ingredients into the wet ingredients. Slowly add using a measuring cup or a spoon while mixing between each addition. Make sure to not over mix your batter.

Step 5: Once the dry and wet ingredients are well incorporated, you can add in the pecans. Evenly mix until combined.

Step 6: Prepare two grease and flour bread pans. Then, pout the batter halfway through the pans.

Step 7: Place inside the preheated oven and bake for 45 to 60 minutes.

Note: This bread should be bake in 3 (1 lb) coffee cans but if you happen to not find any coffee pans, feel free to use the bead pans.


June 13, 2020 0 comment
0 FacebookTwitterPinterestEmail
Main Dish Recipes

Anti-Crabby Cake

by Rebecca June 13, 2020
written by Rebecca

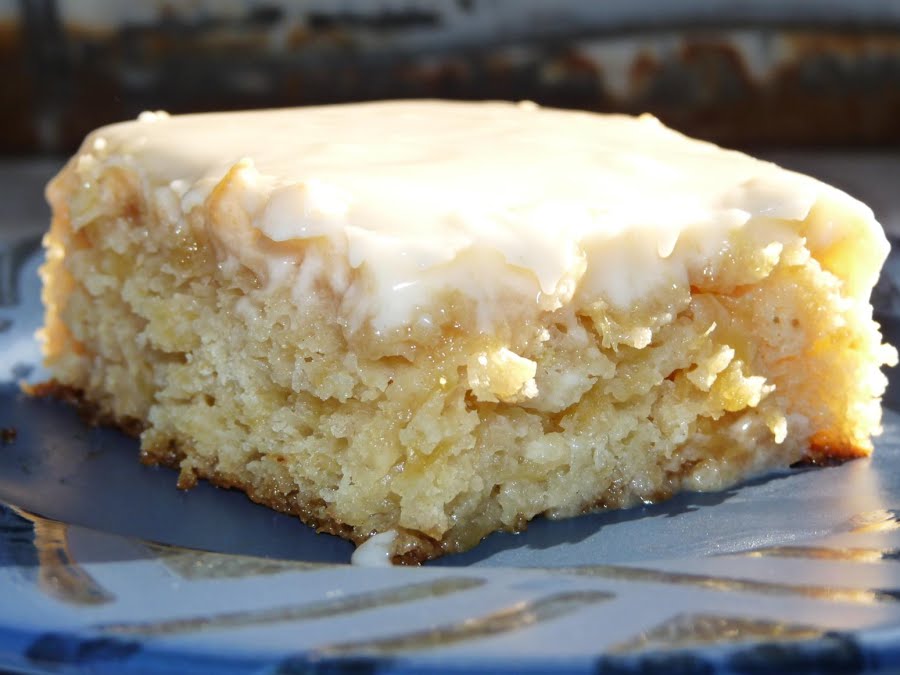
My heart beats a little faster when I first tasted this super moist textured cake. It won my heart at first bite. Its heavenly sweet pineapple flavor is irresistible, refreshing, and oh so delicious! This anti-crabby cake is a simple dessert that I’ve been making since. It’s easy to make, quick, and the ingredients are simple. I make the frosting while baking the cake because I want to frost the cake right in the pan. It’s easier that way, and because the cake is still hot, it absorbs the frosting perfectly. I let the cake cool for a bit and chill before serving.

My husband loves pineapple and this cake is his favorite. This is his perk me up dessert. Whenever he is feeling low, he only asks for one thing. To have a slice of his favorite anti-crabby cake.

INGREDIENTS

FOR THE CAKE

1 can(s) crushed pineapple in 100% juice (large can – 20oz) – do not drain

2 cups all-purpose flour

1 1/2 cups sugar

2 large eggs

2 teaspoons baking soda

FOR THE FROSTING

8 oz cream cheese, room temp

1 stick unsalted butter, room temp

2 cups powdered sugar

1 teaspoon vanilla

2 tablespoons milk

How to make Anti-Crabby Cake

Step 1: Prepare the oven. Preheat it to 350 degrees.

Step 2: Place the crushed pineapple with juice, flour, sugar, eggs, and baking soda in a large mixing bowl. Mix until just incorporated.

Step 3: Pour everything in an ungreased 9 x 13-inch glass pan.

Step 4: Place inside the oven and bake for 30 to 40 minutes or until golden and baked through.

Step 5: Meanwhile, prepare the frosting by adding the cream cheese, unsalted butter, powdered sugar, vanilla, and milk in a large bowl. Beat until well mixed and smooth.

Step 6: Once the cake is ready, remove from the oven and frost while still warm.

Step 7: Evenly spread the frosting over the cake and cool. Place in the fridge to chill before serving. Enjoy!

Anti-Crabby Cake

Rebecca My heart beats a little faster when I first tasted this super moist textured cake. It won my heart at first bite. Its heavenly sweet pineapple flavor is irresistible, refreshing,… Main Dish Recipes Anti-Crabby Cake European Print This
Nutrition facts: 200 calories 20 grams fat
Rating: 5.0/5
( 1 voted )

Ingredients

  • FOR THE CAKE
  • 1 can(s) crushed pineapple in 100% juice (large can - 20oz) – do not drain
  • 2 cups all-purpose flour
  • 1 1/2 cups sugar
  • 2 large eggs
  • 2 teaspoons baking soda
  • FOR THE FROSTING
  • 8 oz cream cheese, room temp
  • 1 stick unsalted butter, room temp
  • 2 cups powdered sugar
  • 1 teaspoon vanilla
  • 2 tablespoons milk

Instructions

Step 1: Prepare the oven. Preheat it to 350 degrees.

Step 2: Place the crushed pineapple with juice, flour, sugar, eggs, and baking soda in a large mixing bowl. Mix until just incorporated.

Step 3: Pour everything in an ungreased 9 x 13-inch glass pan.

Step 4: Place inside the oven and bake for 30 to 40 minutes or until golden and baked through.

Step 5: Meanwhile, prepare the frosting by adding the cream cheese, unsalted butter, powdered sugar, vanilla, and milk in a large bowl. Beat until well mixed and smooth.

Step 6: Once the cake is ready, remove from the oven and frost while still warm.

Step 7: Evenly spread the frosting over the cake and cool. Place in the fridge to chill before serving. Enjoy!

June 13, 2020 0 comment
0 FacebookTwitterPinterestEmail
Main Dish Recipes

Mama’s Mounds Bar Pie

by Rebecca June 12, 2020
written by Rebecca

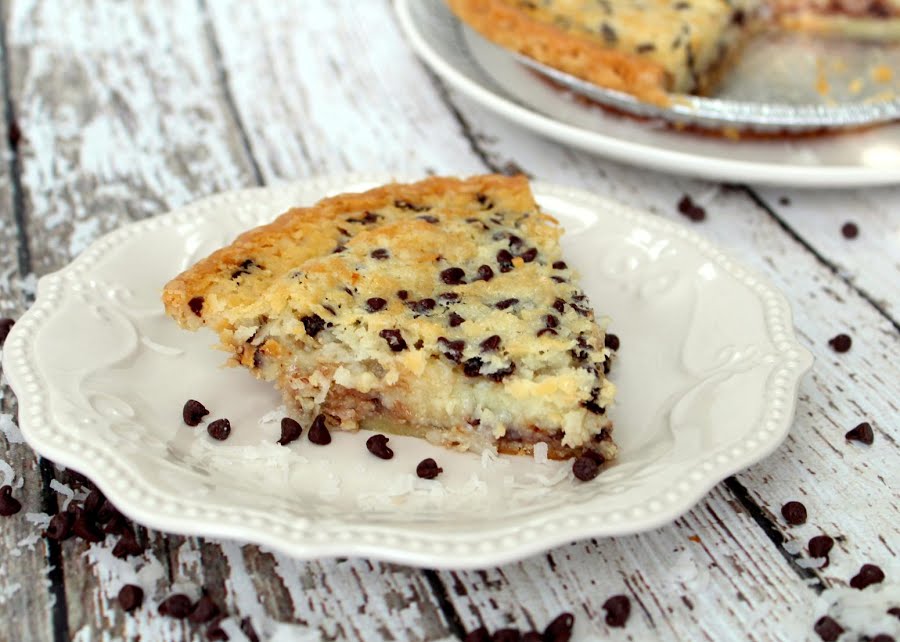
Tomorrow’s the big day. It’s my mom’s 60th birthday! We’re supposed to have a huge gathering for her but she specifically requested to have only a simple get together with family and friends. She a simple woman, you see, my mother. She likes simple things, she’s very practical, and she’s very sweet. She’s a great cook, too. The majority of the recipes I know are from her. I watched her in the kitchen a lot when I was a little younger. And I remembered her favorite dessert. Mounds Bar Pie, it’s a pretty easy dessert, simple to make, and unquestionably delicious! I’m making this for her today. I can’t wait to see her reaction, I’m sure she will be delighted! This pie needs to be refrigerated for 24 hours before serving which is perfect for tomorrow’s occasion. Except regularly, it’s not easy to wait that long because this pie is so good I want to eat it sooner! The coconut combined with the other ingredients is perfect and the chocolate chips give this pie a pretty texture and look. This pie is going to be the highlight of tomorrow’s event. A slice of this delicious mound bar pie with a little candle in the middle to blow and my mom turning another page of her life.

INGREDIENTS

1 cup of sugar

2 tablespoons white flour

1/2 cup butter

2 eggs

1 teaspoon vanilla

3/4 cup milk

1 cup flaked coconut

1/2 cup mini chocolate chips

1 deep dish pie crust shell

How to make Mama’s Mounds Bar Pie

Step 1: Prepare the oven. Preheat it to 300 degrees F.

Step 2: In a bowl, mix the flour and the sugar.

Step 3: Then, cream in the butter and eggs.

Step 4: Stir in the vanilla and milk.

Step 5: Now, fold in the chocolate and coconut.

Step 6: Pour everything in an unbaked deep-dish pie crust.

Step 7: Place inside the preheated oven and bake for about an hour.

Step 8: Once done, remove from the oven. Let it cool for 24 hours in the fridge.

Mama’s Mounds Bar Pie

Rebecca Tomorrow’s the big day. It’s my mom’s 60th birthday! We’re supposed to have a huge gathering for her but she specifically requested to have only a simple get together with… Main Dish Recipes Mama’s Mounds Bar Pie European Print This
Nutrition facts: 200 calories 20 grams fat
Rating: 5.0/5
( 1 voted )

Ingredients

  • 1 cup of sugar
  • 2 tablespoons white flour
  • 1/2 cup butter
  • 2 eggs
  • 1 teaspoon vanilla
  • 3/4 cup milk
  • 1 cup flaked coconut
  • 1/2 cup mini chocolate chips
  • 1 deep dish pie crust shell

Instructions

Step 1: Prepare the oven. Preheat it to 300 degrees F.

Step 2: In a bowl, mix the flour and the sugar.

Step 3: Then, cream in the butter and eggs.

Step 4: Stir in the vanilla and milk.

Step 5: Now, fold in the chocolate and coconut.

Step 6: Pour everything in an unbaked deep-dish pie crust.

Step 7: Place inside the preheated oven and bake for about an hour.

Step 8: Once done, remove from the oven. Let it cool for 24 hours in the fridge.

June 12, 2020 0 comment
0 FacebookTwitterPinterestEmail
Newer Posts
Older Posts

Popular Posts

  • 1

    Crispy Crunchy Parmesan Potatoes

    March 21, 2020
  • 2

    CROCK POT SMOTHERED PORK CHOPS

    March 21, 2020
  • Facebook
  • Twitter

@2019 - All Right Reserved.


Back To Top